Chris@HBH
Active Member
- Joined
- Nov 14, 2018
- Threads
- 1
- Messages
- 32
- Reaction score
- 18
- Location
- Dublin, OH
- First Name
- Chris
- Vehicle(s)
- 13 GT500
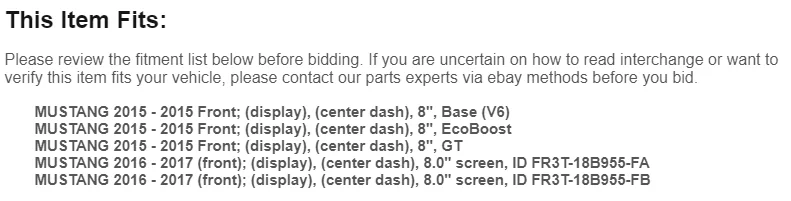
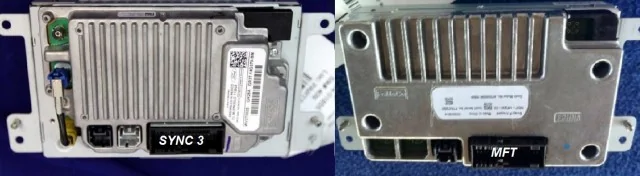
FR3T is 2015 Mustang (MFT) you want GXXTI'm hoping someone can clear something up for me here. I'm watching ebay for parts and found the following part numbers
fr3t-18b955-fa
fr3t-18b955-fb
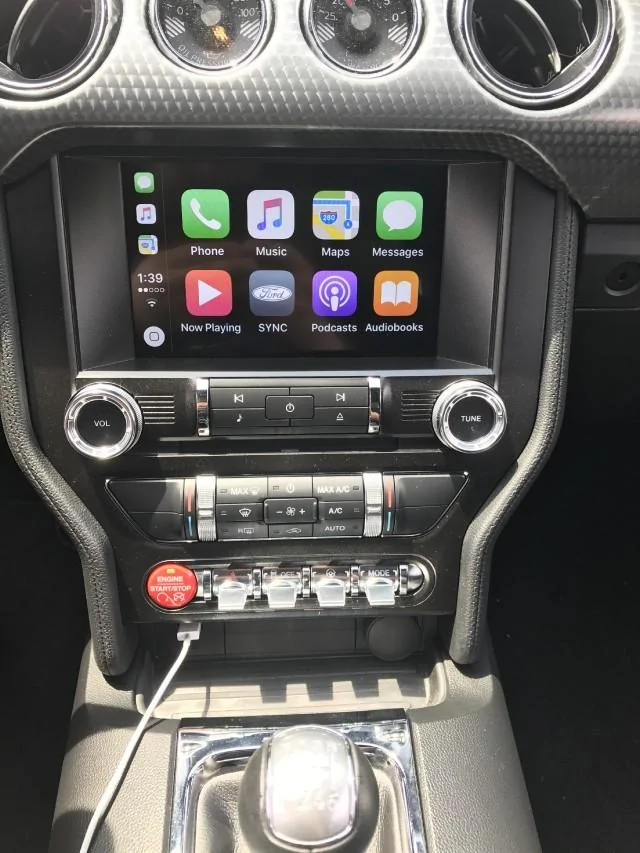
Is this the right touchscreen for car play? I don't want to buy the MFT touchscreen but I read this in the listing ( I have a 2017 GT) . Can anyone tell me the difference between the two parts?

Sponsored


")