OP
OP
96MUSTANG06
Well-Known Member
- Joined
- May 8, 2015
- Threads
- 10
- Messages
- 434
- Reaction score
- 304
- Location
- North Bay CA
- Website
- www.mustang6g.com
- First Name
- Brandon
- Vehicle(s)
- 2016 Mustang GT
- Thread starter
- #331
The Complete Headlight Guide
Ok, so everyone knows that you have to put your headlamps in the oven and crack them open. I used Nathan Brummer's guide to that process https://www.mustang6g.com/forums/showthread.php?t=25218&page=18 . Thank you!

In that guide they suggest you use a screw driver. I would not recommend that. Get yourself a set of plastic trim tools. It may take a little longer, but you will do less damage to your housing. Because of the heat, I went through two sets as the sharp edges gradually melted.

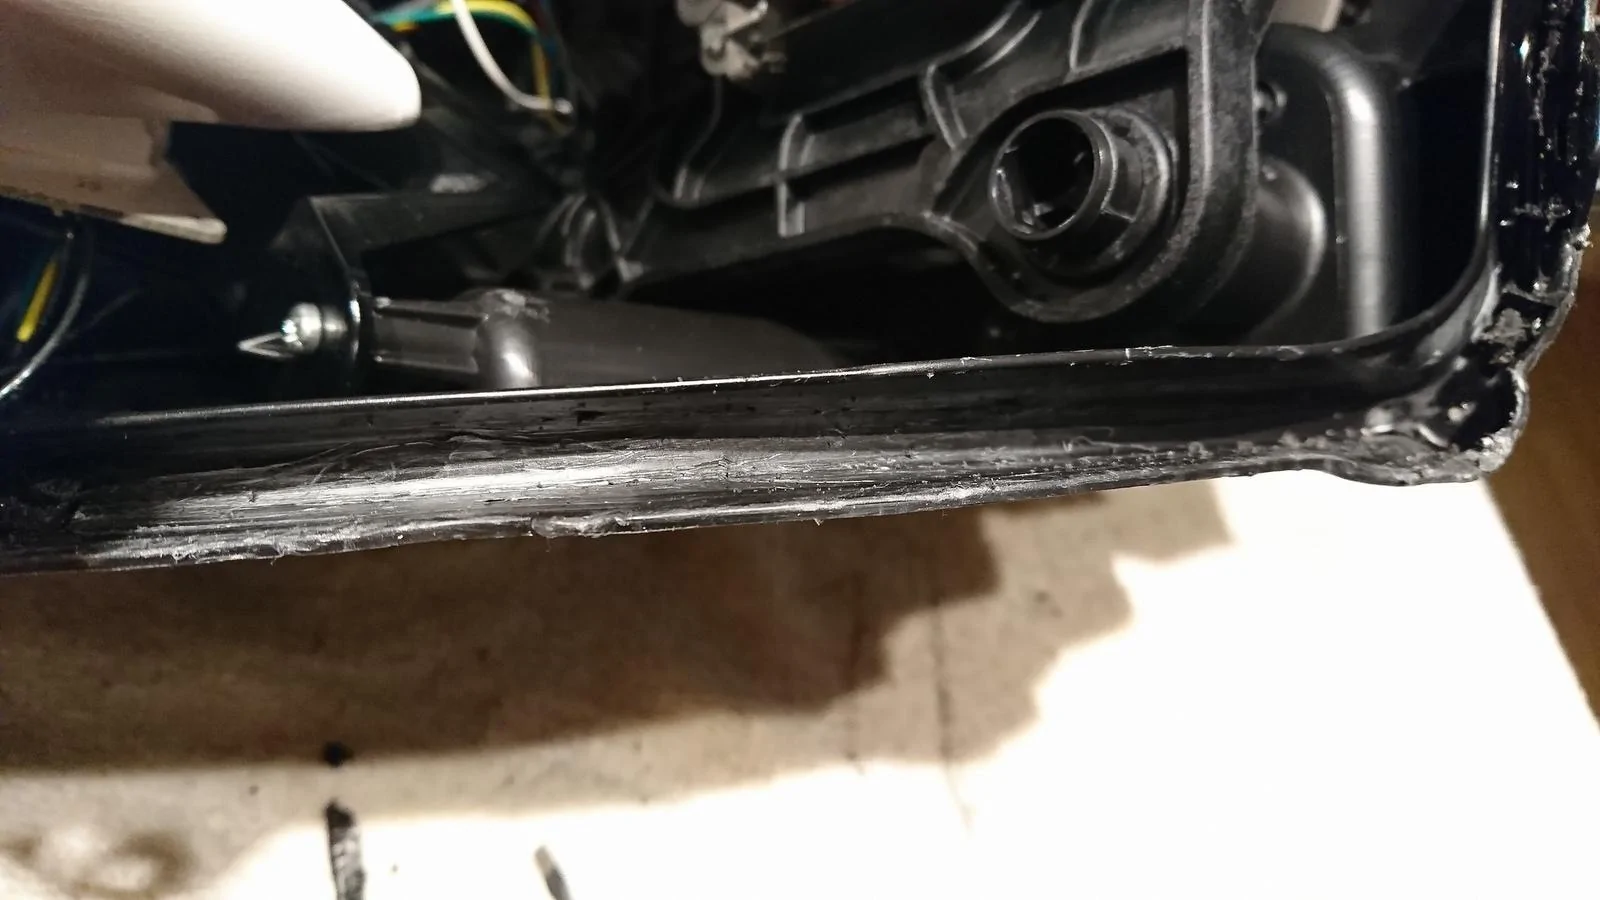
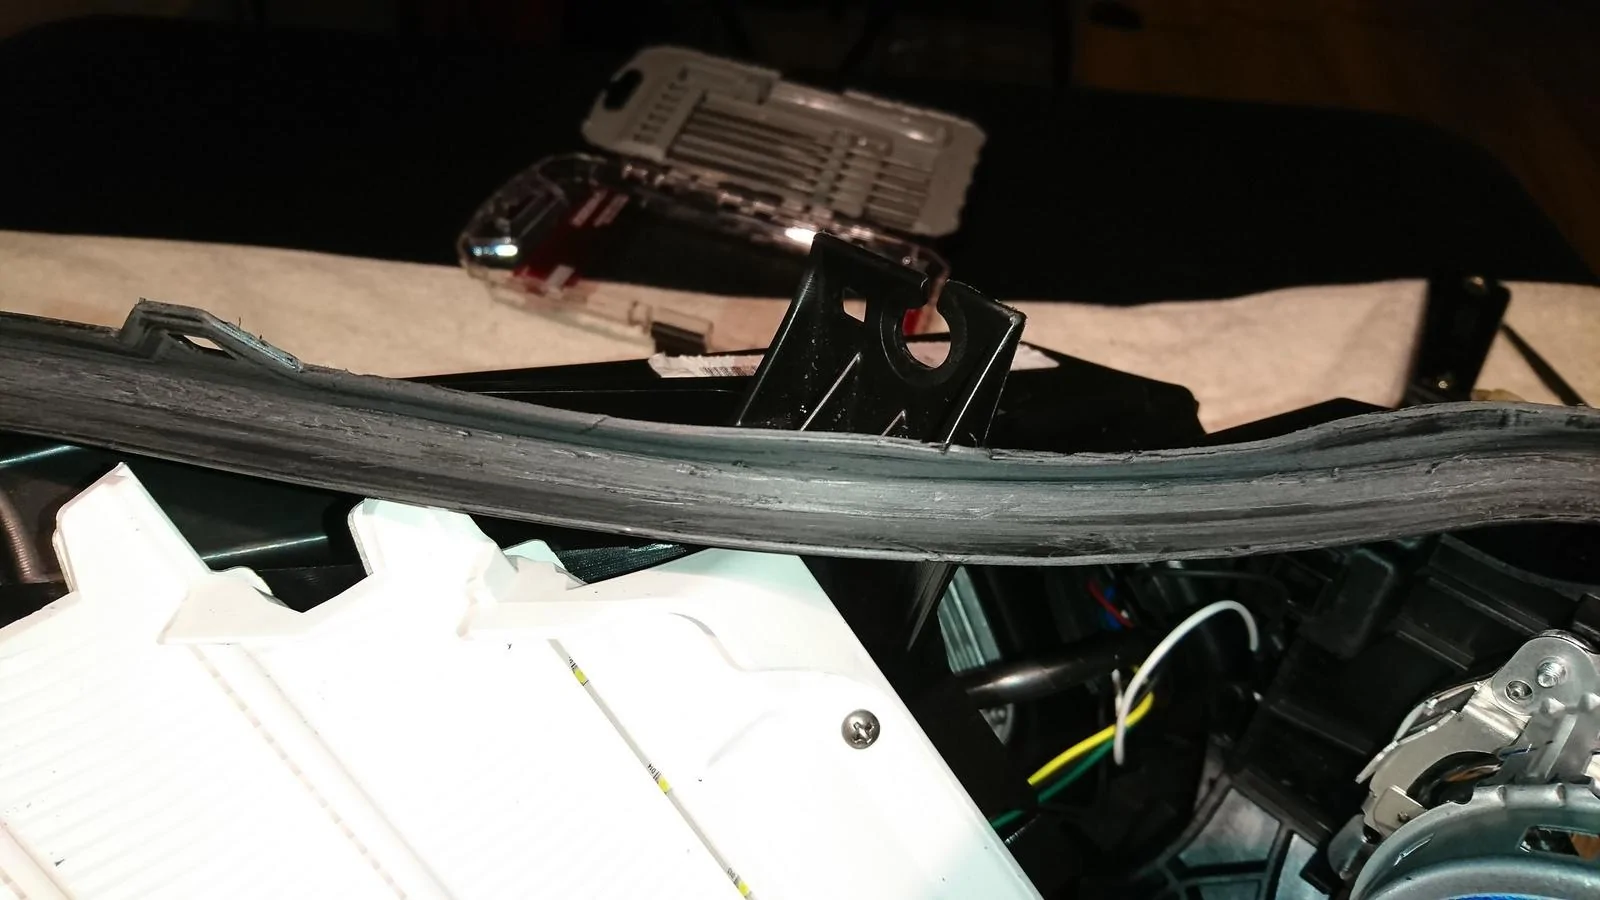
Even with the most careful prying your housing is going to look rough once you remove the lens:
I would suggest using a heat gun with variable settings or a thermostat to remove ALL of the permaseal. Keep the gun on one of its lower settings and cover the electronics on the inside of the housing with a towel to protect them. When you get done your housing should look something like this:
Now that you have cleaned out the permaseal you will want to use a file set, 220 grit sand paper, and finally 400 grit to clean up the housing and insure a proper seal. When you are done the housing should look something like this:
Ok, so all the instructions on how to wire these bad boys up are readily available online. So I'm going to dive straight into custom painting the inner housing. Here are the steps in order:
1. Tape and sand the inner housing.
2. Disassemble the inner housing. Some people prefer to disassemble the housing first. I choose not too, and I feel hand sanding is easier when its all together. Sorry for the fuzzy pics.

3. And then...toss the can of plasti dip and take them to a pro shop to have them sprayed:


4. After they are painted, wired, and tested you can seal them up. The process is well documented so I won't go too far into it, but I will offer a couple of tips.
After I had sealed them with silicone I sat them on the bathroom counter and ran the shower for 40 min as hot as it would go. If there are no water droplets present on the inside of the housing you know they are sealed properly (mine were). If not you are back to the silicone bottle.
Also, you have to run the cords for the DRLs etc out of the back of the housing by removing some sealant tape. I consulted with the body shop about how to seal up the hole in the back for the DRL and Demon eye wiring and the recommended these:


Here is the hole sealed with silver tape and 3m general adhesive:
Finally, after the lights passed the shower test and were sealed, I taped them off and brushed 3m general adhesive over the seam.

Let them dry for 24hrs re-install and enjoy!

Ok, so everyone knows that you have to put your headlamps in the oven and crack them open. I used Nathan Brummer's guide to that process https://www.mustang6g.com/forums/showthread.php?t=25218&page=18 . Thank you!

In that guide they suggest you use a screw driver. I would not recommend that. Get yourself a set of plastic trim tools. It may take a little longer, but you will do less damage to your housing. Because of the heat, I went through two sets as the sharp edges gradually melted.

Even with the most careful prying your housing is going to look rough once you remove the lens:

I would suggest using a heat gun with variable settings or a thermostat to remove ALL of the permaseal. Keep the gun on one of its lower settings and cover the electronics on the inside of the housing with a towel to protect them. When you get done your housing should look something like this:
Now that you have cleaned out the permaseal you will want to use a file set, 220 grit sand paper, and finally 400 grit to clean up the housing and insure a proper seal. When you are done the housing should look something like this:
Ok, so all the instructions on how to wire these bad boys up are readily available online. So I'm going to dive straight into custom painting the inner housing. Here are the steps in order:
1. Tape and sand the inner housing.
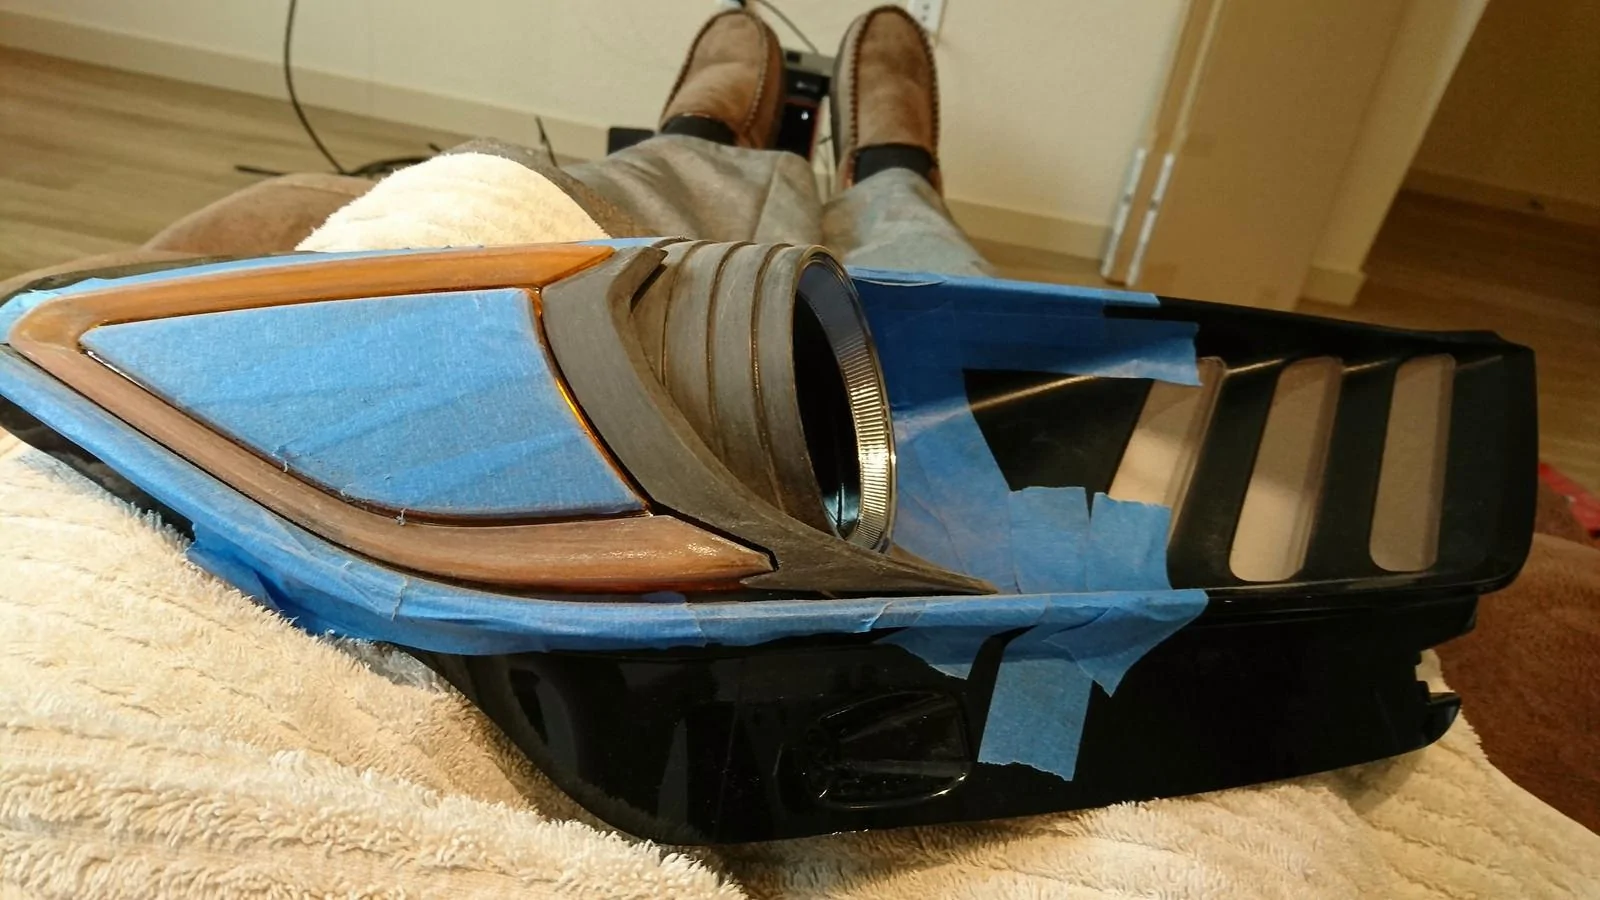

2. Disassemble the inner housing. Some people prefer to disassemble the housing first. I choose not too, and I feel hand sanding is easier when its all together. Sorry for the fuzzy pics.

3. And then...toss the can of plasti dip and take them to a pro shop to have them sprayed:


4. After they are painted, wired, and tested you can seal them up. The process is well documented so I won't go too far into it, but I will offer a couple of tips.
After I had sealed them with silicone I sat them on the bathroom counter and ran the shower for 40 min as hot as it would go. If there are no water droplets present on the inside of the housing you know they are sealed properly (mine were). If not you are back to the silicone bottle.
Also, you have to run the cords for the DRLs etc out of the back of the housing by removing some sealant tape. I consulted with the body shop about how to seal up the hole in the back for the DRL and Demon eye wiring and the recommended these:


Here is the hole sealed with silver tape and 3m general adhesive:

Finally, after the lights passed the shower test and were sealed, I taped them off and brushed 3m general adhesive over the seam.

Let them dry for 24hrs re-install and enjoy!

Sponsored
Last edited: