Tomster
Beware of idiots
- Thread starter
- #1
Some of you may recall that I am trying to ready HR 361 for the track weekend coming up. I went to my friends shop this AM to find the lift is still being used. Some of you may remember that my friend has quite an elaborate shop and he works on high end Porsches and such. Today I arrived to find a Lamborghini on the lift and it wasn't going anywhere anytime soon, so the MGW shifter is out for now.
However..... Way up on my list of things to accomplish is camber plate and caliperfexion caliper stud installation. So I turned around and went home to start the work. The vorshlag plates will be written up when the job is complete, so in the mean time, I will highlight the caliperfexion stud installation.
First, the front wheel lug nuts were loosened before jacking the car and putting it on jack stands. Once up in the air, the front wheels were removed.

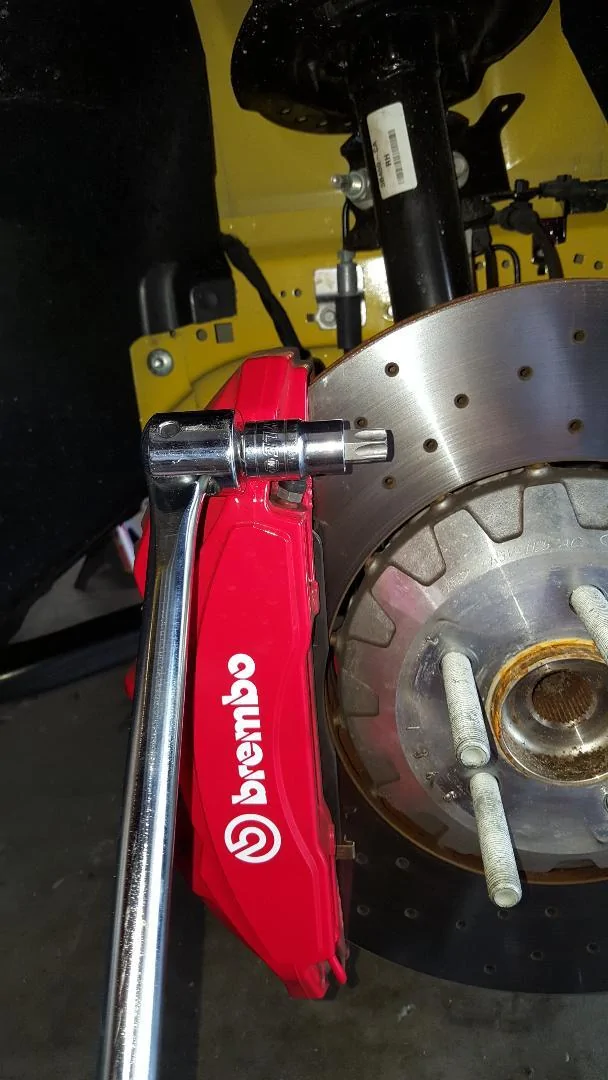
A torx T60 bit is needed to remove the brake caliper bolts. I strongly suggest using a breaker bar because these bolts are very tight, to the order of around 130 ft lbs.

Once the caliper bolts are removed, the caliper will pull right off. I suggest having some wire or zip ties to suspend the calipers from a secure point because you don't want them hanging by the brake line.
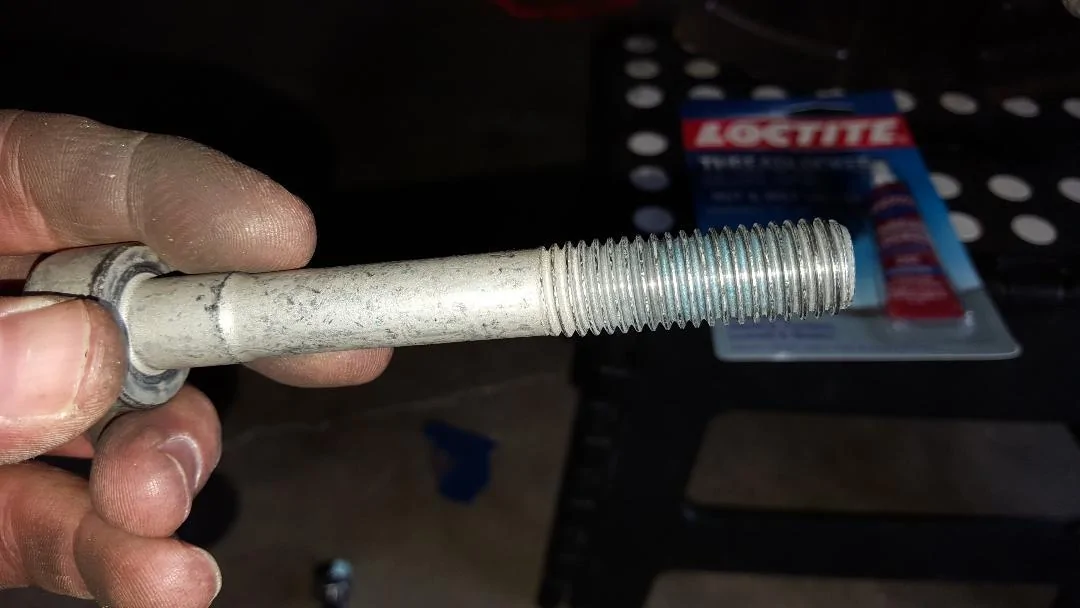
Find the best caliper bolt in the lot (in terms of thread condition as well as overall condition) and clean it up with a wire brush. Use this bolt to chase the threads (screw it in and out) of the knuckle until you can turn it by hand with no assistance of tools. Be sure to blow out the contaminants between attempts. Eventually, the threads will clean up and you will be able to screw it in by hand.
Eventually, the threads will look like this.
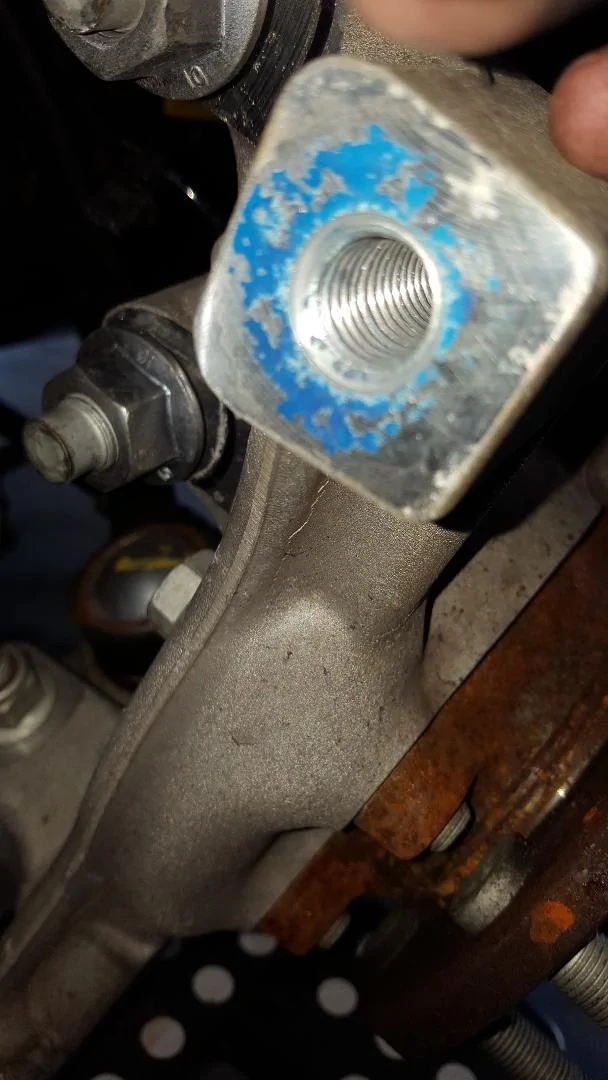
You should be able to install the new caliperfexion stud finger tight (snug). Install it and check overall length. (see instructions for length value and tolerances).
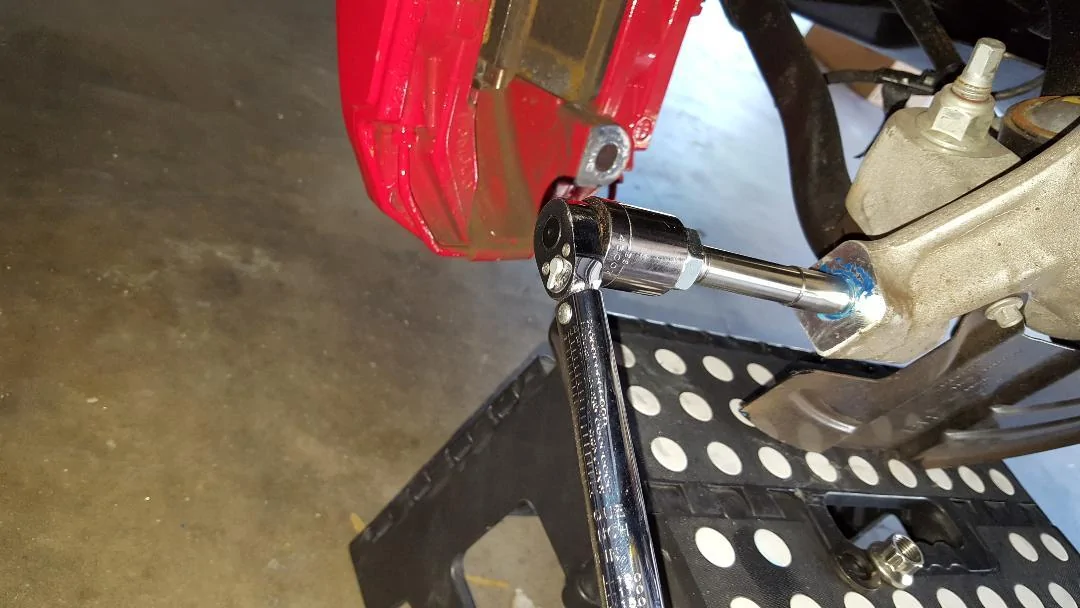
Once you have verified that the threads are clear and the stud will bottom out leaving you with the appropriate overall length, it is time to mount them using some blue Loctite and a torque wrench. Note: The instructions specified not to reef the stud into the knuckle and to use 5 ft lbs of torque. I thought that was really low and verified that with Epiphany via text before completing this step. That sounds awfully low, but he's a smart guy..... BTW, a specification of 5 ft lbs equates to a value of 60 in lbs (you might want to use a torque wrench with values in the in lbs).
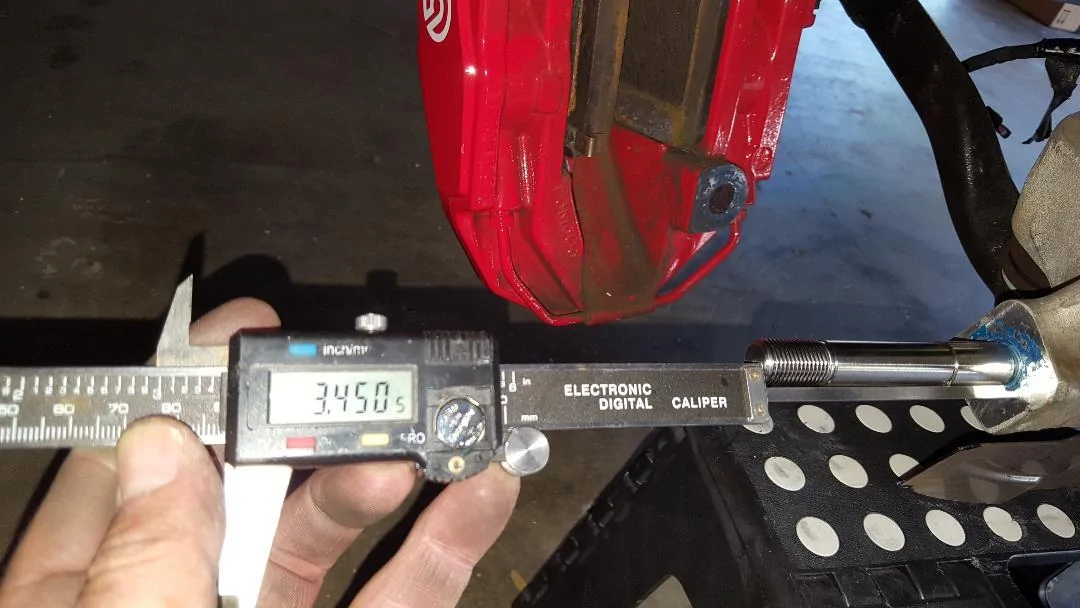
Borrowing the below image from above, notice the double nuts on the stud. Snug them up against each other so that you can torque the stud to length.
Now, it is important to let the Loctite cure as per the manufacturers directions. Since I am doing the vorshlag plates at the same time, I will pick it up and finish the installation tomorrow.
For all practical purposes, the caliperfexion stud installation is complete. All that is left to do is re-install the caliper and torque the nut as per the instructions.
I would like to thank Epiphany for providing such quality parts. These caliperfexion studs will make future brake pad changes a snap. I know this because I had them on my previous track pack. After a weekend of heavy braking, I had to swap the pads out. It was as easy as could be.
Thanks Epiphany!
However..... Way up on my list of things to accomplish is camber plate and caliperfexion caliper stud installation. So I turned around and went home to start the work. The vorshlag plates will be written up when the job is complete, so in the mean time, I will highlight the caliperfexion stud installation.
First, the front wheel lug nuts were loosened before jacking the car and putting it on jack stands. Once up in the air, the front wheels were removed.

A torx T60 bit is needed to remove the brake caliper bolts. I strongly suggest using a breaker bar because these bolts are very tight, to the order of around 130 ft lbs.
Once the caliper bolts are removed, the caliper will pull right off. I suggest having some wire or zip ties to suspend the calipers from a secure point because you don't want them hanging by the brake line.

Find the best caliper bolt in the lot (in terms of thread condition as well as overall condition) and clean it up with a wire brush. Use this bolt to chase the threads (screw it in and out) of the knuckle until you can turn it by hand with no assistance of tools. Be sure to blow out the contaminants between attempts. Eventually, the threads will clean up and you will be able to screw it in by hand.

Eventually, the threads will look like this.
You should be able to install the new caliperfexion stud finger tight (snug). Install it and check overall length. (see instructions for length value and tolerances).

Once you have verified that the threads are clear and the stud will bottom out leaving you with the appropriate overall length, it is time to mount them using some blue Loctite and a torque wrench. Note: The instructions specified not to reef the stud into the knuckle and to use 5 ft lbs of torque. I thought that was really low and verified that with Epiphany via text before completing this step. That sounds awfully low, but he's a smart guy..... BTW, a specification of 5 ft lbs equates to a value of 60 in lbs (you might want to use a torque wrench with values in the in lbs).


Borrowing the below image from above, notice the double nuts on the stud. Snug them up against each other so that you can torque the stud to length.
Now, it is important to let the Loctite cure as per the manufacturers directions. Since I am doing the vorshlag plates at the same time, I will pick it up and finish the installation tomorrow.
For all practical purposes, the caliperfexion stud installation is complete. All that is left to do is re-install the caliper and torque the nut as per the instructions.

I would like to thank Epiphany for providing such quality parts. These caliperfexion studs will make future brake pad changes a snap. I know this because I had them on my previous track pack. After a weekend of heavy braking, I had to swap the pads out. It was as easy as could be.
Thanks Epiphany!
Sponsored
")


