StangTime
Well-Known Member
- Joined
- Apr 16, 2019
- Threads
- 81
- Messages
- 3,594
- Reaction score
- 4,092
- Location
- Ontario 🇨🇦
- First Name
- Todd
- Vehicle(s)
- 19' GT PP1 Manual
- Thread starter
- #1
For those who's bumper cover doesn't appear to be installed correctly, leaving a huge gap under the passenger (or drivers) headlight, it's not the bumper cover. It's the lower headlight mounting bracket that needs adjusting.
Either take it to the dealer if under warranty and hope they don't break or scratch something in the process or fix it yourself. I opted to fix it myself. The less the dealer touches my car the better.
THE FIX: It requires removal of the front bumper. It's not difficult, just time consuming.
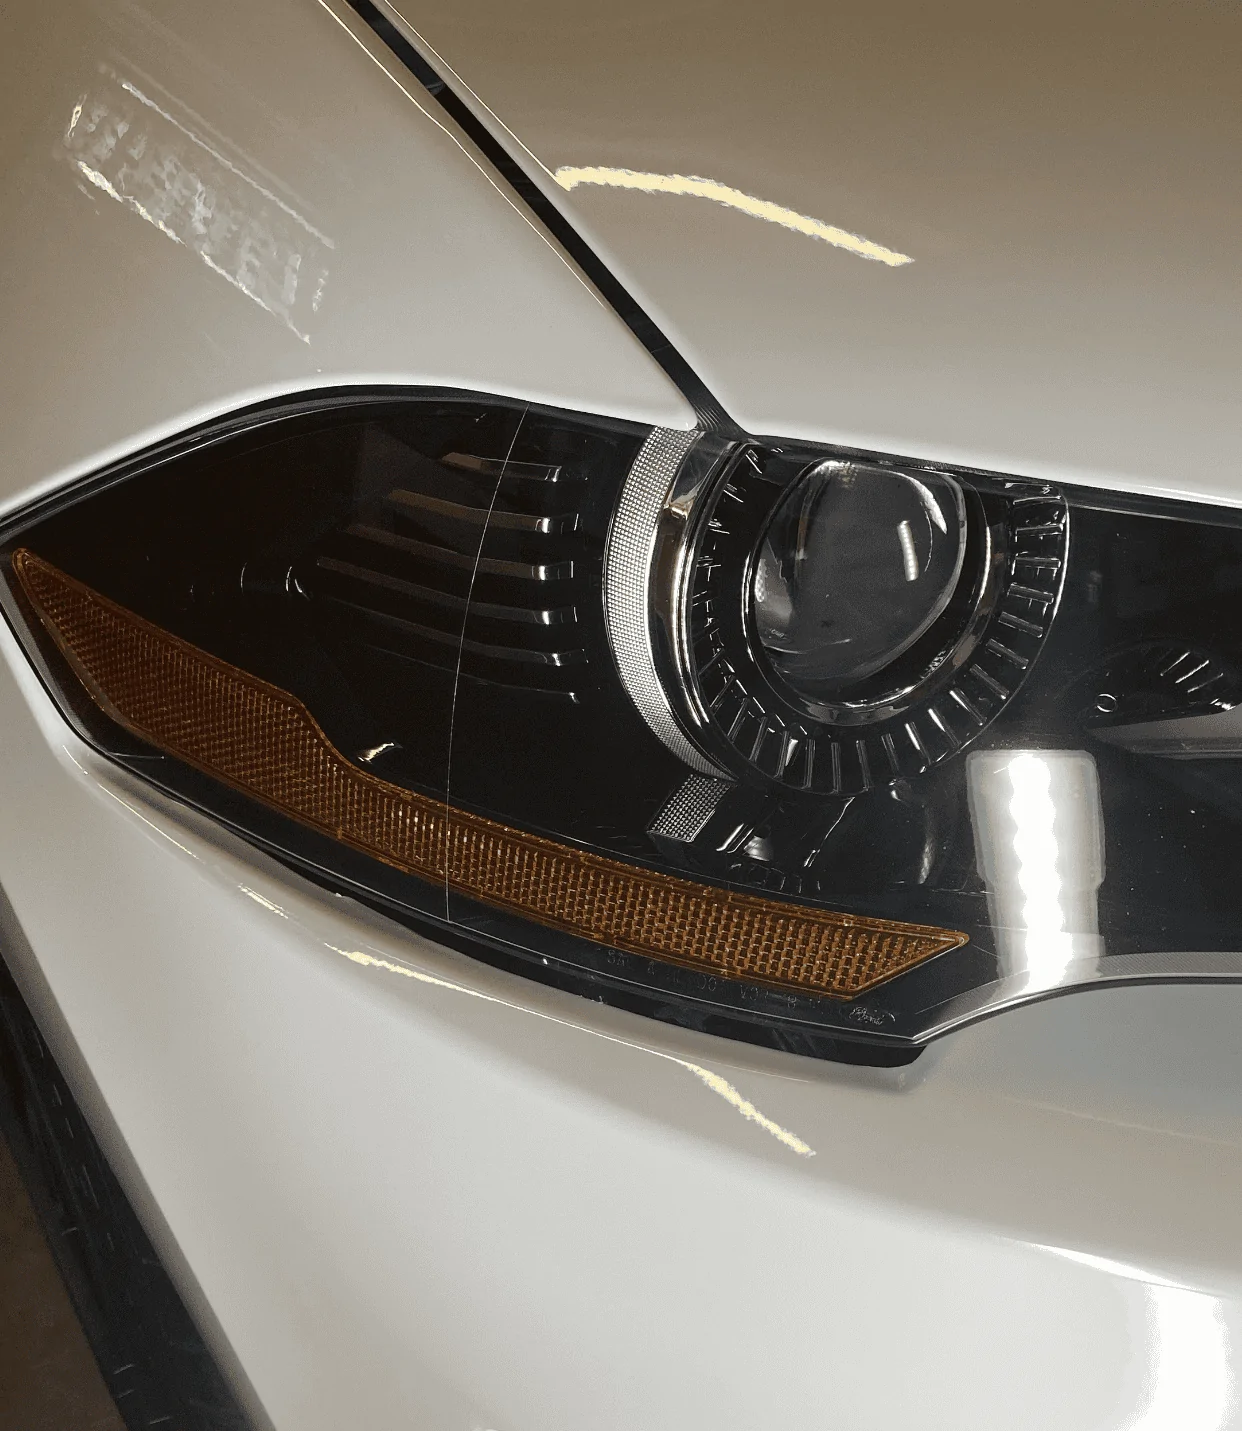
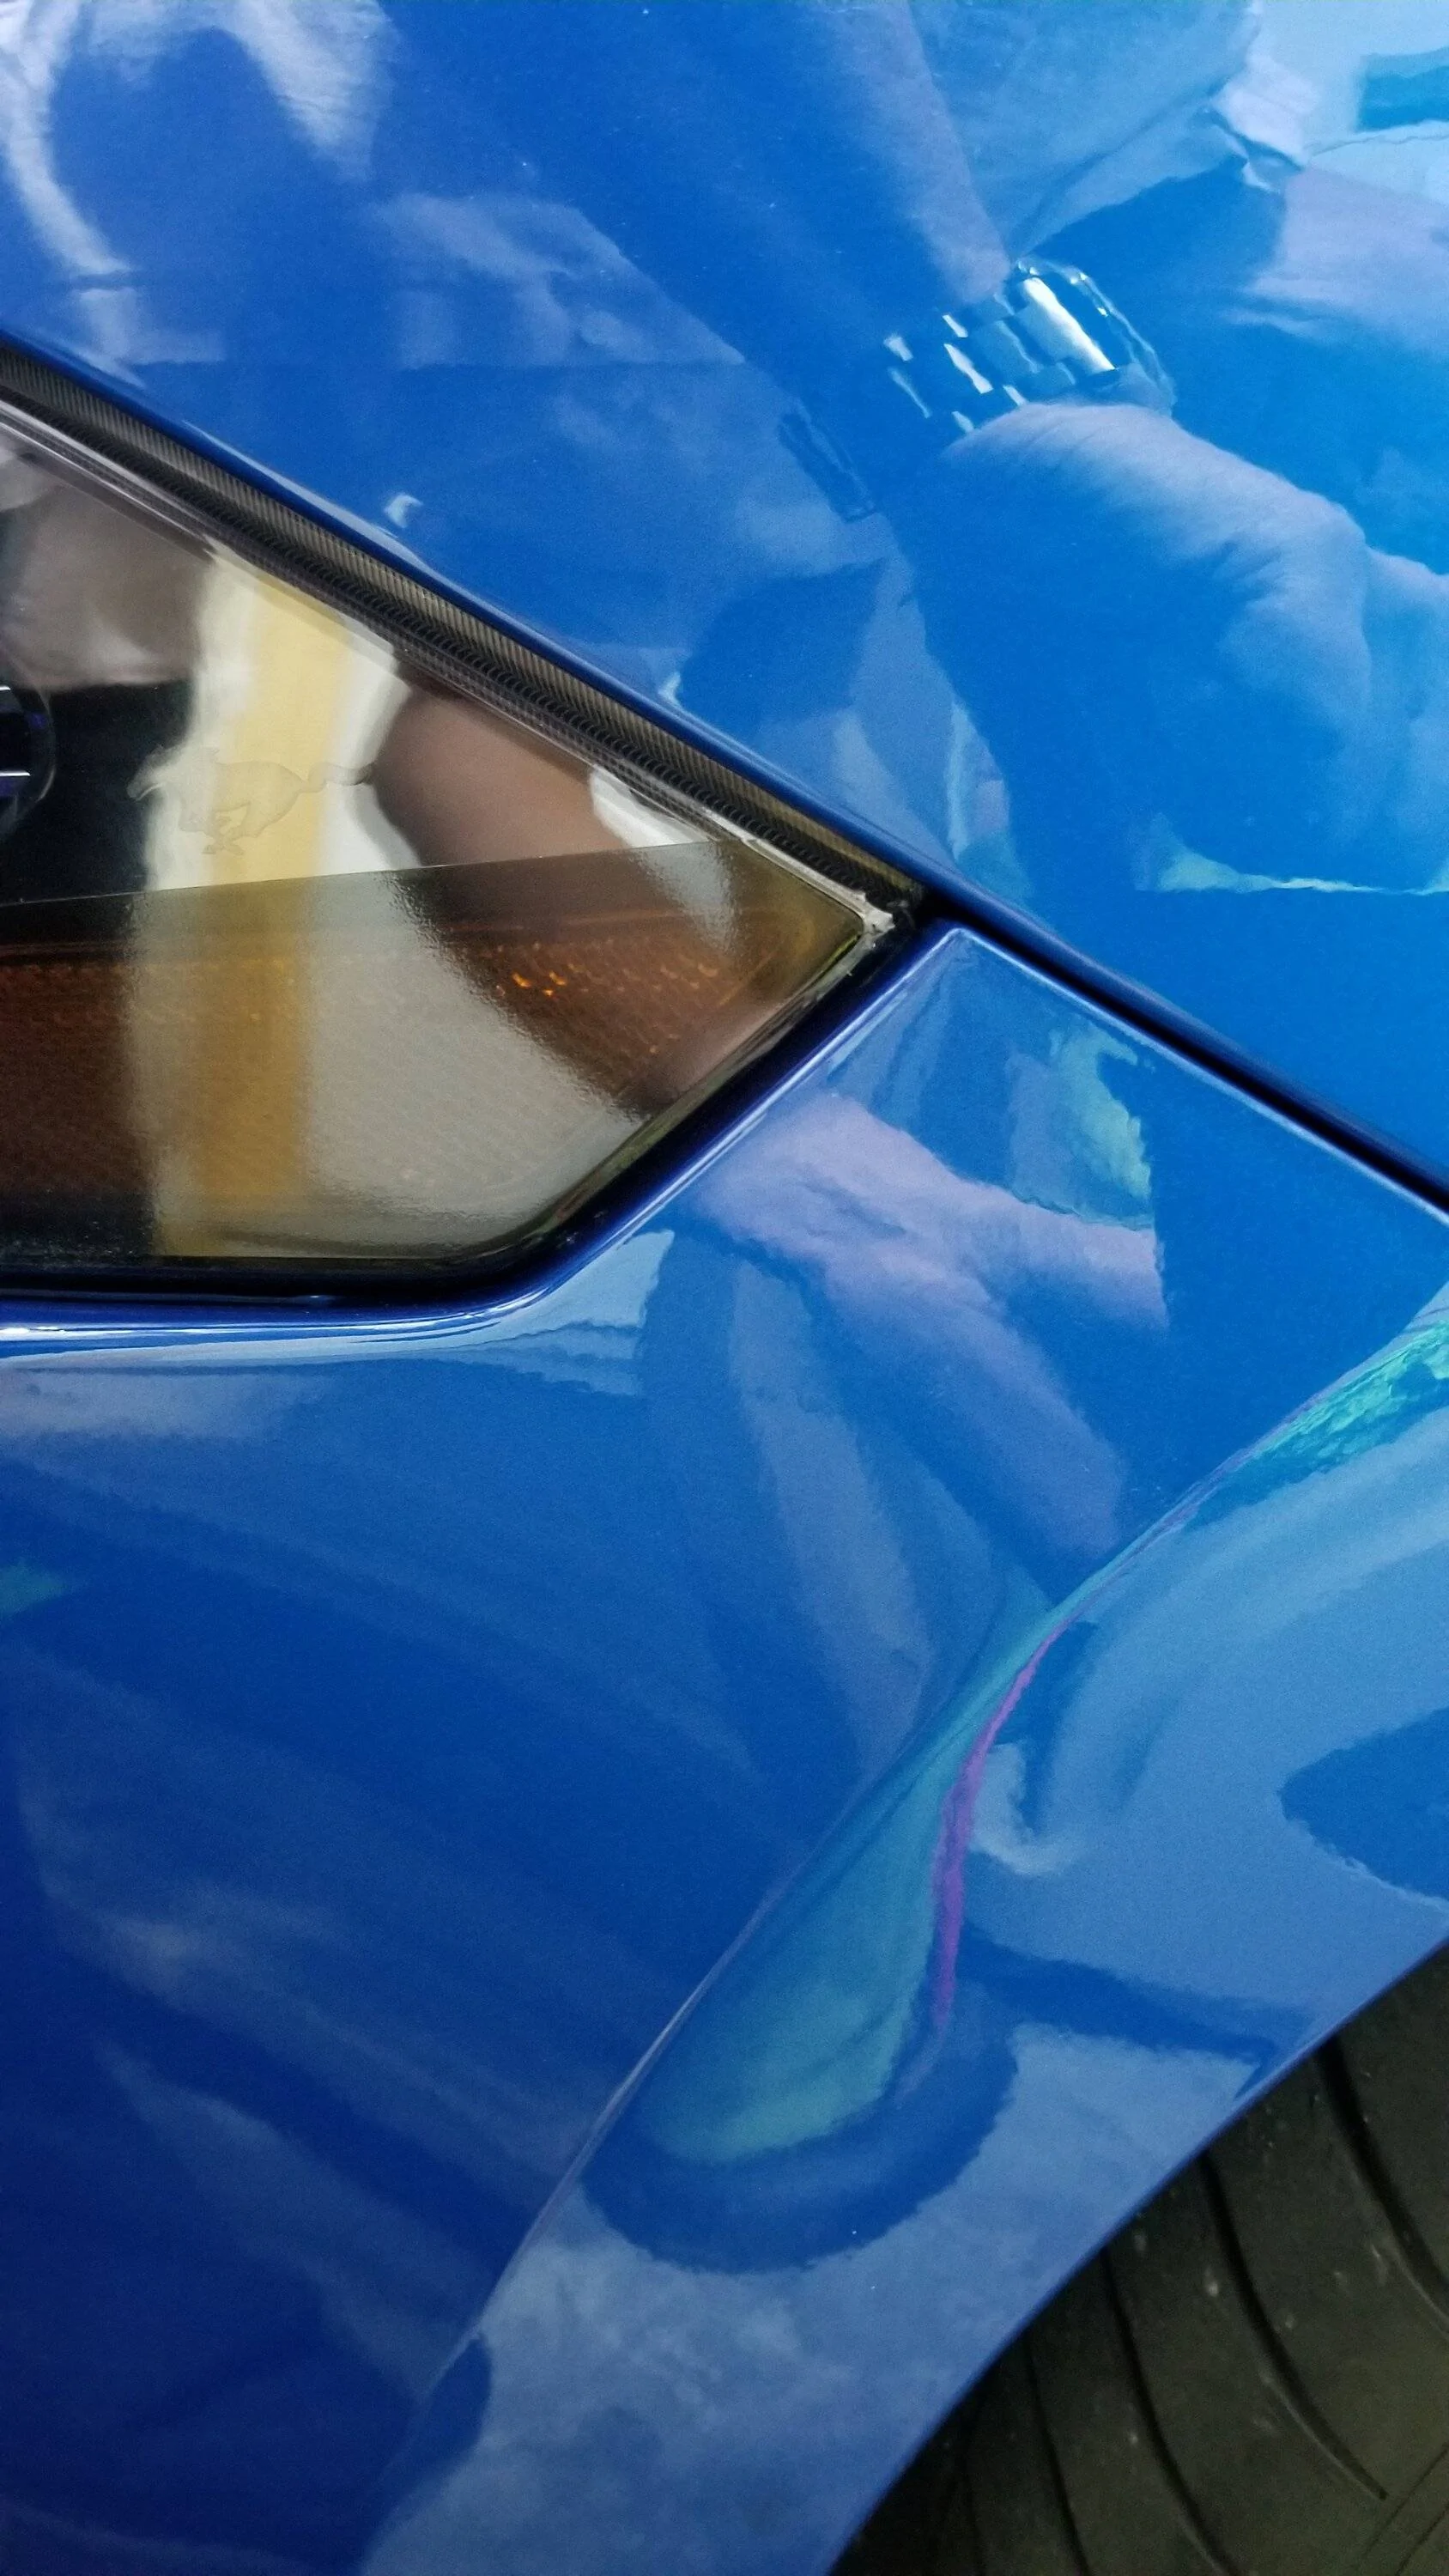
If you have a gap as shown below and you can see the plastic mounting bosses on the underside of the headlight, this is the fix. I am referring to the passenger (RH) side for US spec cars in the write-up as this is the most common assembly defect. If your drivers headlight has a gap, the same applies, just on the opposite side.

A closer look:

1. Remove the bumper cover. Video below is a good guide. A few things about this: You don't need to lift the car but it makes it easier to access the belly pan screws. The belly pan does not have to be completely removed. Just the hardware attaching it to the bumper. At 1:51 in the video, they show pulling back the fender liner to access the 10mm nuts for the bumper clip. I found it easier to remove these nuts from above by reaching into the gap from the top (if your arm fits). Loosen the nuts with a 1/4" ratchet using a 10mm socket on a swivel. Remove the nuts by hand and press down on the plastic "Christmas tree" retainer. Reach in through the fender liner to retrieve the clip assembly. Watch that the threaded posts don't scratch the fender or headlight.
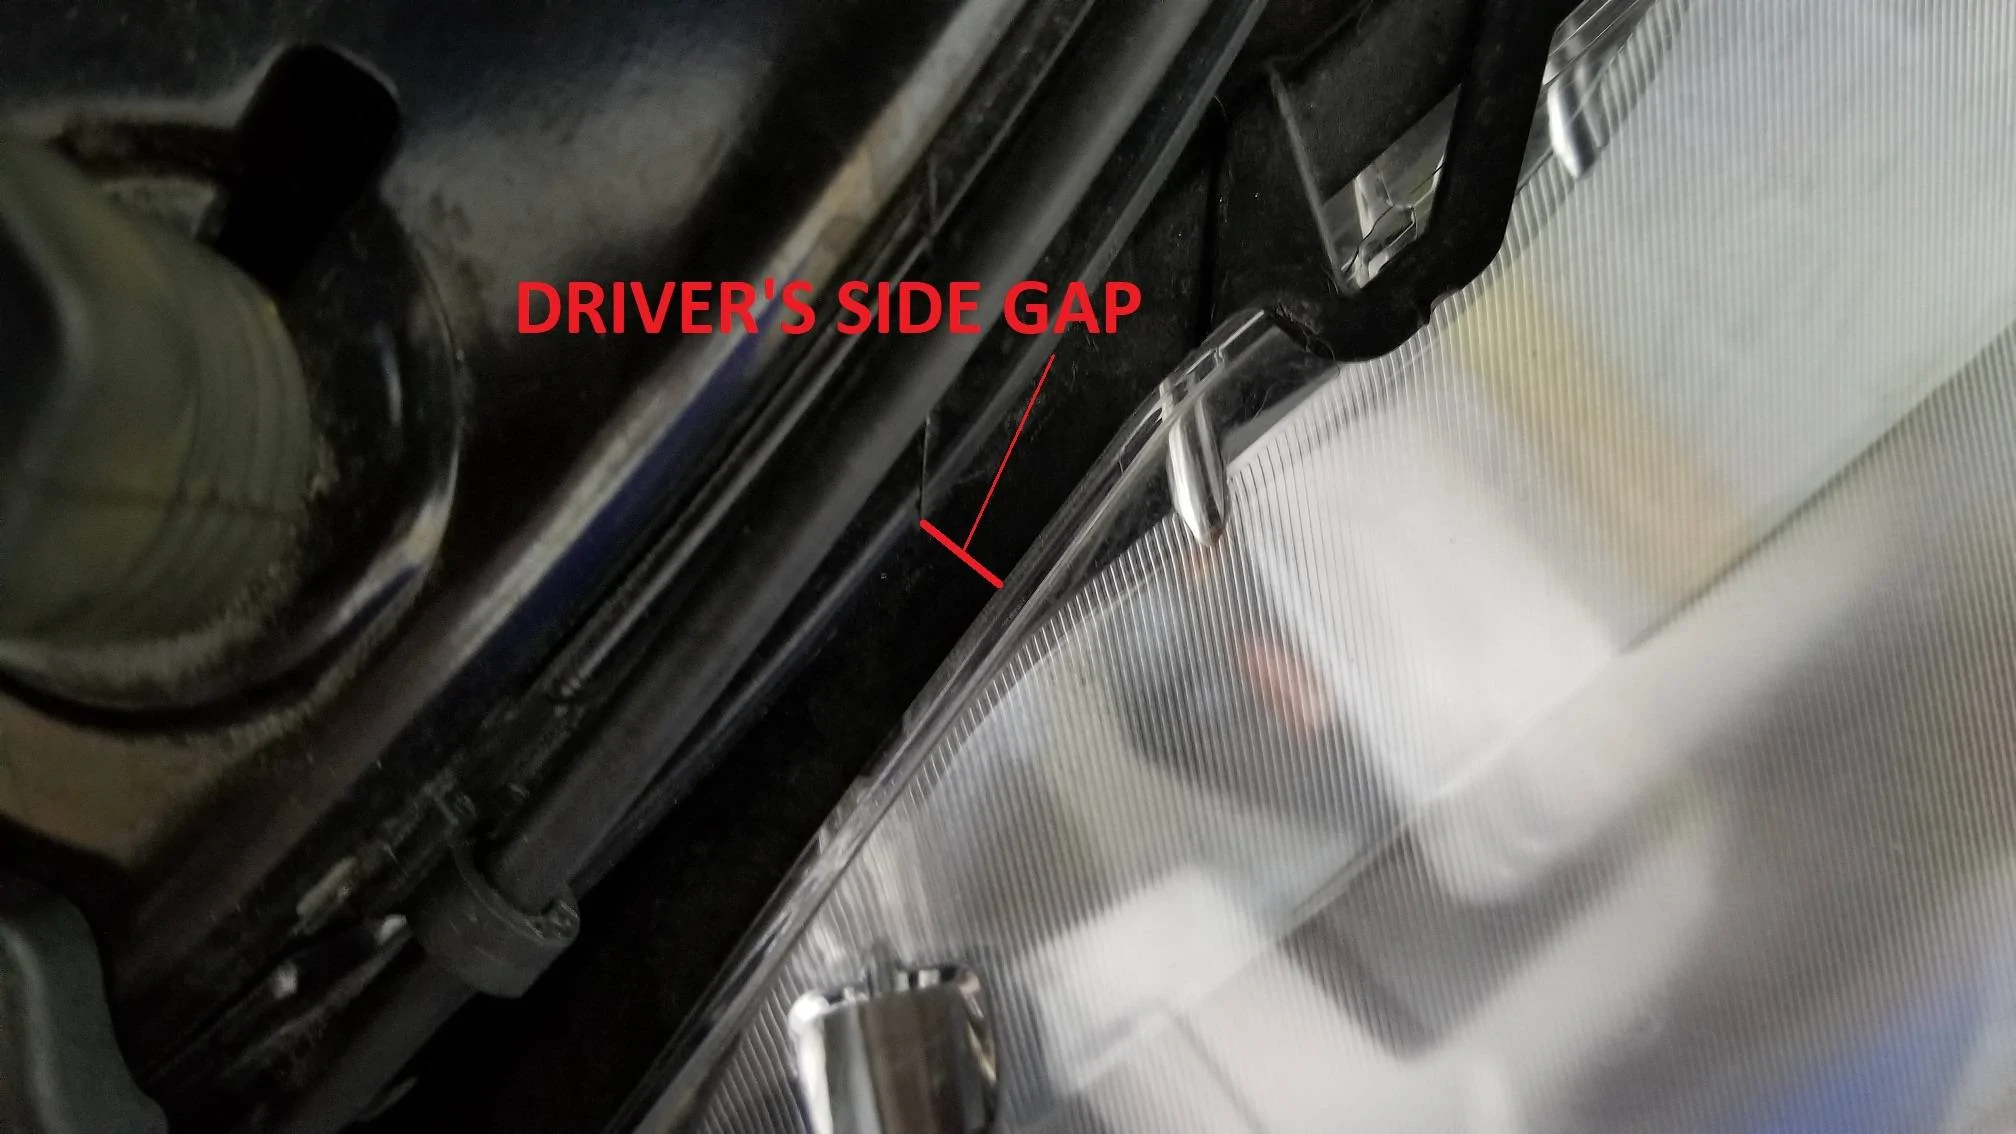
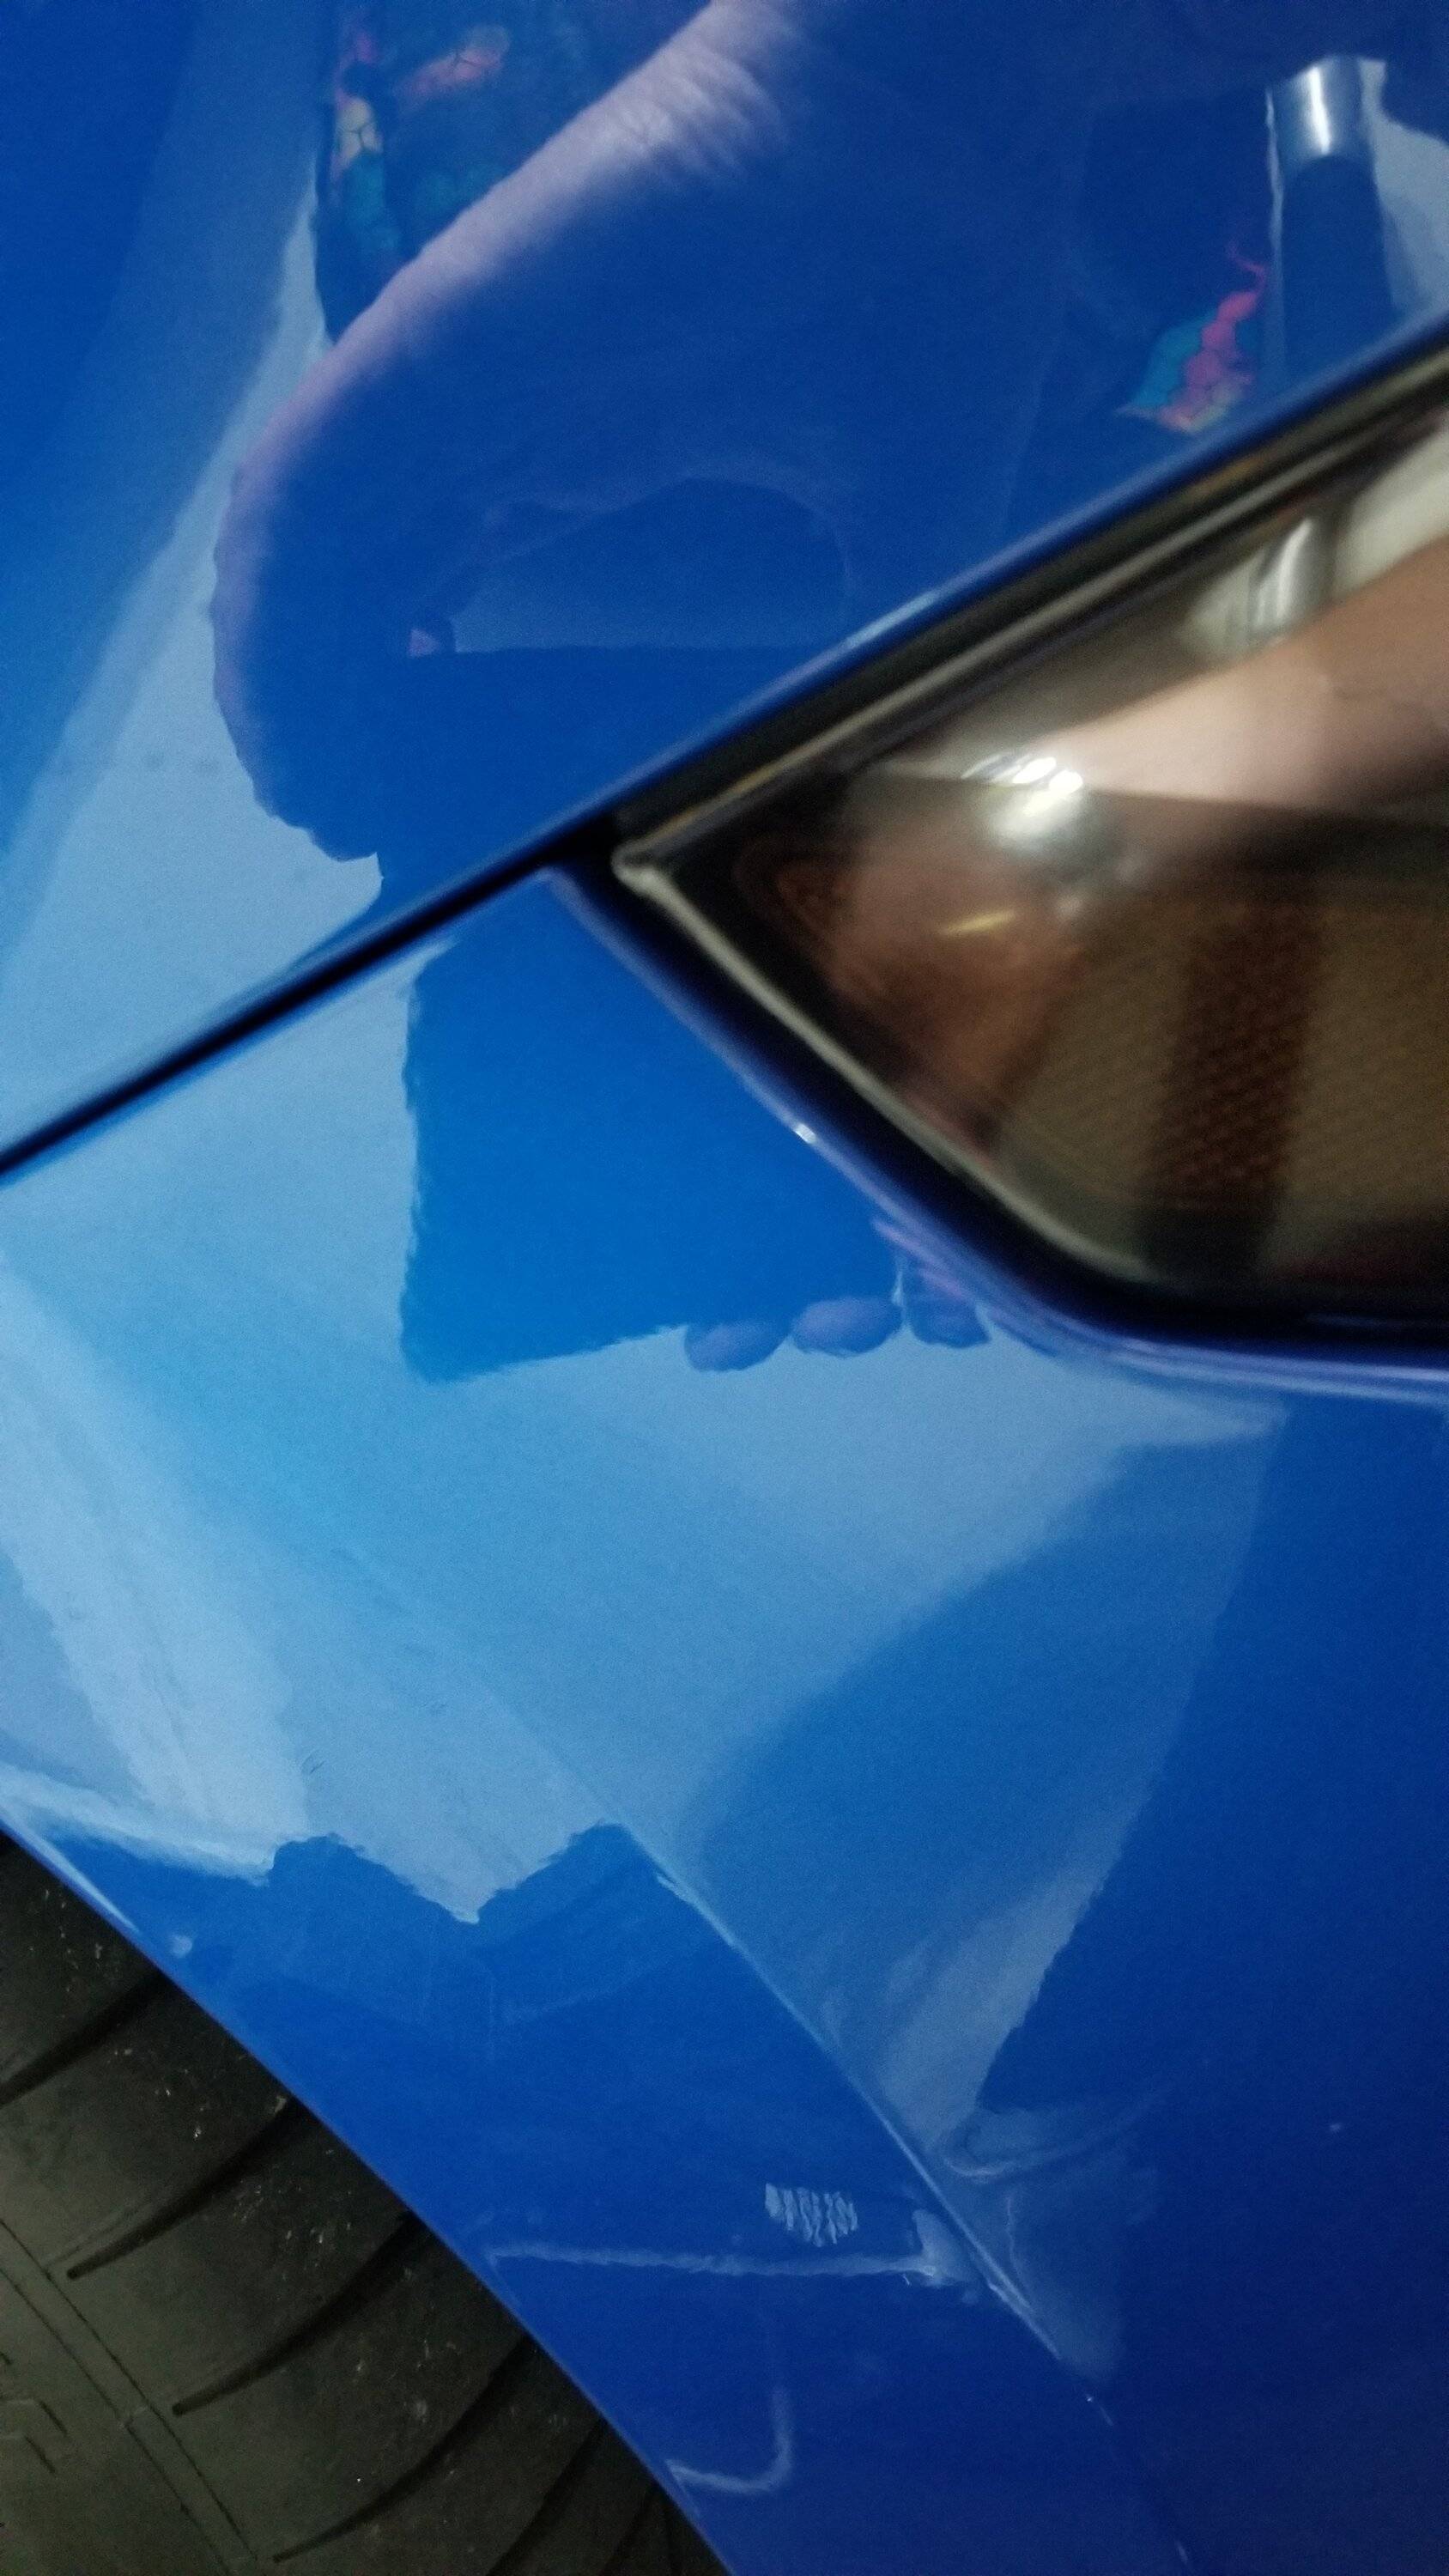
2. Compare your headlight positions. Look at your good side and compare to the bad side. Measure from the seam (mold line) on the black plastic support to the headlight. On the bad side, this gap will be much smaller. The difference is how far forward you need to move the headlight mounting bracket under the headlight.
Good side:

Corrected position. Both sides are equal.
3. Remove the 3 bolts holding the headlight on the offending side. 1 at the top, 1 at the bottom and 1 at the side. Carefully pull the headlight forward and off the car. Set aside.
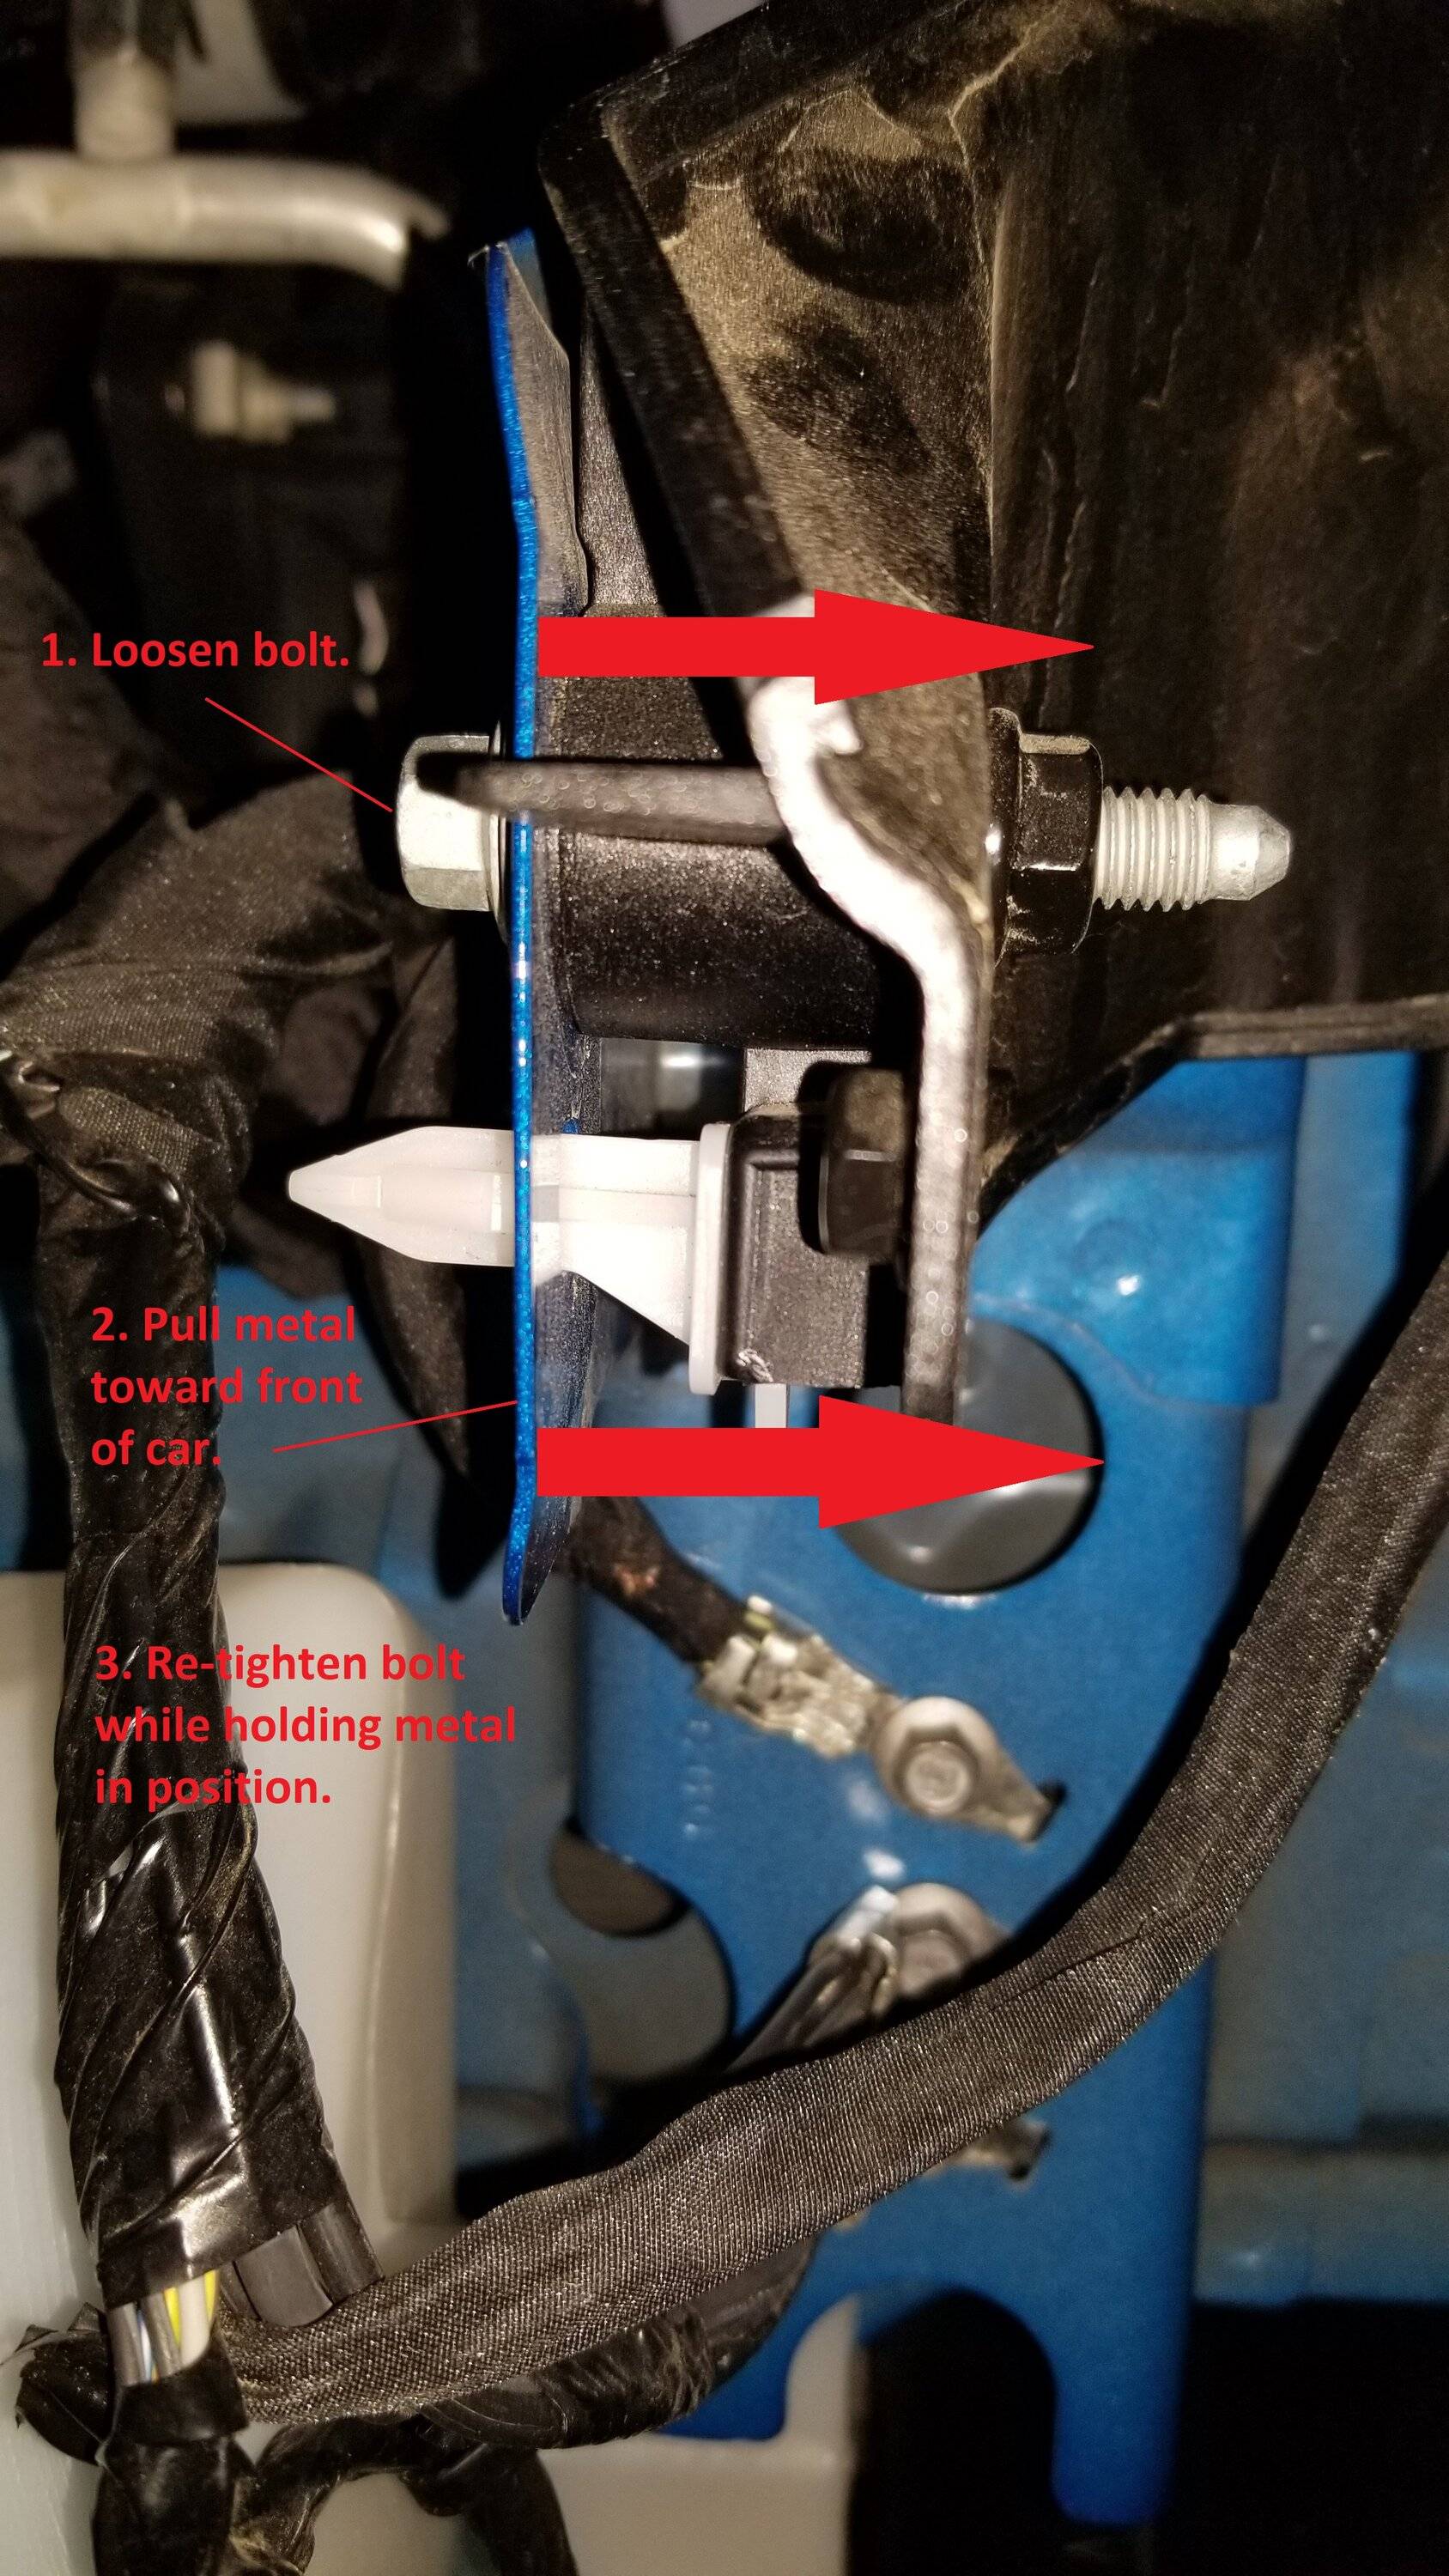
4. Looking from the side you will see a bracket assembly. One part is made of a hard black plastic and the other is painted steel. Loosen the rear bolt. Pull the metal portion forward the amount you need to adjust the headlight. I.E. if your gaps in step 2 are 1/8" off, pull the metal toward the front of the car 1/8". While pulling the metal forward, re-tighten the bolt to hold that position.

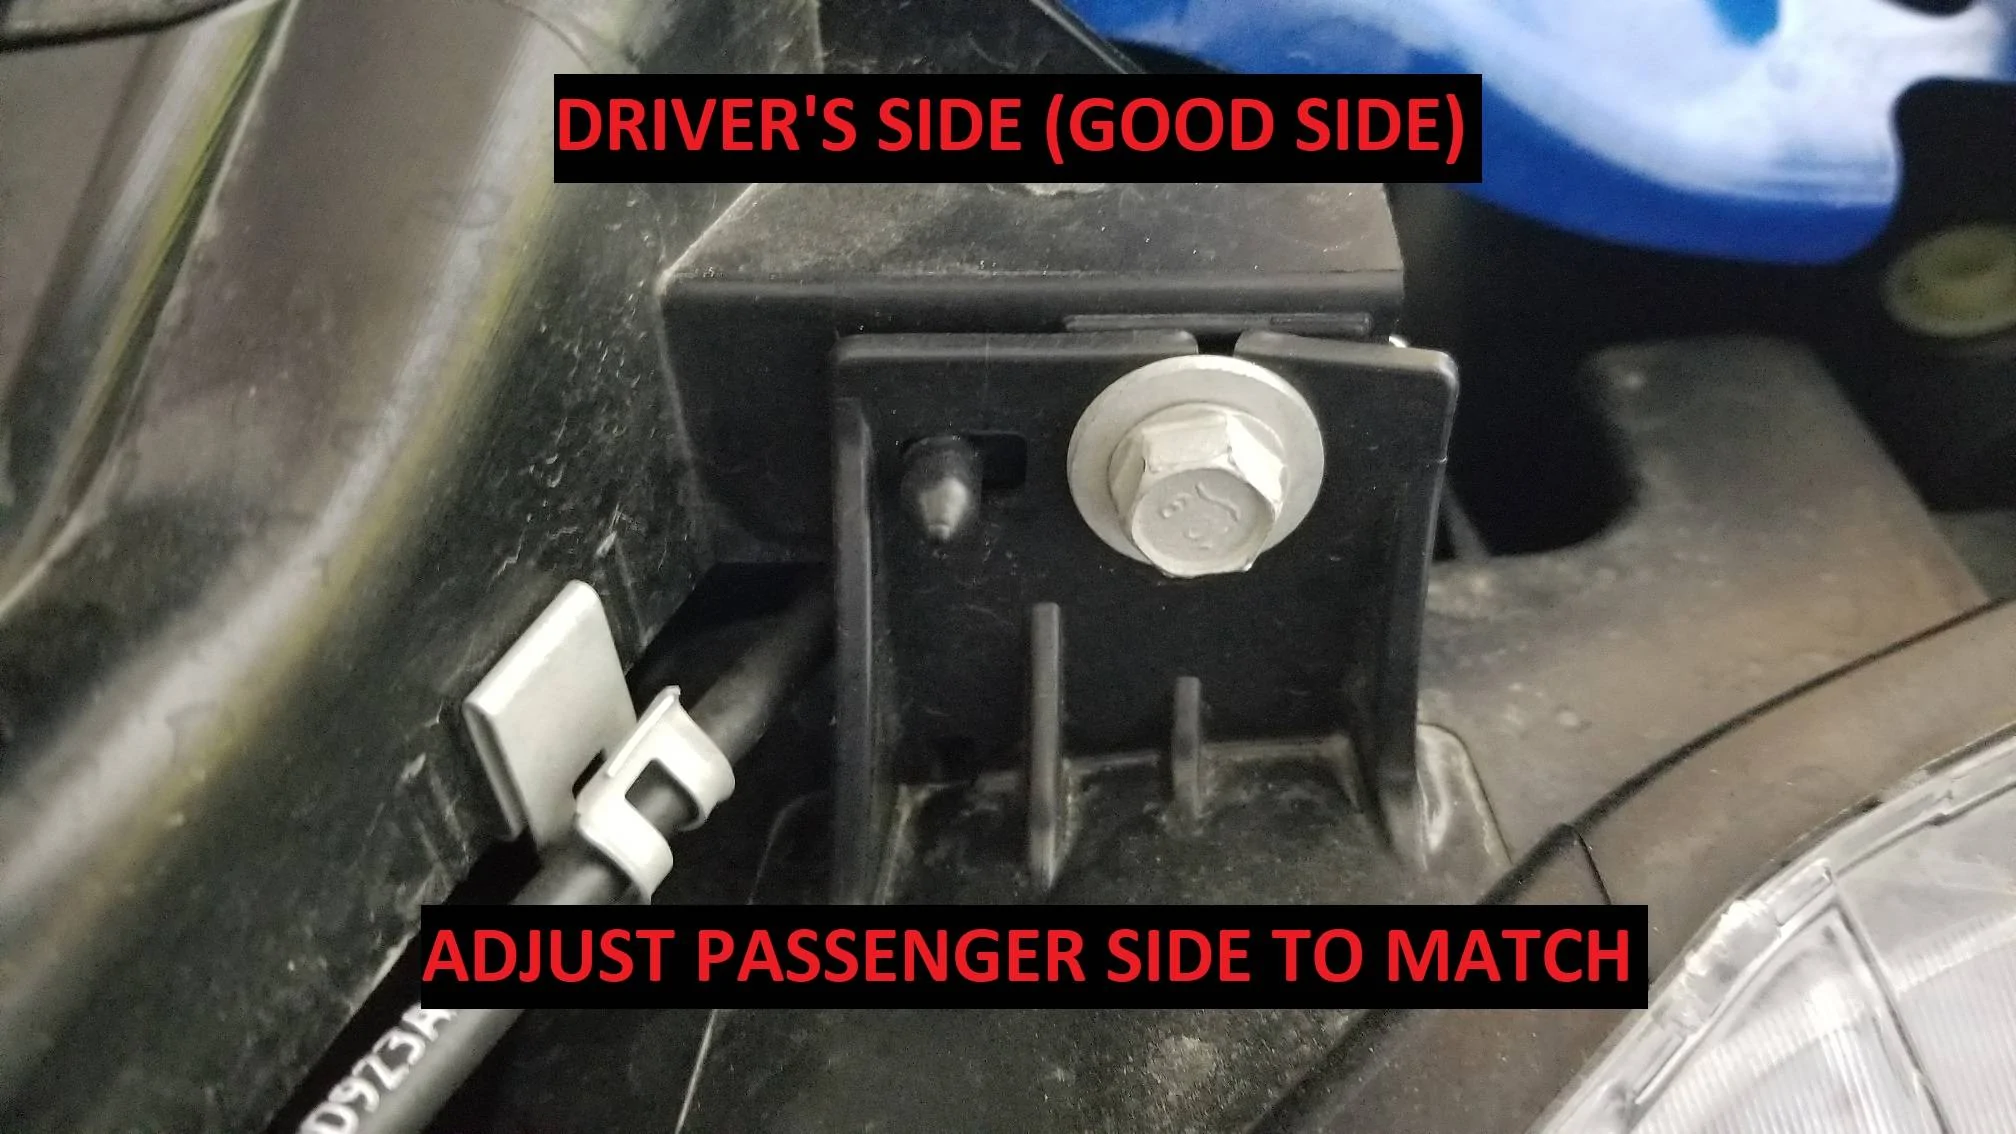
5. Re-install the headlight and thread the bolts in so they are loose and the headlight can be moved a bit. Compare the position of the top headlight mounting bracket and install the passenger side in the same position. On my car, I had to shift my passenger headlight toward the fender.
Make sure the top bolt is loose. Shift the housing to match the drivers side. Tighten the bolt.
5. Tighten the remaining 2 headlight bolts. Check the headlight gap to the fender on both sides to compare. Adjust if necessary.
6. Test fit the bumper by hooking the upper portion over the plastic posts across the radiator support. Make sure the belly pan is lifted upward when the bumper is re-installed. It tucks under the bumper lip. An assistant is helpful with this.
Double checking all gaps are the same using the drivers side as a reference.
The gap around the rear corner of the passenger headlight should match.
The gap under the passenger headlight should be completely gone.
Finish re-installing all the hardware previously removed.
Either take it to the dealer if under warranty and hope they don't break or scratch something in the process or fix it yourself. I opted to fix it myself. The less the dealer touches my car the better.
THE FIX: It requires removal of the front bumper. It's not difficult, just time consuming.
If you have a gap as shown below and you can see the plastic mounting bosses on the underside of the headlight, this is the fix. I am referring to the passenger (RH) side for US spec cars in the write-up as this is the most common assembly defect. If your drivers headlight has a gap, the same applies, just on the opposite side.

A closer look:
1. Remove the bumper cover. Video below is a good guide. A few things about this: You don't need to lift the car but it makes it easier to access the belly pan screws. The belly pan does not have to be completely removed. Just the hardware attaching it to the bumper. At 1:51 in the video, they show pulling back the fender liner to access the 10mm nuts for the bumper clip. I found it easier to remove these nuts from above by reaching into the gap from the top (if your arm fits). Loosen the nuts with a 1/4" ratchet using a 10mm socket on a swivel. Remove the nuts by hand and press down on the plastic "Christmas tree" retainer. Reach in through the fender liner to retrieve the clip assembly. Watch that the threaded posts don't scratch the fender or headlight.
2. Compare your headlight positions. Look at your good side and compare to the bad side. Measure from the seam (mold line) on the black plastic support to the headlight. On the bad side, this gap will be much smaller. The difference is how far forward you need to move the headlight mounting bracket under the headlight.
Good side:
Corrected position. Both sides are equal.

3. Remove the 3 bolts holding the headlight on the offending side. 1 at the top, 1 at the bottom and 1 at the side. Carefully pull the headlight forward and off the car. Set aside.
4. Looking from the side you will see a bracket assembly. One part is made of a hard black plastic and the other is painted steel. Loosen the rear bolt. Pull the metal portion forward the amount you need to adjust the headlight. I.E. if your gaps in step 2 are 1/8" off, pull the metal toward the front of the car 1/8". While pulling the metal forward, re-tighten the bolt to hold that position.
5. Re-install the headlight and thread the bolts in so they are loose and the headlight can be moved a bit. Compare the position of the top headlight mounting bracket and install the passenger side in the same position. On my car, I had to shift my passenger headlight toward the fender.
Make sure the top bolt is loose. Shift the housing to match the drivers side. Tighten the bolt.

5. Tighten the remaining 2 headlight bolts. Check the headlight gap to the fender on both sides to compare. Adjust if necessary.
6. Test fit the bumper by hooking the upper portion over the plastic posts across the radiator support. Make sure the belly pan is lifted upward when the bumper is re-installed. It tucks under the bumper lip. An assistant is helpful with this.
Double checking all gaps are the same using the drivers side as a reference.
The gap around the rear corner of the passenger headlight should match.
The gap under the passenger headlight should be completely gone.
Finish re-installing all the hardware previously removed.
Sponsored


")