Sponsored

Install PP Gauges on Non-PP Model - Recap

18usc371

Well-Known Member
Joined
May 14, 2019
Threads
11
Messages
293
Reaction score
219
Location
Naples, FL
First Name
Jim
Vehicle(s)
GT350 - Track Package - G0628
Done! This was so easy thanks to all your input, tips, pics, etc. Thanks!

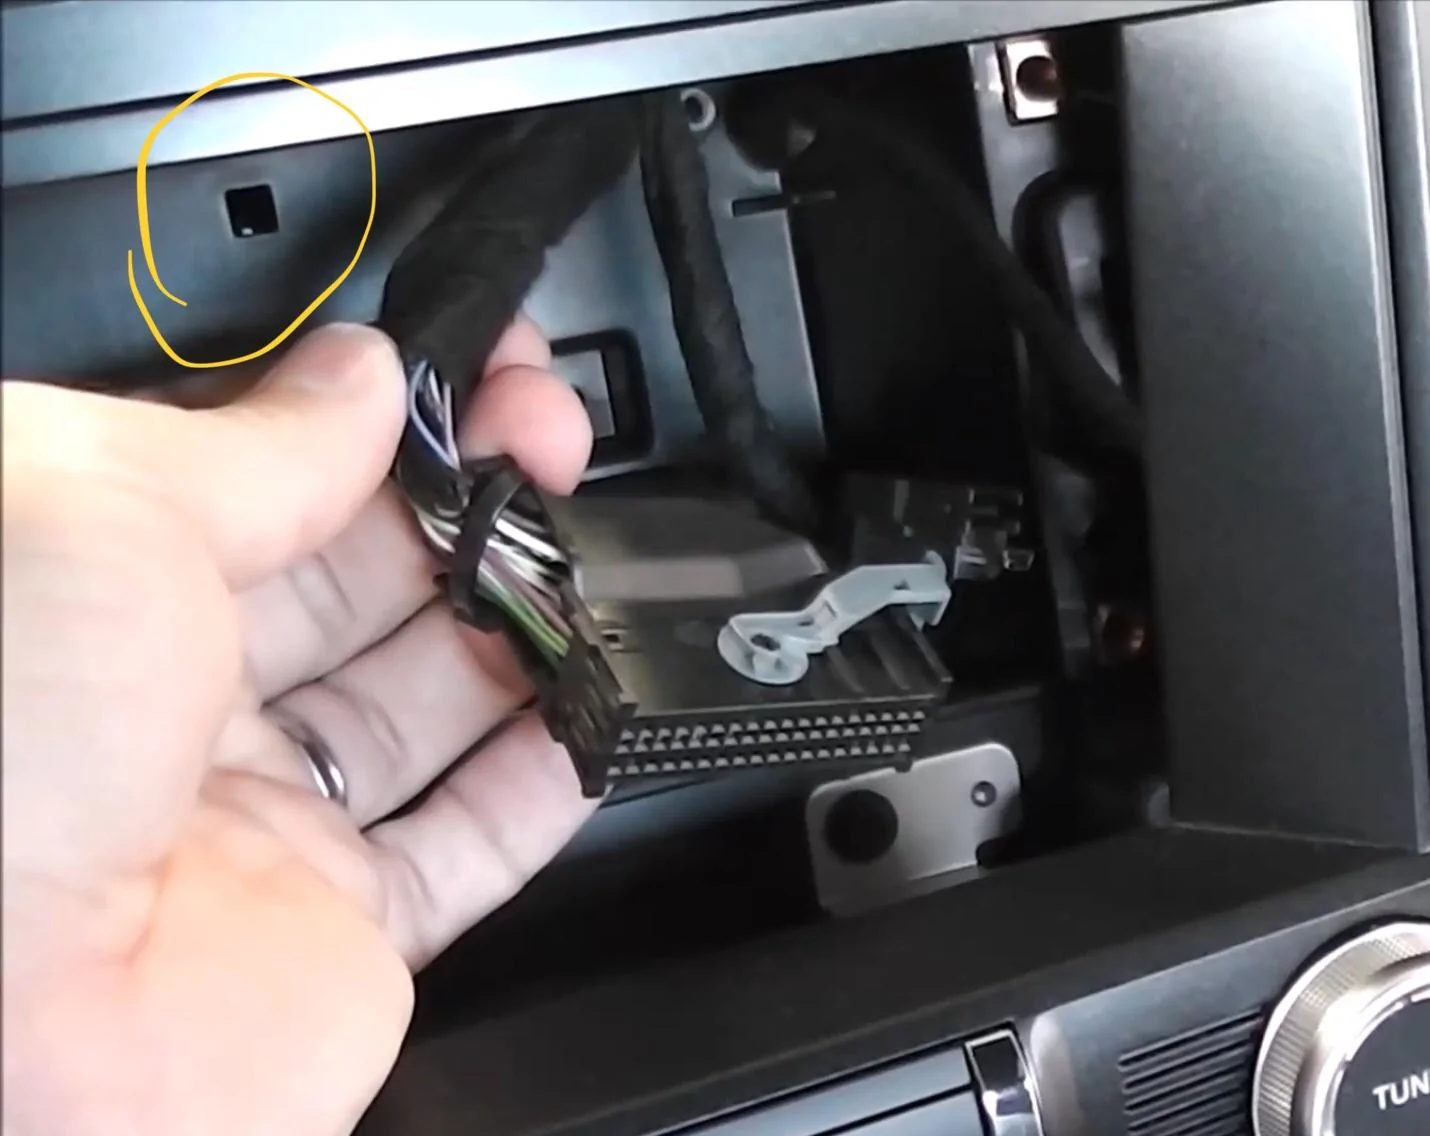
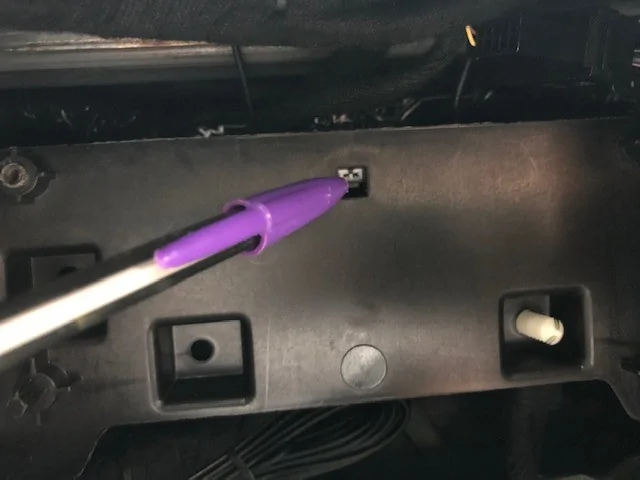
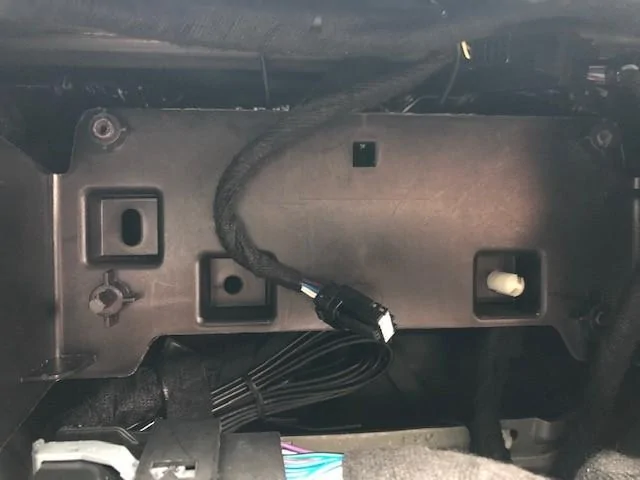
Started out with a Dremel, but quickly just used a sharp utility knife to cut the dash. Nice clean cuts too. I didn't even need to completely remove the radio/climate face-plate to remove the display and pop out and route the 4-pin connector for the gauges. Complete plug and play on the '19.

Up next, 4" to 8" Sync conversion . . .
Sponsored

 
OP
OP

Thestangb

Well-Known Member
Joined
May 8, 2017
Threads
6
Messages
181
Reaction score
59
Location
UAE
First Name
Ayham Kutit
Vehicle(s)
Black S550
But now, after every engine start, the car has the 'low oil pressure' light come on. I understand well, the pressure information is now used by the gauge and the ECU dummy 'switch' receive a pressure on null.

How can I disable this warning message ?

A possible solution : Turned off DTC P0522 (with HP Tuners) ? (Engine Oil Pressure Sensor/Switch Low Voltage)
thanks for your advices !
Look at the first post...I got this fixed, but if u own a GT then you shouldn't make this change as it shouldn't throw any errors.
 

Condor1970

Well-Known Member
Joined
Oct 4, 2018
Threads
95
Messages
1,568
Reaction score
576
Location
Port Orchard WA
Vehicle(s)
2018 Mustang GT
Btw, what are the normal spec'd oil pressures? ....I'm wondering if my gauge is accurate, or needs to be calibrated. I'm using QSUD 5w30.

Cold start - 28psi

Hot idle at 650rpm - 13psi.

Hot highway cruising in 6th gear 1800 rpm - 28psi.

The moment I hit roughly 2,800rpm during acceleration, it jumps to 80-100psi for high rpm operation.
 

ghostang

Well-Known Member
Joined
Apr 26, 2017
Threads
1
Messages
60
Reaction score
19
Location
VA
Vehicle(s)
2018 GT, 2017 Ecoboost
Vehicle Showcase
1
you need to remove bezel and radio display, once removed you will see a square cut out in the plastic dash structure behind display. I did cheat and only pulled the bezel far enough out to get to the screws that hold display in and then moved display out of the way to get to the plug(protect bezel and display with towels to prevent scratching) The harness is plugged into this hole on the opposite side. just reach behind and grab it. when I did mine I had to push the plug out from the front with a small screw driver(covered with electrical tape to prevent to prevent damage or shorting). see pic below borrowed from earlier post(hole circled in yellow)
9E7DA890-7324-4AAE-B3C8-DE87C4DC42EC (1).jpeg
Thanks for the information! It helped me locate the connector. For those that may be having trouble identifying if they have the cable, please see the pictures below:

1. If you have the plug, you will notice two pin holes of the white connector showing through the square cut out in the plastic dash structure behind the display after removing the bezel and radio display.
full.jpg


2. Push in the connector using a pen to loosen the connector from the plastic dash structure.
full.jpg


3. After loosening the connector, reach behind the plastic dash structure and pull out the connector to remove it.
full.jpg


4. Route the connector up through the dash next to the air vent cut out.
full.jpg
 

repins1911

Well-Known Member
Joined
Feb 28, 2016
Threads
8
Messages
48
Reaction score
9
Location
MO
Vehicle(s)
2015 GT Premium DIB
So I did the swap, PP gauges work as they should. The issue I have is my remaining air vent cover keep popping out. There was a post on either this thread or the original that the fitment was tight, but of course I can't find it now. Anyone else have this issue and what was the fix?
 

Sponsored

18usc371

Well-Known Member
Joined
May 14, 2019
Threads
11
Messages
293
Reaction score
219
Location
Naples, FL
First Name
Jim
Vehicle(s)
GT350 - Track Package - G0628
So I did the swap, PP gauges work as they should. The issue I have is my remaining air vent cover keep popping out. There was a post on either this thread or the original that the fitment was tight, but of course I can't find it now. Anyone else have this issue and what was the fix?
Both vents? left of gauge or right gauges only?

Did you trim enough from the dash backing in that vent area?

I know that sounds simple, but is also the most obvious, as it fit prior.

I say that because I “under” cut the sub dash at first to make sure I didn’t cut too much out permanently. Just to be cautious. I had to go back a again in couple of places and shave a bit more as it was still just a tad over at first.
 

repins1911

Well-Known Member
Joined
Feb 28, 2016
Threads
8
Messages
48
Reaction score
9
Location
MO
Vehicle(s)
2015 GT Premium DIB
Both vents? left of gauge or right gauges only?

Did you trim enough from the dash backing in that vent area?

I know that sounds simple, but is also the most obvious, as it fit prior.

I say that because I “under” cut the sub dash at first to make sure I didn’t cut too much out permanently. Just to be cautious. I had to go back a again in couple of places and shave a bit more as it was still just a tad over at first.
Right side only. I thought I cut plenty but will have to take it apart again make sure. I know I had read that the vents sit slightly farther apart in the PP dash trim.
 

18usc371

Well-Known Member
Joined
May 14, 2019
Threads
11
Messages
293
Reaction score
219
Location
Naples, FL
First Name
Jim
Vehicle(s)
GT350 - Track Package - G0628
Right side only. I thought I cut plenty but will have to take it apart again make sure. I know I had read that the vents sit slightly farther apart in the PP dash trim.
Assuming the 4-hole dash panel has the original fitting left and right vent bezels, and the right bezel wasn’t loose (or tight) in the original PP donor car, i.e no fit issues, I would guess the trimming needs to be addressed.

You can’t really do anything about the spacing on the panel itself.
 

300mag

Well-Known Member
Joined
Sep 30, 2018
Threads
12
Messages
268
Reaction score
63
Location
Atlanta
First Name
Dave
Vehicle(s)
17 Ecoboost Prem Vert
So I did the swap, PP gauges work as they should. The issue I have is my remaining air vent cover keep popping out. There was a post on either this thread or the original that the fitment was tight, but of course I can't find it now. Anyone else have this issue and what was the fix?
yes I have the issue where the PP panel with vents won't pop in. my fix is to remove the left from pp panel, insert panel. once pp panel(with right vent attached) is installed I can get the left vent to insert and snap into panel. just a tight squeeze but it goes in and snaps into place.
 

Bnewell101

Well-Known Member
Joined
May 6, 2019
Threads
16
Messages
49
Reaction score
1
Location
North Carolina
First Name
Brandon
Vehicle(s)
2016 mustang GT
Vehicle Showcase
1
So splicing into pins 53 and 54 I noticed there's 2 wires each that go in to the pin (small white and small blue), anyone know if you splice into both wires each or is the connection only to 1?
img_20190615_092015-jpg.jpg
 

Sponsored

repins1911

Well-Known Member
Joined
Feb 28, 2016
Threads
8
Messages
48
Reaction score
9
Location
MO
Vehicle(s)
2015 GT Premium DIB
yes I have the issue where the PP panel with vents won't pop in. my fix is to remove the left from pp panel, insert panel. once pp panel(with right vent attached) is installed I can get the left vent to insert and snap into panel. just a tight squeeze but it goes in and snaps into place.
Just an update to the issue I had. I removed the air vent pods and reinstalled the dash trim. Then I marked the sub dash, for lack of a better term, where the trim over lapped and cut back a quarter inch past my marks. Now the trim installs with zero resistance. I would recommend this as part of the initial install when doing the cutting portion.
 

300mag

Well-Known Member
Joined
Sep 30, 2018
Threads
12
Messages
268
Reaction score
63
Location
Atlanta
First Name
Dave
Vehicle(s)
17 Ecoboost Prem Vert
Just an update to the issue I had. I removed the air vent pods and reinstalled the dash trim. Then I marked the sub dash, for lack of a better term, where the trim over lapped and cut back a quarter inch past my marks. Now the trim installs with zero resistance. I would recommend this as part of the initial install when doing the cutting portion.
post pics when you get a chance.
 

18usc371

Well-Known Member
Joined
May 14, 2019
Threads
11
Messages
293
Reaction score
219
Location
Naples, FL
First Name
Jim
Vehicle(s)
GT350 - Track Package - G0628
Believe it or not, it's a good idea to cap it. The reason why, is even though the cabin air is filtered, some particles do get through, and they will over a long period of time build up inside the gauge housing, which could "potentially" cause a problem. Just find a cheap piece of plastic, cut it into a circle, and plug the hole, holding it in place with some clear silicon sealant/adhesive. That way you can pop it out later if you ever need to.
Just as a follow up:

I test fitted everything without the middle vent blocked an found quite a bit of climate, in my case A/C, "leaking" out the top and bottom of the dash panel around the gauges. You could feel cold air vented up toward the windshield and down toward the radio display. The panel around the gauges was quite a bit colder than the area around the other two vents. I should have taken the some readings with my temp gun . . .

So I cut a plastic disk from the lid of a La Banderita queso dip (hot). I'm sure mild or medium queso lids would have worked too. About 72mm diameter. That depends on deep you cut the flange on the middle vent. I cut it back to the ribs on either side at 3 and 9 o'clock. Then it taped it up:
354326-6982a2ad0ca4989a44048c05683f8691.jpg
354327-676fd1e1d1f46a983dde25af9460d79f.jpg


After that, the leaks stopped, but it still got too warm/cold for my liking. I cut another disk out of thick Styrofoam from a to-go container from some black beans from the Cuban joint down the road, and taped that too:

354331-ee82aad3779148e055501cc39e5e32b4.jpg
354332-61d3273d28d46837915c4e883bb14bc2.jpg


I should have just started with the Styrofoam!

Now, no appreciable temp difference and all climate exiting the other two vents. View attachment 375225 View attachment 375226 View attachment 375230 View attachment 375231
 

Attachments

  • 0 bytes Views: 0
  • 0 bytes Views: 0
  • 0 bytes Views: 0
  • 0 bytes Views: 0

Condor1970

Well-Known Member
Joined
Oct 4, 2018
Threads
95
Messages
1,568
Reaction score
576
Location
Port Orchard WA
Vehicle(s)
2018 Mustang GT
^^^ Initially I did the same with a salsa lid, but I found that even with it inserted to the inside shoulder of the center vent, the plug wires on the back of the gauge were still contacting it and the wiring was getting pinched.

In the end, I decide to use the cap off the top of a Rustoleum paint can that has the notches for popping it off the can. Like the one pictured below. I removed the inside plastic, and cut the lid back to about half its size, then I was able to insert the cap inverted into the vent allowing it to go deep inside the vent to block all fair flow. I also removed the center vent splitter inside the duct to allow for the cap to go deep inside and create a nice deep pocket. I then used very thick clear silicon around the edges to fully seal everything.


AU_HPWheel_FltBlk_11oz_L.png


Another big problem with using the Performance Pack Dash Trim over the Base Model duct work, is the Performance Pack dash trim has the outer vents located further apart than the base model to make more room for the gauges. The interior duct work of the Performance Pack is molded differently. Because of this, even though you can install the PP dash trim over the Base Model duct work, the outer vents are not lined up to the centers of the ventilation ducting. This will cause gaps around the edges of the round vents and cause a loss of air inside the dash. The little ring of foam around the vent is not enough to compensate and fully seal it when it's off center like that. The only way to truly get a proper seal, is to replace all the dashboard ventilation ducting. Or, in my case, modify the dash trim to hold a set of PP gauges to allow the outer vents to stay where they are originally located.
 

18usc371

Well-Known Member
Joined
May 14, 2019
Threads
11
Messages
293
Reaction score
219
Location
Naples, FL
First Name
Jim
Vehicle(s)
GT350 - Track Package - G0628
^^^ Initially I did the same with a salsa lid, but I found that even with it inserted to the inside shoulder of the center vent, the plug wires on the back of the gauge were still contacting it and the wiring was getting pinched.

. . . The little ring of foam around the vent is not enough to compensate and fully seal it when it's off center like that. The only way to truly get a proper seal, is to replace all the dashboard ventilation ducting. Or, in my case, modify the dash trim to hold a set of PP gauges to allow the outer vents to stay where they are originally located.
I didn't check for pinching. I'll have to re-visit that. Thanks.

I did notice the slight mis-alignment of the duct work to PP dash, but was hoping the foam seal would do the job. Perhaps a larger foam seal would do most of it. It's been super hot here, and the two vents are blowing nice and cold, even if I'm leaking. I just didn't want the direct blast of climate on the gauge box as previously discussed.

Admittedly, your solution in complete, albeit more involved.
Sponsored


Top