Sponsored

Whipple Installation

Bbarfoot14

Well-Known Member
Joined
Jan 19, 2016
Threads
79
Messages
519
Reaction score
135
Location
RI
Vehicle(s)
2015 Mustang GT PP
Vehicle Showcase
1
Quite honestly, it could not have been any easier, the long ball hex I linked got at them perfectly.

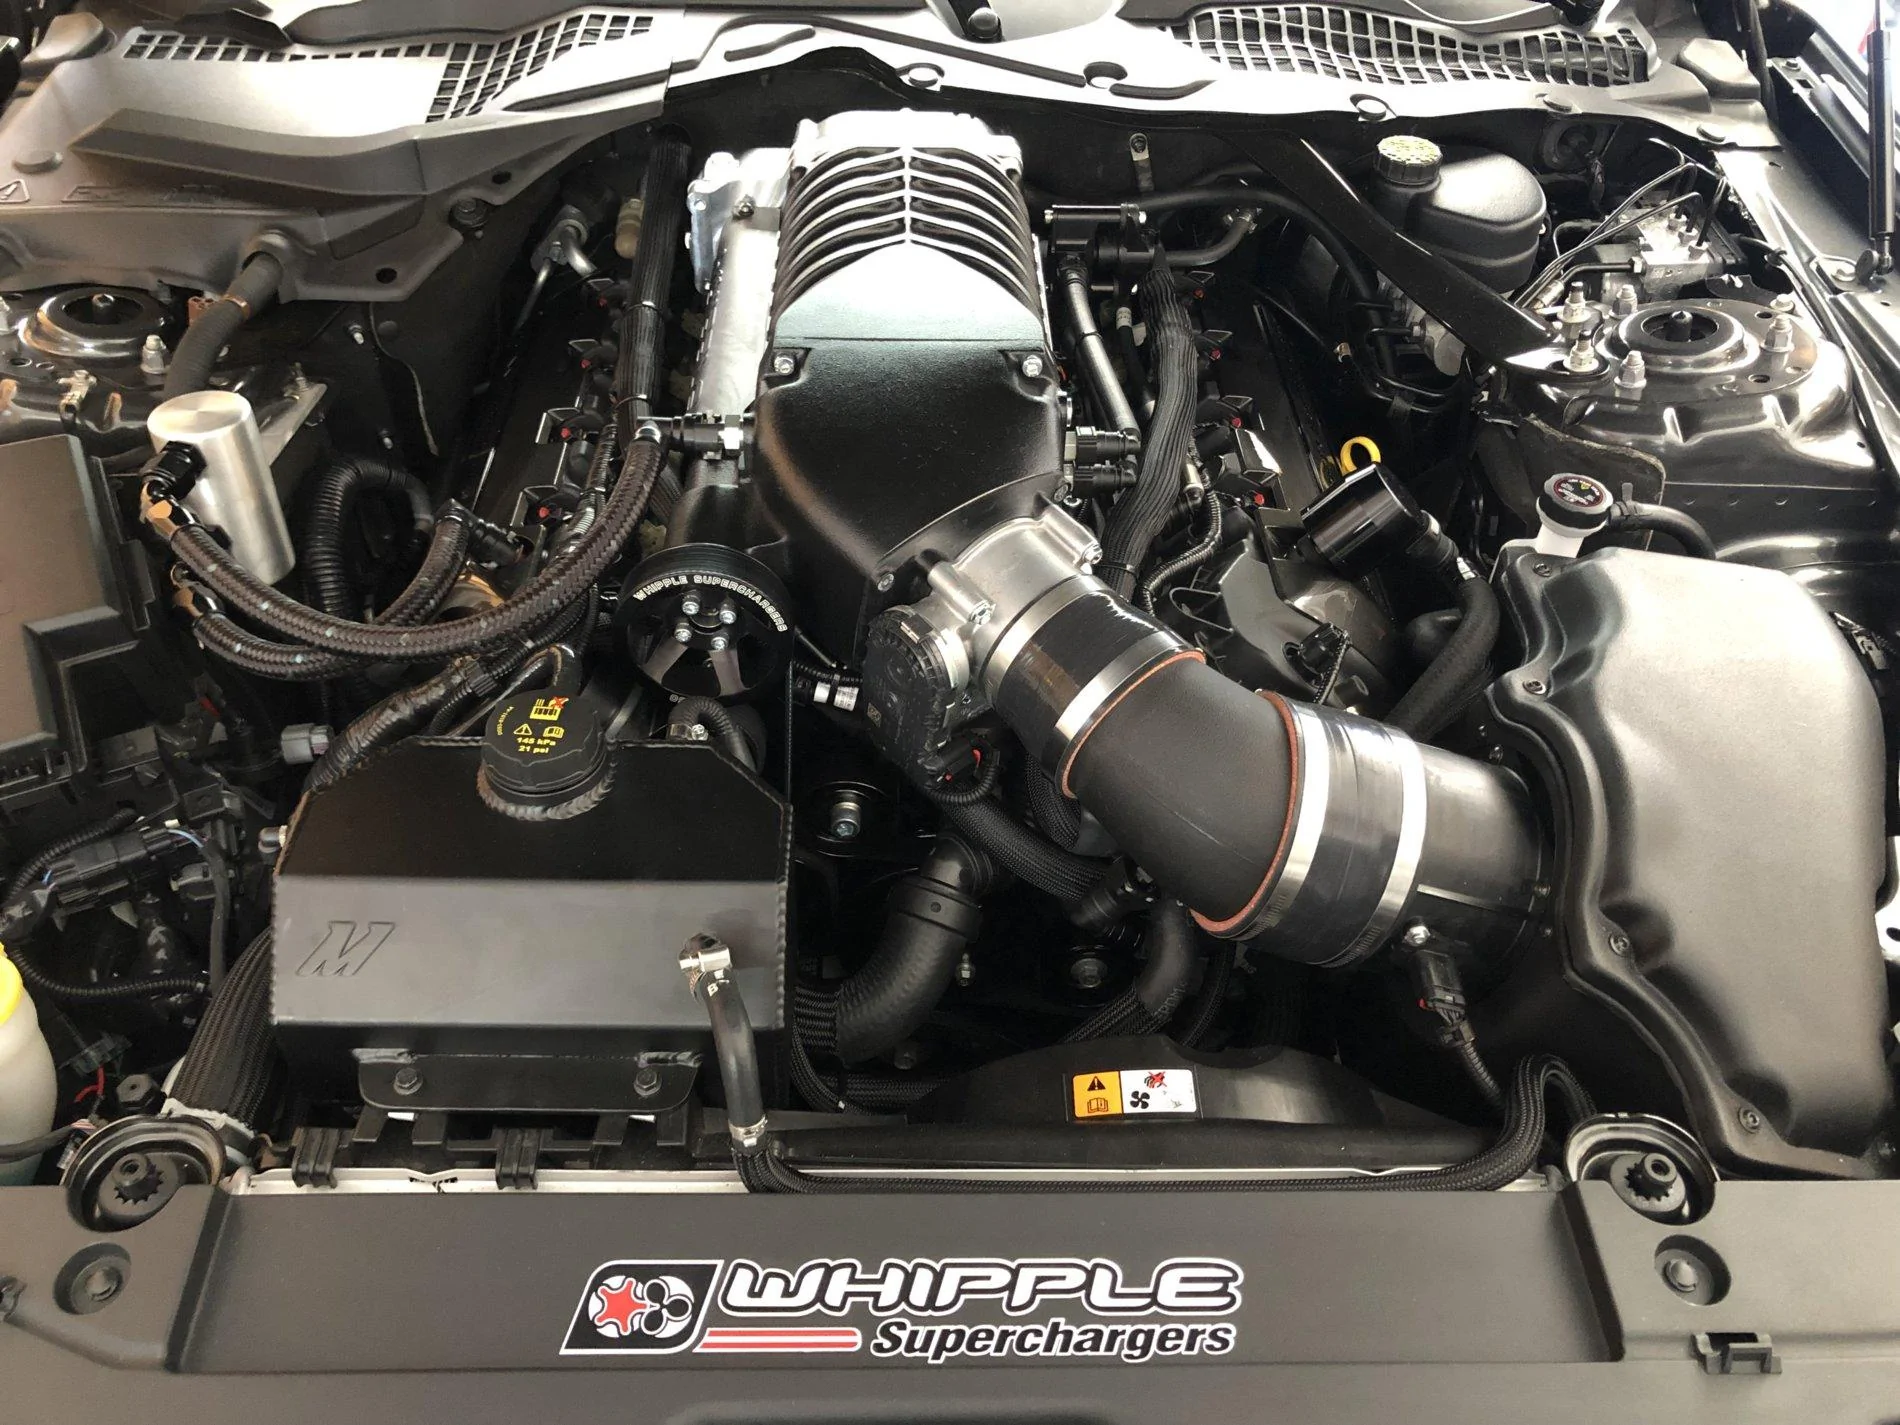
Figured out the connector issue. I inadvertently plugged the MAF one into the throttle body. When I pulled it out the red core came out inside the plug. I didn’t notice as it looked normal, Whipple noticed, I fixed and both went in fine.

For reference, the plug labeled as 105908, P/N: JEEP ETC, is for the throttle body connection.
Hahaha consider yourself lucky, last time I used those husky ones on a whipple install the ball point broke off inside the bolt and it had to be extracted. Husky is shit. But glad everyone worked out with the cord
Sponsored


YumaStang

Member
Joined
Jan 28, 2019
Threads
0
Messages
18
Reaction score
2
Location
Yuma,AZ
Vehicle(s)
2015 Mustang GT
I bought a set of Long Ball Hex Bit Sockets to torque the manifold as mentioned above but I cannot get to the bolts underneath the fuel rail. I tried at different angles but I either start to round out the bolts or grind up against the fuel rail. Im also attempting to do this without the super charger head unit to make things easier. Any tips? Any thoughts about removing the fuel rail and using washers as a spacer and torquing in the proper sequence to get the proper clamping force then removing the bolts and installing the fuel rail and then retorquing?
 

Burkey

Well-Known Member
Joined
Feb 9, 2016
Threads
87
Messages
5,524
Reaction score
3,512
Location
Australia
Vehicle(s)
2016 Mustang GT
Vehicle Showcase
1
I bought a set of Long Ball Hex Bit Sockets to torque the manifold as mentioned above but I cannot get to the bolts underneath the fuel rail. I tried at different angles but I either start to round out the bolts or grind up against the fuel rail. Im also attempting to do this without the super charger head unit to make things easier. Any tips? Any thoughts about removing the fuel rail and using washers as a spacer and torquing in the proper sequence to get the proper clamping force then removing the bolts and installing the fuel rail and then retorquing?
The torque values are so low that it’s not even worth your time.
Just install the parts in the order that gives you access to them.
 

Bbarfoot14

Well-Known Member
Joined
Jan 19, 2016
Threads
79
Messages
519
Reaction score
135
Location
RI
Vehicle(s)
2015 Mustang GT PP
Vehicle Showcase
1
I bought a set of Long Ball Hex Bit Sockets to torque the manifold as mentioned above but I cannot get to the bolts underneath the fuel rail. I tried at different angles but I either start to round out the bolts or grind up against the fuel rail. Im also attempting to do this without the super charger head unit to make things easier. Any tips? Any thoughts about removing the fuel rail and using washers as a spacer and torquing in the proper sequence to get the proper clamping force then removing the bolts and installing the fuel rail and then retorquing?
I made a post a few weeks ago on this topic check it out, whipple gen 3 tips and tricks is the title I believe.
 

YumaStang

Member
Joined
Jan 28, 2019
Threads
0
Messages
18
Reaction score
2
Location
Yuma,AZ
Vehicle(s)
2015 Mustang GT
I made a post a few weeks ago on this topic check it out, whipple gen 3 tips and tricks is the title I believe.
Yup, saw that and thats what Im going to do. Was just seeing if anyone out there had any other ideas.
 

Sponsored

OP
OP
Gee

Gee

Well-Known Member
Joined
Jun 27, 2016
Threads
13
Messages
205
Reaction score
69
Location
RI
Vehicle(s)
2016 Mustang GT
Vehicle Showcase
1
Update after a Sunday worth of install.

Completed the remaining steps of install, flashed with Whipple tune, nGauge install and first start. First 20-30 seconds or so there was some stumble, but after the revs lowered, did the crank relearn, she ran mint, no DTC's, no leaks, no issues. Several cycles of starting and shutting off to get the factory system coolant and whipple heat exchanger coolant where they should be, all air removed. The oversized HE takes 3+ gallons of coolant. Use Motorcraft pre-mix (VC-3DIL-B). Found at RockAuto.com for $10/gallon. It was $56 for 4 gallons shipped. Cheapest I could find.

Quick tips on burping the factory coolant system to get the air out. Squeezing the upper and lower radiator hoses helps flush out the air if you don't have a fancy system that uses compressed air to do it. You can also unbolt your coolant tank and lift it as high as you can to make it the highest point in the system, it helps. Took about 1/2 an hour of engine cycling to get all the air out and the coolant all the way through the heater core, in car heat working properly. The whipple HE just keeps taking coolant to top off, I was pretty shocked how many cycles it took to get the level where it needed to be.

The bumper and belly pan aren't installed yet because I decided to add the Mishimoto coolant tank. Didn't get it in time so next weekend I'll be getting that and the Lund Omega Boost Box installed and then buttoning her up. I'll take some pics once complete.

After that's done I'll be installing the DSS 800 halfshafts and swapping out the steeda red diff bushing for the BMR BK051 with the TH017 bolt upgrade kit. Need to mount the ET Street R bias plys to the 17x9.5 race stars and then it's time to hit the 1320!
 
Last edited:

96gt4.6

Well-Known Member
Joined
Feb 18, 2018
Threads
22
Messages
396
Reaction score
163
Location
Kansas
Vehicle(s)
2017 GT Premium/A6, 2020 Explorer ST
Awesome! I'm excited to see your results! Just to summarize, the strip passes will be on the stage 1 whipple kit, with the supplied whipple tune? What fuel?
 
OP
OP
Gee

Gee

Well-Known Member
Joined
Jun 27, 2016
Threads
13
Messages
205
Reaction score
69
Location
RI
Vehicle(s)
2016 Mustang GT
Vehicle Showcase
1
Awesome! I'm excited to see your results! Just to summarize, the strip passes will be on the stage 1 whipple kit, with the supplied whipple tune? What fuel?
Yes, stg 1 w/ whipple tune. It's a long drive to the track (130mi) and with my other cars I've typically arrived with about 1/4 tank, then added a few gallons of sunoco 100 to take it to just under 3/4. With these cars, not sure as I haven't really looked into it. I would assume either the 100 or 104 unleaded will be fine for some added protection.

i do intend to run the car on the street and track with octane adjust off as there are plenty of good 93 stations here in the NE. I'm still reading up on Knock Limiting in the flight control to see if I should leave it on or turn it off. Leaning off but still researching input.
 
OP
OP
Gee

Gee

Well-Known Member
Joined
Jun 27, 2016
Threads
13
Messages
205
Reaction score
69
Location
RI
Vehicle(s)
2016 Mustang GT
Vehicle Showcase
1
Update from the weekend, finally got it all buttoned up and back together. A couple of additional tips.

- If you get the oversized HE, you can cut about 4-5" off the hose that comes out of the HE tank and routes across the front of the car towards the lower port of the HE. Whipple gives you an extender hose than runs from the lower port on the HE which has a hose adapter to join the two. With them coupled together as provided the line hangs and has a bit of extra slack. I figured if I left it as is that I might have issues fitting the bumper and/or belly pan and didn't want to find that out after filling the system with coolant, so I cut off a few inches from the line where it connects to the adapter. Everything fit well back together, nothing pinched.

- A couple of threads with good information/tips on Whipple installs, one of which has several comments on belt sizing info if ya'll need it:
https://www.mustang6g.com/forums/th...ple-club-any-advice-for-a-first-timer.114260/
https://www.mustang6g.com/forums/threads/whipple-gen-3-install-tips-tricks.117283/

Wrapped up installation of the nGauge and Lund omega boost box. Currently working on the nGauge configuration. Planning to mostly use the (6) gauge screen looking at: Boost (renamed Analog Input 1 and config'd for boost box), Spark (total advance), Lambda 1 & 2, AIT2, ECT. The (4) gauge screen config'd for STFT1 & 2, LTFT1 & 2. Lights at the top are config'd for KNOCKR, with 0 being first green, .25 for other two greens, 1 for yellow and 2 for both reds (Thanks to @NikNala for this idea). I'm planning to configure the colors to be green when in ranges acceptable for WOT operation and to turn red when out of range. I figured this would be the easiest way for my eyes to quickly pick up an issue. As far as RPM, I have the raptor shift light for that.

Still no test drive yet unfortunately. We've been hit with two storms in the last few days, the latest one dumped 12" of snow down last night. Not a fan. Here's some pics of the final.
IMG_2789.webp
IMG_2787.webp
IMG_2788.webp
 

Bbarfoot14

Well-Known Member
Joined
Jan 19, 2016
Threads
79
Messages
519
Reaction score
135
Location
RI
Vehicle(s)
2015 Mustang GT PP
Vehicle Showcase
1
[/QUOTE]
Still no test drive yet unfortunately. We've been hit with two storms in the last few days, the latest one dumped 12" of snow down last night. Not a fan. Here's some pics of the final.
IMG_2789.webp
IMG_2787.webp
IMG_2788.webp
[/QUOTE]
Looks clean brotha.
Just an observation... is your IC coolant pink like the regular coolant? What kind did you use?
 

Sponsored
OP
OP
Gee

Gee

Well-Known Member
Joined
Jun 27, 2016
Threads
13
Messages
205
Reaction score
69
Location
RI
Vehicle(s)
2016 Mustang GT
Vehicle Showcase
1
Thanks man. I used the same pre-mix used for the engine cooling system. Ford Motorcraft Orange Pre-mix VC-3DIL-B.
 

WhiteyDog

WOOF!!!
Joined
Jun 30, 2016
Threads
16
Messages
1,788
Reaction score
733
Location
Manheim, Pa.
Vehicle(s)
16
Looks like an *ss kicking set-up. And yeah, we got those storms too, but you guys got more than we did out of it.
 
  • Like
Reactions: Gee

Bbarfoot14

Well-Known Member
Joined
Jan 19, 2016
Threads
79
Messages
519
Reaction score
135
Location
RI
Vehicle(s)
2015 Mustang GT PP
Vehicle Showcase
1
Still no test drive yet unfortunately. We've been hit with two storms in the last few days, the latest one dumped 12" of snow down last night. Not a fan. Here's some pics of the final.
IMG_2789.webp
IMG_2787.webp
IMG_2788.webp
[/QUOTE]
Looks clean brotha.
Just an observation... is your IC coolant pink like the regular coolant? What kind did you use?[/QUOTE]
Pm’d You brotha
 

YumaStang

Member
Joined
Jan 28, 2019
Threads
0
Messages
18
Reaction score
2
Location
Yuma,AZ
Vehicle(s)
2015 Mustang GT
@Gee Awesome install! Looks super clean. I like your catch can- who is it made by?
Sponsored

 
  • Like
Reactions: Gee


Top