Sponsored

My stereo upgrade project

Matti777

Well-Known Member
Joined
Jun 5, 2020
Threads
20
Messages
388
Reaction score
197
Location
Edmonton
First Name
Matthew
Vehicle(s)
2020 Mustang GT
I've started a 9 speaker upgrade project so I thought I would post some pics as I go. Its a little different. The goal was some decent SQ at reasonable volumes for classic rock, funk, etc.

Its been interesting figuring everything out although there are a few bridges to cross yet. It can get technical quick if you want it to (DSPs, eq software, acoustics theory). I have most everything figured out after a lot of research here and at the diymobile audio forum. Everything is bought (budget build with some used components and it still cost over $2500 Cdn...I shouldn't have add it up!) and I'm starting the install this week. I'm using StangTime's design to build an amp bypass harness/splitter box and the Five Start Car Stereo design for a Palight amp board


Sub amp JL XD600/1
Main amp JL RD400/4
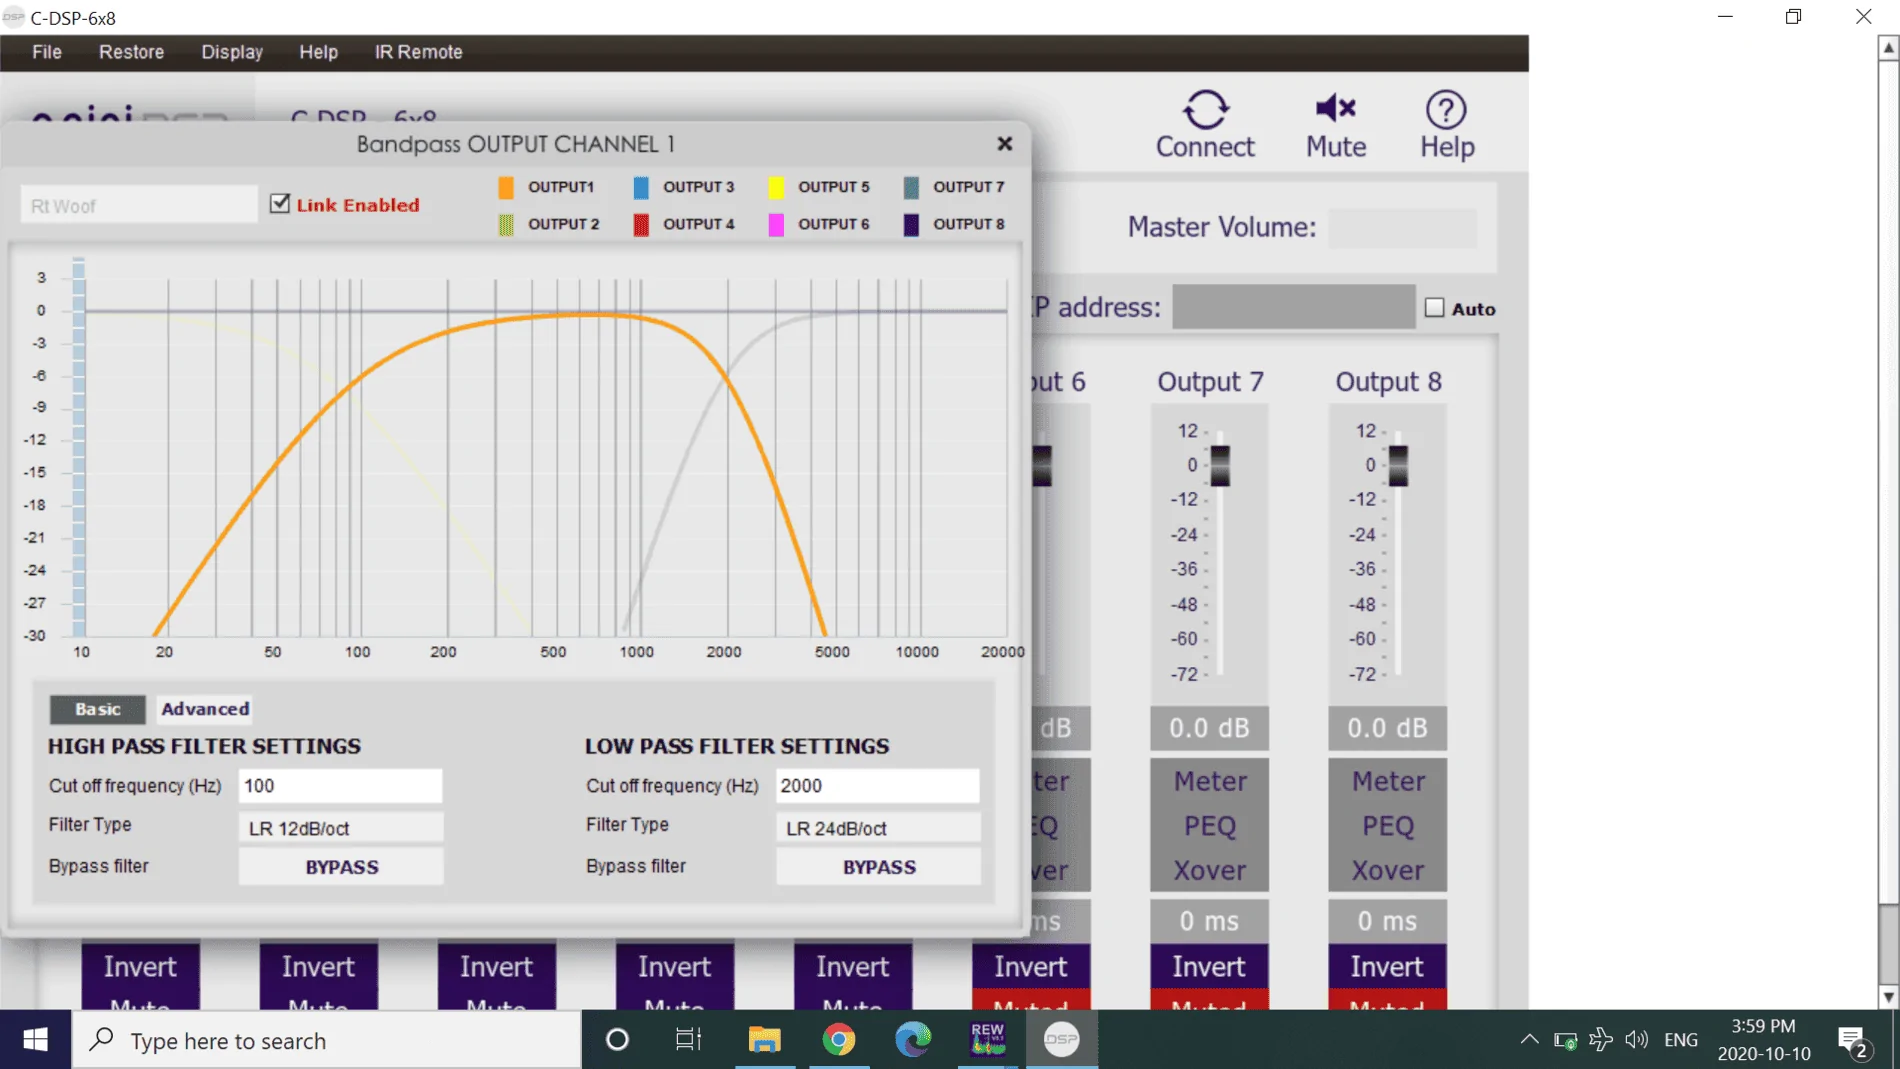
DSP miniDSP 6x8 with acoustic microphone for tuning
sub JL CS110LG-TW3 behind the passenger seat
door speakers JL C3-650
tweeters SB Acoustics SB29 3 inch tweeters (mounted in the 3.5 position...A pillar tweeters to be deleted)
Sound deadening Noico and Kolossus Kno Knoise
All copper power cable
Software - REW / miniDSP

I'll start with the crossover at around 2000 hz to manage potential beaming issues
Sponsored

 
OP
OP

Matti777

Well-Known Member
Joined
Jun 5, 2020
Threads
20
Messages
388
Reaction score
197
Location
Edmonton
First Name
Matthew
Vehicle(s)
2020 Mustang GT
The Palight foamed PVC board is easy to work with. It cuts well with a jig saw or skill saw. I've used #6 and #8 screws as well as PVC cement with great success. I had to order a whole 4'x8' sheet. I could probably perfect my template and cut another one but it looks alright sitting in the tire well. I've glued feet underneath that are high enough that I can use the center hold down for my ground point. I might add a stiffening brace and a few more feet under the air pump box. I won't mount the amps until after I run the wiring. I'm hoping the wiring is long enough to run everything right to the back of the car.

tr2.jpg


tr1.jpg


tr.jpg
 

StangTime

Well-Known Member
Joined
Apr 16, 2019
Threads
77
Messages
3,504
Reaction score
3,931
Location
Ontario 🇨🇦
First Name
Todd
Vehicle(s)
19' GT PP1 Manual
Following this build. Looks good so far. :clap: I've seen you on DIY car audio forums too.
I would have liked to use the Palight but my only local source quoted me over a hundred dollars for a sheet. Not happening. Went with 1/2 plywood and will cover it with carpet.
Looking forward to seeing more of this.
 

mikes2017gt

Well-Known Member
Joined
Feb 21, 2017
Threads
59
Messages
936
Reaction score
311
Location
San Antonio, TX
Vehicle(s)
17 GT Prem M/T 3.55
Following your build. Pretty cool that you're going with a miniDSP. Don't see many builds on this forum with them. I have a miniDSP 2x4 that I use for home theater. I never could wrap my head around Biquads. WAY above my head. I like the graphical user interface though. Easy to use and works well.

I also wanted to use Sintra/expanded PVC for my amp rack, but nobody local to me carries it and I wasn't paying $50 + shipping for a 2'x4' sheet when the same size sheet of 3/4" MDF is $12.

So I wound up using good old MDF and filling a 5-gallon bucket full of MDF dust b/c I drilled a few holes in the board. I hate MDF.

Be aware that even if you're using the correct Metra spacer rings for the front doors (I did) that you might get cone slap from the midbass hitting the door panel. I did and I am using a very conservative midbass.

The fix for this is a custom spacer ring, but don't make it out of MDF, make it out of 1/2" sheet PVC. You can buy a 12"x24" sheet on Amazon for $25. Our friend @StangTime was kind enough to share his PDF for the rings (attached). I can verify that if you build it as-shown, it will fit perfectly and your midbasses won't hit the door panel. You'll have to customize the size of the hole to your particular driver, of course.

Pic of one of my midbasses with a 1/2" PVC mounting ring.

IMG_20200928_132940105.jpg


Looking forward to seeing your progress. Take lots of pics!
 

Attachments

Last edited:

OF5.0

Well-Known Member
Joined
Mar 28, 2019
Threads
15
Messages
456
Reaction score
253
Location
Pittsburgh
First Name
Scott
Vehicle(s)
2022 Shelby GT500 CFTP
The Palight foamed PVC board is easy to work with. It cuts well with a jig saw or skill saw. I've used #6 and #8 screws as well as PVC cement with great success. I had to order a whole 4'x8' sheet. I could probably perfect my template and cut another one but it looks alright sitting in the tire well. I've glued feet underneath that are high enough that I can use the center hold down for my ground point. I might add a stiffening brace and a few more feet under the air pump box. I won't mount the amps until after I run the wiring. I'm hoping the wiring is long enough to run everything right to the back of the car.

tr2.jpg


tr1.jpg


tr.jpg
What thickness of PVC board are you using? Will you be using nutserts to mount the equipment?
 

Sponsored

OP
OP

Matti777

Well-Known Member
Joined
Jun 5, 2020
Threads
20
Messages
388
Reaction score
197
Location
Edmonton
First Name
Matthew
Vehicle(s)
2020 Mustang GT
Its 1/2" board. I'm sure #8 screws would be good but I bought #10-24 nutserts
 

mikes2017gt

Well-Known Member
Joined
Feb 21, 2017
Threads
59
Messages
936
Reaction score
311
Location
San Antonio, TX
Vehicle(s)
17 GT Prem M/T 3.55
Did you check that #10 machine screws would fit your equipment? I tried using #10's and they didn't fit into my JL amp's mounting ears. I have the same 600/1 as you, BTW. I went with #8-32 screws/inserts.
 
OP
OP

Matti777

Well-Known Member
Joined
Jun 5, 2020
Threads
20
Messages
388
Reaction score
197
Location
Edmonton
First Name
Matthew
Vehicle(s)
2020 Mustang GT
I could be wrong...they might be #8.
 
OP
OP

Matti777

Well-Known Member
Joined
Jun 5, 2020
Threads
20
Messages
388
Reaction score
197
Location
Edmonton
First Name
Matthew
Vehicle(s)
2020 Mustang GT
The miniDSP software seems fairly straightforward. The Dayton 408 DSP software was even easier.
1602367309147.png
 

chowman90

Well-Known Member
Joined
Nov 18, 2015
Threads
28
Messages
248
Reaction score
95
Location
Canada
Vehicle(s)
2015 Mustang GT
The Palight foamed PVC board is easy to work with. It cuts well with a jig saw or skill saw. I've used #6 and #8 screws as well as PVC cement with great success. I had to order a whole 4'x8' sheet. I could probably perfect my template and cut another one but it looks alright sitting in the tire well. I've glued feet underneath that are high enough that I can use the center hold down for my ground point. I might add a stiffening brace and a few more feet under the air pump box. I won't mount the amps until after I run the wiring. I'm hoping the wiring is long enough to run everything right to the back of the car.

tr2.jpg


tr1.jpg


tr.jpg
Hey, how did you measure for the board that you are going to mount the amps to?
 

Sponsored

mikes2017gt

Well-Known Member
Joined
Feb 21, 2017
Threads
59
Messages
936
Reaction score
311
Location
San Antonio, TX
Vehicle(s)
17 GT Prem M/T 3.55
Look at the underside of the stock trunk floor panel. See that big, U-shaped puffy piece of foam? Remove it and trace its shape to piece of MDF. That's your starting point. From there you will need to gradually sneak up on the proper fit for your spare tire well. Depends on how far down in the well you want the amp rack to sit. When you're done, you can stick the foam back on the panel with a can of 3M 777 spray adhesive or some other spray glue.
 
OP
OP

Matti777

Well-Known Member
Joined
Jun 5, 2020
Threads
20
Messages
388
Reaction score
197
Location
Edmonton
First Name
Matthew
Vehicle(s)
2020 Mustang GT
I made a template out of paper and then 1/8" foam board from Staples. I think I ended up with about a 13 3/8" radius at the top end. It was a bit of trial and error making the template. The board sits about 2 1/4" off the bottom so it is smaller than the the trunk floor panel insulation.

I did end up running all of the wires to the back of the car. There is extra length so I can lift the board up to get to the underside for installation.
 

chowman90

Well-Known Member
Joined
Nov 18, 2015
Threads
28
Messages
248
Reaction score
95
Location
Canada
Vehicle(s)
2015 Mustang GT
Thanks! Will looking to work on my car during the winter
 
OP
OP

Matti777

Well-Known Member
Joined
Jun 5, 2020
Threads
20
Messages
388
Reaction score
197
Location
Edmonton
First Name
Matthew
Vehicle(s)
2020 Mustang GT
Got the board finished except for a little bit of tidying. My terminations aren't as pretty as I would like but it will do. It was a lot of work. All of the remote turn on connections work using the PAC Tr4 but I probably didn't need it as the miniDSP will work with 4 volts. I loaded the DSP settings and the stereo is working which is a relief (stock speakers). Another relief is that with a bypassed factory amp the steering wheel controls all appear to be working and surprisingly the HU sound settings are working too. I'm not sure how to deal with those now that the EQ will be set via the DSP. I assume I will turn them all down. Now onto the doors which is a project unto itself.

amp board.jpg
 

StangTime

Well-Known Member
Joined
Apr 16, 2019
Threads
77
Messages
3,504
Reaction score
3,931
Location
Ontario 🇨🇦
First Name
Todd
Vehicle(s)
19' GT PP1 Manual
Got the board finished except for a little bit of tidying. My terminations aren't as pretty as I would like but it will do. It was a lot of work. All of the remote turn on connections work using the PAC Tr4 but I probably didn't need it as the miniDSP will work with 4 volts. I loaded the DSP settings and the stereo is working which is a relief (stock speakers). Another relief is that with a bypassed factory amp the steering wheel controls all appear to be working and surprisingly the HU sound settings are working too. I'm not sure how to deal with those now that the EQ will be set via the DSP. I assume I will turn them all down. Now onto the doors which is a project unto itself.

amp board.jpg
Nicely done! Another great audio build.
For the head unit audio controls, leave all at the default position. I assume you did the Forscan change to remove the factory EQ signal molestation?
Sponsored


Top