Honey Badger's Completely Off-the-Rails Race Car Build and Track Adventure Thread

OP
OP
honeybadger

honeybadger

Just don't care
Joined
Apr 20, 2016
Threads
63
Messages
4,089
Reaction score
7,429
Location
COTA
First Name
Kevin
Vehicle(s)
'17 GT350
Damn they look good in the car. I keep going back to These pics to stare at them. Love how they show off the rotors
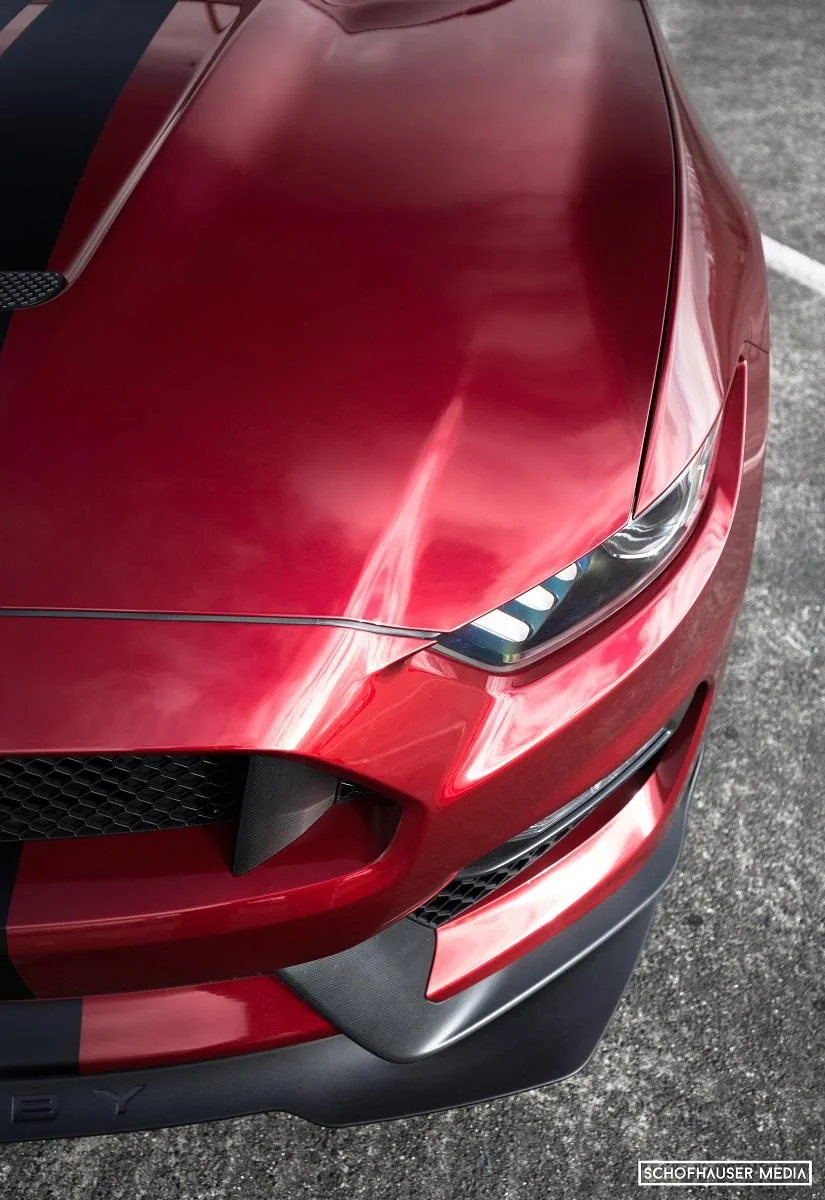
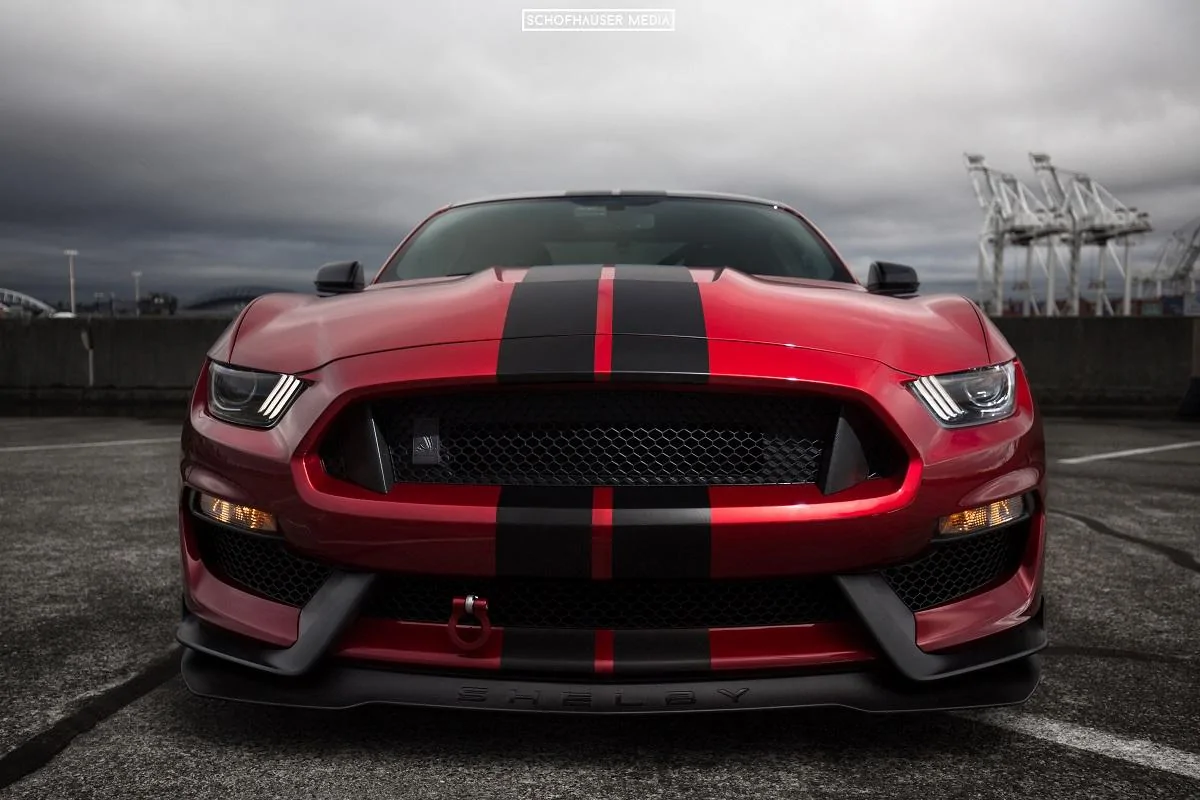
They make the brakes look HUGE. Tons of airflow too. Excited to get them out on track and see how they do.

Nice job on the caliper match. The lettering for brembo will be black I'm guessing?
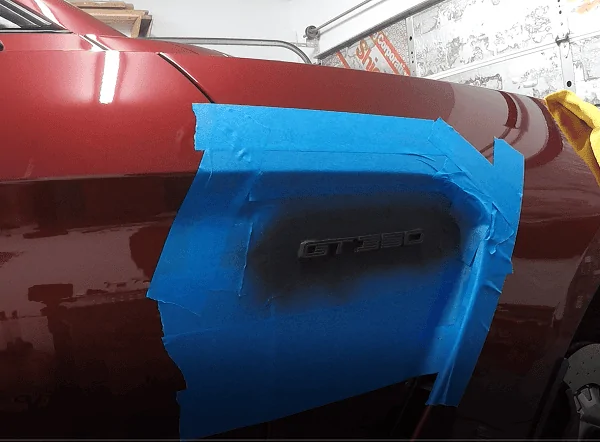
Thank you! We'll see how the G2 paint holds up to track abuse, but the color match was great for a single stage. Yep. I have special black lettering coming. It has a nice surprise along with it. I'm pumped.

Your 350 looks great!
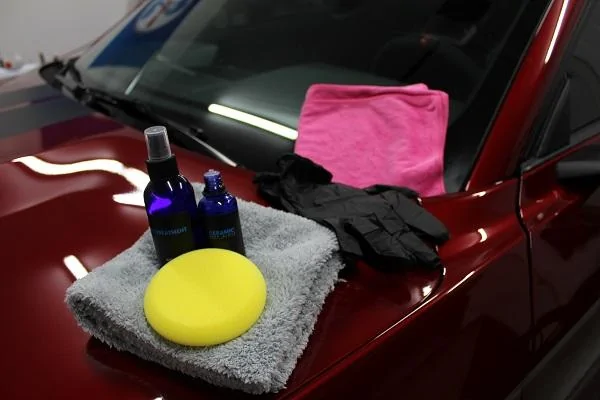
Thanks! Lot's of garage time the past 2 weeks!

I gotta say bro, you really pulled off those stripes. Looks great! And the more I look at the blacked out badges, the more I like them. Matches your car perfectly. :clap2::clap2::clap2:
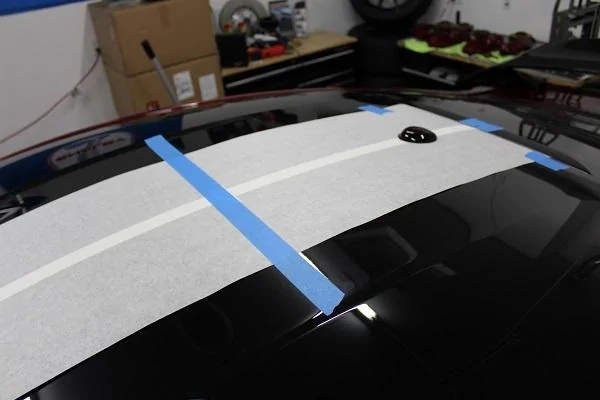
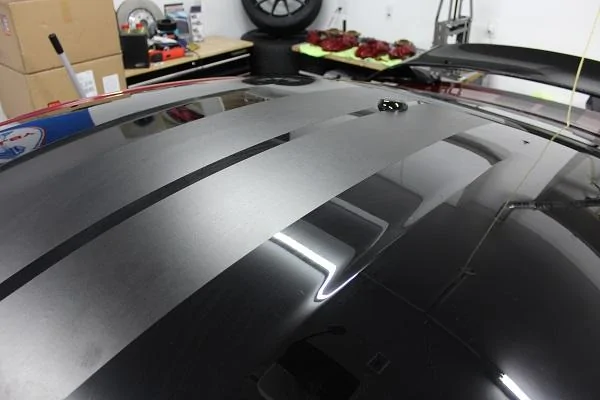
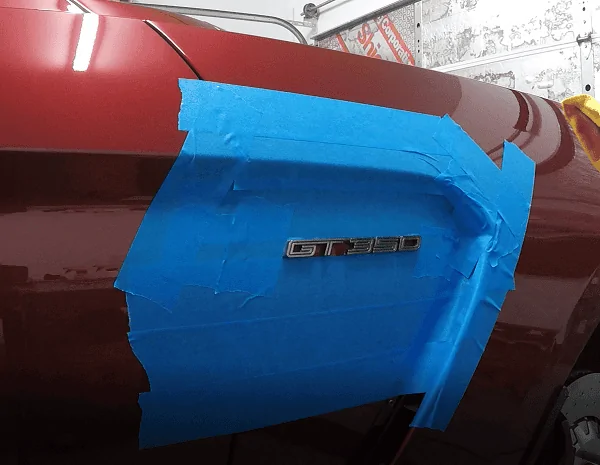
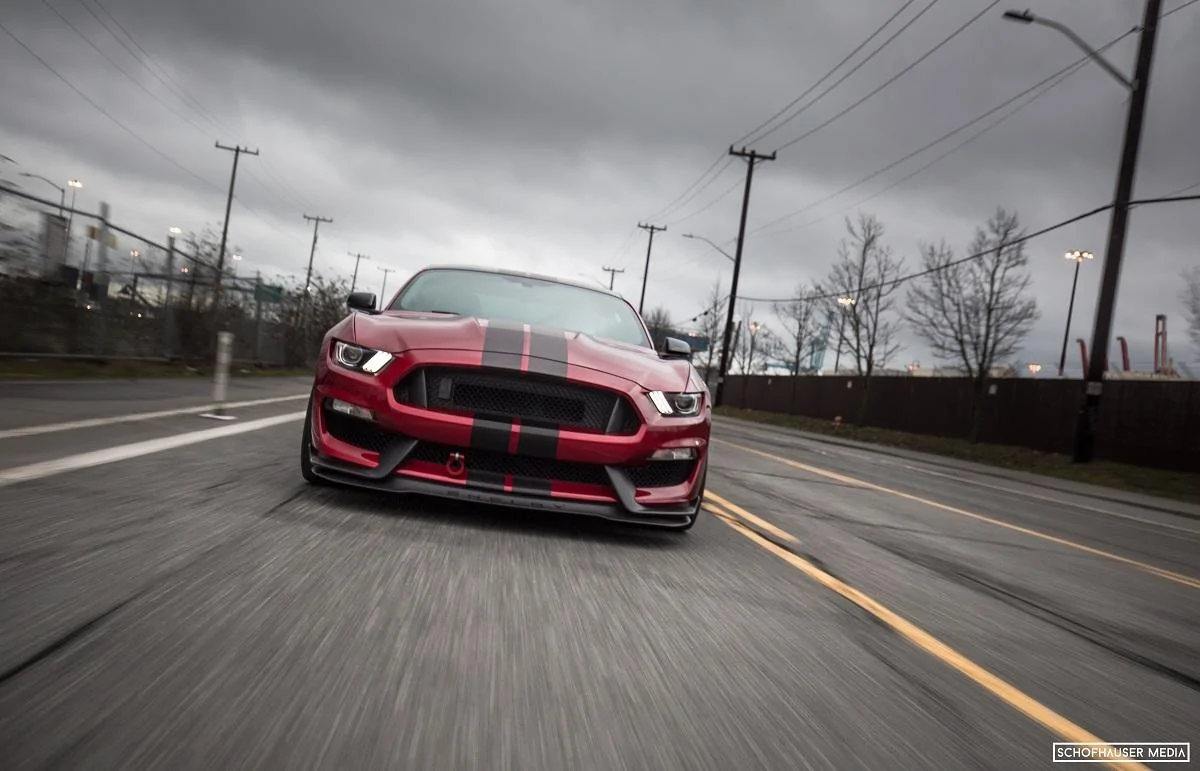
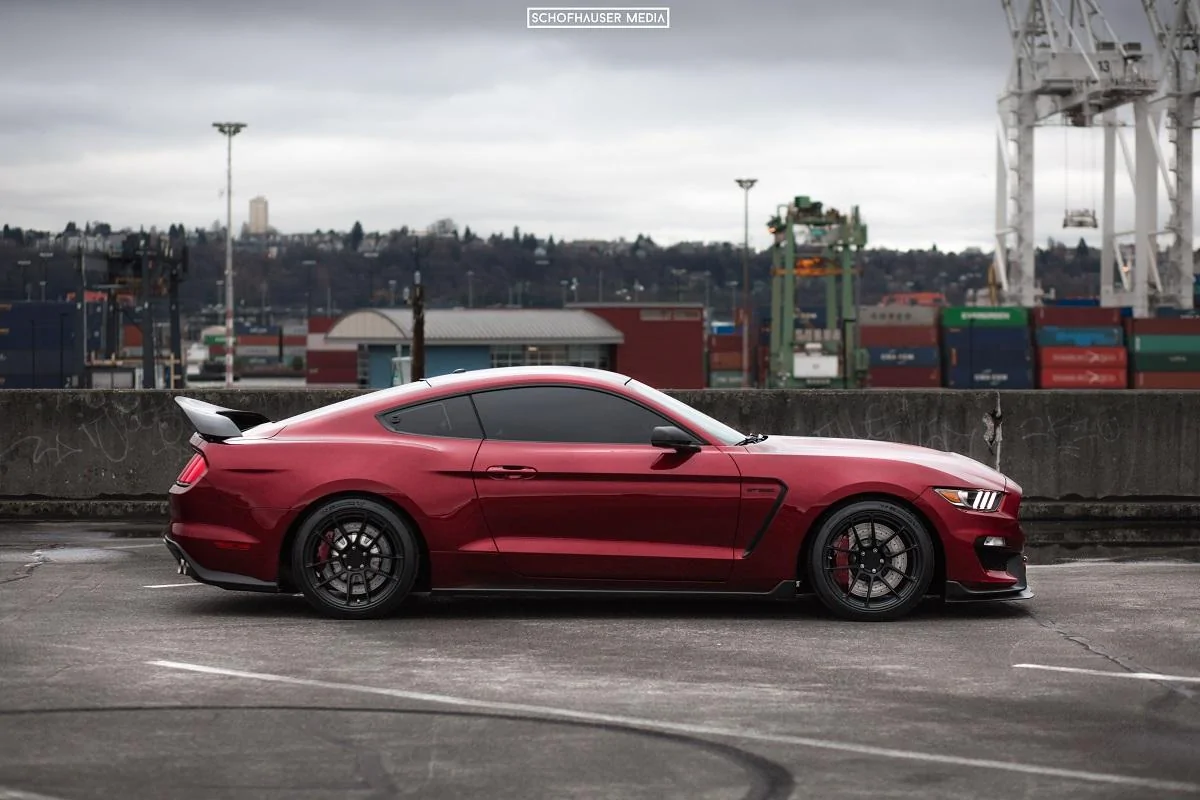
Thanks, brother! Can't wait till April. I'm dying to get out an play now! Ready for more Knotts shenanigans

We’ve got AERO....schwing!
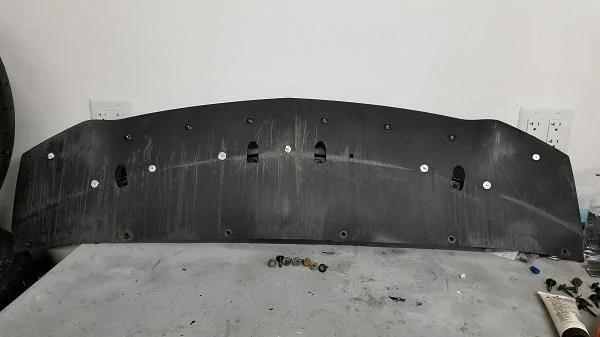
As much as I bitched about the R splitter cost, I completely forgot about it as soon as I put it on the car. :lol: Looks damn good. Have tripped on twice already, though. Ha!
 
OP
OP
honeybadger

honeybadger

Just don't care
Joined
Apr 20, 2016
Threads
63
Messages
4,089
Reaction score
7,429
Location
COTA
First Name
Kevin
Vehicle(s)
'17 GT350
Track Season Prep Part 2

Back for more fun.

One we left off with Caliper painting. After that, it was time to install the new studs in the hubs, reinstall the hubs on the car, and then reinstall the calipers, add the new brake lines and rotors.

Cosmetically, I had to install the stripes, ceramic coat the car, ceramic coat the wheels, and black out the emblems.

Let's get started.

ARP studs
First step was to press the new studs into the hubs. Unfortunately I can't find any of my pics/video from that. Boo. But fairly straightforward. Get the hub support under the press and press the new stud in. Just make you're getting it straight, fully seated and you do it in the right direction :)

To get the hubs back installed on the car, I just followed the process I did in part 1, but in reverse. :)

Caliper rebuild
Next, I had to rebuild the calipers. My rears were ready to go because I didn't take them apart. However, my fronts needed the pistons/dust boots re-installed. First, make sure your calipers are clean and there are no contaminants in the chambers (used compressed air to blow them out). I then rubbed brake fluid on my pistons to make sure they were lubricated and would install easy. I then pushed the dust boot on from the top of the piston. To make sure it is seated correctly, I found pulling the dust boot down on the piston to stretch it out seated it correctly (see below). One thing to keep in mind, there are a few different sizes to the pistons/dust boots, so make sure you match them out correctly. Once the pistons are lubricated and the boots installed, just press them into the holes.

Rebuilding calipers.webp


Next I reinstalled the calipers onto the car along with the Goodridge brake lines. Unfortunately I can't find my footage from that either. No idea WTH happened. But it's pretty easy. Install the brake lines onto the calipers first. Then unscrew the OEM ones and quickly swap in the new Goodridge lines. This way the fluid doesn't drip everywhere.

Brake fluid flush
With all the calipers/lines installed, it was time to flush the system of the Motul RB600 and install Castrol SRF. First, I removed all the fluid in the brake fluid reservoir an refilled with SRF. To make things easier for myself this time, I got a Motive Power Bleeder (that's the one for our cars) and filled it with 1 liter of SRF and hooked it up to my reservoir. The power bleeder made a HUGE difference for me. Because it was pumping fluid in, I never needed to worry about running out. And because there was pressure, I was never worried about the lines accidentally sucking in air. I pushed about a whole liter through to get clean fluid and ensure there were no bubbles (in addition to what I put in there to replace the air pockets and what I pulled out of the reservoir). The rear calipers looked good, but had bubbles show up last minute. They represent about 2/3 of what you see in the bottles.

Fluid.webp


R Splitter
Not much to show or say here since this has been covered a ton of times on the forum. But the R splitter was MUCH easier to install than the non-R. That alone makes me want to keep buying them. Ha! After I got OEM splitter off, I investigated the wear and tear in the light. A bit extensive I'd say :lol:

Splitter scrapes.webp


Bolts.jpg


Stripe Installation
Next up was installing the stripes. This wasn't too bad. I started by using my wife's sewing measuring tape. While installing on the roof, I taped it to the edge of the windshield area.

Flexible tape measure.webp


Tape edge.webp


This allowed me to find the middle of the roof. I put a piece of painter tape with a Sharpie mark right on the center line. I did the same on the back part of the roof as well.

Middle of tape.webp


I then marked the center of the stripes and lined them up.
Lining up middles.webp


Put a big piece of tape across the center of the stripe to hold it in place when you start installing.
Tape in middle of stripes.webp


I installed 1/2 at a time. Peel backing paper away and cut it off near the tape. Then wet down the roof and stripes. Then lay it down and start to squeegee the water away (recommend searching YouTube videos for this How-to).

Applying first half.webp


Once done with that side, pick up the other side, remove the backing paper, spray and install.

Apply stripes other side.JPG


All done!

Stripes done.webp


Blacking out the emblems
I also decided to try blacking out the emblems. I loved the way they turned out. I used Rustoleum's rubber coating, Flexidip, in flat black (similar to Plastidip). The process is really easy. Just tape off around your emblem like so.

Painting Emblems - tape.webp


Then do a minimum of 5 coats (plastidip comes off easier the thicker it is). After you're done, remove the tape and then take a tooth pick carefully drag the dip away from the areas you don't want it (in between the letters).

Painting Emblems -coats.webp


End result is pretty awesome.

20180127_220234.webp


Ceramic Coating

I tried a new Ceramic Coating that I found on Amazon called 9H by Color N' Drive. This stuff was pretty easy to apply and fairly forgiving. I followed this [ame="[MEDIA=youtube]0_ahLQRX8FA[/MEDIA]"]video[/ame]. It doesn't follow the directions in the box, but it works well. I recommend following the video, not the instructions.

CC.webp


To prep the paint, I did 1-stage polish (just quickly went over the car with my DA and Meguiars 205) to remove the old ceramic coating and any light scuffs. I then wiped it down 2 times with a 50/50 alcohol/water solution to remove oils/residue. End results were impressive (you'll see when I post the photos from Eric's photoshoot).

20180128_210415.jpg


Pics from photoshoot coming really soon :)
 

ldp82

Well-Known Member
Joined
Jun 30, 2017
Threads
5
Messages
121
Reaction score
40
Location
MA
Vehicle(s)
GT350, Genesis 5.0 & 996 cab
Car is looking great. makes me jealous mine is tucked away so tightly
 

icormba

Well-Known Member
Joined
Sep 26, 2015
Threads
6
Messages
1,224
Reaction score
830
Location
San Jose, Ca
First Name
Chris
Vehicle(s)
Jeep SRT8 / GT350R / FocusRS
Back for more fun.

R Splitter
Not much to show or say here since this has been covered a ton of times on the forum. But the R splitter was MUCH easier to install than the non-R. That alone makes me want to keep buying them. Ha! After I got OEM splitter off, I investigated the wear and tear in the light. A bit extensive I'd say :lol:
I thought the opposite! It took me forever to get those stupid white half moon clips to line-up! Then again, maybe my front fascia is mis-aligned... my tow hook install didn't line up either.
 
OP
OP
honeybadger

honeybadger

Just don't care
Joined
Apr 20, 2016
Threads
63
Messages
4,089
Reaction score
7,429
Location
COTA
First Name
Kevin
Vehicle(s)
'17 GT350
I thought the opposite! It took me forever to get those stupid white half moon clips to line-up! Then again, maybe my front fascia is mis-aligned... my tow hook install didn't line up either.
Ha. I had that problem with one of my screws on the driver side. Either way, the splitter is a pain. But I thought the R was much easier overall :D
 
OP
OP
honeybadger

honeybadger

Just don't care
Joined
Apr 20, 2016
Threads
63
Messages
4,089
Reaction score
7,429
Location
COTA
First Name
Kevin
Vehicle(s)
'17 GT350
Photo shoot drop

LEGIT never thought I'd have photos like this of my OWN car. Absolutely incredible. My buddy, Eric, at Schofhauser Media is an absolute master :hail::hail::hail::hail:

Luckily the PNW treated us with a nice moody day for some really great dramatic shots. Such a great juxtaposition of moody, grey industrial and a modern, brutish, loud, red car.

Dead on.jpg


Front angle.jpg


Top of hood.webp


Front roller.webp


Front side roller.webp


Rear tail lights.webp


Low side.webp


Front bumper.webp


Side profile.webp


[MENTION=32677]50Deep@DCTMS[/MENTION] has few coming to his wheel thread as well. Got some great close up shots of the new SV502s!

Track day on Saturday. Whoot whoot!
 

jaRS

Well-Known Member
Joined
Dec 9, 2017
Threads
4
Messages
51
Reaction score
20
Location
FL
Vehicle(s)
2017 GT350R- Avalanche Gray with Black Stripes
Awesome pics. Love the pic with the reflection of the tail lights.
 

Epiphany

Well-Known Member
Joined
Oct 11, 2015
Threads
76
Messages
7,958
Reaction score
13,573
Location
Global
Vehicle(s)
I like to disassemble things.
You had me at juxtaposition...
 

icormba

Well-Known Member
Joined
Sep 26, 2015
Threads
6
Messages
1,224
Reaction score
830
Location
San Jose, Ca
First Name
Chris
Vehicle(s)
Jeep SRT8 / GT350R / FocusRS
A few months ago I was thinking of putting over the top stripes on my black roof. Now you got me thinking again! dang it!
 
OP
OP
honeybadger

honeybadger

Just don't care
Joined
Apr 20, 2016
Threads
63
Messages
4,089
Reaction score
7,429
Location
COTA
First Name
Kevin
Vehicle(s)
'17 GT350
Awesome pics. Love the pic with the reflection of the tail lights.
One of my favorites. Claawwwww marks

Looks great!!!
Thanks!

You had me at juxtaposition...
Hehe. :)

Truly amazing work. Nicely done Kevin!
Thank you!

A few months ago I was thinking of putting over the top stripes on my black roof. Now you got me thinking again! dang it!
Do it! Matte black looks so good on the black roof
 

Zombo

befejezett
Joined
Apr 1, 2016
Threads
20
Messages
1,033
Reaction score
737
Location
NJ
Vehicle(s)
2016 GT350 Track Pack - Race Red, Blk Roof - G5405
I'm not a big stripe fan, but the matt black without the white looks fantastic on that Ruby!
 
 
Top