Sponsored

Quick Xineering downshift blip module install review

RetiredFireCaptain

Well-Known Member
Joined
Oct 24, 2020
Threads
8
Messages
94
Reaction score
127
Location
Richmond, VA
First Name
Joe
Vehicle(s)
2020 GT350 Heritage Edition Package #L0350
That's what I liked about my ZL1 M6 was having a on / off for the rev-match.......

I wish they would include a switch in the package as well. Who is their right mind is going to hook this up without an on/off switch.
Sponsored


lunatect

Well-Known Member
Joined
Jul 9, 2020
Threads
2
Messages
251
Reaction score
203
Location
Prescott, AZ
First Name
Dennis
Vehicle(s)
2016 Shelby GT350
FYI: Most racers using a manual transmission don't really "heel/toe." They use the left half of their right foot to brake and roll their right foot over to blip the throttle with the right half of their right foot. Much easier!
 

Steve68Cougar

Well-Known Member
Joined
Jan 12, 2018
Threads
3
Messages
135
Reaction score
189
Location
KS
Vehicle(s)
'68 Cougar, '08 Mustang Bullitt, '18 Mustang RS2
Thanks for your assessment and comments. i purchased the kit last week and have been hesitant in installing as I am headed to TN next week and don't want to be stuck with any complications of not getting everything connected.
Is it my understanding that twisting the clutch harness allows the whole mount module to release and then you need to press the tab to actually remove the wiring?
I watched Jeff ashton's install video and it looked like he was able to reach up and disconnect/connect the switch directly into the switch harness...
I was also told by Xengineering that with my 2019 model (and 2020) they switched the brake wiring, so they are having me tap the brake wire directly at the blue harness above the brake pedal vs at the BCM..
I also agree with your reasoning for having the unit for track use... I am in the same situation with planning on occasional track use and wanting to eliminate this factor.
Yes, once the switch is out you still have to press the tab to remove the wiring.
 

Lorne34

Project Hidalgo
Joined
Jun 8, 2016
Threads
70
Messages
3,913
Reaction score
4,400
Location
Wisconsin
First Name
Lorne
Vehicle(s)
2019 GT350
Vehicle Showcase
1
I installed the unit last week in preparation for an upcoming NASA event at Barber. Here are a few notes in no particular order:
1. The install takes longer than you might think in order to visually lay everything out. It’s one of those projects that takes some time the first round, but after that can be completed in 15 minutes.
2. All of the connections are OEM grade. It does not feel like a “universal fit” aftermarket bolt-on, as is often the case with these things. It’s a very nice module.
3. Shoutout out to JAJ in post #9, the wire taps he linked are amazing. Buy them for tapping the brake wire.
4. For power, no need to splice or tap wires. There’s an easy to access fuse panel in the passenger side footwell, and you can use “Micro2” (not mini) fuse taps to simply plug into a spare slot in the fuse panel (there are plenty of open spots). I purchased these on Amazon.
5. Another shoutout to JAJ on his switch placement near the AC sensor. I found the panel is flatter and switch to be better positioned under the sensor, but either place works well.

Not much else to say. Great unit!
Can you send me a link to the Micro 2 fuse taps that you used? I am not sure what size to use.. also, when I researched them it said something about piggy backing into the fuse tap... It is my understanding that I should just be able to plug into an open fuse slot on the panel and then attach the wire directly to the Orange wire on the Xeneering switch, correct?
 

Lorne34

Project Hidalgo
Joined
Jun 8, 2016
Threads
70
Messages
3,913
Reaction score
4,400
Location
Wisconsin
First Name
Lorne
Vehicle(s)
2019 GT350
Vehicle Showcase
1
Well, I was finally able to get the installation done, but not without some challenges.
Here is my synopsis:
1. The clutch plug is a nightmare, get your wife or daughter to reach up in there and do it. I didn't quite understand the posts about twisting the coupler and removing the mount. I decided to not try that as I am not sure which is worse, getting the plug into the harness or getting the harness remounted where it's supposed to be. After 30 minutes of killing my hand I had my oldest daughter complete the task in 5 minutes, most of which was me explaining where the plug was located.
2. for 2019-2020 models there were some changes to the BCM, so I was told initially to posi-tap directly into the wiring harness on the foot pedal. That is a BAD idea. Even after removing the harness plug from the brake pedal you do not have enough access to the wires to comfortably posi-tap. There is a zip tie connection up very deep into the upper dash that prevents the wiring harness from dropping down. I was able to do it, but ended up having the wire pull out of the posi-tap due to brake pedal movement. I ended up speaking with Will and was able to identify the VT/WHT wire in the BCM which hadn't changed location. Much better fitment. Another reason for not tapping the brown wire into the brake pedal harness directly is the length on the brown wire is insufficient, as well as complicated to route and zip tie without causing the wire to pull. I’m just grateful that the brown wire released easily and did not pull out or damage my brake pedal harness connector. I feel much more at peace with having the wiretaps at the BCM connection.
3. Once I got the brown wire tapped into the BCM the unit still was not working...I discovered the brown wire was not fully engaged/wrapped into the positap connector. I ended up cutting the open wire and stripping a fresh section.
4. Switch- I wanted to try the unit out with no drama and go for the simplest solution, so I purchased a 12v cigarette port switch and just ran the cable down the center console to the orange wire coiled up in the glove box.
The goal would be to put a rocker switch in the center console similar to what Jeff Ashton did, but use the wiring from the cigarette lighter plug in the center console vs having to go back to the BCM. I did confirm that the cigarette lighter adapter is controlled by Accessory power, so it would work and not keep the module on 24x7 to avoid battery drain.
There is definitely a learning curve with this unit as well once installed. I lurched forward at a stop sign once and my shifts are slower than the blip ratio and duration.
Here is some suggestions from Will:

Hello Lorne,

Being mindful of foot placement is the biggest part of the learning curve. Bringing the shifter into neutral before stopping at a stop sign will keep you out of gear and will allow the engine to freely spin without lurking the car, if a blip is initiated.
I remember when I was first doing spirited street driving with my module, my feet became noodles trying to not stand on the clutch. I learned to treat my pedals like buttons for what I wanted to do, never holding down the pedals until the event I needed (downshift, braking, etc.) was over.
Over time, I became a lot more aware of my feet, and driving with the module on at all times was the new norm... well, except for reversing up my steep driveway, that was always tough, the module was turned off for that one.

Posting some pictures below..
,
BCM VW connection.jpg
IMG_1231.JPG
IMG_1233.JPG
IMG_1234.JPG
IMG_1236.JPG
IMG_1247.JPG
IMG_1250.JPG
 
Last edited:

Sponsored

ChipG

Well-Known Member
Joined
Jan 27, 2021
Threads
33
Messages
532
Reaction score
590
Location
Nashville TN
First Name
Chip
Vehicle(s)
'20 GT350/'95 F250/'65 Fastback/'96 Cobra Project
I did the install on this as well. Overall not bad, but as noted by many, the clutch switch part is a :curse:
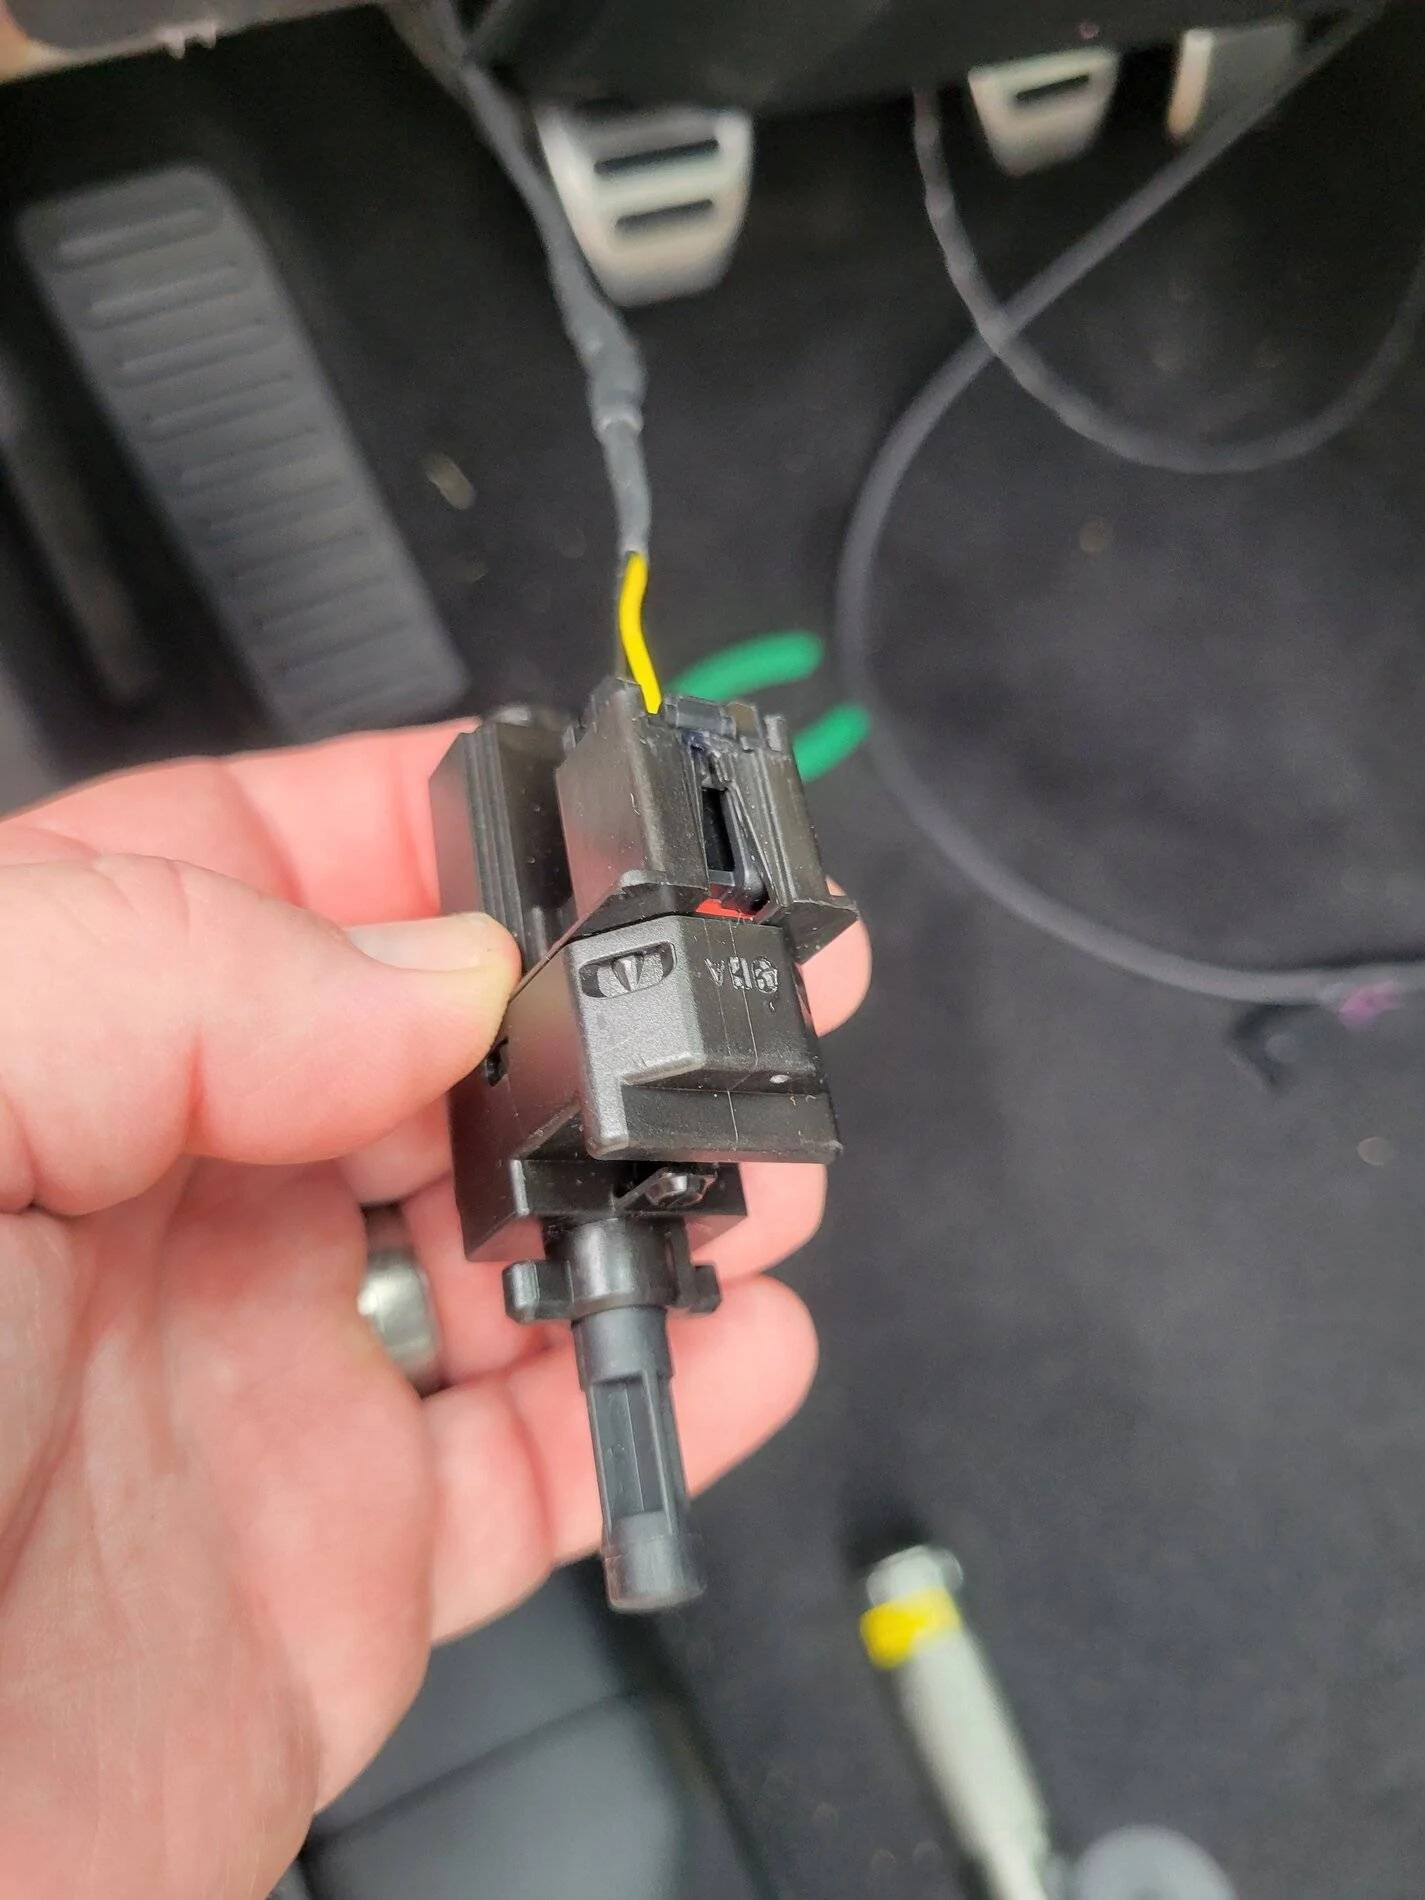
! I'll give the spoiler alert up front, though - I went to Road Atlanta, used the module for the first two sessions, then at the urging of my instructor, I turned it off and went to heel and toe and never looked back. I think it would have taken just as much effort to tune the module and my driving for good rev matches as it did to heel and toe. I went the rest of the weekend without using it and this past weekend drove at Barber all weekend without using it as well. I'll be uninstalling the box and putting it up for sale if anybody is interested. Not looking forward to doing that clutch switch again 😡
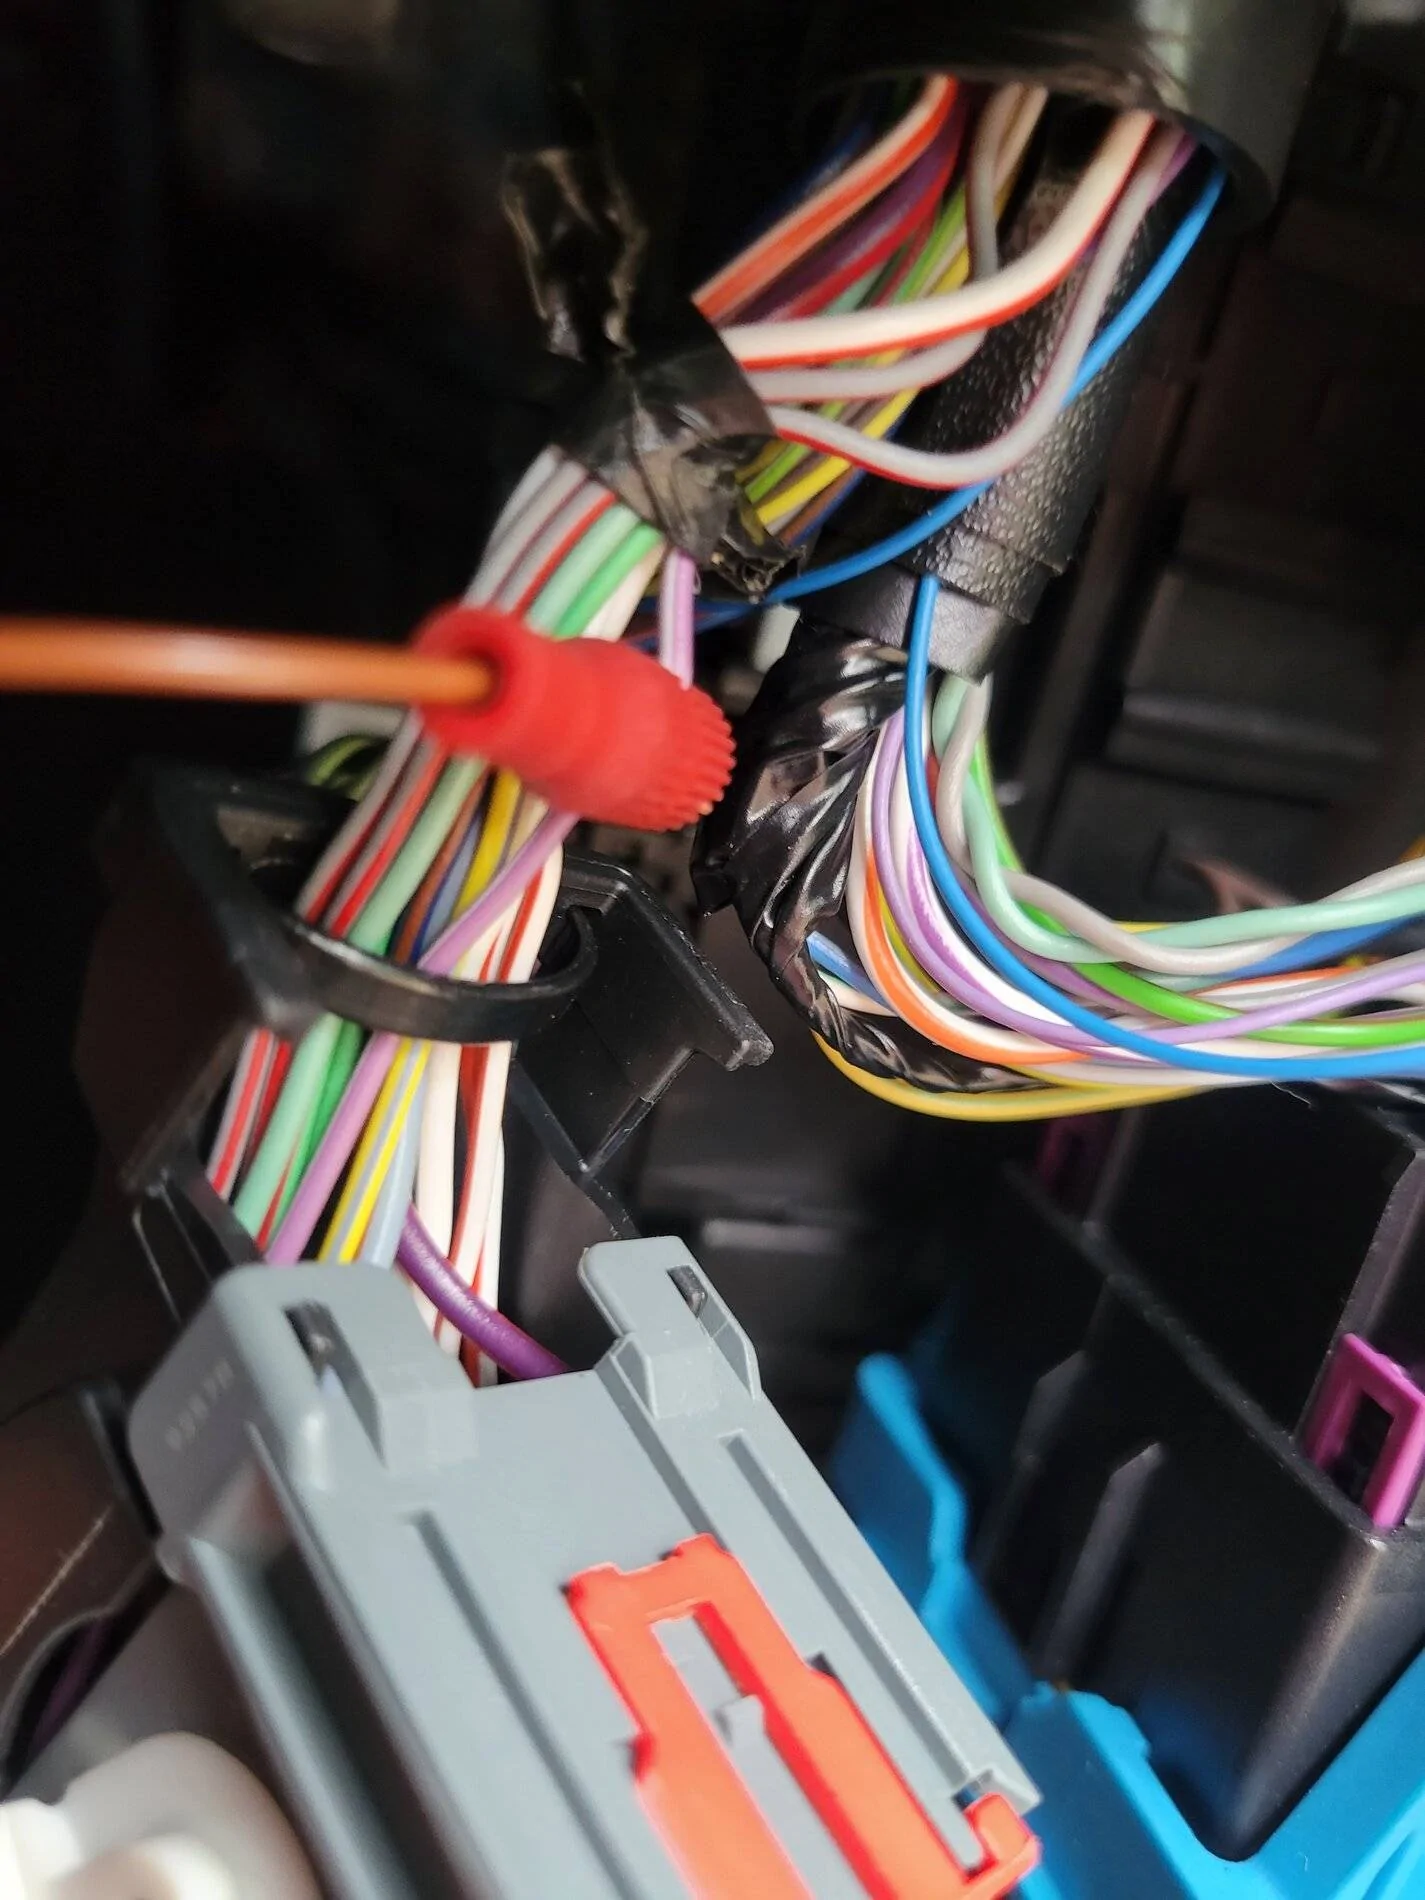
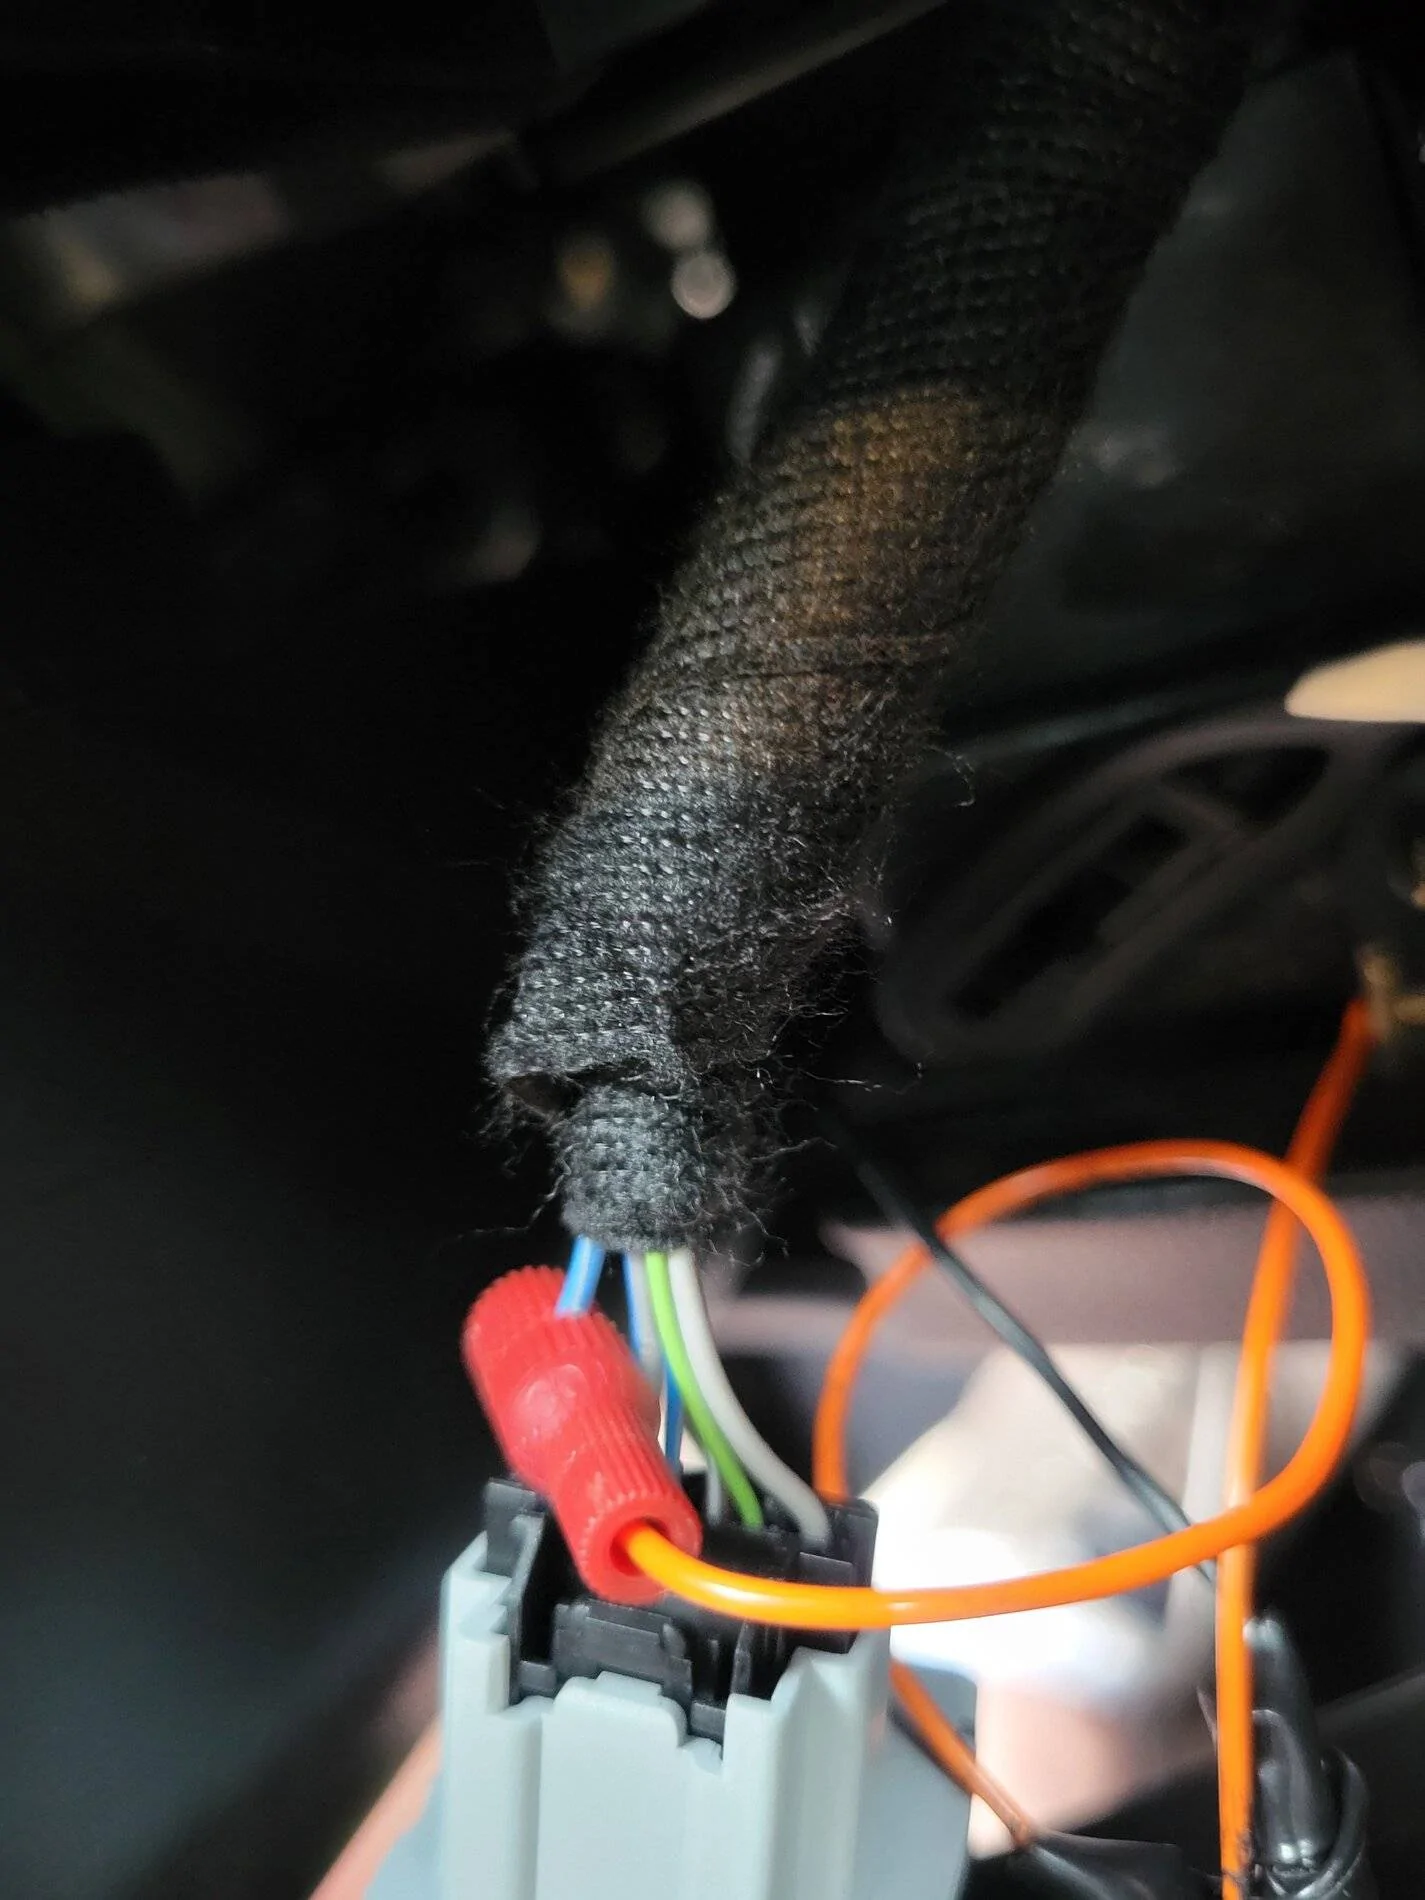
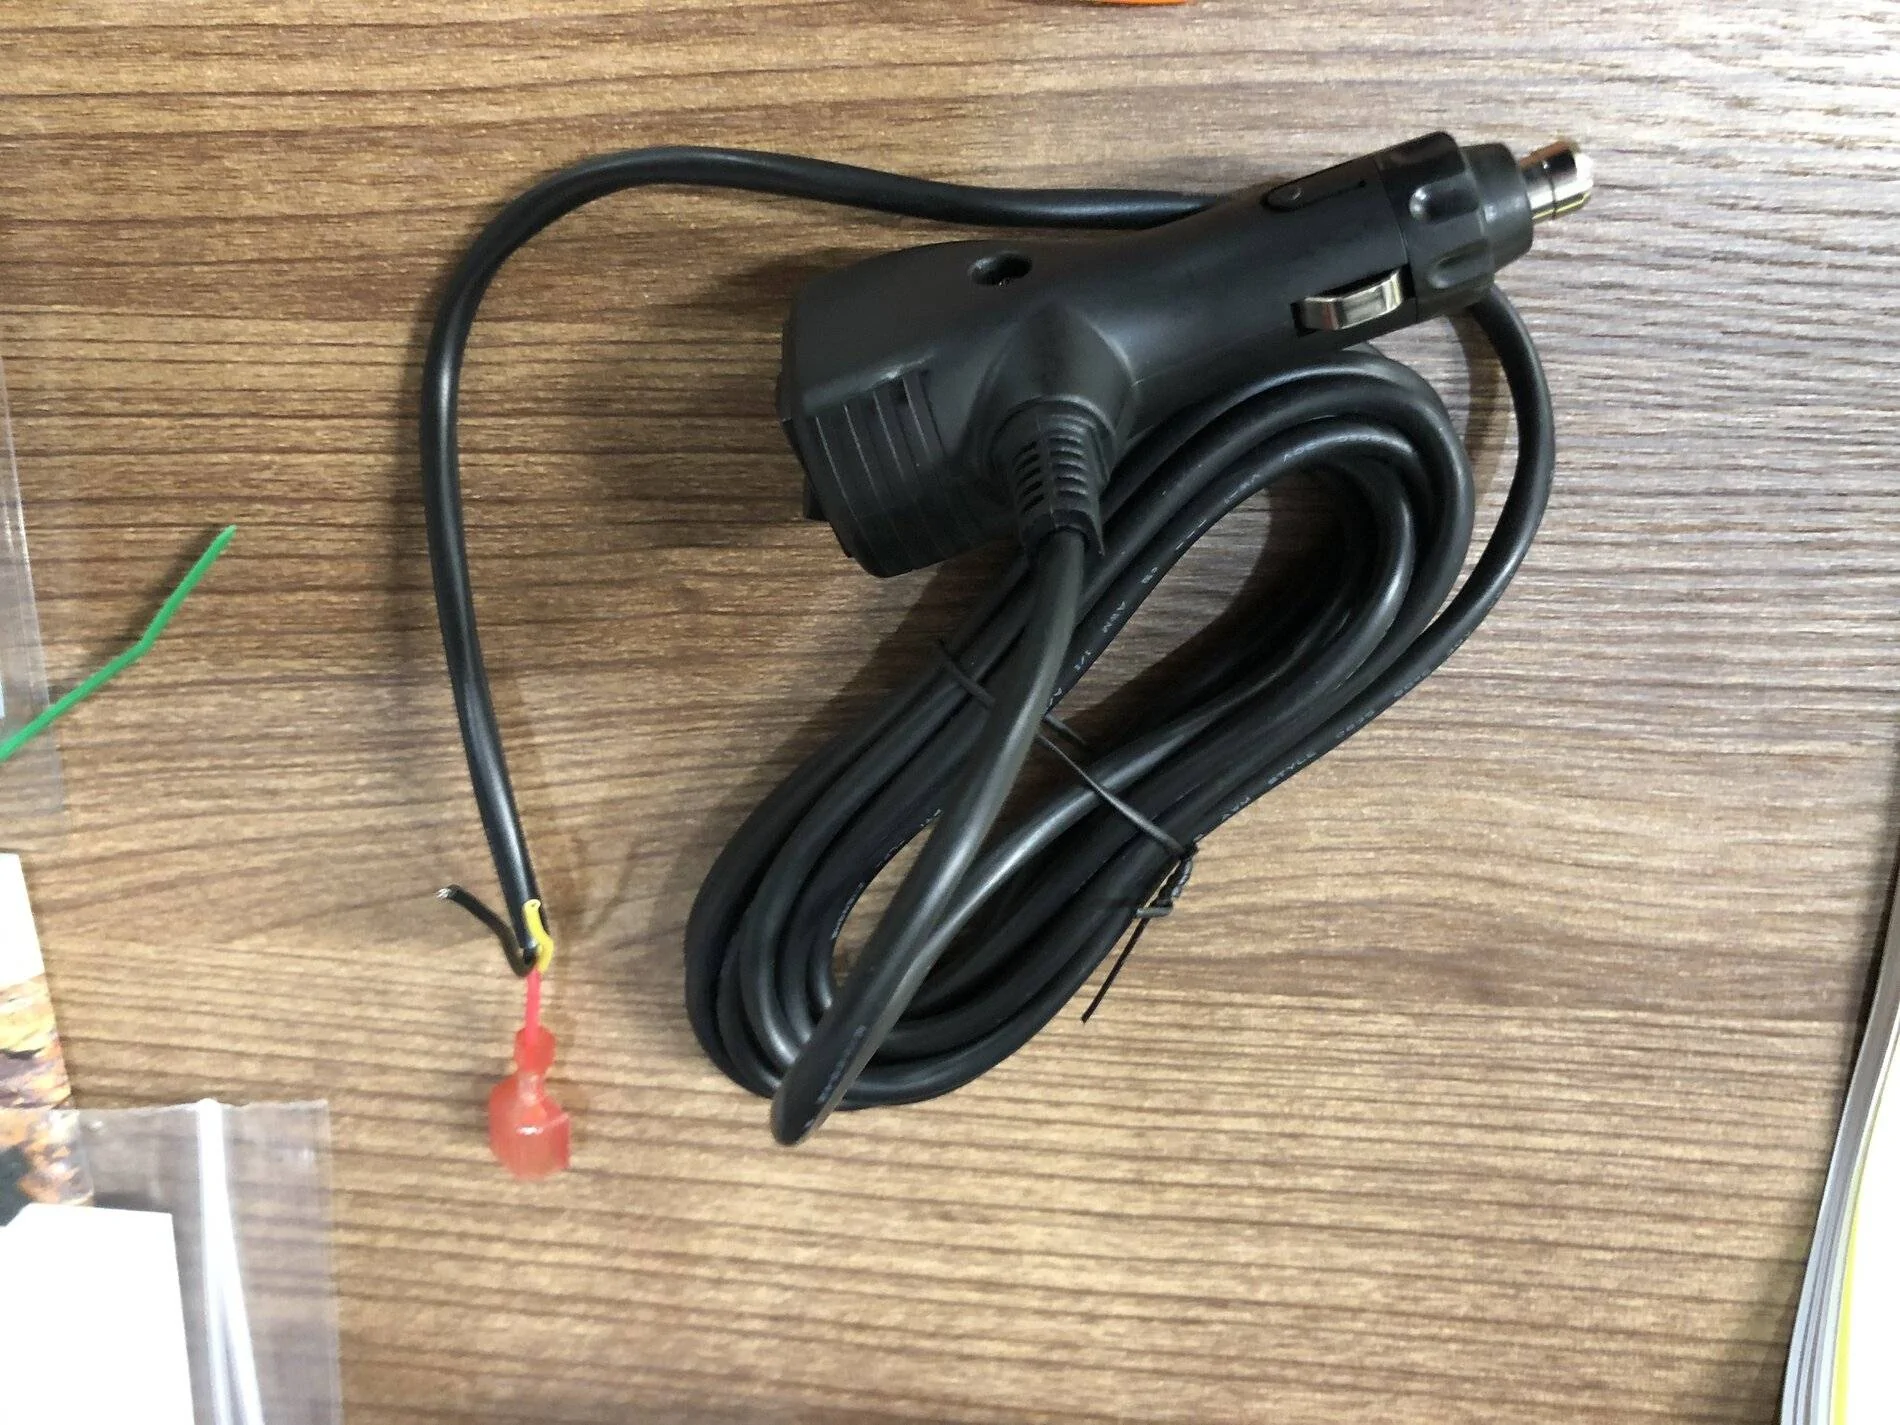
. All that said, for those who are interested in using the module, a couple of install notes and photos follow:

I mounted the Xineering module in the glovebox like so using velcro:

20210625_174718.jpg


Running the wires to the fuse box and across behind the center stack were straightforward.

20210625_173350.webp


But this switch is the PITA:

20210625_144058.webp


I pulled the left side panels from the dash:

20210625_141343.webp


20210625_142556.webp


and it did help get better access, but still, a royal pain.

Other note is that I installed a switch by the interior air temp sensor to the right of the steering wheel:

20210625_162811.webp


20210625_163605.jpg


20210625_164120.jpg


Tapping into the wires was easy, I ran a ground to a nut behind the dash, and the lighted switch works perfectly.

20210625_173845.webp


Everything functions just fine, I just found that it works better for me to heel and toe.
 

Lorne34

Project Hidalgo
Joined
Jun 8, 2016
Threads
70
Messages
3,913
Reaction score
4,400
Location
Wisconsin
First Name
Lorne
Vehicle(s)
2019 GT350
Vehicle Showcase
1
Looks Great! I do have a couple of Questions:
1. Did you drill or cut a hole in the side of the glove box to run the wires straight through? I had to drape them over the back of the glove box per the installation video.
2. Where did you tap the wires for the switch? I know the orange wire from the control box goes to the switch, but did you tap the other power from the BCM?
3. What method of heel toe did your instructor have you use? Did you brake tap with the ball of your right foot and then swing your heel over or did you use the side of your foot to blip the throttle? I guess the size of your foot/shoe sometimes determines what is most comfortable.
4. Did you have any issues with threshold braking on the track in terms of the amount of pressure you had to put on the pedal with only using a portion of your foot? That was always the biggest issue with some of the videos I watched of guys who have decided to use this module vs the traditional method...
 

ChipG

Well-Known Member
Joined
Jan 27, 2021
Threads
33
Messages
532
Reaction score
590
Location
Nashville TN
First Name
Chip
Vehicle(s)
'20 GT350/'95 F250/'65 Fastback/'96 Cobra Project
Looks Great! I do have a couple of Questions:
1. Did you drill or cut a hole in the side of the glove box to run the wires straight through? I had to drape them over the back of the glove box per the installation video.
2. Where did you tap the wires for the switch? I know the orange wire from the control box goes to the switch, but did you tap the other power from the BCM?
3. What method of heel toe did your instructor have you use? Did you brake tap with the ball of your right foot and then swing your heel over or did you use the side of your foot to blip the throttle? I guess the size of your foot/shoe sometimes determines what is most comfortable.
4. Did you have any issues with threshold braking on the track in terms of the amount of pressure you had to put on the pedal with only using a portion of your foot? That was always the biggest issue with some of the videos I watched of guys who have decided to use this module vs the traditional method...

1 - There's already a slot in the left side of the glovebox, I just ran the wires through there.
2 - The switch has 3 posts. I grounded to a nearby nut behind the dash. The "load" post (switched) goes to the orange wire to the module. The positive post goes to the wire the orange wire would tap if you weren't doing a switch. I tapped into the blue wire with grey striped going into the interior air temp sensor connector, which you can see in the last picture I posted.
3 - He didn't specify the method, but I found it works best for me to roll the side of my foot over to hit the throttle. I don't have big feet but it worked fine for me - the pedal positioning is good when you're driving hard. It took me very little time to get reasonably proficient.
4 - No issues. I worked on figuring out where in each lap to upshift/downshift and timed my downshifts to be when I'm starting to roll off of heavy braking into trail braking, which worked well for me. H&T worked much better if I didn't try to do it immediately upon entering braking but instead after some braking when the RPMs have come down.
 

Lorne34

Project Hidalgo
Joined
Jun 8, 2016
Threads
70
Messages
3,913
Reaction score
4,400
Location
Wisconsin
First Name
Lorne
Vehicle(s)
2019 GT350
Vehicle Showcase
1
1 - There's already a slot in the left side of the glovebox, I just ran the wires through there.
2 - The switch has 3 posts. I grounded to a nearby nut behind the dash. The "load" post (switched) goes to the orange wire to the module. The positive post goes to the wire the orange wire would tap if you weren't doing a switch. I tapped into the blue wire with grey striped going into the interior air temp sensor connector, which you can see in the last picture I posted.
3 - He didn't specify the method, but I found it works best for me to roll the side of my foot over to hit the throttle. I don't have big feet but it worked fine for me - the pedal positioning is good when you're driving hard. It took me very little time to get reasonably proficient.
4 - No issues. I worked on figuring out where in each lap to upshift/downshift and timed my downshifts to be when I'm starting to roll off of heavy braking into trail braking, which worked well for me. H&T worked much better if I didn't try to do it immediately upon entering braking but instead after some braking when the RPMs have come down.
Thanks again for your input. I am going to work with the module at first to see how it goes and then work on heel/toe....
 

mikedahammer

Well-Known Member
Joined
Oct 14, 2017
Threads
22
Messages
195
Reaction score
520
Location
Virginia
Vehicle(s)
GT350
Installed mine over the weekend.

The hardest part was that damn clutch switch. I tried for like 30 min. Finally got the wife and her tiny hands. Took her like 15 sec lol.

I installed a switch to turn on and off. Taping the wires is sketchy. However pretty easy once you do it. Testing this wed and sat before track next week.

PXL_20201001_192729165.jpg


Snapchat-1536710729.jpg
Do you have the part number or link for that switch and what gauge wire is needed. Also, what ground did people tap into for the switch?
 

Sponsored

72&18

Well-Known Member
Joined
Apr 24, 2020
Threads
25
Messages
277
Reaction score
234
Location
Charlotte
First Name
Doug
Vehicle(s)
72 Mach 1, 18 GT350, 22 Bronco 2 Door
Do you have the part number or link for that switch and what gauge wire is needed. Also, what ground did people tap into for the switch?
You can use any on/off switch that looks good to you. I think mine came with 18 gauge, so I used that as well. It is not carrying much current, so that should be good. As for the ground, I had to go under the dash a little to find something metal to ground to. There is a lot of plastic, but keep looking and you will find something.
 

JAJ

Well-Known Member
Joined
Apr 9, 2016
Threads
4
Messages
2,221
Reaction score
1,976
Location
Vancouver BC
Vehicle(s)
2016 GT350 Track Pack
Do you have the part number or link for that switch and what gauge wire is needed. Also, what ground did people tap into for the switch?
When I hooked mine up, I used one of those little tiny taps to lift the switched power off the temp sensor on that panel. Since there was already an orange wire running from the switch to the wiring bundle, I just ran a second black wire along with it and used a second tap to connect it into the common wire on the Xineering harness.
 
OP
OP
drummerboy

drummerboy

Well-Known Member
Joined
Mar 15, 2019
Threads
21
Messages
478
Reaction score
429
Location
SoCal
Vehicle(s)
'19 GT350
Looks like we are all sharing the clutch switch pain.

As for where to ground, there is a very convenient spot - on the firewall in just in front of and above the kickpanel fuse box is a real long, skinny bolt (iirc it's a 1/4" or 5/16" head?) with a gigantic washer on it. I've been sandwiching grounds here due to its proximity to the fuses and just keeping things simple by always running power and ground wire pair to the same location.

In regards to the blip not working out for folks, that sure is a shame. I remember mine being not aggressive enough out of the box and immediately increasing the duration and throttle %. Also, I remember setting the parameters based on some higher RPM sporty shifts on the street, and it really needs just a tad more than that for track use. While it's not true rev matching, I'd never know the difference with the settings dialed in as long as I keep consistent shifts.

I never learned to heel-toe. There is a particular corner at Chuckwalla, high speed double apex section. The previous straight has you grabbing 4th gear for a bit. I'm going from 115 on entry and dragging brake down to the first apex to 70. I can rocket through here, it's a fun section. But, as a heel-toe noob, I cannot feel the car while my brain is also trying to heel-toe into 3rd on corner entry while trail braking on the edge at 95mph... it's just too much for me, and that's why I love the blipper. I just want to go fast as I can with what little time I have. I lost so much speed through this corner trying to do it without the blipper, was always over-braking when trying to heel-toe. I'd need a ton of practice to attack this corner at speed.
 

Lorne34

Project Hidalgo
Joined
Jun 8, 2016
Threads
70
Messages
3,913
Reaction score
4,400
Location
Wisconsin
First Name
Lorne
Vehicle(s)
2019 GT350
Vehicle Showcase
1
Looks like we are all sharing the clutch switch pain.

As for where to ground, there is a very convenient spot - on the firewall in just in front of and above the kickpanel fuse box is a real long, skinny bolt (iirc it's a 1/4" or 5/16" head?) with a gigantic washer on it. I've been sandwiching grounds here due to its proximity to the fuses and just keeping things simple by always running power and ground wire pair to the same location.

In regards to the blip not working out for folks, that sure is a shame. I remember mine being not aggressive enough out of the box and immediately increasing the duration and throttle %. Also, I remember setting the parameters based on some higher RPM sporty shifts on the street, and it really needs just a tad more than that for track use. While it's not true rev matching, I'd never know the difference with the settings dialed in as long as I keep consistent shifts.

I never learned to heel-toe. There is a particular corner at Chuckwalla, high speed double apex section. The previous straight has you grabbing 4th gear for a bit. I'm going from 115 on entry and dragging brake down to the first apex to 70. I can rocket through here, it's a fun section. But, as a heel-toe noob, I cannot feel the car while my brain is also trying to heel-toe into 3rd on corner entry while trail braking on the edge at 95mph... it's just too much for me, and that's why I love the blipper. I just want to go fast as I can with what little time I have. I lost so much speed through this corner trying to do it without the blipper, was always over-braking when trying to heel-toe. I'd need a ton of practice to attack this corner at speed.
Totally agree with this. I used it at my last Road America Track day and it was a game changer for me. I didn't trust the module at first, but once I just relaxed and let it do it's thing it was great. I may go to the track 2-3 times a YEAR.. so for me it's worth it just to go fast, have fun and enjoy without being worried about it.
Sponsored


Top