Sponsored

DIY Grille Delete?

hidetolol

Active Member
Joined
May 28, 2015
Threads
4
Messages
26
Reaction score
6
Location
United States
Vehicle(s)
Soon to be 2016 GT Premium w/ PP

Midnight_LMR

Well-Known Member
Joined
Sep 10, 2015
Threads
28
Messages
431
Reaction score
90
Location
Edmond, OK
First Name
Chris
Vehicle(s)
2017 GT PP
Hey guys just saw this and thought maybe someone would appreciate the write-up versus a $300 vendor alternative. I did mine for about half the price $100 for upper and lower grilles from NewAutoParts.com

http://www.newautoparts.com/ford/au...ine/body-cat/bumper-and-components-front-scat

and $40 for a nice piece of expanded metal that doesn't look like the "chicken wire" i found alot of other places,

http://www.amazon.com/gp/product/B000H9TJFQ?psc=1&redirect=true&ref_=oh_aui_detailpage_o09_s00

also some VHT Rollbar paint (satin black) for the metal that I had on my paint shelf.

http://www.autozone.com/paint-and-b...erature-roll-bar-and-chassis-paint/60045_0_0/

As the pictures show I used a dremel to remove the honey comb but unlike others, i actually took an hour or two and between the cutting disc and sanding wheels i cut the honeycomb clear from the inside because i didn't want to lose the depth of the grille. A bit of a PITA but if you're a bit OCD like me then its worth the extra effort in the end. I recommend wet-sanding at the end and then I taped off and resprayed just the part where the honeycomb use to be with matte black paint from local auto parts store

http://www.oreillyauto.com/site/c/d...475&categoryRedirect=N0474&pt=N0474&ppt=C0171

That is what I used and it blended seamlessly but of course use whatever you like. I did spend a good hour or so on custom fitting the expanded metal (once painted) so that it was bent at the top to mount into the same holes as the support brackets and then smoothed and rounded off on the bottom to fit the bottom brace holes. This way I can run my hand along the whole thing and not get cut on future work. The metal I bought had a front and back to it, there was a bit of a bevel to the holes on the front side and mounting it like I did still allowed for around 2 inches of space between the intercooler and the metal and also used the frame of the car and mountings to give the metal rigidity against big stones extra. I have had it on the car for about a month now with no issues whatsoever and have had numerous compliments about its unique look. This definitely makes it standout as you can see the intercooler etc through it yet the holes are small enough to catch bugs etc and the metal is strong enough to protect.

*****O one thing I forgot to mention, I also removed the 2 large clips holding the wire loom to the back of the bumper support and tucked the bundle into the conveniently placed channel in the back center of the support and then used the holes that were previously for the bolts holding the air vents to run black zip ties through and trim off facing down. This eliminates being able to see the ridiculously large clips and loom hanging out of place and also protects it a bit better from the elements. 2 minute alteration with great results*****
Capture.PNG_grille_delete.webp
MetalInstalled.webp
GaragePic.webp
OutdoorPic.jpg
 

Chameleon

Well-Known Member
Gold Sponsor
Joined
Feb 17, 2014
Threads
157
Messages
11,994
Reaction score
4,264
Location
S550 INTERIOR DRESS UP
Website
www.ebay.com
Vehicle(s)
03' Cobra, 05' GT, 13' GT, 15' GT
Hey guys just saw this and thought maybe someone would appreciate the write-up versus a $300 vendor alternative.

*****O one thing I forgot to mention, I also removed the 2 large clips holding the wire loom to the back of the bumper support and tucked the bundle into the conveniently placed channel in the back center of the support and then used the holes that were previously for the bolts holding the air vents to run black zip ties through and trim off facing down. This eliminates being able to see the ridiculously large clips and loom hanging out of place and also protects it a bit better from the elements. 2 minute alteration with great results*****
Looks fantastic. :headbang:

PM me a quote please to have one.
 

M3Convert

American Muscle Noob
Joined
Apr 1, 2015
Threads
12
Messages
268
Reaction score
93
Location
New England
Vehicle(s)
Deep Impact Blue GT Premium
Custom Car Grill Delete Video


These guys have a broad selection of meshes to use too. I just bought a powder coated hex pattern in aluminum. I'll post up when it's done.
 

Sponsored

Ap8823

Well-Known Member
Joined
Jul 17, 2015
Threads
7
Messages
318
Reaction score
40
Location
Las Vegas
First Name
Anthony
Vehicle(s)
2015 EcoBoost Premium
How did you guys get the metal to stick to the grill?
 

Midnight_LMR

Well-Known Member
Joined
Sep 10, 2015
Threads
28
Messages
431
Reaction score
90
Location
Edmond, OK
First Name
Chris
Vehicle(s)
2017 GT PP
Mine is stuck to the grill, its bolted to the frame supports. sits about 2" off the intercooler
 

M3Convert

American Muscle Noob
Joined
Apr 1, 2015
Threads
12
Messages
268
Reaction score
93
Location
New England
Vehicle(s)
Deep Impact Blue GT Premium
How did you guys get the metal to stick to the grill?
The video shows then using something called "Goop"

I am going to use this, and add some bodywork rivets/washers for extra security
 

mtb5020

Car RamRod
Joined
Nov 10, 2015
Threads
21
Messages
155
Reaction score
38
Location
Mean Streets of Philly
First Name
Mike
Vehicle(s)
2015 Mustang GT PP
Custom Grill

This may not be pure DIY, but I installed the customcargrills.com upper and lower mesh grill. About $100 including 2 tubes of GOOP. The kit was great, the finish on the grill(s) was flawless. When you order from customcargrills.com, the grill pieces come pre-cut and pre-bent, ready to go out of the box. Saves time and effort of cutting and bending and the frustration of cutting or bending incorrectly and starting all over again. Initially skeptical, the glue actually works well, similar to hot glue in application, only its cold. There is an online video showing how to install. [ame]. He shows a dremel cutting the stock fascia out. I attempted this method but my Dremel was battery operated and kept bogging down. So I said F it and grabbed a SawzAll and went to town. Results were excellent. The mesh is finer than stock, more protection from birds and stones. Customcargrills also has different patterns and colors. Go check them out. http://www.customcargrills.com/Ford-Car-Grills.asp
grills.jpg
grills 1.jpg
IMG_5551 - Copy.JPG
 
Last edited:

Ap8823

Well-Known Member
Joined
Jul 17, 2015
Threads
7
Messages
318
Reaction score
40
Location
Las Vegas
First Name
Anthony
Vehicle(s)
2015 EcoBoost Premium


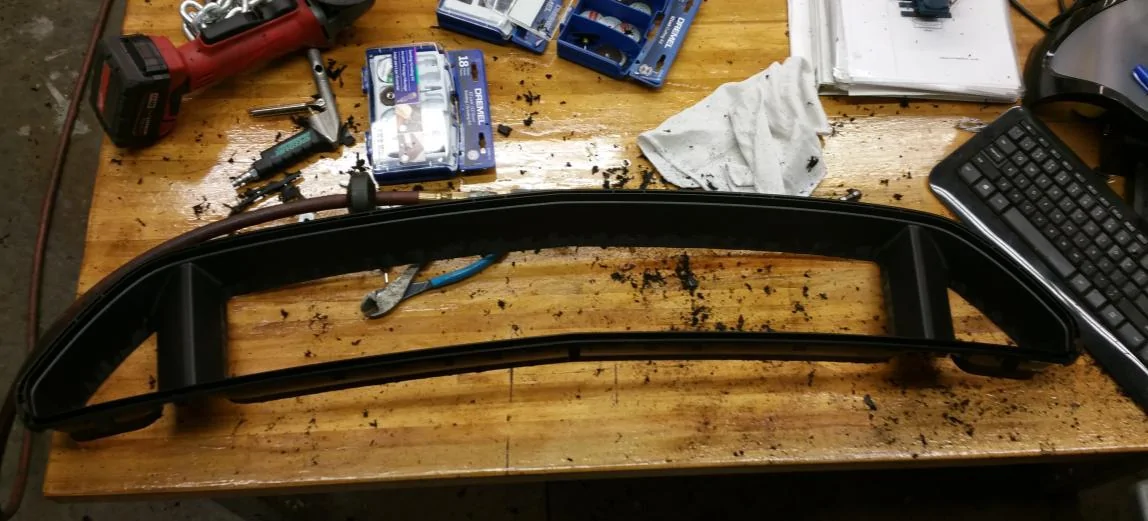
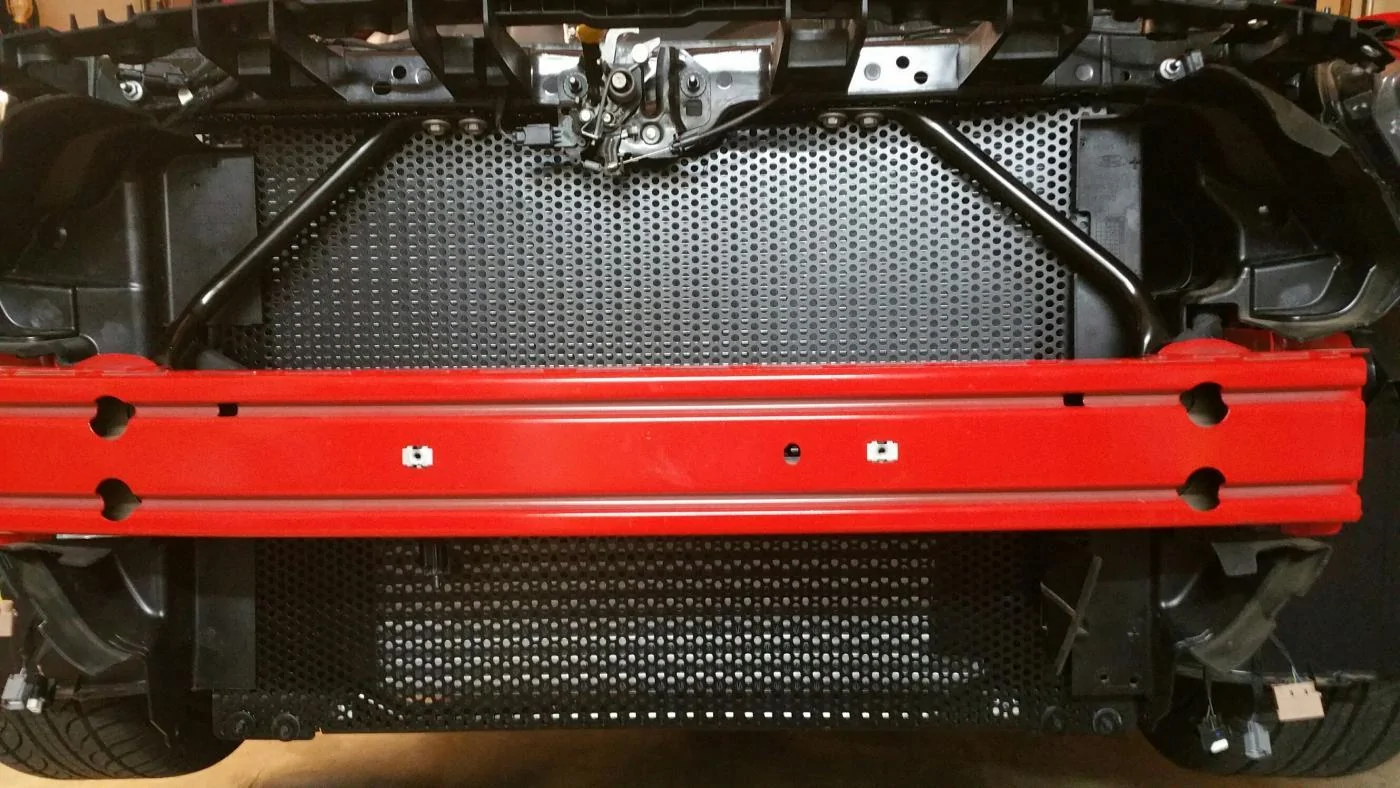
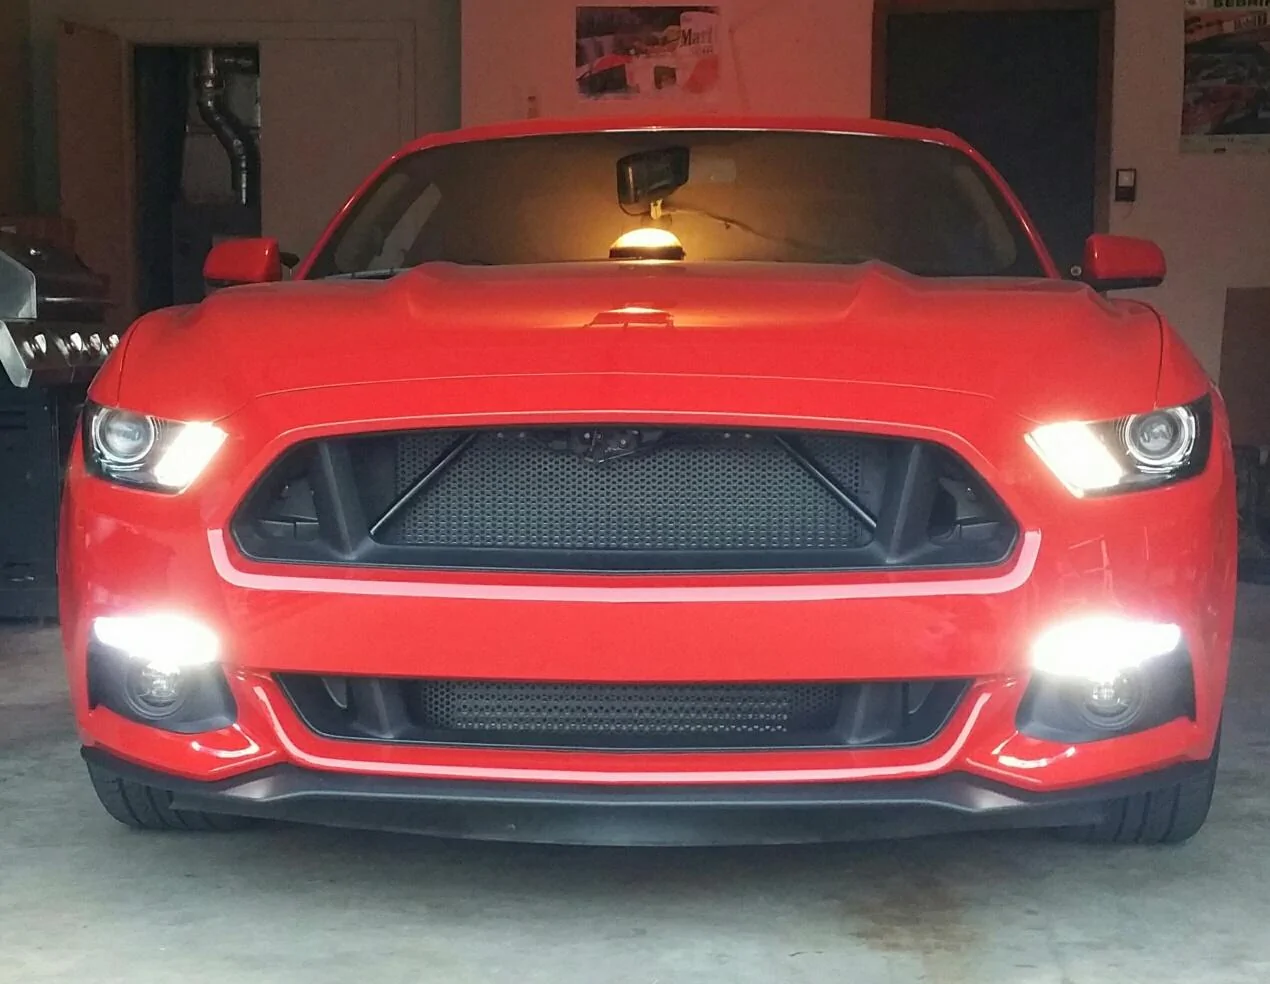
Here is how mine turned out when I used that eBay ABS honeycomb sheet. masked off the frame and sprayed the ABS with Krylon MAXX in satin black after I used plastic epoxy to "weld" it together.

No on car shots yet as I'm waiting for my car to be delivered still :brokenheart:
any pics of it on your car? have received your car yet haha, i just ordered my grill tonight and am trying to find a cool mesh. Not to see through but still looks cool. maybe doubling up on mesh would help?:ford:
 

Sponsored

Midnight_LMR

Well-Known Member
Joined
Sep 10, 2015
Threads
28
Messages
431
Reaction score
90
Location
Edmond, OK
First Name
Chris
Vehicle(s)
2017 GT PP

Project Whitemare

GTFO Squad
Joined
Nov 12, 2014
Threads
43
Messages
1,307
Reaction score
1,011
Location
Bay Area
Website
www.instagram.com
First Name
Nick
Vehicle(s)
2015 Mustang GT/PP
You guys are all making some awesome grills!
 

mtb5020

Car RamRod
Joined
Nov 10, 2015
Threads
21
Messages
155
Reaction score
38
Location
Mean Streets of Philly
First Name
Mike
Vehicle(s)
2015 Mustang GT PP
How hard was it dissemble/assemble it all? I am not mechanically inclined and I feel like I might break a clip or something.

For reference, I was looking at this guide: http://www.americanmuscle.com/rtr-grille-1516-manu-install.html
This is doable with minimal tools and experience. However, it does take some patience. There are a number of self tapping screws to remove. Have to be very careful when re-installing. The bumper screws on the top under the cover only get screwed in until they are flush, then a 1/4 turn or so. Circled in red in picture.

If you watch the video Midnight_LMR recommended, you have to be careful. When the guy in the video pulls the side of the bumper out, you have to first remove the 7 mm screws as Midnight_LMR mentioned. If not, you will crack the bumper and there is no way to fix it. See picture below for screw location, very tough to find. Circled in blue in both pics. Drew in black the screw angle on the red car.

Also, I recommend removing the wheels and wheel well cover to gain easier access.
bumper screw locations.webp
bumper 7 mm location.JPG
 

Midnight_LMR

Well-Known Member
Joined
Sep 10, 2015
Threads
28
Messages
431
Reaction score
90
Location
Edmond, OK
First Name
Chris
Vehicle(s)
2017 GT PP
yes [MENTION=19690]mtb5020[/MENTION] is 100% right, I thought I could skate away with just removing them part way as a buddy (with older mustang claimed) and I cracked a part of the clip. Spent the next 24 hours with a rag, plastic slates and gorilla glue held by a clamp to get it right again. Thankfully its repaired near flawless and on the inside so you cant see it once its mounted but damn did that piss me off lol. Make sure you 100% remove completely those 7mm bolts!!
Sponsored


Top