Sponsored

Ceramic Coating Q&A

Status
Not open for further replies.

Suma Performance

Well-Known Member
Joined
Jan 1, 2021
Threads
11
Messages
150
Reaction score
26
Location
Seattle
Vehicle(s)
2020 GT
Always curious about ceramic coating? We're here to answer any questions that you might have?

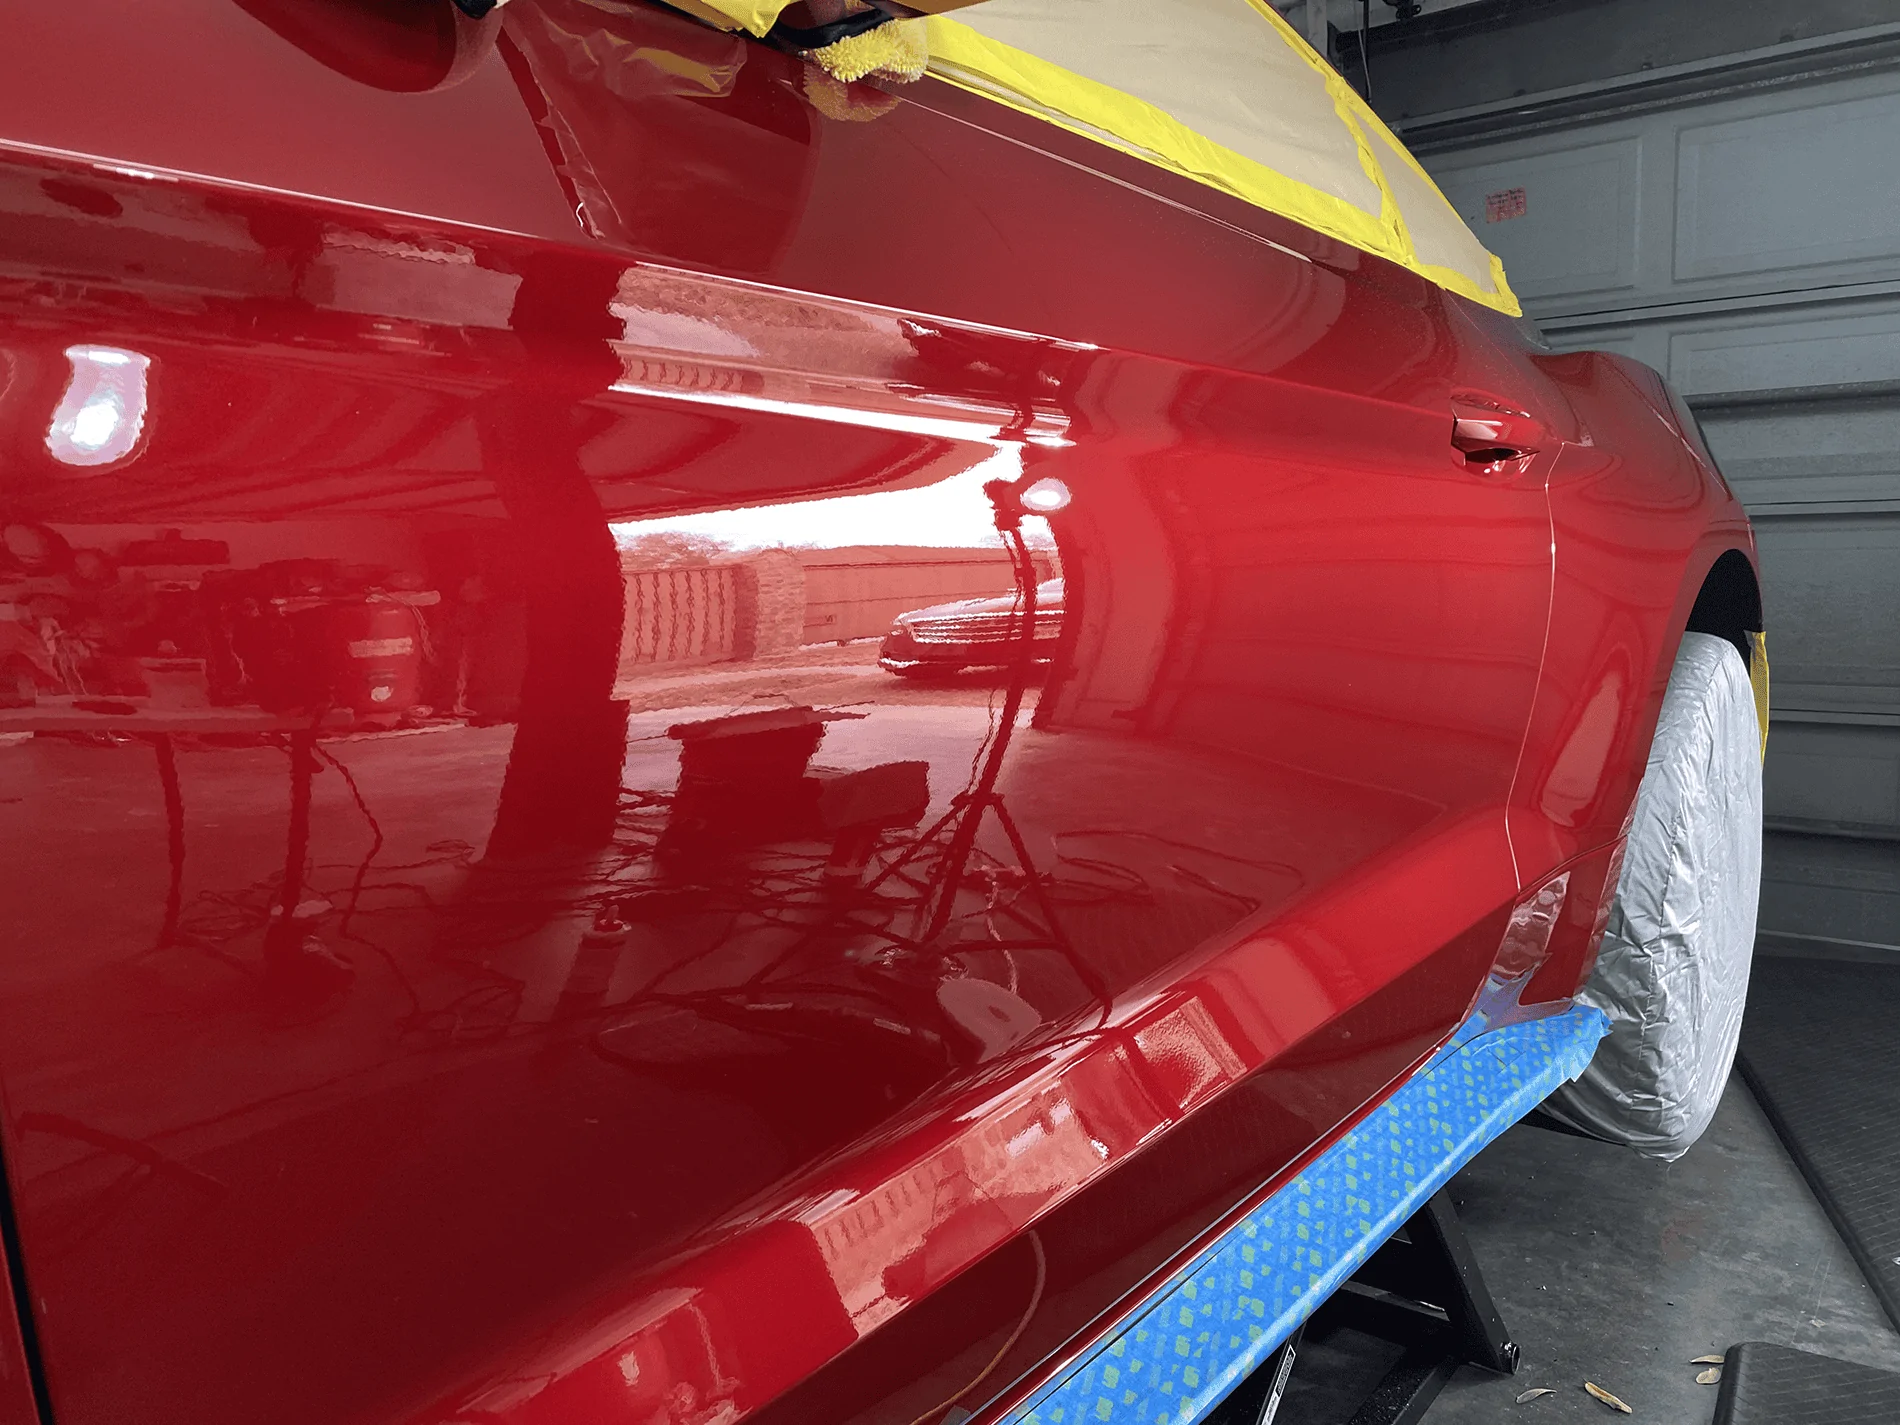
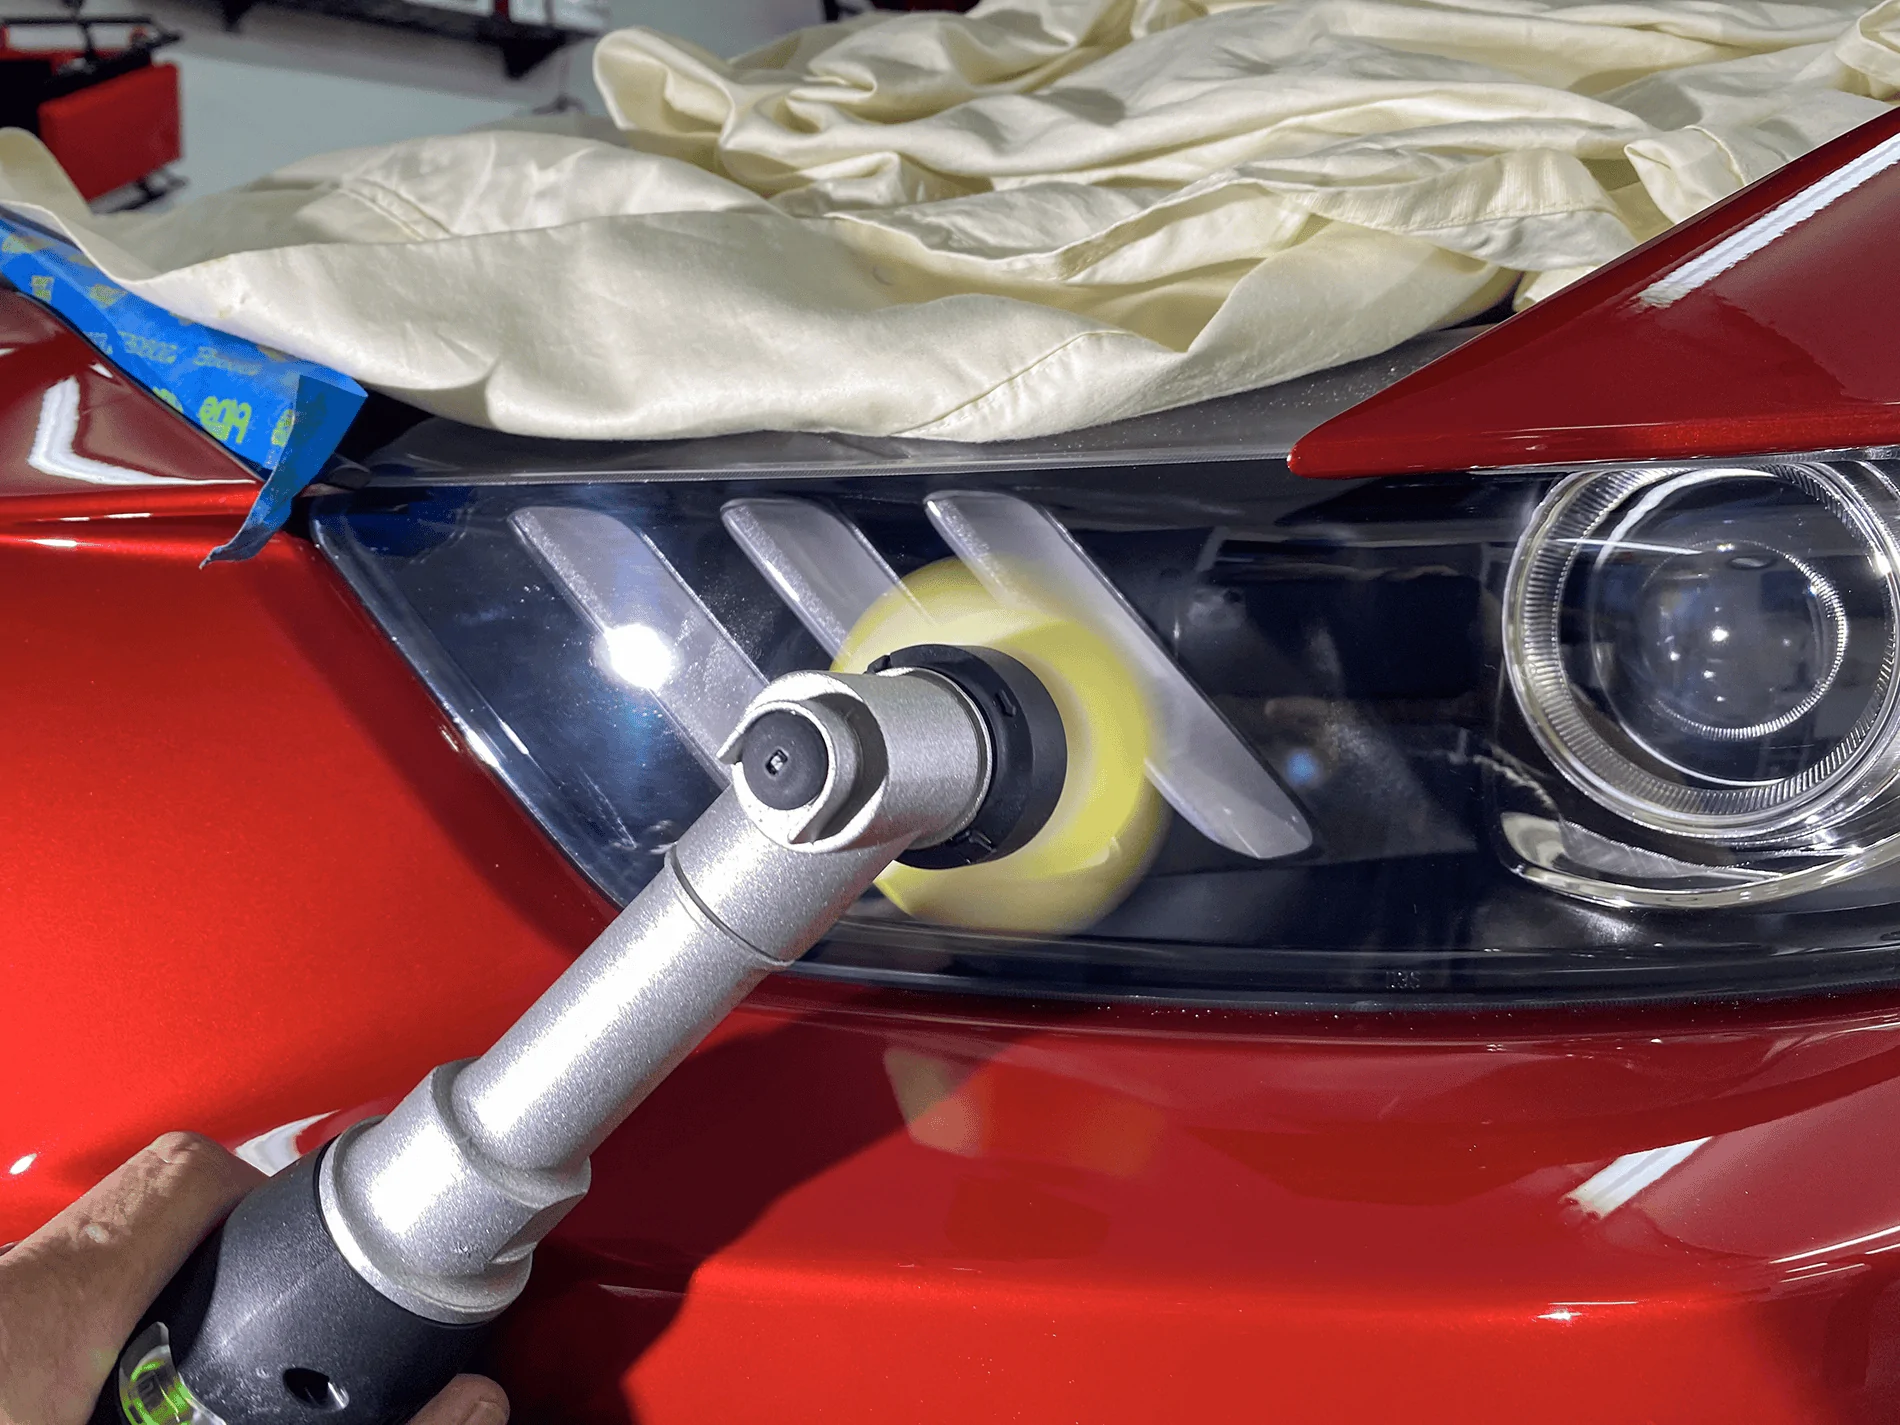
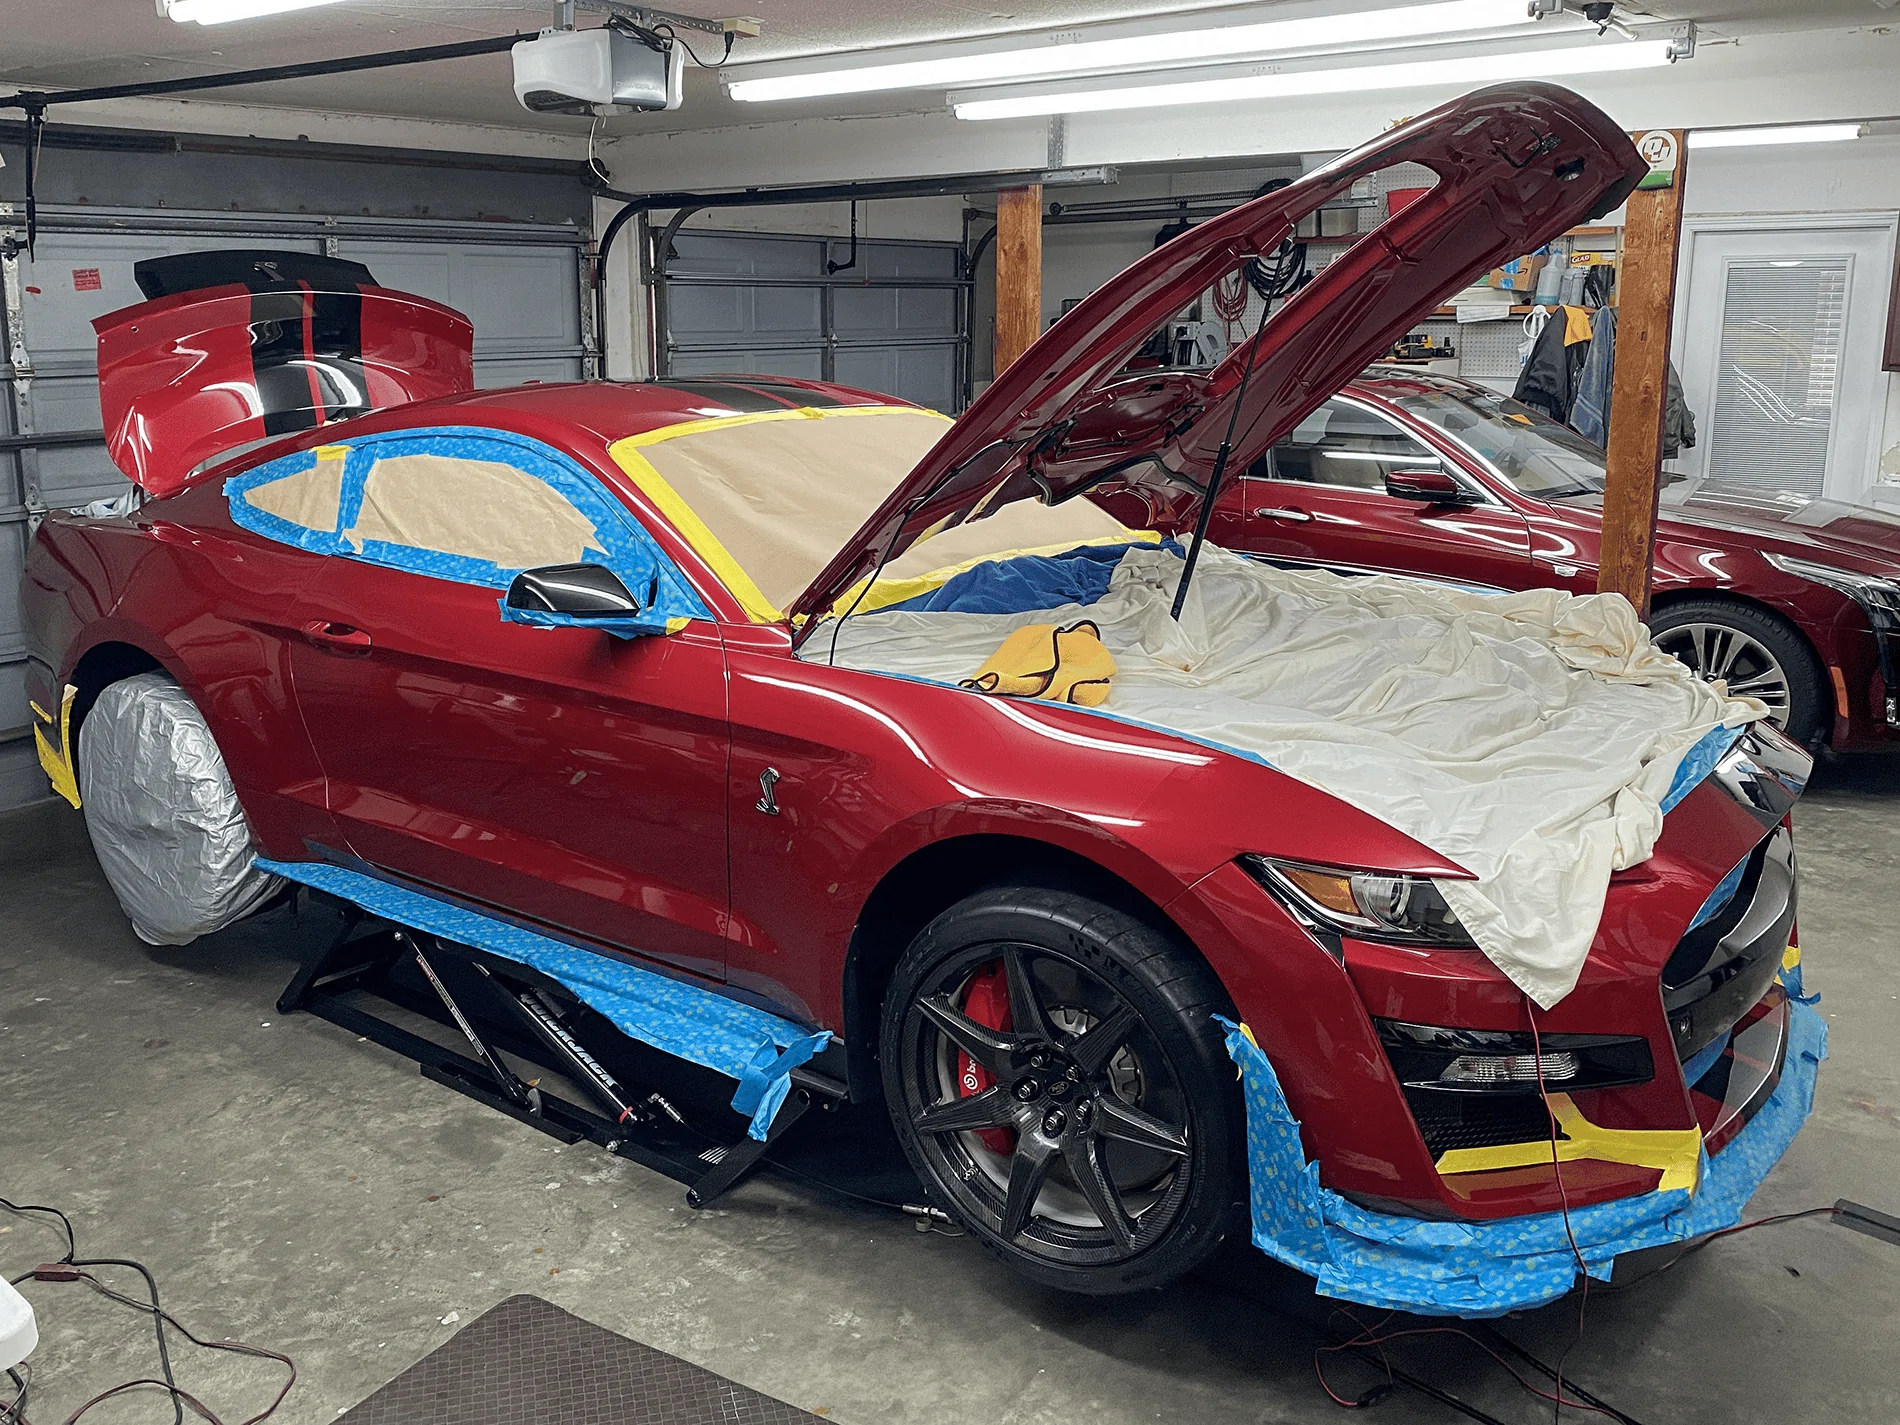
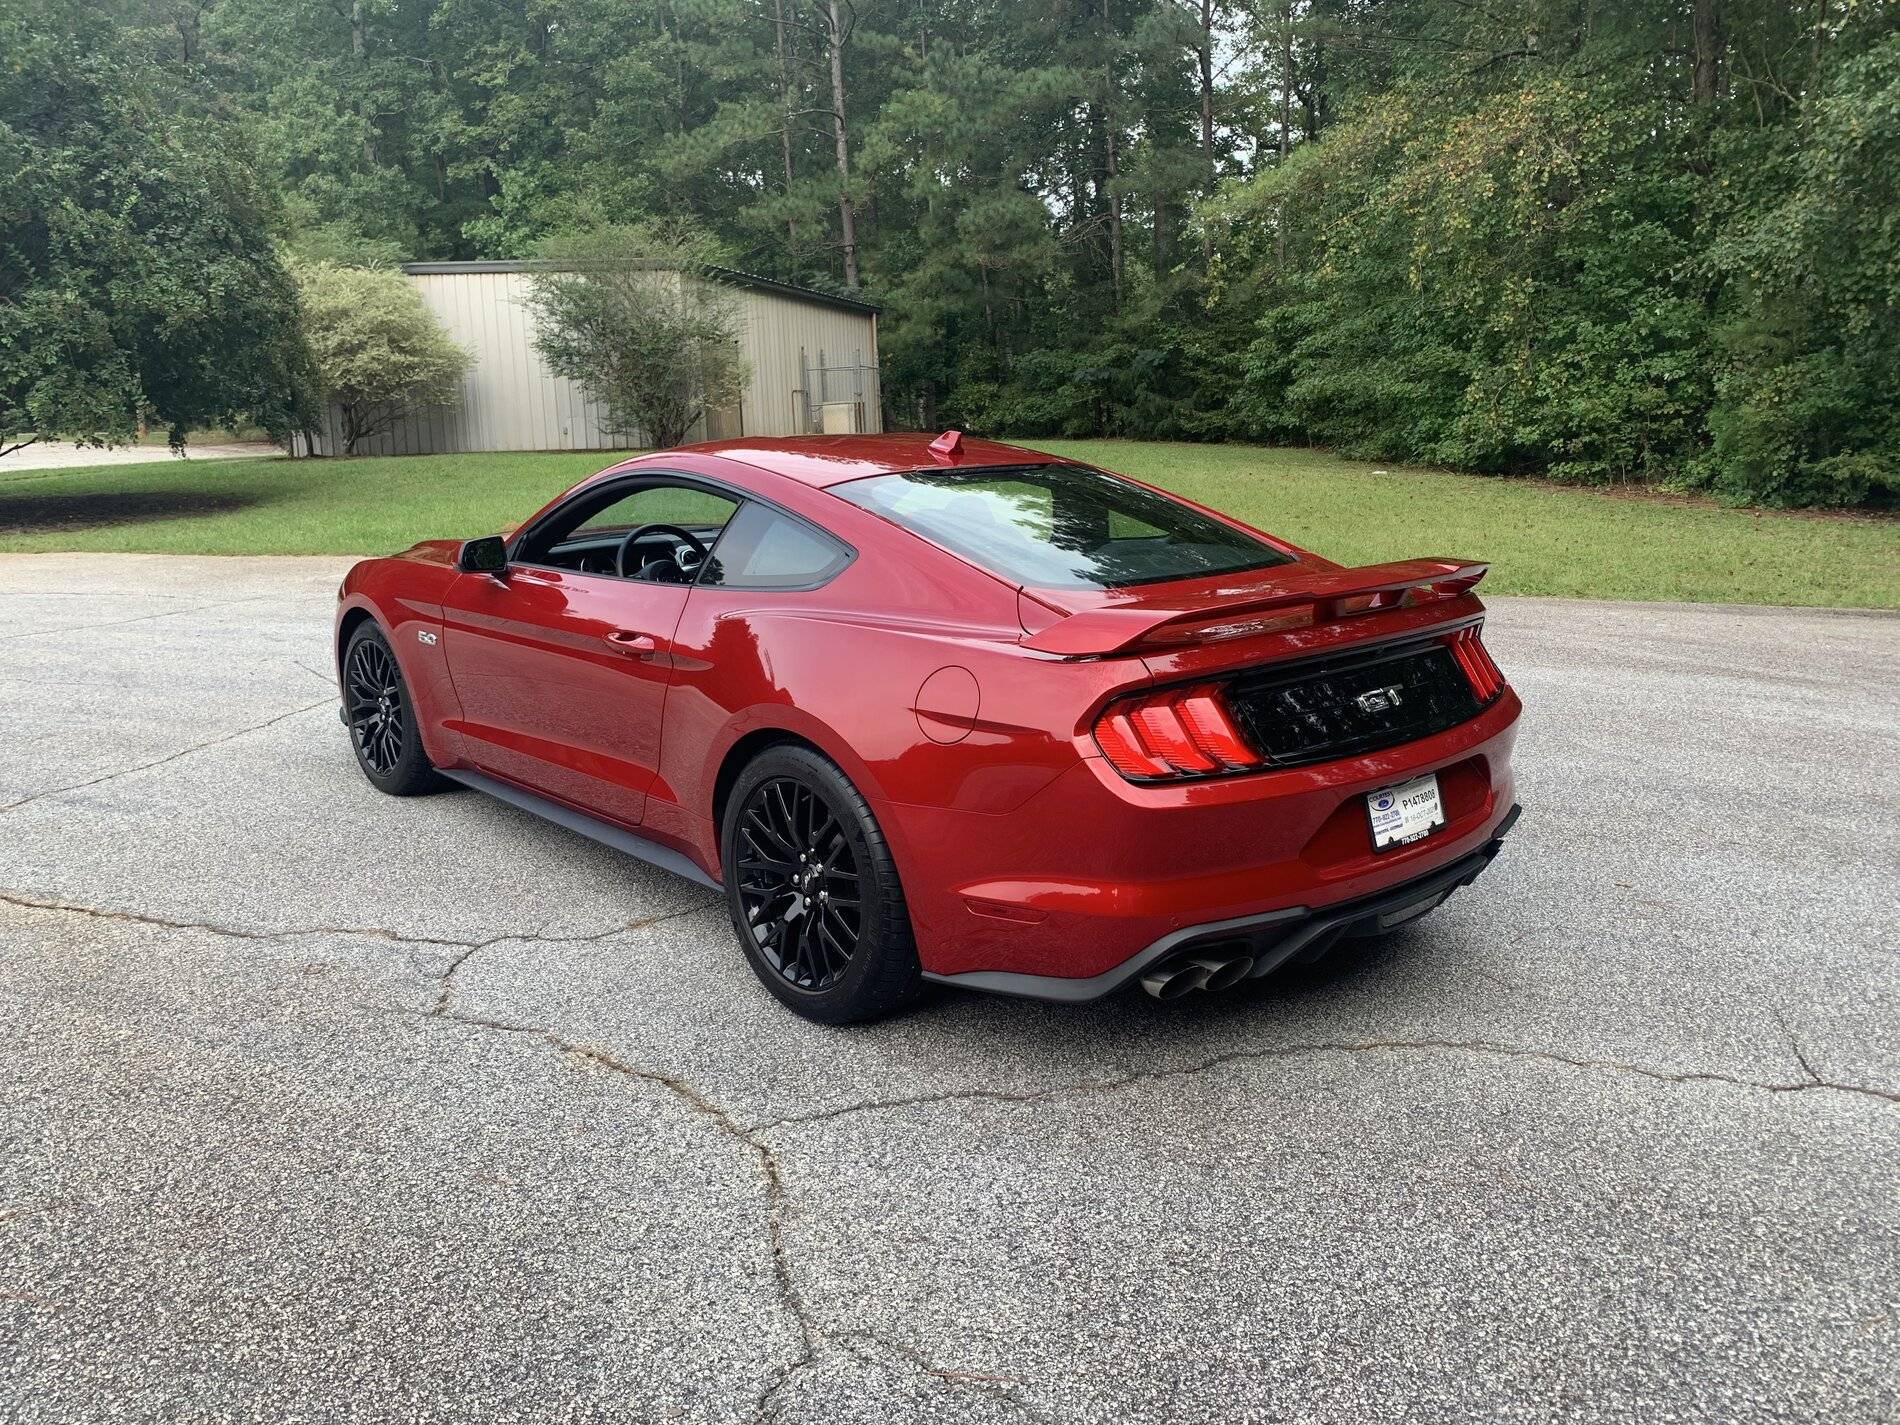
We know it can pretty confusing with all the information out there. And it doesn't have to be expensive and can be applied by DIY user like you. Here, we wanted to create thread such that members can post any questions that you might have on ceramic coating?

Our ceramic coating, actually all car detailing products, were developed in-house tested with detailers and car enthusiasts to make sure they are easy to apply while still provide the professional results.

https://www.sumaperformance.com/pages/ceramic-spray
Sponsored

 
OP
OP
Suma Performance

Suma Performance

Well-Known Member
Joined
Jan 1, 2021
Threads
11
Messages
150
Reaction score
26
Location
Seattle
Vehicle(s)
2020 GT
Still mirror shine after 2 weeks, driving in the rain.

Ceramic spray was applied two weeks. It has been raining for the past two weeks in Seattle. The ceramic coating was doing its job in repelling dirt and grime.
 

kilobravo

Well-Known Member
Joined
Aug 10, 2019
Threads
76
Messages
8,005
Reaction score
7,231
Location
Corpus Christi, TX
Website
kilobravo.com
First Name
KB
Vehicle(s)
'16 CT6, '18 SD, '20 GT 500
Finally found the time (and motivation) to get started with the ceramic coating on "MYSARAH." :-) I can quickly see that It's gonna be a long project. I finished the masking and got the passenger side horizontals polished yesterday so at least two more days of that, maybe three.

Then, I'm going to put her on the little lift so I can install some aftermarket "GT 500" side stripes.

I had to remove the wing so I could polish the deck lid and, as expected based on the reports of other owners, Ford did a lousy job of mounting it. I could have done better with a cordless drill for God's sake. <shaking head> So, I gotz to scuff up those areas a bit, then prime and paint before re-installing the wing which, BTW, weighs less than two pounds, I swear. It was actually funny how light it is.

And finally, the coating will take two days to apply and another to cure. Meanwhile, here are some photos of the project..


1615123921116.png


1615123985235.png


1615124015213.png


1615124036269.png


1615124063226.png


1615124081337.png


Last edited:

DFB5.0

Well-Known Member
Joined
Mar 15, 2017
Threads
62
Messages
3,633
Reaction score
10,527
Location
Australia
Vehicle(s)
Mustang GT Fastback
Finally found the time (and motivation) to get started with the ceramic coating on "MYSARAH." :-) I can quickly see that It's gonna be a long project. I finished the masking and got the passenger side horizontals polished yesterday so at least two more days of that, maybe three.

Then, I'm going to put her on the little lift so I can install some aftermarket "GT 500" side stripes.

I had to remove the wing so I could polish the deck lid and, as expected based on the reports of other owners, Ford did a lousy job of mounting it. I could have done better with a cordless drill for God's sake. <shaking head> So, I gotz to scuff up those areas a bit, then prime and paint before re-installing the wing which, BTW, weighs less than two pounds, I swear. It was actually funny how light it is.

And finally, the coating will take two days to apply and another to cure. Meanwhile, here are some photos of the project..


1615123921116.png


1615123985235.png


1615124015213.png


1615124036269.png


1615124063226.png


1615124081337.png


Nice work, that GT500 will look amazing once your done.

What coating did you choose?
 

Sponsored

Joined
Feb 28, 2020
Threads
2
Messages
5
Reaction score
427
Location
HSV, Alabama
First Name
Dan
Vehicle(s)
2019 Bullitt, 2020 GT350R, 2020 Explorer ST
CarPro CQuartz, DFB...and thanks, I sure hope she looks great when I'm finished.
I can see your project is going to take some time. Well worth the effort for sure. How did the prep work on the scuff mark repairs turn out for you? How many coats do you plan with the CarPro?
 

kilobravo

Well-Known Member
Joined
Aug 10, 2019
Threads
76
Messages
8,005
Reaction score
7,231
Location
Corpus Christi, TX
Website
kilobravo.com
First Name
KB
Vehicle(s)
'16 CT6, '18 SD, '20 GT 500
Yep Dan, this one is definitely going to take some time. I'm four days in and while I was able to finish the driver's side and the front end today, I still have the passenger side to go.

Then I have to do some touch-up paint work on a few factory defects. Like where that goop they use between body parts cracked away in a couple spots and I have one tiny rock ding on the nose of the hood. Then I'll tackle the crappy hole drilling Ford did on the deck lid. I just plan to rough up the area and give it a coat of good primer, "etching" if I can find it. <smile>

A buddy from the 500 Forum made some gaskets for his two brackets and he is kindly sending me a piece large enough for my two. I figure this part at least two days.

Then a good wash with Eraser, a double super rinse, <grin> blow dry, and then I can start on the ceramic. I'm figuring three days for that.

So my guess is ten to twelve days of work total. Worth it but my back is hollering at me now. :cool:

In answer to your question about scuff marks, short of the tiniest, nearly invisible scratch or two that I missed and the three or four factory blemishes, I THINK she is completely free of all other marks and scratches, at least on everything but the passenger side so far. I'll finish that pretty quickly tomorrow. I'm only taking about 5mil of clear off which is NBD.

Penske REALLY put down some PAINT though...the hoizontal surfaces have over twice as much paint depth as the sides.

As for the number of coats of ceramic...I'm honestly not sure. After doing the wife's car with one coat, I think I may go with just one on the 500 too. As long as it lasts for a year or so, I'll be happy as by then I'll have the "polishing fever" again, probably and who knows what the coolest coating will be then, right?. :-) But, I MAY put two coats on the horizontal surfaces as I'm sure I'll have a good bit left over in the bottle. Her car is larger and there was probably 20ml left over.

I said good things to my little buddy, QuickJack, again today. It is so nice to be able to get her up in the air for a project like this.


1615246800727.png


1615246833590.png


Yep, I imagine everyone has some orange peel, I've yet to see a US OEM paint job without some. But, they're knocked down a bit and I am getting some really nice gloss from the Rupes UltraFine pads and M205.


1615246868681.png


1615246906926.png


DFB5.0

Well-Known Member
Joined
Mar 15, 2017
Threads
62
Messages
3,633
Reaction score
10,527
Location
Australia
Vehicle(s)
Mustang GT Fastback
Yep Dan, this one is definitely going to take some time. I'm four days in and while I was able to finish the driver's side and the front end today, I still have the passenger side to go.

Then I have to do some touch-up paint work on a few factory defects. Like where that goop they use between body parts cracked away in a couple spots and I have one tiny rock ding on the nose of the hood. Then I'll tackle the crappy hole drilling Ford did on the deck lid. I just plan to rough up the area and give it a coat of good primer, "etching" if I can find it. <smile>

A buddy from the 500 Forum made some gaskets for his two brackets and he is kindly sending me a piece large enough for my two. I figure this part at least two days.

Then a good wash with Eraser, a double super rinse, <grin> blow dry, and then I can start on the ceramic. I'm figuring three days for that.

So my guess is ten to twelve days of work total. Worth it but my back is hollering at me now. :cool:

In answer to your question about scuff marks, short of the tiniest, nearly invisible scratch or two that I missed and the three or four factory blemishes, I THINK she is completely free of all other marks and scratches, at least on everything but the passenger side so far. I'll finish that pretty quickly tomorrow. I'm only taking about 5mil of clear off which is NBD.

Penske REALLY put down some PAINT though...the hoizontal surfaces have over twice as much paint depth as the sides.

As for the number of coats of ceramic...I'm honestly not sure. After doing the wife's car with one coat, I think I may go with just one on the 500 too. As long as it lasts for a year or so, I'll be happy as by then I'll have the "polishing fever" again, probably and who knows what the coolest coating will be then, right?. :-) But, I MAY put two coats on the horizontal surfaces as I'm sure I'll have a good bit left over in the bottle. Her car is larger and there was probably 20ml left over.

I said good things to my little buddy, QuickJack, again today. It is so nice to be able to get her up in the air for a project like this.


1615246800727.png


1615246833590.png


Yep, I imagine everyone has some orange peel, I've yet to see a US OEM paint job without some. But, they're knocked down a bit and I am getting some really nice gloss from the Rupes UltraFine pads and M205.


1615246868681.png


1615246906926.png


Loving the progress of this, a color like that is going to reward your efforts handsomely.
 

kilobravo

Well-Known Member
Joined
Aug 10, 2019
Threads
76
Messages
8,005
Reaction score
7,231
Location
Corpus Christi, TX
Website
kilobravo.com
First Name
KB
Vehicle(s)
'16 CT6, '18 SD, '20 GT 500
By quittin' time today I had finished the passenger side but just barely. In the process, I did some cosmetic cleanup on my RokBlokz install. Only one door jam to go and that will complete the paint correction. Touch up paint on a couple spots then scuff up and prime the crappy Flat Rock wing mount holes. I'll give that twenty four to dry then I'll pull the masking and give her a serious bath. Then ceramic.


1615331909168.png
 

VIPR01

Well-Known Member
Joined
Mar 11, 2018
Threads
14
Messages
265
Reaction score
318
Location
Valhalla
Vehicle(s)
71 Gremlin
Gotta love the Rupes ibird long neck.....noticed the decklid-those things scratch if you stare at them to long. Nice Work, did a similar process a few days ago-keeping Motrin in business.
 

Sponsored

kilobravo

Well-Known Member
Joined
Aug 10, 2019
Threads
76
Messages
8,005
Reaction score
7,231
Location
Corpus Christi, TX
Website
kilobravo.com
First Name
KB
Vehicle(s)
'16 CT6, '18 SD, '20 GT 500
VIPR: Yep, every time I use the little Nano Ibrid, I like it even more. You can't get EVERYWHERE <grin> but you can sure come close. I used both sizes of backing plates and respective pads about an even amount of time. Picked up some 2" "Fast Compounding" pads from Griot's awhile back and tried those out for the first time yesterday. They cut faster than Rupes Mediums but, not too fast. I think I may like them better than the Rupes as they last considerably longer than the softer foam type.

<BIG smile> Got a kick out of the Motrin comment, I feel ya, brother. :-)
 

CorvZ061

Well-Known Member
Joined
Sep 9, 2020
Threads
18
Messages
424
Reaction score
414
Location
Oxford, Ga
First Name
Travis
Vehicle(s)
2022 GT
So two things, one I used Adam’s Graphene coating about 6 months ago, still going great. Actually going to be doing a friends Hellcat his weekend. Only advice I have is take your time with the paint correction if you’re doing it at home, the better you get it prior to ceramic the better it turns out.

Now for my question and then a pic of my car after I finished it 6 months ago along with one from a few weeks ago.

I’m thinking about adding some over the top stripes on my Rapid red car, thinking something off white, similar to Wimbledon White. I’m sure I’ll need to polish off the ceramic coating from the hood, roof, trunk, and bumpers to get the vinyl to lay down and stick correctly, or can it be done over the top of the coating? Does anyone happen to know how wide the stripes are on the Gt500?

66DA9059-C264-495A-972E-4FCAC81BB372.jpeg


BB82E5BB-6451-403B-870D-BC9802A320E7.jpeg
 

kilobravo

Well-Known Member
Joined
Aug 10, 2019
Threads
76
Messages
8,005
Reaction score
7,231
Location
Corpus Christi, TX
Website
kilobravo.com
First Name
KB
Vehicle(s)
'16 CT6, '18 SD, '20 GT 500
Travis: I do believe they are 10" wide, each. I haven't measured the current car but the vinyl on my '14 was ten inches and it looked identical in width to me.

As for the ceramic and stripes, it may take some time but I think you can get most if not all of it off with a moderately-aggressive compound like M105/Rupes Coarse and a medium or coarse pad. It will be more difficult than removing orange peel but I THINK it's doable, especially after six months. The critical issue is getting through IT without going through the clear coat. I do know the stuff is hard as a rock when it cures. I also think the vinyl would have adhesion issues over time if you don't get all the ceramic off.
 
Last edited:

kilobravo

Well-Known Member
Joined
Aug 10, 2019
Threads
76
Messages
8,005
Reaction score
7,231
Location
Corpus Christi, TX
Website
kilobravo.com
First Name
KB
Vehicle(s)
'16 CT6, '18 SD, '20 GT 500
Got a bit more done today, to wit...scuffed, primed, and painted the wing bracket holes. Picked up two kinds of primer, one generic auto paint primer and one "etching" version. Didn't want to mask the whole rear end of the car JUST so I could spray this tiny area so I went with spraying on to a piece of cardboard and using Q-Tips to apply. It will never be seen once the bracket is re-installed so cosmetically, all I cared about was rust protection.

For anyone interested, here are the paints I used...


1615412711377.png


1615412731315.png


Until recently, I'd been using small syringes to apply paint on dings, etc., but I saw someone mention this nifty tool and it works PERFECTLY for those little bastids that are too small for a brush. Great little tool, highly recommended.


1615412853613.png


Got the last door jam polished and then I taped off the wing bracket holes. Rattail filed the holes and scuffed up the small area around each then, primed and painted. Waiting for the paint to cure now, photos tamarra.


1615412980829.png


1615413003496.png


I had two spots like this, both in nearly the same location on each rear fender. It's that gray goop. Scuffed, mutltiple coats of primer and color coat, then clear. Finished photos to follow.


1615413157973.png


Finally, the taped and prepped bracket holes.


1615413219402.png


In the old days, I'd have a cold beer about now but these days, I'd rather have a deelishus latte and I think I'll go pull one of those right now. :-)
 

VIPR01

Well-Known Member
Joined
Mar 11, 2018
Threads
14
Messages
265
Reaction score
318
Location
Valhalla
Vehicle(s)
71 Gremlin
KiloBravo - I did the same with the ibird, just received a few different pads/mini mcguires cutting pads for the Nano also.

The Fine Line pen works great for paint chips, takes a steady hand. But, works as advertised!
Respect the time taken to do this process correctly! Looks fantastic
Sponsored

 
Status
Not open for further replies.


Top