Mikepol2
Well-Known Member
- Joined
- Jul 17, 2018
- Threads
- 140
- Messages
- 3,998
- Reaction score
- 7,125
- Location
- Pittsburgh, PA
- First Name
- Mike
- Vehicle(s)
- 2021 Mach 1, 2019 Ram 1500
- Thread starter
- #1
So I did some searches on how to remove the Mach 1 bumper cover but found nothing specific, and turns out there are differences between our cars and other Mustangs. Here is the way I would do it, knowing what I know now:
1) First get the car in the air and remove ten 7mm hex head screws from the belly pan. You’ll need about a 5 inch extension to reach four that are in recessed pockets. You don’t need to remove the one that holds the oil change door closed. Towards the very back, there is a plastic pushpin between two of the screws. When all screws have been removed pull down on the back of the belly pan to pull the push pin out. Here is the inside of the belly pan:

2) Remove push pins from each front wheel well. I have the HP car, so there are three that hold the front fender lip in place. There are seven others of a different style that hold the wheel well liner to the belly pan, two of them are on corners of the inlet of the air duct from the front grill:
3) Like the GT, use a 10 mm deep well socket with a universal joint and extensions to remove the two 10 mm bolts that hold the bumper cover to the front fender, there are two on each side. You can come in from the top. Then press down on the black plastic pushpin between them to remove the corner of the cover from the fender:
4) You should now be able to reach inside each corner and unplug the black connector leading to the turn signal:
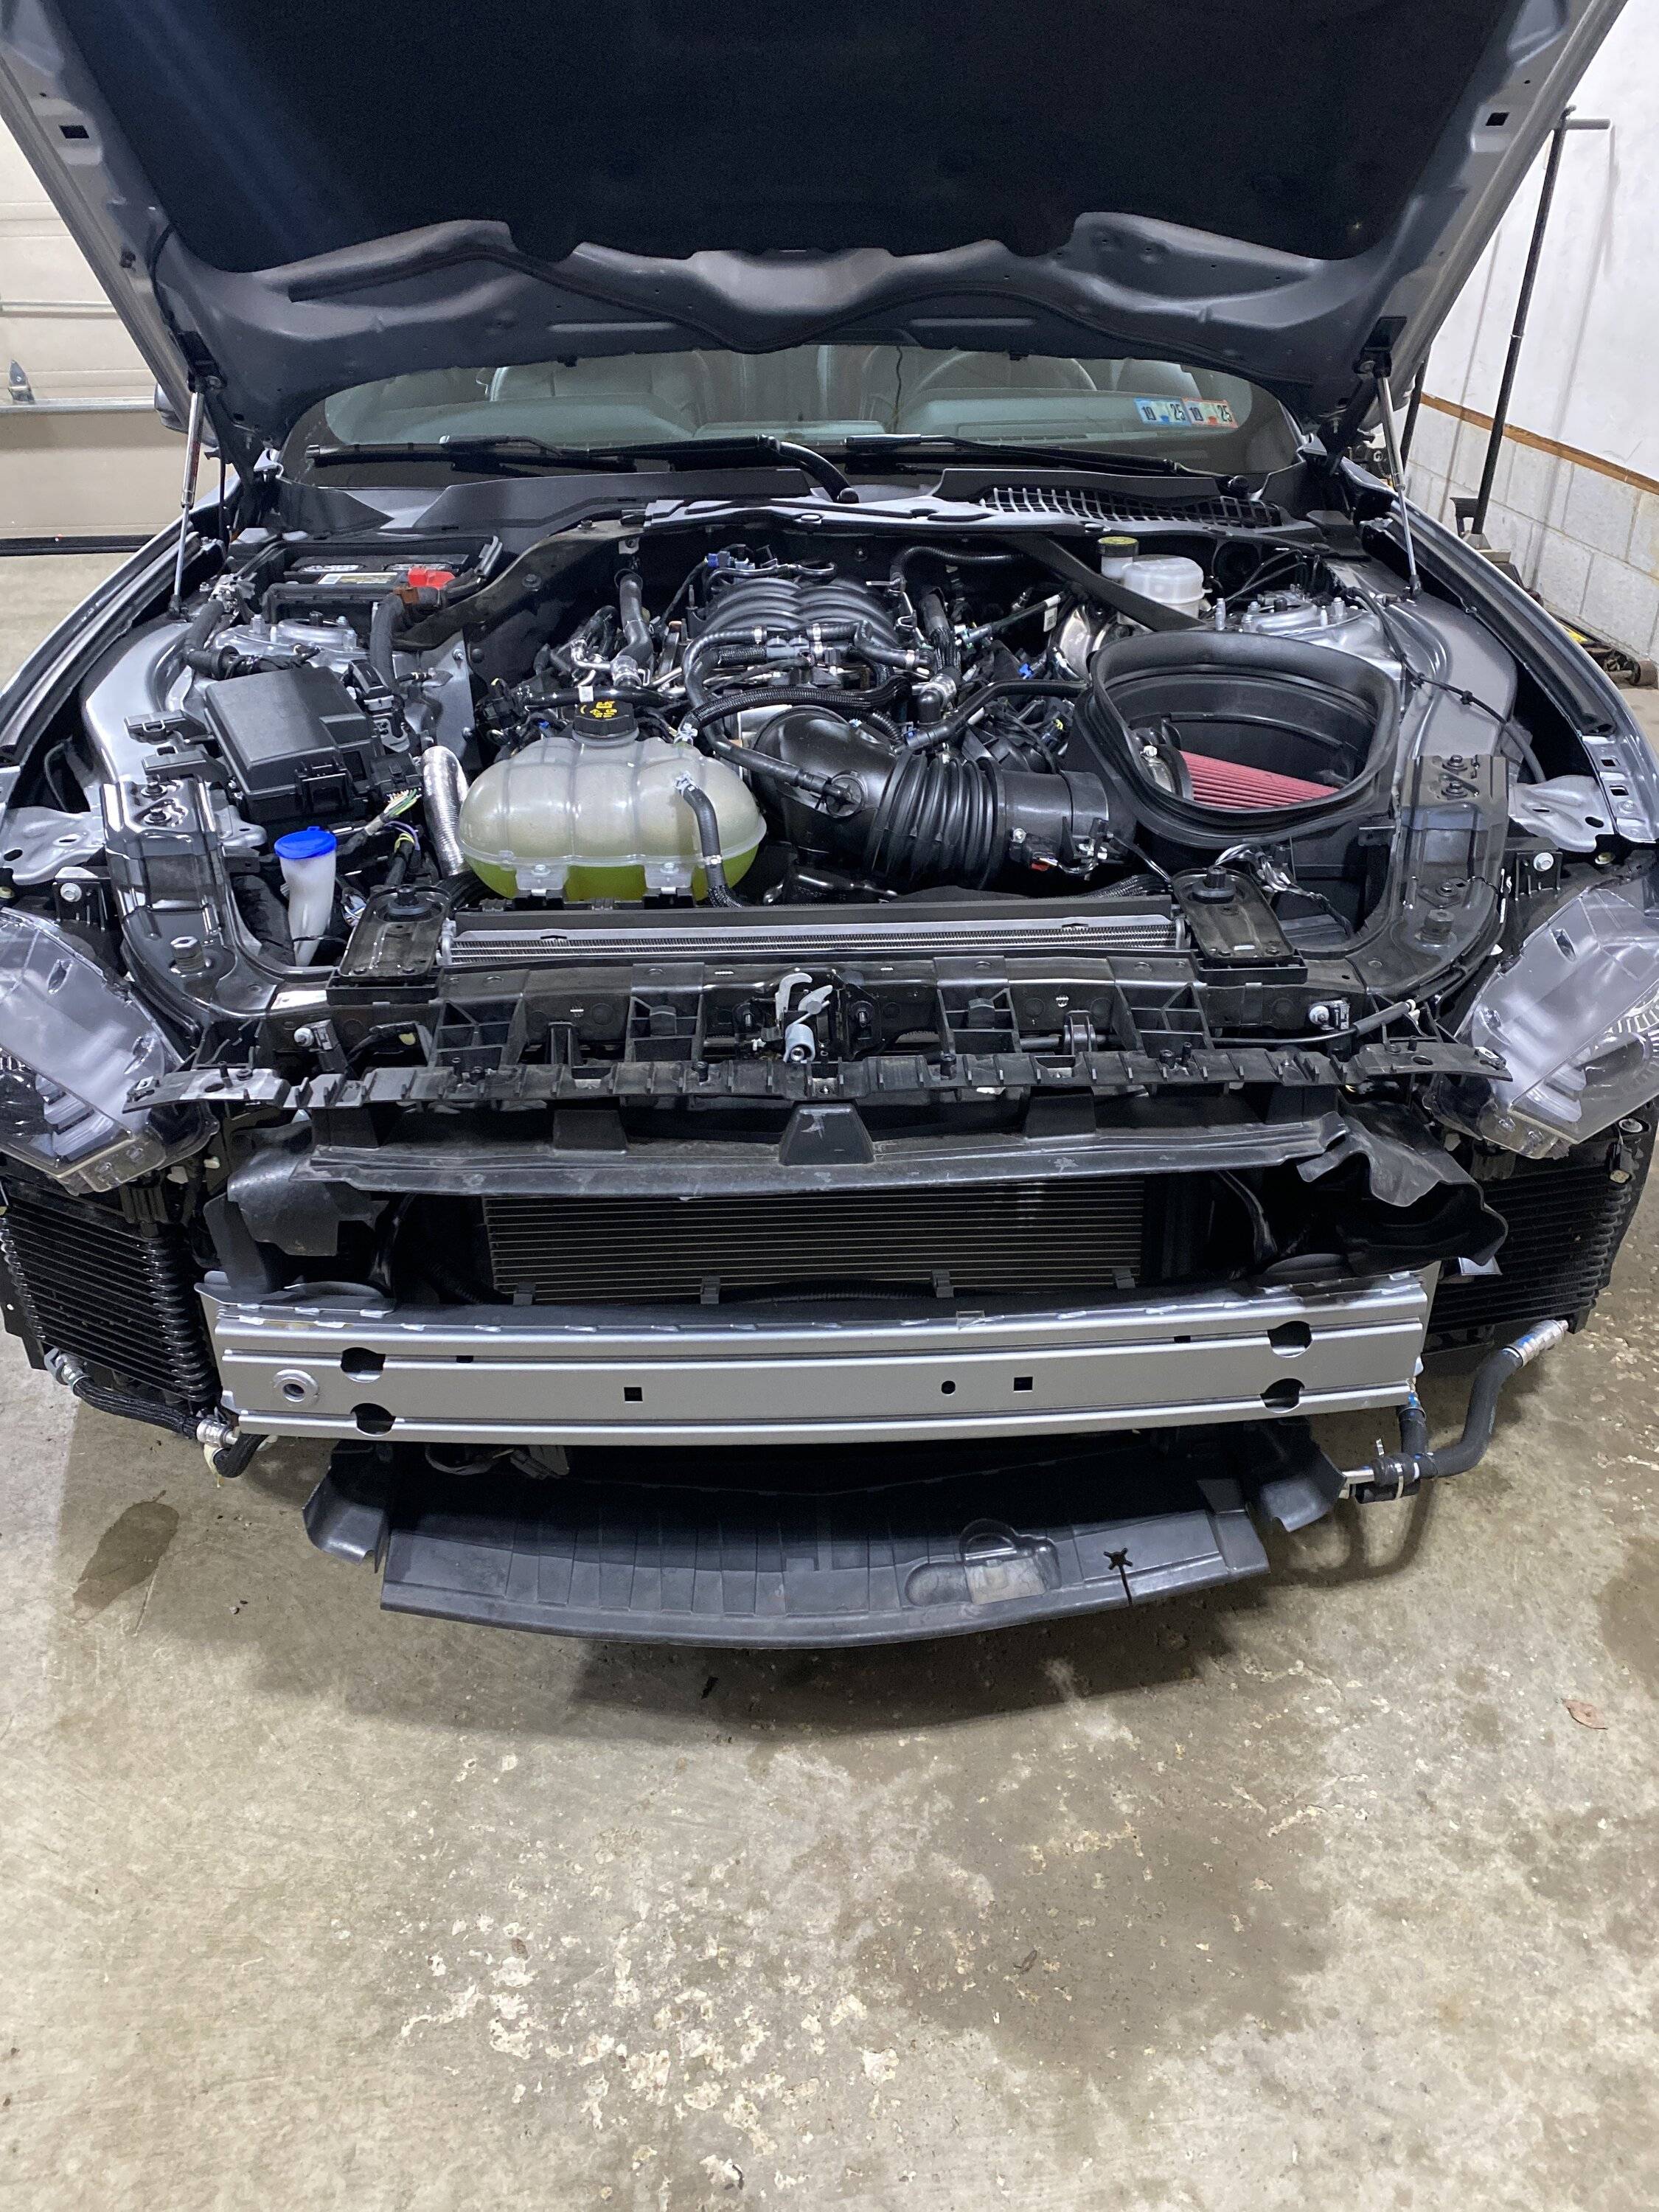
5) Lower the car to the ground and remove the shroud covering the radiator by removing eight pushpins:
6) At this point, the only thing holding the cover onto the car are eight screws under the shroud that you just removed. The two on the ends are 5.5 mm hex head (I used a 7/32 socket) and the other six are 8 mm hex:
7) Now carefully pry the top of the cover off the black pins on top of the radiator support and putting your hands in the fog light holes in the grill, lift the assembly away from the car.
The GT instructions include removing screws under the front splitter, but in my case, it was not required. I suspect it would not be required without the HP splitter either.
Hope someday someone finds this to be helpful so they don’t have to go through the ridiculousness that I did today!
1) First get the car in the air and remove ten 7mm hex head screws from the belly pan. You’ll need about a 5 inch extension to reach four that are in recessed pockets. You don’t need to remove the one that holds the oil change door closed. Towards the very back, there is a plastic pushpin between two of the screws. When all screws have been removed pull down on the back of the belly pan to pull the push pin out. Here is the inside of the belly pan:

2) Remove push pins from each front wheel well. I have the HP car, so there are three that hold the front fender lip in place. There are seven others of a different style that hold the wheel well liner to the belly pan, two of them are on corners of the inlet of the air duct from the front grill:

3) Like the GT, use a 10 mm deep well socket with a universal joint and extensions to remove the two 10 mm bolts that hold the bumper cover to the front fender, there are two on each side. You can come in from the top. Then press down on the black plastic pushpin between them to remove the corner of the cover from the fender:

4) You should now be able to reach inside each corner and unplug the black connector leading to the turn signal:

5) Lower the car to the ground and remove the shroud covering the radiator by removing eight pushpins:

6) At this point, the only thing holding the cover onto the car are eight screws under the shroud that you just removed. The two on the ends are 5.5 mm hex head (I used a 7/32 socket) and the other six are 8 mm hex:

7) Now carefully pry the top of the cover off the black pins on top of the radiator support and putting your hands in the fog light holes in the grill, lift the assembly away from the car.
The GT instructions include removing screws under the front splitter, but in my case, it was not required. I suspect it would not be required without the HP splitter either.
Hope someday someone finds this to be helpful so they don’t have to go through the ridiculousness that I did today!
Sponsored
Last edited: