
Sponsored

Lilmags500
Well-Known Member
- Joined
- Mar 29, 2020
- Threads
- 3
- Messages
- 158
- Reaction score
- 177
- Location
- Peoples Republic of Massachusetts
- First Name
- Jody
- Vehicle(s)
- 22 Mach 1 19 F350 20 Fusion Ti 19 Escape Ti
No tape on the bumper , just 3 push pins .....Appreciate the reply. As they are glued to the side fender they too are glued to the front bumper? So one cannot just detach. Unless the fender flare portion that runs over the bumper is just fastened to the bumper with the grommets?

ChitownStang
Well-Known Member
- Joined
- Mar 9, 2015
- Threads
- 81
- Messages
- 3,259
- Reaction score
- 4,198
- Location
- Chicago, North Shore
- Vehicle(s)
- 2021 Mach 1
- Vehicle Showcase
- 1
Looks really good, nice job Jody!Both sides done. Passenger side was easier than I thought. Had to drill a small hole on the very left side on the delete (left of the fog light hole) as there is a clip there as well. So able to pull it to snap close.

So after all that is it as easy as removing the top plastic above the radiator and taking blanks off, drilling and reinstalling?
Do you have that template you can share?
It would be cool to do oval shapes to match the grills
OP
OP

IanKar
Well-Known Member
- Thread starter
- #19
I'll share shortly. But yes, remove top radiator plastic cover. I saw this link on youtube.Looks really good, nice job Jody!
So after all that is it as easy as removing the top plastic above the radiator and taking blanks off, drilling and reinstalling?
Do you have that template you can share?
It would be cool to do oval shapes to match the grills
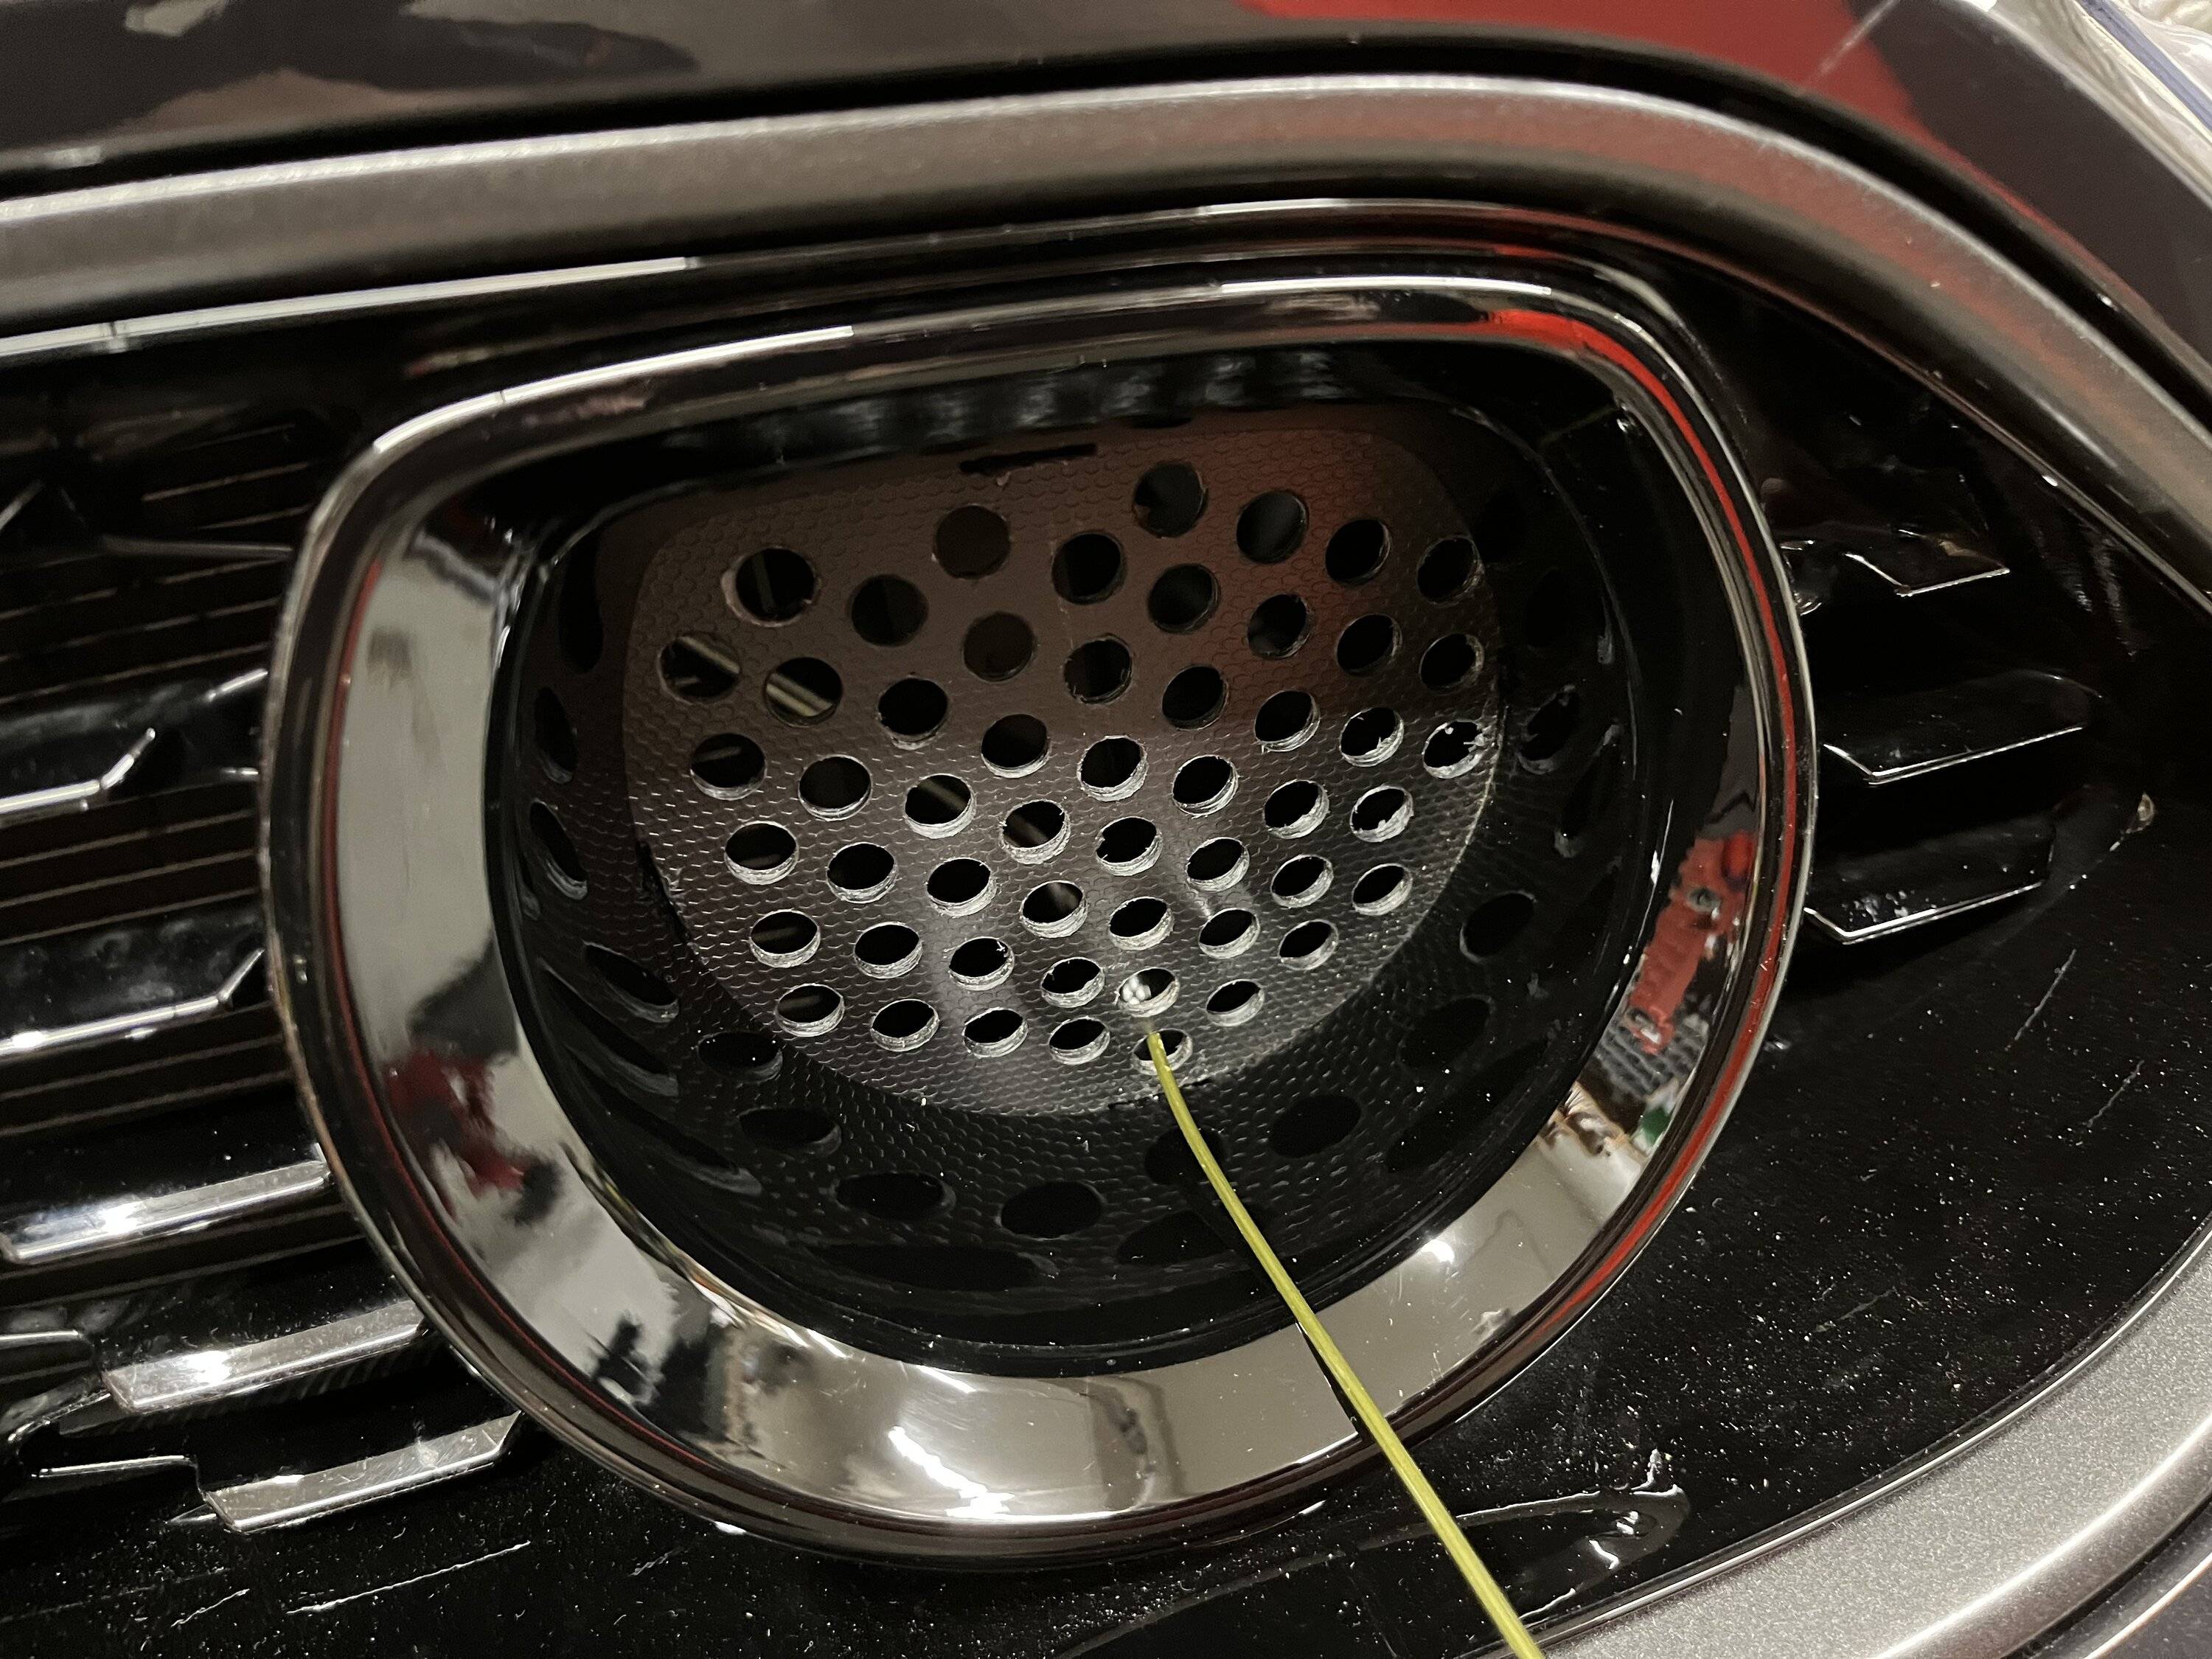
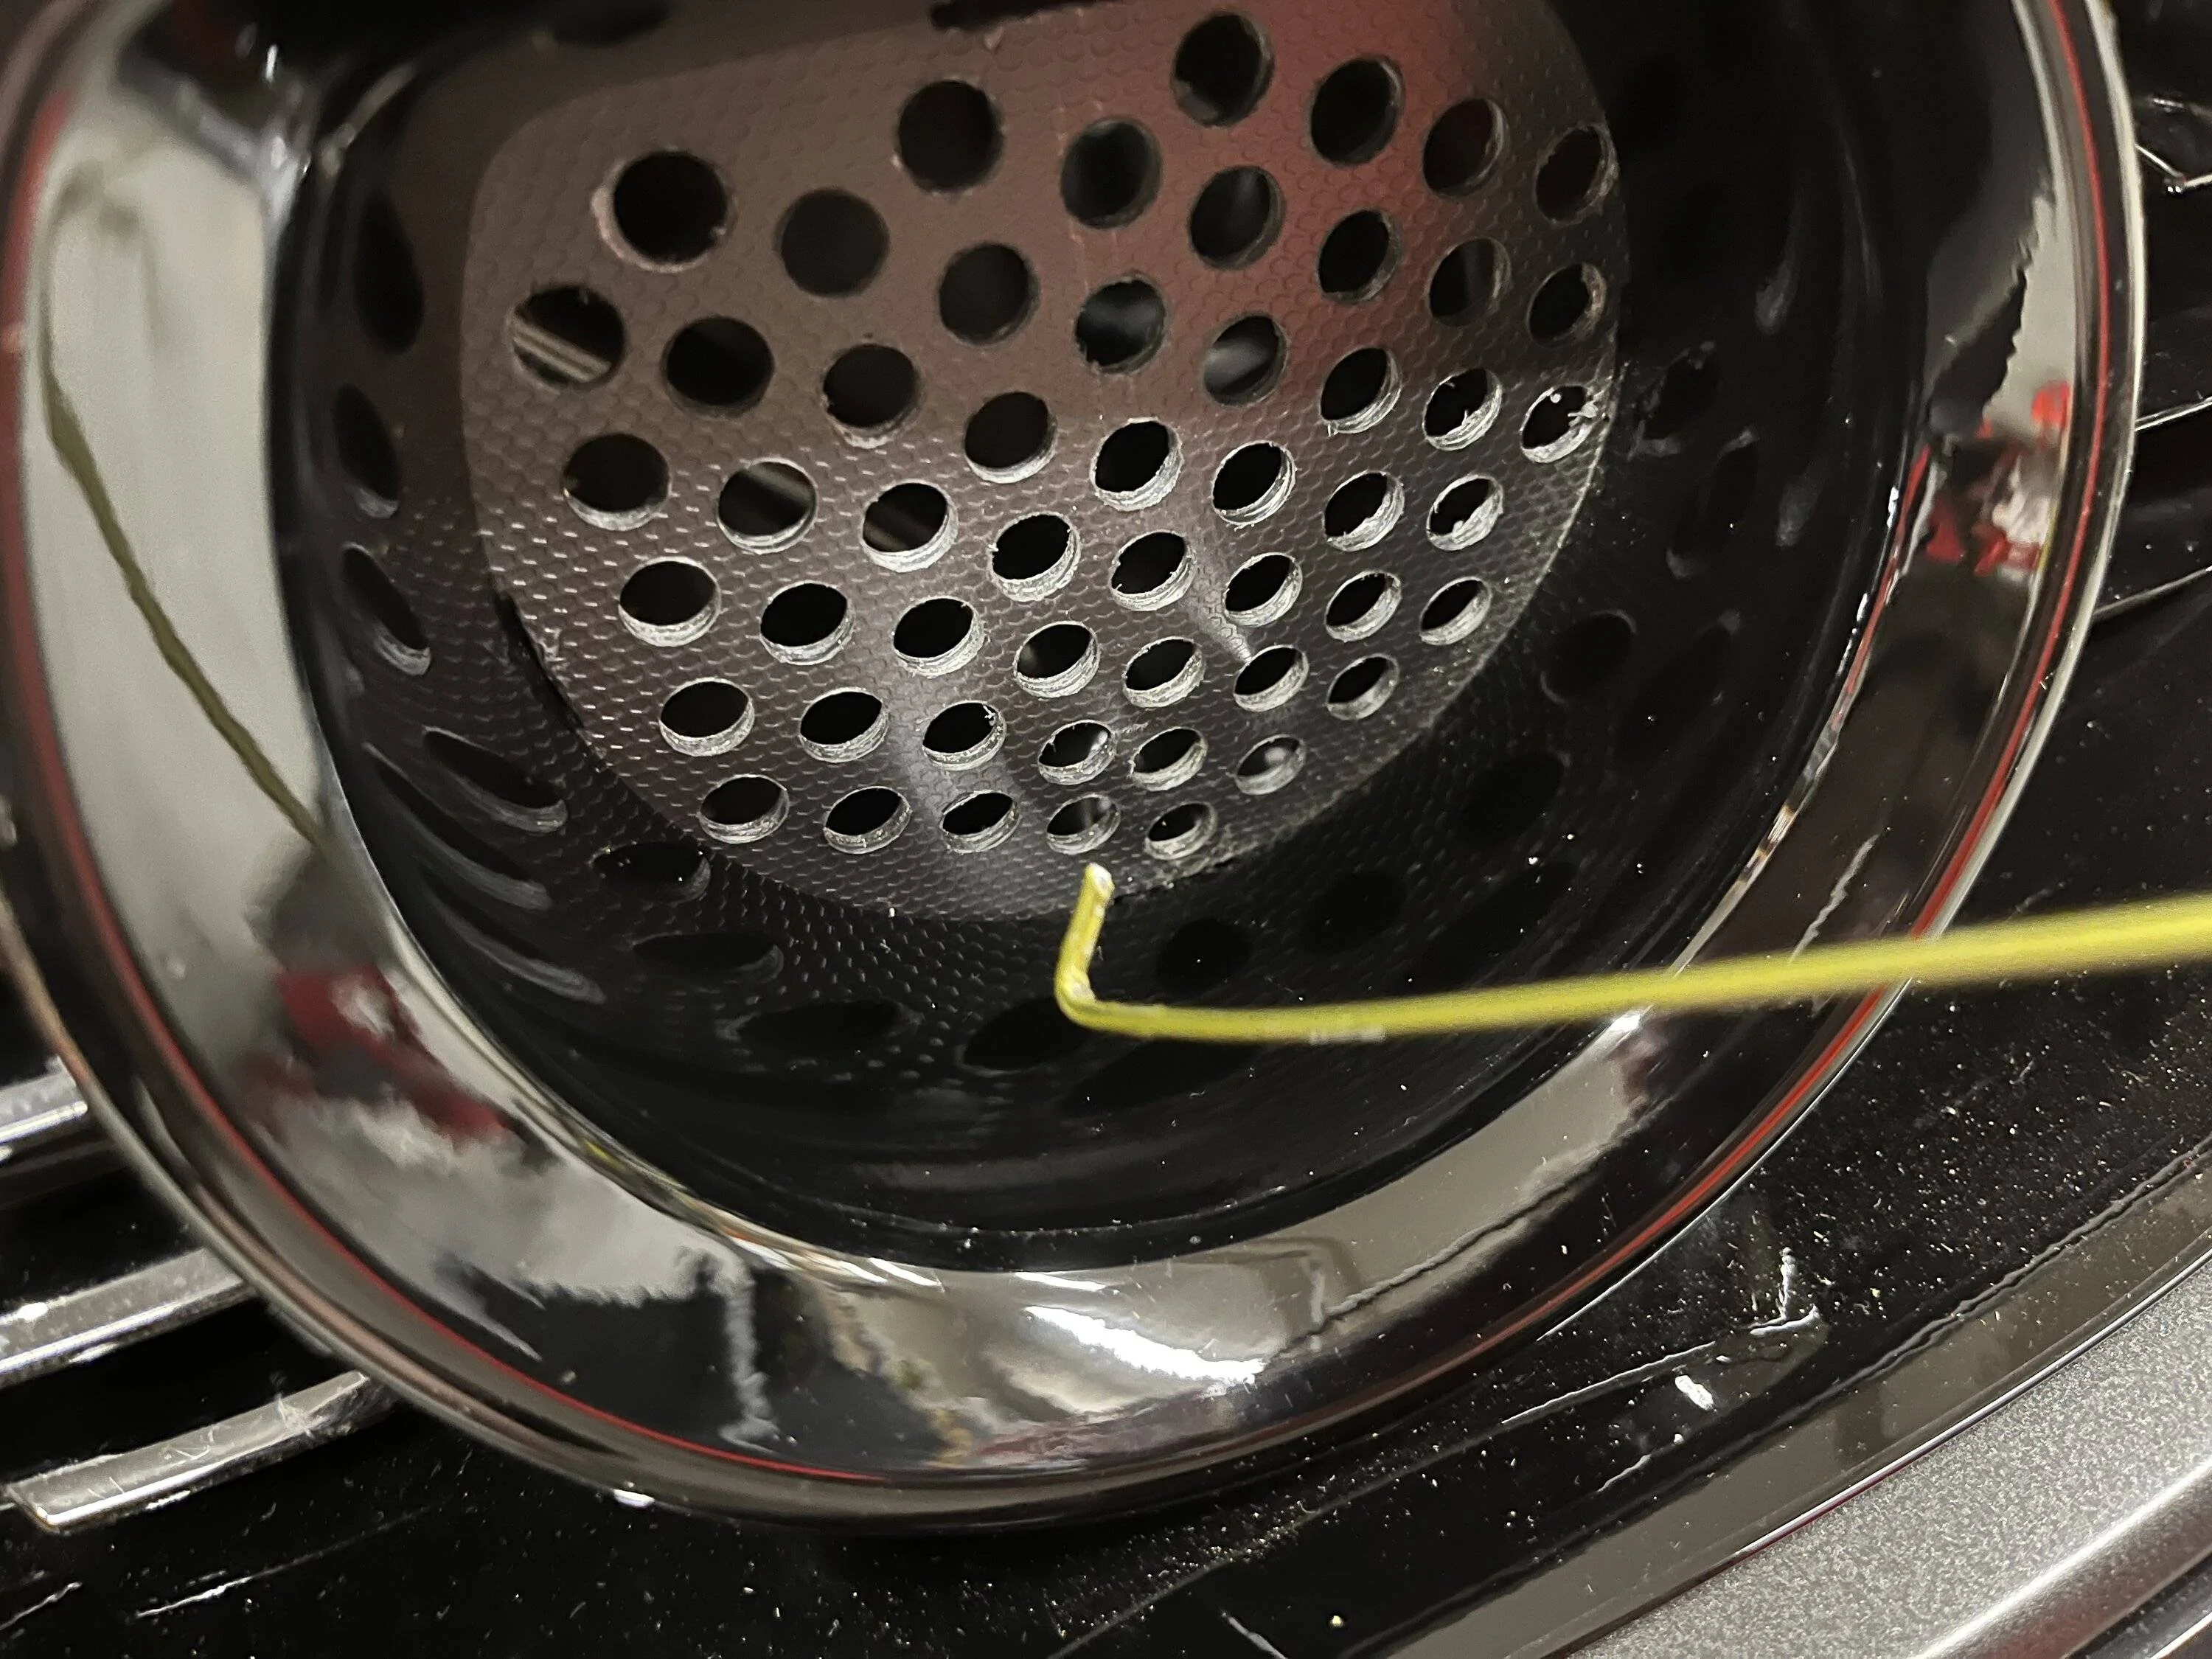
Drill the deletes and then reinsert them in reverse order of how you removed. Position them in place and using the drilled holes, put a coat hanger wire with small bend 90deg on the end and feed through the hole closest to the blank clip and pull towards you until it clips in place. Repeat for the other clips. For the passenger side, the fog light delete is bigger. There is a clip on the left side from the fog light hole (you'll see this in the video link) and I drilled small hole above the clip so I could also pull it closed.
ChitownStang
Well-Known Member
- Joined
- Mar 9, 2015
- Threads
- 81
- Messages
- 3,259
- Reaction score
- 4,198
- Location
- Chicago, North Shore
- Vehicle(s)
- 2021 Mach 1
- Vehicle Showcase
- 1
Damn, That does not look easy to get back in!
Sponsored
OP
OP
IanKar
Well-Known Member
- Thread starter
- #21
It was pretty easy.Damn, That does not look easy to get back in!
Here's the link to the template I used.
https://www.accurateperforating.com/sites/default/files/RS089.pdf
OP
OP
IanKar
Well-Known Member
- Thread starter
- #22
Using the paper template, I cut it to fit into the round groove of the delete. This stops if from rotating and stays pretty well in place. Put the delete like this on a bench drill and used 3mm drill to pilot drill each circle. in the center. Just estimating the center of each small circle. When drilling, I pressed down with my left hand and fingers on the template next to the hole that I was drilling so it would not rip up with the drill. Once I got the pilot holes done, I followed up with a 9.5mm (or 10) drill and drilled through each pilot hole.Damn, That does not look easy to get back in!
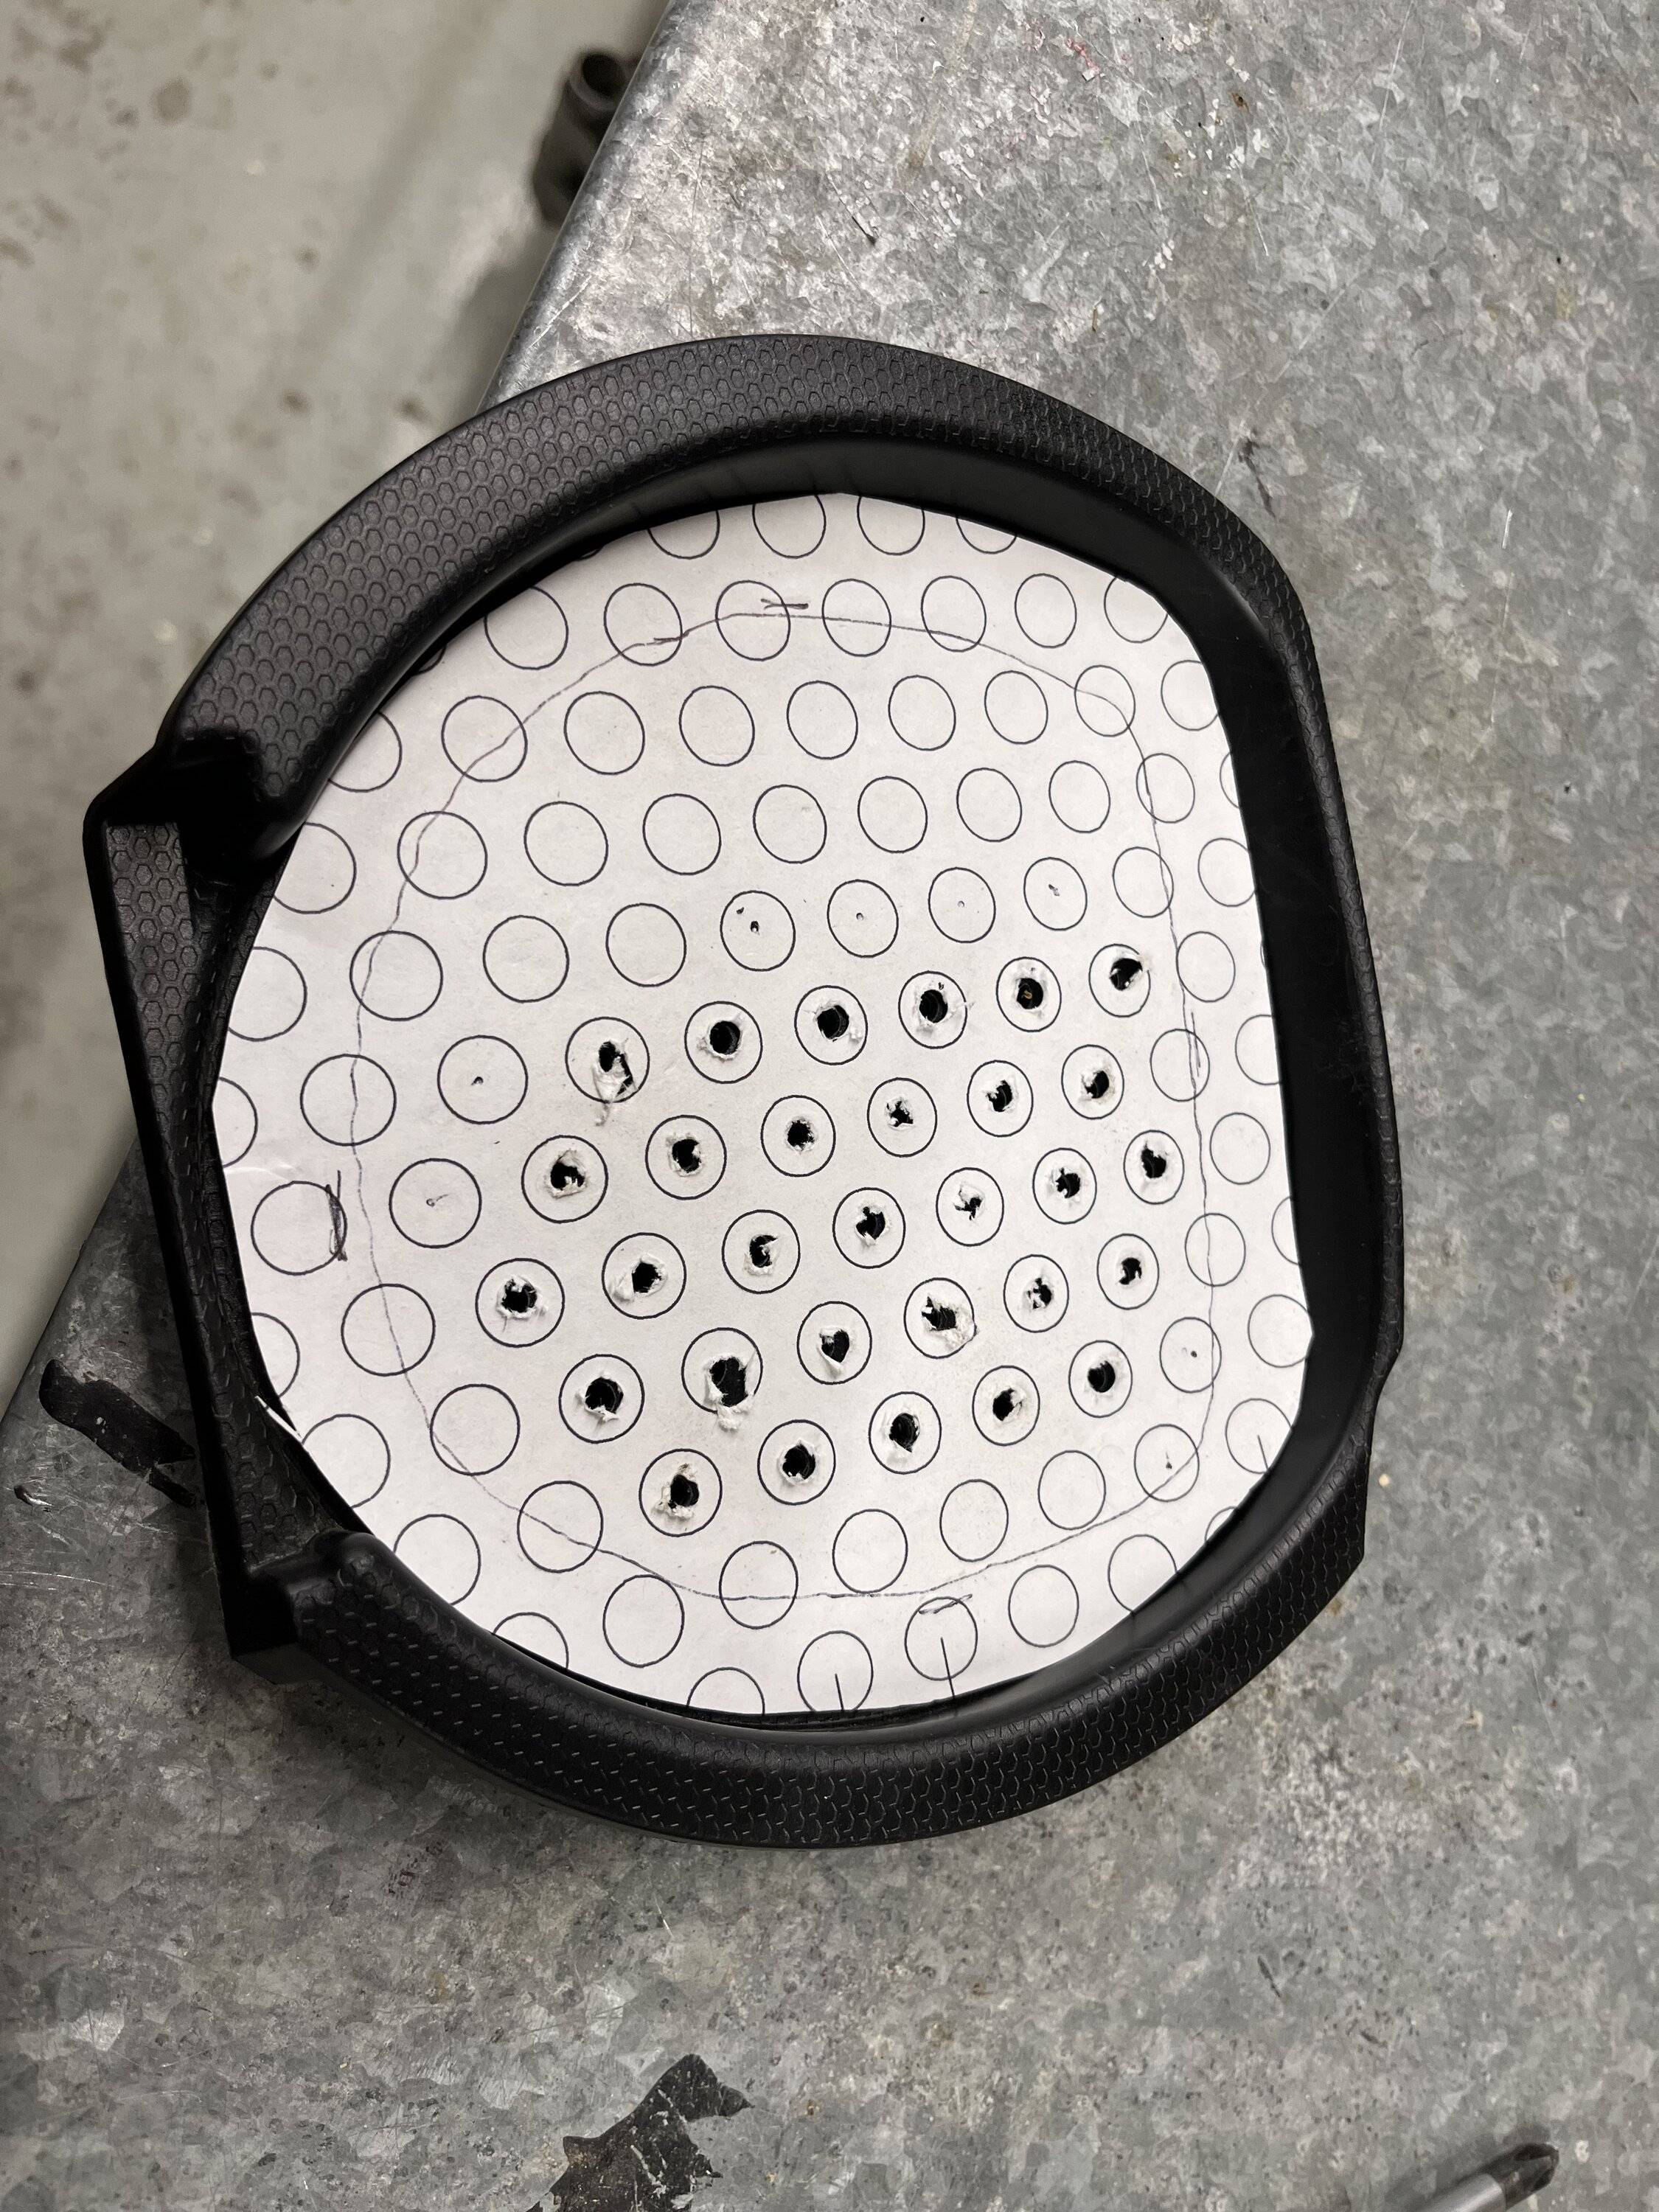
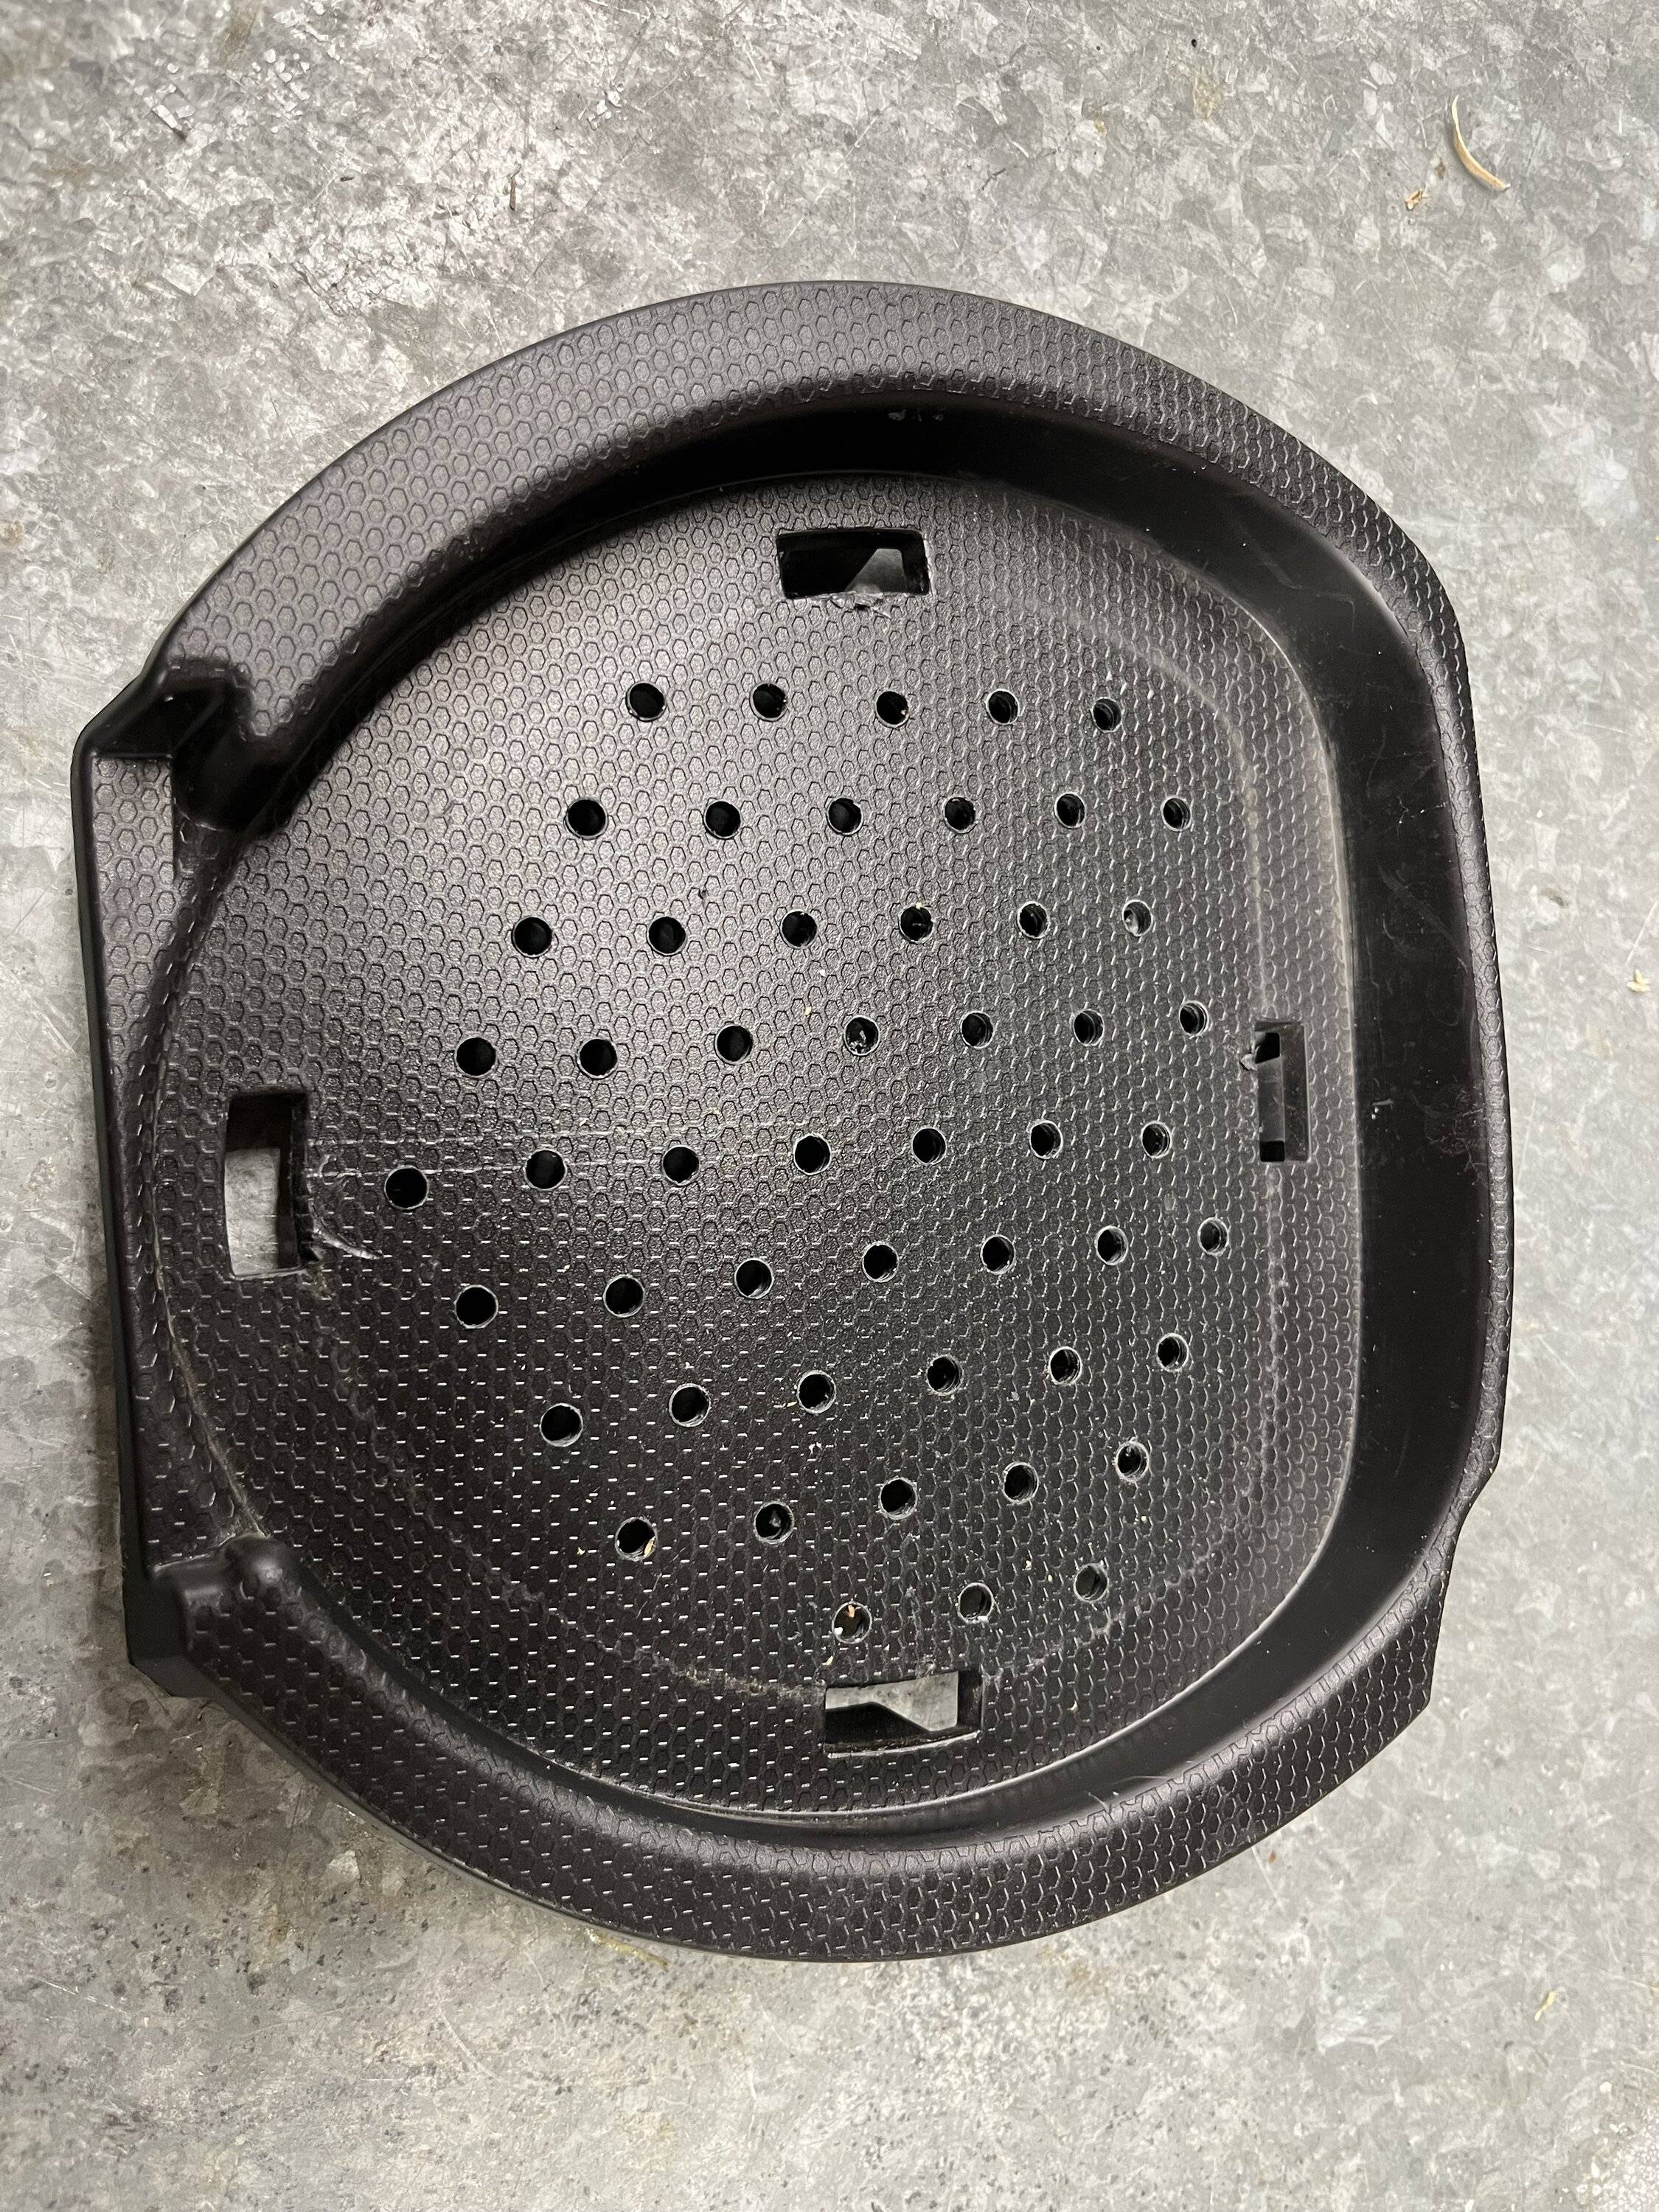
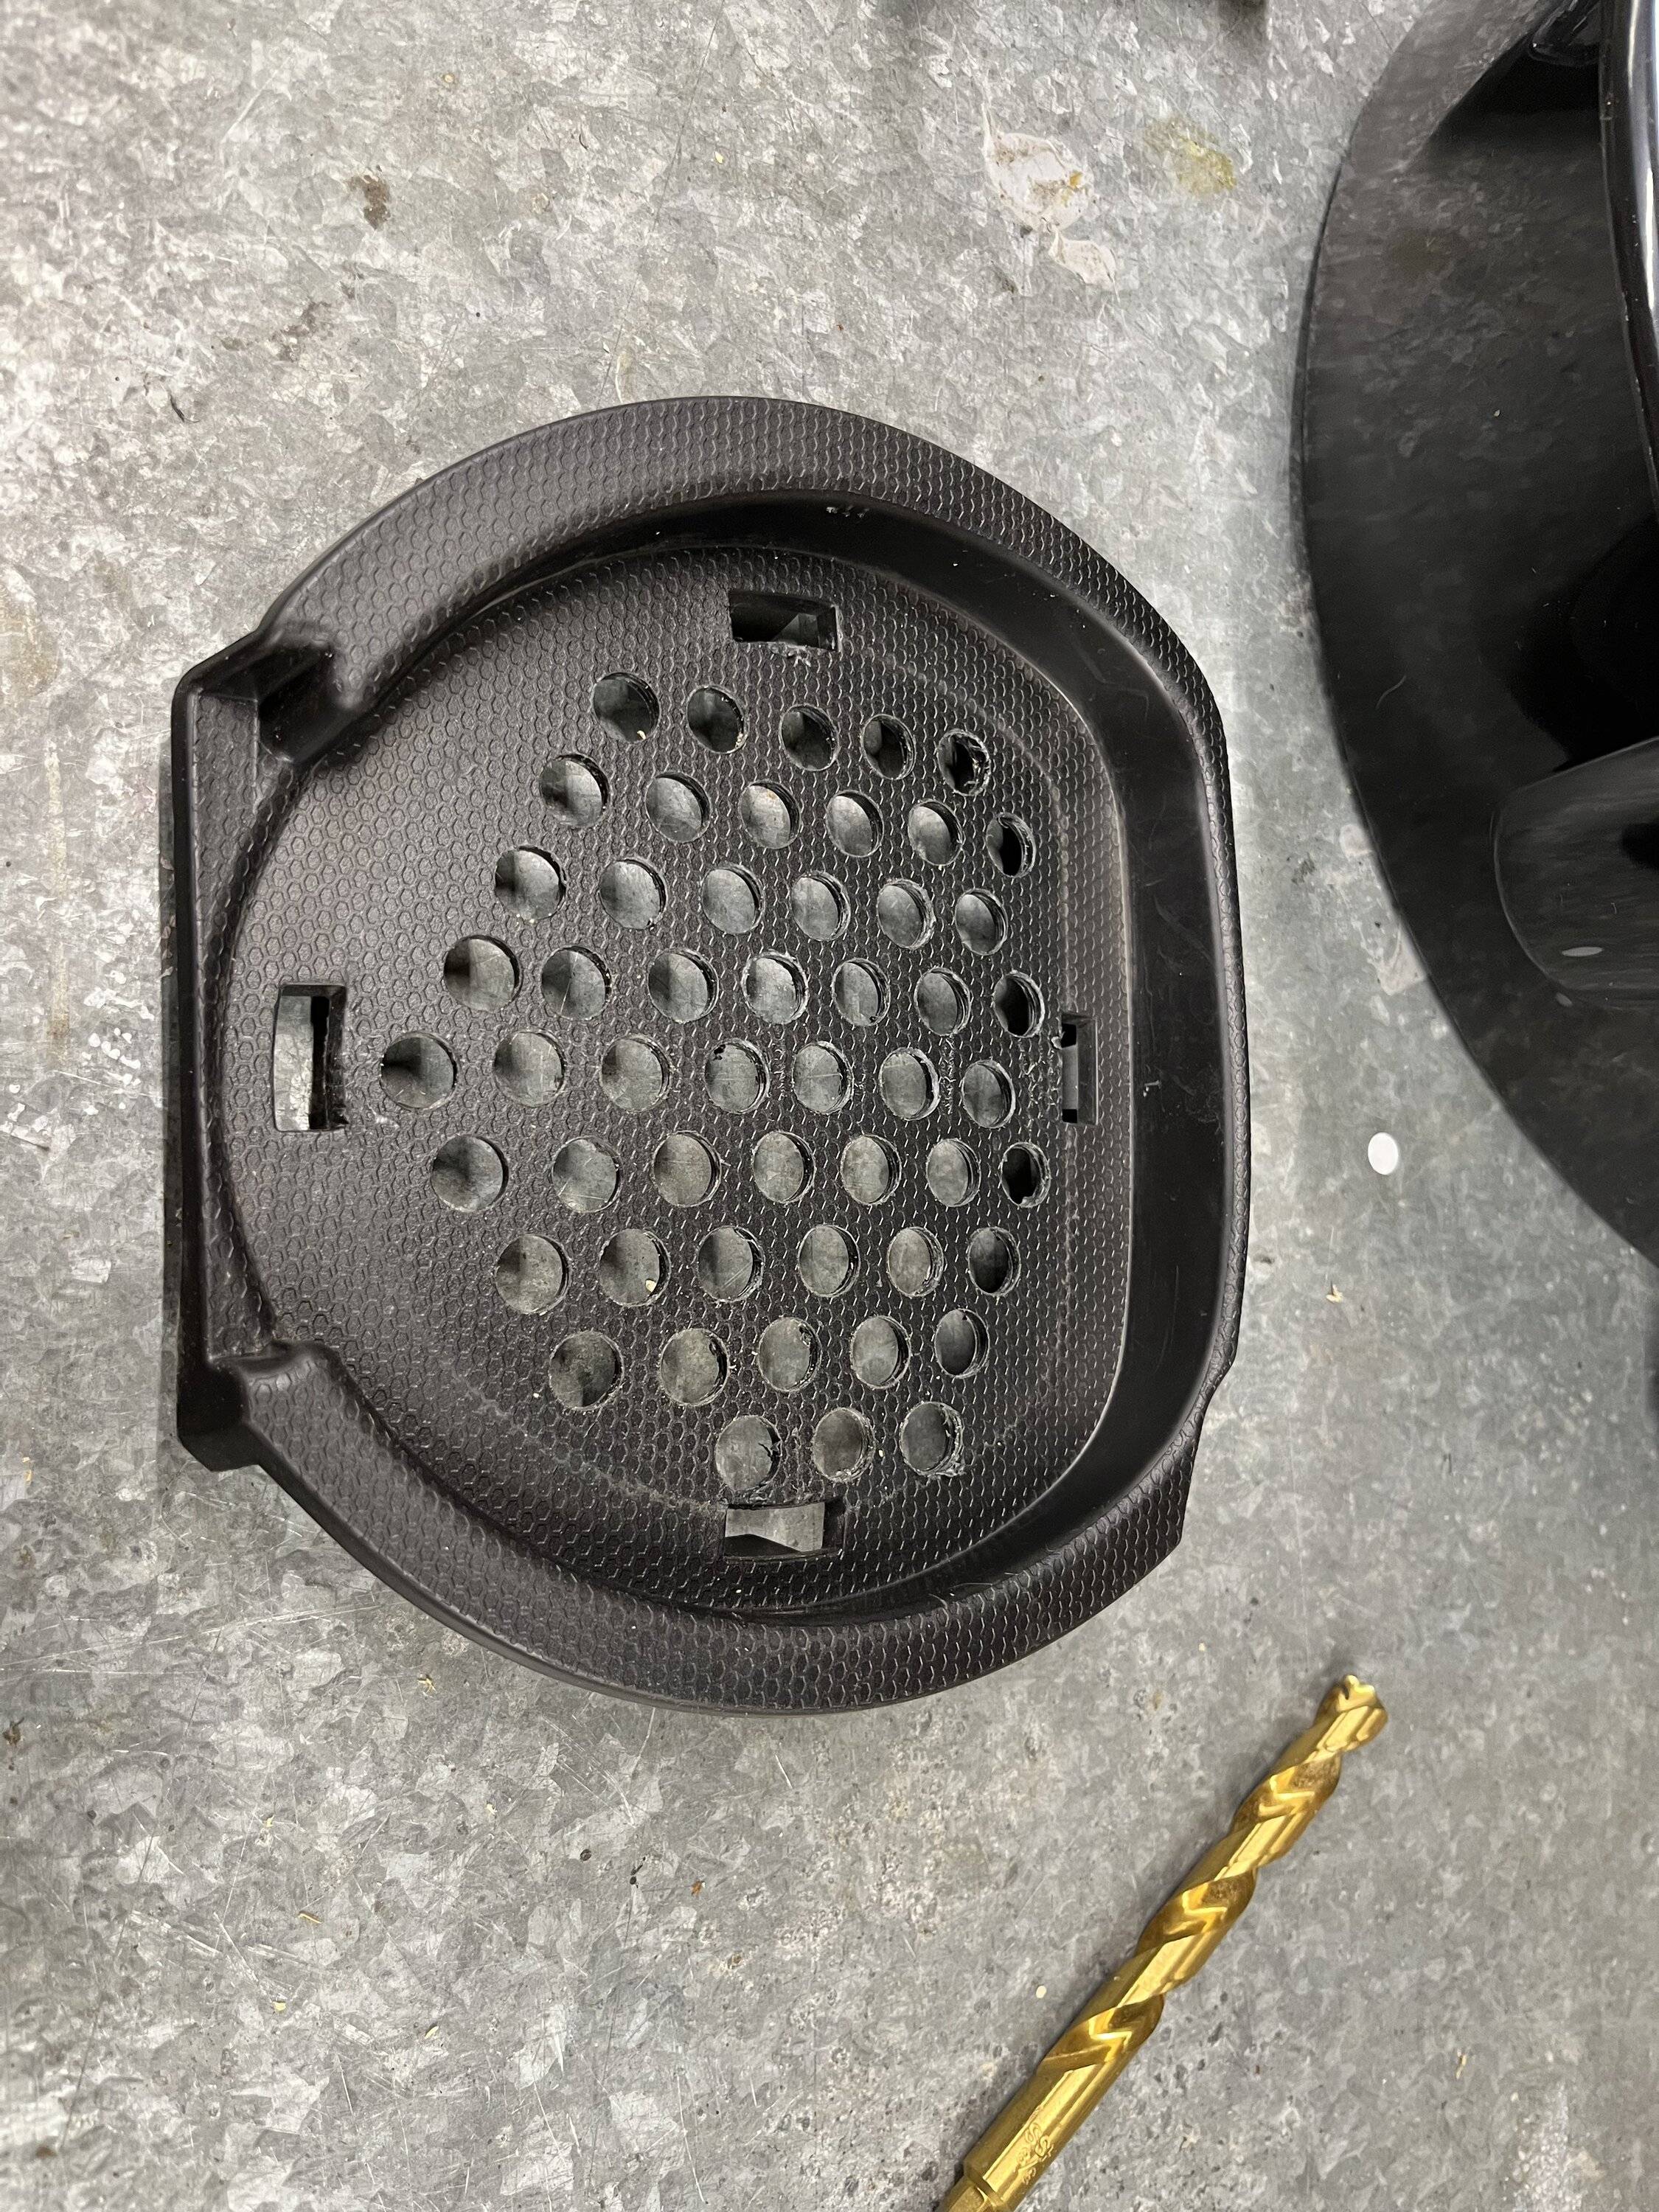
OP
OP
IanKar
Well-Known Member
- Thread starter
- #23
It's pretty easy to put these back. Slip them through the top, catch it with your one hand through the fog light hole, and guide it to almost exactly where it should be. I use a long screw driver and the wire hook. Once it in line, then put the wire through the hole closet to the clip, and pull it and it snaps into place. Repeat with the other clips.Damn, That does not look easy to get back in!
ChitownStang
Well-Known Member
- Joined
- Mar 9, 2015
- Threads
- 81
- Messages
- 3,259
- Reaction score
- 4,198
- Location
- Chicago, North Shore
- Vehicle(s)
- 2021 Mach 1
- Vehicle Showcase
- 1
Thanks for the detailed explanation Ian! I think I may have to do this once it warms up some.Using the paper template, I cut it to fit into the round groove of the delete. This stops if from rotating and stays pretty well in place. Put the delete like this on a bench drill and used 3mm drill to pilot drill each circle. in the center. Just estimating the center of each small circle. When drilling, I pressed down with my left hand and fingers on the template next to the hole that I was drilling so it would not rip up with the drill. Once I got the pilot holes done, I followed up with a 9.5mm (or 10) drill and drilled through each pilot hole.

Notice any difference when driving?
OP
OP
IanKar
Well-Known Member
- Thread starter
- #25
Sorry too soon to let you know. I hope it does and it' supposed to according to some track people I know. It does make sense though. The driver side leads straight into the air filter. So more HP? maybe by 1 HP - I dunnoThanks for the detailed explanation Ian! I think I may have to do this once it warms up some.
Notice any difference when driving?
Sponsored


