CarbonZ
Well-Known Member
- Joined
- Mar 14, 2021
- Threads
- 7
- Messages
- 309
- Reaction score
- 470
- Location
- Raleigh, NC
- Vehicle(s)
- 2017 GT350
- Thread starter
- #1
Alright guys, this will not be a complete guide. More of an addendum to instructions (which are quite good). There are however many things not in the instructions that need to be addressed and or added to. I will break those down as I tackle specific parts. Also, this may not be in specific install order. More of a helpful guide to assist others with the install.
I will note that this is a very niche mod, and while it is just a bolt on, there is much more to it than that. This is however not your average CF wing. And to be honest most will not need it/want it. I myself probably do not need this. I do not track my car enough to warrant it, or have the skill set to take full advantage of it at this time. I am hoping too though. While it does come preprogrammed of sort, the user needs to fine tune the settings.
If you get them wrong you could potentially make the vehicle unsafe to oneself or to those around them.
Victor Racing link
GT350T - 70" Smart Active Aero Wing | Victor Racing
Vid of it in action from YT fordfanboi. Huge thanks to him as well. He answered a ton of my question both pre, and post order
Circuit of the Americas 16 Shelby GT350 2:27.5 - YouTube

The active wing has five levels of adjustment that it does on the fly. Three levels of downforce dependent on speed, DRS, and the all interesting airbrakes. There is a street mode, as well as track of course. The angles of attack and g forces needed for airbrakes are adjusted based on those settings. The rest is done via speed settings. There is also a show mode for you car show guys that will adjust the wing while parked through the levels. Pretty cool, but will want a spare batt for shows (or so I’m told)
The full instructions as well as a few install videos are on their website, and if you considering this, I highly recommend you review those before you place your order. Nothing in the install is particularly hard, but there are things that may be beyond your comfort zone, and I would not want a random shop installing this. (I will get more into that later). Also, I am just an avg. guy that wrenches on their car from time to time. I am not a mechanic/body guy or anything of the sort. If my recommendations are countered by someone who knows better, please take that into consideration. There are so many ways to do things I do not claim at all that the way I did things are the best by any means.
So lets say you read this far and say to yourself this sounds really interesting…well then let's get into it
First off here is a list of things you will need not included in your kit in no particular order
-Sanding blocks
-Vinyl (color of your choosing)
-Thread tap m6x1
-14 gauge wire
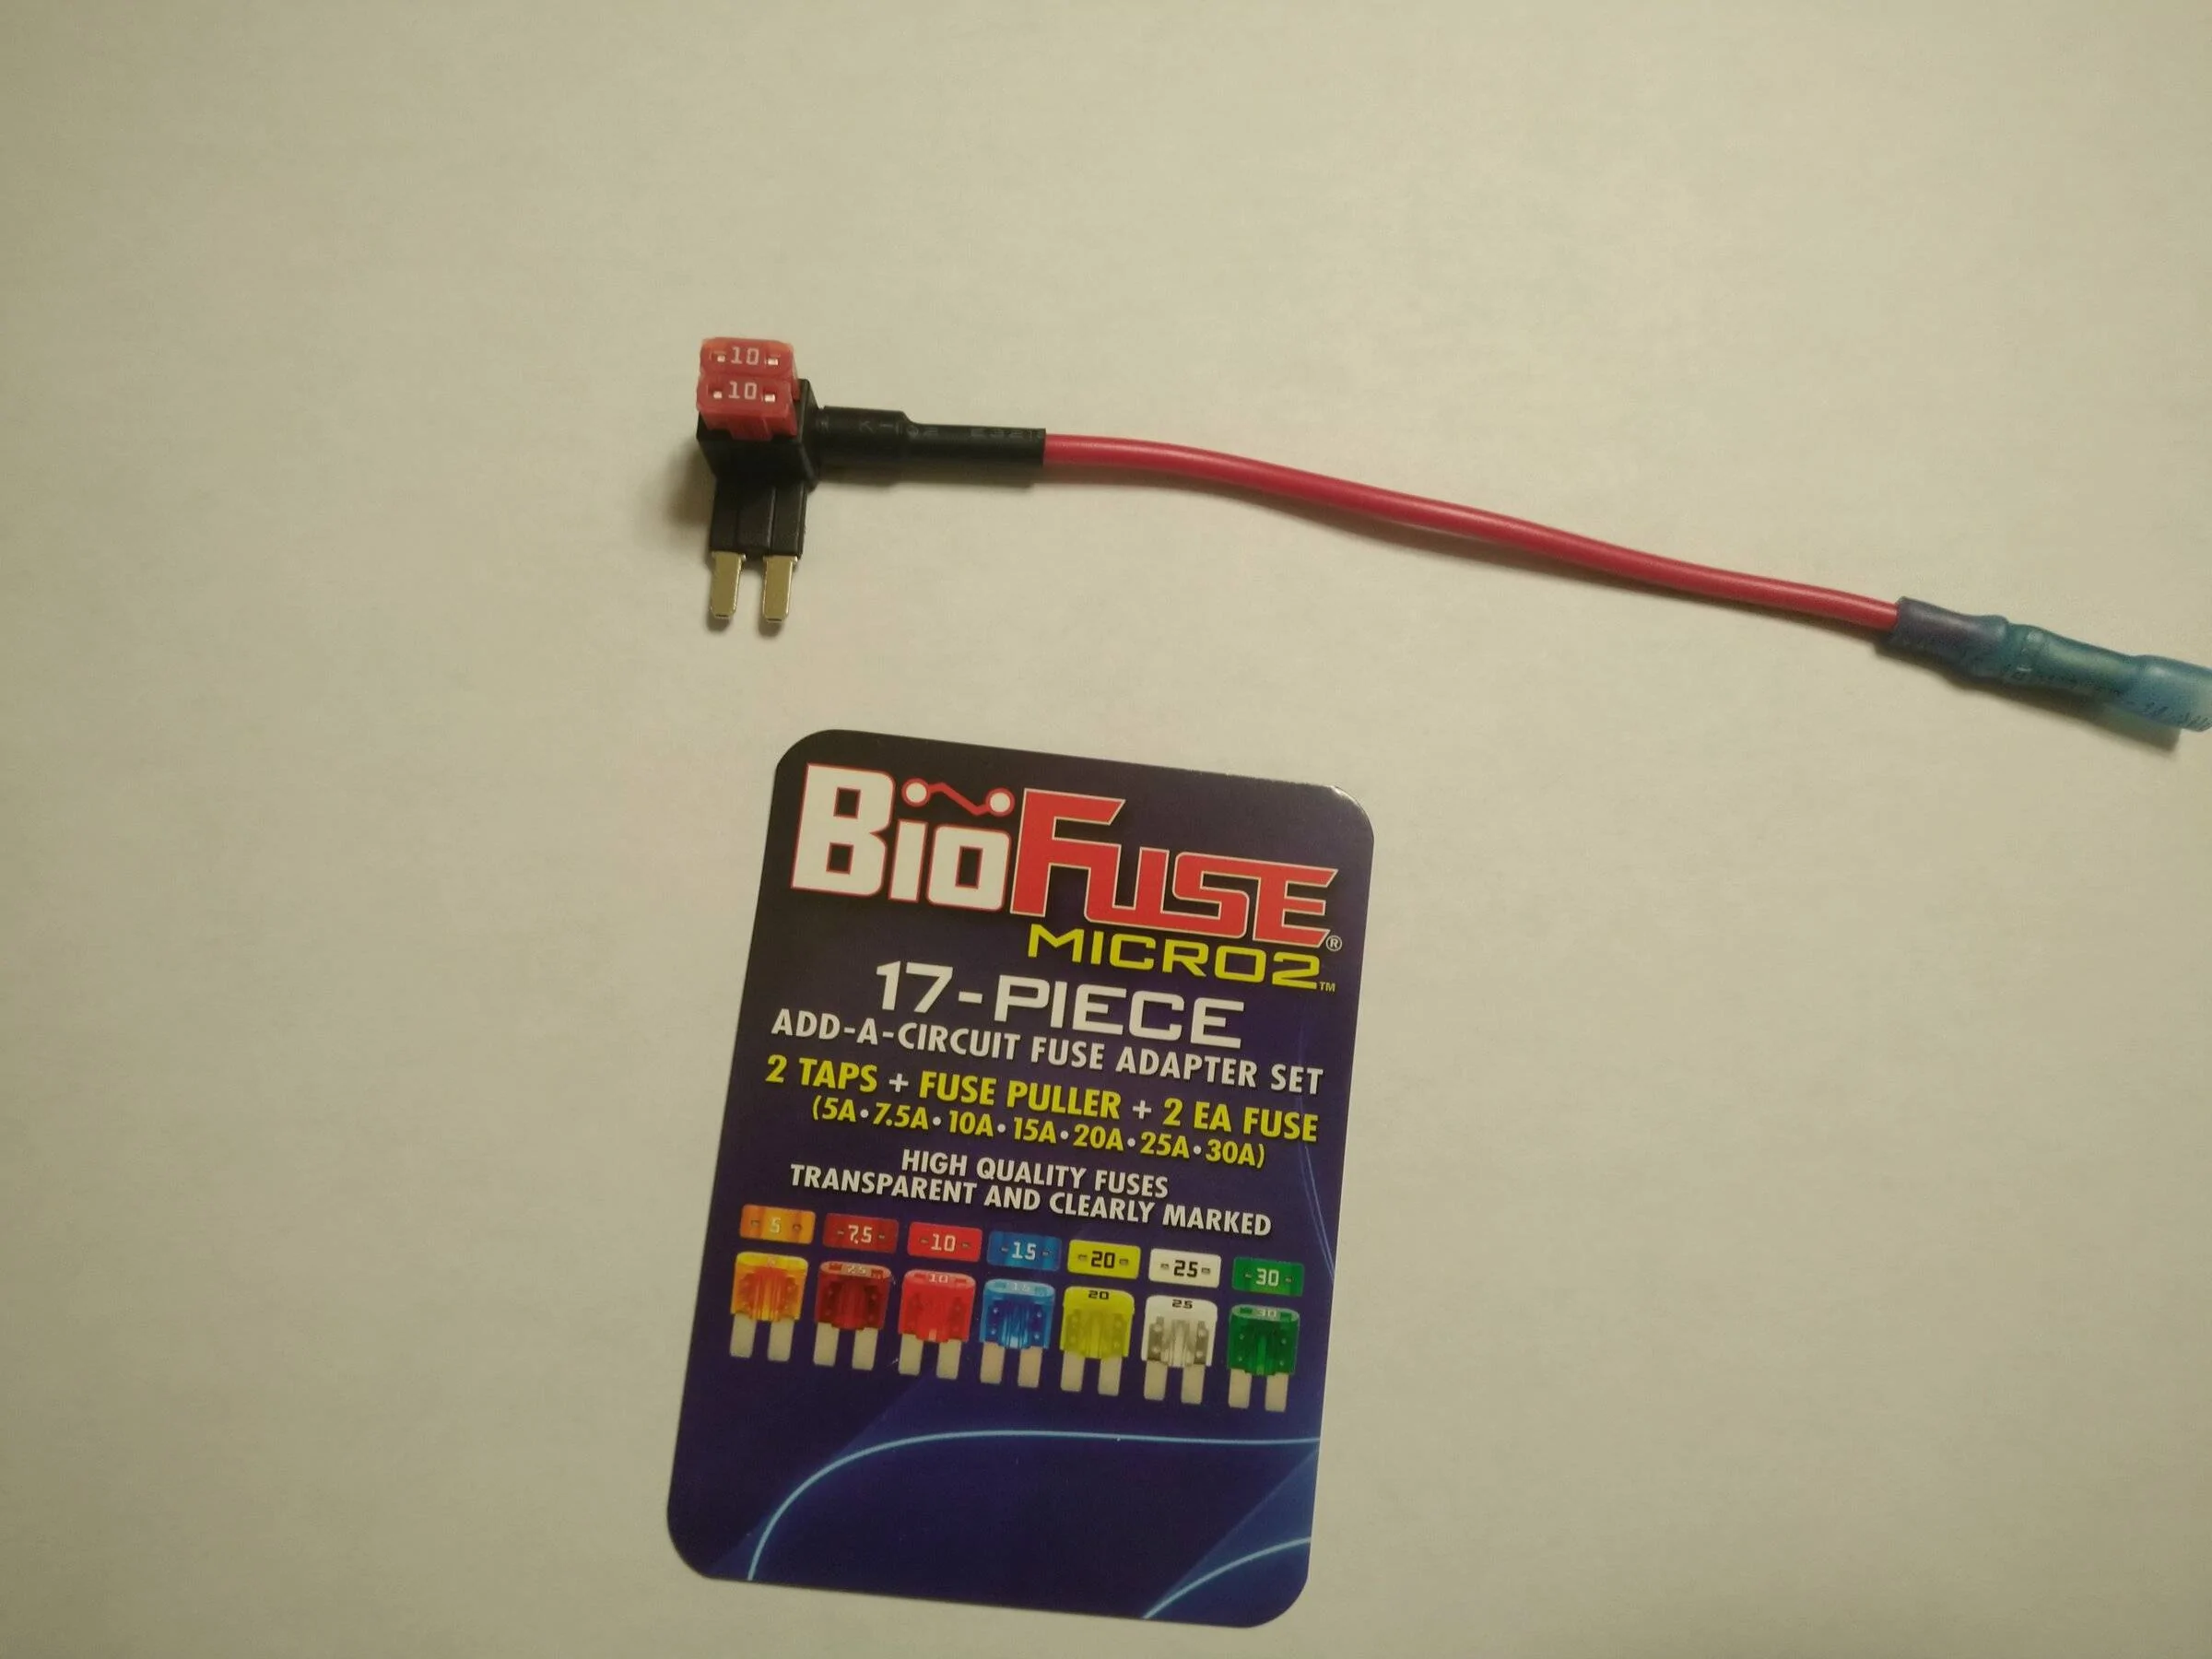
-Fuse tap, or relay
-in line fuse
-Tape measure ( a good one)
-RTV (color of your choosing, I used clear)
-zip ties
-blue tape
-18g wire assorted colors (you may need to extend actuator wiring depends how you run them)
-Soldering iron or butt connectors
-electrical tape
-wire cutting tools
-Shop rags
-step bit up to at least ¾’
-Assorted grommets
-center punch
-mounting solution for remote (phone style windshield mount, trunk mount, or custom…your choosing)
-20ft cat7 cable (depending on where you plan to mount the remote. Kit includes a 10ft cable)
-cable sleeving
-wd40
-locktight
-metal files (basic set of multiple sizes)
-panel pry tools, snap remover
-dremal, hack saw or whatever you prefer (bolts need to be trimmed)
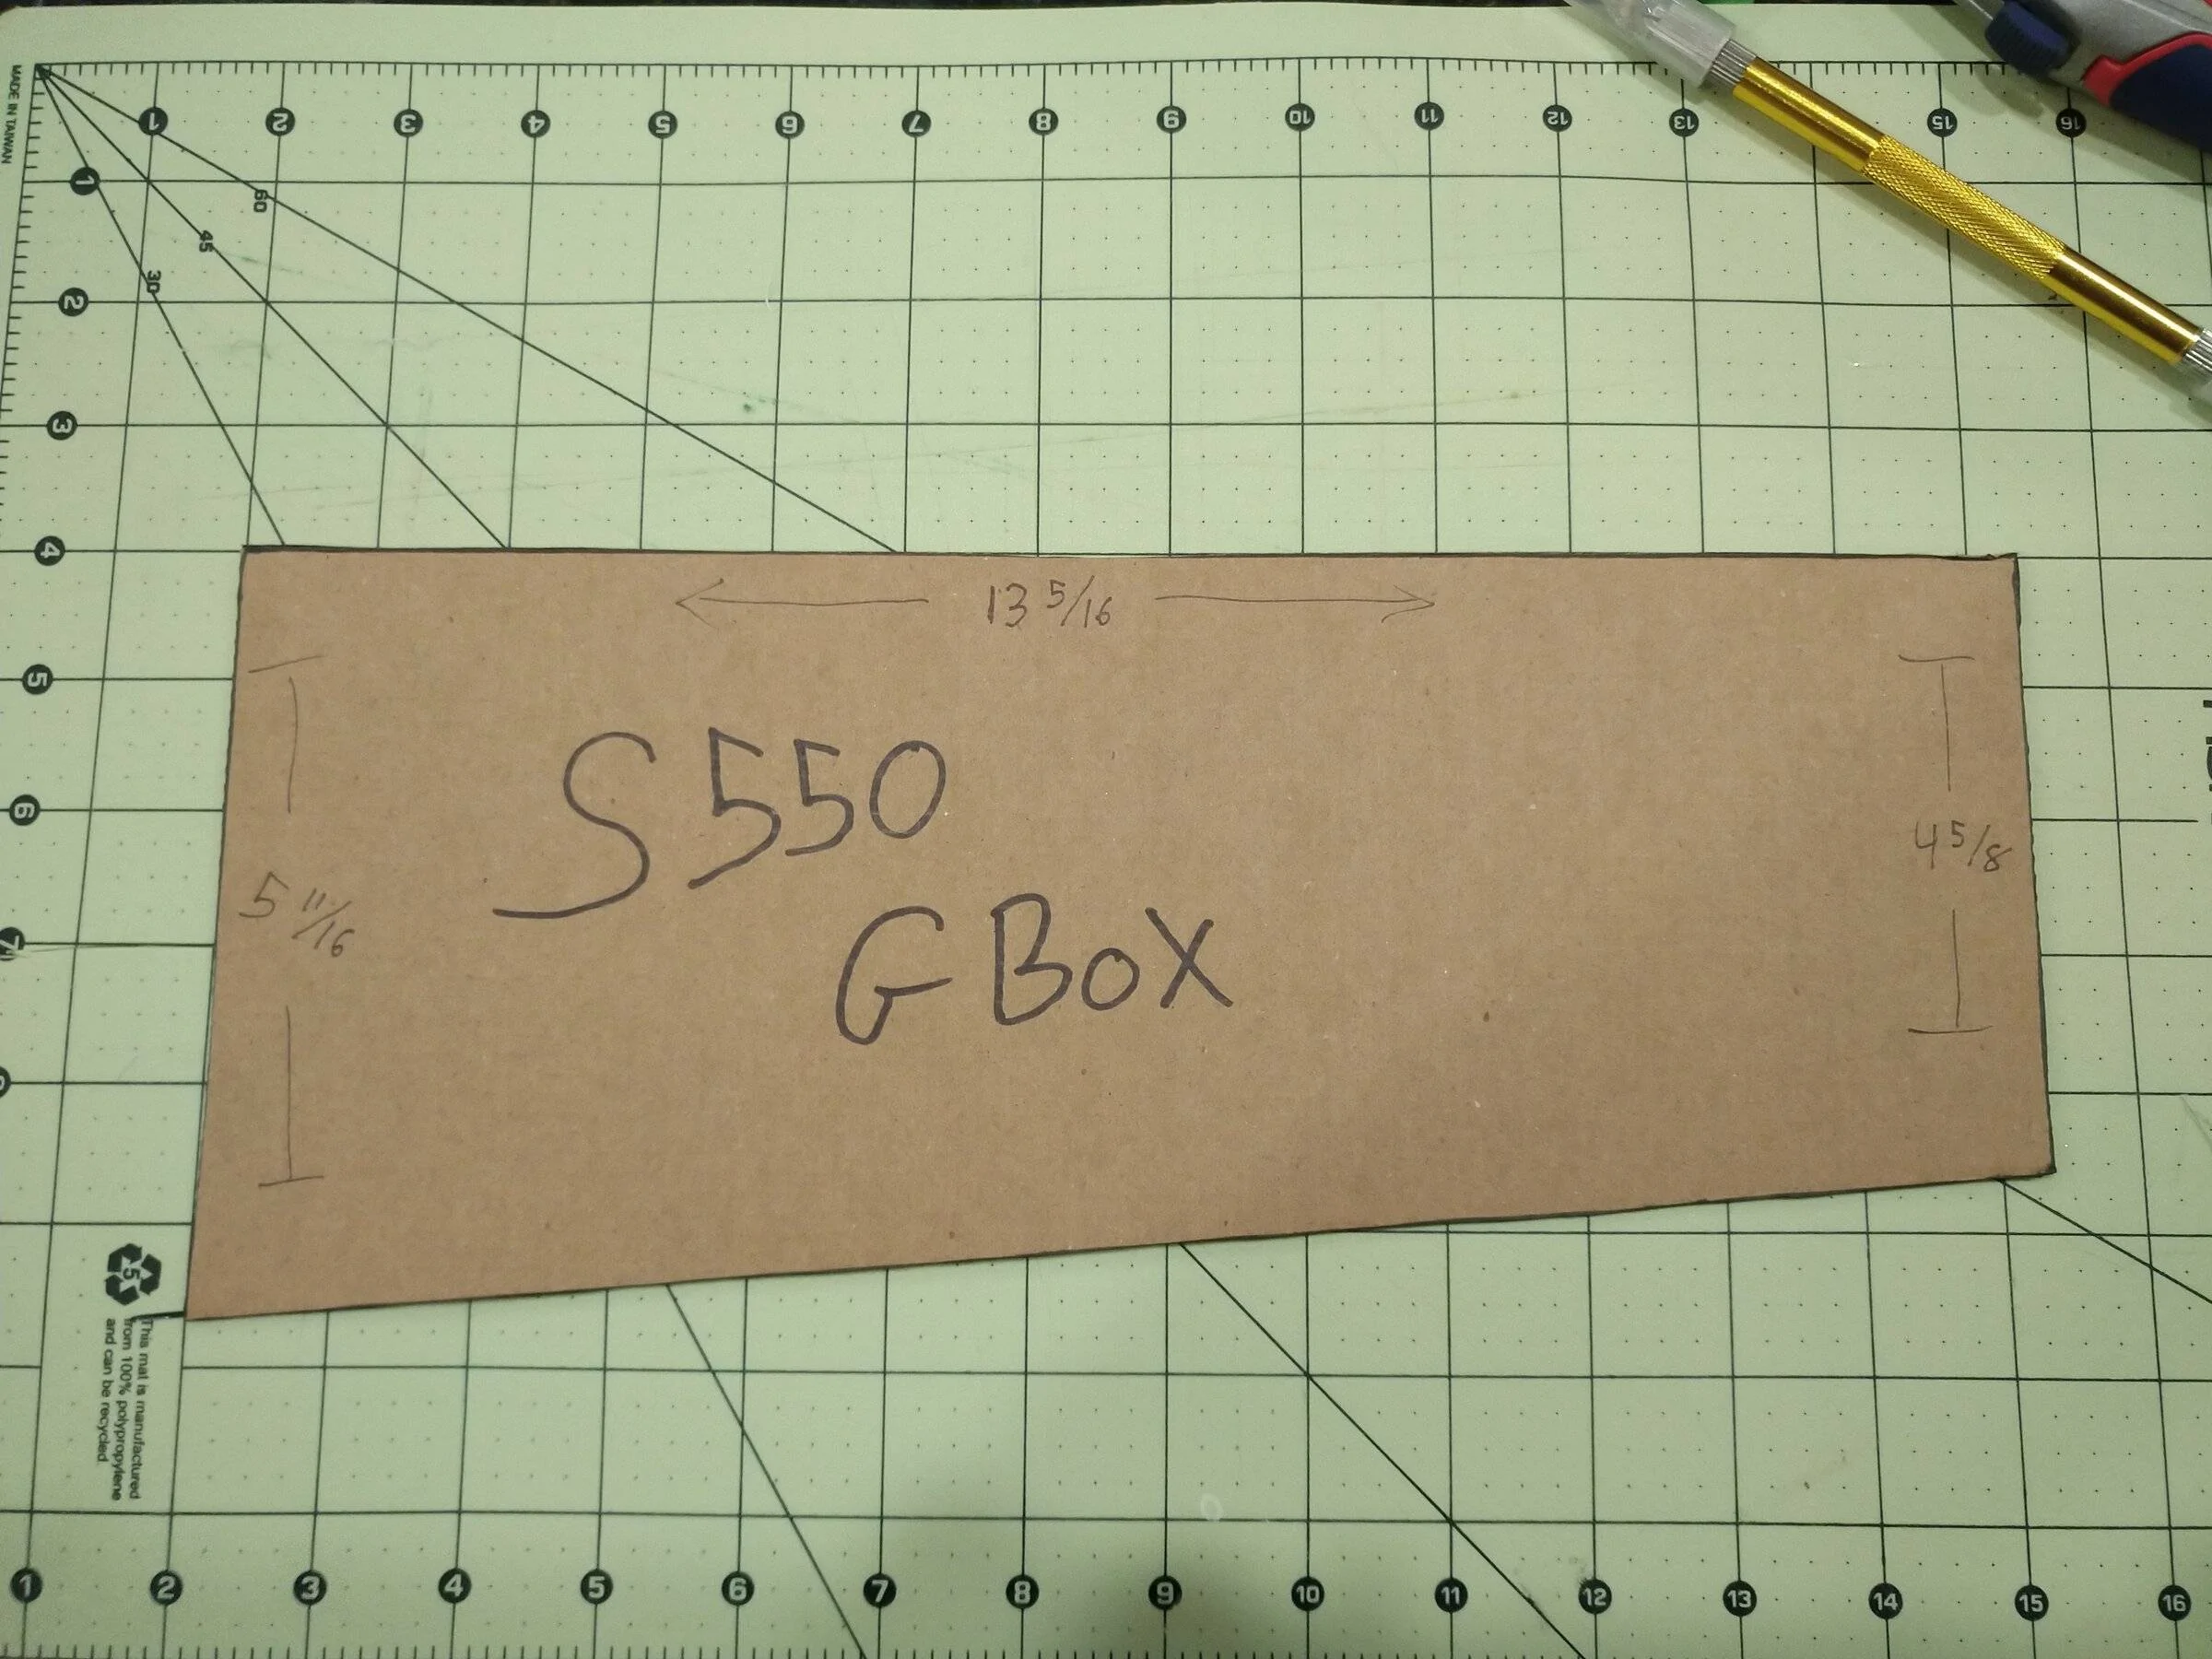
-Drill jig
-ppe (glasses, gloves, mask, potentially a respirator)
-And the all-important Patience and TIME, and a celebratory drink of your choosing.
*I will probably add to this later, that’s just what I could think of offhand. Of course, you need basic tools as well
Kit arrived in two boxes. Meticulously packed.
 ,
,
Check to make sure everything is there. I was missing my deck bolts/hardware. VR shipped them out quickly and I had em in a few days. Measure the distance between the brackets on your wing. Mine were riveted 5” off either side. Again, VR sent a replacement wing right out. Highly doubt that will happen to anyone else again. They paid shipping both ways for that (not cheap) But if something is off like that, they will take care of you. No complaints at all there from me. So now you have everything onto the install….
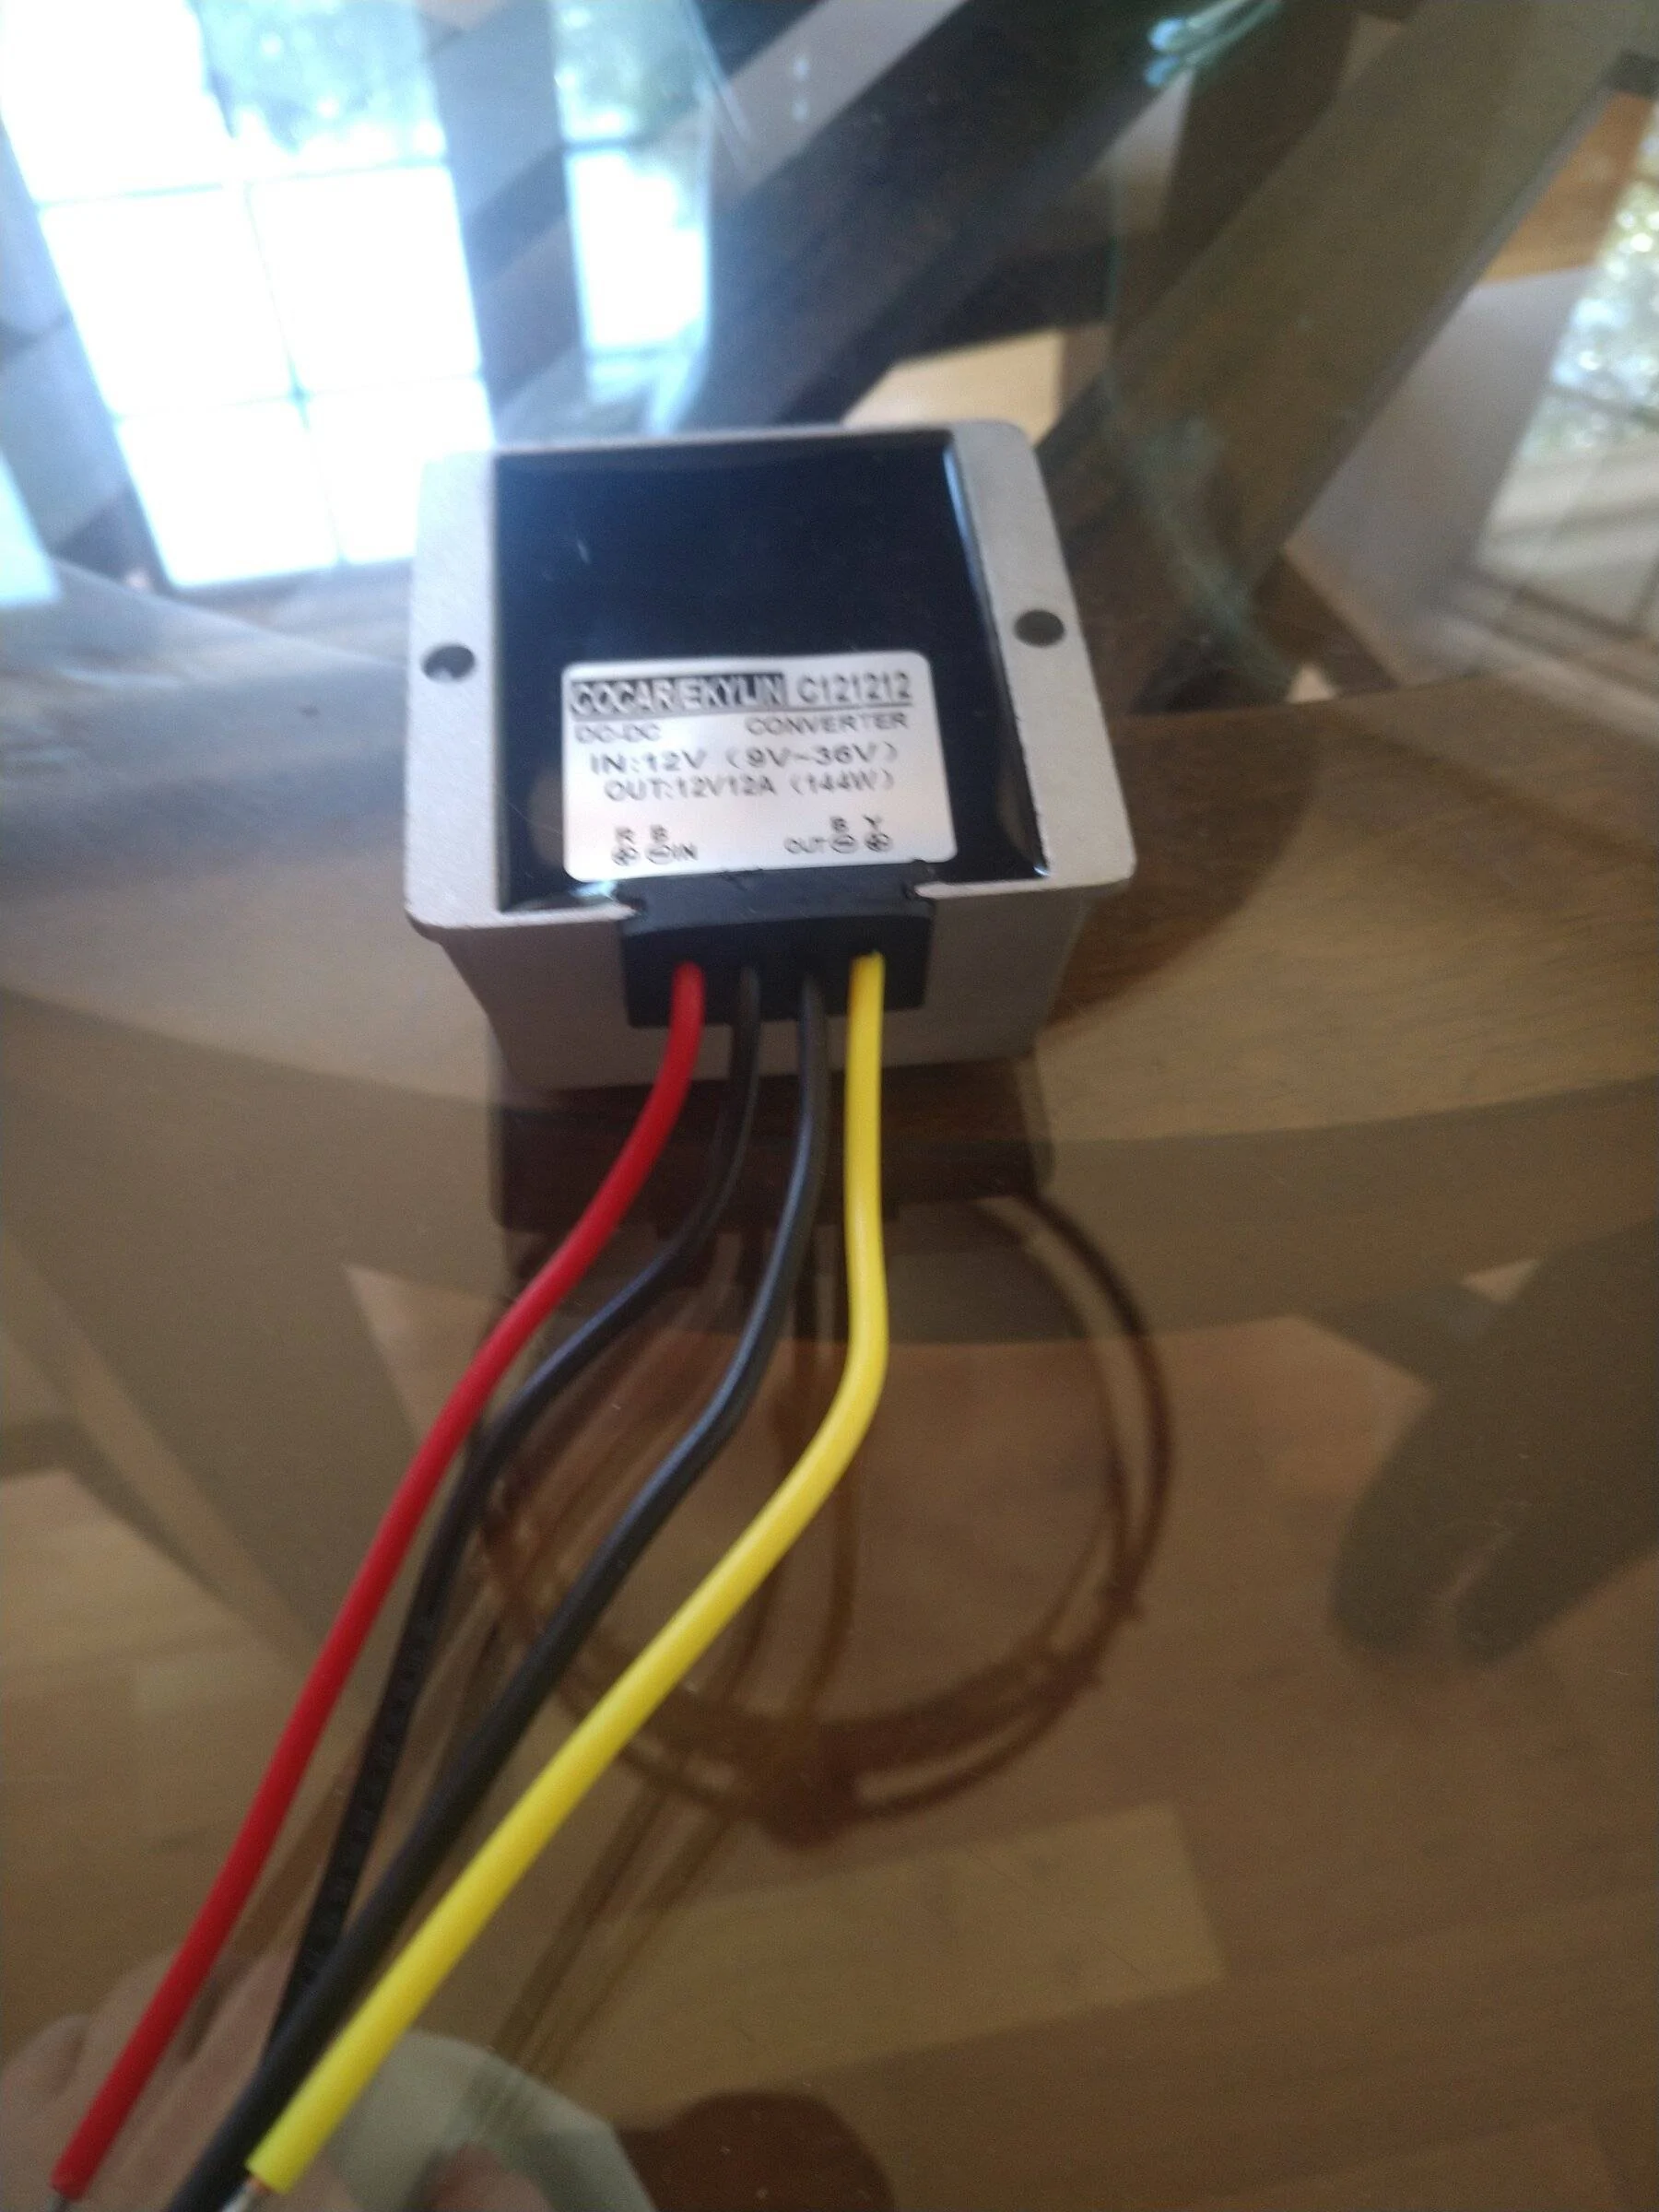
---So, to start…(Power/Ground)
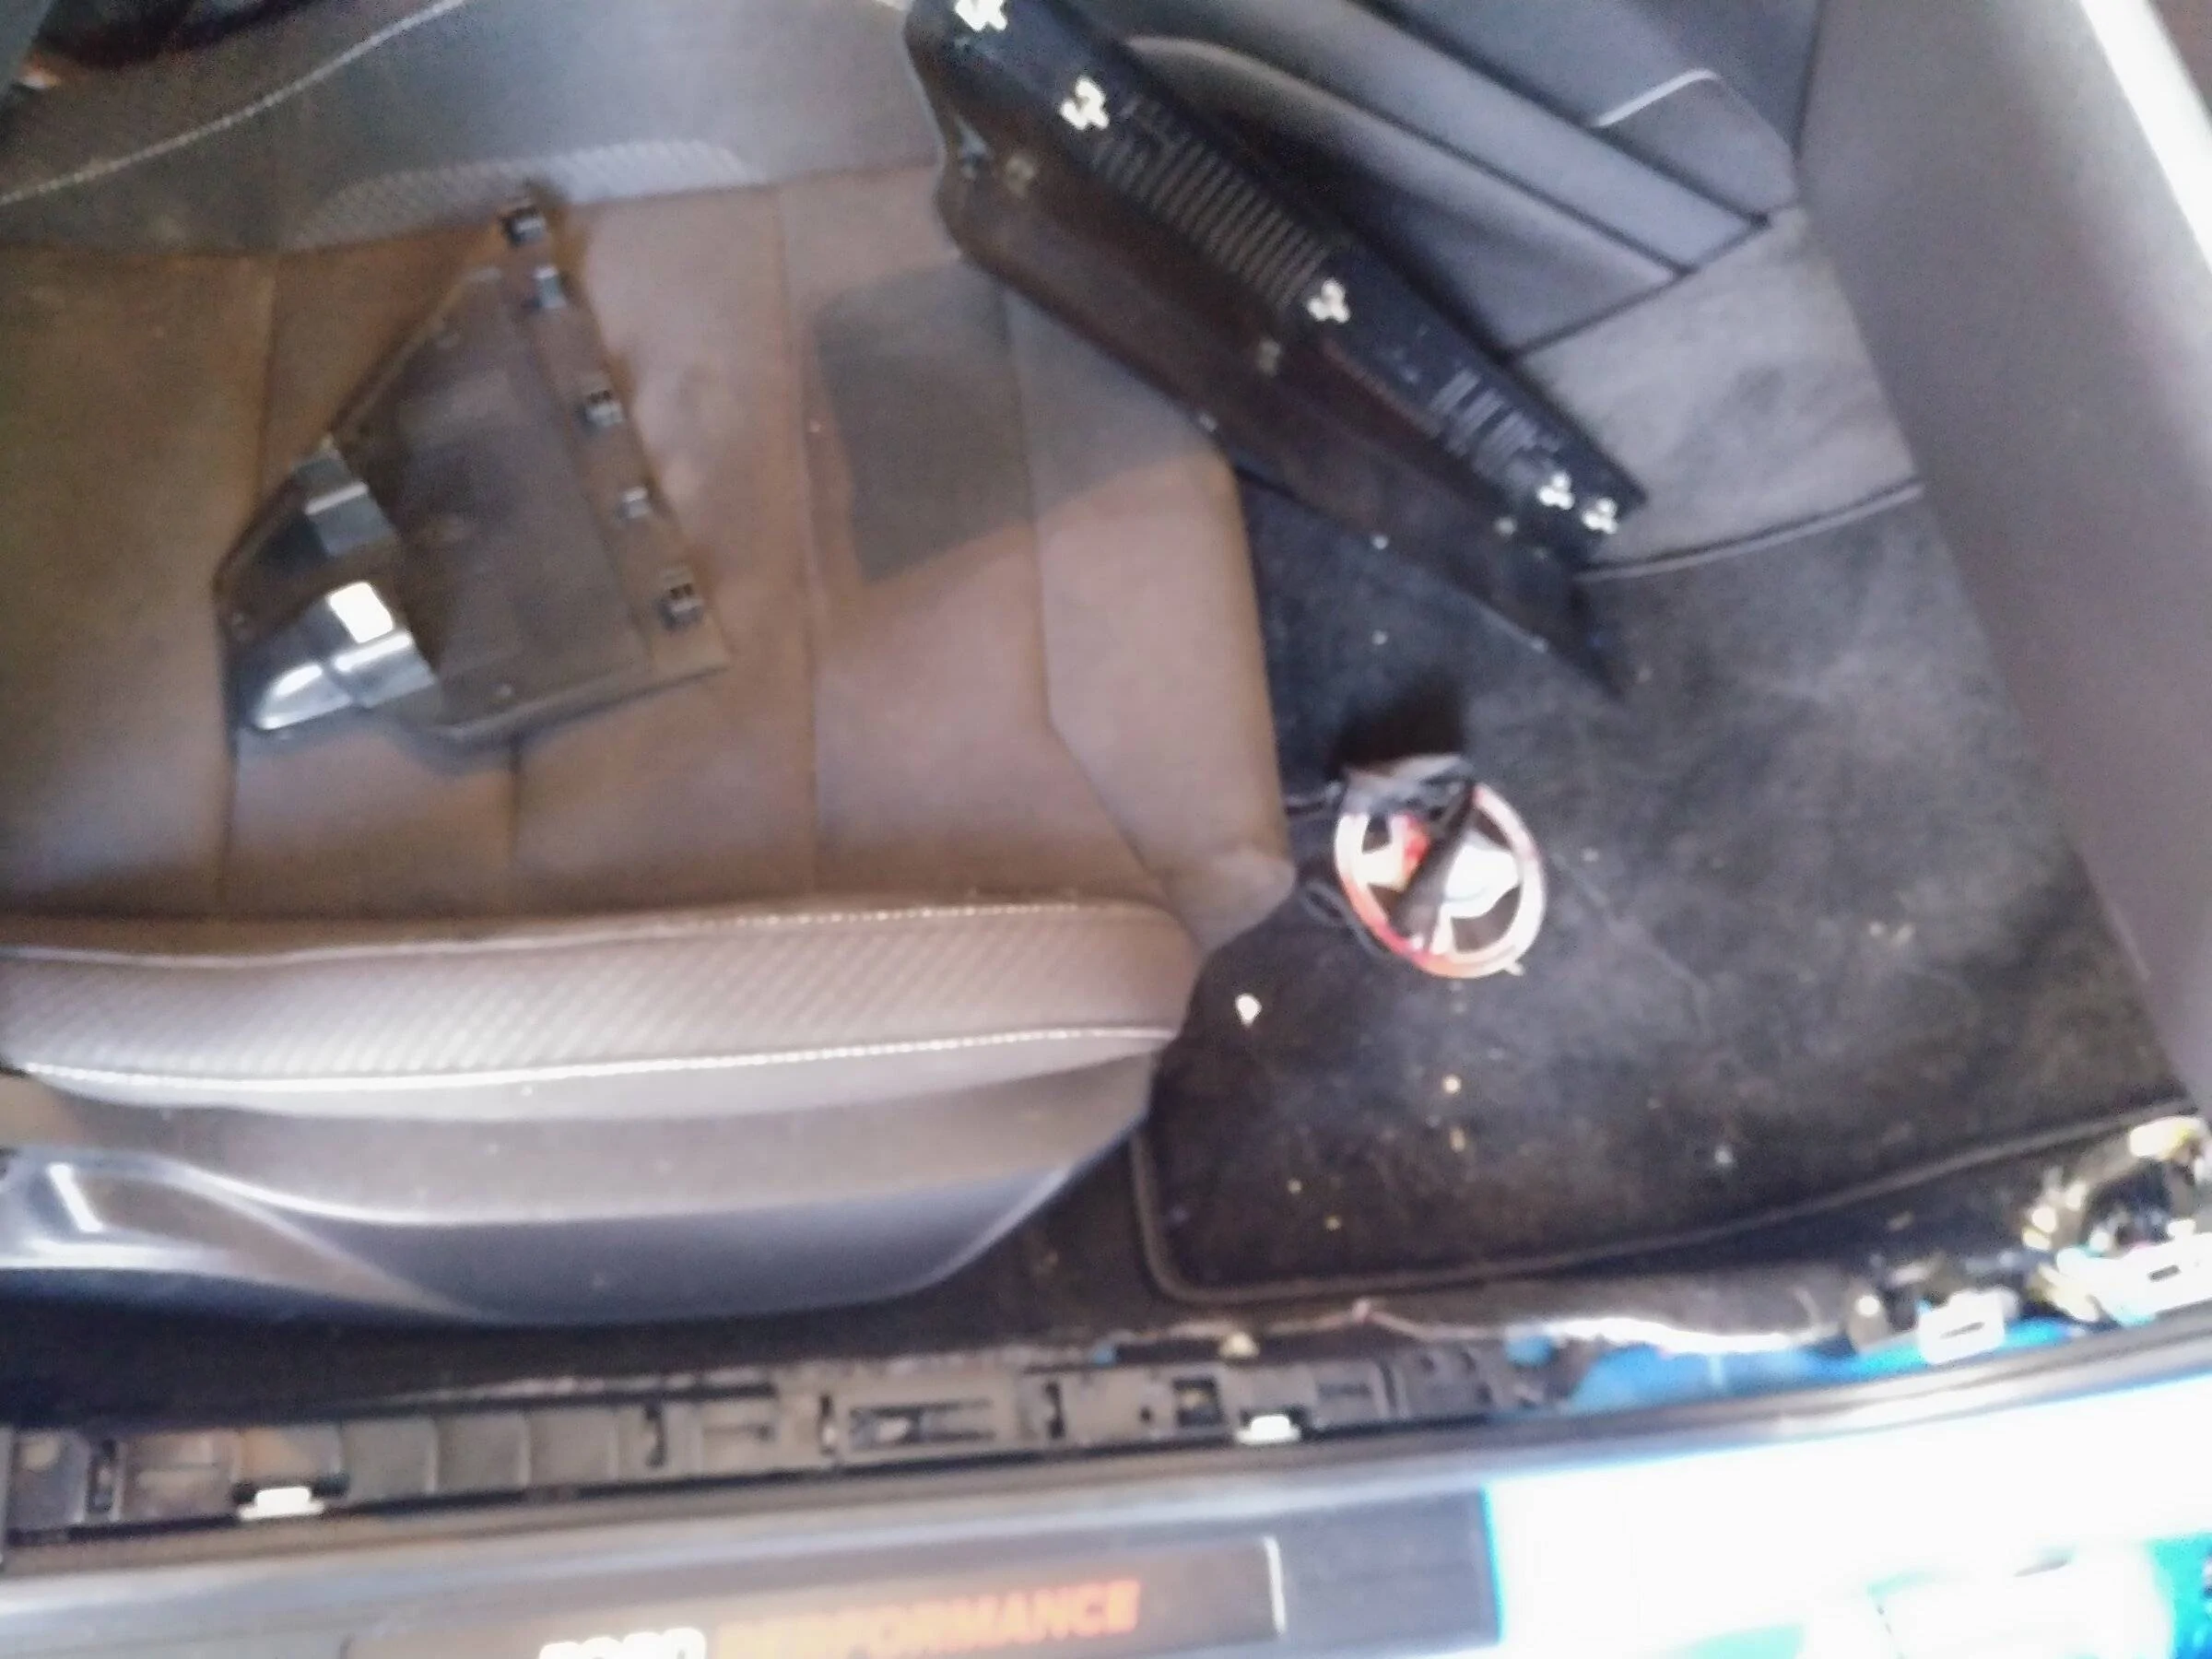
There is no explanation of where to pull power from in the instructions, or anything included for that in the kit. You have to figure that out on your own. Each actuator will pull up to 5a so 10a total. I’m starting with running a fuse tap from the passenger kick plate. Fuse 23 which is 10a switched. Running power wire from there to rear with another 10a in line fuse (just for added protection) and using the factory body ground by the trunk latch. (You need to pull the trunk panels anyway for a later step) You will need to pull panels, rear seat etc. to tuck the power wire, and remote line (assuming of course you don’t have a gutted track car already. I won't go into that. Research audio installs on YouTube or here, and you will see how that all is done. Pretty basic. I would not reinstall the panels you pulled until the wing is on, and you have done a functions test. Keep the panels set aside for now. Of course, the other option is to run a relay. Prob the better way to do it, and I will do that is the tap doesn’t work out.
---So now you have a plan for wiring let's get to the deck….
You have options here. Use your factory deck, wingless or not. Pull said wing and get to work. Orrrr.... Grab a spare off eBay, or blank, your choice. I will say my kit took 5-6 months to get here from VR from the day I ordered. (Covid supply chain disruptions) It was supposed to be here in 5ish weeks. So, from when you place your order you have time to figure out a plan for a deck lid. Do whatever you think is best.
Removing a factory wing is easy enough… again search. My GT350 wing left a ton of holes. As for measuring the brackets for drill preparation.... its measuring…measure 100 times then drill. Use a hole punch to mark center and drill a pilot if you would like. Use a drill guide to make sure your holes are straight through, not angled. If you do it by eye you may have to file and blow out the holes to line it up…that’s bad. Clean up the burrs from your holes with a thin file. Don’t get crazy. Do the underside too as the tolerance for those zip tie spacers are tight. They will go in, but a burr on the inside between layers will make your life a living hell. 45-degree file on the inside of the holes a little and your good. *Some wording I use throughout like (zip tie spacers/supports) in this instance will not make sense unless your familiar with the instructions.
Hole patching….The middle holes in my case are covered by the stripes, leaving one hole visible after the new mounts are on either side. That is where the vinyl and some of the rtv come into play. The proper way to do it of course would be to take it to a body shop and have them patched…I didn’t do that. I had some spare thin gauge plastic sheeting….(not sure what type offhand, but doesn’t matter) cutout a circular shape, covered in rtv and plugged the vacant holes from the inside. Blue tape on the deck outside beforehand with cutouts in the shape of the holes you plan to patch.…keep the hole cutouts nice and clean as the rtv will touch anything not taped. …don’t make a mess. Then I used a squeegee to smooth overflow of rtv for the center 3 holes in the deck. Two rtv patches of sort. Pulled the blue tape off immediately and let it cure for 24hrs. nice smooth rtv plug that are not visible when the stripes/vinyl are applied. Obviously while this works temporarily for me it's something to consider for yourself. Figure out a plan on how to tackle holes in your trunk if applicable. Plugs, vinyl, filler etc. your call.
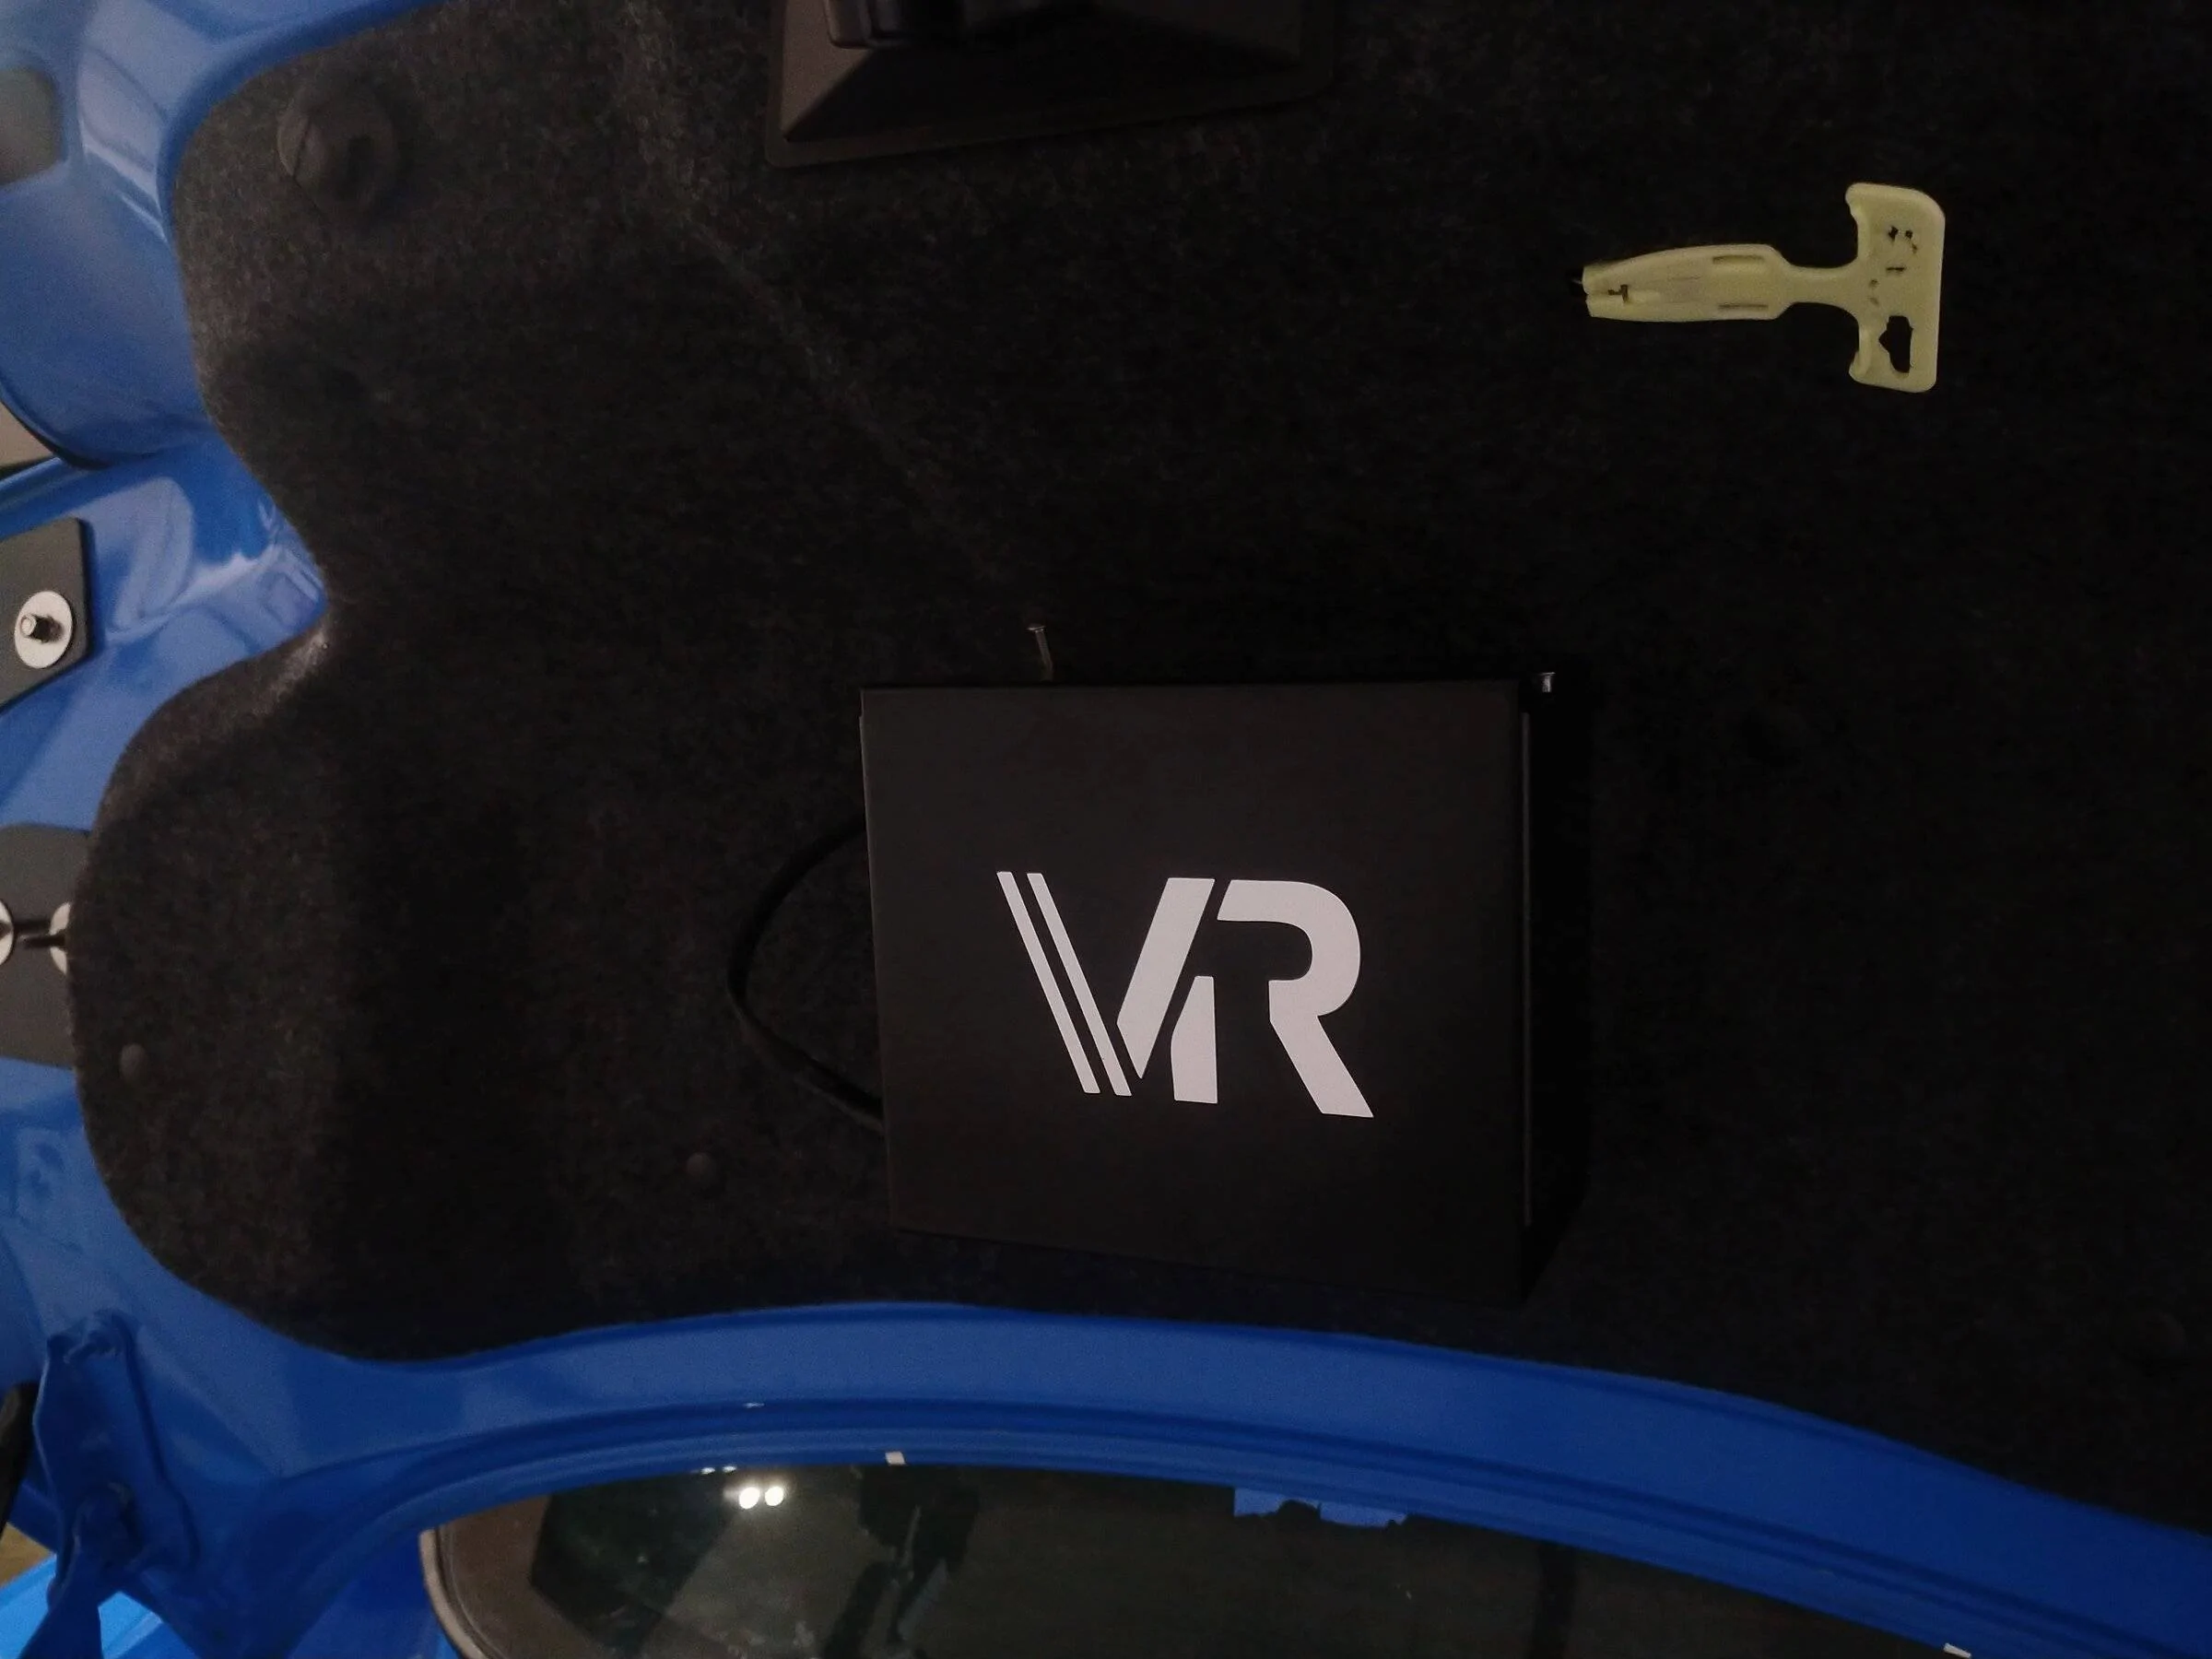
*in the picture above you can see where I drilled the holes in the center trunk for the control box. I would lower those down by an inch. the top of the box is very close to the trunk liner making putting the cover on the box a pita. (better pics of the finished box will be further down in the thread) if you do lower it you may need to extend the actuator wires too. something to consider. I used those two plugs with toothpaste on them to transfer the hole marks to the trunk liner.*
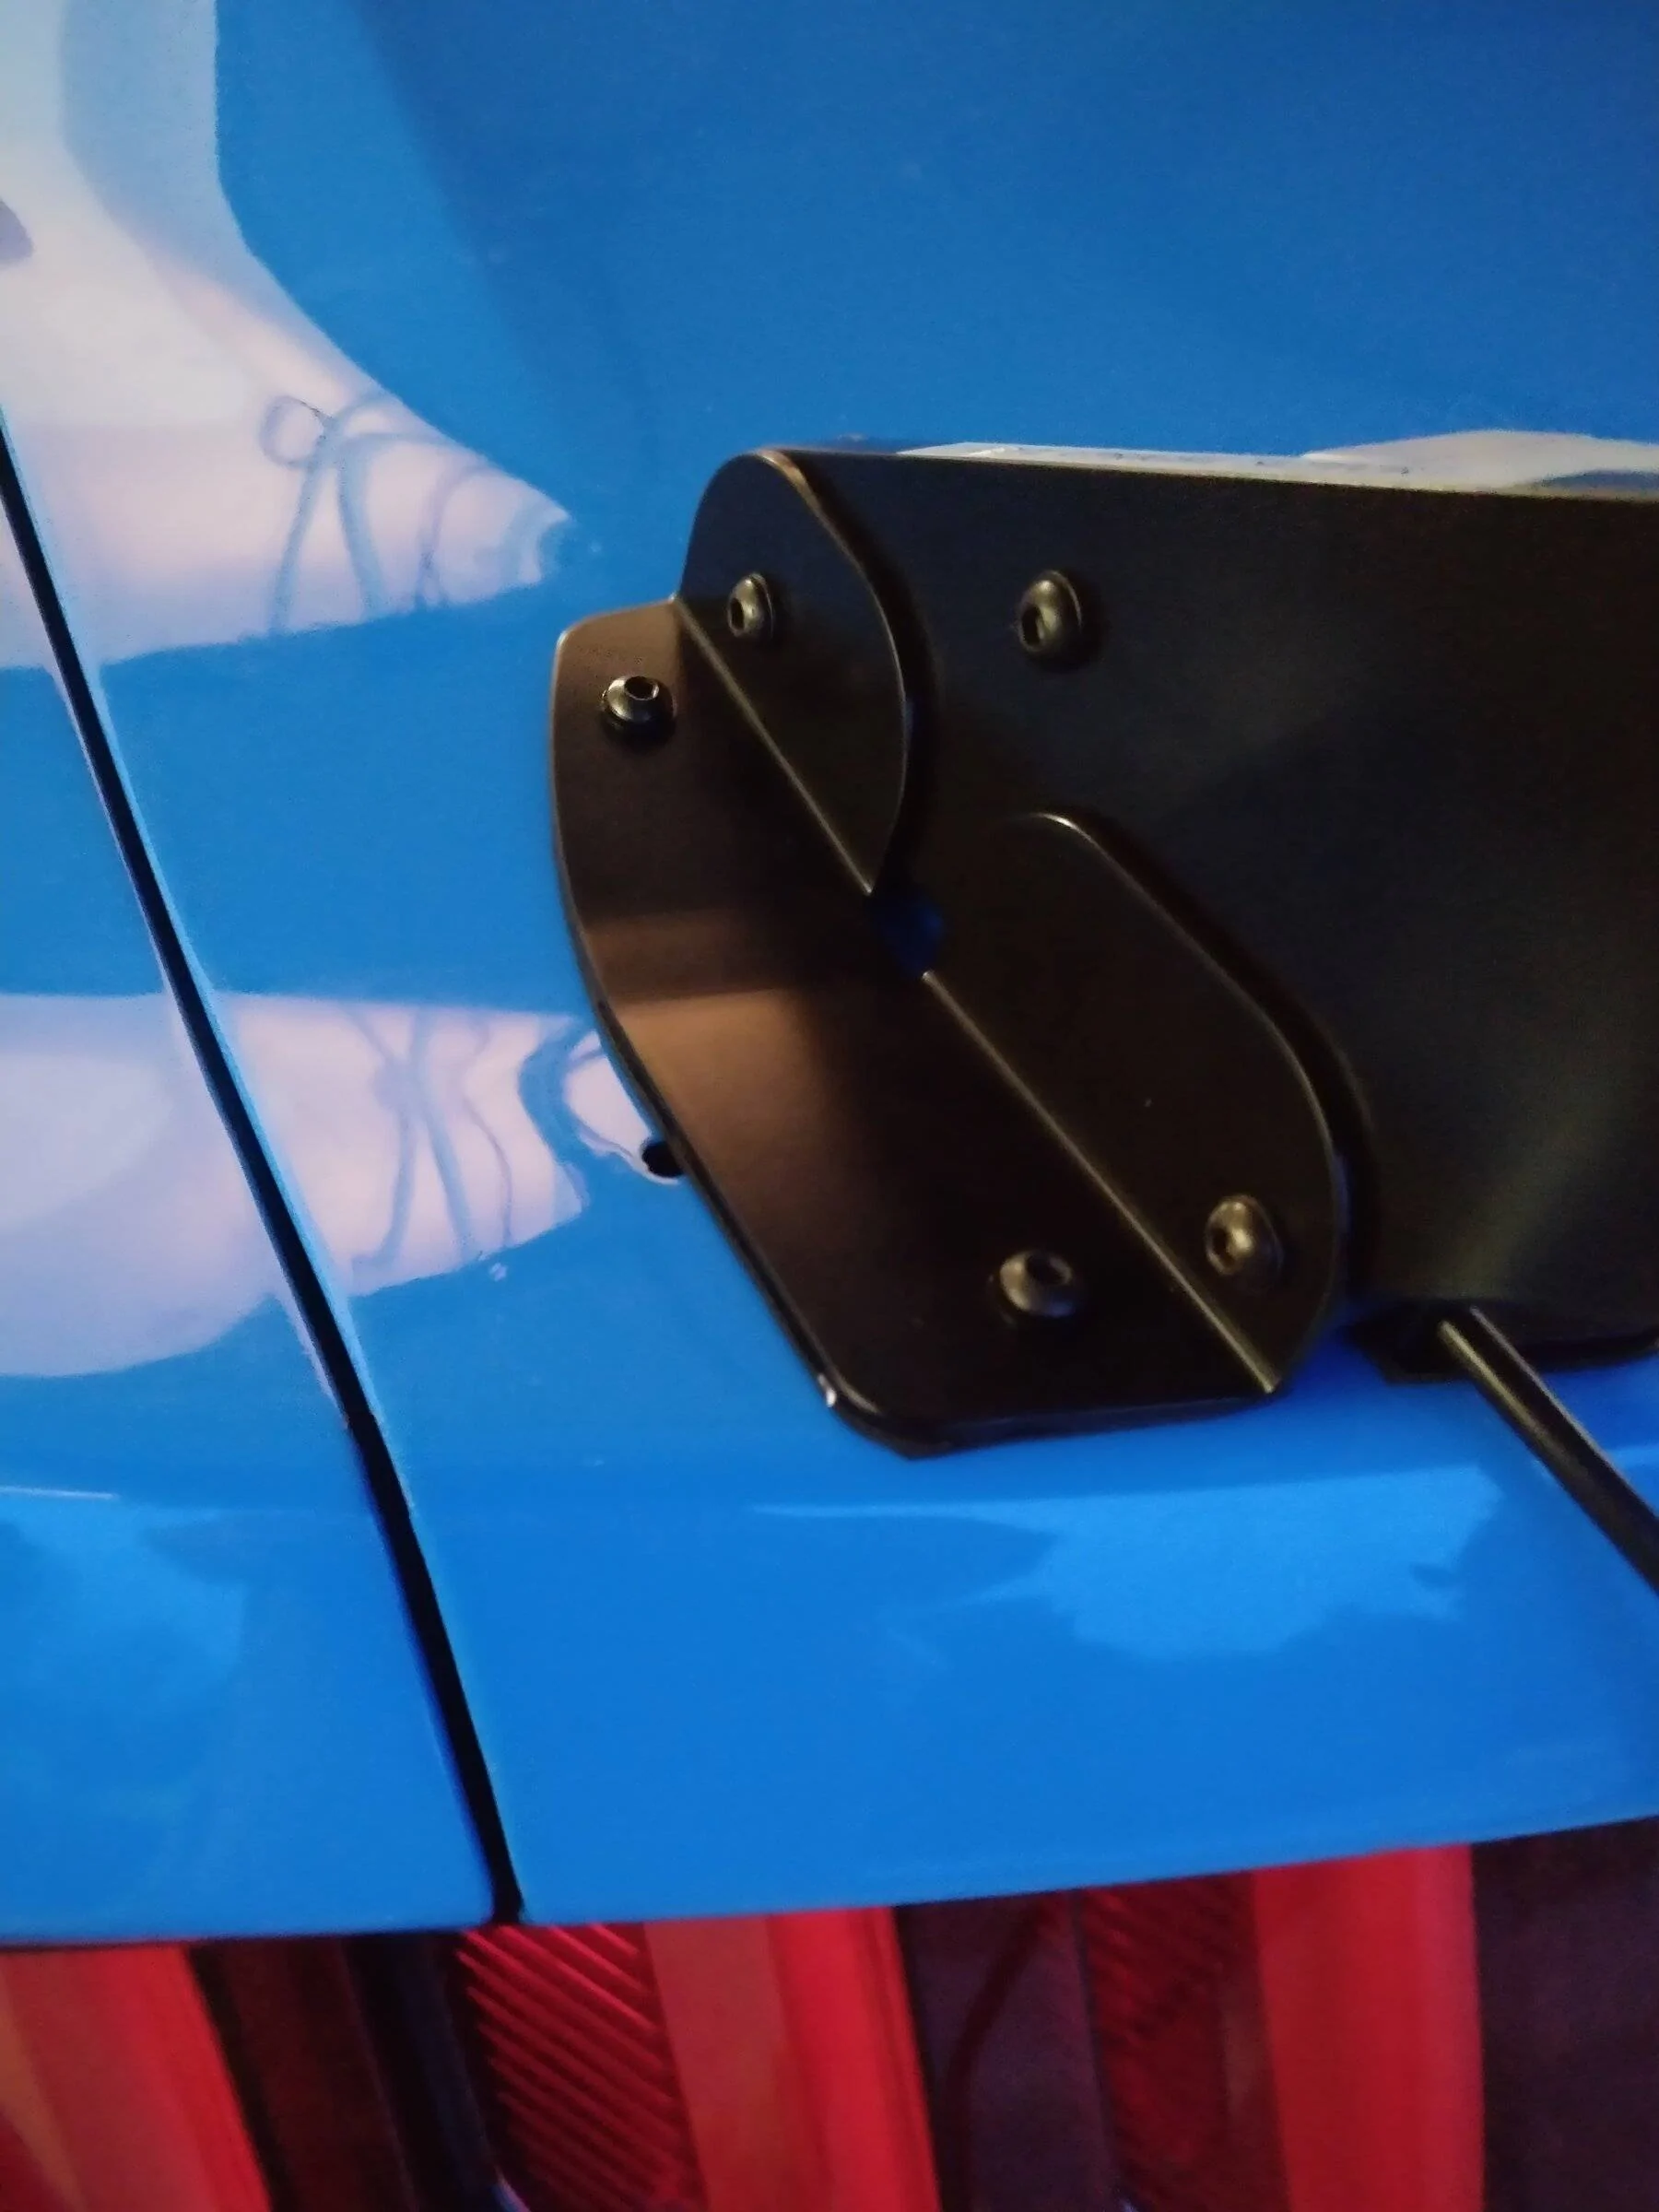
Center holes plugged… I had to figure out a plan for the outside hole that are not covered by the new wing mounts. The hole is so close to the bracket I wish the design just extended out a tad to cover it. My solution was a cf vinyl cutout that covered everything under the mounts and the hole itself. So, an odd shape of cf vinyl is visible, but it helped seal up the other holes as well under the mounts. Again, used rtv on all those holes. (Do not do that that until the inner supports are in though. Reference the instructions) I could not get a plug on the underside outside edge as it was too far back between trunk layers to reach.
Success…. your wing is on, its hopefully straight, your holes are plugged and you wiring is ready…. Wiring…

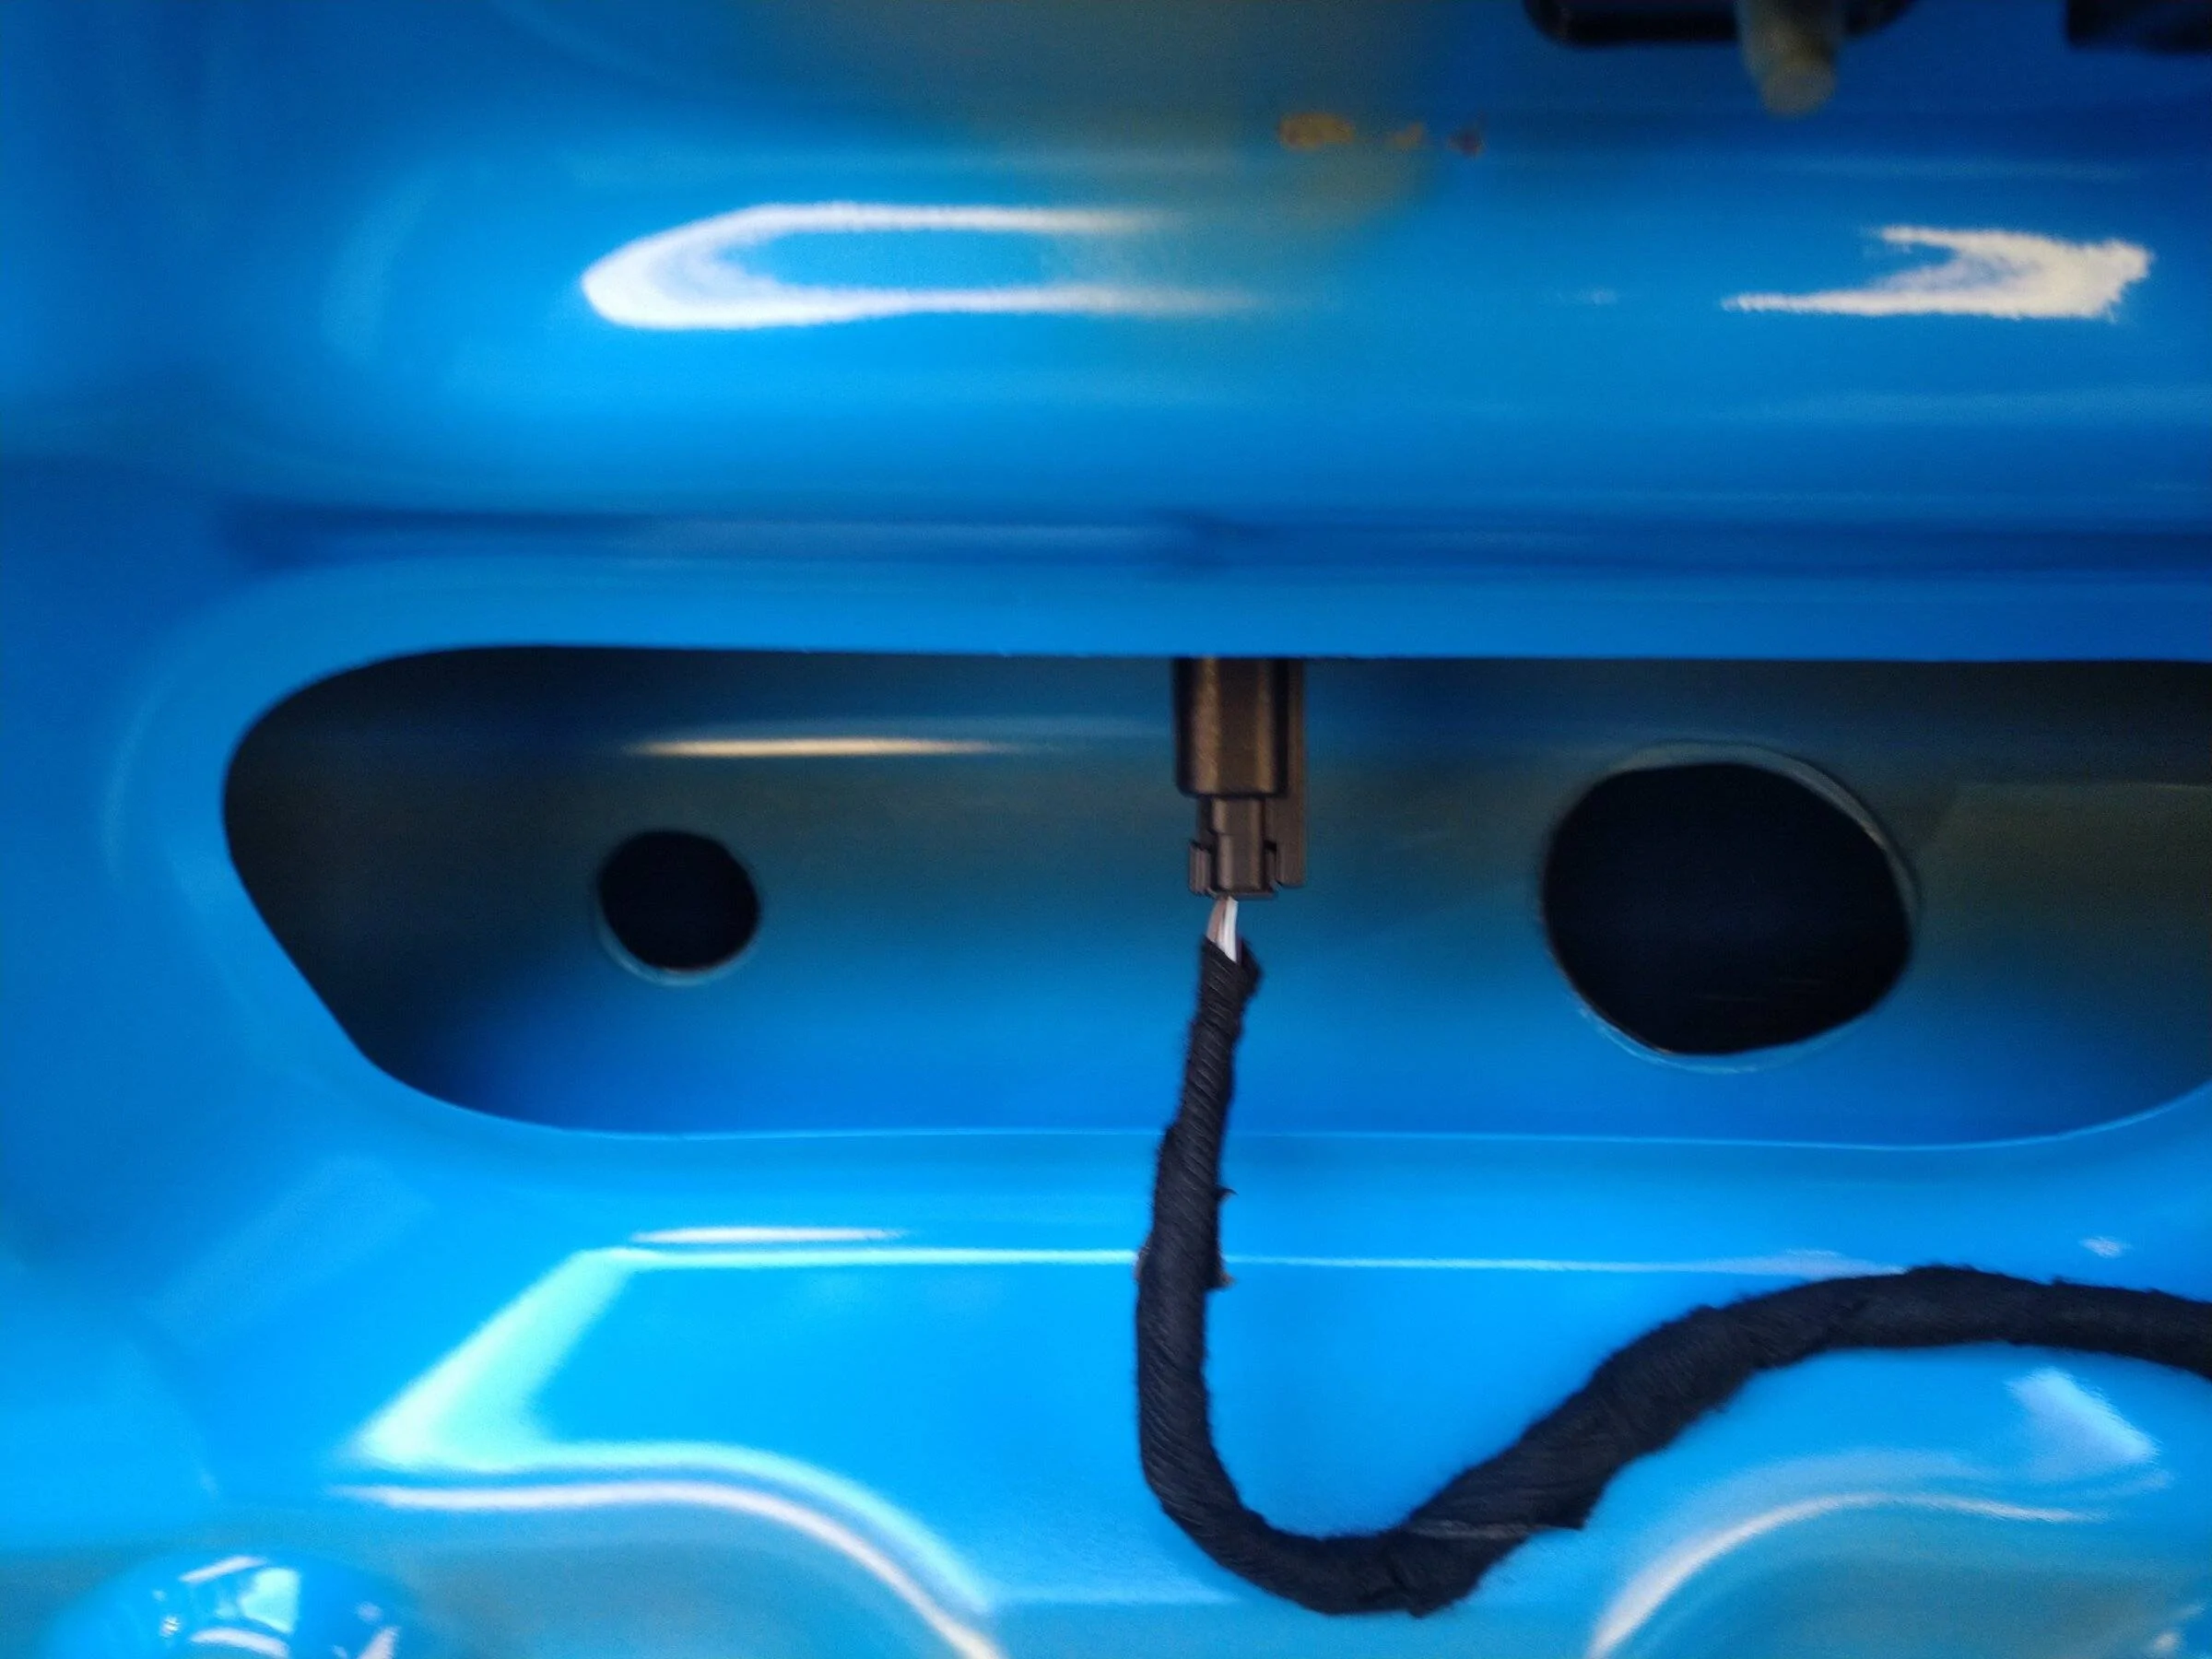
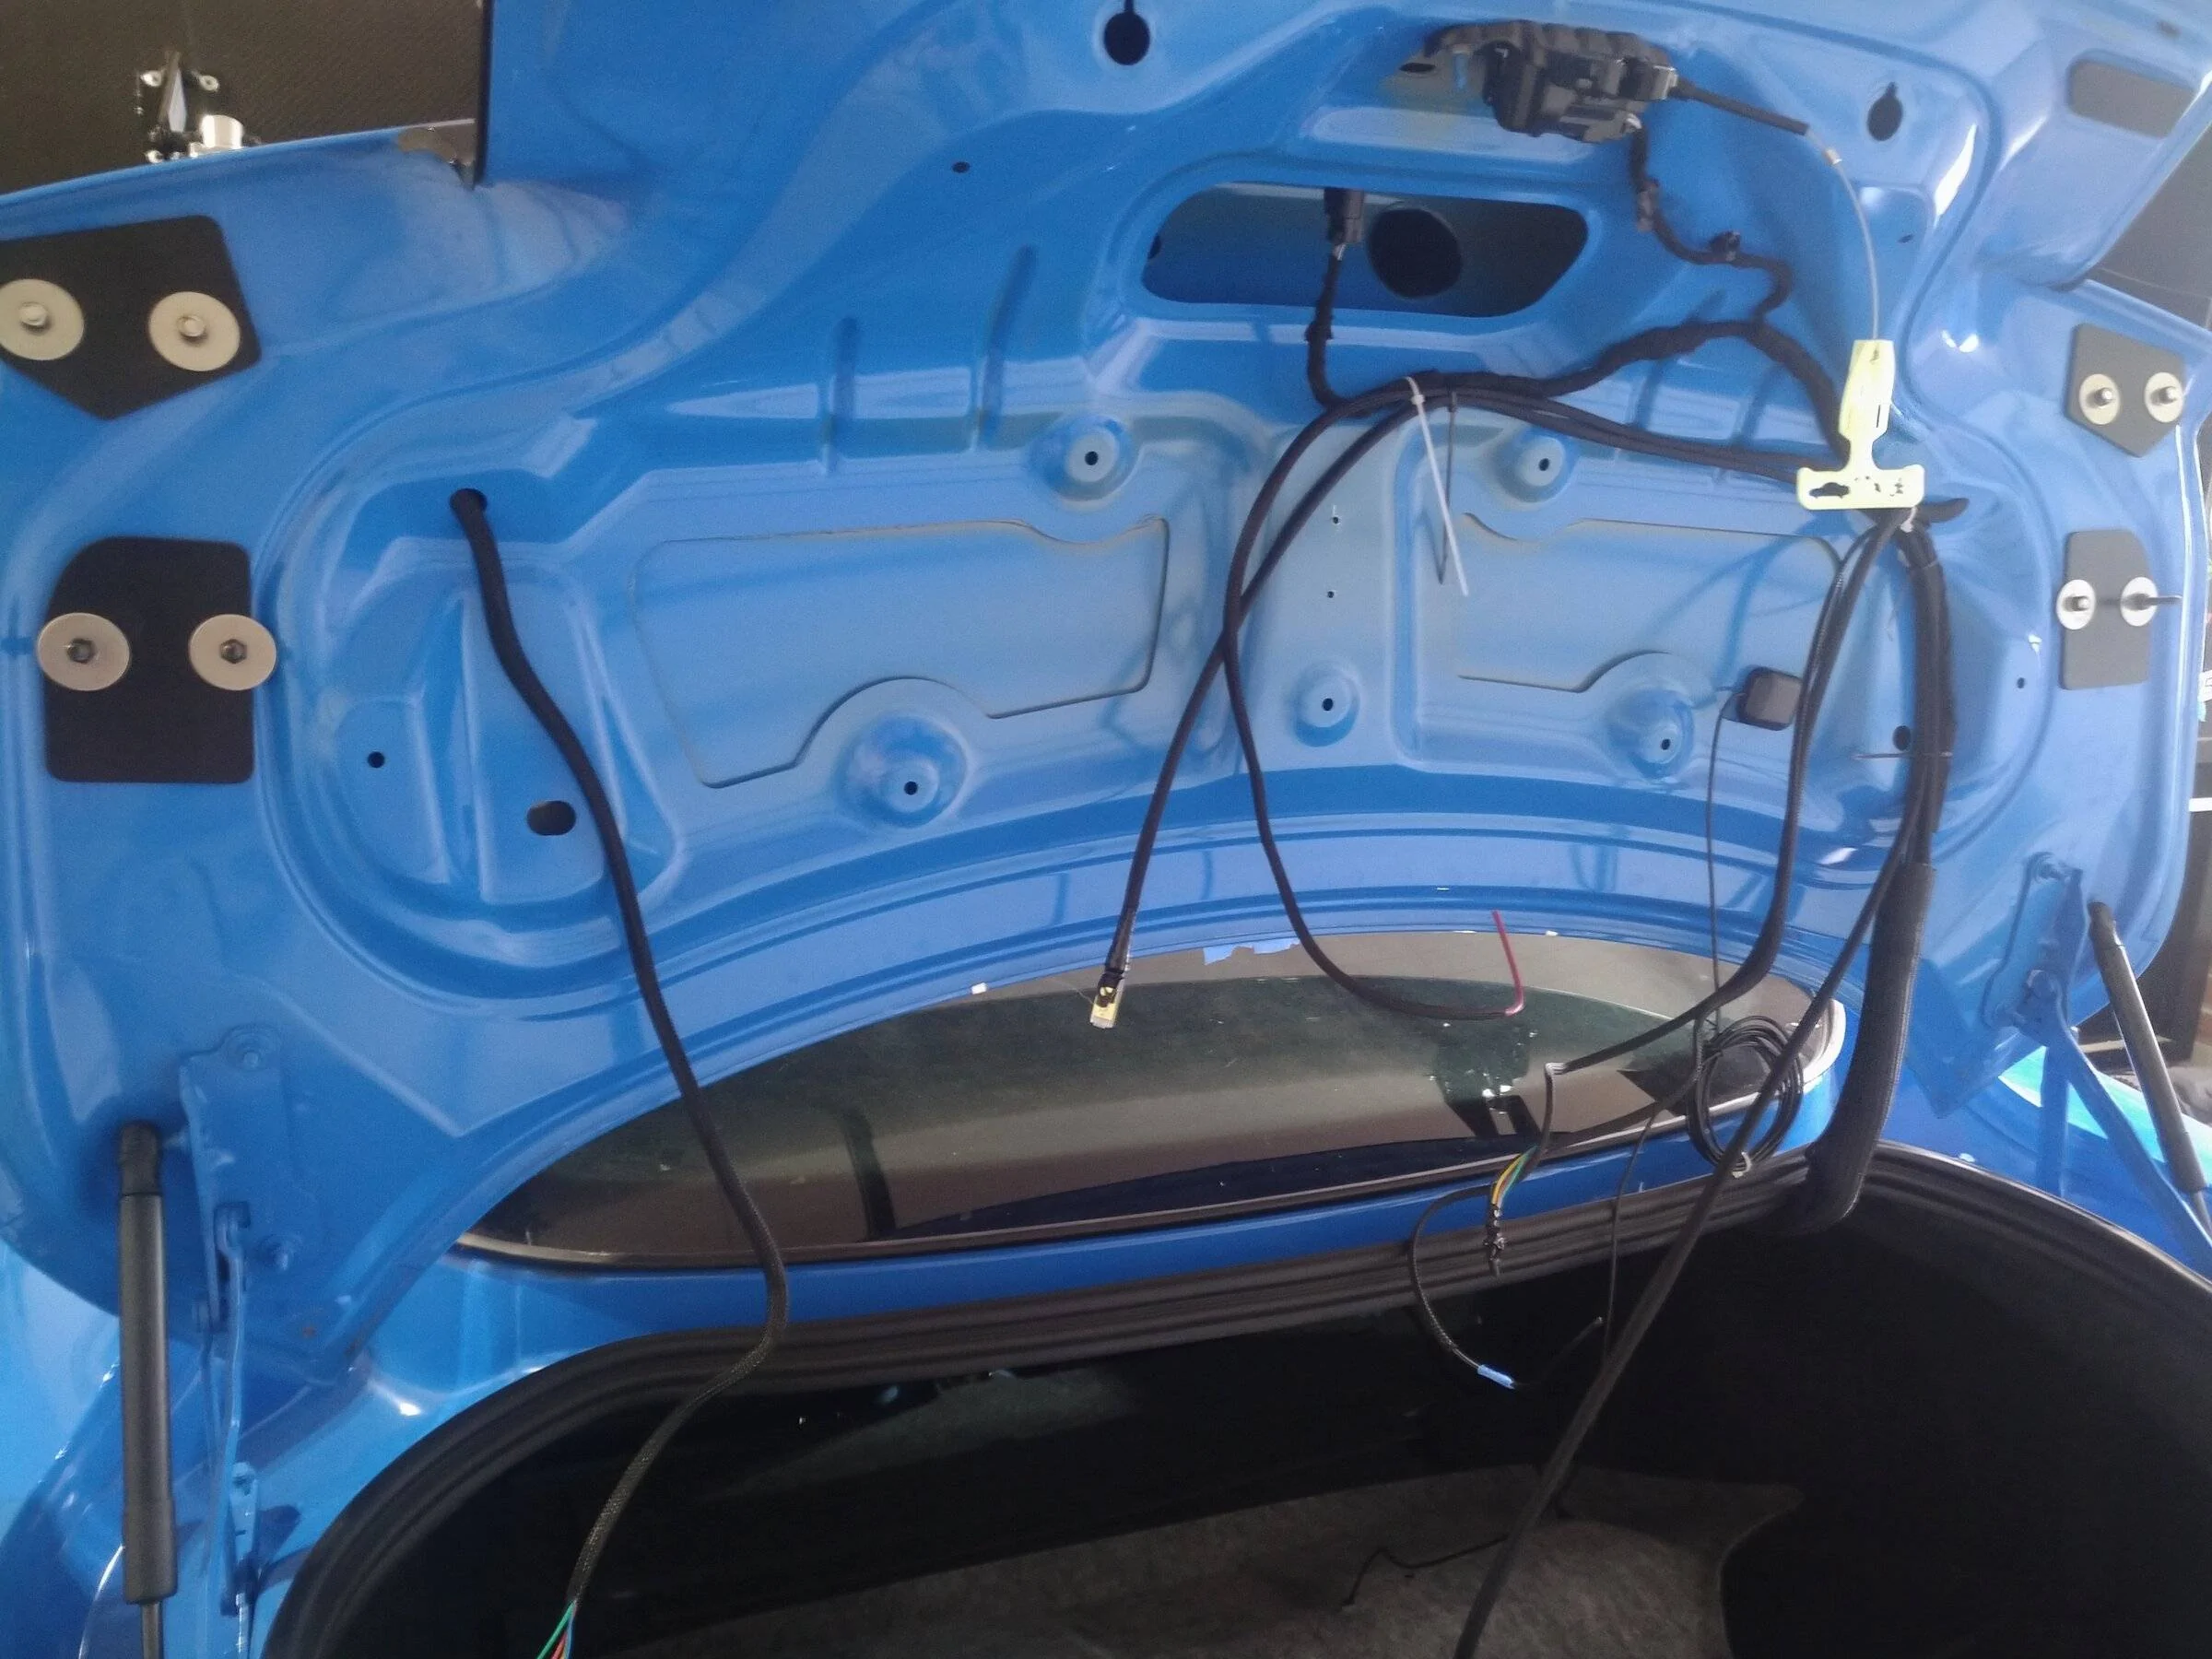
As previously noted, you should have your power /ground sorted. I mounted the GPS antenna to the underside of the trunk lid. Lower right hand corner of the single sheet (not double) if this doesn’t work (signal disruption) I will update. Actuator wiring… I routed the lines through the deck lid so all would be hidden under the trunk cover. Worked great but I had to extend 3 actuator wires from the right side. Only by about 4-5"s. Poked holes behind the control box in the trunk cover, and it keeps everything hidden. Ground and power did the same. The only cable you cannot hide is the cat cable to the remote. That will be visible when the trunk is open just because of where the connection is. Maybe Vr could relocate that in the box later…. (wish list)
*Forgot to mention pulling the actuators cables through the grommet is kind of a pita. Pull too hard grommet pulls through. I used a little ky on a qtip and man that thing slid right through no problem. Dish soap would prob work as well. Remember you have to rtv that later though so use a lube that is water soluble.
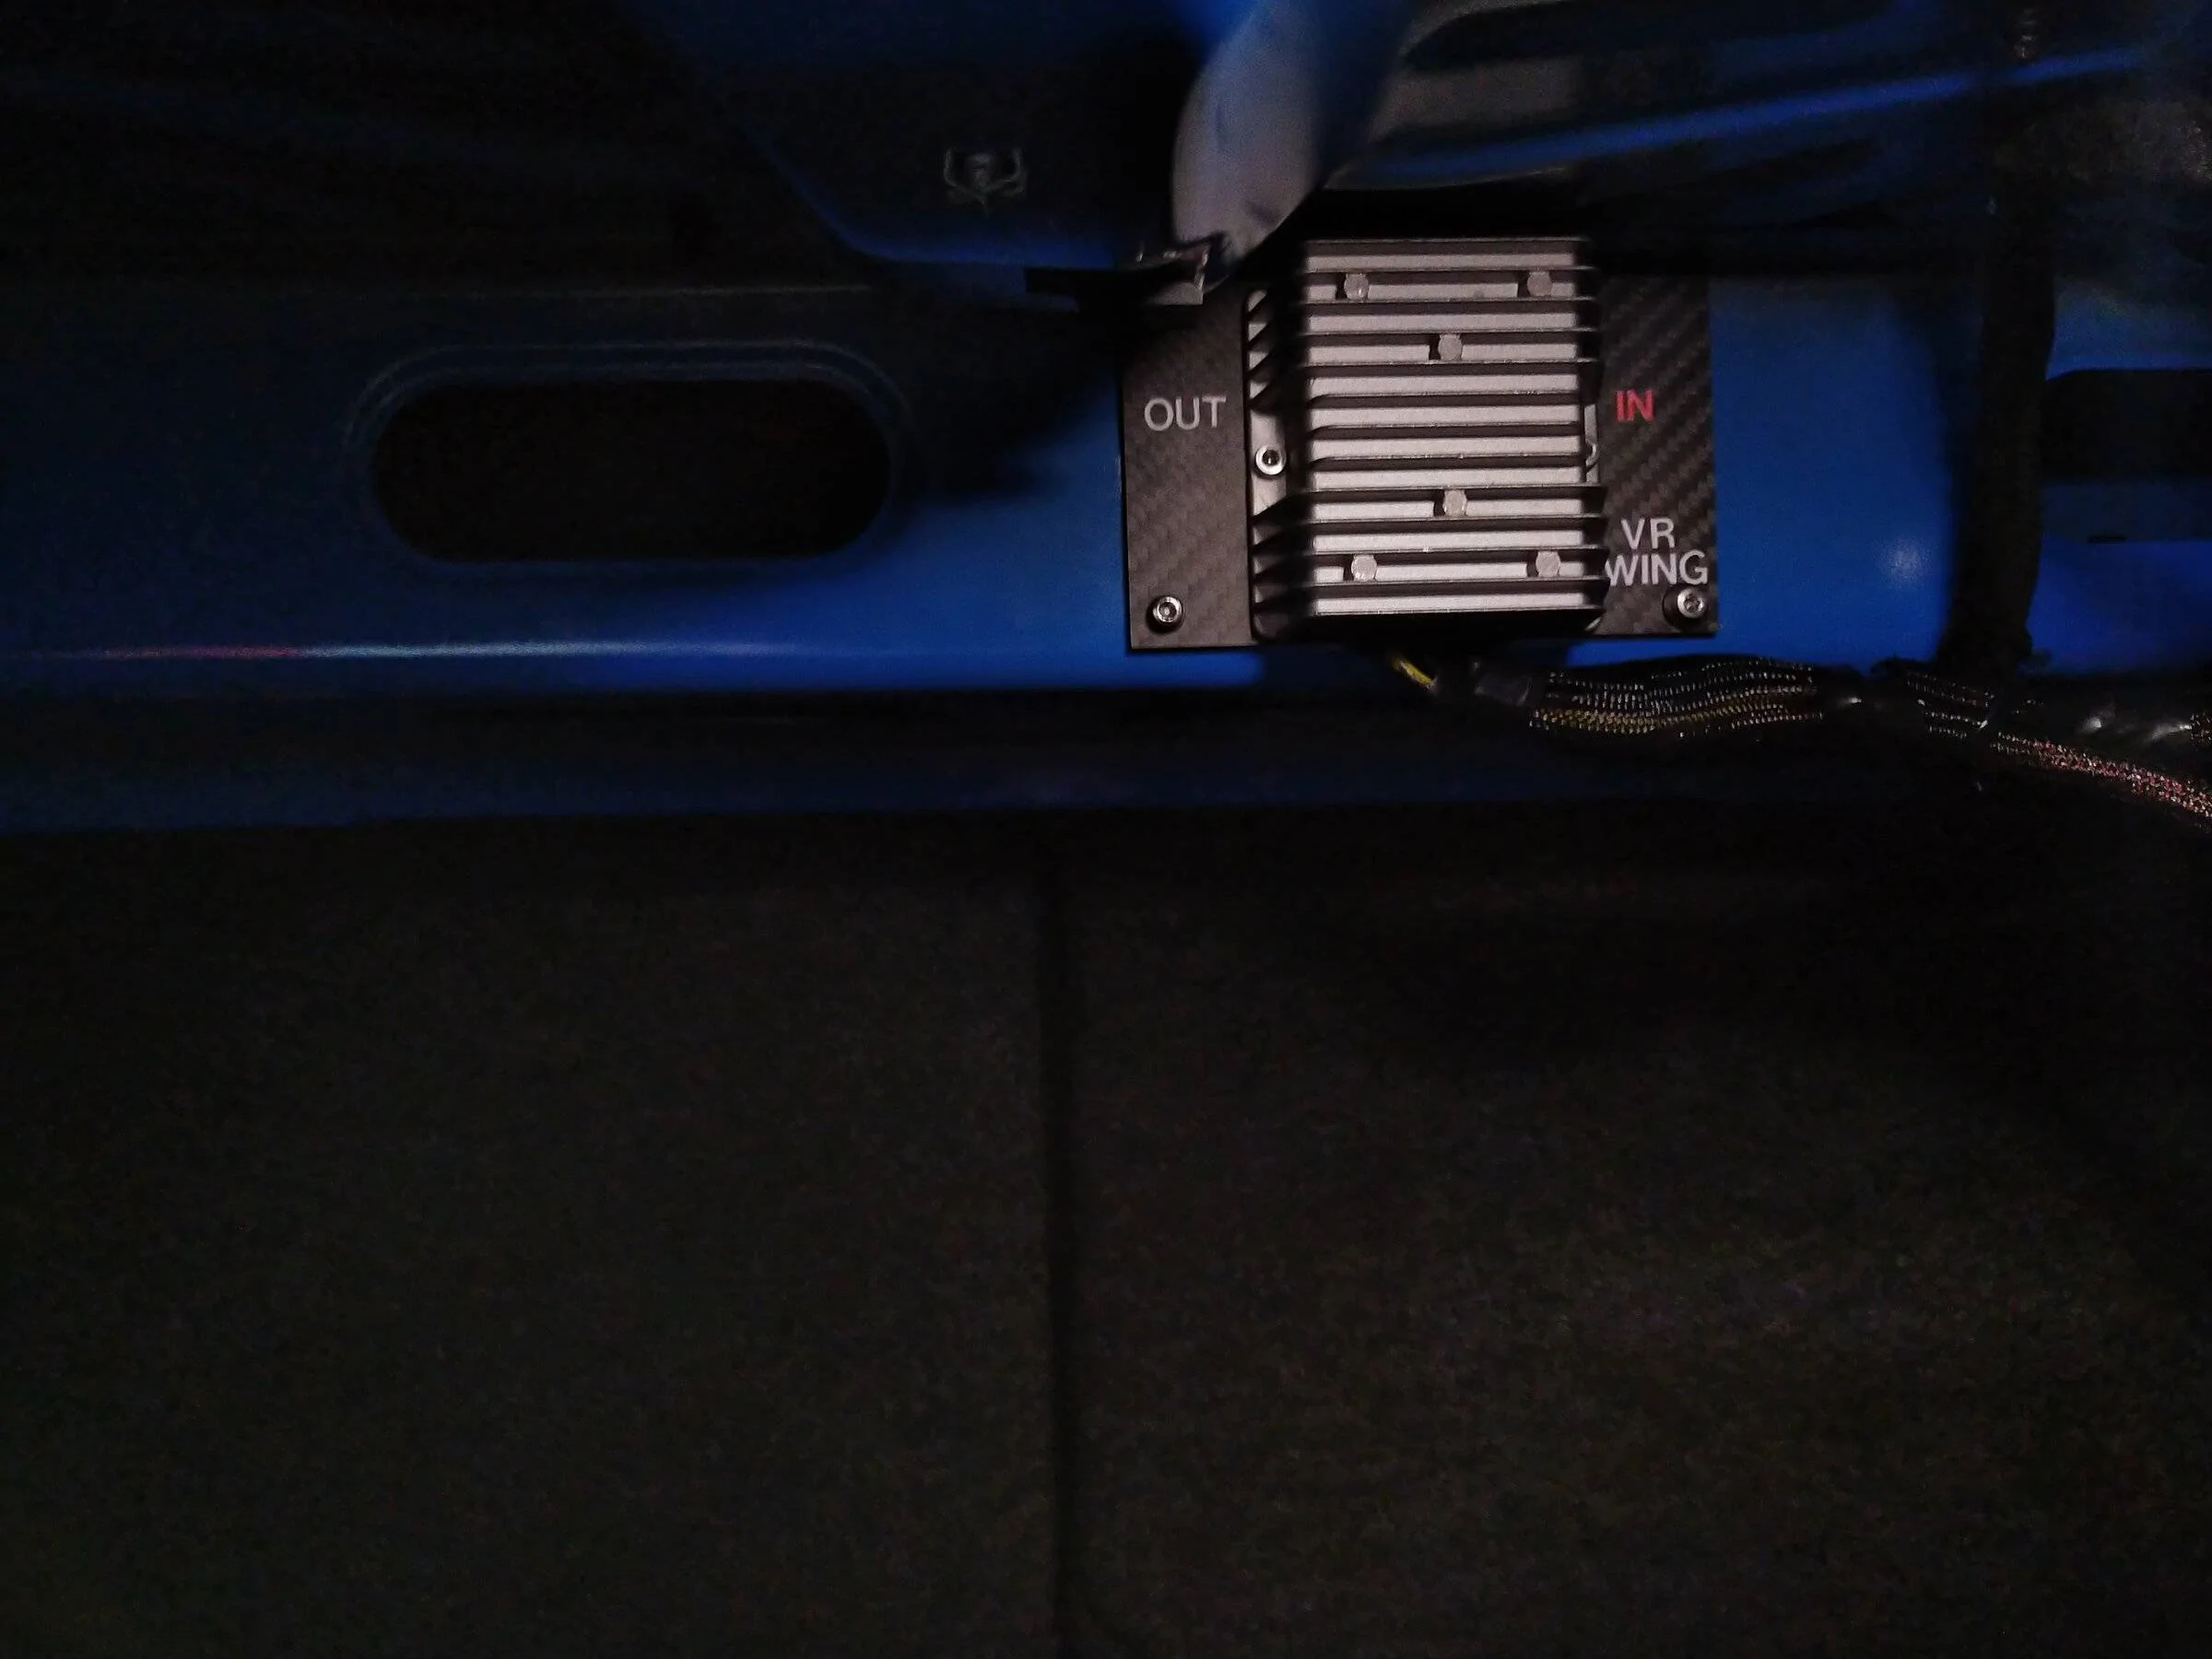
Now to keep things really clean and hidden I used a step drill on the underside of the control box. ¾” hole and used a grommet on either side. This way all the wires run from behind the box into the control box. 4 bolts to remove the brackets for the electronics to get to a bare plate. Do not move the boards around while doing this. The arduinos and other hardware need to remain in place. They are held together by their own brackets, but the connectors and ribbon cables could come lose. (Speaking of ribbon cables, check all connections in the box. One of my ribbon cables was half out when received. Pushed it back in and put a dab of hot glue on it) Take pictures of everything. That way if something comes loose you know where it goes! 3 bolts are the same length, 1 is shorter. Remember where the shorter bolt goes if you do this!
Test run. Wire up everything per the schematic and turn her on. Hopefully it works. Assuming it does a few things left to do, but have a beer first. you deserve it! Hopefully the rest of yours is much smoother than mine!
Active aero first test - GIF - Imgur
END plates….
I highly suggest you call VR and get them to do a full mockup of the wing with the endplates on and tightened down pre shipment. One of my endplates is toed in and cambered in. I also had to use the tap to clear out the threads into the core. If you have to tap go slow, slow, slow. You do not want to break those inserts loose. I screwed the tap in by hand with a little wd40 on the tap itself, turned it with a small crescent wrench till it hit resistance and backed it out. Cleaned it off went at it again. I had to do this on 3 of the 4 inserts. Only takes about 5 mins per hole, but something to consider. Do not turn that tap with extreme force. The resin will work itself out after a couple passes and you’ll be good.
Now the end plate that’s screwed up they recommend I use a sanding block on the end cap resin on the wing itself to square it up. Quite frankly this fix pisses me off and should have been done by them. As previously stated, I am not a body guy and have no desire to do this. Major pain in the ass. Now this could be due to them rushing my replacement wing to me. I don’t know. So please call and have them do a test fit. Will update with how that worked out later. That’s where the respirator comes into play for the needs list above. Obviously particulate is bad, so be safe.
Assuming all that's good…. last on the list is where to put the remote, reinstalling the panels you pulled, and doing the chassis mounts.
According to their installer the chassis brace should sit no more than 1/8th of inch off the taillight housing. You do not want downforce to be applied to the light assembly. Drilling the chassis for the plates is little sketchy but nothing major. You have already drilled 8 holes in your deck. 6 more to go, but this time I to the car itself. In the instructions the pictures show a spade bit being used. VR recommends you use the included drill bit for this part instead, not a spade bit. Remember down force will be applied here so make your holes as perfect as possible.
They recommend using a hole punch on the inner hole you marked. This is tricky at least for me. My punch is the standard 5" and the angle to mark the hole can cause the punch to slip. I also had to punch it maybe 5-10 times till I could feel the mark on the inside. I marked as best I could, then drilled a tiny pilot. Marked my correction if needed to center then drilled it out with the 1/4" bit. Worked fine. I went one hole at a time. Mocked up with the bolts snug. Marked my next hole,drilled, repeated for all 6.
With the chassis mount in you want the trunk to close cleanly and not really touch the brace at a parked position. That’s where the bolts you previously cut down come into play. Use a little toothpaste on the bolts and close the trunk. Push the trunk closed above the latch, not from the wing. If it touches you will transfer the toothpaste to the plate and know where to drill your recess. Ideally you want a few mm clearance. Do not put a glob of toothpaste on the bolt. Very thin coat. That way you know how much you need to relief cut the plate. Just enough for it to close without touching. They will touch as soon as downforce is applied. It may take several times opening and closing the trunk to get it perfect.
REMOTE locations
The Remote needs to be plugged in at all times. You can’t set it and unplug the cat line from the control box. It is also not something that needs to be monitored, but will be nice to have access to it while seated. If you want to know what your wings doing look in the rearview mirror. Set your mode and drive. Making adjustments on the fly with the remote would be pretty dangerous I imagine. If you want to adjust the g force for airbrake activation for example, pull into the pits, or pull over on the street. SO where to put it? Really that’s all up to you. Suction cup windshield mount style, dash solution, leave it in the trunk somewhere (do not leave it in spare tire well. It gets hot and will cook the unit I’m told). I chose to mount mine in the glove box using a piece of polycarbonate, wrapped in vinyl. That’s the easy part, put it wherever you want and route the cable accordingly.
PART 2
Using the remote
The remote really doesn't come preprogrammed. It has factory function test only. It is up to you to set each mode.
You will need an angle finder. I used a digital one off Amazon. The instructions say the angle of attack will have reference numbers that you can base settings off. This is not true. When adjusting attack angle you have to measure the actual angle using an angle finder. There are no angle numbers on the LCD screen
DRS should be near 0 degrees. Make sure it is not negative degrees as that would cause lift, and lift is bad. Measure your wing angle on a flat surface, from the center of the wing. I put mine at about 1 degree.
DRS will be your default wing start position unless you change the D1 speed settings to 0mph. DRS will stay untill you reach whatever speed setting d1 is set to activate. Also at this time the steering wheel DRS button is not an available option as stated in the instructions. I'd call Victor as to the why's, but basically it's a liability issue, and putting the car into DRS at speed, basically removing downforce, could cause a lot of potential issues. So for now DRS is a start feature only. It's set to activate from 0-30mph in stock form. Or however you set it.
You can set the wing to a fixed position anytime you want. It will stay locked and function as a regular wing would. Also, for street you can adjust it to what you want for how you daily it. Drastically reduce airbrake activation, Have DRS/D3 activate at cruising hwy speed for commutes etc. prob save you some gas milage that way.
While the winters are fairly mild in NC, it is still winter, and I won't really know what it can do until it warms up. There are a few pages dedicated to using the remote and adjusting settings that come with the kit.
For now I'm setting it up for two street, and 1 track setting. P1 daily, P2 street/tracking, P3 Full track. Obviously how you go about this all up to you. If it's a track only car you could use all 3 presets, 1 for each track you drive. Set up D3 to be similar to DRS so it activated at your highest speed coming out of your fastest turn. Lots to play with, and figure out. This is not a bolt a wing on and go drive. Test, test, test your settings.
So that’s it. Obviously not a step by step just things to watch out for and consider. It's pretty damn cool though so far. At this time it's too new to give an honest review and benefits. I need to really drive with it and dial it in to my liking.
Pros cons off the top of my head
PROS
-obviously active aero….why you’re here. Could also be a con if the settings are adjusted poorly
-it's really not that expensive for what it is. Value
-wow factor, it's a very interesting conversation piece.
-company seems great overall, responsive and the attention to detail (minus end plates for me) seems way above par
-lifetime warranty
CONS
-Its heavy 30ish + lbs
-Install is a lot of work. No way around it
-Definitely say it is a diy, or have VR install it if you're in TX. So much needs to be perfect that a random installer would prob rush through it and it just wouldn’t be right. Not a typical apr style wing… Especially concerning the chassis mounts. Get those wrong it’s an issue. If you do plan to have it installed by an outside shop. I would speak to the guy who will be doing the install directly beforehand. Make sure they understand what it is supposed to do and what the parts are actually for.
-fit and finish in my case, did I talk about that end plate yet?
*A few other notes. You can always apply touch up paint to the holes, and or rtv as you slide the bolts though. You don't want your deck/ car Rusting In spots in a few years.
I also will be hot glueing all the wire connections I did inside the control box. Don't want things vibrating loose over time....Applying a little foam to the box cover to help reduce vibration noise too is something on my list. Not that I have any atm, but just piece of mind/future prepping. That's easy enough to do at any time if needed though.*
That’s all I can think of offhand. This was a lot, so my brain is fried. If you buy one hope this helps, any questions feel free to ask. Again, this is very new to me, so I cannot speak to longevity, real world benefits etc. at this time.
I will note that this is a very niche mod, and while it is just a bolt on, there is much more to it than that. This is however not your average CF wing. And to be honest most will not need it/want it. I myself probably do not need this. I do not track my car enough to warrant it, or have the skill set to take full advantage of it at this time. I am hoping too though. While it does come preprogrammed of sort, the user needs to fine tune the settings.
If you get them wrong you could potentially make the vehicle unsafe to oneself or to those around them.
Victor Racing link
GT350T - 70" Smart Active Aero Wing | Victor Racing
Vid of it in action from YT fordfanboi. Huge thanks to him as well. He answered a ton of my question both pre, and post order
Circuit of the Americas 16 Shelby GT350 2:27.5 - YouTube
The active wing has five levels of adjustment that it does on the fly. Three levels of downforce dependent on speed, DRS, and the all interesting airbrakes. There is a street mode, as well as track of course. The angles of attack and g forces needed for airbrakes are adjusted based on those settings. The rest is done via speed settings. There is also a show mode for you car show guys that will adjust the wing while parked through the levels. Pretty cool, but will want a spare batt for shows (or so I’m told)
The full instructions as well as a few install videos are on their website, and if you considering this, I highly recommend you review those before you place your order. Nothing in the install is particularly hard, but there are things that may be beyond your comfort zone, and I would not want a random shop installing this. (I will get more into that later). Also, I am just an avg. guy that wrenches on their car from time to time. I am not a mechanic/body guy or anything of the sort. If my recommendations are countered by someone who knows better, please take that into consideration. There are so many ways to do things I do not claim at all that the way I did things are the best by any means.
So lets say you read this far and say to yourself this sounds really interesting…well then let's get into it
First off here is a list of things you will need not included in your kit in no particular order
-Sanding blocks
-Vinyl (color of your choosing)
-Thread tap m6x1
-14 gauge wire
-Fuse tap, or relay
-in line fuse
-Tape measure ( a good one)
-RTV (color of your choosing, I used clear)
-zip ties
-blue tape
-18g wire assorted colors (you may need to extend actuator wiring depends how you run them)
-Soldering iron or butt connectors
-electrical tape
-wire cutting tools
-Shop rags
-step bit up to at least ¾’
-Assorted grommets
-center punch
-mounting solution for remote (phone style windshield mount, trunk mount, or custom…your choosing)
-20ft cat7 cable (depending on where you plan to mount the remote. Kit includes a 10ft cable)
-cable sleeving
-wd40
-locktight
-metal files (basic set of multiple sizes)
-panel pry tools, snap remover
-dremal, hack saw or whatever you prefer (bolts need to be trimmed)
-Drill jig
-ppe (glasses, gloves, mask, potentially a respirator)
-And the all-important Patience and TIME, and a celebratory drink of your choosing.
*I will probably add to this later, that’s just what I could think of offhand. Of course, you need basic tools as well
Kit arrived in two boxes. Meticulously packed.


Check to make sure everything is there. I was missing my deck bolts/hardware. VR shipped them out quickly and I had em in a few days. Measure the distance between the brackets on your wing. Mine were riveted 5” off either side. Again, VR sent a replacement wing right out. Highly doubt that will happen to anyone else again. They paid shipping both ways for that (not cheap) But if something is off like that, they will take care of you. No complaints at all there from me. So now you have everything onto the install….
---So, to start…(Power/Ground)
There is no explanation of where to pull power from in the instructions, or anything included for that in the kit. You have to figure that out on your own. Each actuator will pull up to 5a so 10a total. I’m starting with running a fuse tap from the passenger kick plate. Fuse 23 which is 10a switched. Running power wire from there to rear with another 10a in line fuse (just for added protection) and using the factory body ground by the trunk latch. (You need to pull the trunk panels anyway for a later step) You will need to pull panels, rear seat etc. to tuck the power wire, and remote line (assuming of course you don’t have a gutted track car already. I won't go into that. Research audio installs on YouTube or here, and you will see how that all is done. Pretty basic. I would not reinstall the panels you pulled until the wing is on, and you have done a functions test. Keep the panels set aside for now. Of course, the other option is to run a relay. Prob the better way to do it, and I will do that is the tap doesn’t work out.

---So now you have a plan for wiring let's get to the deck….
You have options here. Use your factory deck, wingless or not. Pull said wing and get to work. Orrrr.... Grab a spare off eBay, or blank, your choice. I will say my kit took 5-6 months to get here from VR from the day I ordered. (Covid supply chain disruptions) It was supposed to be here in 5ish weeks. So, from when you place your order you have time to figure out a plan for a deck lid. Do whatever you think is best.
Removing a factory wing is easy enough… again search. My GT350 wing left a ton of holes. As for measuring the brackets for drill preparation.... its measuring…measure 100 times then drill. Use a hole punch to mark center and drill a pilot if you would like. Use a drill guide to make sure your holes are straight through, not angled. If you do it by eye you may have to file and blow out the holes to line it up…that’s bad. Clean up the burrs from your holes with a thin file. Don’t get crazy. Do the underside too as the tolerance for those zip tie spacers are tight. They will go in, but a burr on the inside between layers will make your life a living hell. 45-degree file on the inside of the holes a little and your good. *Some wording I use throughout like (zip tie spacers/supports) in this instance will not make sense unless your familiar with the instructions.

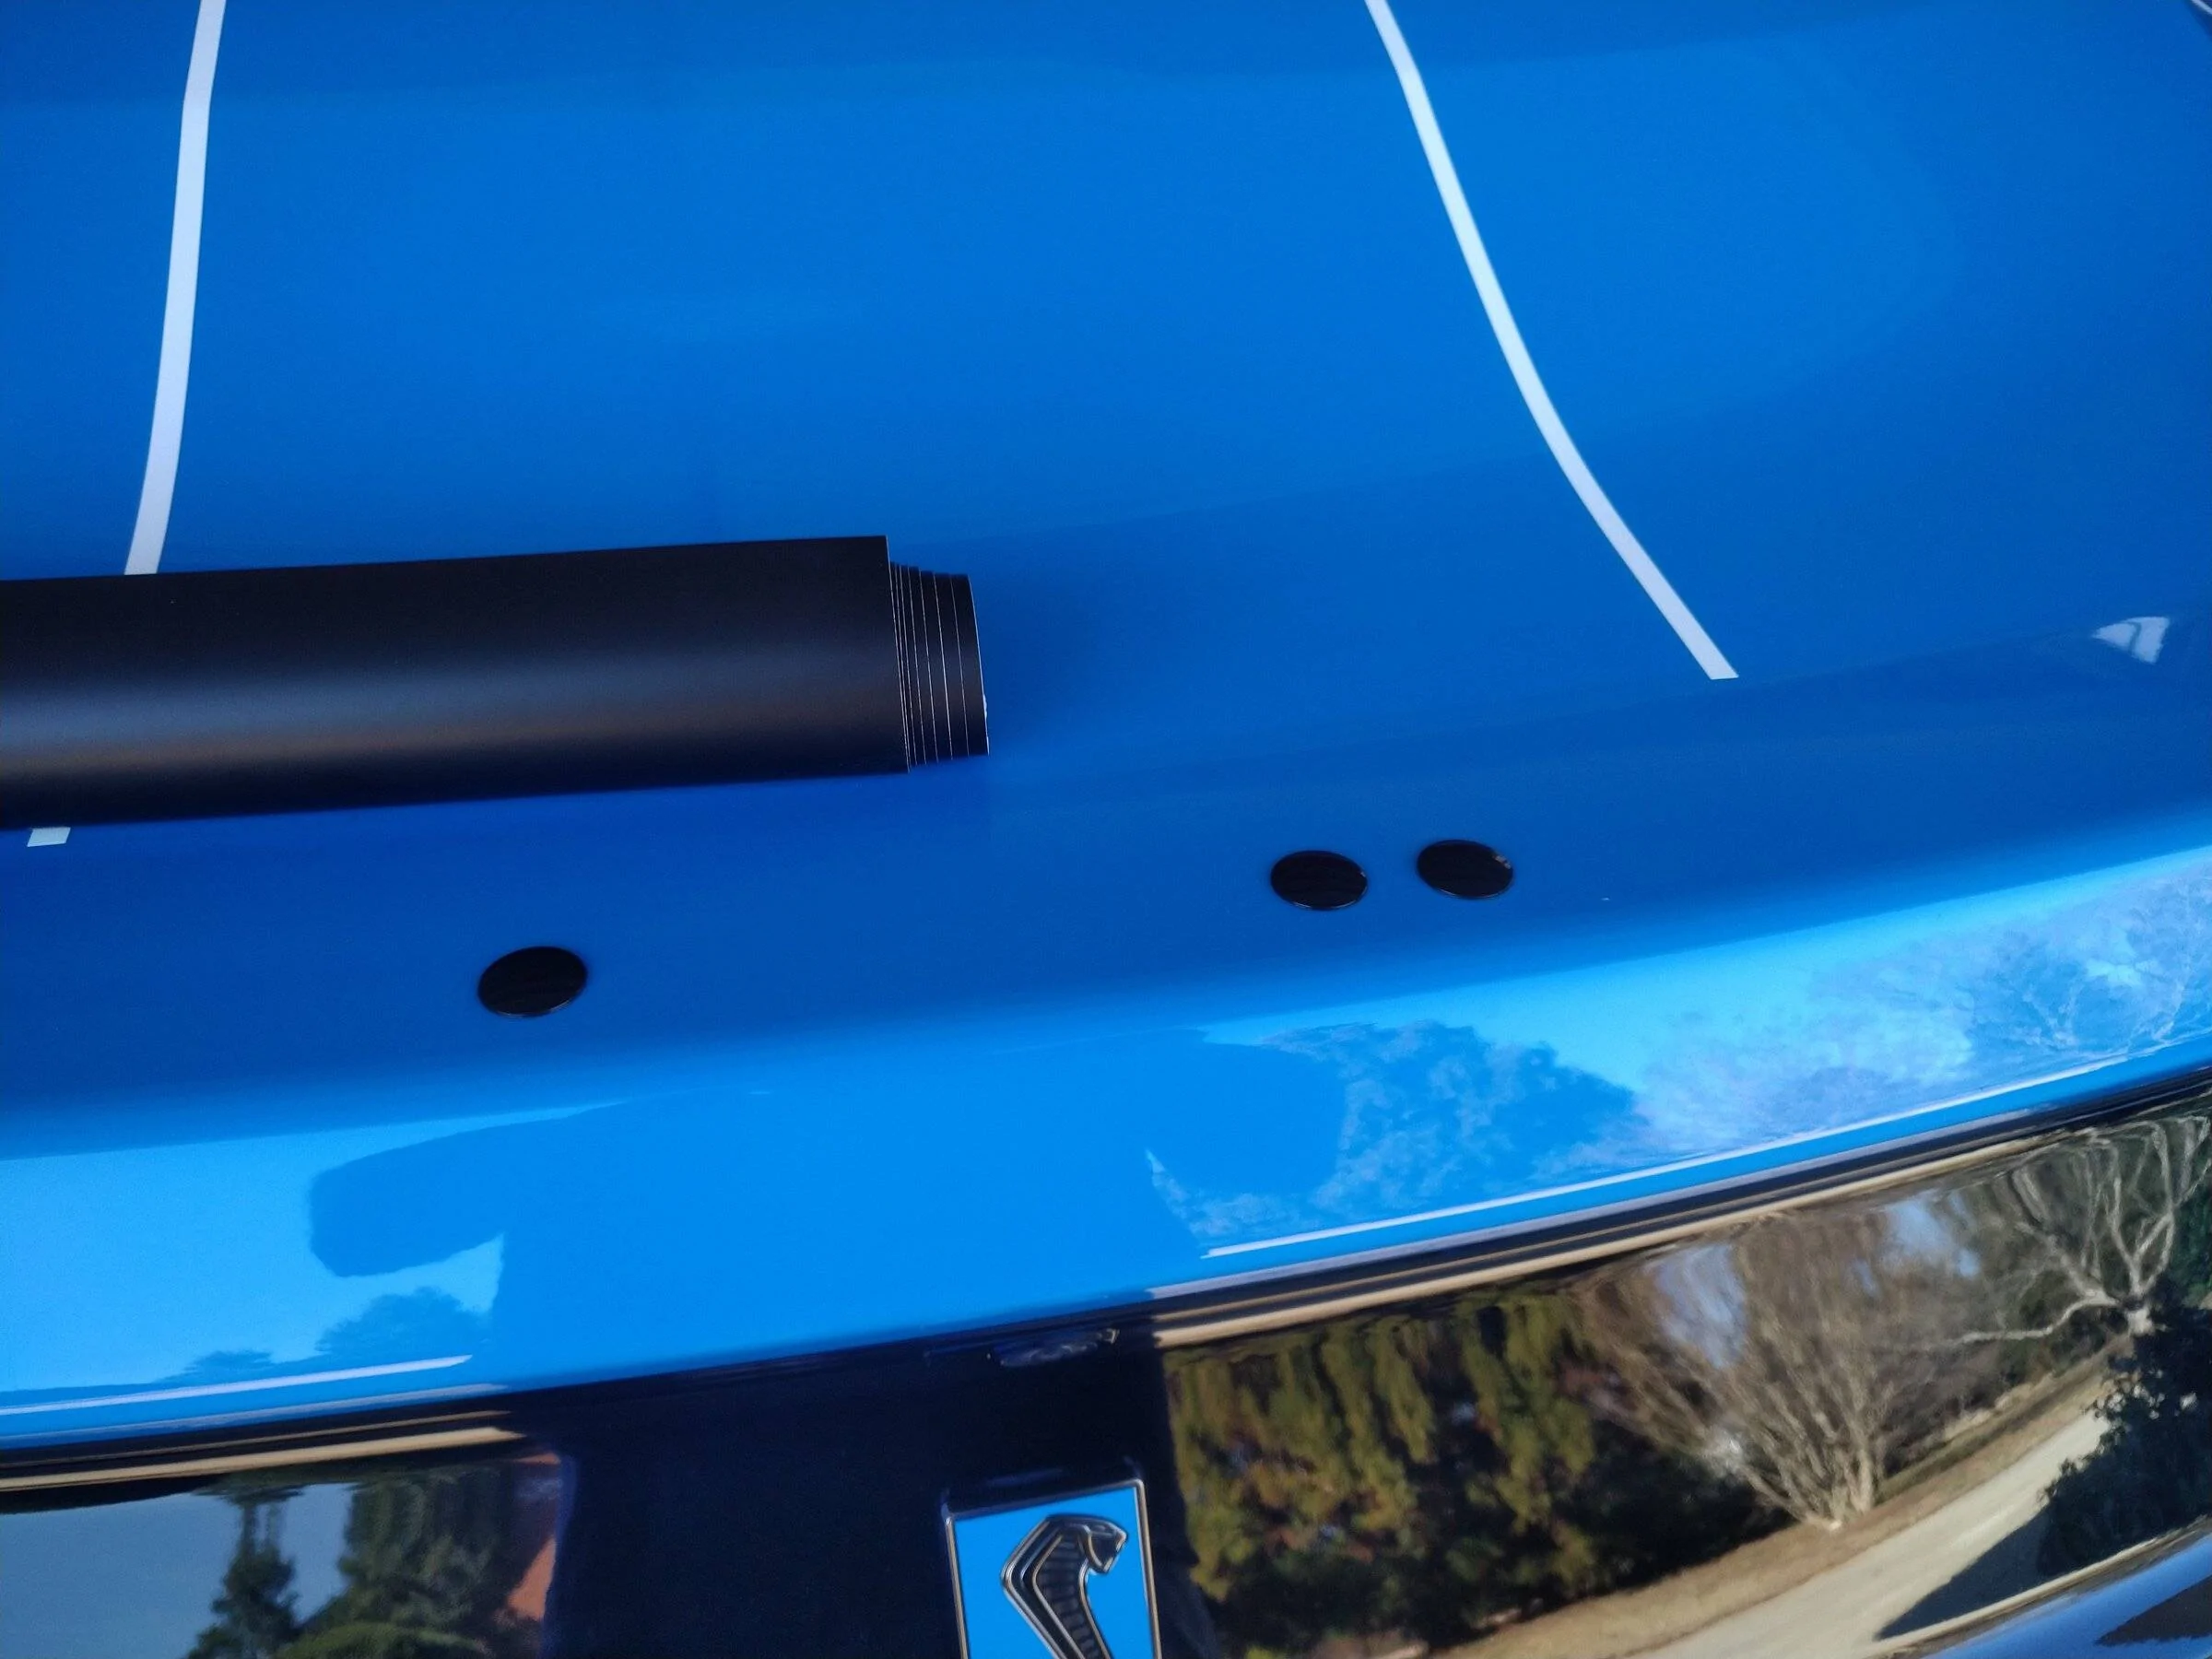


Hole patching….The middle holes in my case are covered by the stripes, leaving one hole visible after the new mounts are on either side. That is where the vinyl and some of the rtv come into play. The proper way to do it of course would be to take it to a body shop and have them patched…I didn’t do that. I had some spare thin gauge plastic sheeting….(not sure what type offhand, but doesn’t matter) cutout a circular shape, covered in rtv and plugged the vacant holes from the inside. Blue tape on the deck outside beforehand with cutouts in the shape of the holes you plan to patch.…keep the hole cutouts nice and clean as the rtv will touch anything not taped. …don’t make a mess. Then I used a squeegee to smooth overflow of rtv for the center 3 holes in the deck. Two rtv patches of sort. Pulled the blue tape off immediately and let it cure for 24hrs. nice smooth rtv plug that are not visible when the stripes/vinyl are applied. Obviously while this works temporarily for me it's something to consider for yourself. Figure out a plan on how to tackle holes in your trunk if applicable. Plugs, vinyl, filler etc. your call.
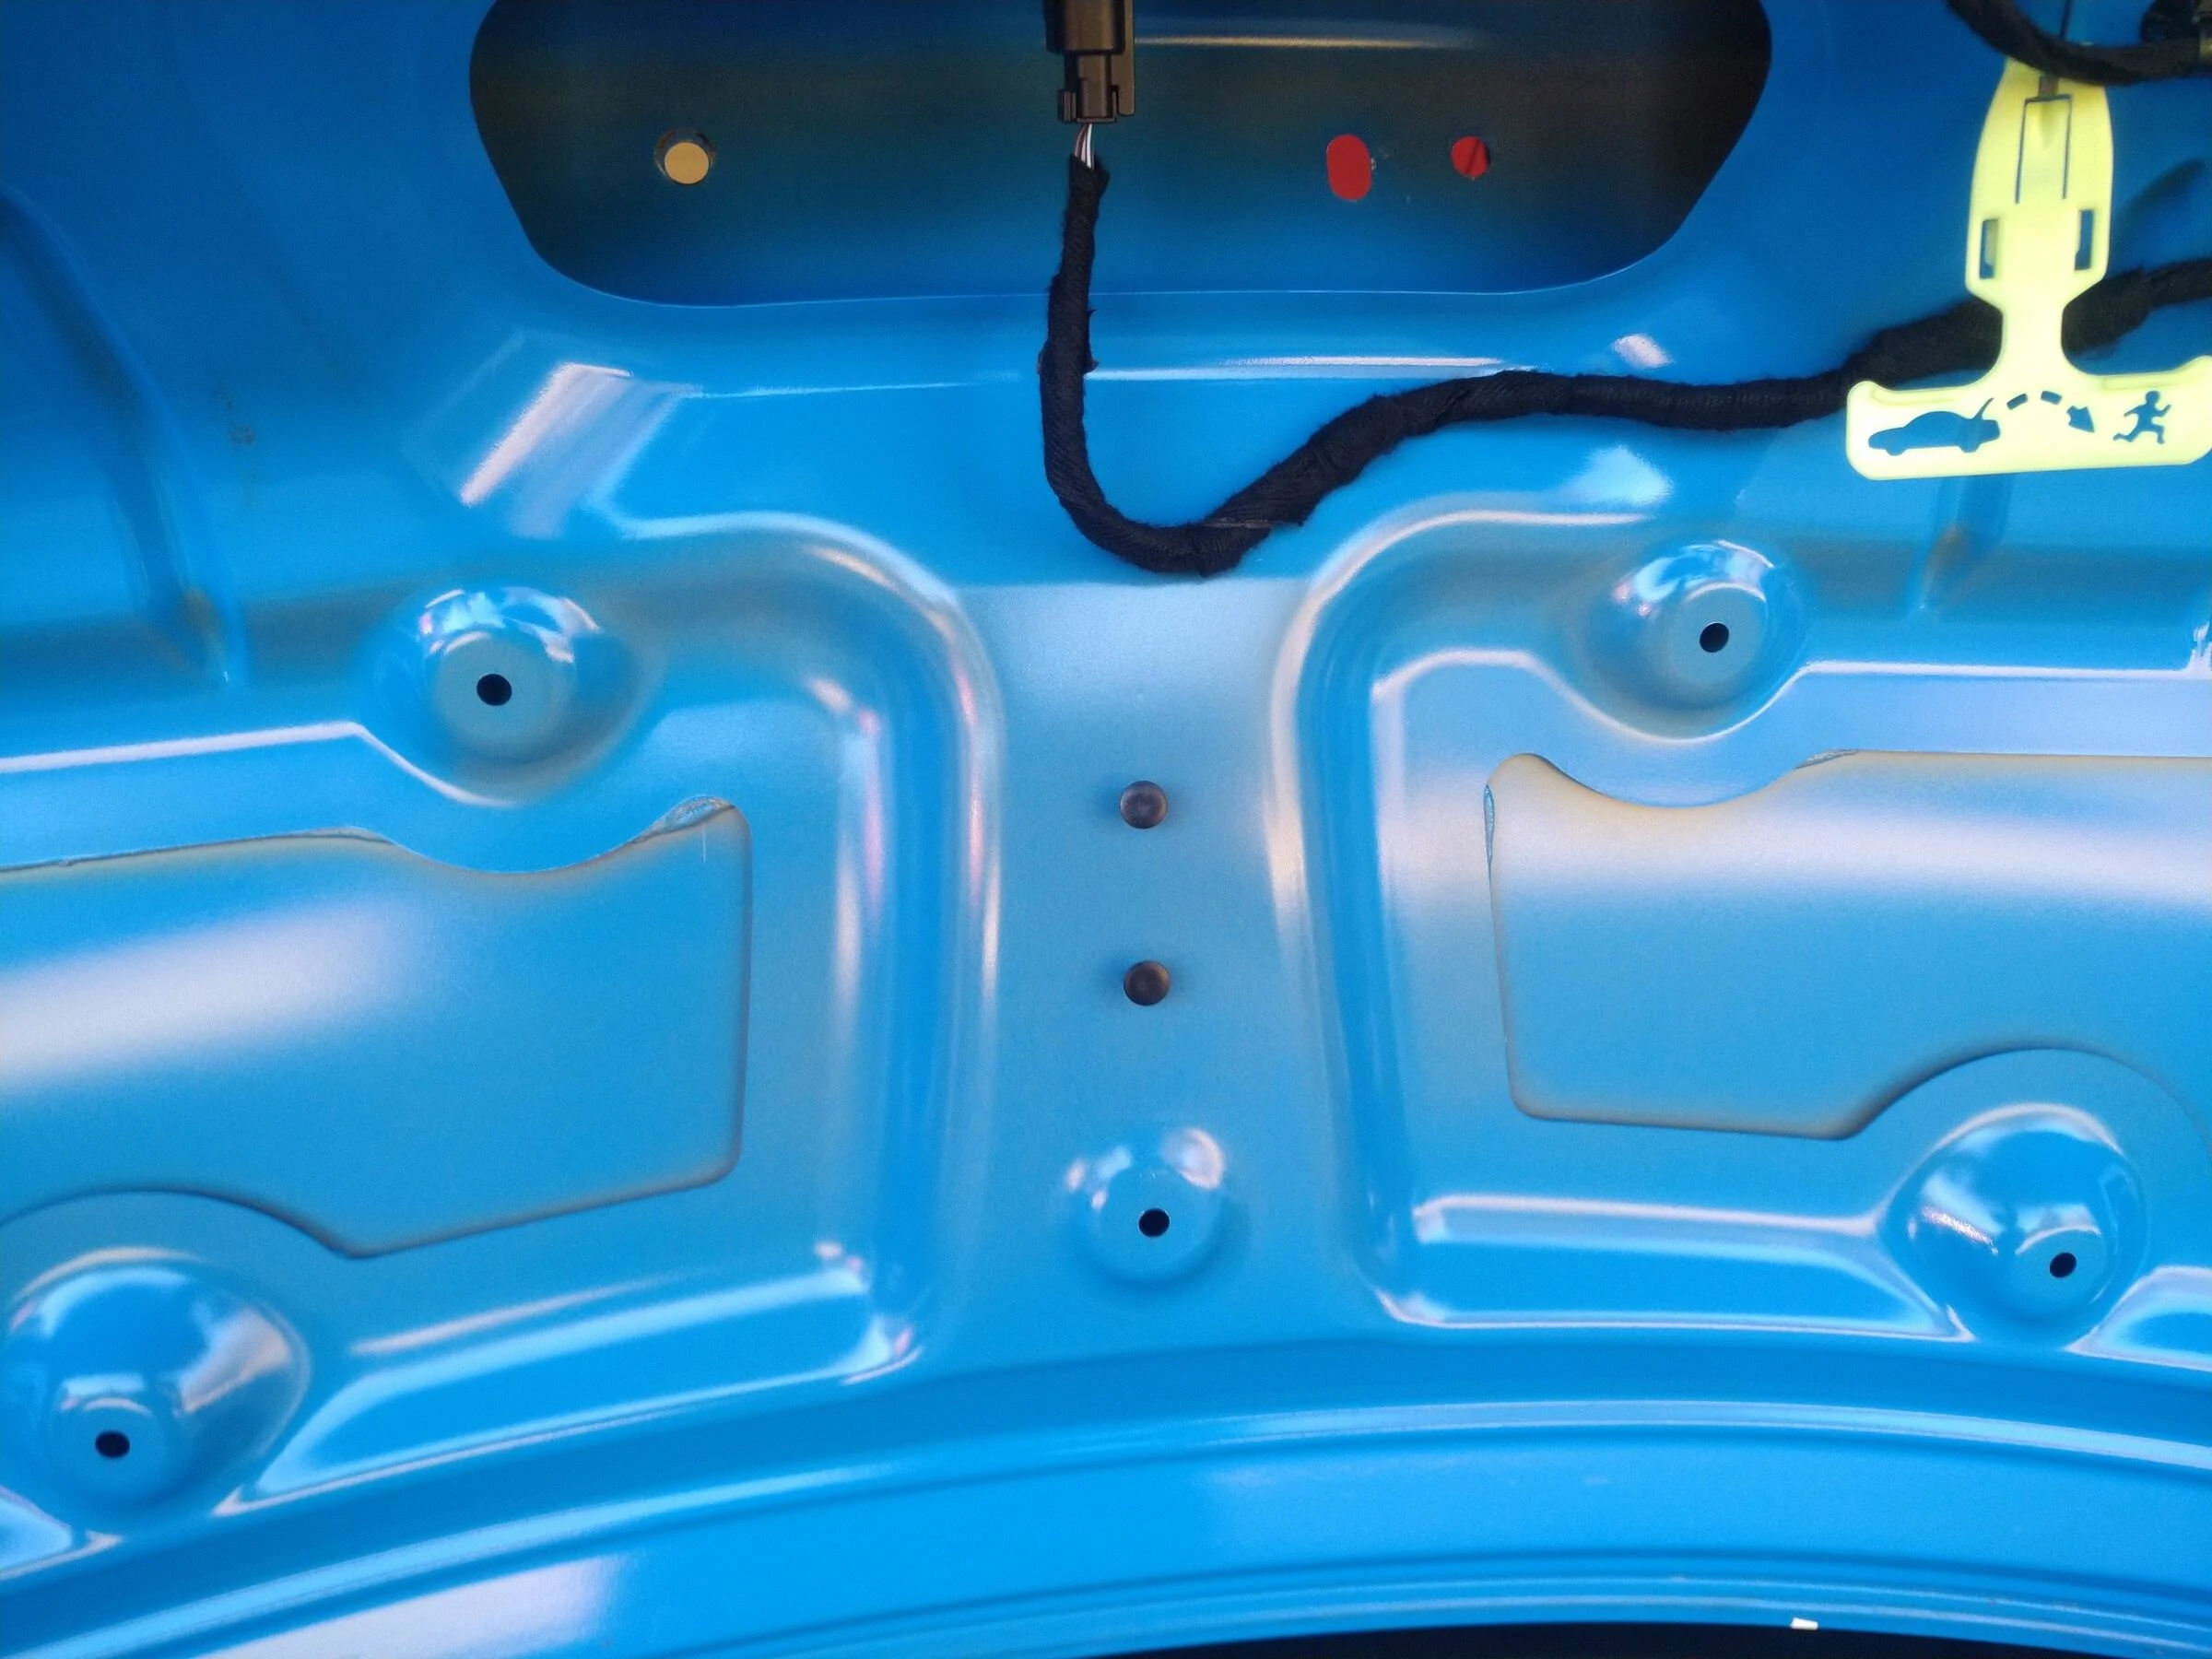
*in the picture above you can see where I drilled the holes in the center trunk for the control box. I would lower those down by an inch. the top of the box is very close to the trunk liner making putting the cover on the box a pita. (better pics of the finished box will be further down in the thread) if you do lower it you may need to extend the actuator wires too. something to consider. I used those two plugs with toothpaste on them to transfer the hole marks to the trunk liner.*
Center holes plugged… I had to figure out a plan for the outside hole that are not covered by the new wing mounts. The hole is so close to the bracket I wish the design just extended out a tad to cover it. My solution was a cf vinyl cutout that covered everything under the mounts and the hole itself. So, an odd shape of cf vinyl is visible, but it helped seal up the other holes as well under the mounts. Again, used rtv on all those holes. (Do not do that that until the inner supports are in though. Reference the instructions) I could not get a plug on the underside outside edge as it was too far back between trunk layers to reach.

Success…. your wing is on, its hopefully straight, your holes are plugged and you wiring is ready…. Wiring…

As previously noted, you should have your power /ground sorted. I mounted the GPS antenna to the underside of the trunk lid. Lower right hand corner of the single sheet (not double) if this doesn’t work (signal disruption) I will update. Actuator wiring… I routed the lines through the deck lid so all would be hidden under the trunk cover. Worked great but I had to extend 3 actuator wires from the right side. Only by about 4-5"s. Poked holes behind the control box in the trunk cover, and it keeps everything hidden. Ground and power did the same. The only cable you cannot hide is the cat cable to the remote. That will be visible when the trunk is open just because of where the connection is. Maybe Vr could relocate that in the box later…. (wish list)
*Forgot to mention pulling the actuators cables through the grommet is kind of a pita. Pull too hard grommet pulls through. I used a little ky on a qtip and man that thing slid right through no problem. Dish soap would prob work as well. Remember you have to rtv that later though so use a lube that is water soluble.
Now to keep things really clean and hidden I used a step drill on the underside of the control box. ¾” hole and used a grommet on either side. This way all the wires run from behind the box into the control box. 4 bolts to remove the brackets for the electronics to get to a bare plate. Do not move the boards around while doing this. The arduinos and other hardware need to remain in place. They are held together by their own brackets, but the connectors and ribbon cables could come lose. (Speaking of ribbon cables, check all connections in the box. One of my ribbon cables was half out when received. Pushed it back in and put a dab of hot glue on it) Take pictures of everything. That way if something comes loose you know where it goes! 3 bolts are the same length, 1 is shorter. Remember where the shorter bolt goes if you do this!


Test run. Wire up everything per the schematic and turn her on. Hopefully it works. Assuming it does a few things left to do, but have a beer first. you deserve it! Hopefully the rest of yours is much smoother than mine!
Active aero first test - GIF - Imgur
END plates….
I highly suggest you call VR and get them to do a full mockup of the wing with the endplates on and tightened down pre shipment. One of my endplates is toed in and cambered in. I also had to use the tap to clear out the threads into the core. If you have to tap go slow, slow, slow. You do not want to break those inserts loose. I screwed the tap in by hand with a little wd40 on the tap itself, turned it with a small crescent wrench till it hit resistance and backed it out. Cleaned it off went at it again. I had to do this on 3 of the 4 inserts. Only takes about 5 mins per hole, but something to consider. Do not turn that tap with extreme force. The resin will work itself out after a couple passes and you’ll be good.
Now the end plate that’s screwed up they recommend I use a sanding block on the end cap resin on the wing itself to square it up. Quite frankly this fix pisses me off and should have been done by them. As previously stated, I am not a body guy and have no desire to do this. Major pain in the ass. Now this could be due to them rushing my replacement wing to me. I don’t know. So please call and have them do a test fit. Will update with how that worked out later. That’s where the respirator comes into play for the needs list above. Obviously particulate is bad, so be safe.
Assuming all that's good…. last on the list is where to put the remote, reinstalling the panels you pulled, and doing the chassis mounts.
According to their installer the chassis brace should sit no more than 1/8th of inch off the taillight housing. You do not want downforce to be applied to the light assembly. Drilling the chassis for the plates is little sketchy but nothing major. You have already drilled 8 holes in your deck. 6 more to go, but this time I to the car itself. In the instructions the pictures show a spade bit being used. VR recommends you use the included drill bit for this part instead, not a spade bit. Remember down force will be applied here so make your holes as perfect as possible.
They recommend using a hole punch on the inner hole you marked. This is tricky at least for me. My punch is the standard 5" and the angle to mark the hole can cause the punch to slip. I also had to punch it maybe 5-10 times till I could feel the mark on the inside. I marked as best I could, then drilled a tiny pilot. Marked my correction if needed to center then drilled it out with the 1/4" bit. Worked fine. I went one hole at a time. Mocked up with the bolts snug. Marked my next hole,drilled, repeated for all 6.

With the chassis mount in you want the trunk to close cleanly and not really touch the brace at a parked position. That’s where the bolts you previously cut down come into play. Use a little toothpaste on the bolts and close the trunk. Push the trunk closed above the latch, not from the wing. If it touches you will transfer the toothpaste to the plate and know where to drill your recess. Ideally you want a few mm clearance. Do not put a glob of toothpaste on the bolt. Very thin coat. That way you know how much you need to relief cut the plate. Just enough for it to close without touching. They will touch as soon as downforce is applied. It may take several times opening and closing the trunk to get it perfect.

REMOTE locations
The Remote needs to be plugged in at all times. You can’t set it and unplug the cat line from the control box. It is also not something that needs to be monitored, but will be nice to have access to it while seated. If you want to know what your wings doing look in the rearview mirror. Set your mode and drive. Making adjustments on the fly with the remote would be pretty dangerous I imagine. If you want to adjust the g force for airbrake activation for example, pull into the pits, or pull over on the street. SO where to put it? Really that’s all up to you. Suction cup windshield mount style, dash solution, leave it in the trunk somewhere (do not leave it in spare tire well. It gets hot and will cook the unit I’m told). I chose to mount mine in the glove box using a piece of polycarbonate, wrapped in vinyl. That’s the easy part, put it wherever you want and route the cable accordingly.


PART 2
Using the remote
The remote really doesn't come preprogrammed. It has factory function test only. It is up to you to set each mode.
You will need an angle finder. I used a digital one off Amazon. The instructions say the angle of attack will have reference numbers that you can base settings off. This is not true. When adjusting attack angle you have to measure the actual angle using an angle finder. There are no angle numbers on the LCD screen
DRS should be near 0 degrees. Make sure it is not negative degrees as that would cause lift, and lift is bad. Measure your wing angle on a flat surface, from the center of the wing. I put mine at about 1 degree.
DRS will be your default wing start position unless you change the D1 speed settings to 0mph. DRS will stay untill you reach whatever speed setting d1 is set to activate. Also at this time the steering wheel DRS button is not an available option as stated in the instructions. I'd call Victor as to the why's, but basically it's a liability issue, and putting the car into DRS at speed, basically removing downforce, could cause a lot of potential issues. So for now DRS is a start feature only. It's set to activate from 0-30mph in stock form. Or however you set it.
You can set the wing to a fixed position anytime you want. It will stay locked and function as a regular wing would. Also, for street you can adjust it to what you want for how you daily it. Drastically reduce airbrake activation, Have DRS/D3 activate at cruising hwy speed for commutes etc. prob save you some gas milage that way.
While the winters are fairly mild in NC, it is still winter, and I won't really know what it can do until it warms up. There are a few pages dedicated to using the remote and adjusting settings that come with the kit.
For now I'm setting it up for two street, and 1 track setting. P1 daily, P2 street/tracking, P3 Full track. Obviously how you go about this all up to you. If it's a track only car you could use all 3 presets, 1 for each track you drive. Set up D3 to be similar to DRS so it activated at your highest speed coming out of your fastest turn. Lots to play with, and figure out. This is not a bolt a wing on and go drive. Test, test, test your settings.
So that’s it. Obviously not a step by step just things to watch out for and consider. It's pretty damn cool though so far. At this time it's too new to give an honest review and benefits. I need to really drive with it and dial it in to my liking.
Pros cons off the top of my head
PROS
-obviously active aero….why you’re here. Could also be a con if the settings are adjusted poorly
-it's really not that expensive for what it is. Value
-wow factor, it's a very interesting conversation piece.
-company seems great overall, responsive and the attention to detail (minus end plates for me) seems way above par
-lifetime warranty
CONS
-Its heavy 30ish + lbs
-Install is a lot of work. No way around it
-Definitely say it is a diy, or have VR install it if you're in TX. So much needs to be perfect that a random installer would prob rush through it and it just wouldn’t be right. Not a typical apr style wing… Especially concerning the chassis mounts. Get those wrong it’s an issue. If you do plan to have it installed by an outside shop. I would speak to the guy who will be doing the install directly beforehand. Make sure they understand what it is supposed to do and what the parts are actually for.
-fit and finish in my case, did I talk about that end plate yet?
*A few other notes. You can always apply touch up paint to the holes, and or rtv as you slide the bolts though. You don't want your deck/ car Rusting In spots in a few years.
I also will be hot glueing all the wire connections I did inside the control box. Don't want things vibrating loose over time....Applying a little foam to the box cover to help reduce vibration noise too is something on my list. Not that I have any atm, but just piece of mind/future prepping. That's easy enough to do at any time if needed though.*
That’s all I can think of offhand. This was a lot, so my brain is fried. If you buy one hope this helps, any questions feel free to ask. Again, this is very new to me, so I cannot speak to longevity, real world benefits etc. at this time.
Sponsored
Last edited: