

GTP
Deutsche Pony
- Joined
- May 27, 2015
- Threads
- 270
- Messages
- 6,143
- Reaction score
- 4,129
- Location
- Indy
- Website
- www.BambergAudio.com
- First Name
- Philip
- Vehicle(s)
- 2019 GT PP1 A10 Outrageous Orange HPDE mods
- Thread starter
- #1
Here is my technique for installing the ZL1 wicker bill onto my PP1 rear wing.
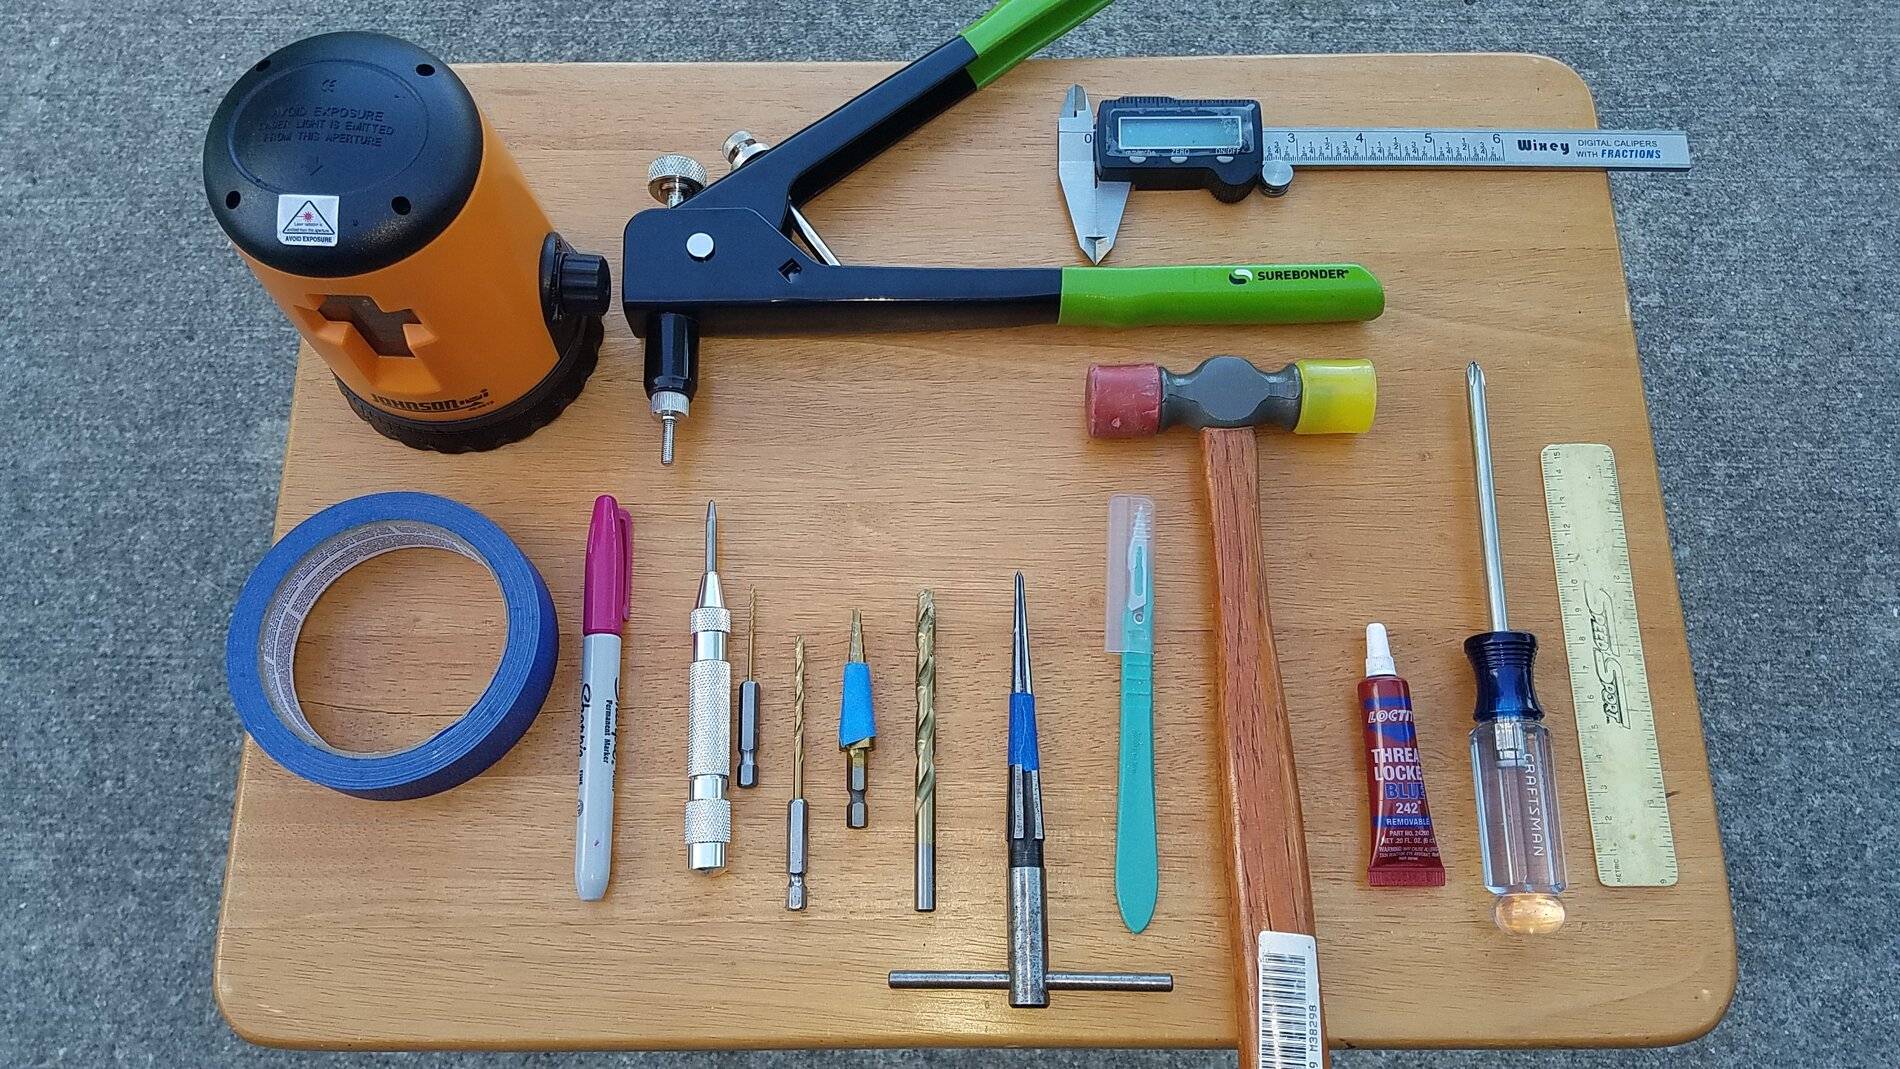
This first photo of the tools used explains a lot. I arranged them left to right in order of use.

Some tips:
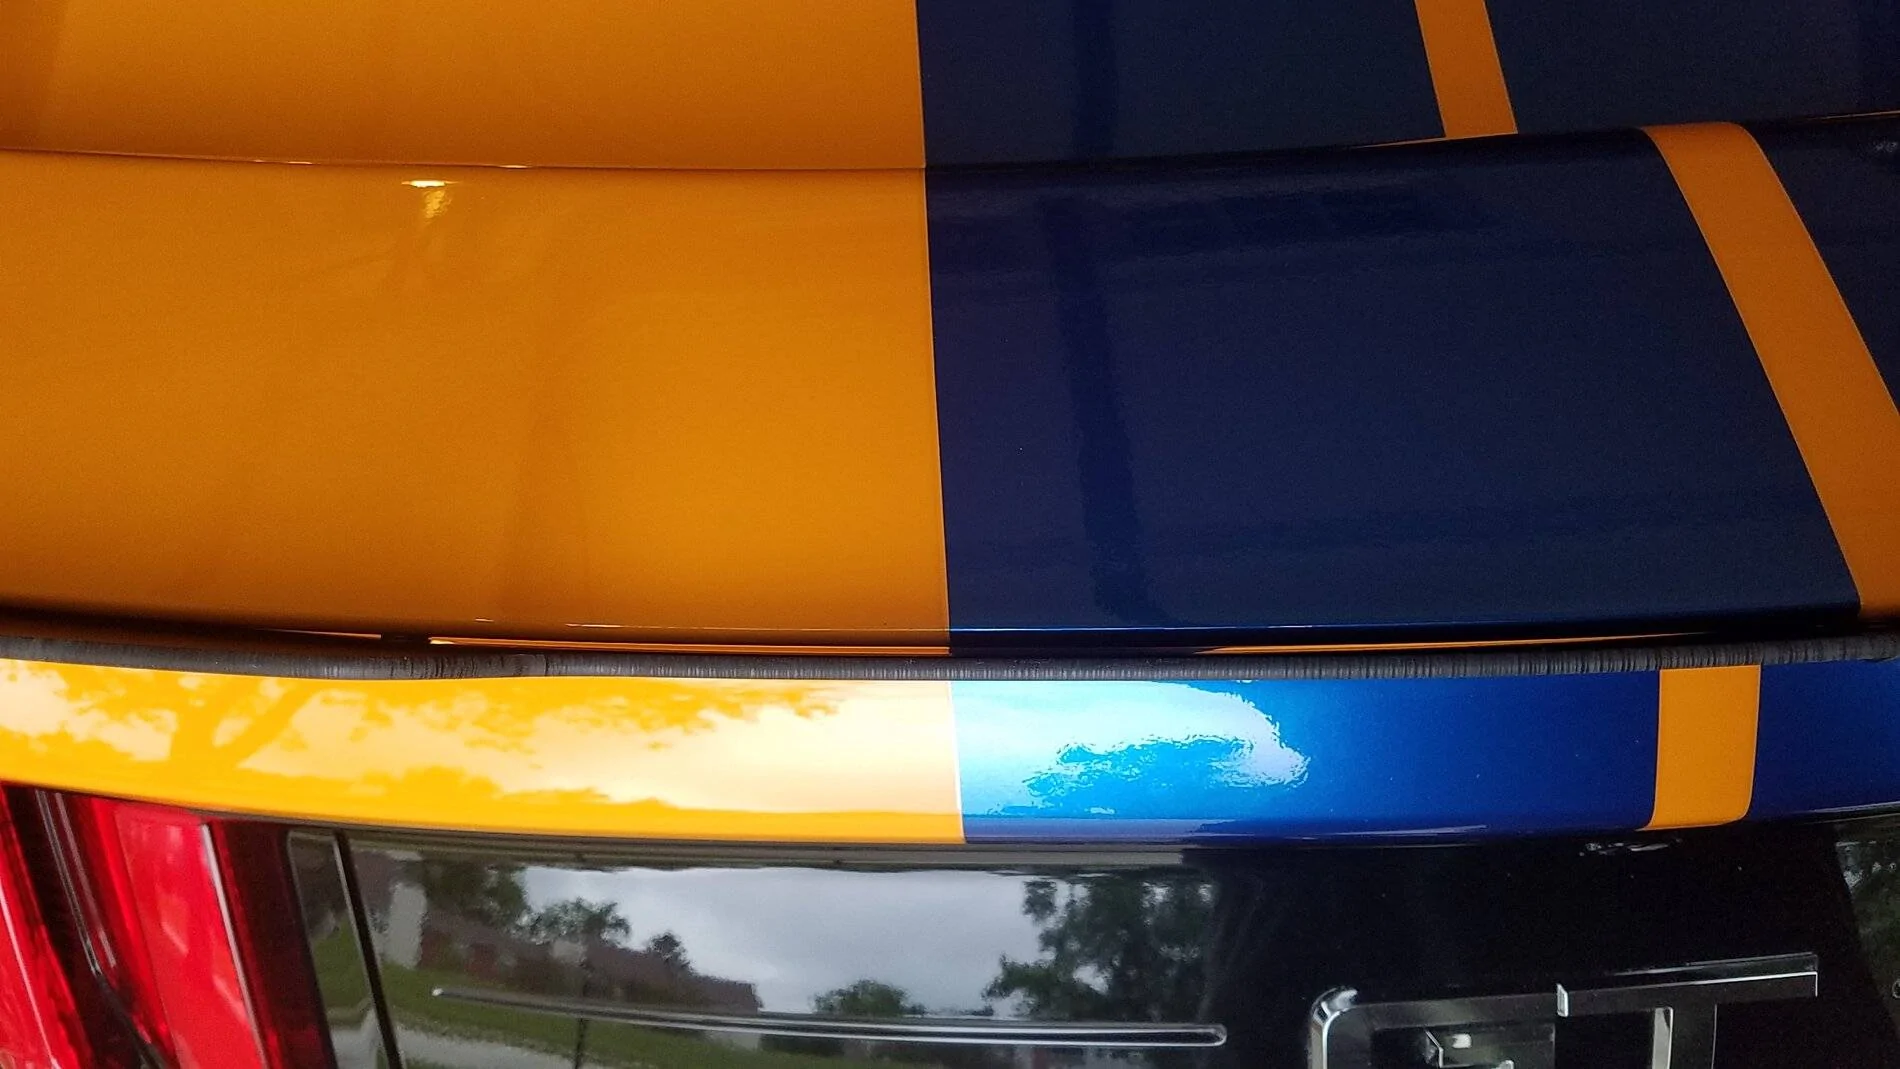
Photo of the air gap - this is sighted directly down the bill face (look for the thin orange line between two black lines):
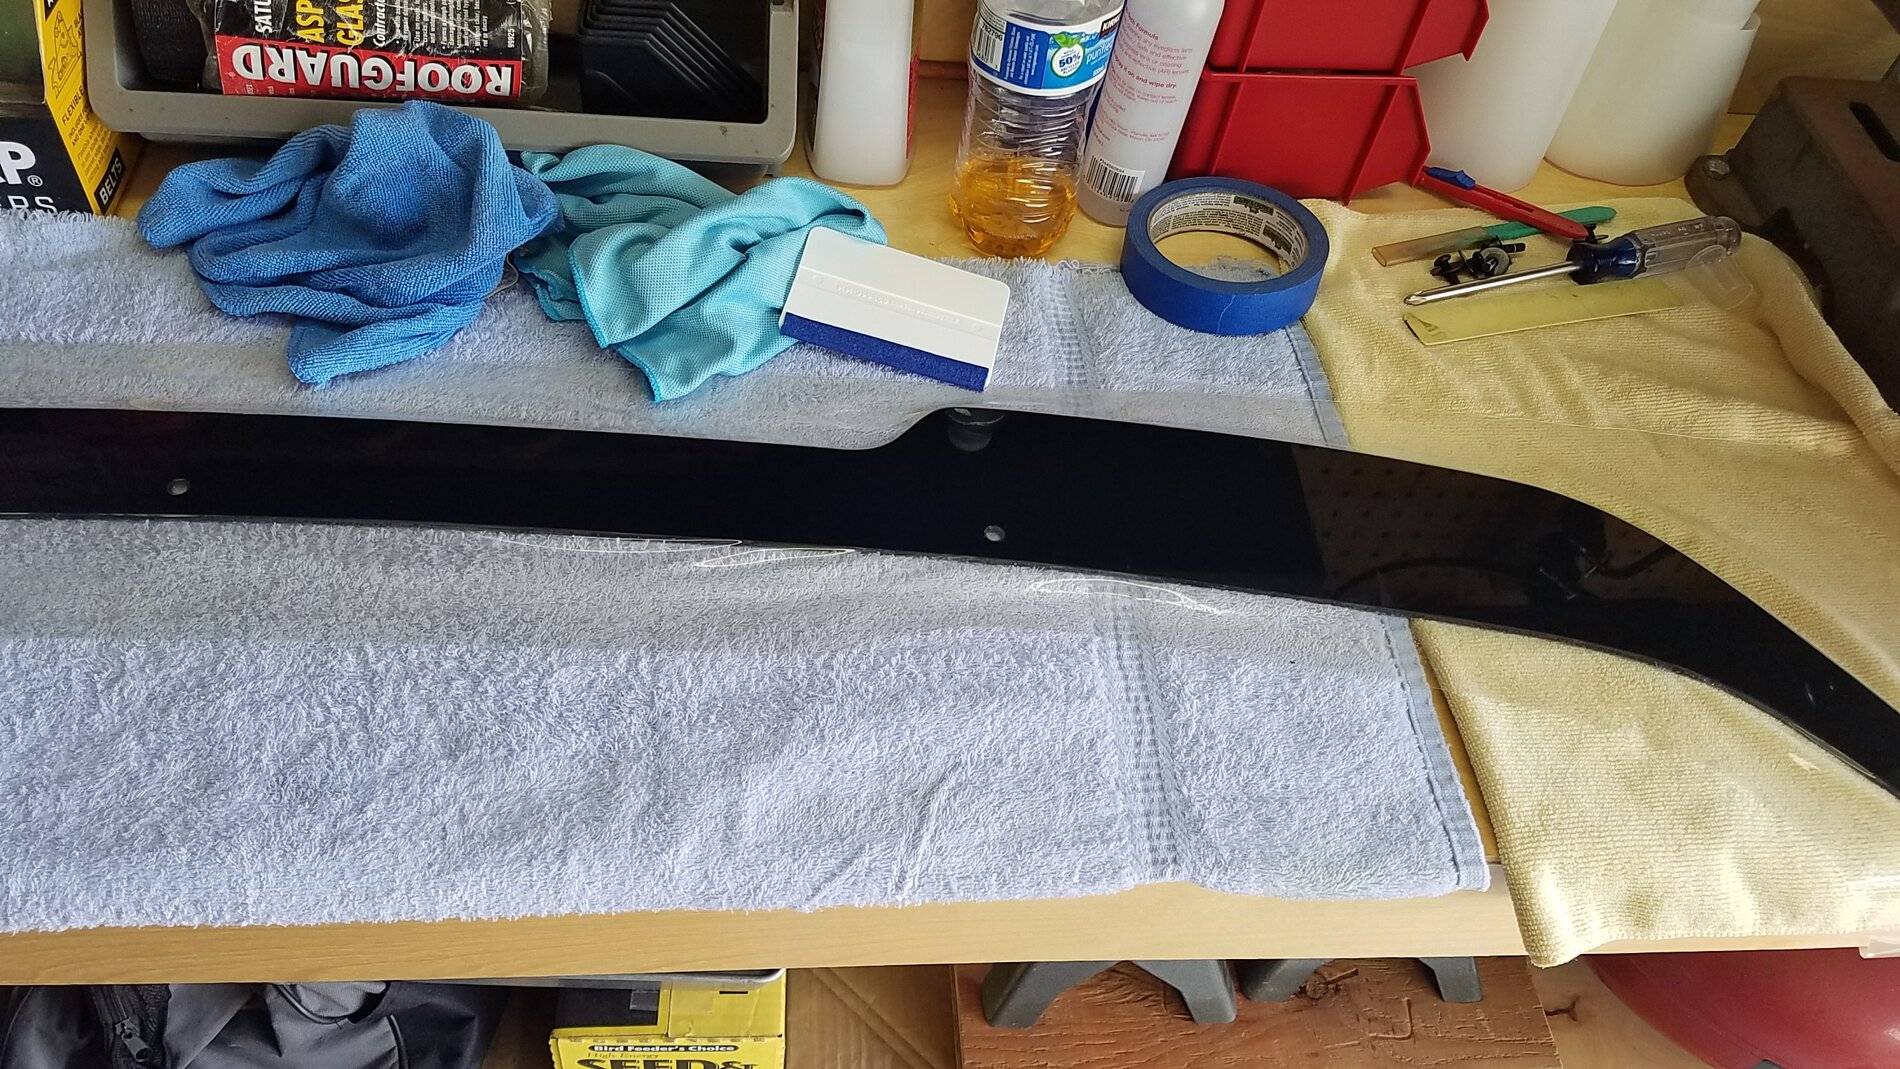
I honestly could not prevent swirls, smudges, and scratches of the new gloss black plastic bill. It would only get worse. Even routine hand washing will cause swirls. So I picked up some clear film from a favorite Xpel dealer. The wicker is about 58" wide - perfect because clear film rolls are 60"! I don't describe my clear film install process here. It is not an exact science for me. Normally I prefer to pay the dealer, but a truly flat surface is (barely) within my skills. I used lots of spray water and a felt-tipped squeeze tool.
Photo of my narrow work bench, showing the film installed but not trimmed:
Next was the VHB tape process to fill that air gap. I have less aggressive tape, but it is grey, not black. I thought I might want to remove the wicker bill some day. But it was more important to me that the tape was black, so VHB it is.
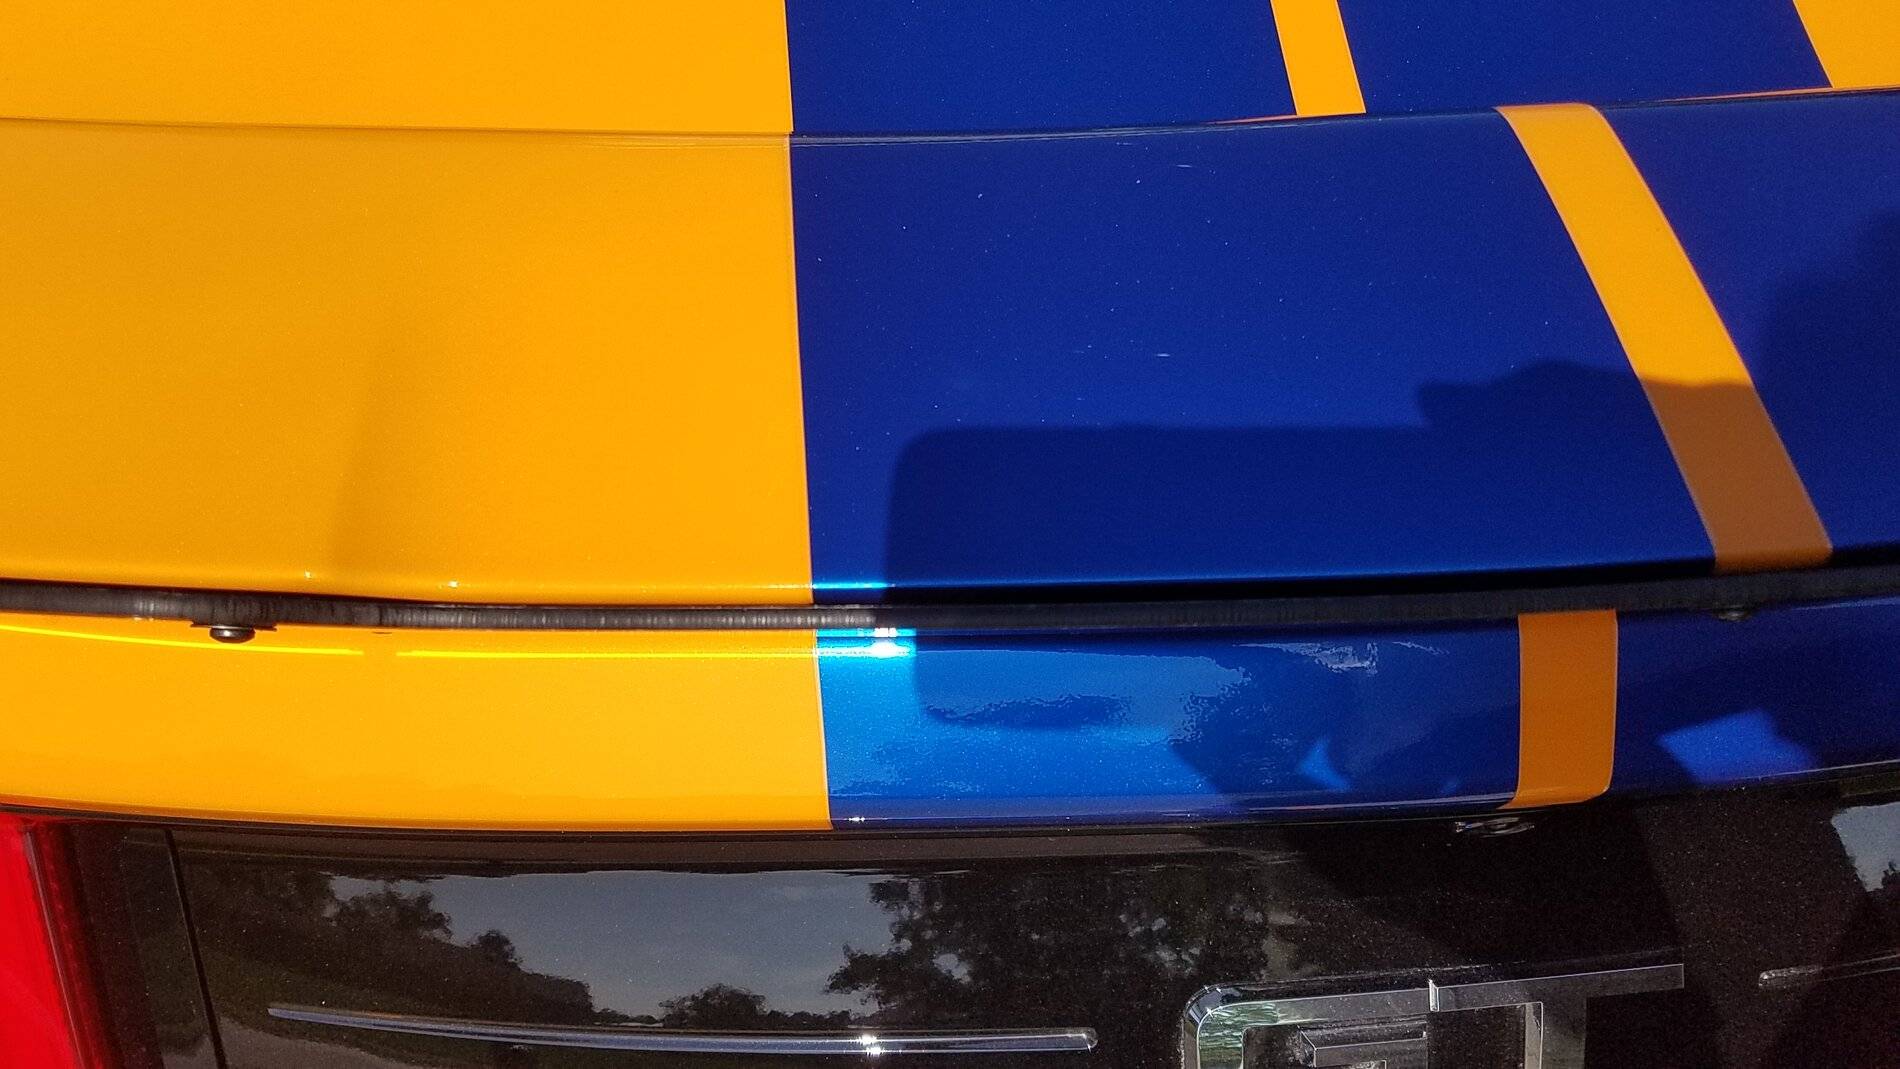
Air gap gone:
Success!
More photos of end result in Posts 10 & 11 of this thread:
https://www.mustang6g.com/forums/threads/zl1-addons-wicker-bill.149477/#post-3280292
This first photo of the tools used explains a lot. I arranged them left to right in order of use.
- Laser aimed at camera center was used to find exact center of my wing. I discovered that the wing stripes were offset slightly to the right. I should have used this technique for the stripes, too! Oh, well, the black wicker bill now completely conceals the back edge of the wing.
- Blue tape for various general uses.
- Sharpie to mark hole locations.
- Center punch at hole locations.
- 1/16" pilot bit, followed by 1/8" pilot bit, followed by step drill to 1/4", followed by ZL1-supplied 9/32" drill bit, followed by tapered reamer to get snug fit of the rivnuts. (I'm anal about precise hole locations and that drilled holes remain very round in soft and/or thin materials.)
- Razor knife to trim away excess clear film around the hole edges.
- Hammer (rubber end) to knock rivnuts in.
- Rivnut tool. I spent a lot of time searching for a 10-32 mandrel. Apparently 8-32 and 10-24 are common, but 10-32 not so much. I found the tool and 4 mandrel sizes (including 10-32) at Menard's for $15.
- Caliper was used to measure rivnut diameter and hole diameter.
- 6" scale for spot checks.
- Blue thread lock and screwdriver for the screws.
Some tips:
- I did the install by myself, but I imagine it is easier with a helper, especially at the beginning when trying to line things up accurately.
- The wicker elevation is set when you feel its lower edge aligns with the lower edge of the wing.
- You can trust that the wicker will be centered left-right so long as the middle hole is centered. (Hence the laser.) Install the center rivnut and then screw the bill in place at the center hole as per the ZL1 video.
- However, use the 6" scale to check that the upper edge of the bill is at equal elevations above the wing at a left and right location. Only then should you mark the remaining 4 holes with the Sharpie. Again, a helpful helper is helpful here.
Photo of the air gap - this is sighted directly down the bill face (look for the thin orange line between two black lines):
I honestly could not prevent swirls, smudges, and scratches of the new gloss black plastic bill. It would only get worse. Even routine hand washing will cause swirls. So I picked up some clear film from a favorite Xpel dealer. The wicker is about 58" wide - perfect because clear film rolls are 60"! I don't describe my clear film install process here. It is not an exact science for me. Normally I prefer to pay the dealer, but a truly flat surface is (barely) within my skills. I used lots of spray water and a felt-tipped squeeze tool.
Photo of my narrow work bench, showing the film installed but not trimmed:
Next was the VHB tape process to fill that air gap. I have less aggressive tape, but it is grey, not black. I thought I might want to remove the wicker bill some day. But it was more important to me that the tape was black, so VHB it is.
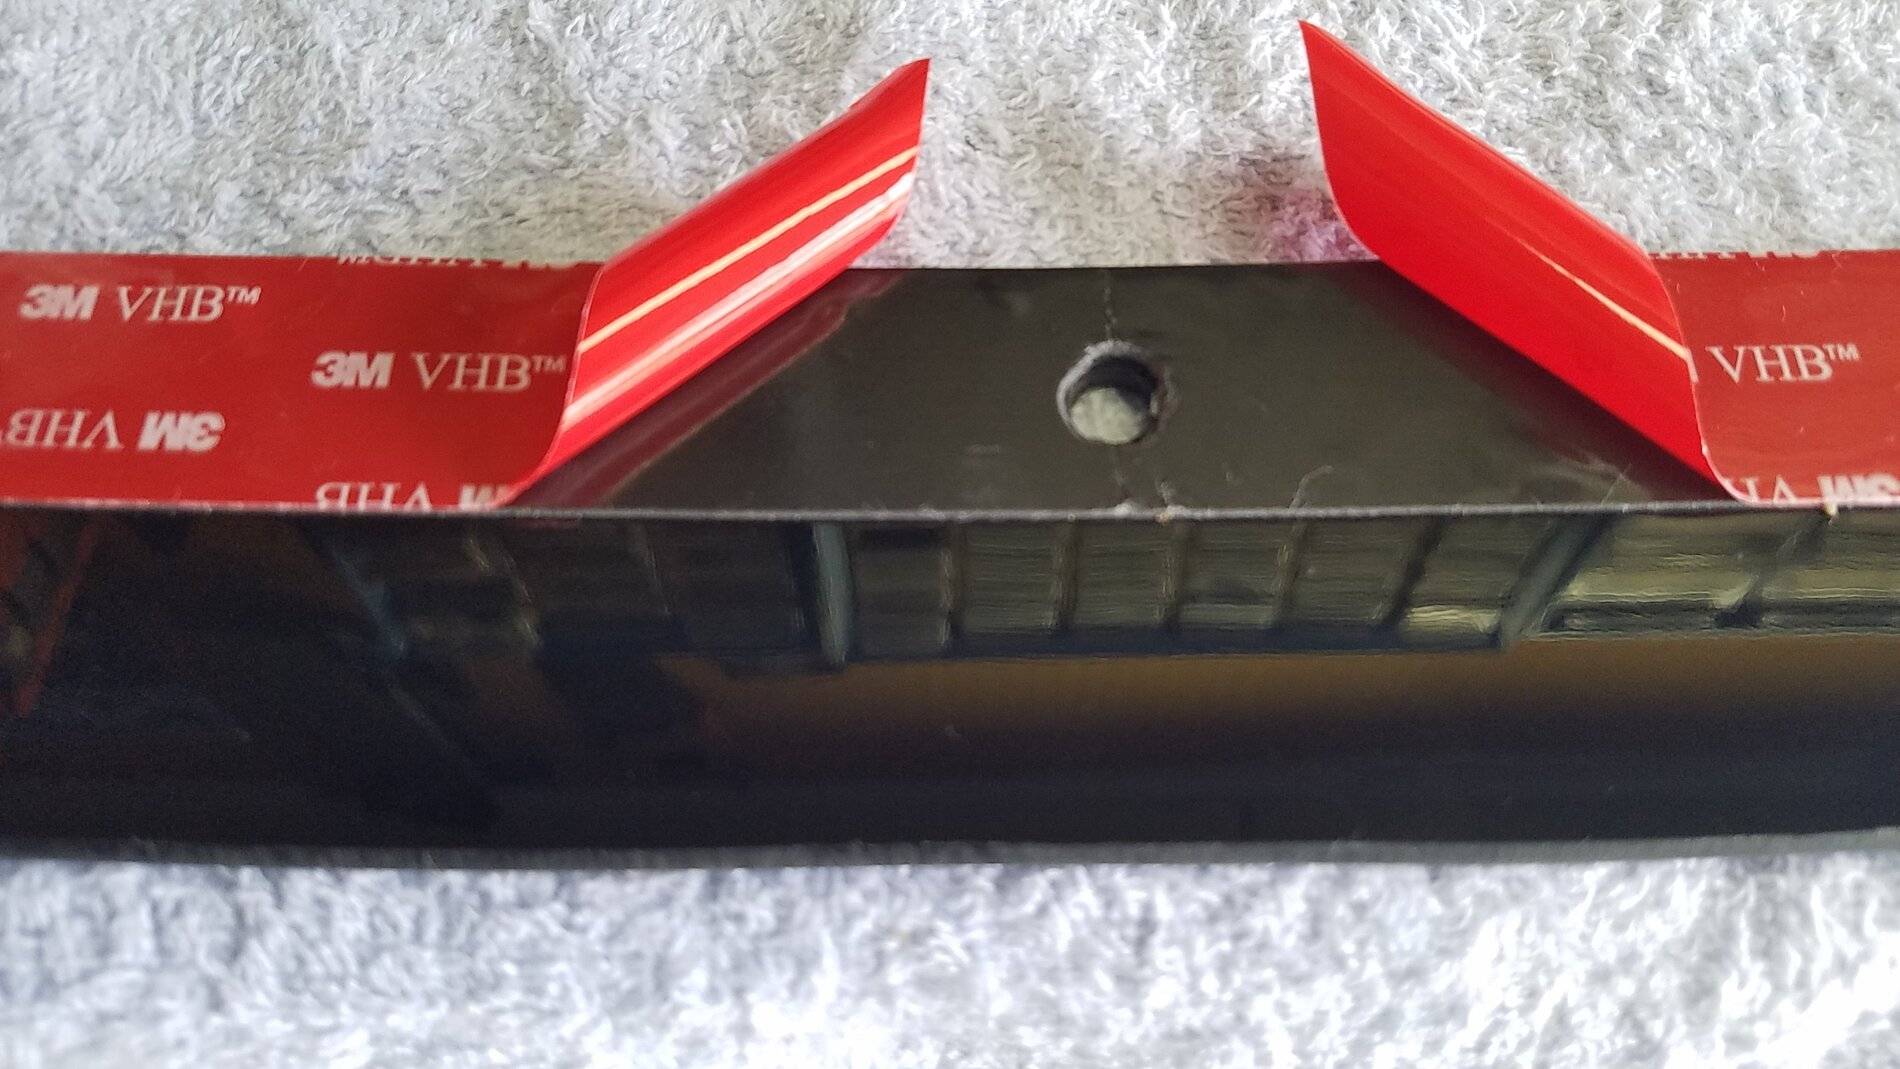
- Apply the 1"-wide VHB tape first to the lower edge of the bill, and trim it to match the round ends.
- Trim out the tape at the 5 holes.
- The rear wing edge is carved out near the ends. The exposed VHB is sure to pick up all kinds of dirt/debris, so I "sealed" it with the electrical tape (a hack).
- Peel back 10-11" of the red VHB backing film from each end. Apply black electrical tape onto the LOWER edge of these exposed areas of the VHB tape. Do not cover the last 2" at the ends, because the wing is full width again there.
- This will leave 1/4" of VHB tape sticky and 3/4" of it sealed smooth. Replace the red film over the exposed sticky tape again. But leave each end hole exposed by 1" and fold over each end over by 45 degrees so as to make a "pull tab".
- Split the red backing film at each of the 3 middle holes. This is so that you can pull off the film after the spoiler is loosely screwed in place and not have the film captured at each of those holes. (The two end holes were already exposed for the electrical tape process.)
- Fold about an inch of the film over to a 45-degree angle at each hole. This makes "pull tabs" for the film to be pulled out from under the bill.
- Loosely screw the bill back onto the wing with only the 3 center screws. Tighten the 3 center screws just enough to remove any gap, and then pull out the two center-most sections of red film. The film will tend to hang up right at the screws, but hold your breath and slowly pull harder until they come out.
- Then install and loosely tighten the two end screws, and pull out the last two sections of red film.
- Before tightening the screws any further, remove each one in turn and apply a small drop of blue thread-lock. Then tighten them to snug tight, not more.
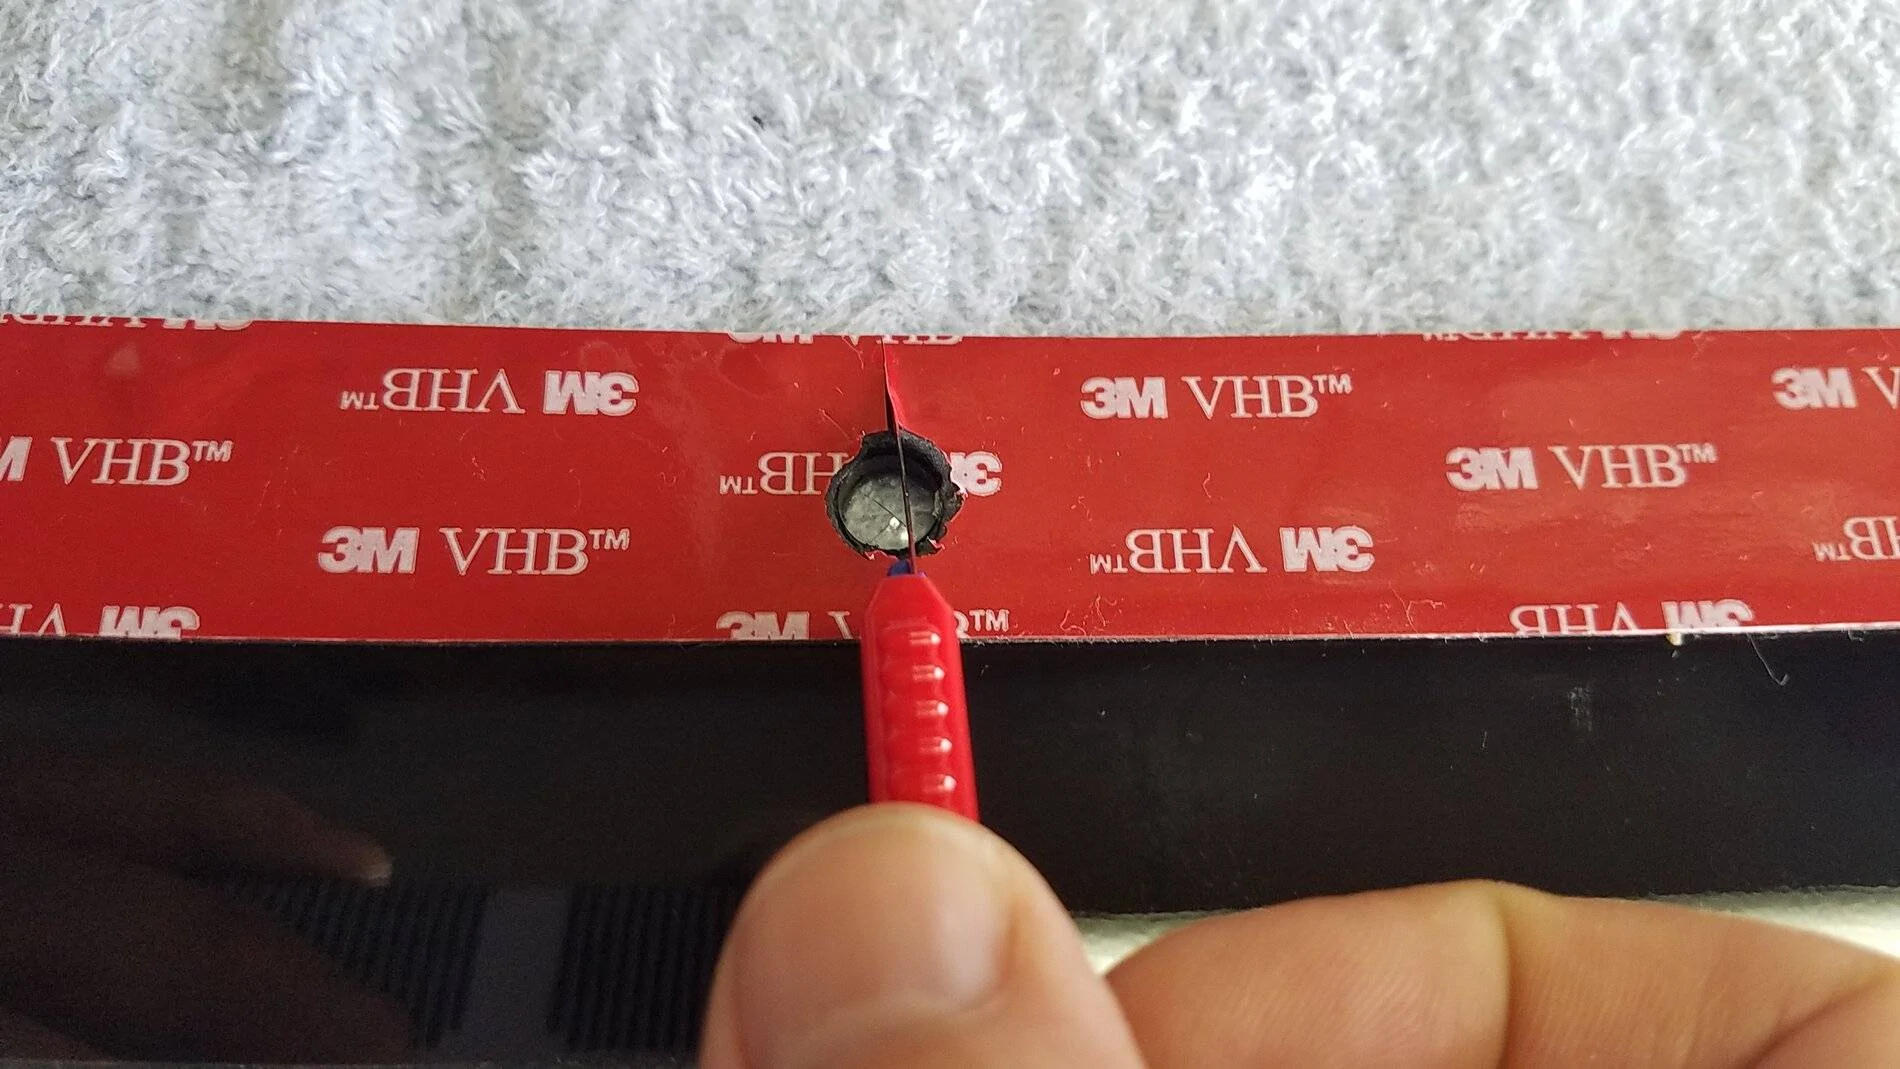
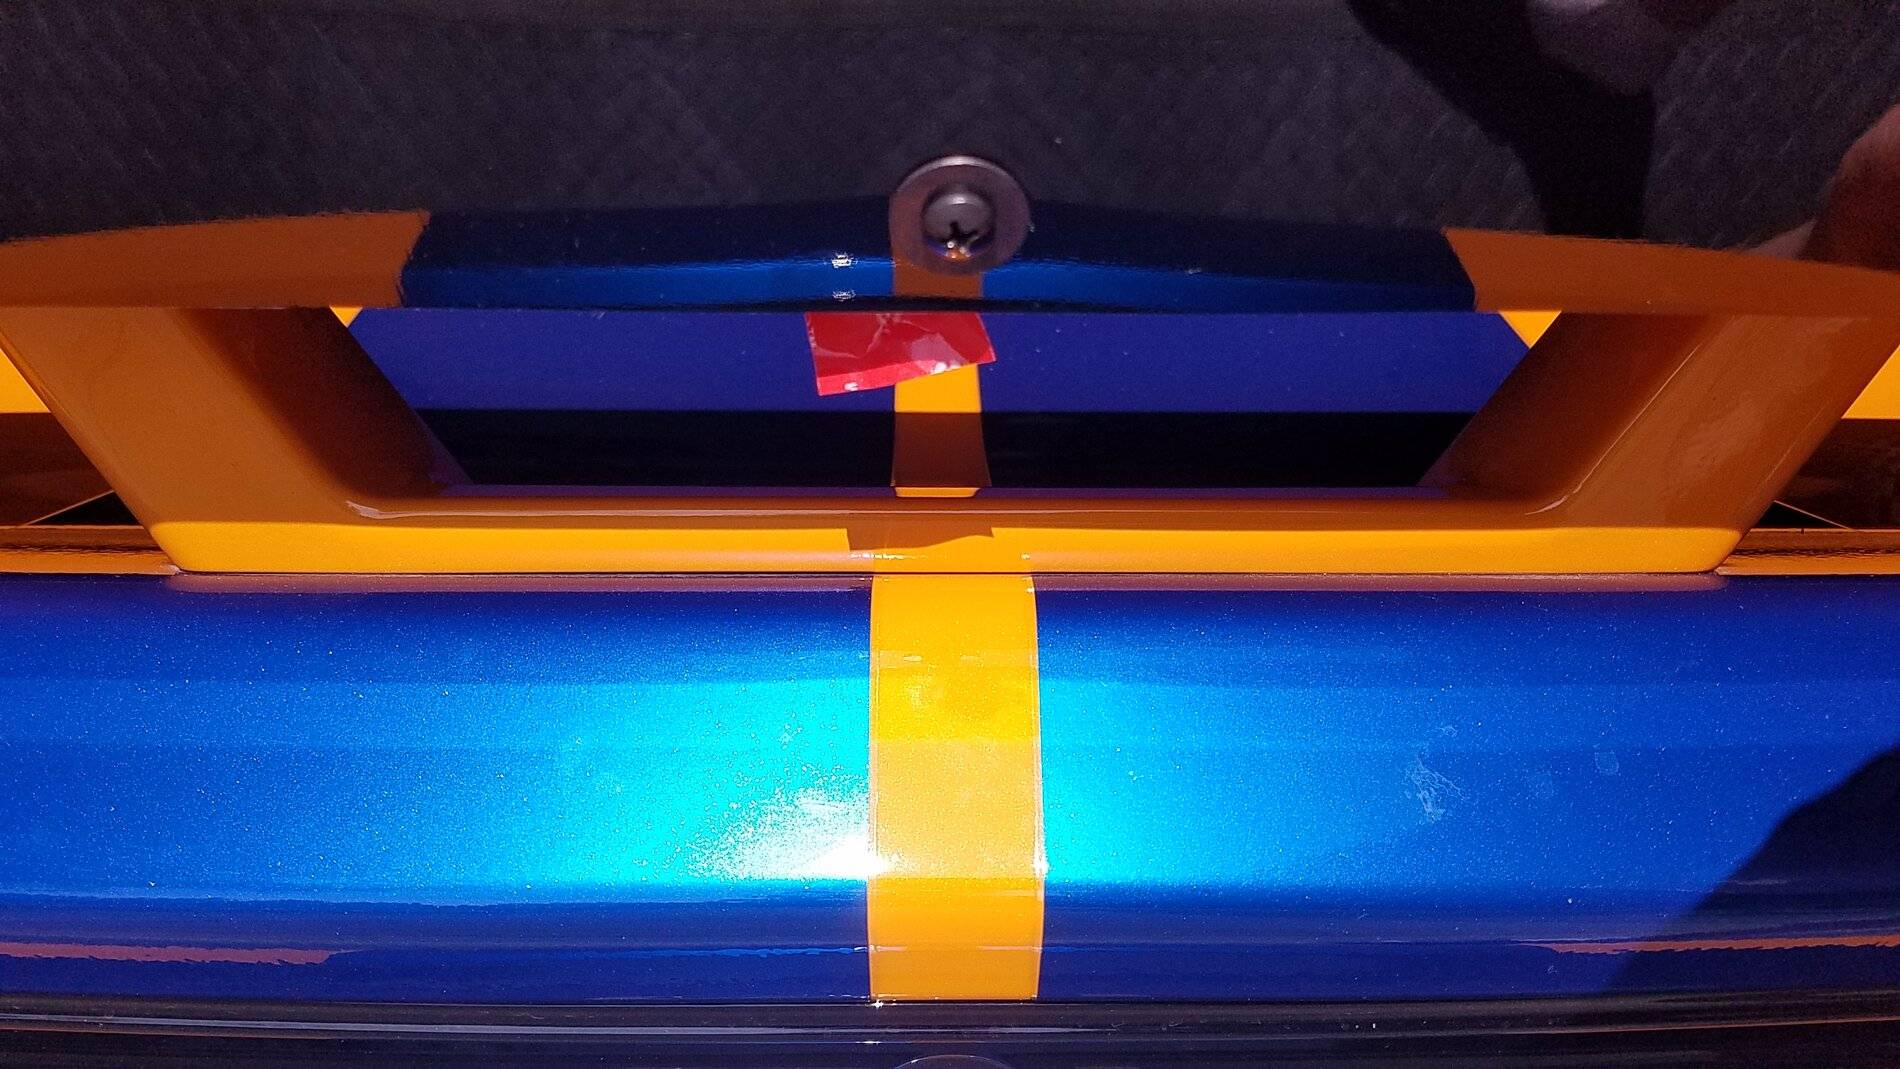
Air gap gone:
Success!
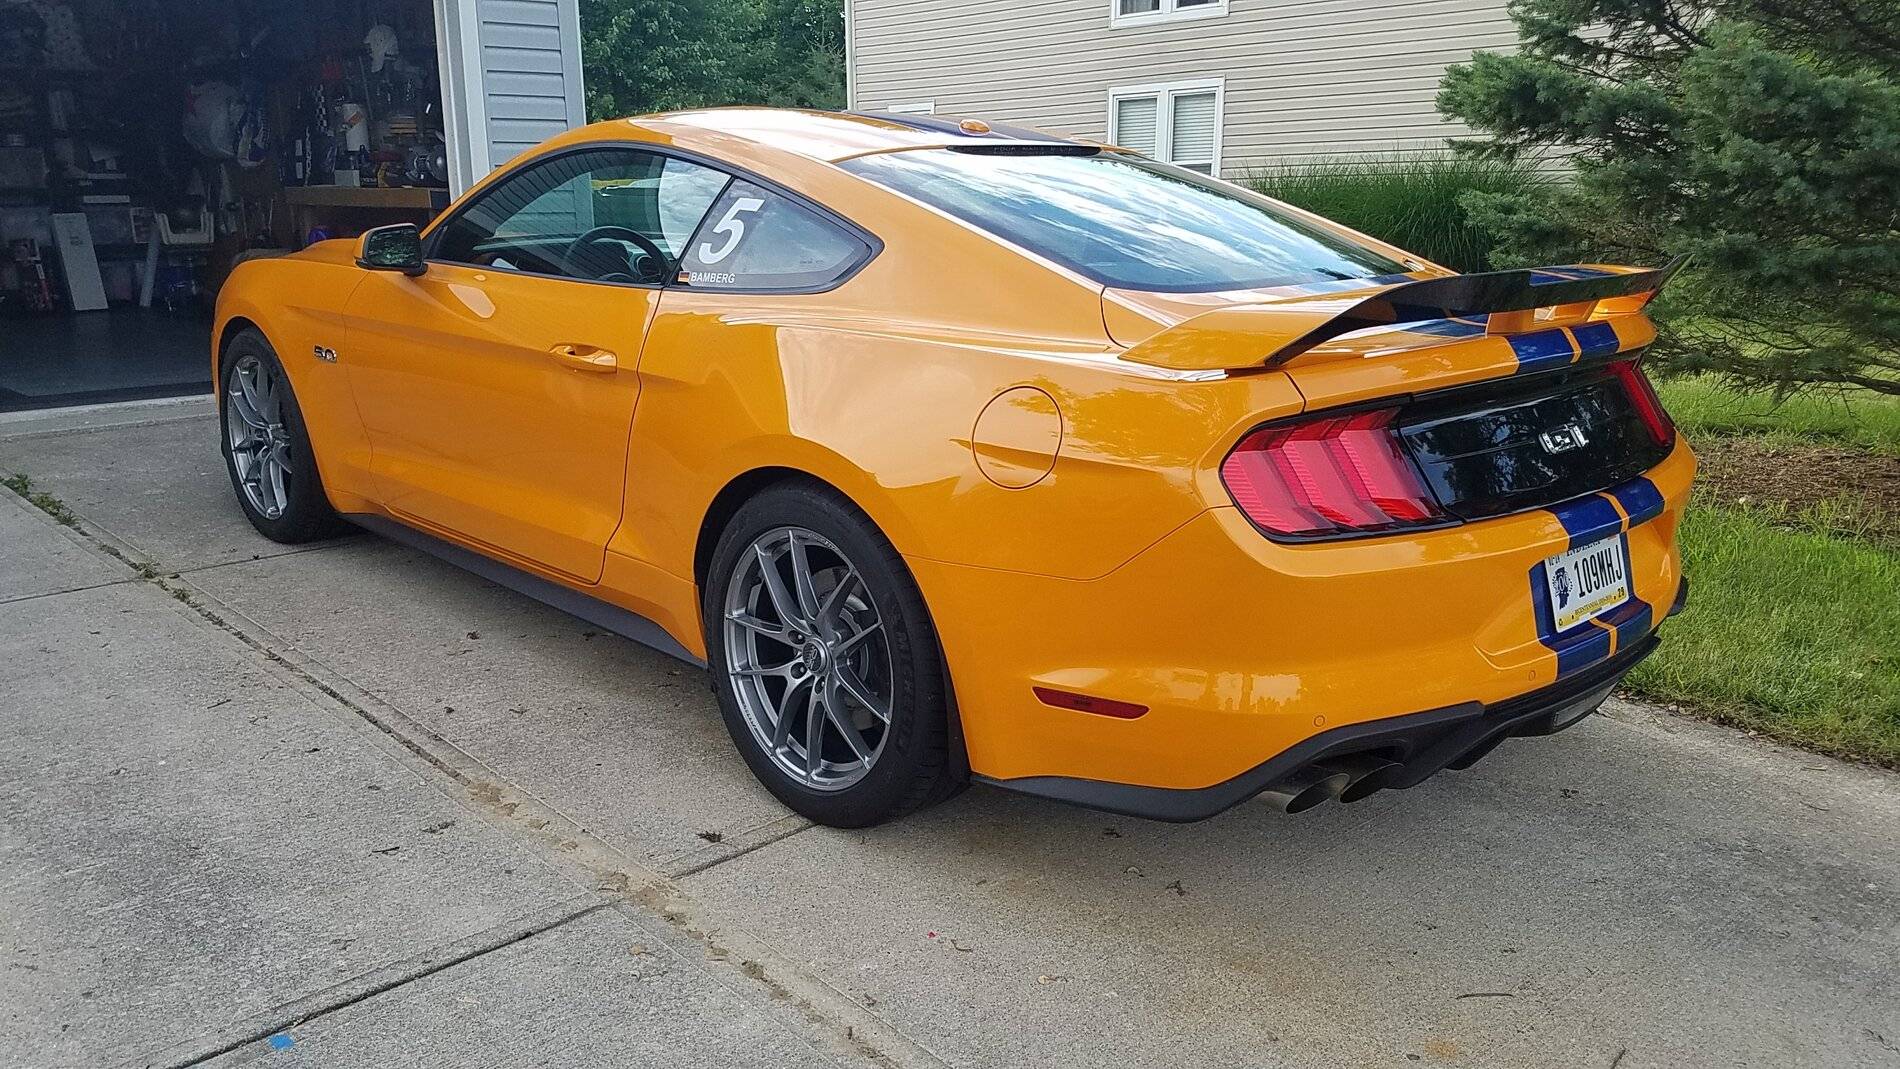
More photos of end result in Posts 10 & 11 of this thread:
https://www.mustang6g.com/forums/threads/zl1-addons-wicker-bill.149477/#post-3280292
Sponsored


