Lorne34
Project Hidalgo
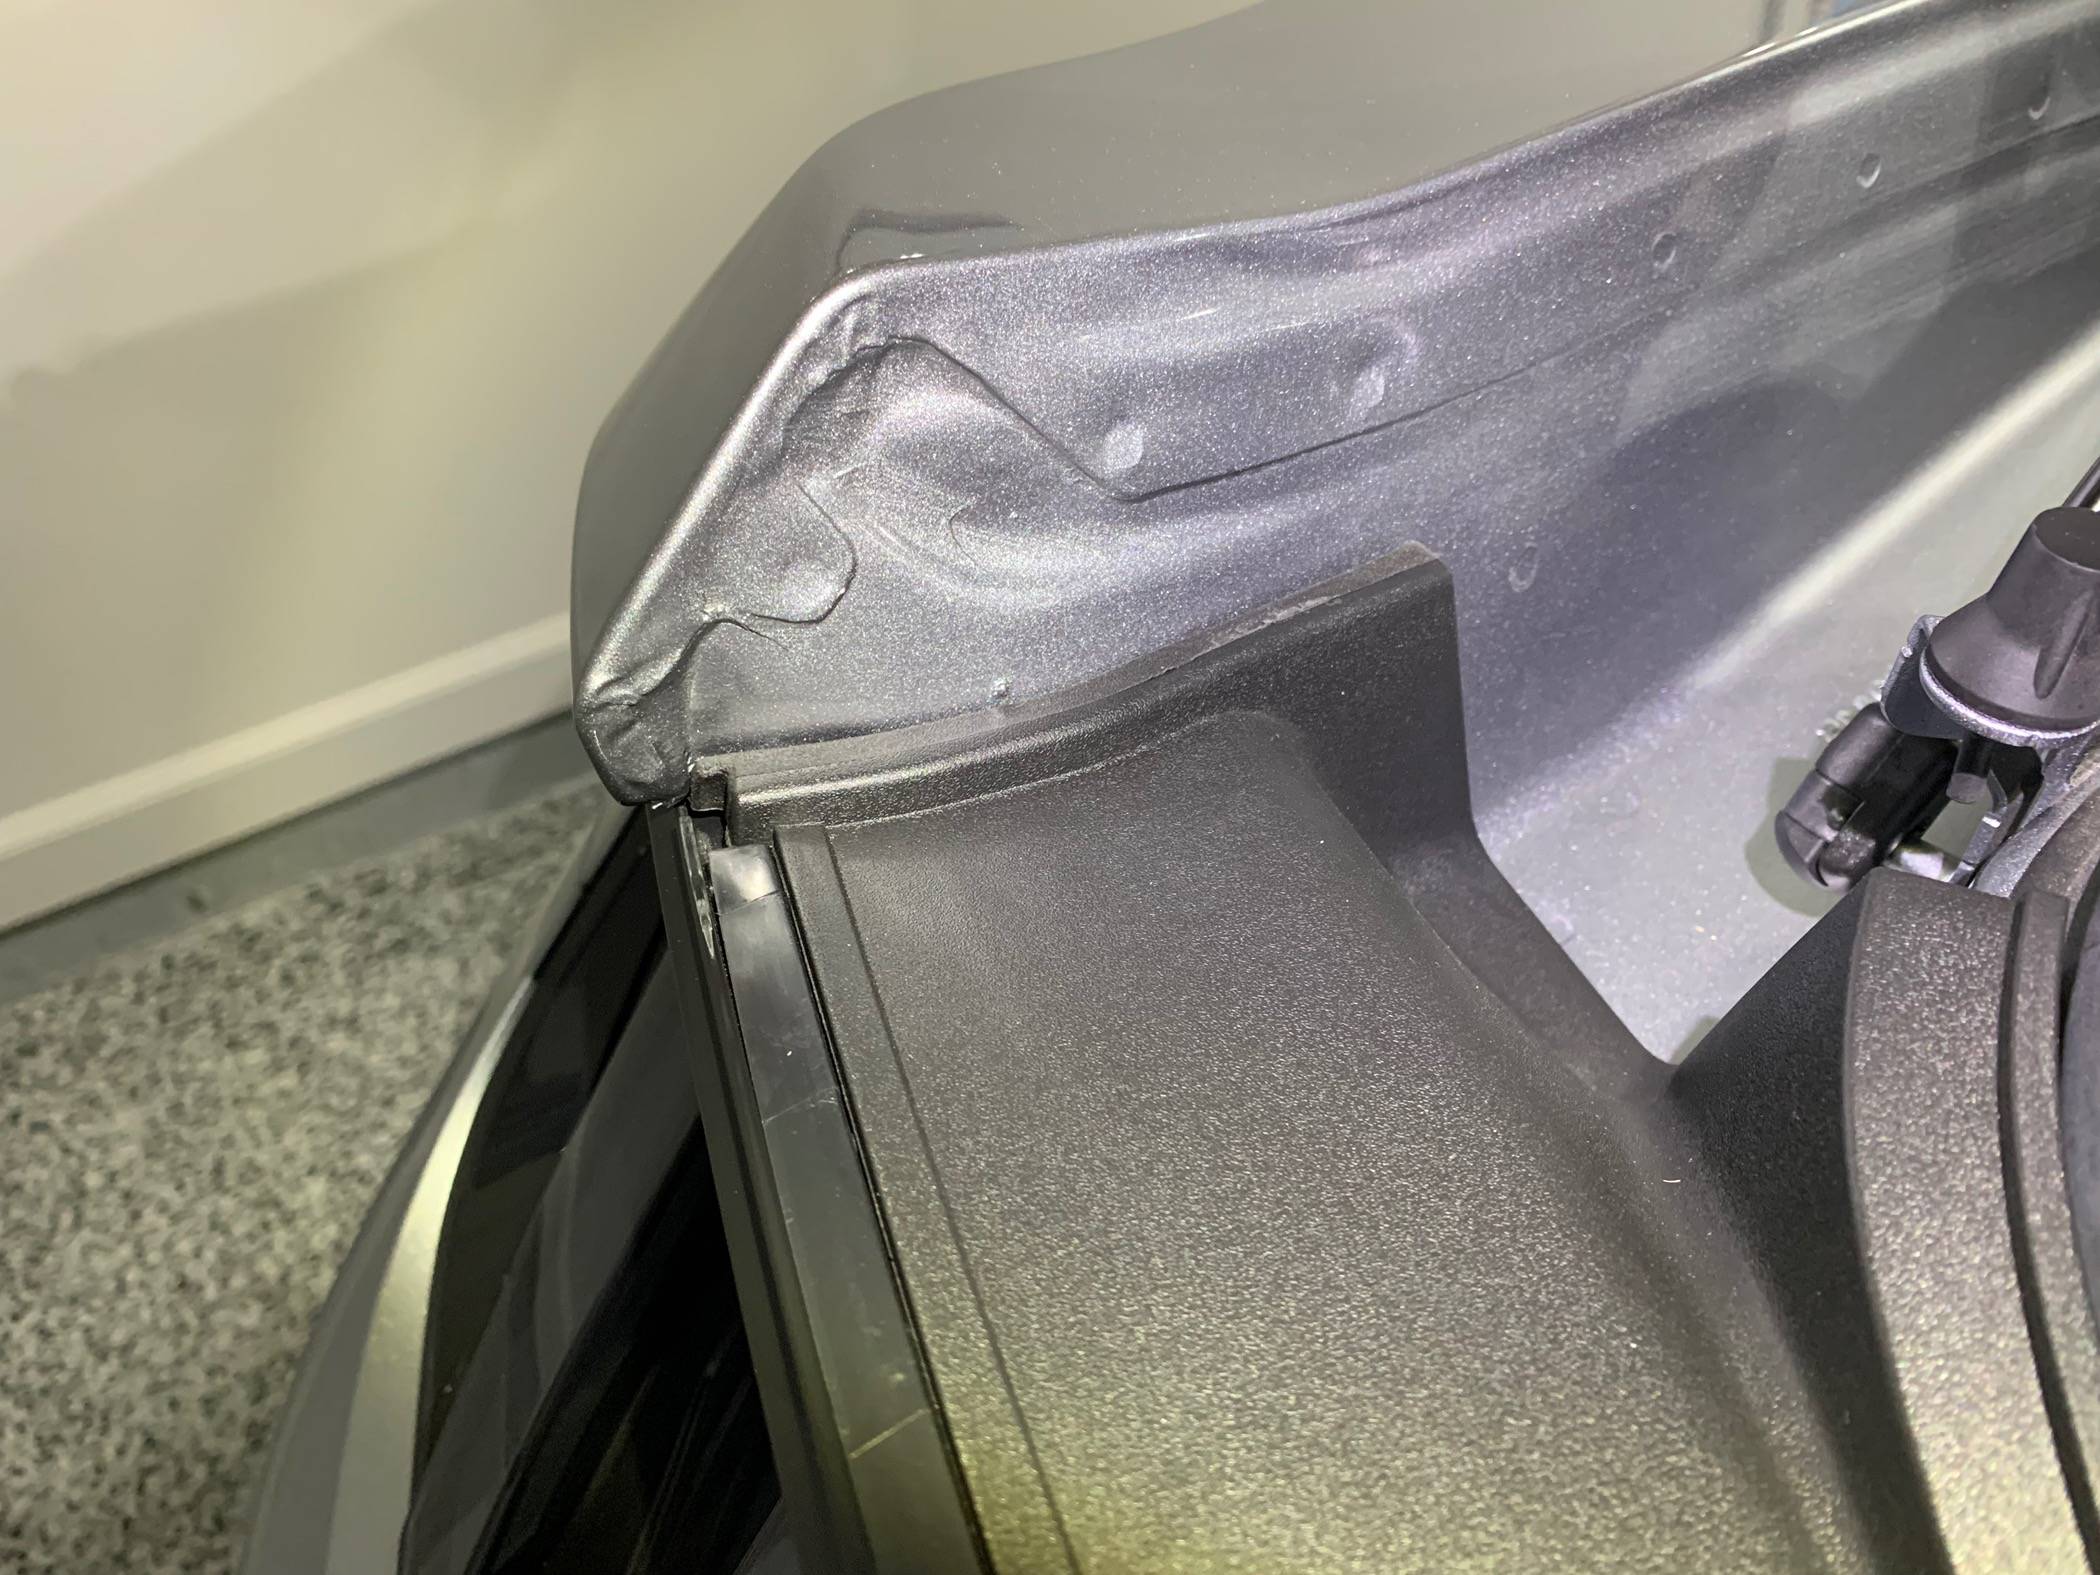
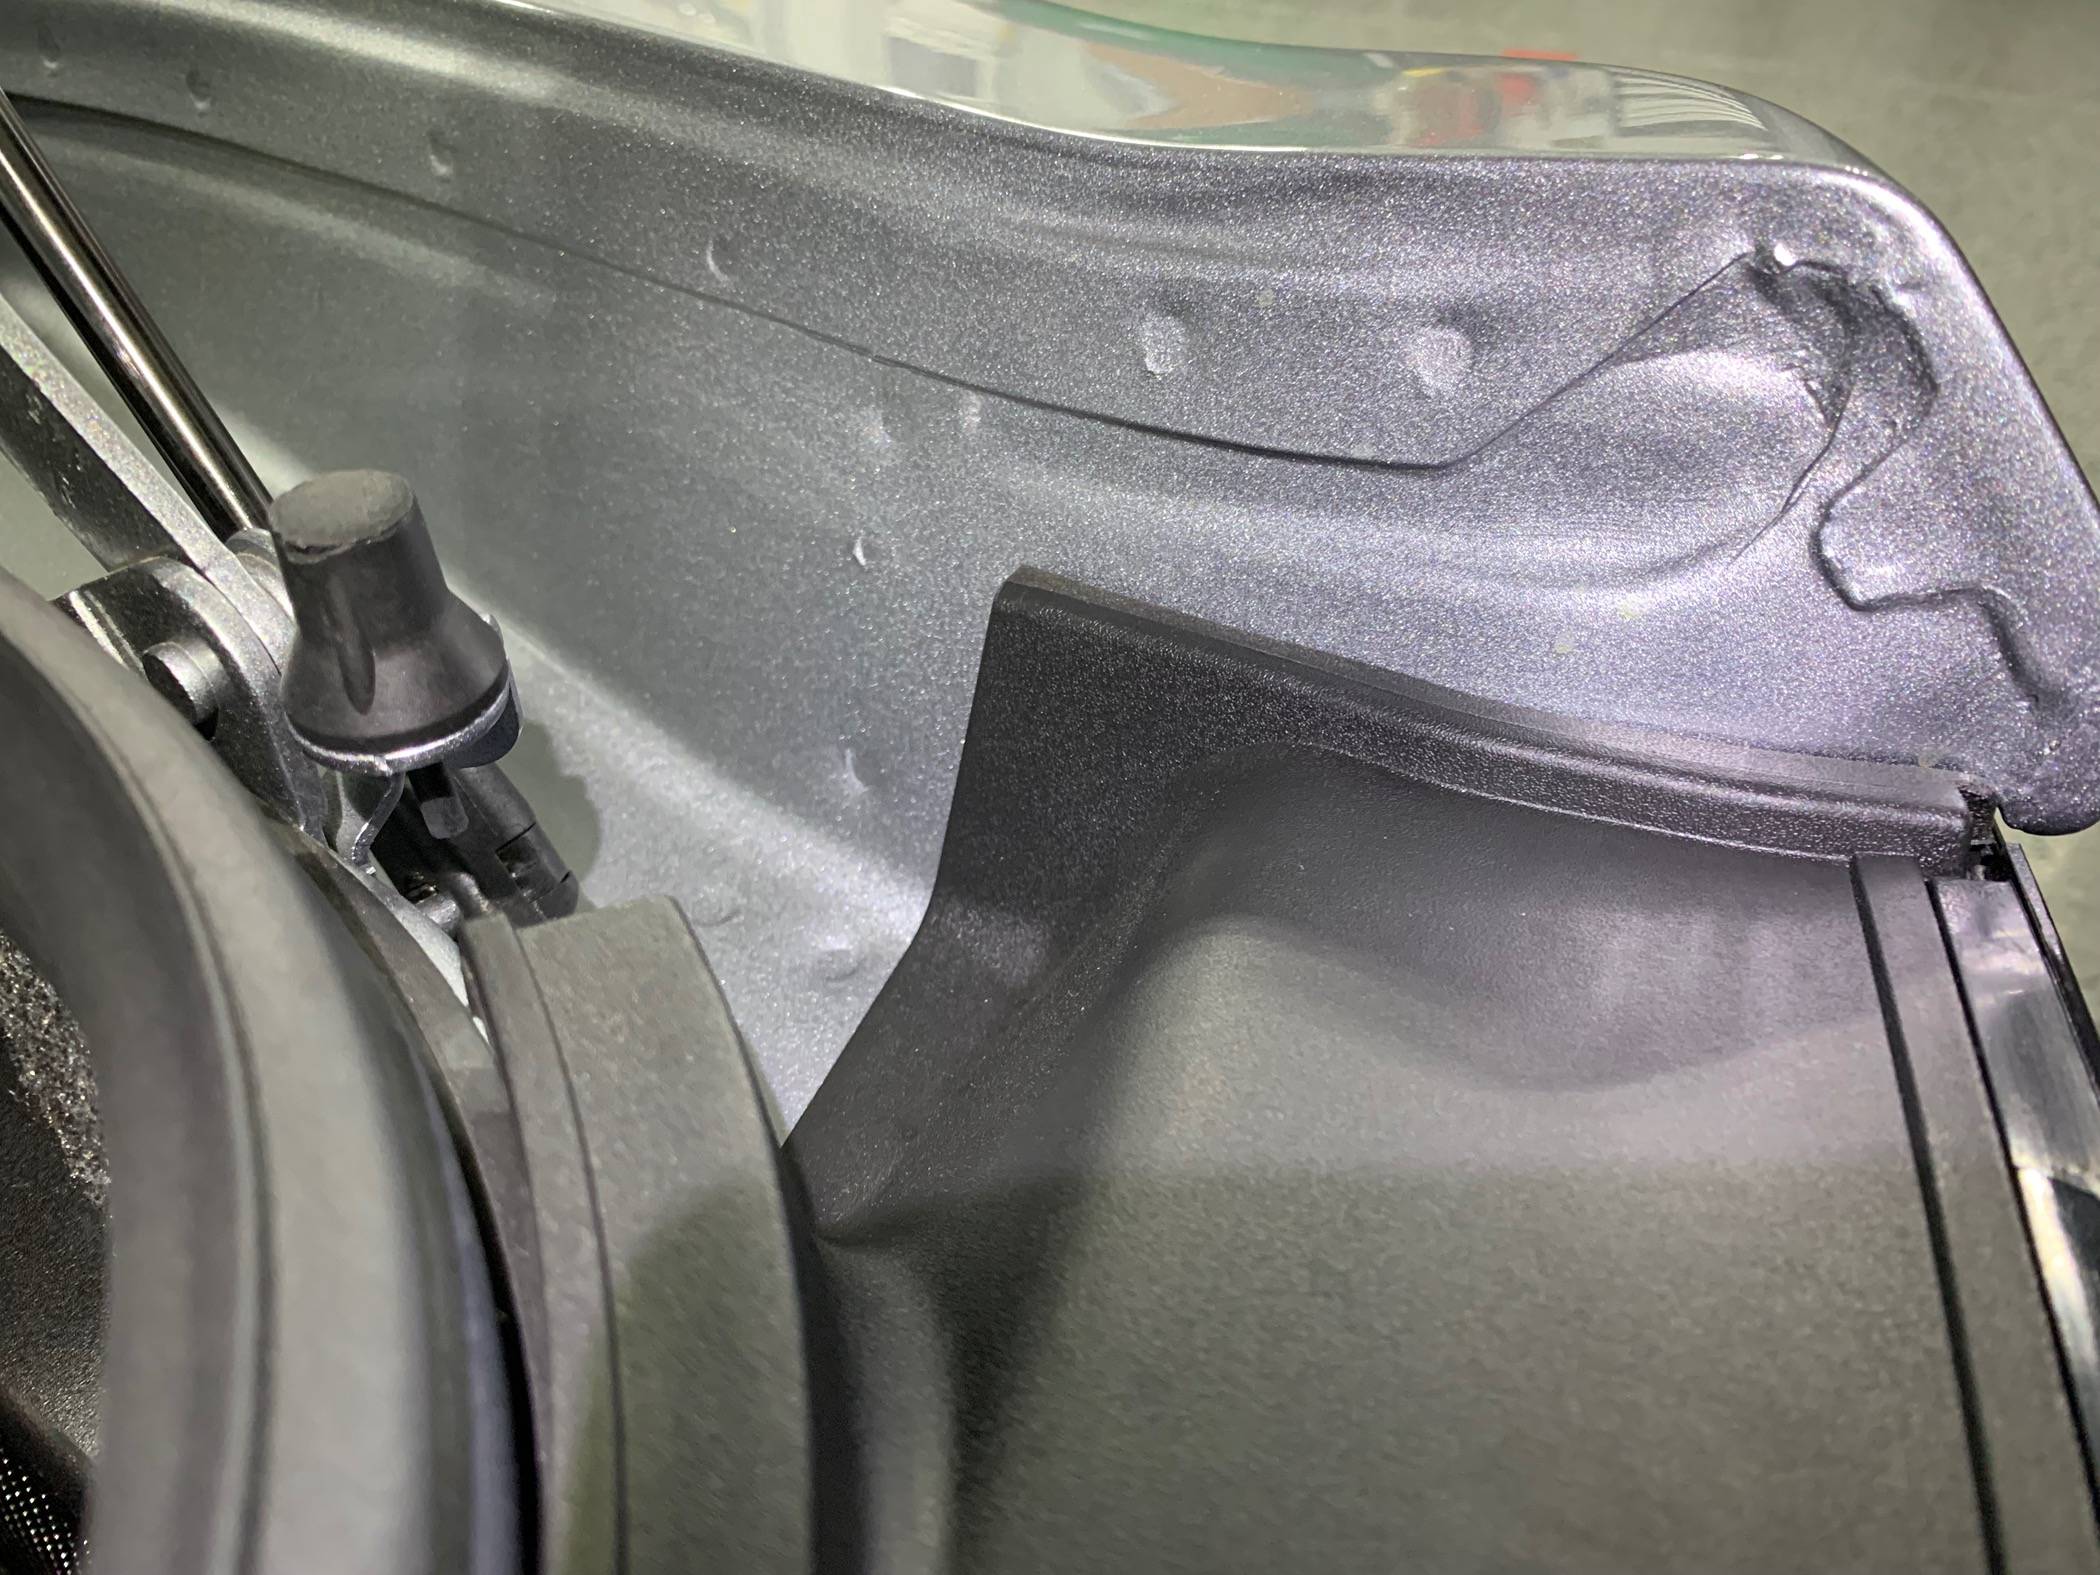
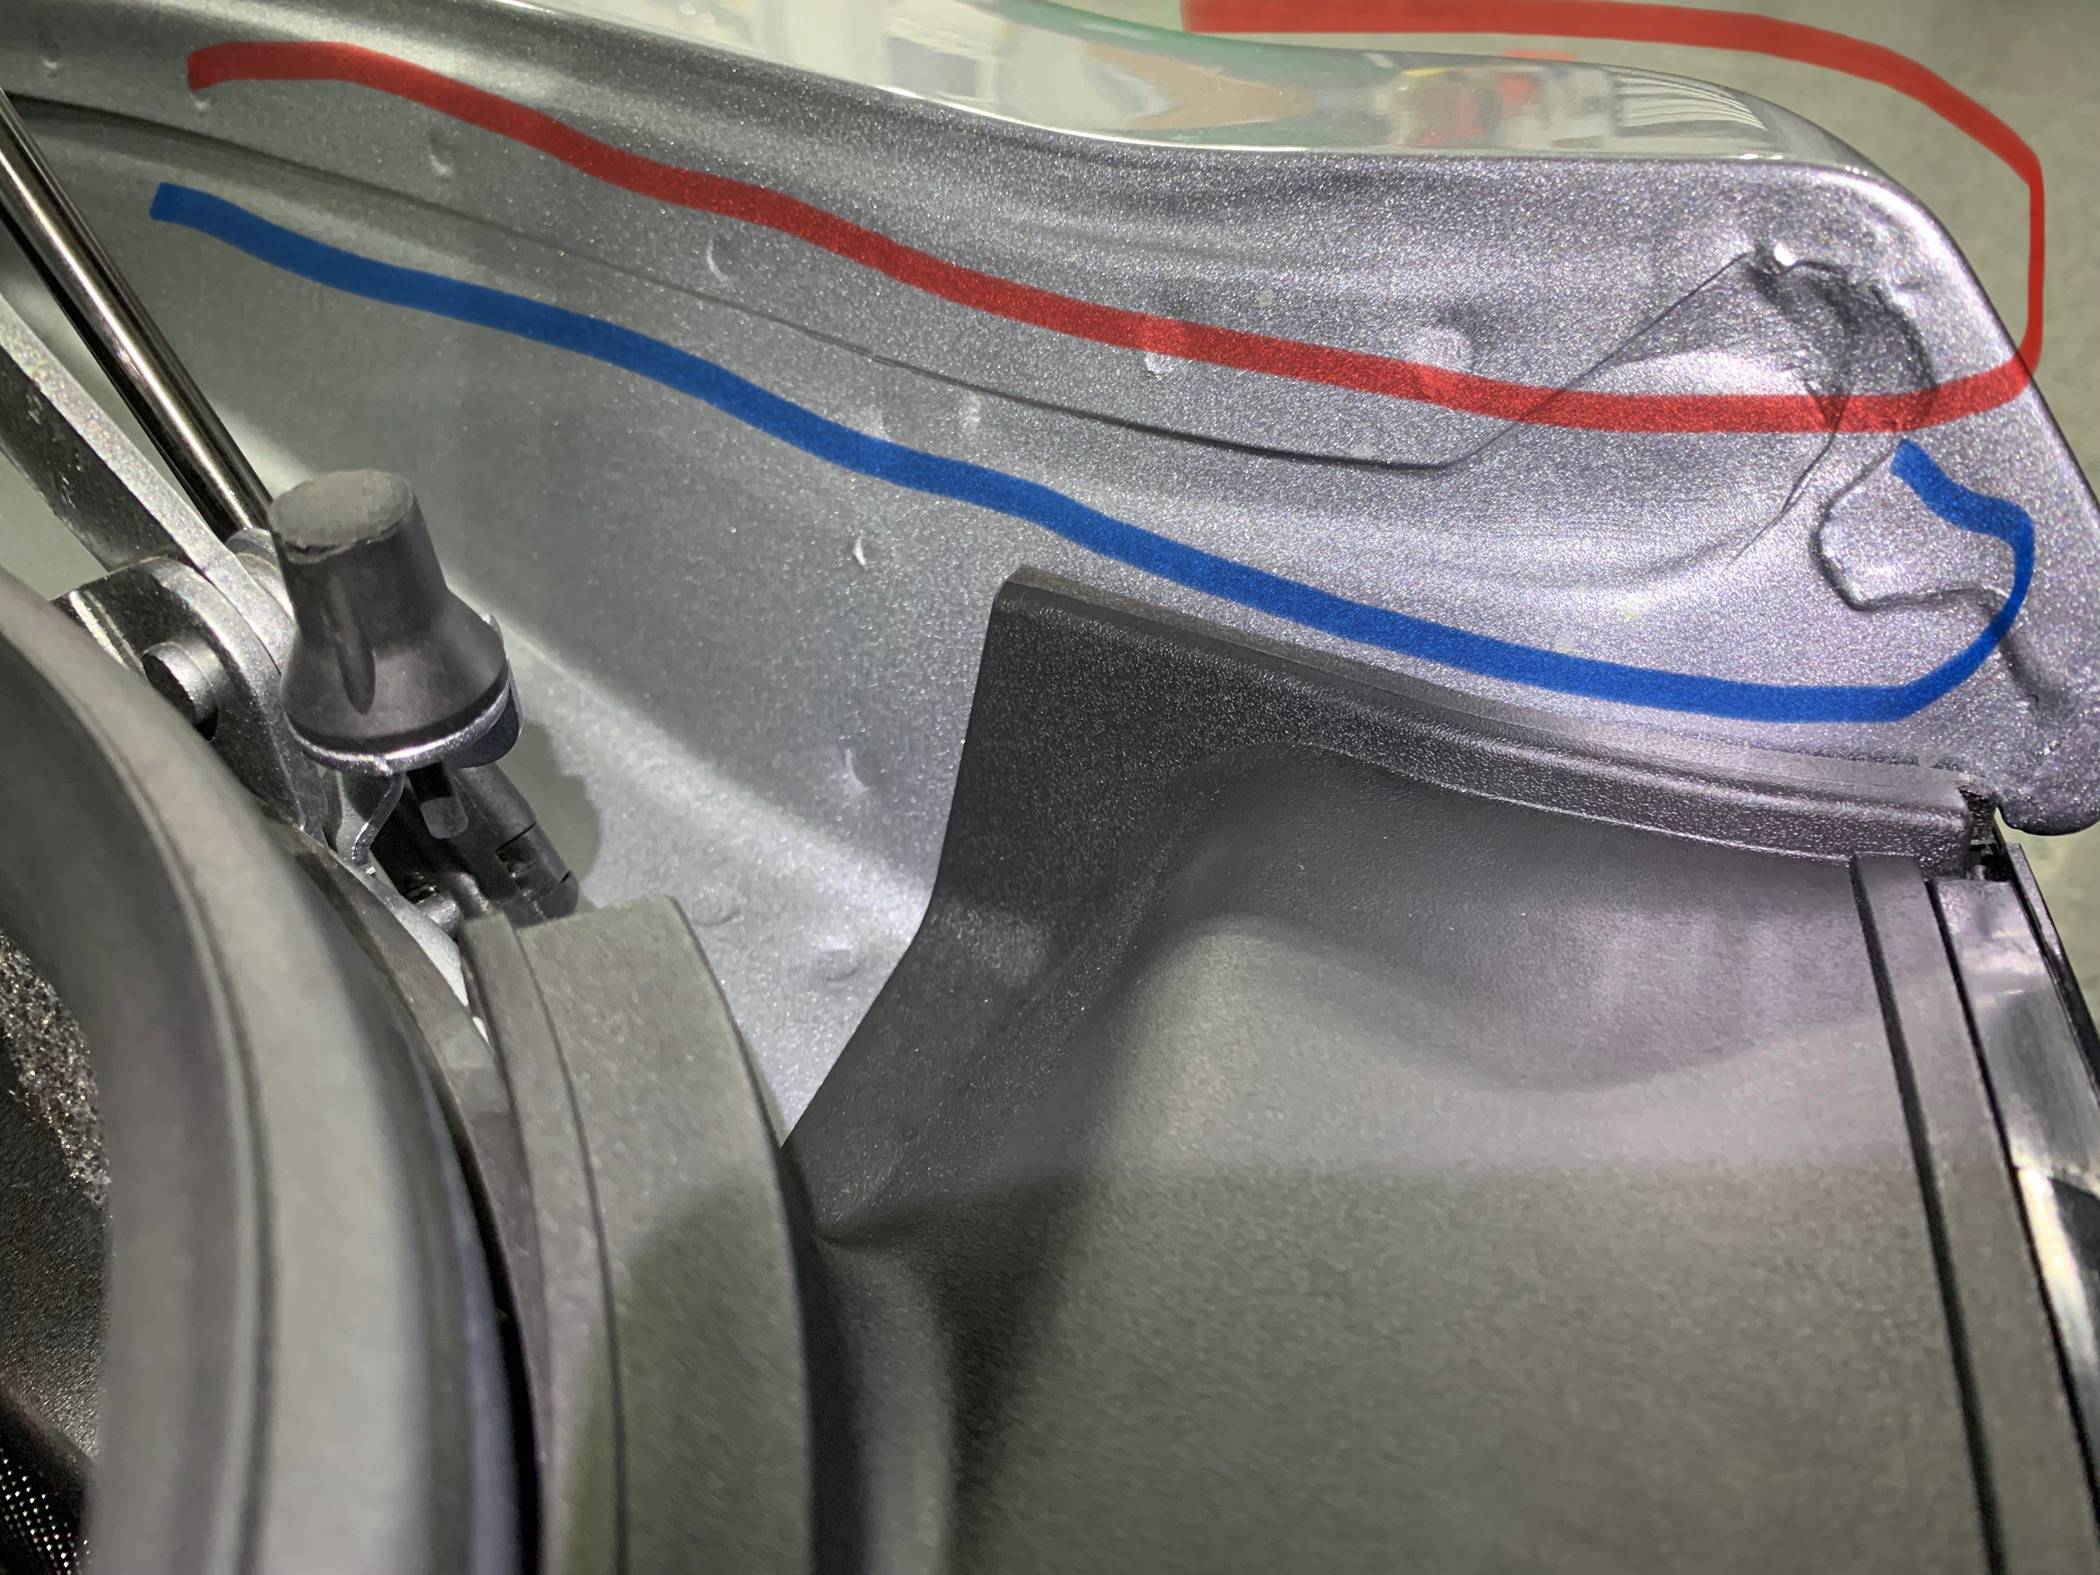
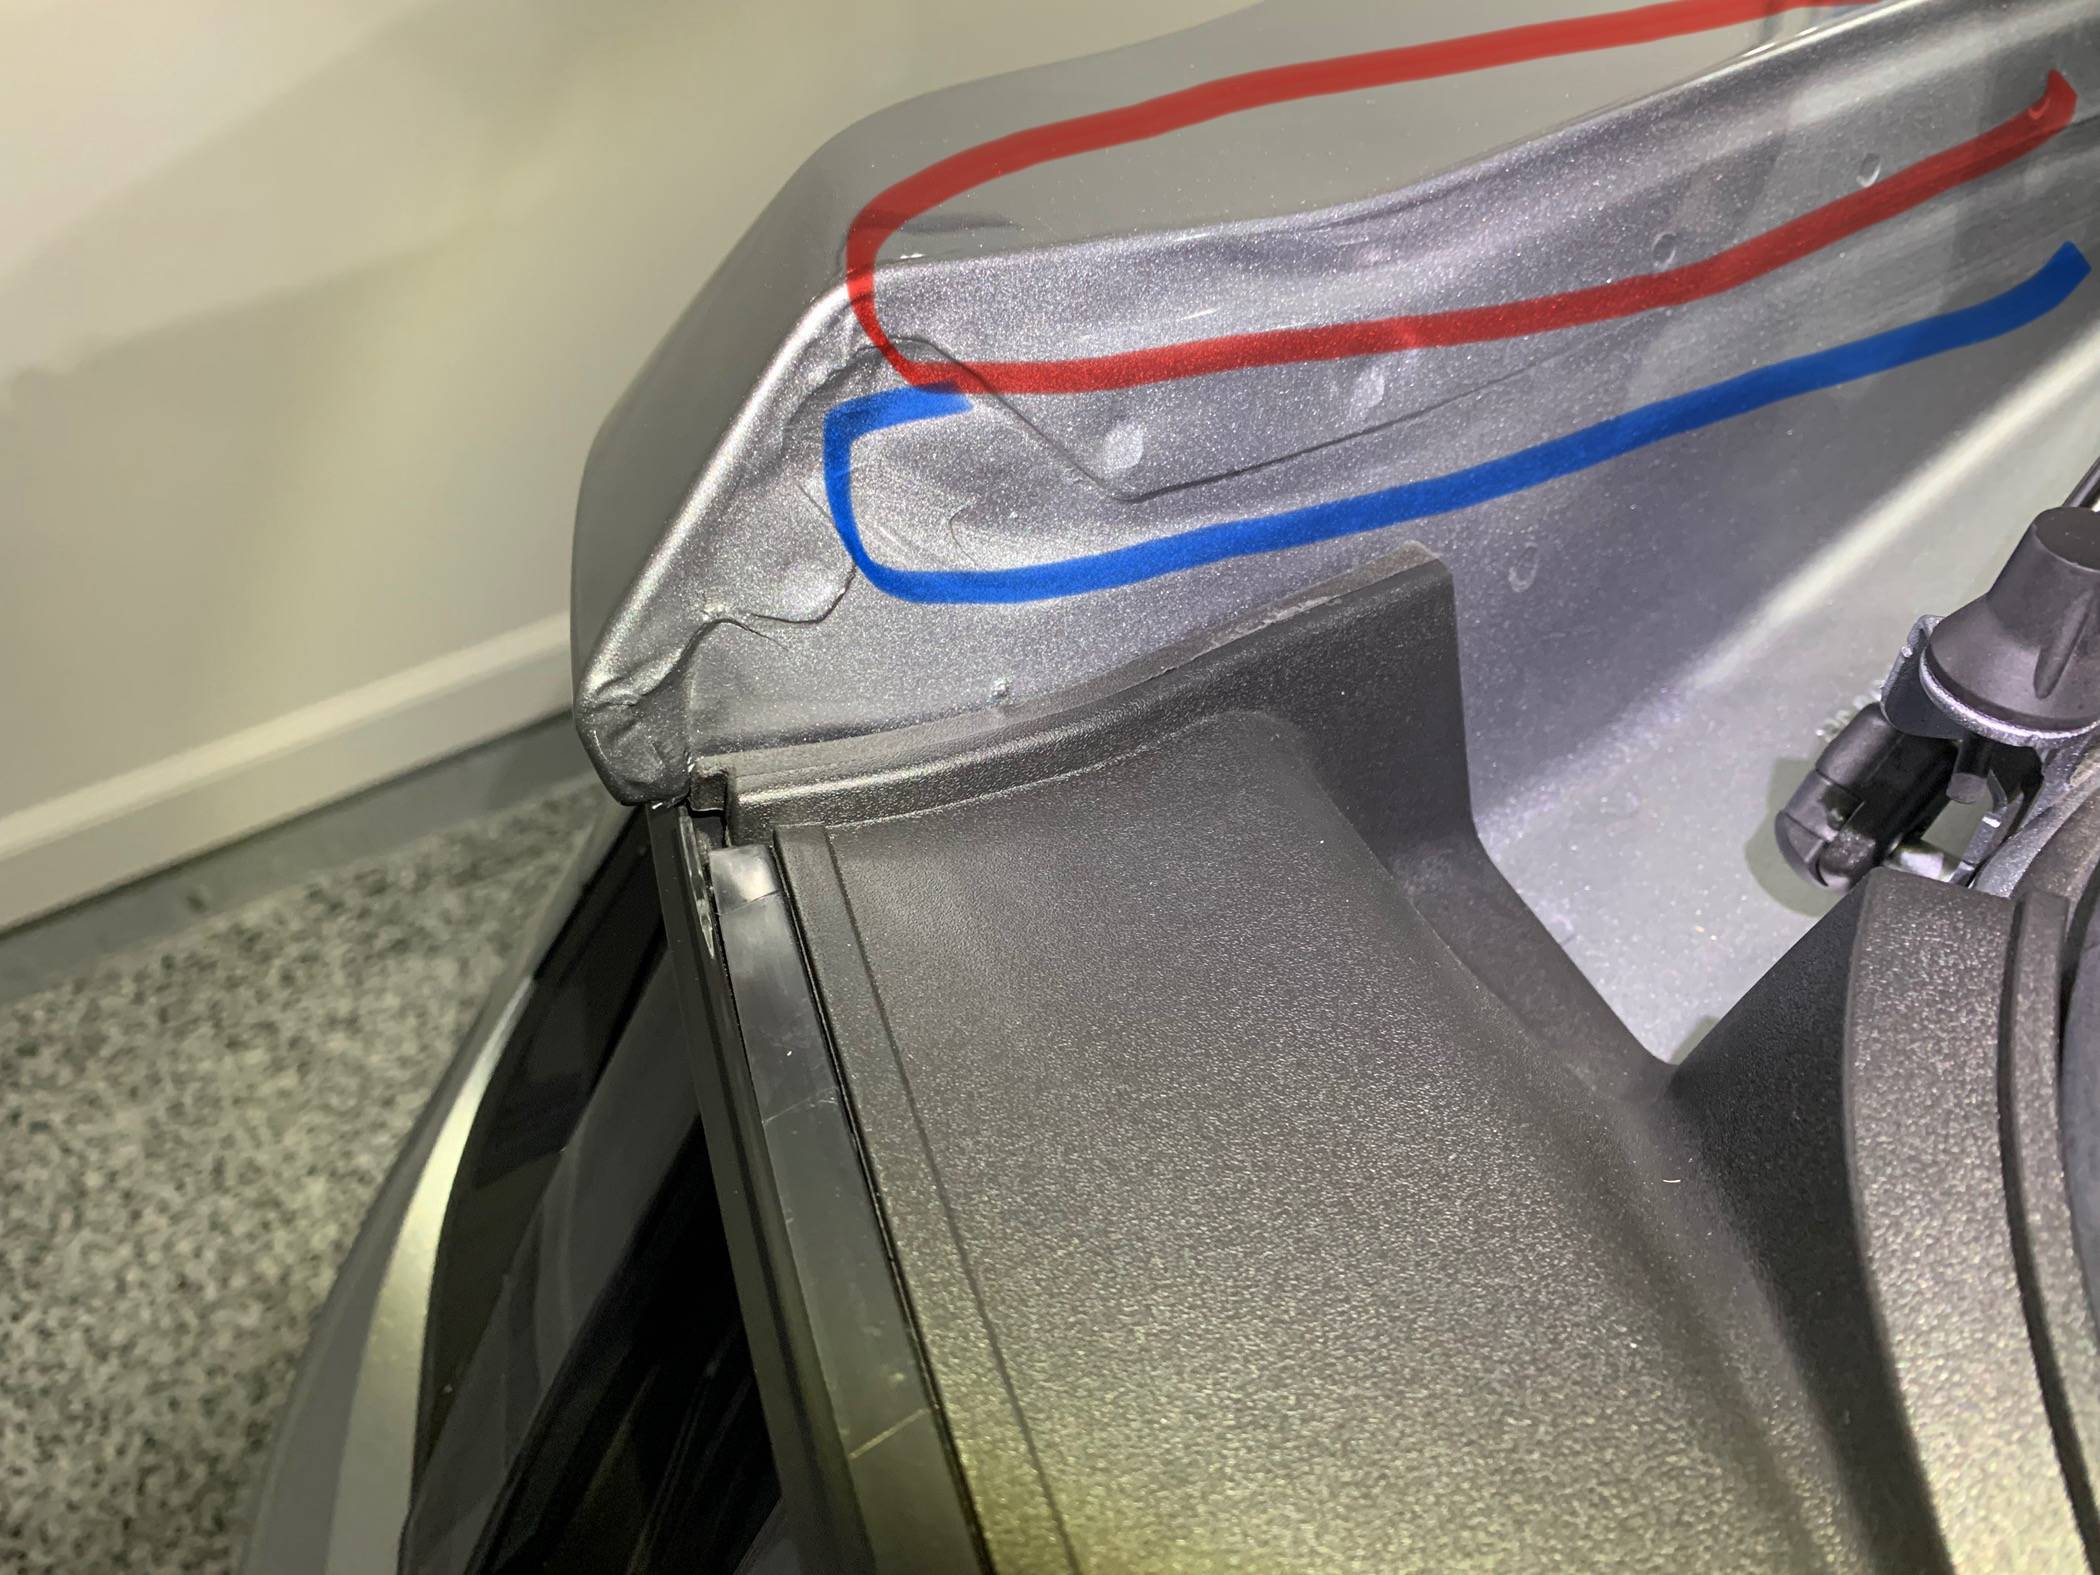
So sorry that you are going through all of this. These are great cars, but not hand made on a Ferrari assembly line, so we have to live with some concessions.
Not that my statement above excuses any of this, it's just that I and everyone else needs to remember that from the a pillar back these are rolling off the same lot as every other Mustang Eco, GT, etc.
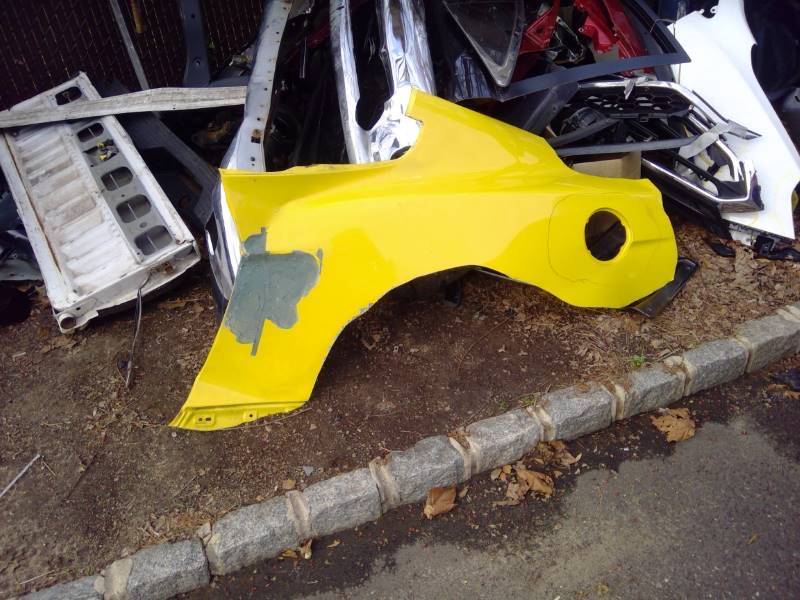
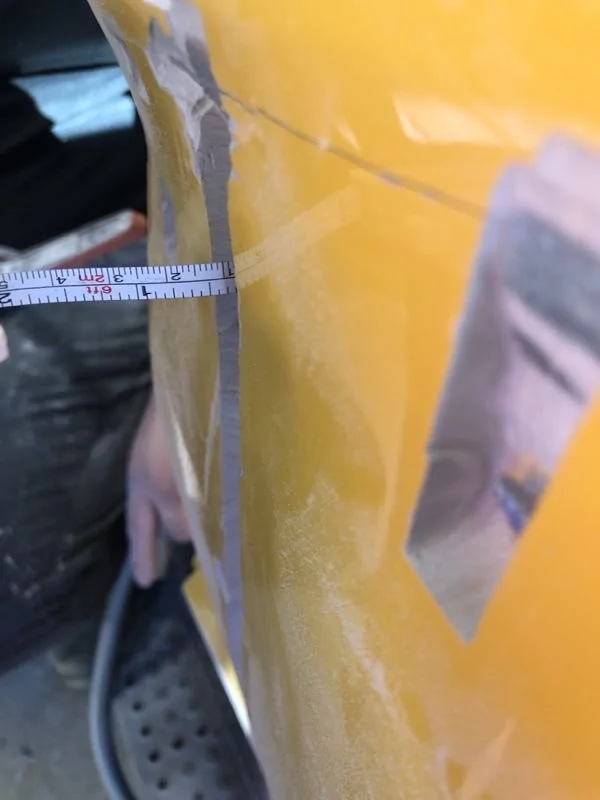
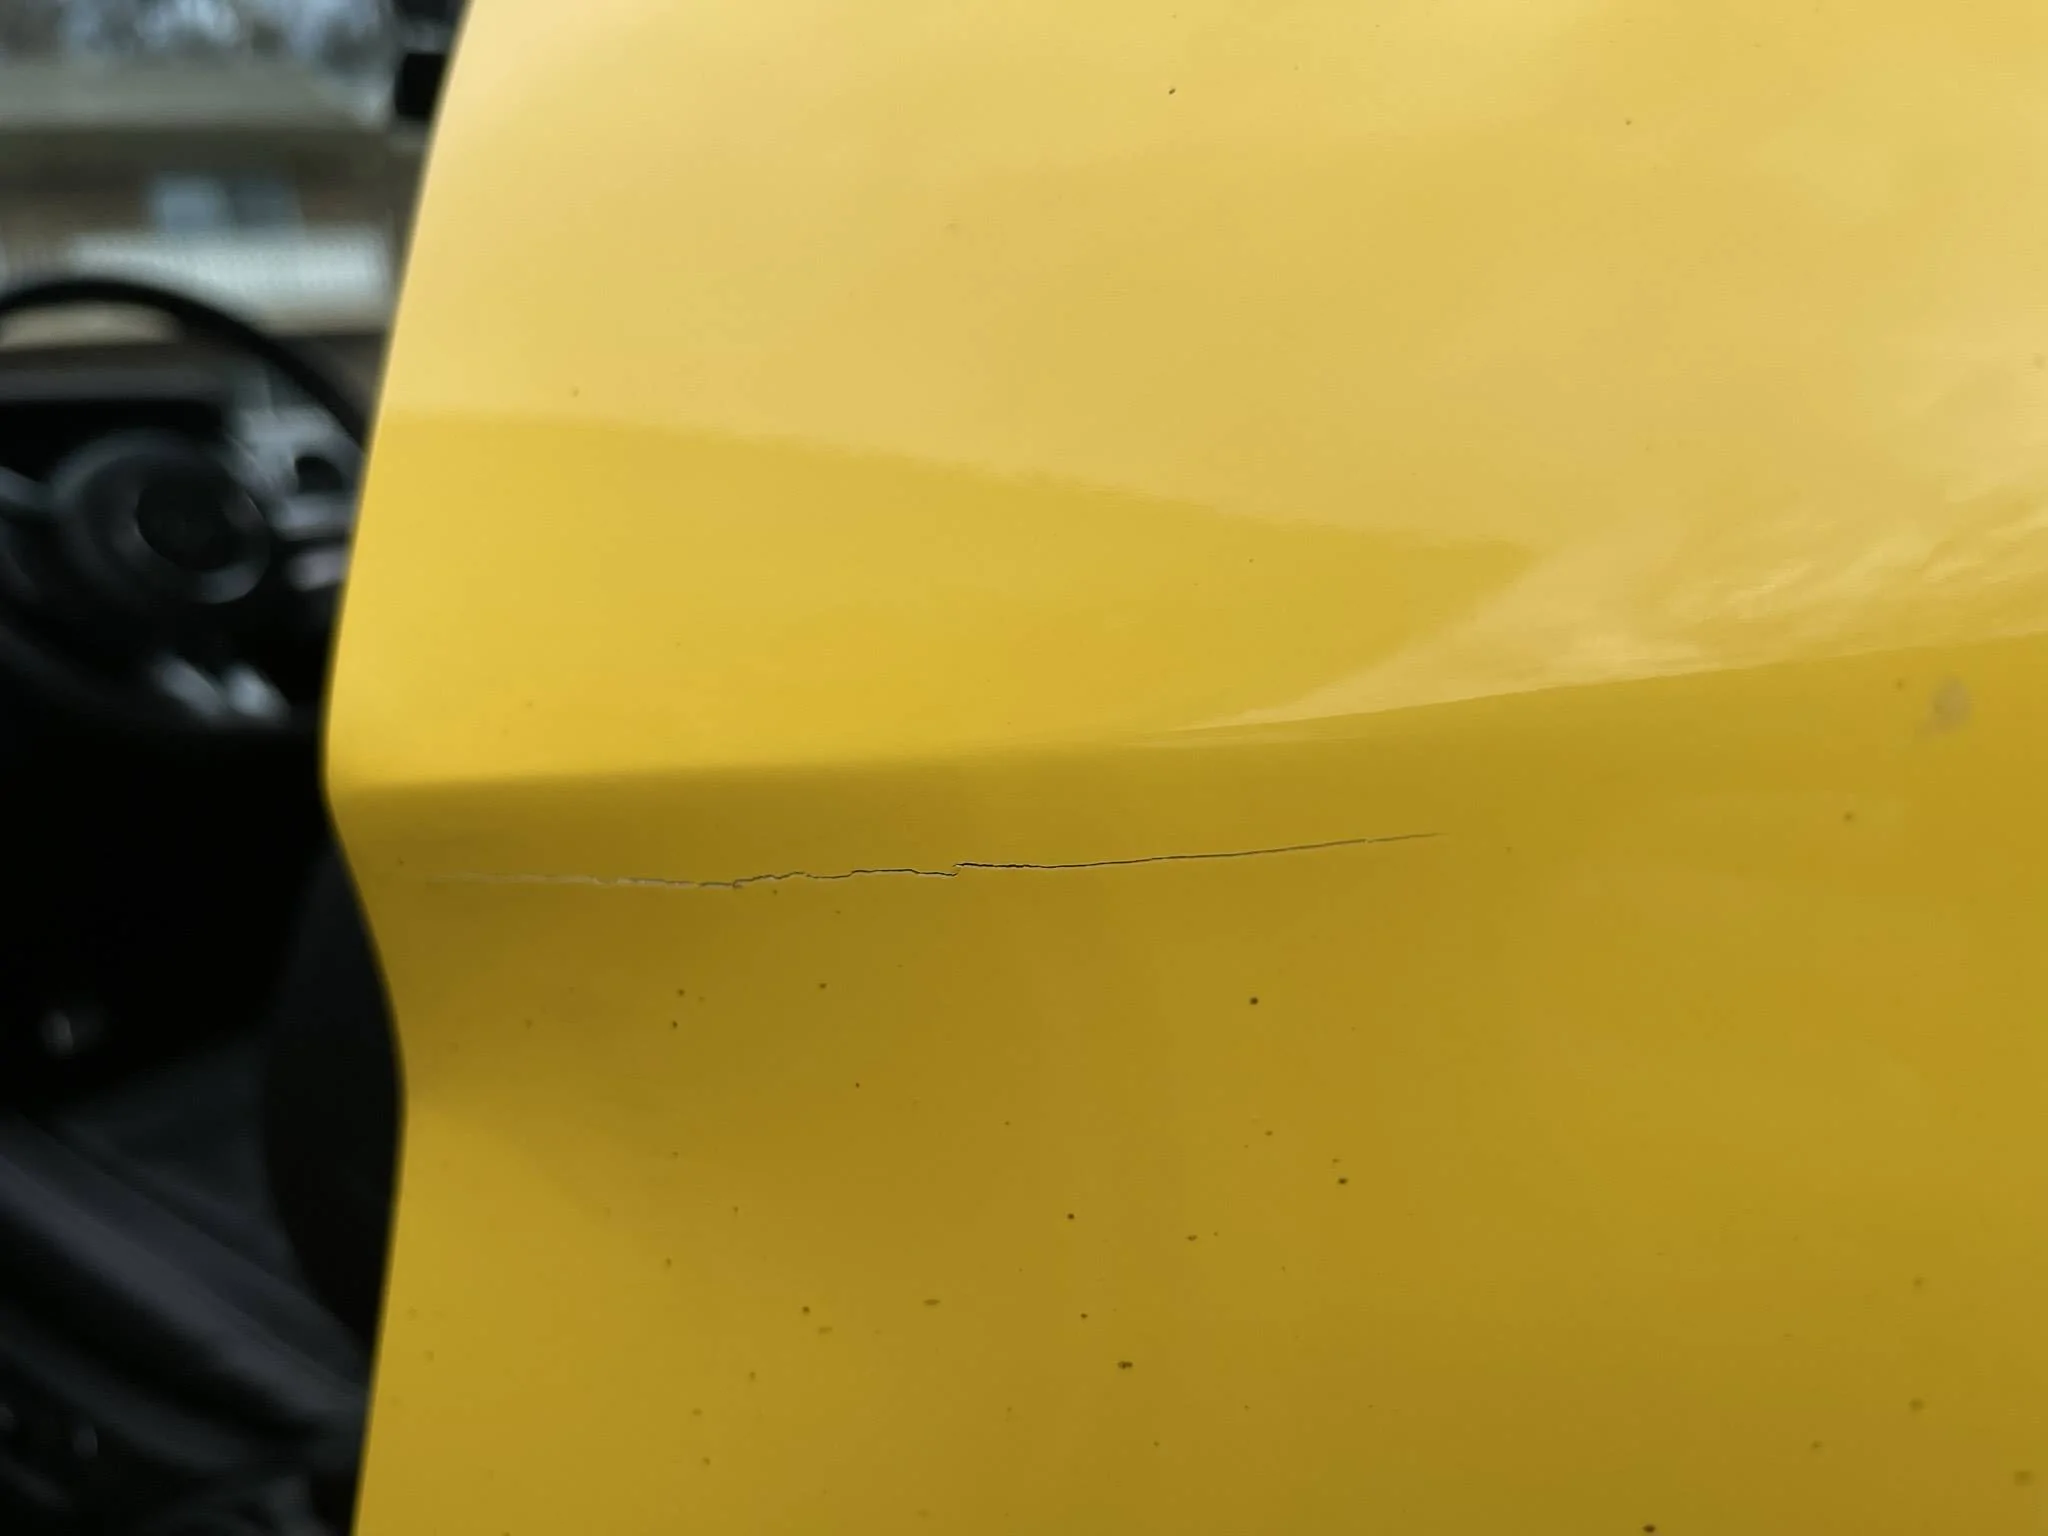
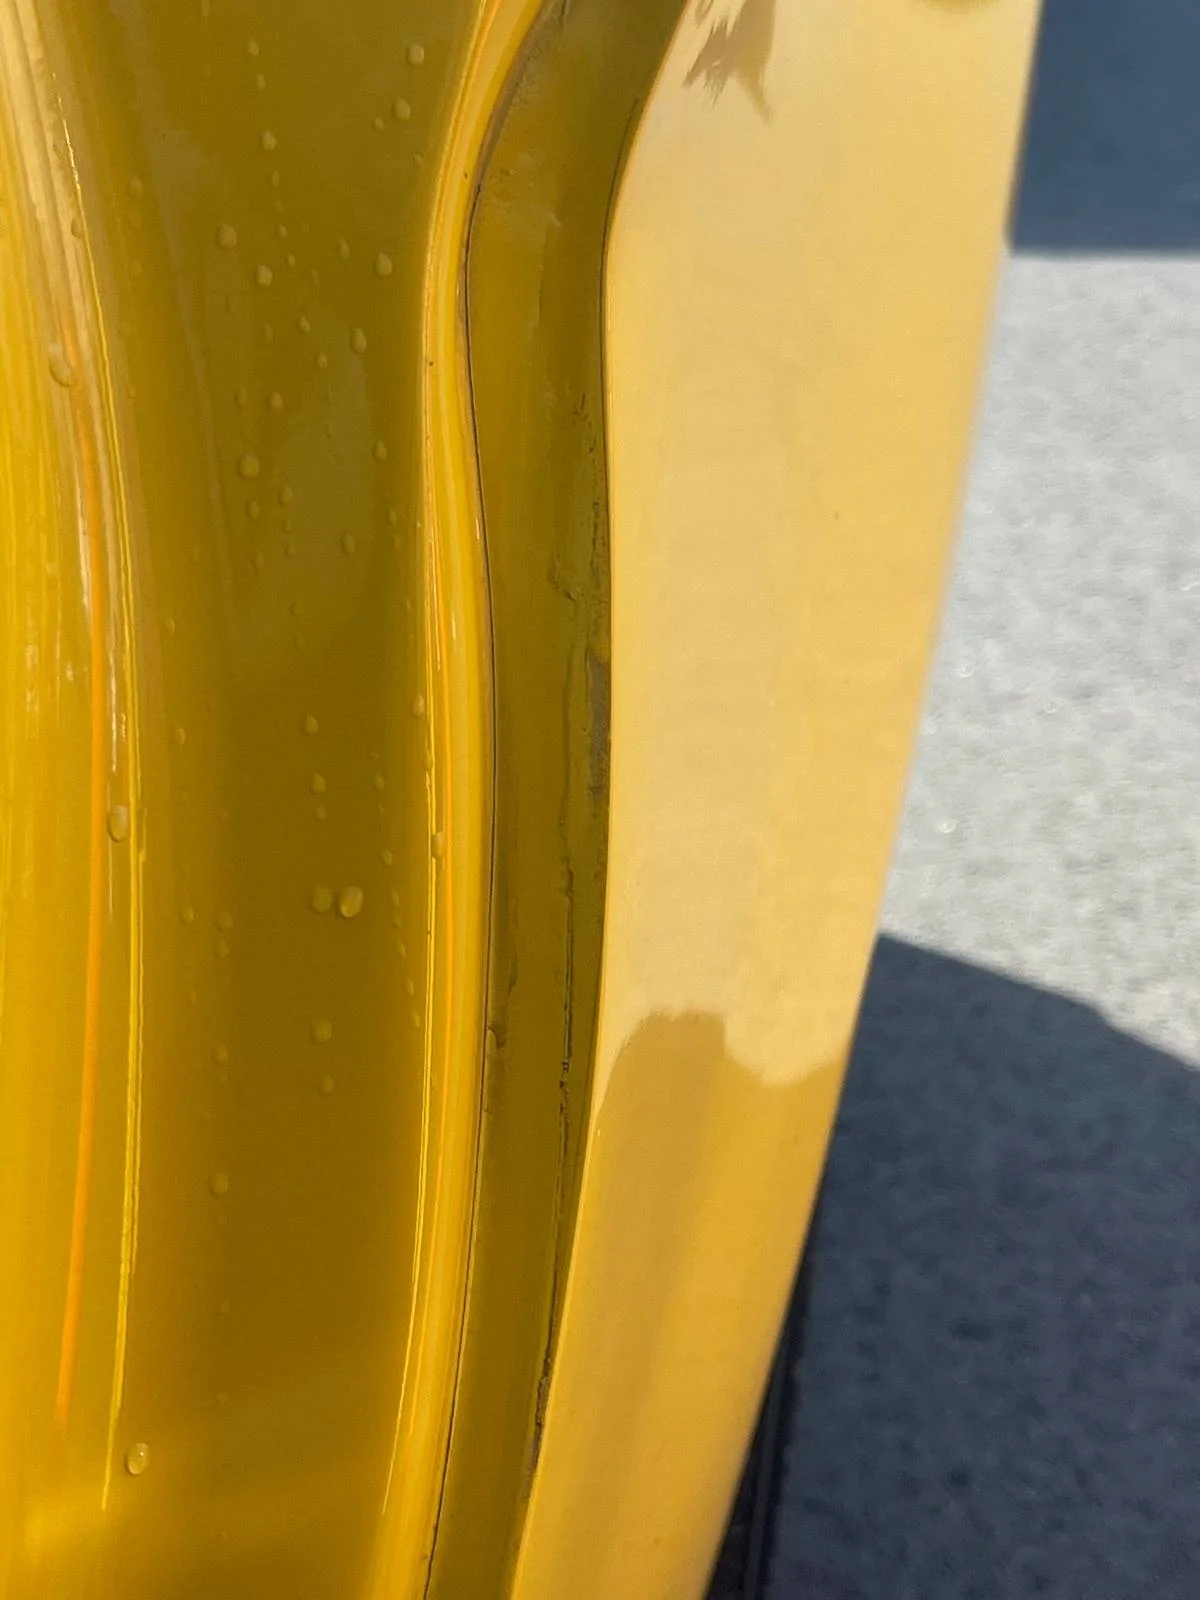
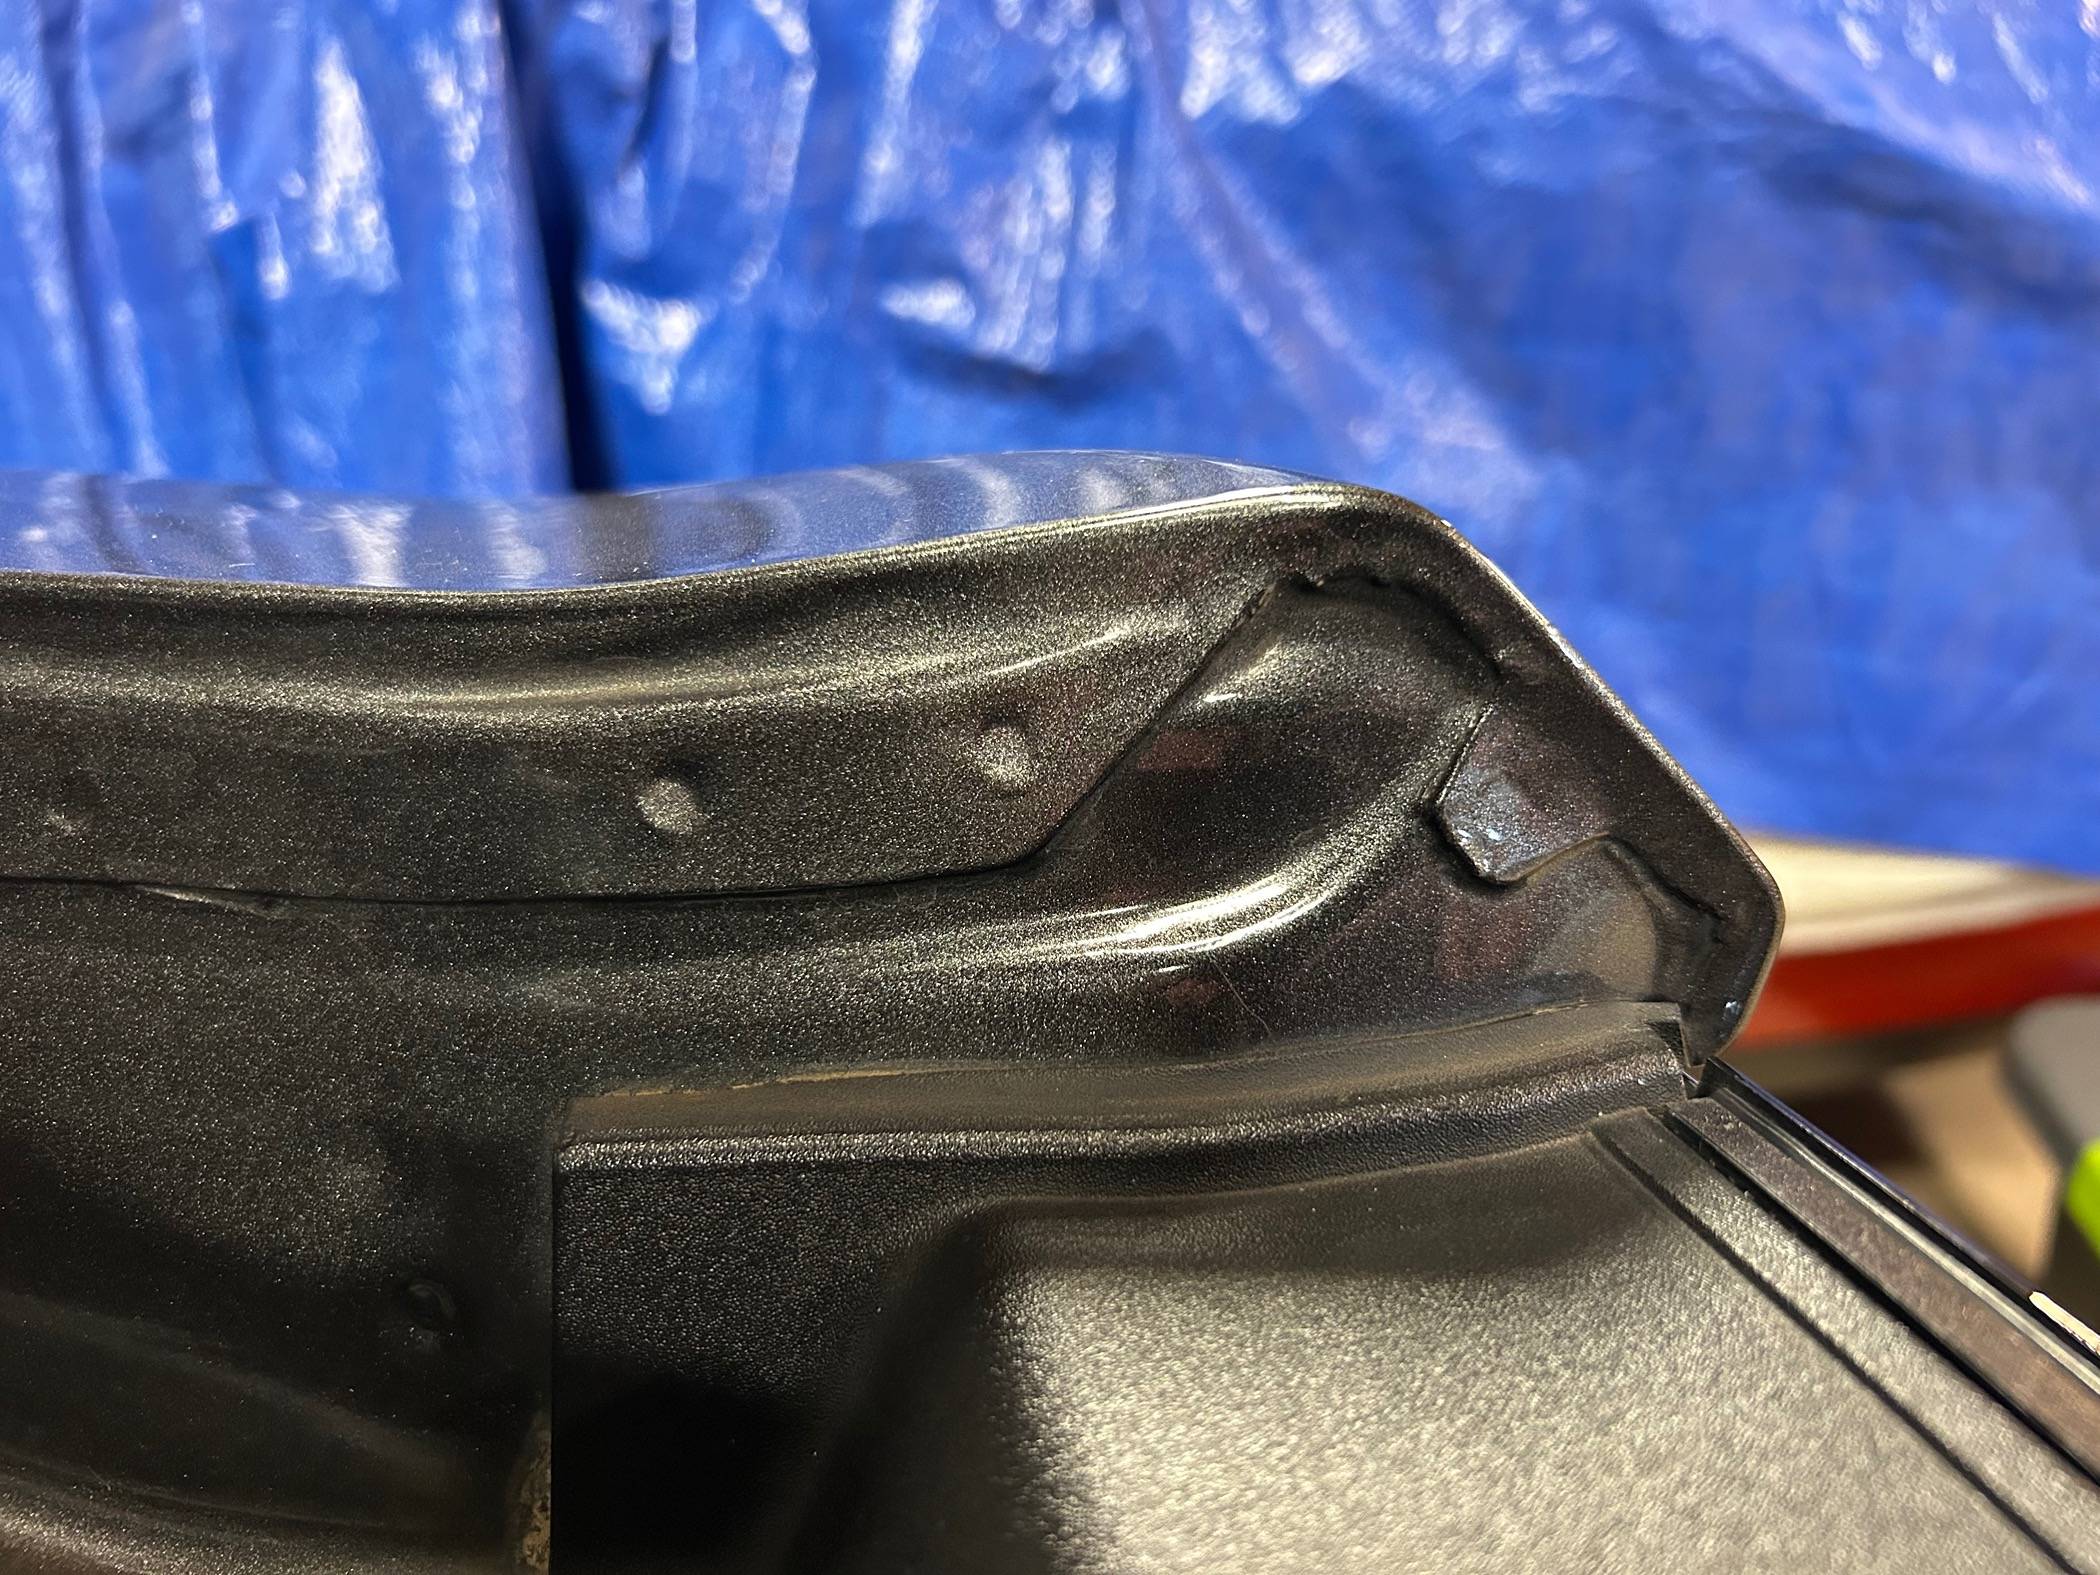
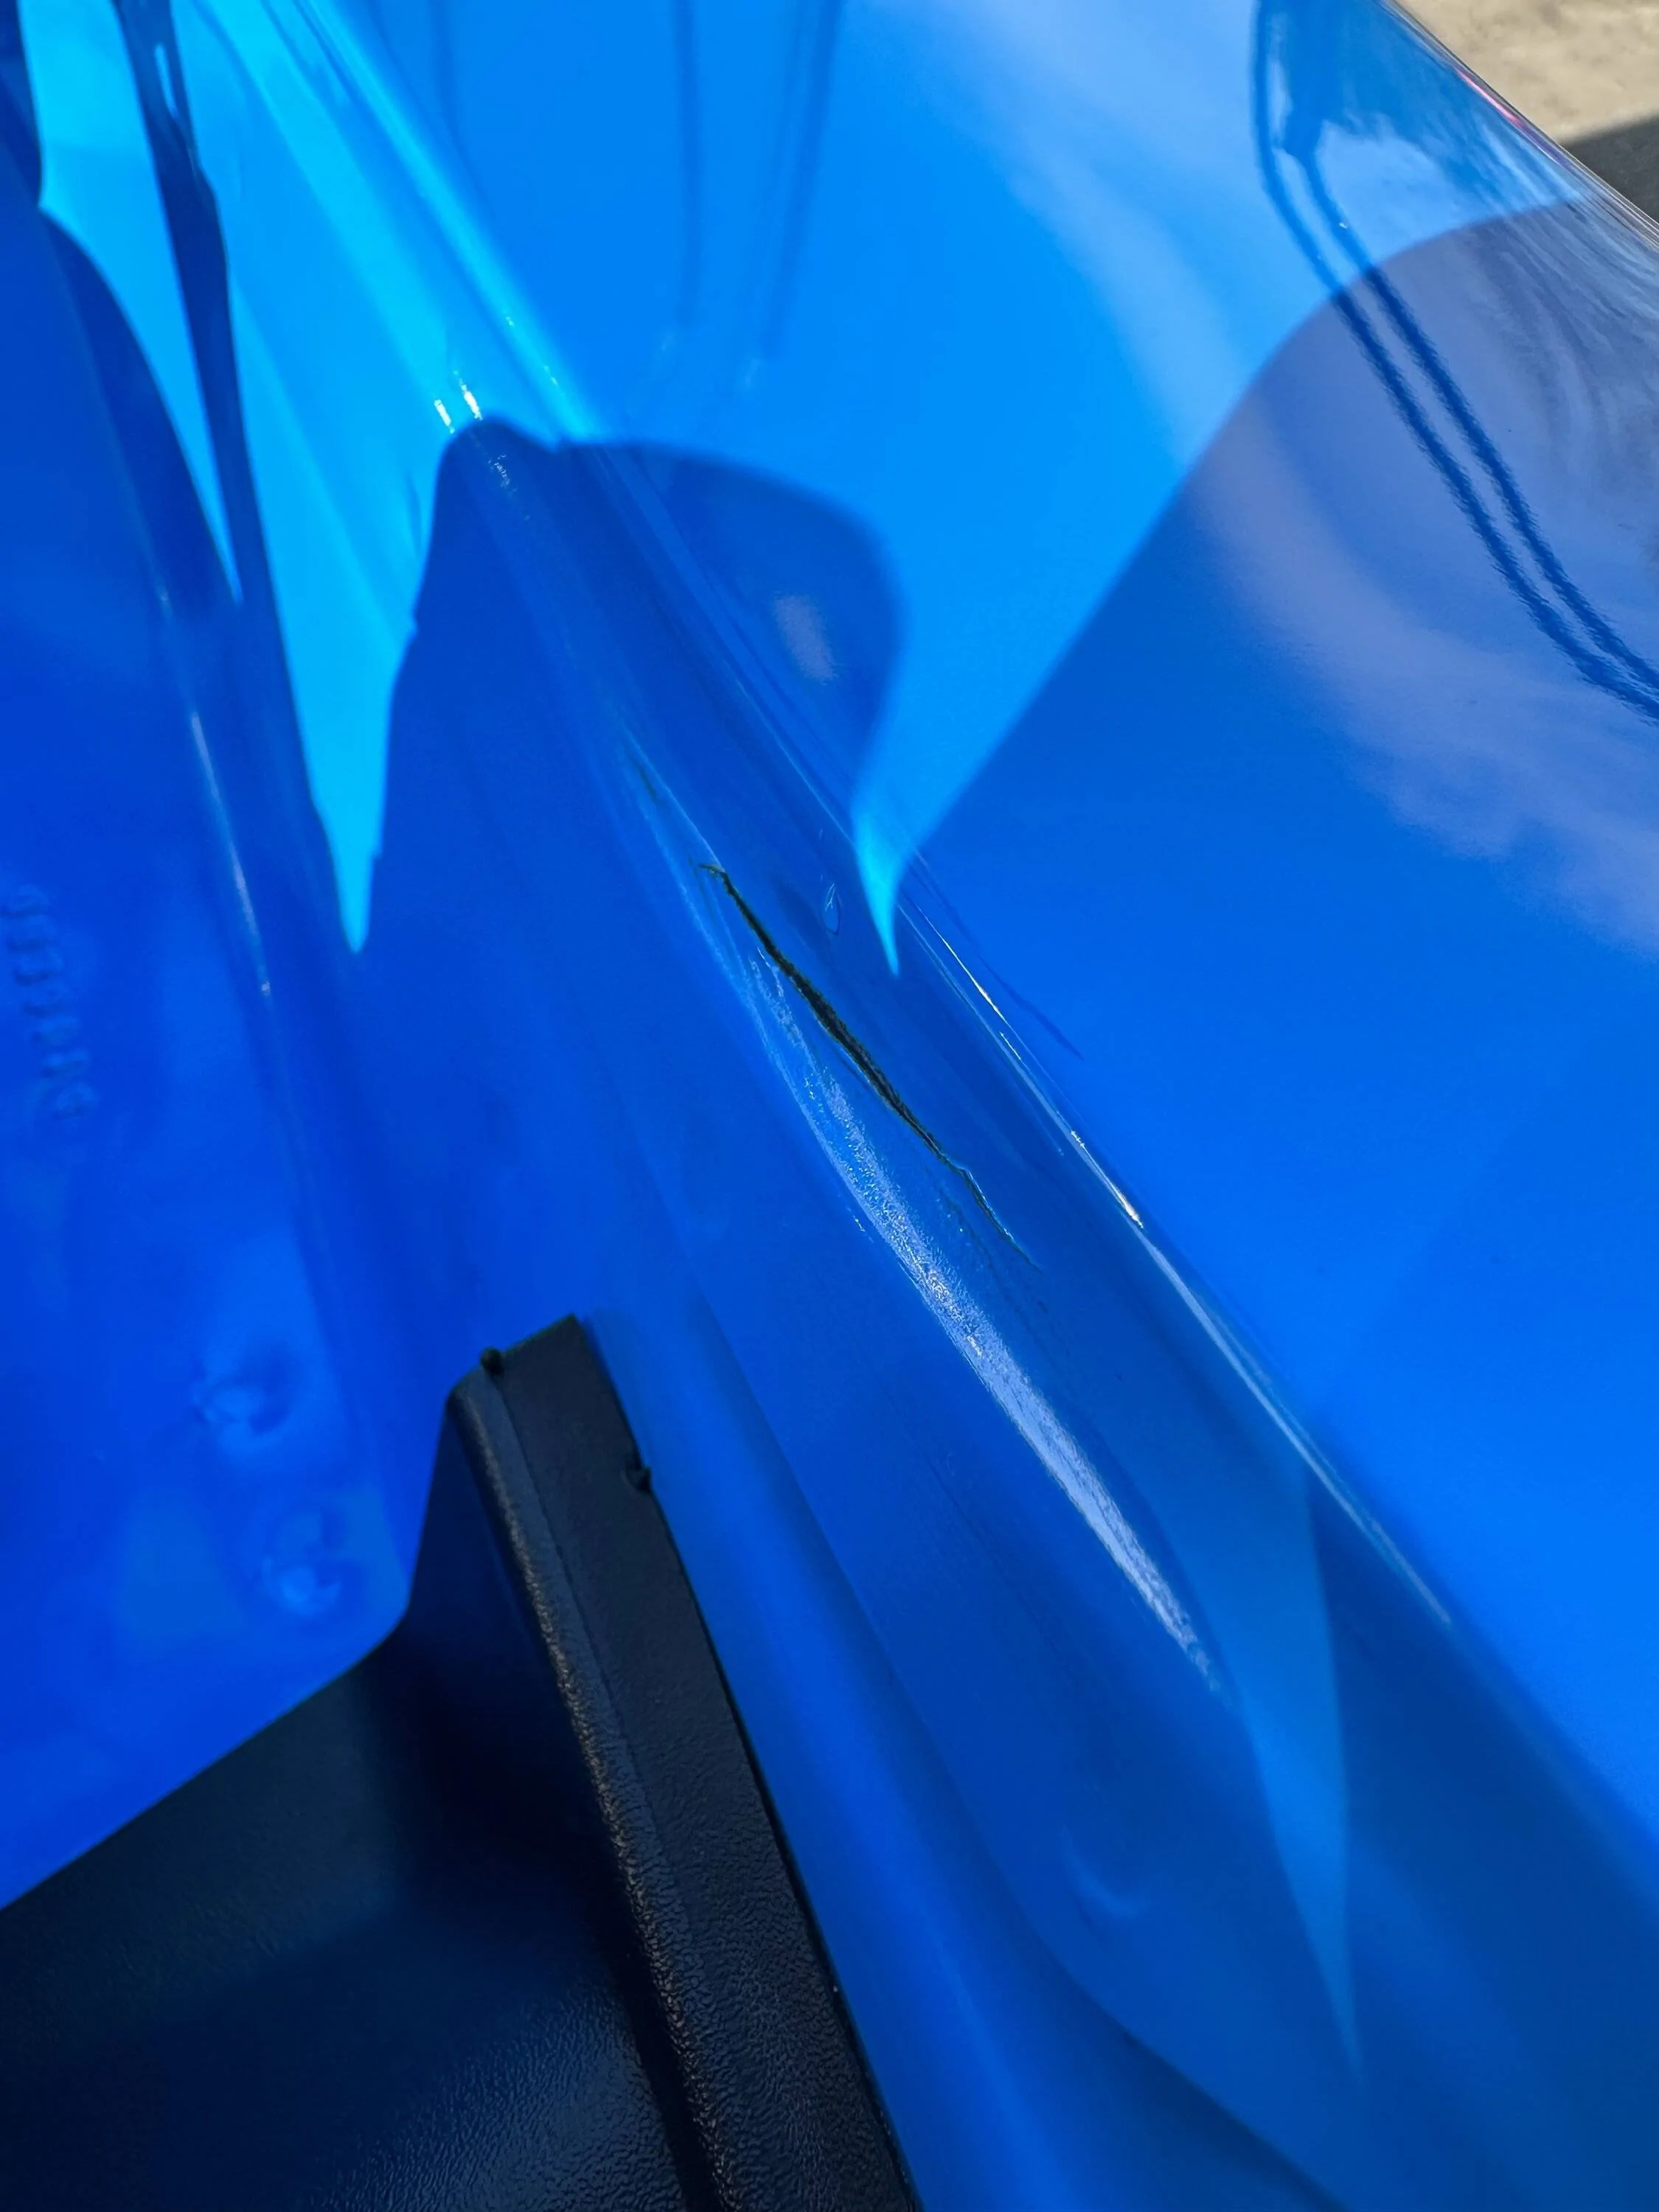
In this case it's hard to determine exactly what happened based upon Carfax, etc.
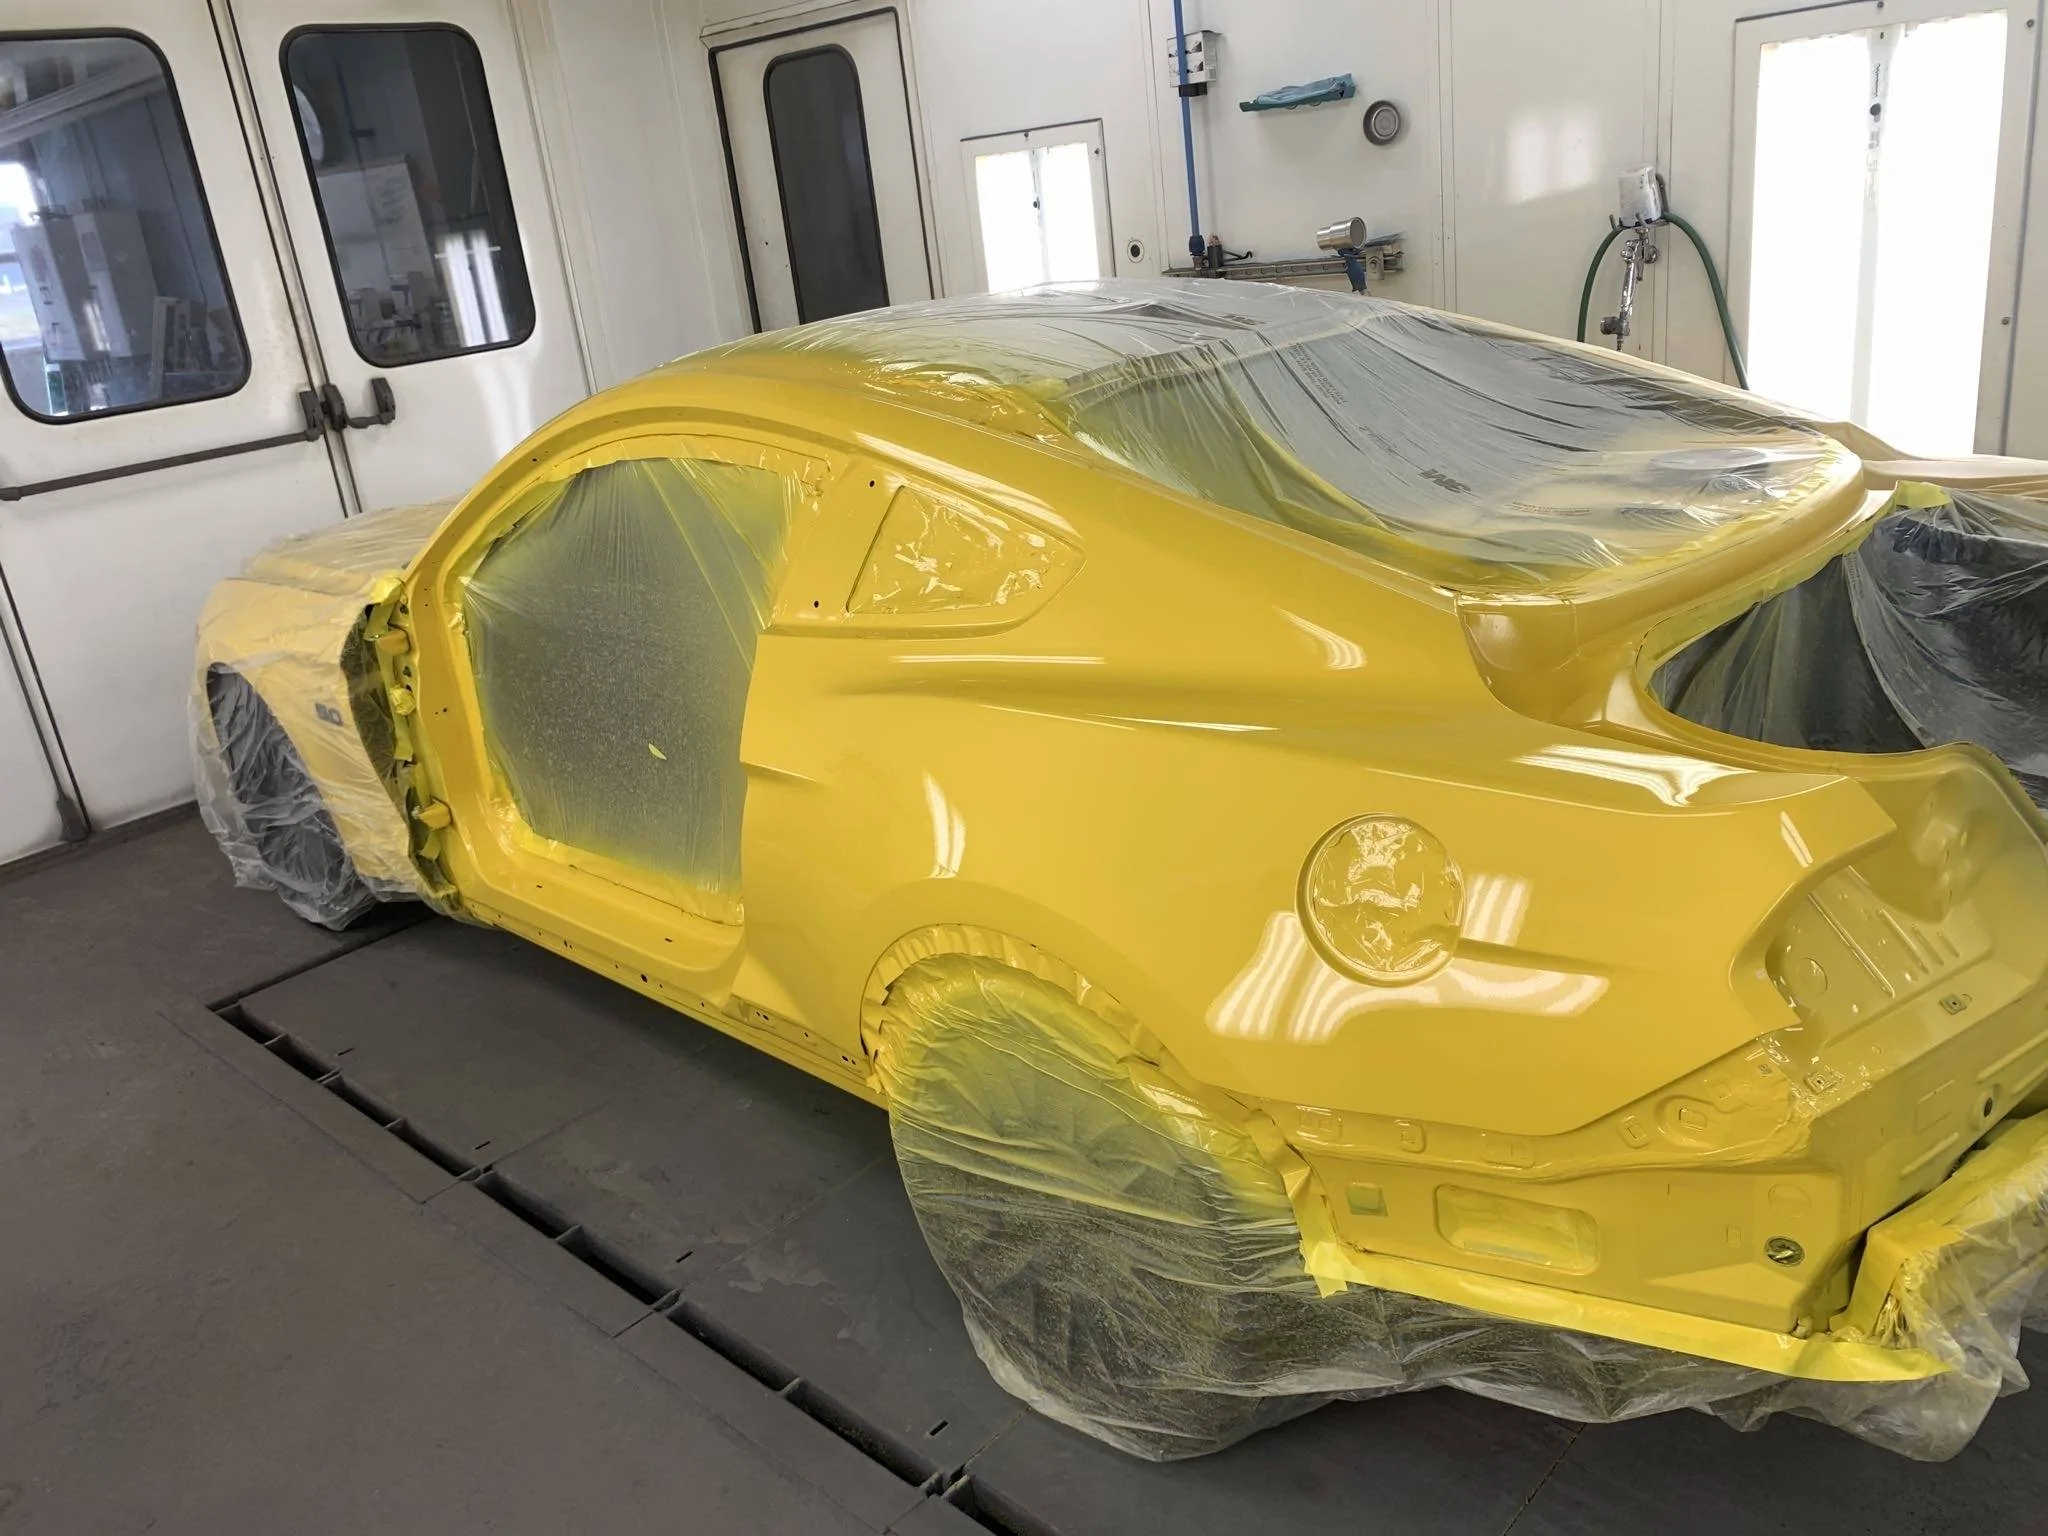
At this point your best option is to take it to the body shop you trust and possibly Ford to get professional opinions on where you are at with this, ....how bad, and possible repair options.
Will be praying for a good outcome.
Not that my statement above excuses any of this, it's just that I and everyone else needs to remember that from the a pillar back these are rolling off the same lot as every other Mustang Eco, GT, etc.
In this case it's hard to determine exactly what happened based upon Carfax, etc.
At this point your best option is to take it to the body shop you trust and possibly Ford to get professional opinions on where you are at with this, ....how bad, and possible repair options.
Will be praying for a good outcome.
Sponsored
")