Demonic
Well-Known Member
- Thread starter
- #1
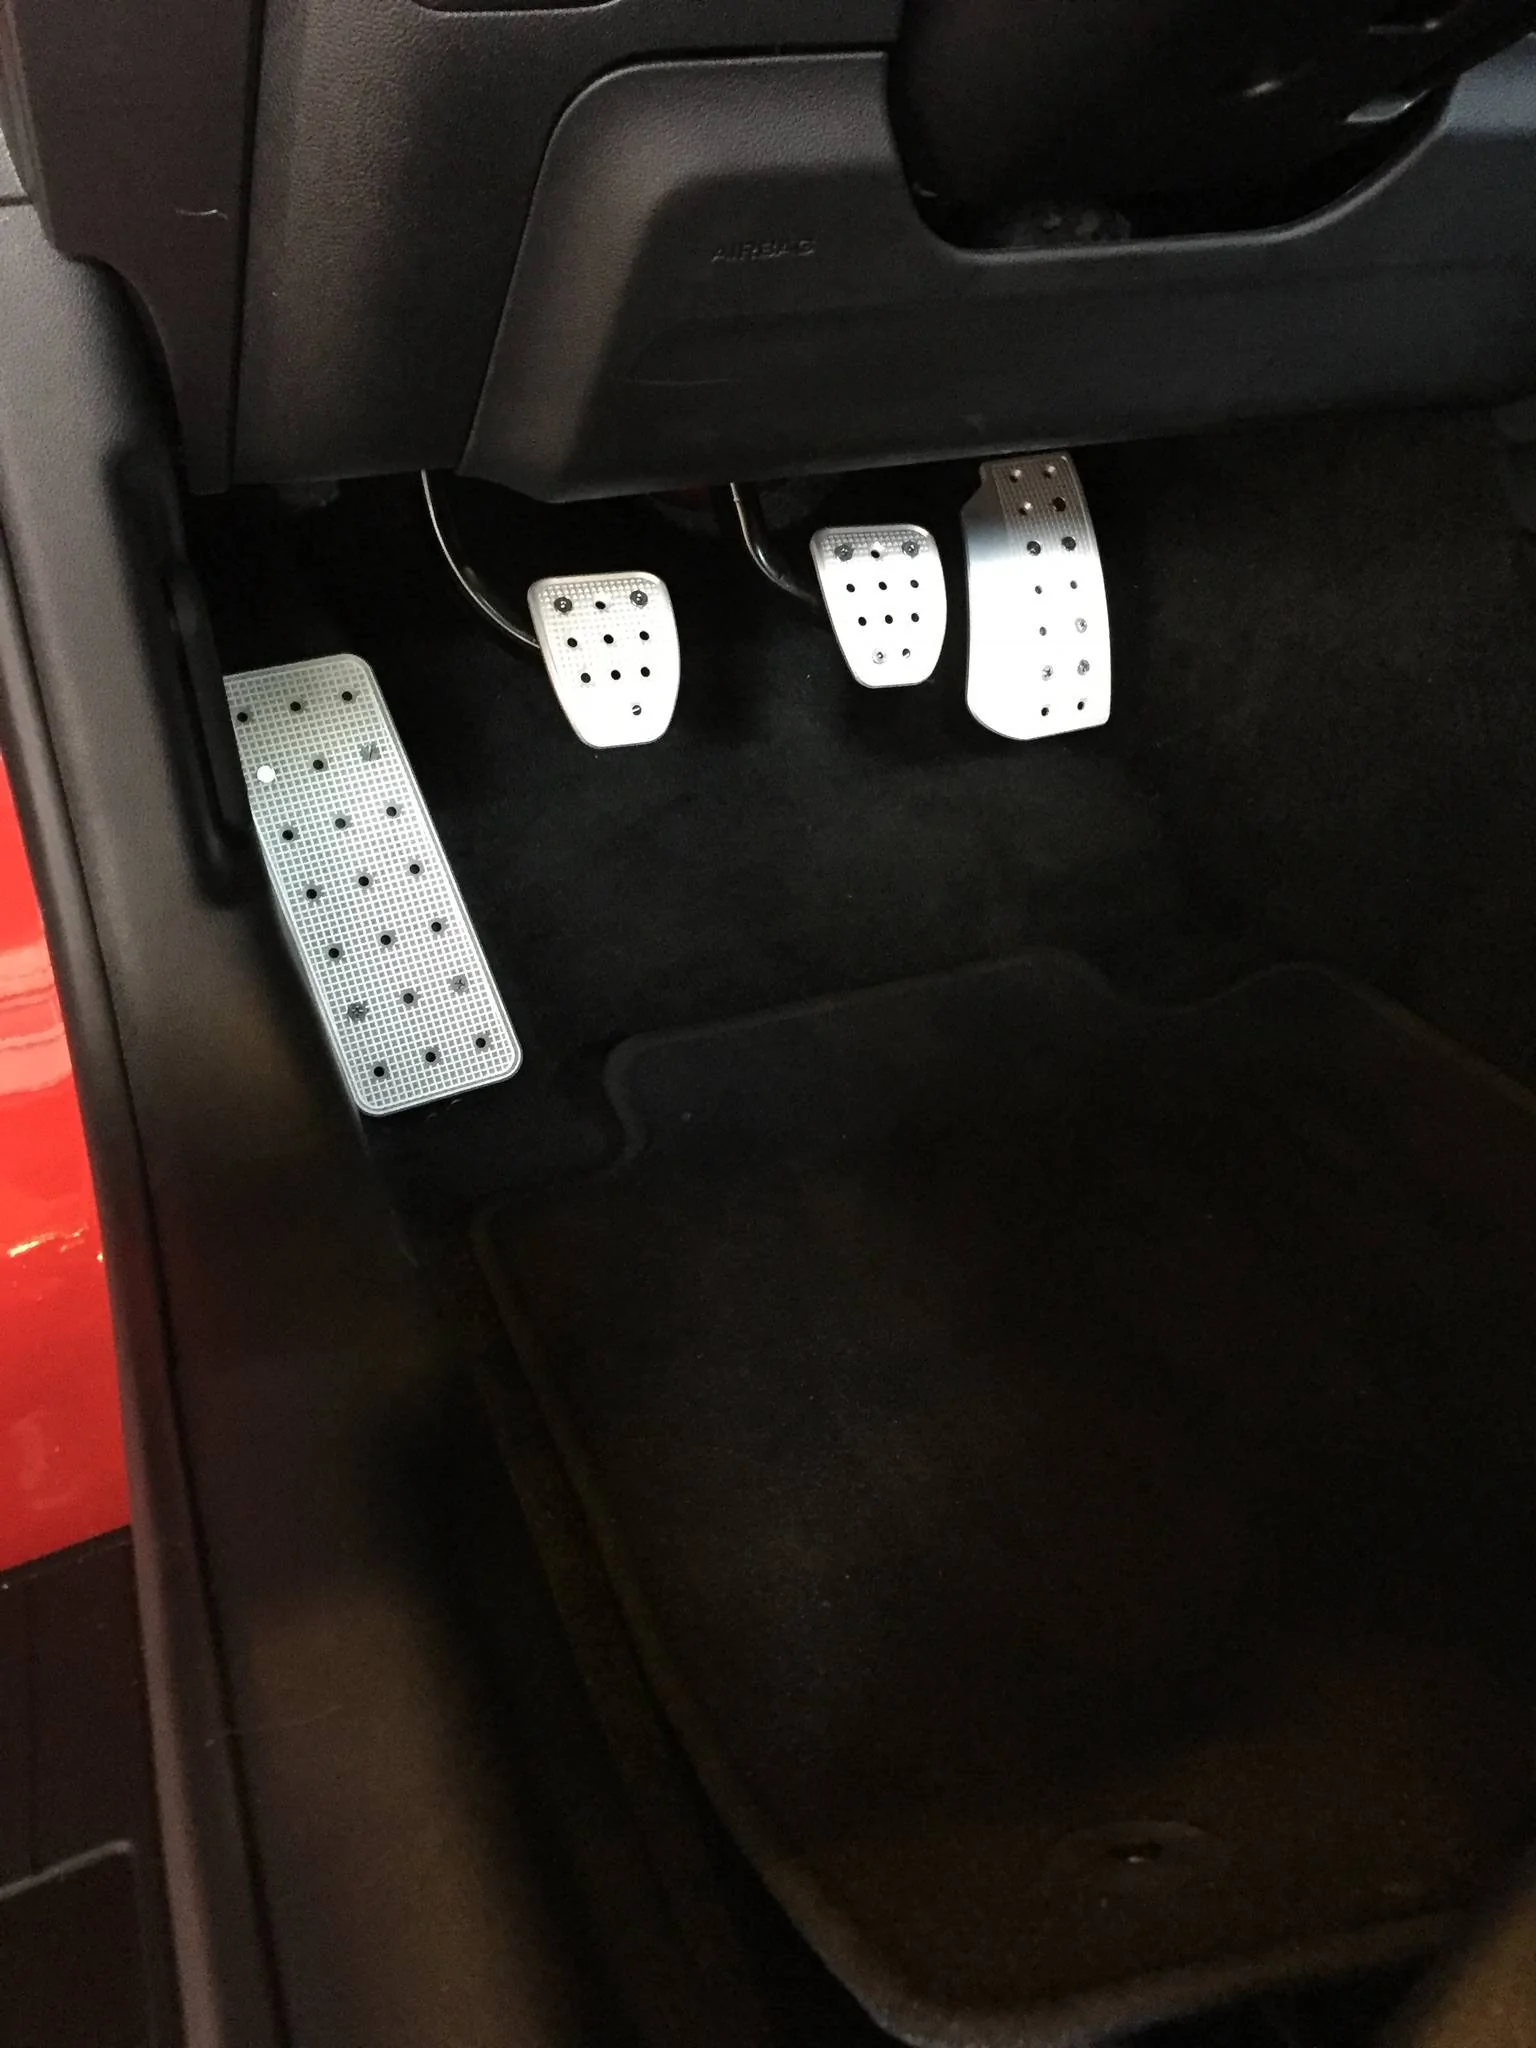
I placed SRP pedals order several weeks ago, and received them last week, and got them installed over the weekend. I know these have been mentioned and posted about before, but back when I was ordering I couldn't find much info on his newer Hex pattern pedals, so I wanted to post some pictures and report back.
Back when I first received my R, having gotten used to the floor mounted gas pedal and nice spacing for heel and toe in cars like the older M cars and the Porsches, I was a bit disappointed in the pedal setup for the GT350. With the combination of the Hillman nylon spacers from Lowes, and now these pedals, I'm thrilled. It's perfect for me, and looks killer. For those who haven't seen them mentioned before, in Lowes, you can usually find a set of Hillman nylon spacers in 1"x3/8"x3/8" that you can use to space the gas pedal so it sits further out and closer to the plane of the brake pedal. This was a big help, but still leaves the side gap between the gas and brake. When I went to order the SRP pedals I saw a picture Sullivan (SRP) had posted on Rennlist of the two tone hex grid. The two tone hex is $50 more than the regular SRP pedals: $25 extra for hex because of the added CNC time, and $25 for the anodizing. Part of why I wanted the this pattern was because none of the anodizing is on wear surfaces, so I don't have to be concerned about it getting worn down or scratched.

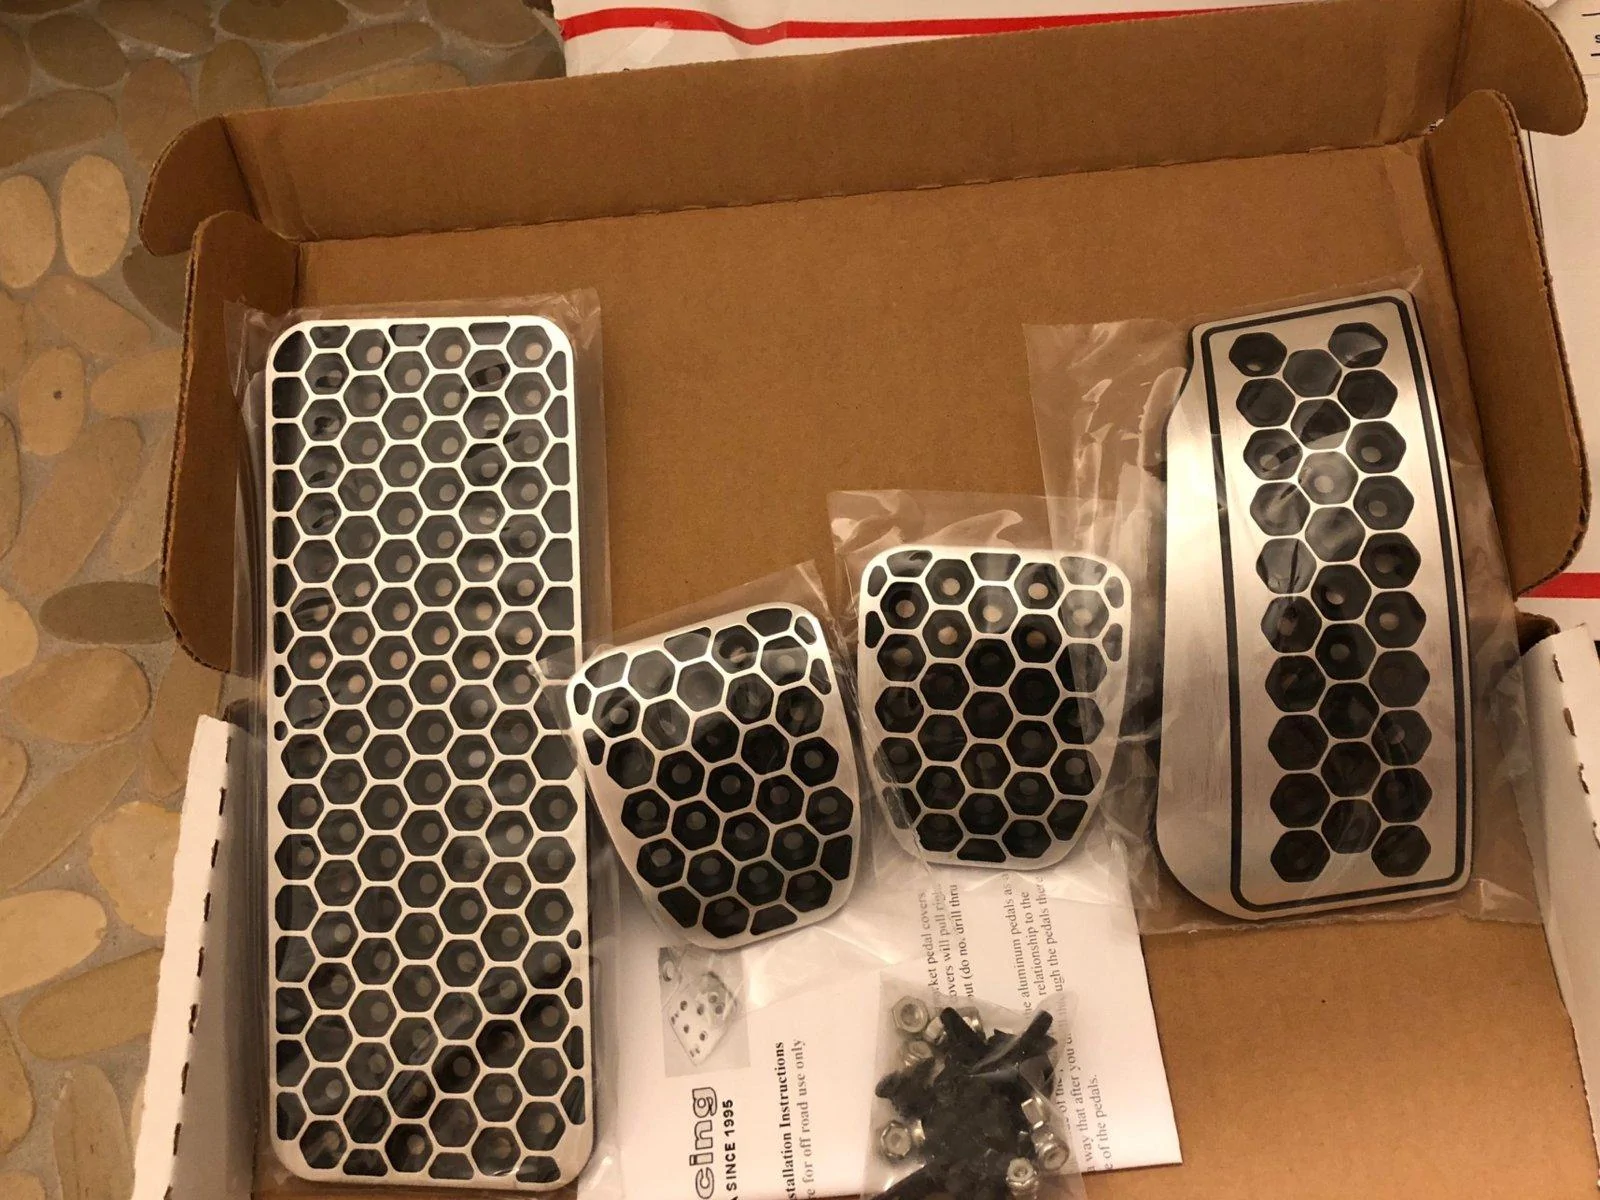
The hardware is a set of 8-32 thread countersunk grad 10.9 hex bolts, and some self-tapping screws for the gas or dead pedal. I saw mentions of two people who during their install decided to tap and thread the holes for the clutch and brake pedal instead of using the lock nuts on the back. I actually planned to do the same originally. However I'm not sure if I'd still recommend that. The way the pedals sit against the metal plates, the screw holes are on a slight angle. This means that depending on the angle you end up tapping the holes for threads, there's very likely to be a shear force on the bolts, and shearing off a small bolt down inside one of those pedal plates would be a major pain to drill out and remove. So I passed on tapping for threads and just drilled straight holes.
I didn't bother taking pictures of the hole drilling, since it was basically the same as those who already posted pictures. The only thing I would add is that for the pattern of holes on these pedals, I found 3 holes to work best. When you pop off the original pedal cover, there's already one hole present towards the top of the pedal. The SRP instructions are to start with a 1/16" hole and then move to a 3/16". I started by enlarging the one pre-existing hole at the top to 7/32". I made it a hair larger than 3/16" because the factory hole is on an angled surface so making the hole slightly larger prevents the screw from binding. Then I put painters tape on the bottom part of the pedal, and placed that one screw through the pedal. The one screw then centers the pedal at the top, while you align the bottom. Mark the two holes onto the painters or masking tape. Then use a punch and hammer to punch the spots for the two pilot holes. I saw someone mention using a spring loaded punch. This wasn't necessary for me, as the pedals had enough natural resistance that a couple good taps on a regular punch marked the spot. I then used a cobalt bit for the pilot hole, and enlarged to 3/16" holes for those bottom two holes.
The gas pedal was a bit trickier. As others have mentioned, the curve of the SRP gas pedal doesn't exactly match the curve of the stock plastic gas pedal assembly. Furthermore, since the gas pedal is taller, the top edge of the new pedal contacts against the arm of the gas pedal. I used a hydraulic floor jack (remember to use something to protect the surface of the pedal) to press the pedal upward against a beam in the garage to slightly flatten out the pedal. This allowed it to better match the curvature and not be interfering with the arm. It appears Sullivan puts the pedals into a hydraulic press to make the curve, so I'm going to email him about this in the hopes that the arc can be corrected for anyone ordering these pedals for a Mustang/GT350.
I then attached the gas pedal to the assembly using the 8-32 threaded hex bolts instead of the self tapping screws. This required using a dremel and carbide bit to make some recesses for the nuts to sit flush on the back of the gas pedal since there's some ribbing there.
Inside garage with flash light:
Outside with natural light:
Back when I first received my R, having gotten used to the floor mounted gas pedal and nice spacing for heel and toe in cars like the older M cars and the Porsches, I was a bit disappointed in the pedal setup for the GT350. With the combination of the Hillman nylon spacers from Lowes, and now these pedals, I'm thrilled. It's perfect for me, and looks killer. For those who haven't seen them mentioned before, in Lowes, you can usually find a set of Hillman nylon spacers in 1"x3/8"x3/8" that you can use to space the gas pedal so it sits further out and closer to the plane of the brake pedal. This was a big help, but still leaves the side gap between the gas and brake. When I went to order the SRP pedals I saw a picture Sullivan (SRP) had posted on Rennlist of the two tone hex grid. The two tone hex is $50 more than the regular SRP pedals: $25 extra for hex because of the added CNC time, and $25 for the anodizing. Part of why I wanted the this pattern was because none of the anodizing is on wear surfaces, so I don't have to be concerned about it getting worn down or scratched.
The hardware is a set of 8-32 thread countersunk grad 10.9 hex bolts, and some self-tapping screws for the gas or dead pedal. I saw mentions of two people who during their install decided to tap and thread the holes for the clutch and brake pedal instead of using the lock nuts on the back. I actually planned to do the same originally. However I'm not sure if I'd still recommend that. The way the pedals sit against the metal plates, the screw holes are on a slight angle. This means that depending on the angle you end up tapping the holes for threads, there's very likely to be a shear force on the bolts, and shearing off a small bolt down inside one of those pedal plates would be a major pain to drill out and remove. So I passed on tapping for threads and just drilled straight holes.
I didn't bother taking pictures of the hole drilling, since it was basically the same as those who already posted pictures. The only thing I would add is that for the pattern of holes on these pedals, I found 3 holes to work best. When you pop off the original pedal cover, there's already one hole present towards the top of the pedal. The SRP instructions are to start with a 1/16" hole and then move to a 3/16". I started by enlarging the one pre-existing hole at the top to 7/32". I made it a hair larger than 3/16" because the factory hole is on an angled surface so making the hole slightly larger prevents the screw from binding. Then I put painters tape on the bottom part of the pedal, and placed that one screw through the pedal. The one screw then centers the pedal at the top, while you align the bottom. Mark the two holes onto the painters or masking tape. Then use a punch and hammer to punch the spots for the two pilot holes. I saw someone mention using a spring loaded punch. This wasn't necessary for me, as the pedals had enough natural resistance that a couple good taps on a regular punch marked the spot. I then used a cobalt bit for the pilot hole, and enlarged to 3/16" holes for those bottom two holes.
The gas pedal was a bit trickier. As others have mentioned, the curve of the SRP gas pedal doesn't exactly match the curve of the stock plastic gas pedal assembly. Furthermore, since the gas pedal is taller, the top edge of the new pedal contacts against the arm of the gas pedal. I used a hydraulic floor jack (remember to use something to protect the surface of the pedal) to press the pedal upward against a beam in the garage to slightly flatten out the pedal. This allowed it to better match the curvature and not be interfering with the arm. It appears Sullivan puts the pedals into a hydraulic press to make the curve, so I'm going to email him about this in the hopes that the arc can be corrected for anyone ordering these pedals for a Mustang/GT350.
I then attached the gas pedal to the assembly using the 8-32 threaded hex bolts instead of the self tapping screws. This required using a dremel and carbide bit to make some recesses for the nuts to sit flush on the back of the gas pedal since there's some ribbing there.
Inside garage with flash light:

Outside with natural light:

Sponsored