Biggsy
Well-Known Member
thanks,,, here is the amazon link.
https://www.amazon.com/gp/product/B07SQV871L/ref=ppx_yo_dt_b_search_asin_title?ie=UTF8&psc=1
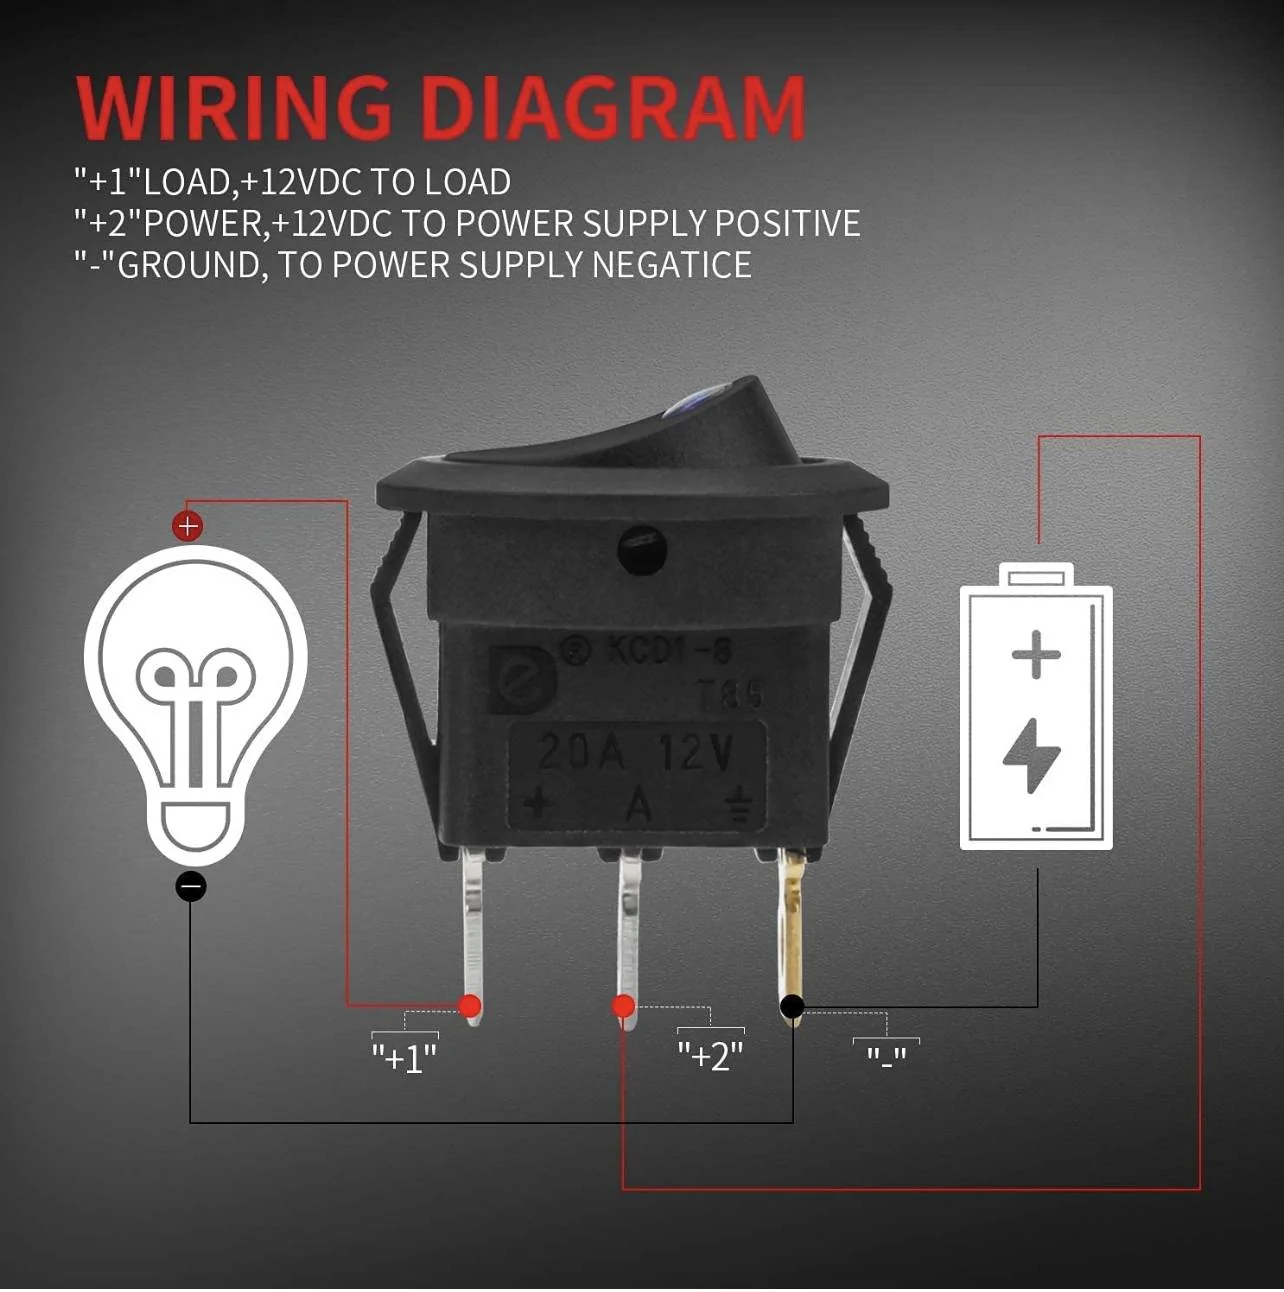
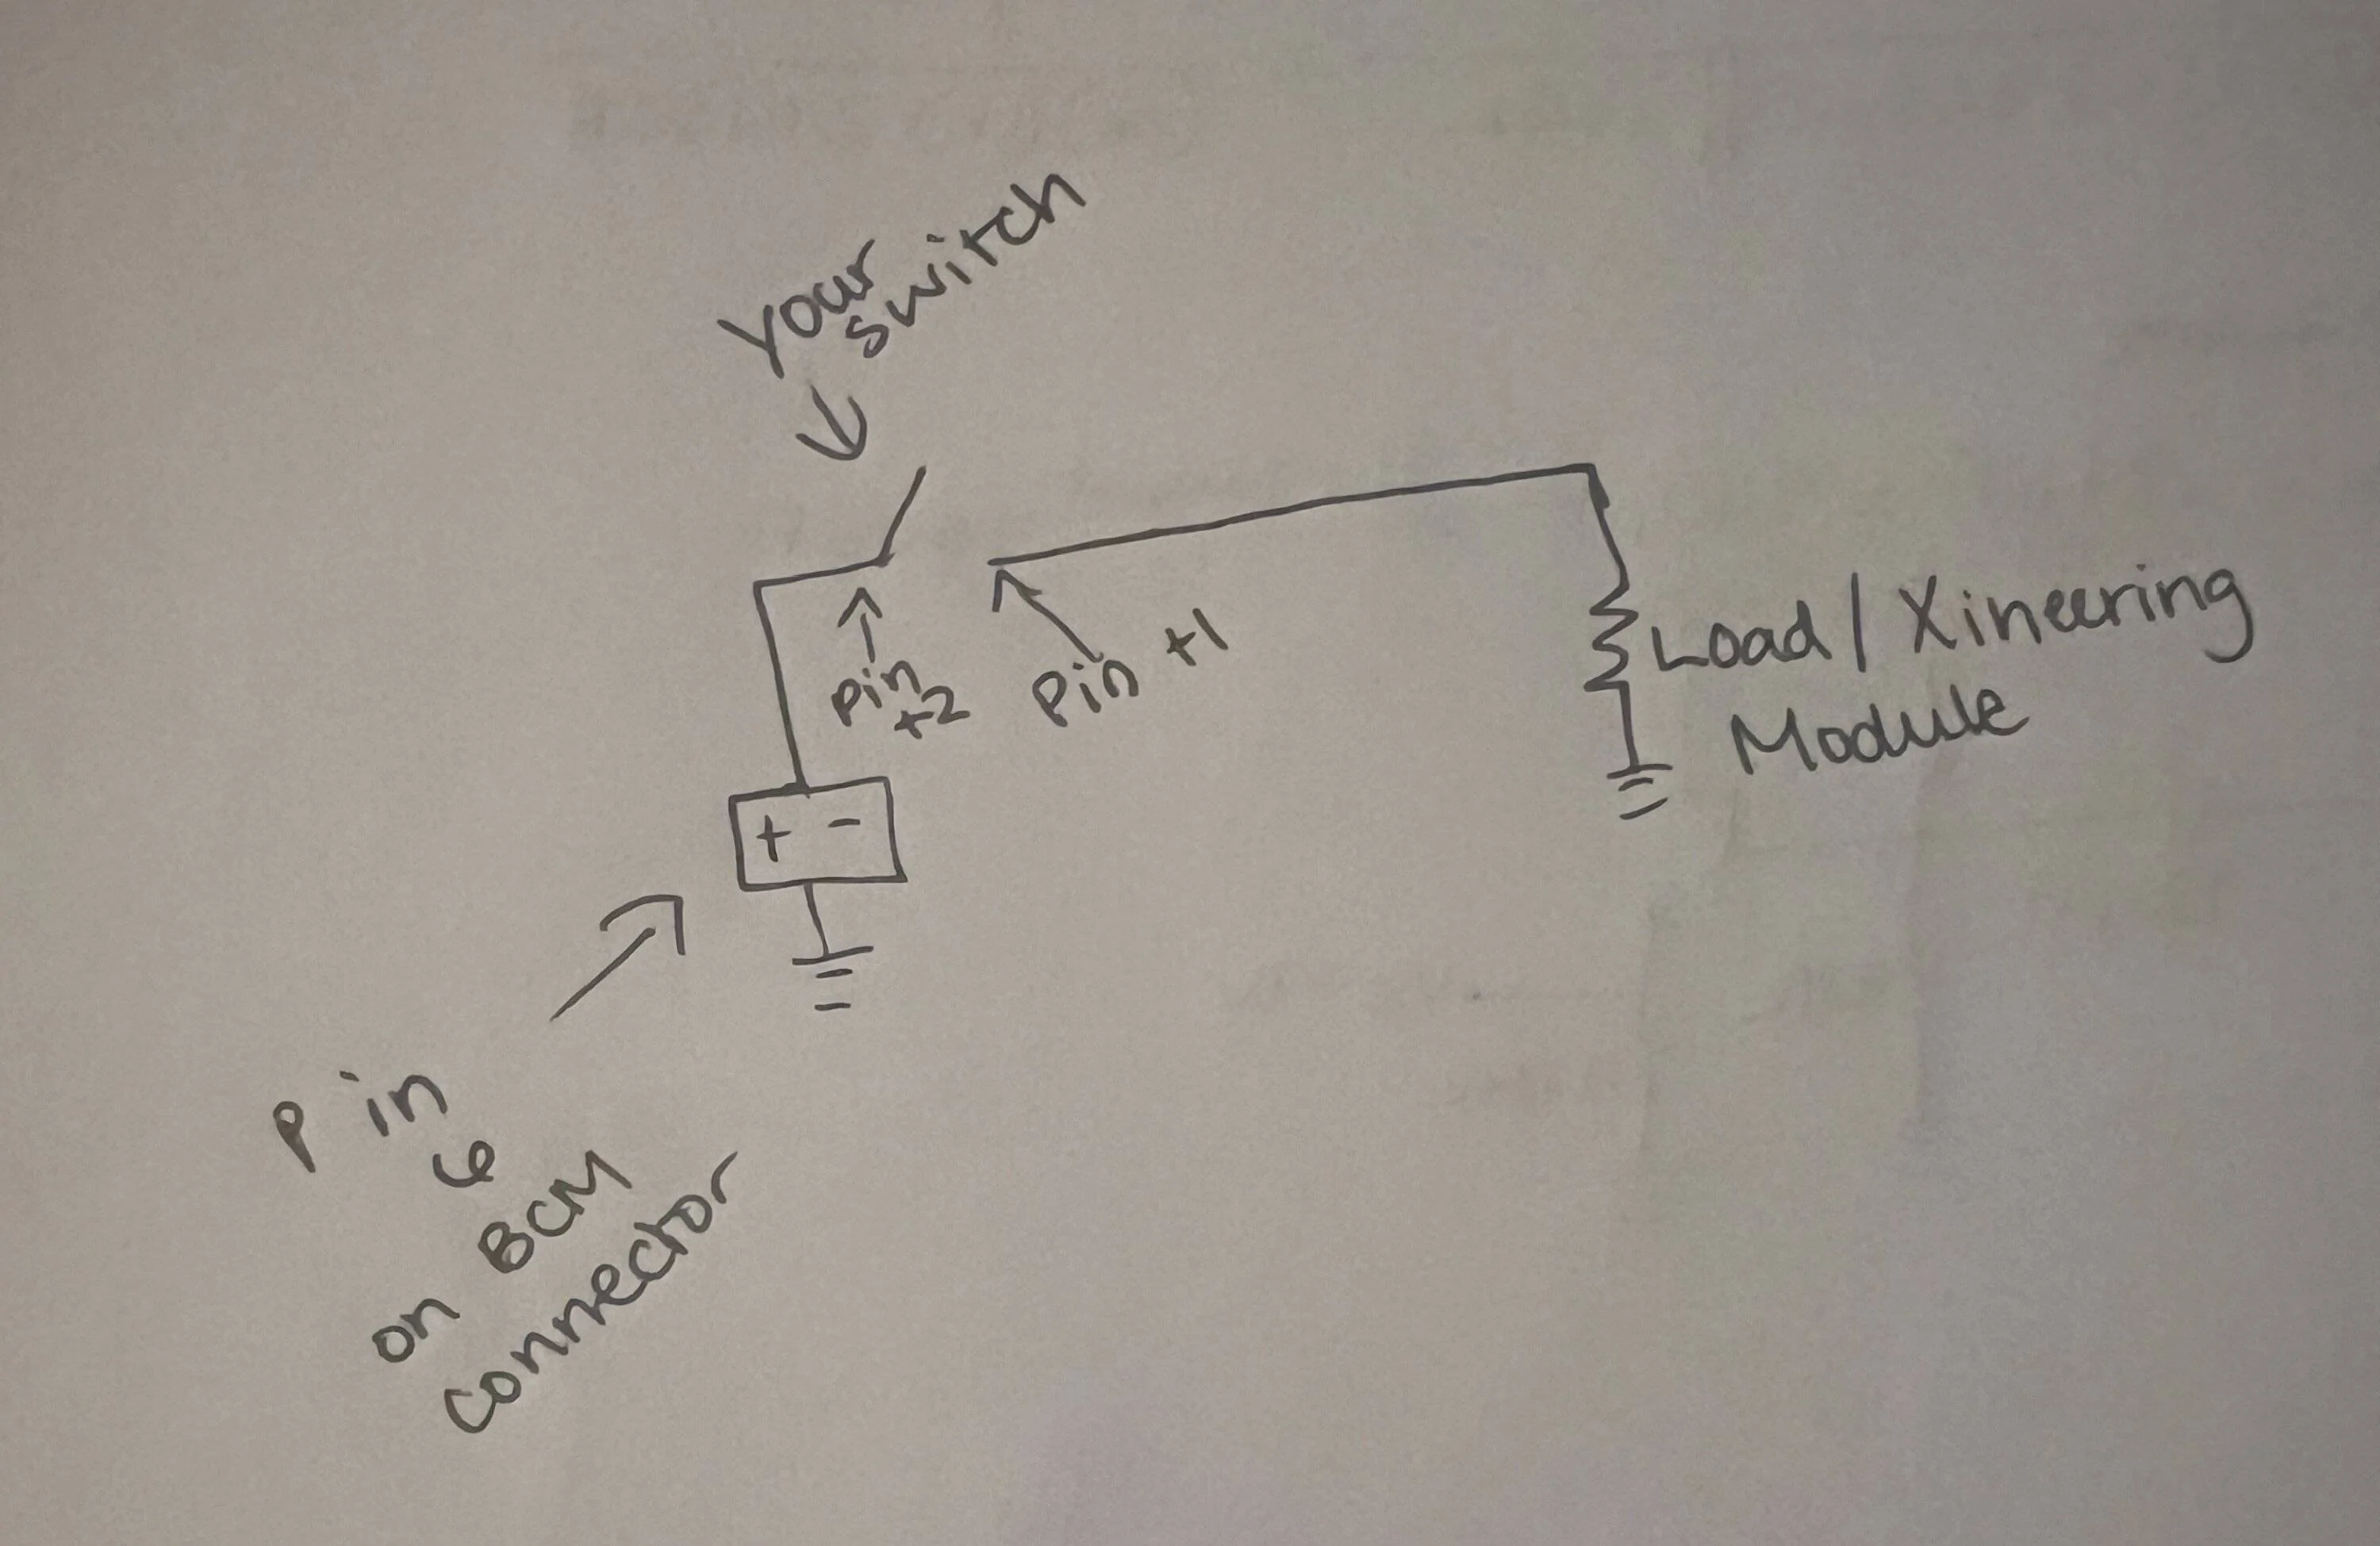
So the “+1” pin goes to the orange wire which as you know it connected to the module already
“+2” pin is connected to the power source. You can choose where you want to grab it from. You mentioned the temp sensor before. I routed mine back to the BCM which is the harness in the instructions. Also as some mentioned in this thread that they did a fuse tap to that fuse box at the presenter footwell. You can choose where you feel best.
The third pin “-“ is the ground which again you can choose where you want to wire it to. I again went back to the fuse panel and found a bolt. I ran the wire with a ring terminal to the bolt there. You may be able to pick up the ground from the temp sensor.
I really hope that helps. Just want to move the current from the car power source to the module.
Sponsored


