19-kilo
Well-Known Member
- Joined
- Mar 30, 2019
- Threads
- 3
- Messages
- 123
- Reaction score
- 53
- Location
- Denver, Colorado
- First Name
- Colin
- Vehicle(s)
- 2018 GT350R, 2011 SVT Raptor, 6.2L
- Thread starter
- #1
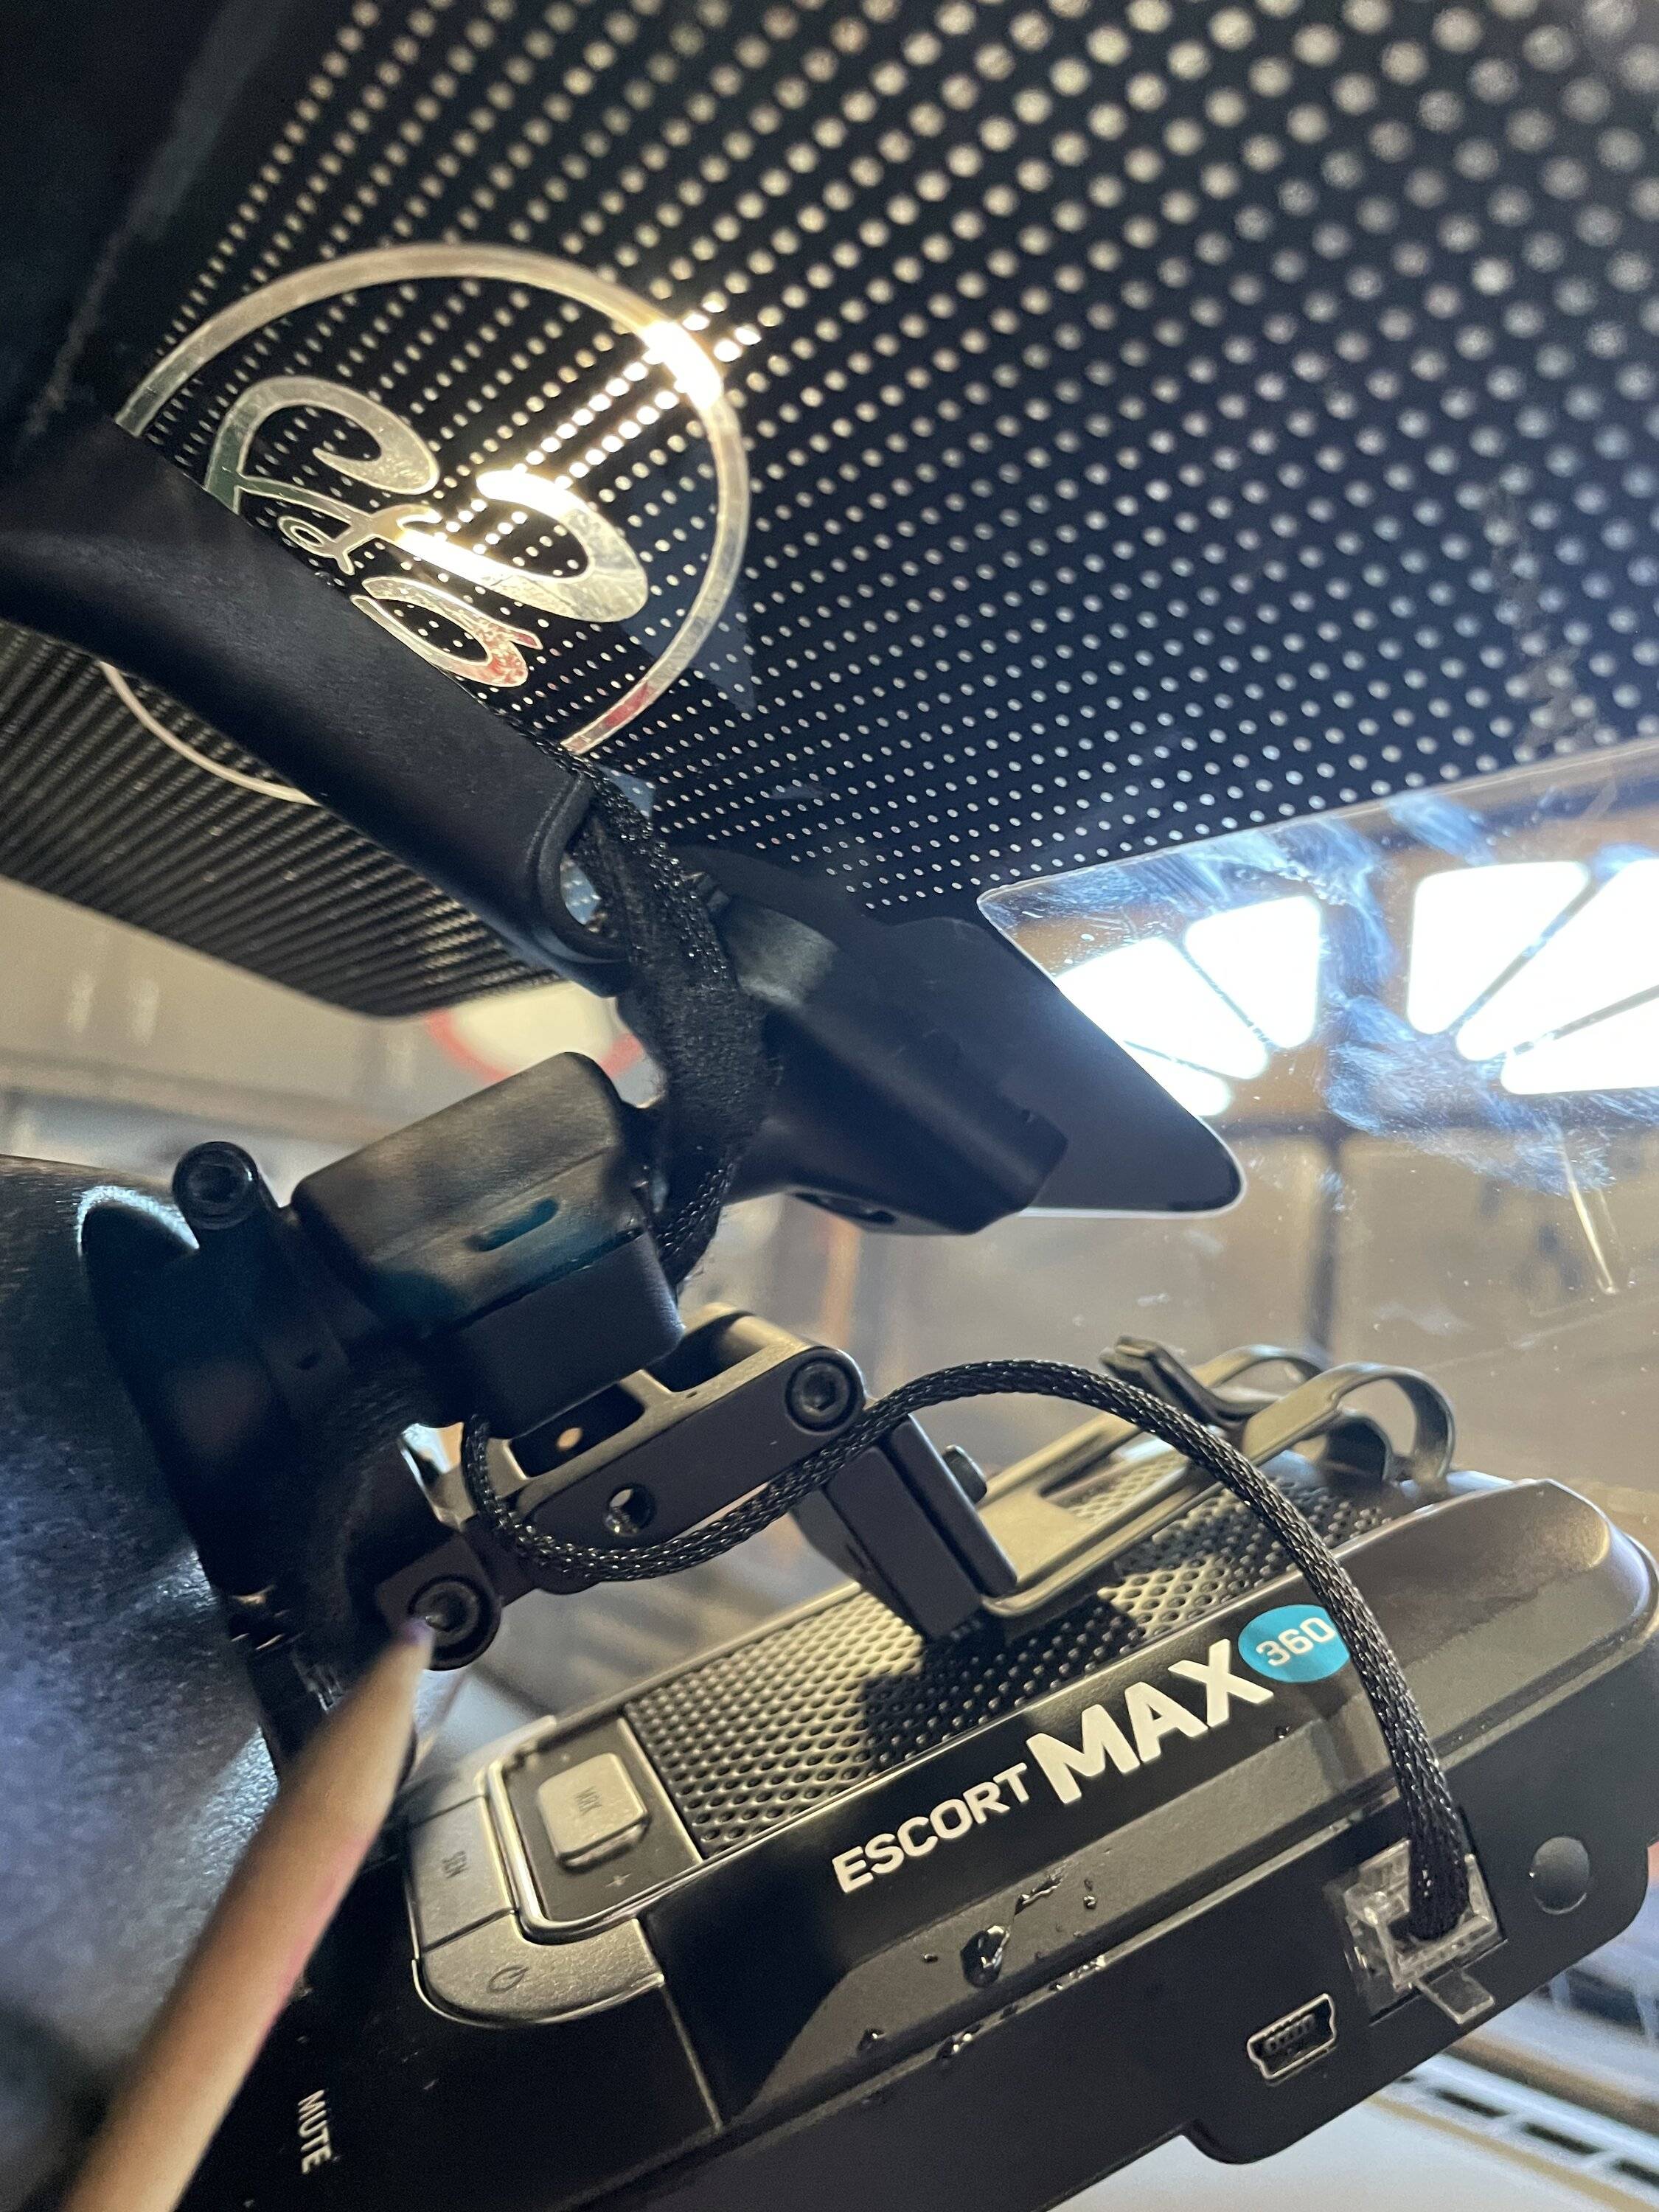
Today I installed an Escort 360 max radar detector in my 2020 GT500. I used the Blendmount with hardwire kit.
I looked for some instructions online and didn’t find any that were very good or that were specific to the 2020 mustang. So I put these together, I hope they help the community.
I opted not to use the more convenient mirror tap as I had continuity issues in my last build (but that was the older kit style and didn’t have the newer thin probes that work better).
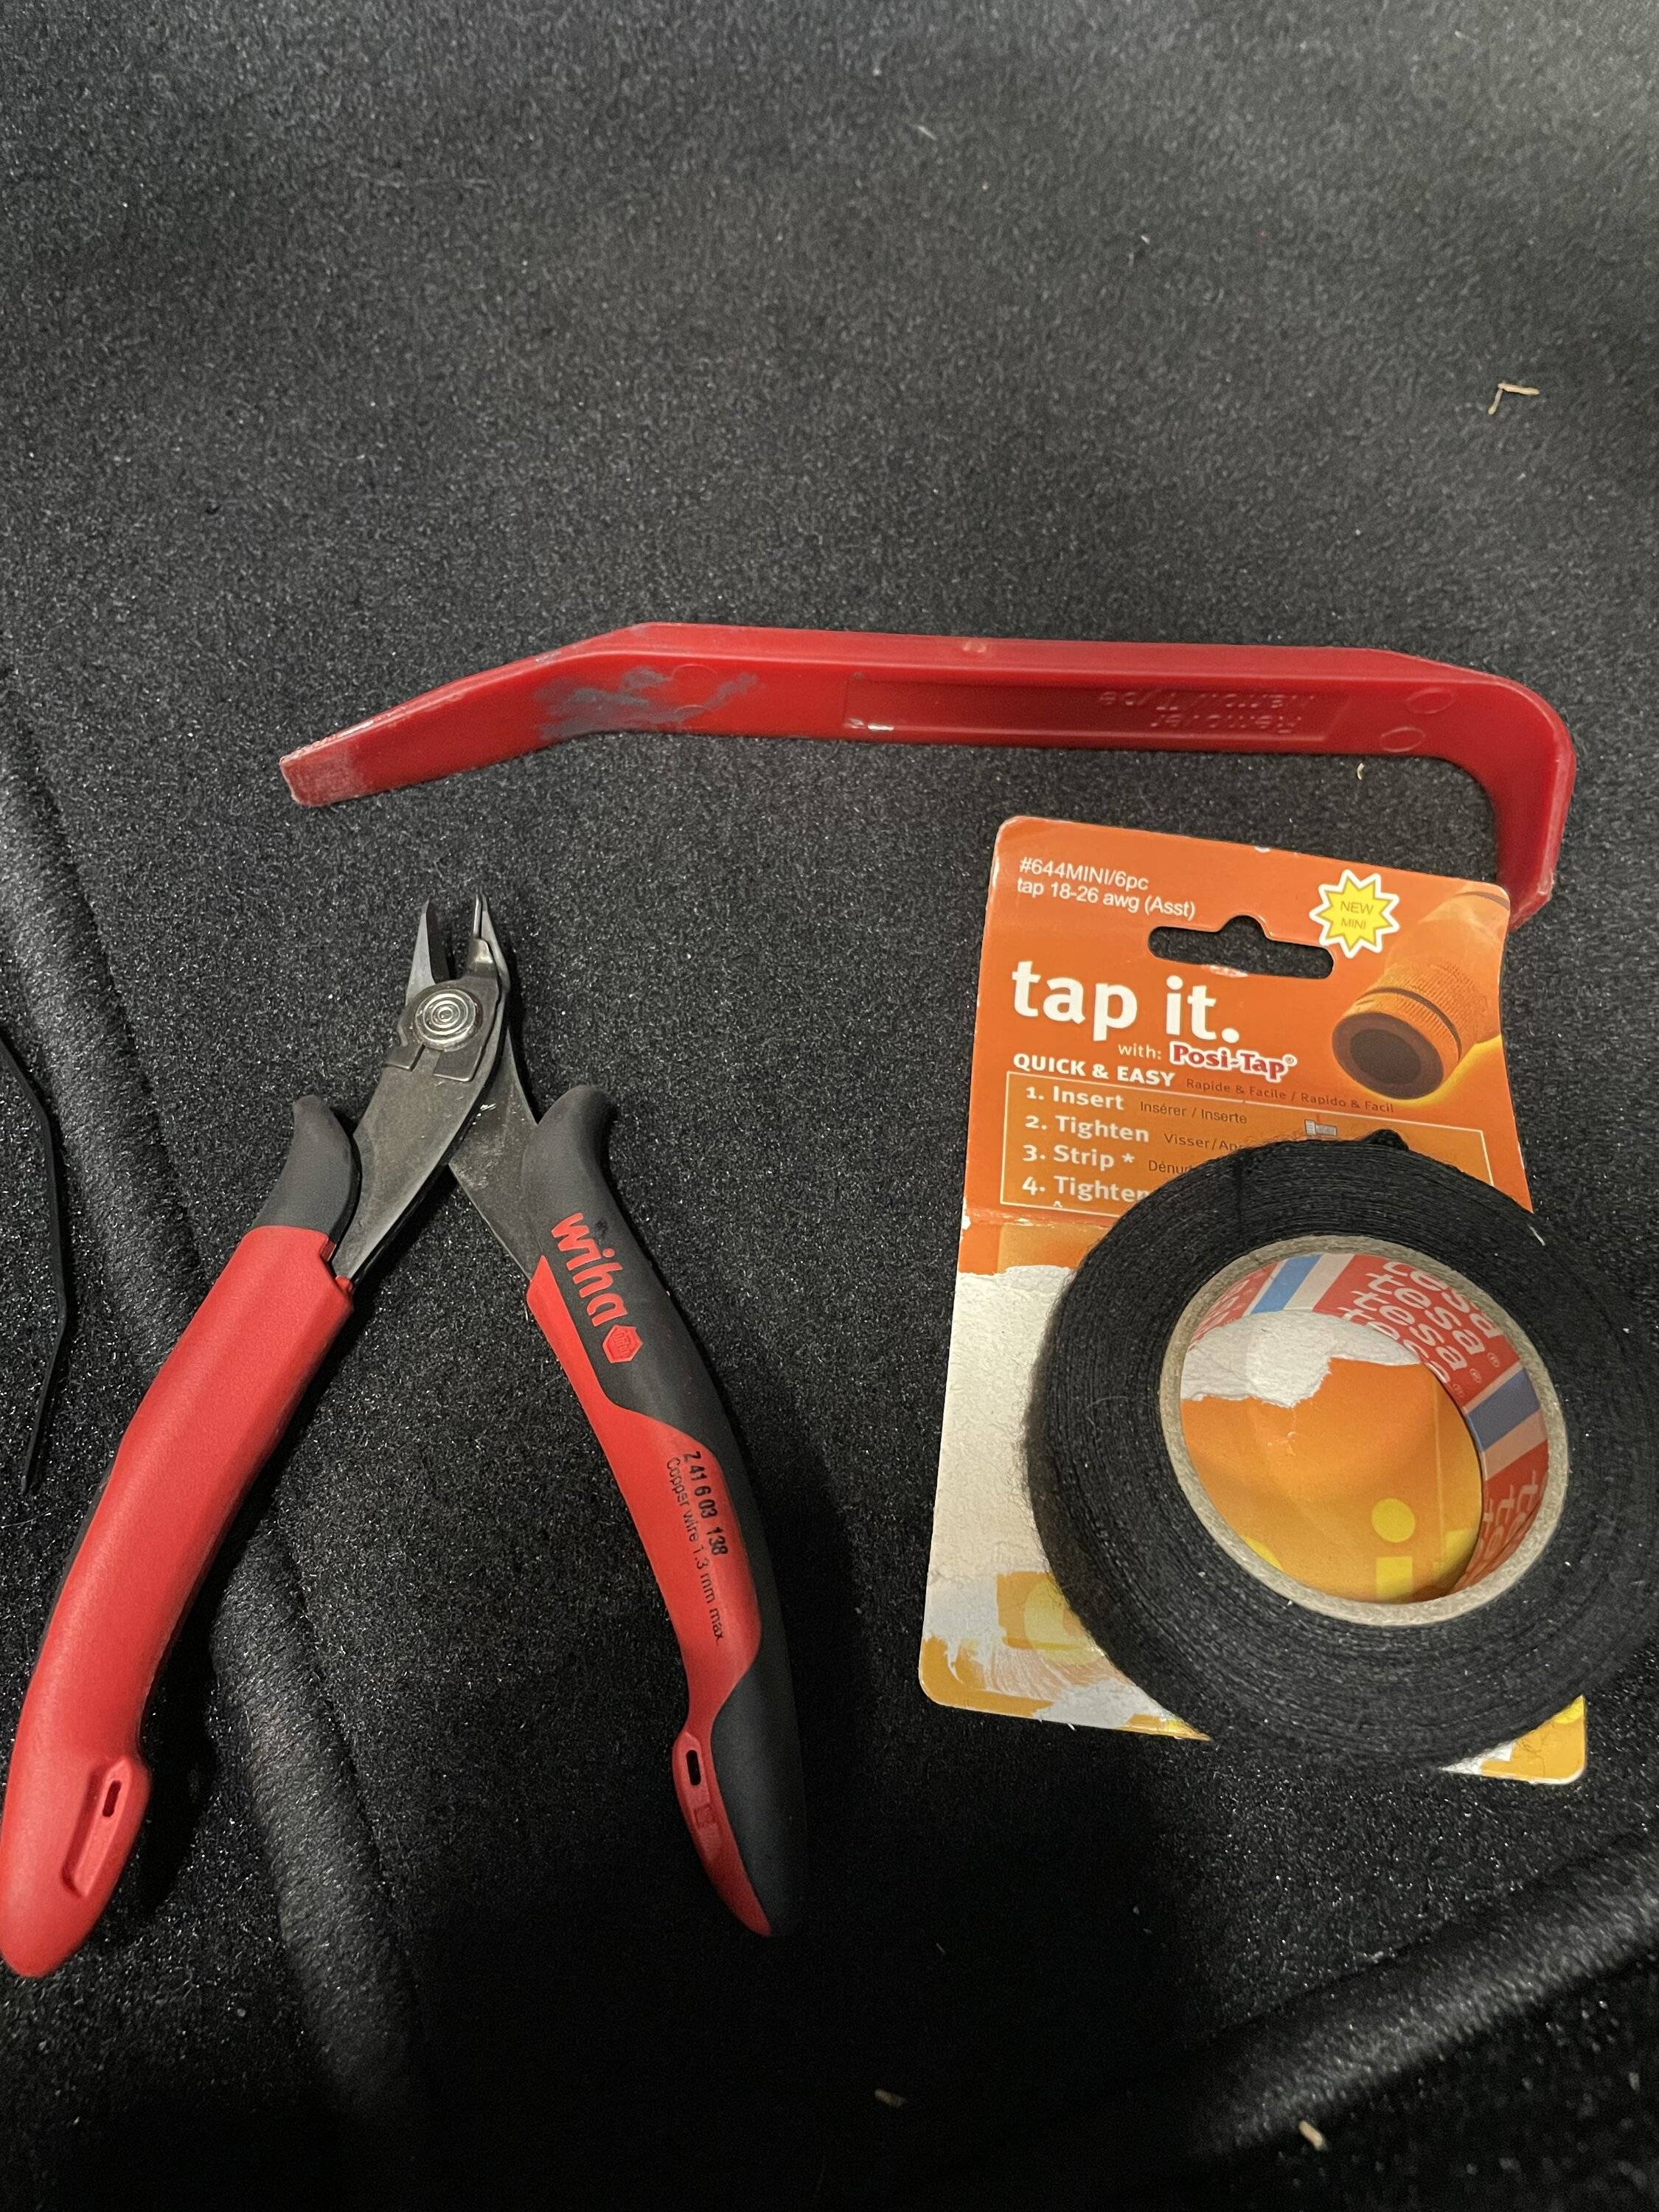
I wanted a super clean install with near OEM look. I’m really happy with how it turned out. Here are the pics of my install and some helpful tools.
Items used:
- Flush cut zip tie cutter. A must have (no other method I have found gets the cut so clean)
- Tap IT wire taps
- plastic trim pry bar
- light
- wire stripper
- Tessa OEM style cloth wire harness tape (this stuff is the bomb for OEM installs)
- volt meter
- rubber mat to lay on as the door sill gets really sharp.
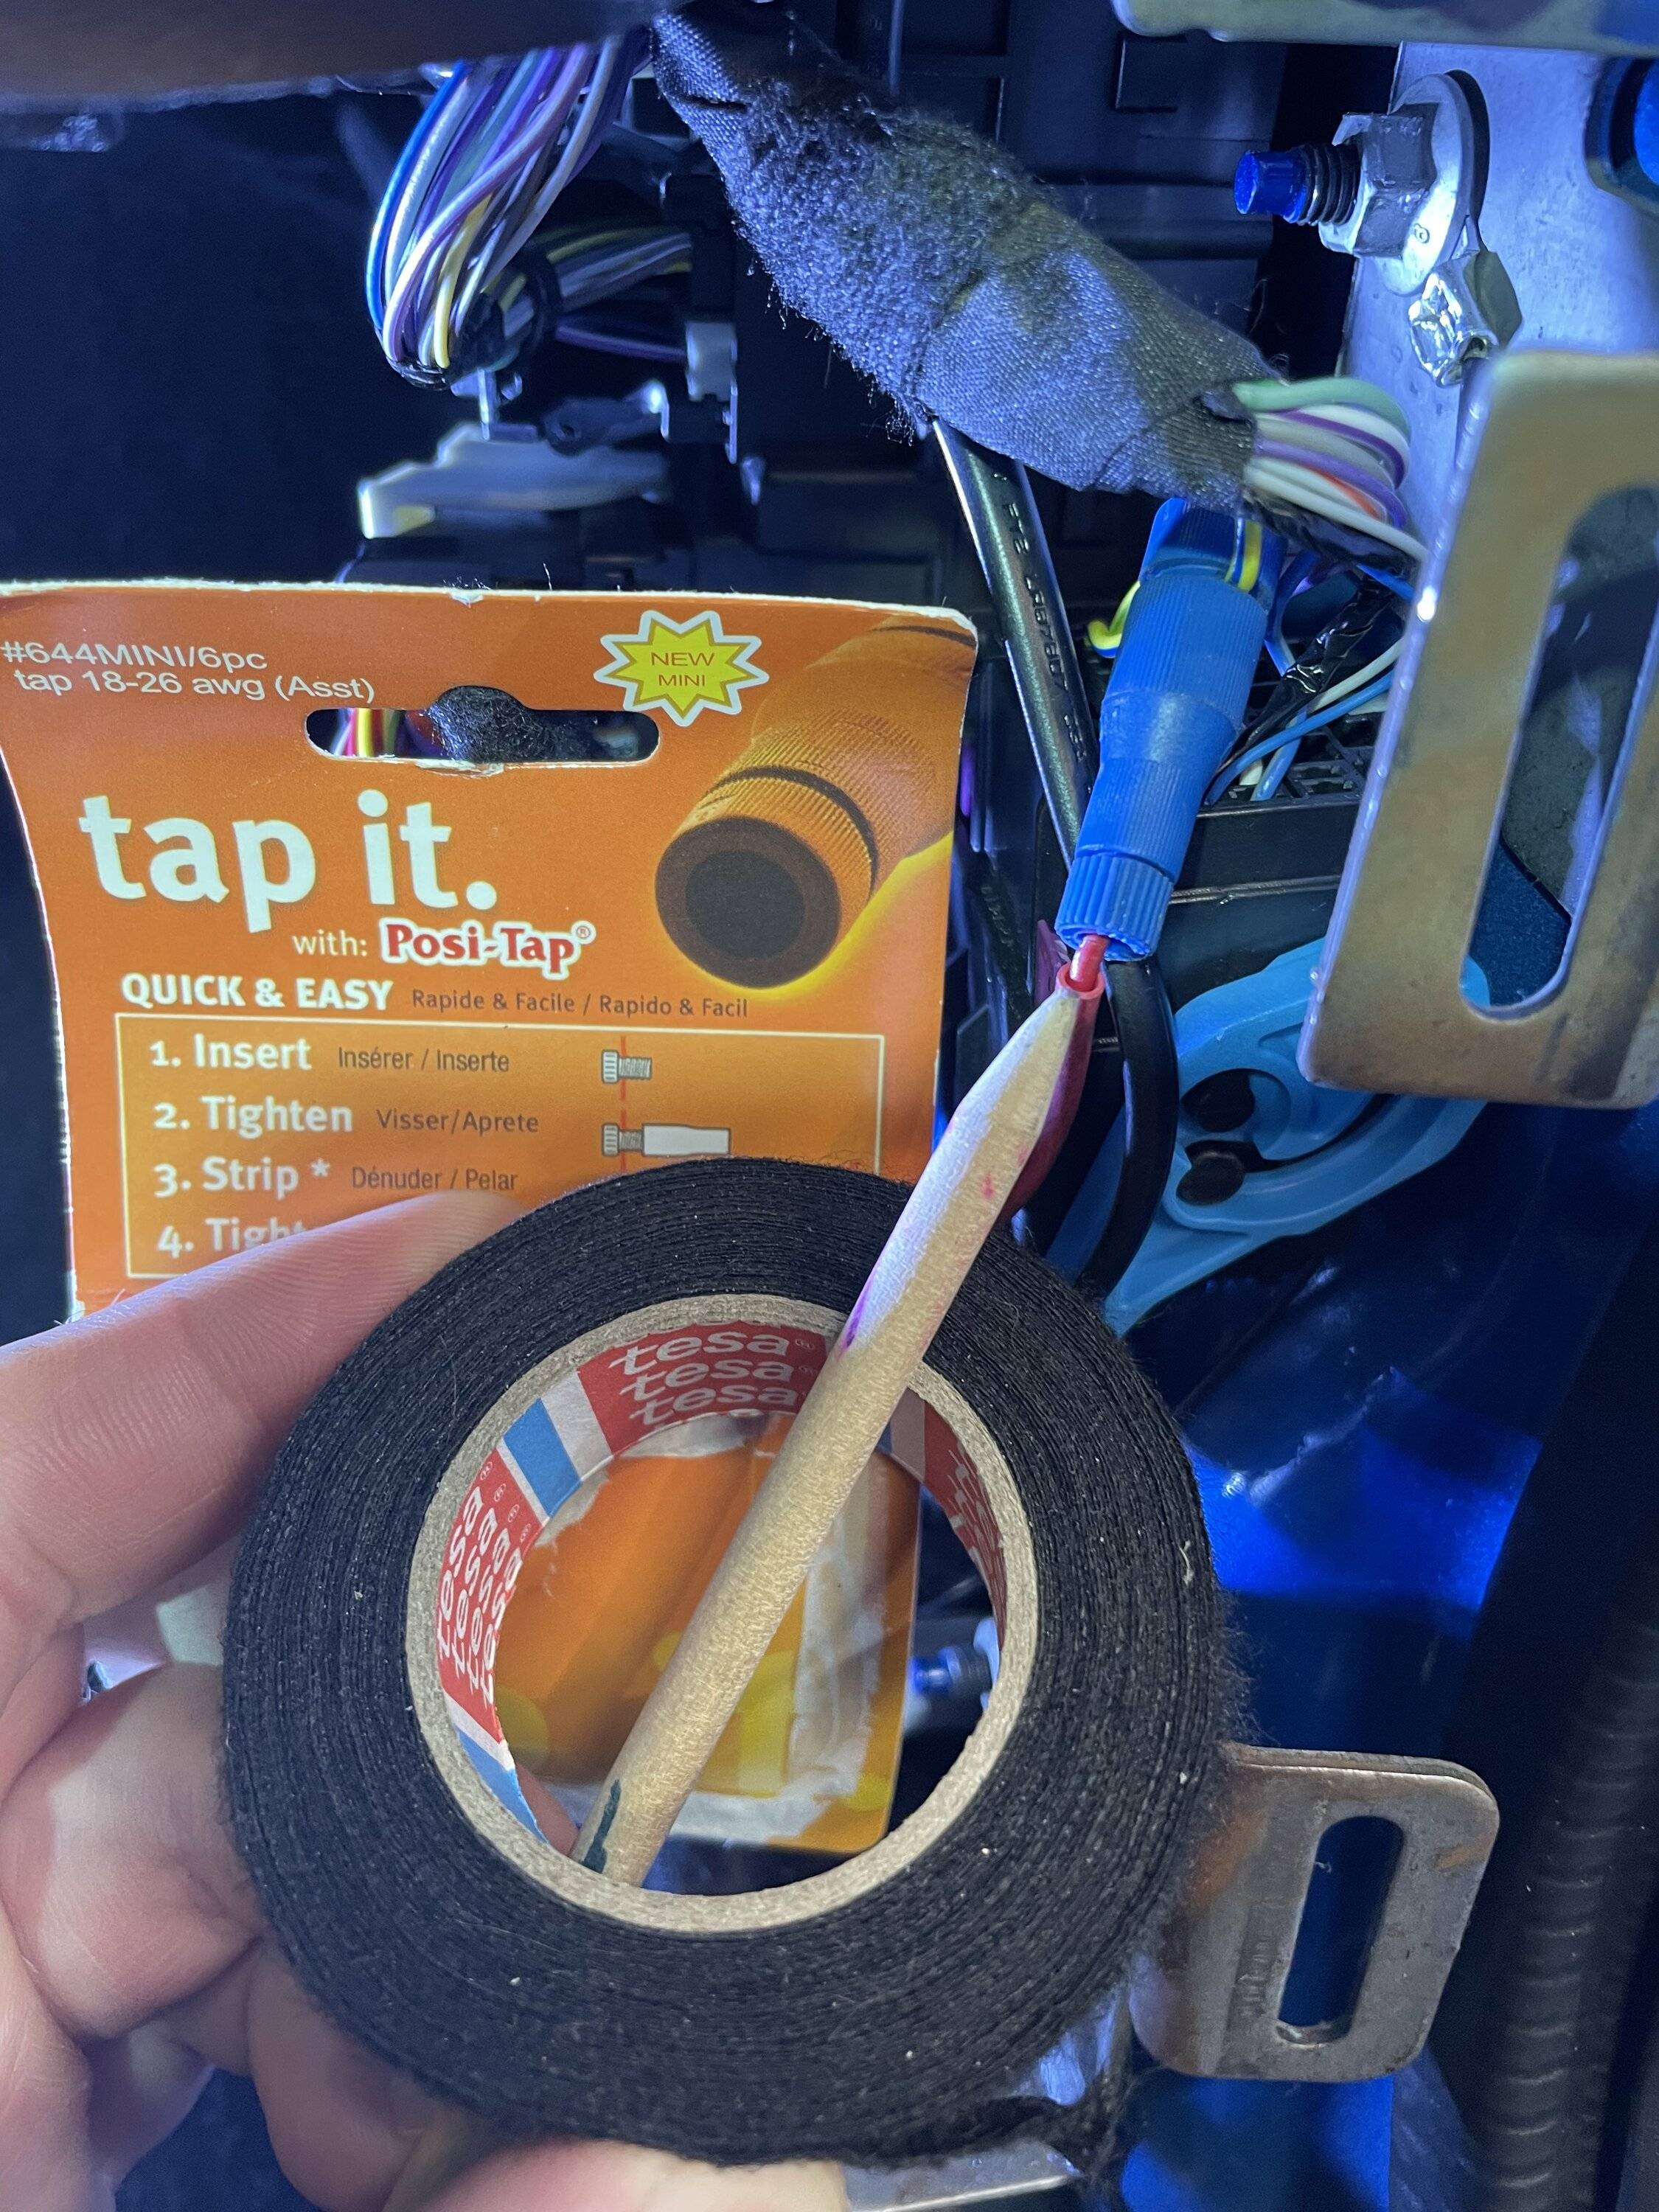
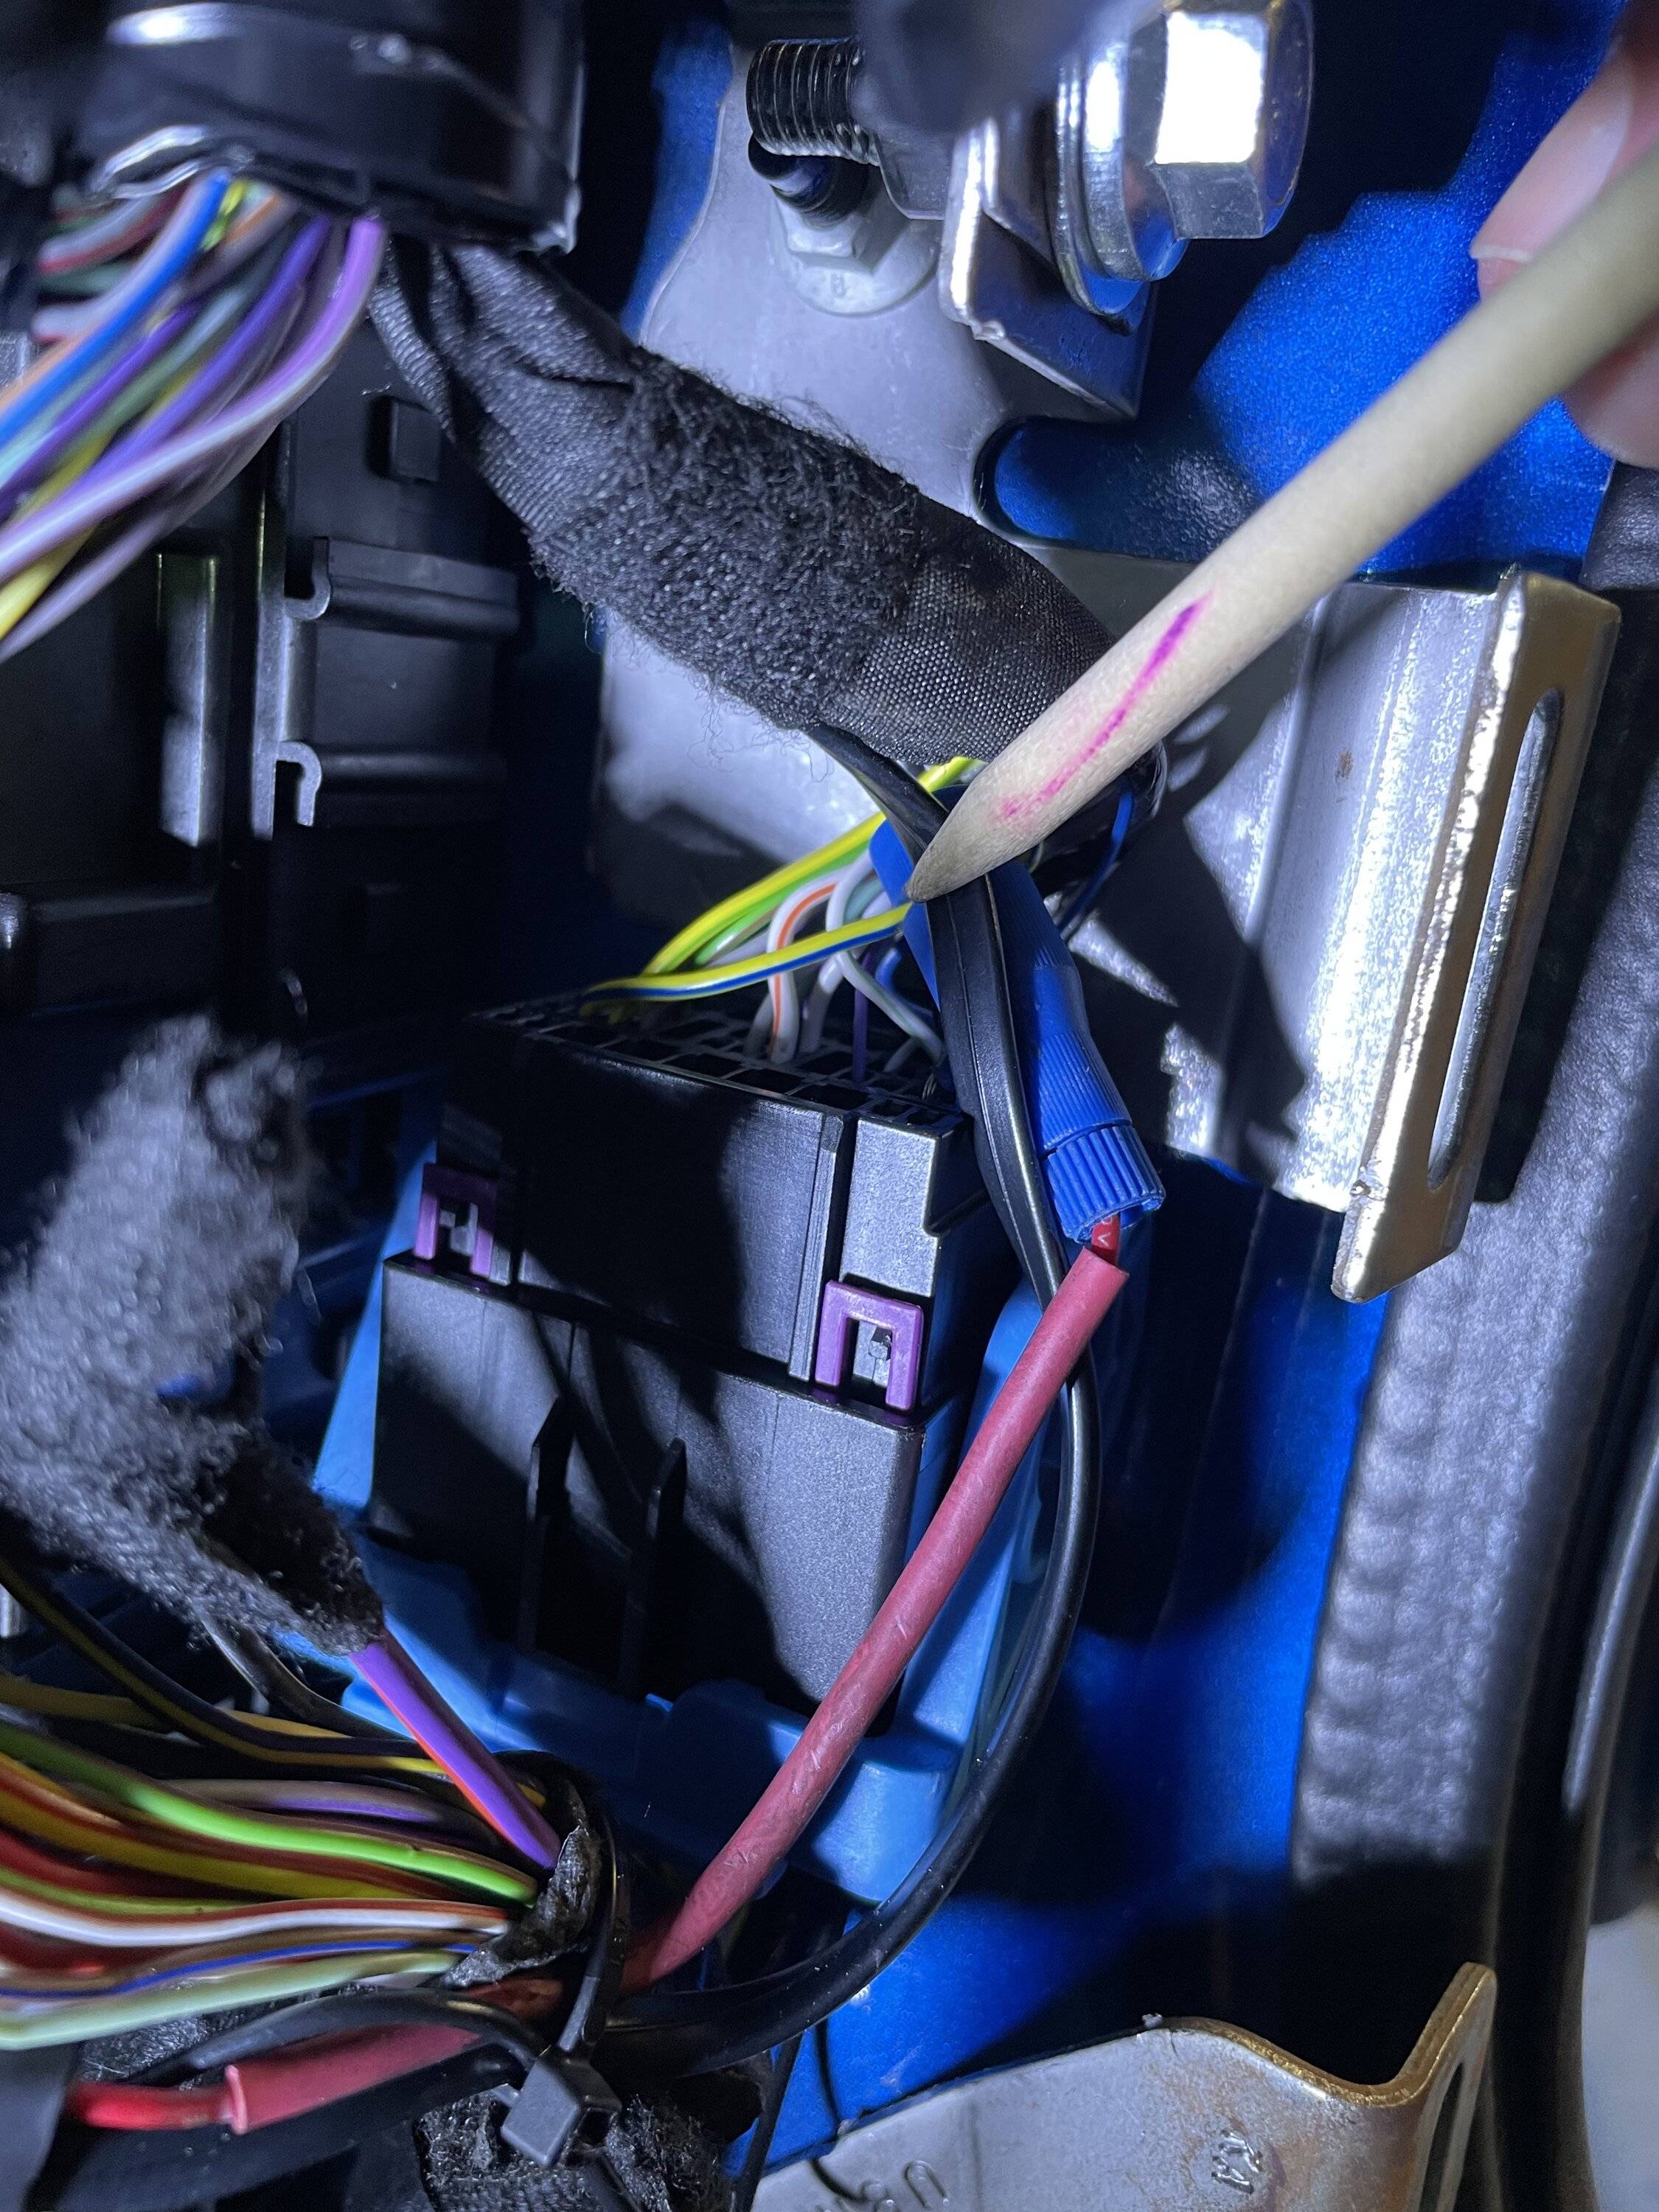
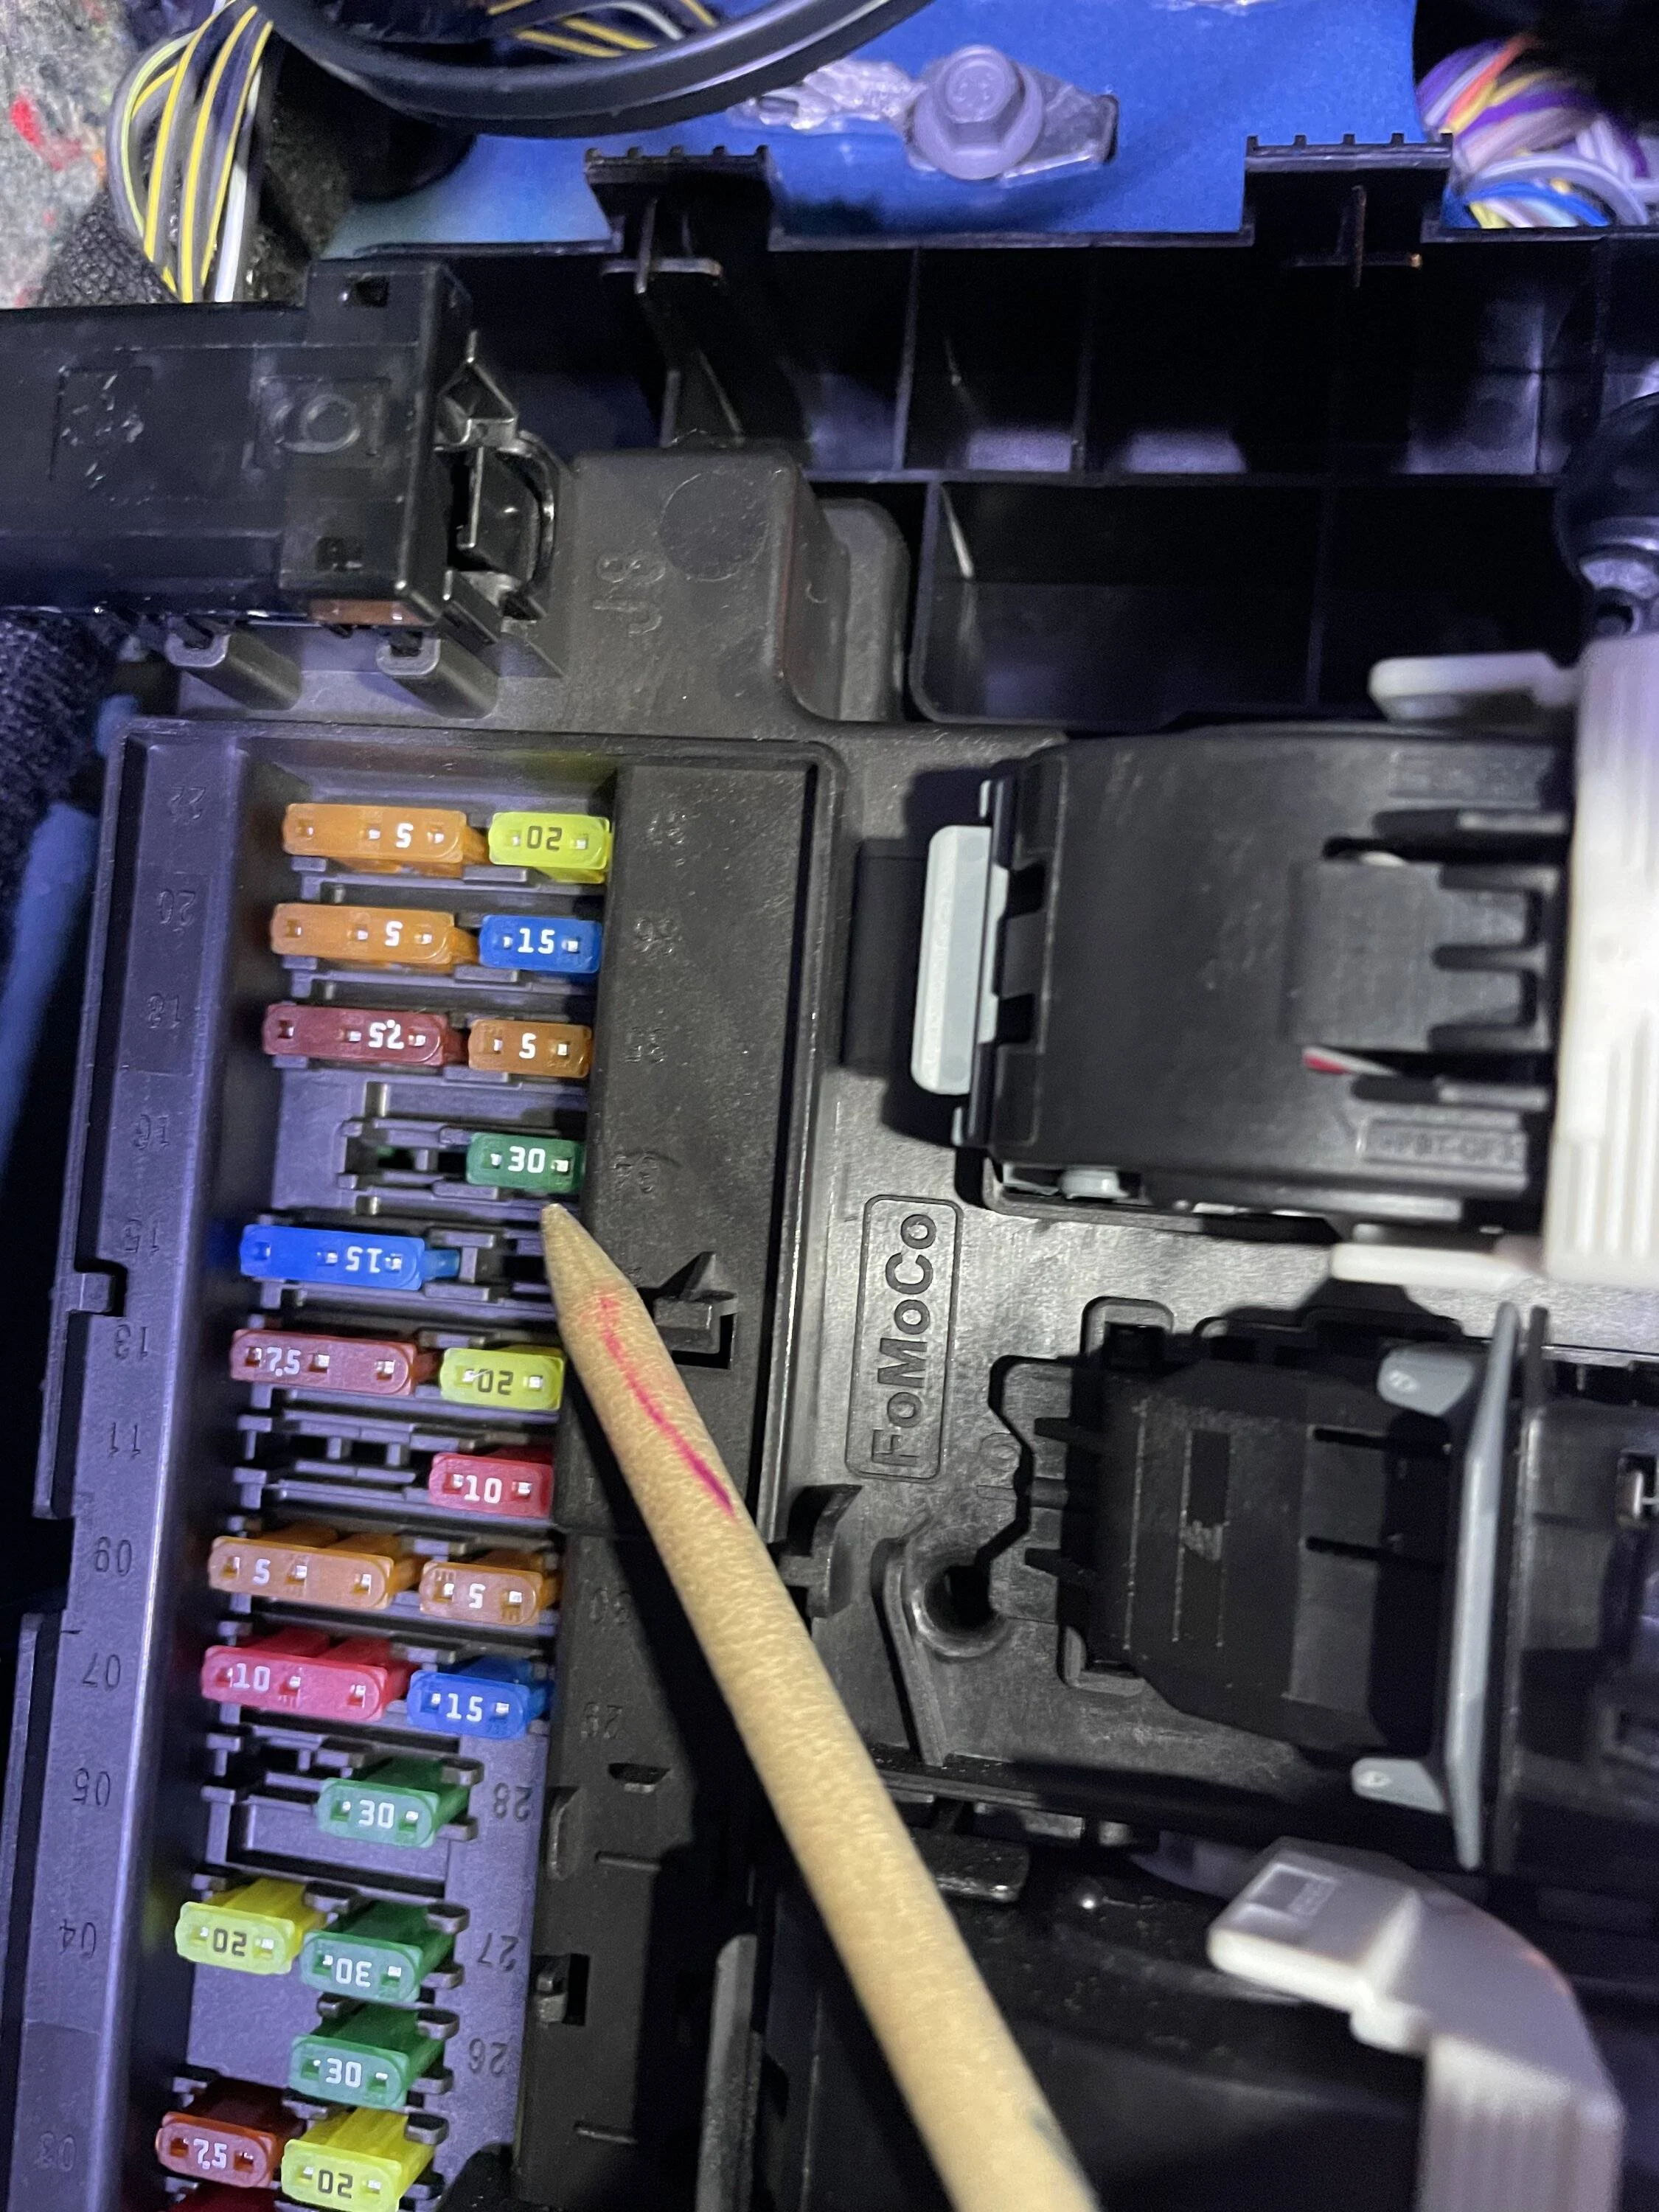
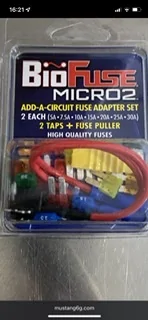
The TapIt brand wire taps make for a super secure and easy tap into the 12v switched wire. I found the ignition switched 12v source to be the yellow wire with a blue stripe. I read you can also use fuse 34 with an “add a fuse” micro adaptor. Show in the pics. But I have not verified myself.
Steps:
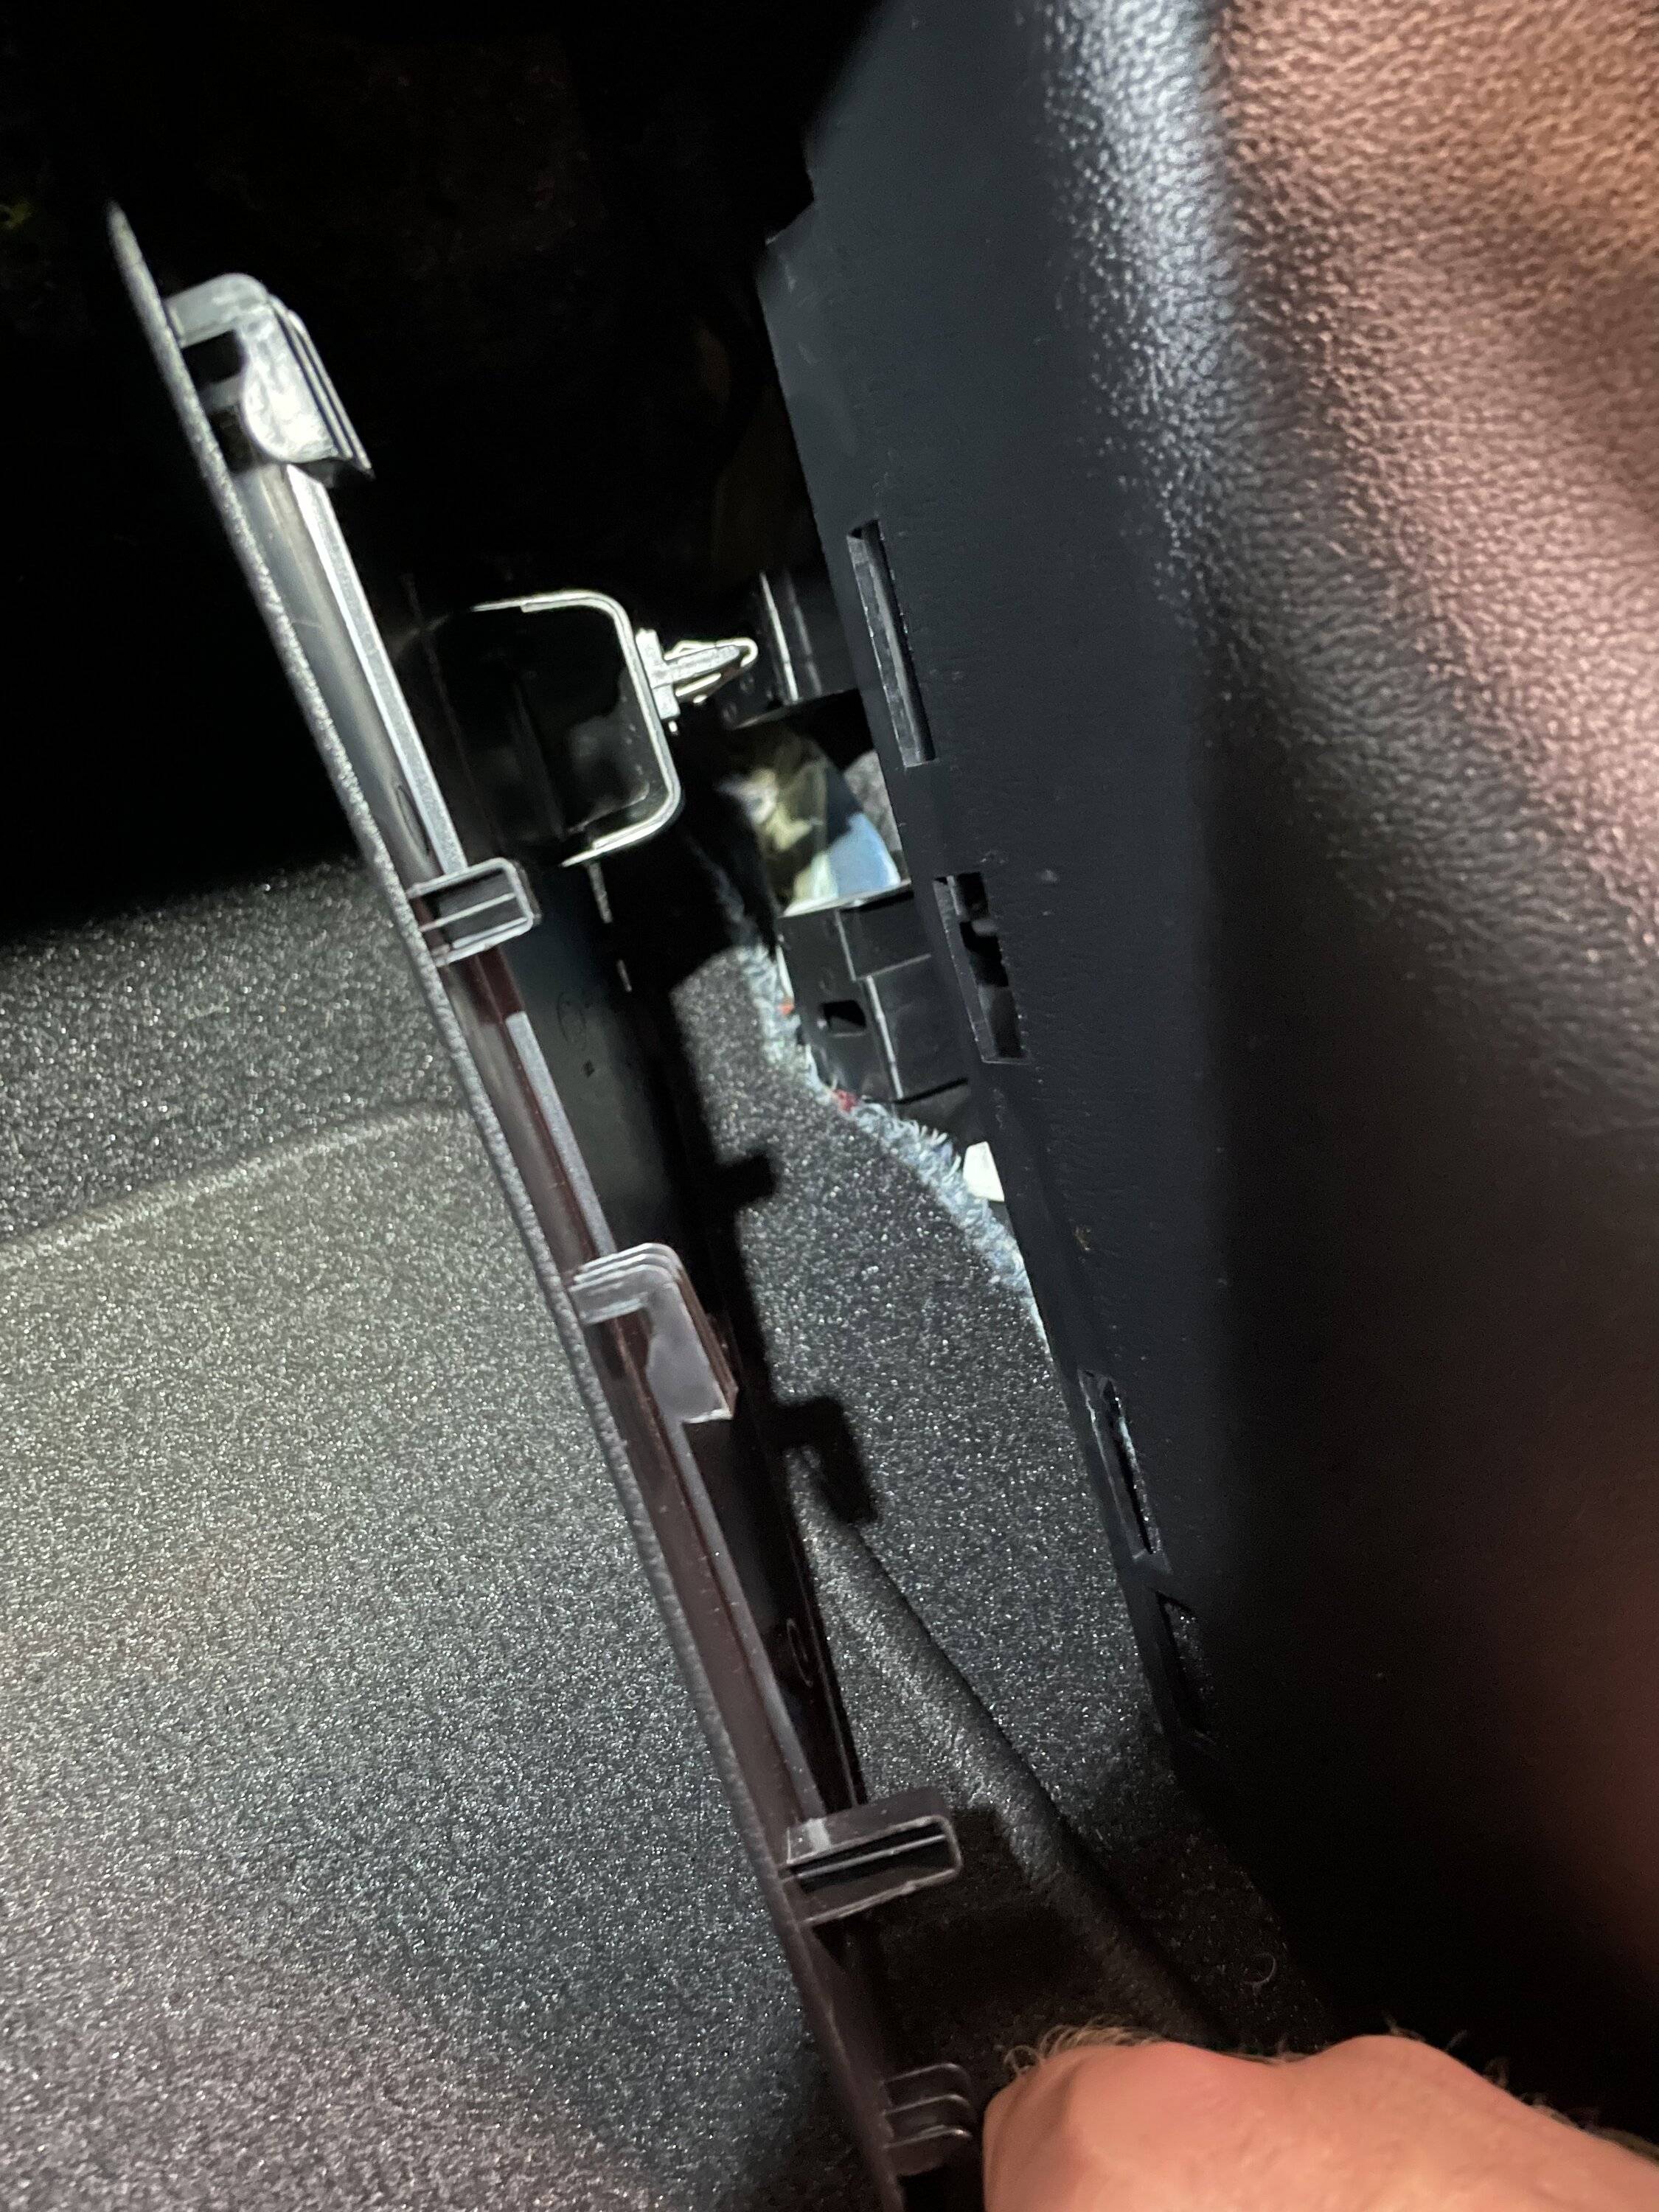
- remove trim from door sill, kick fuse panel, upper side HVAC trim, and A pillar. There are good videos out there but the key is to pull firmly but not bend the trim. Use the pry bar to gently lift it free. Don’t lose any trim clips.
- find 12v ignition on switched source wire (yellow with blue stripe)
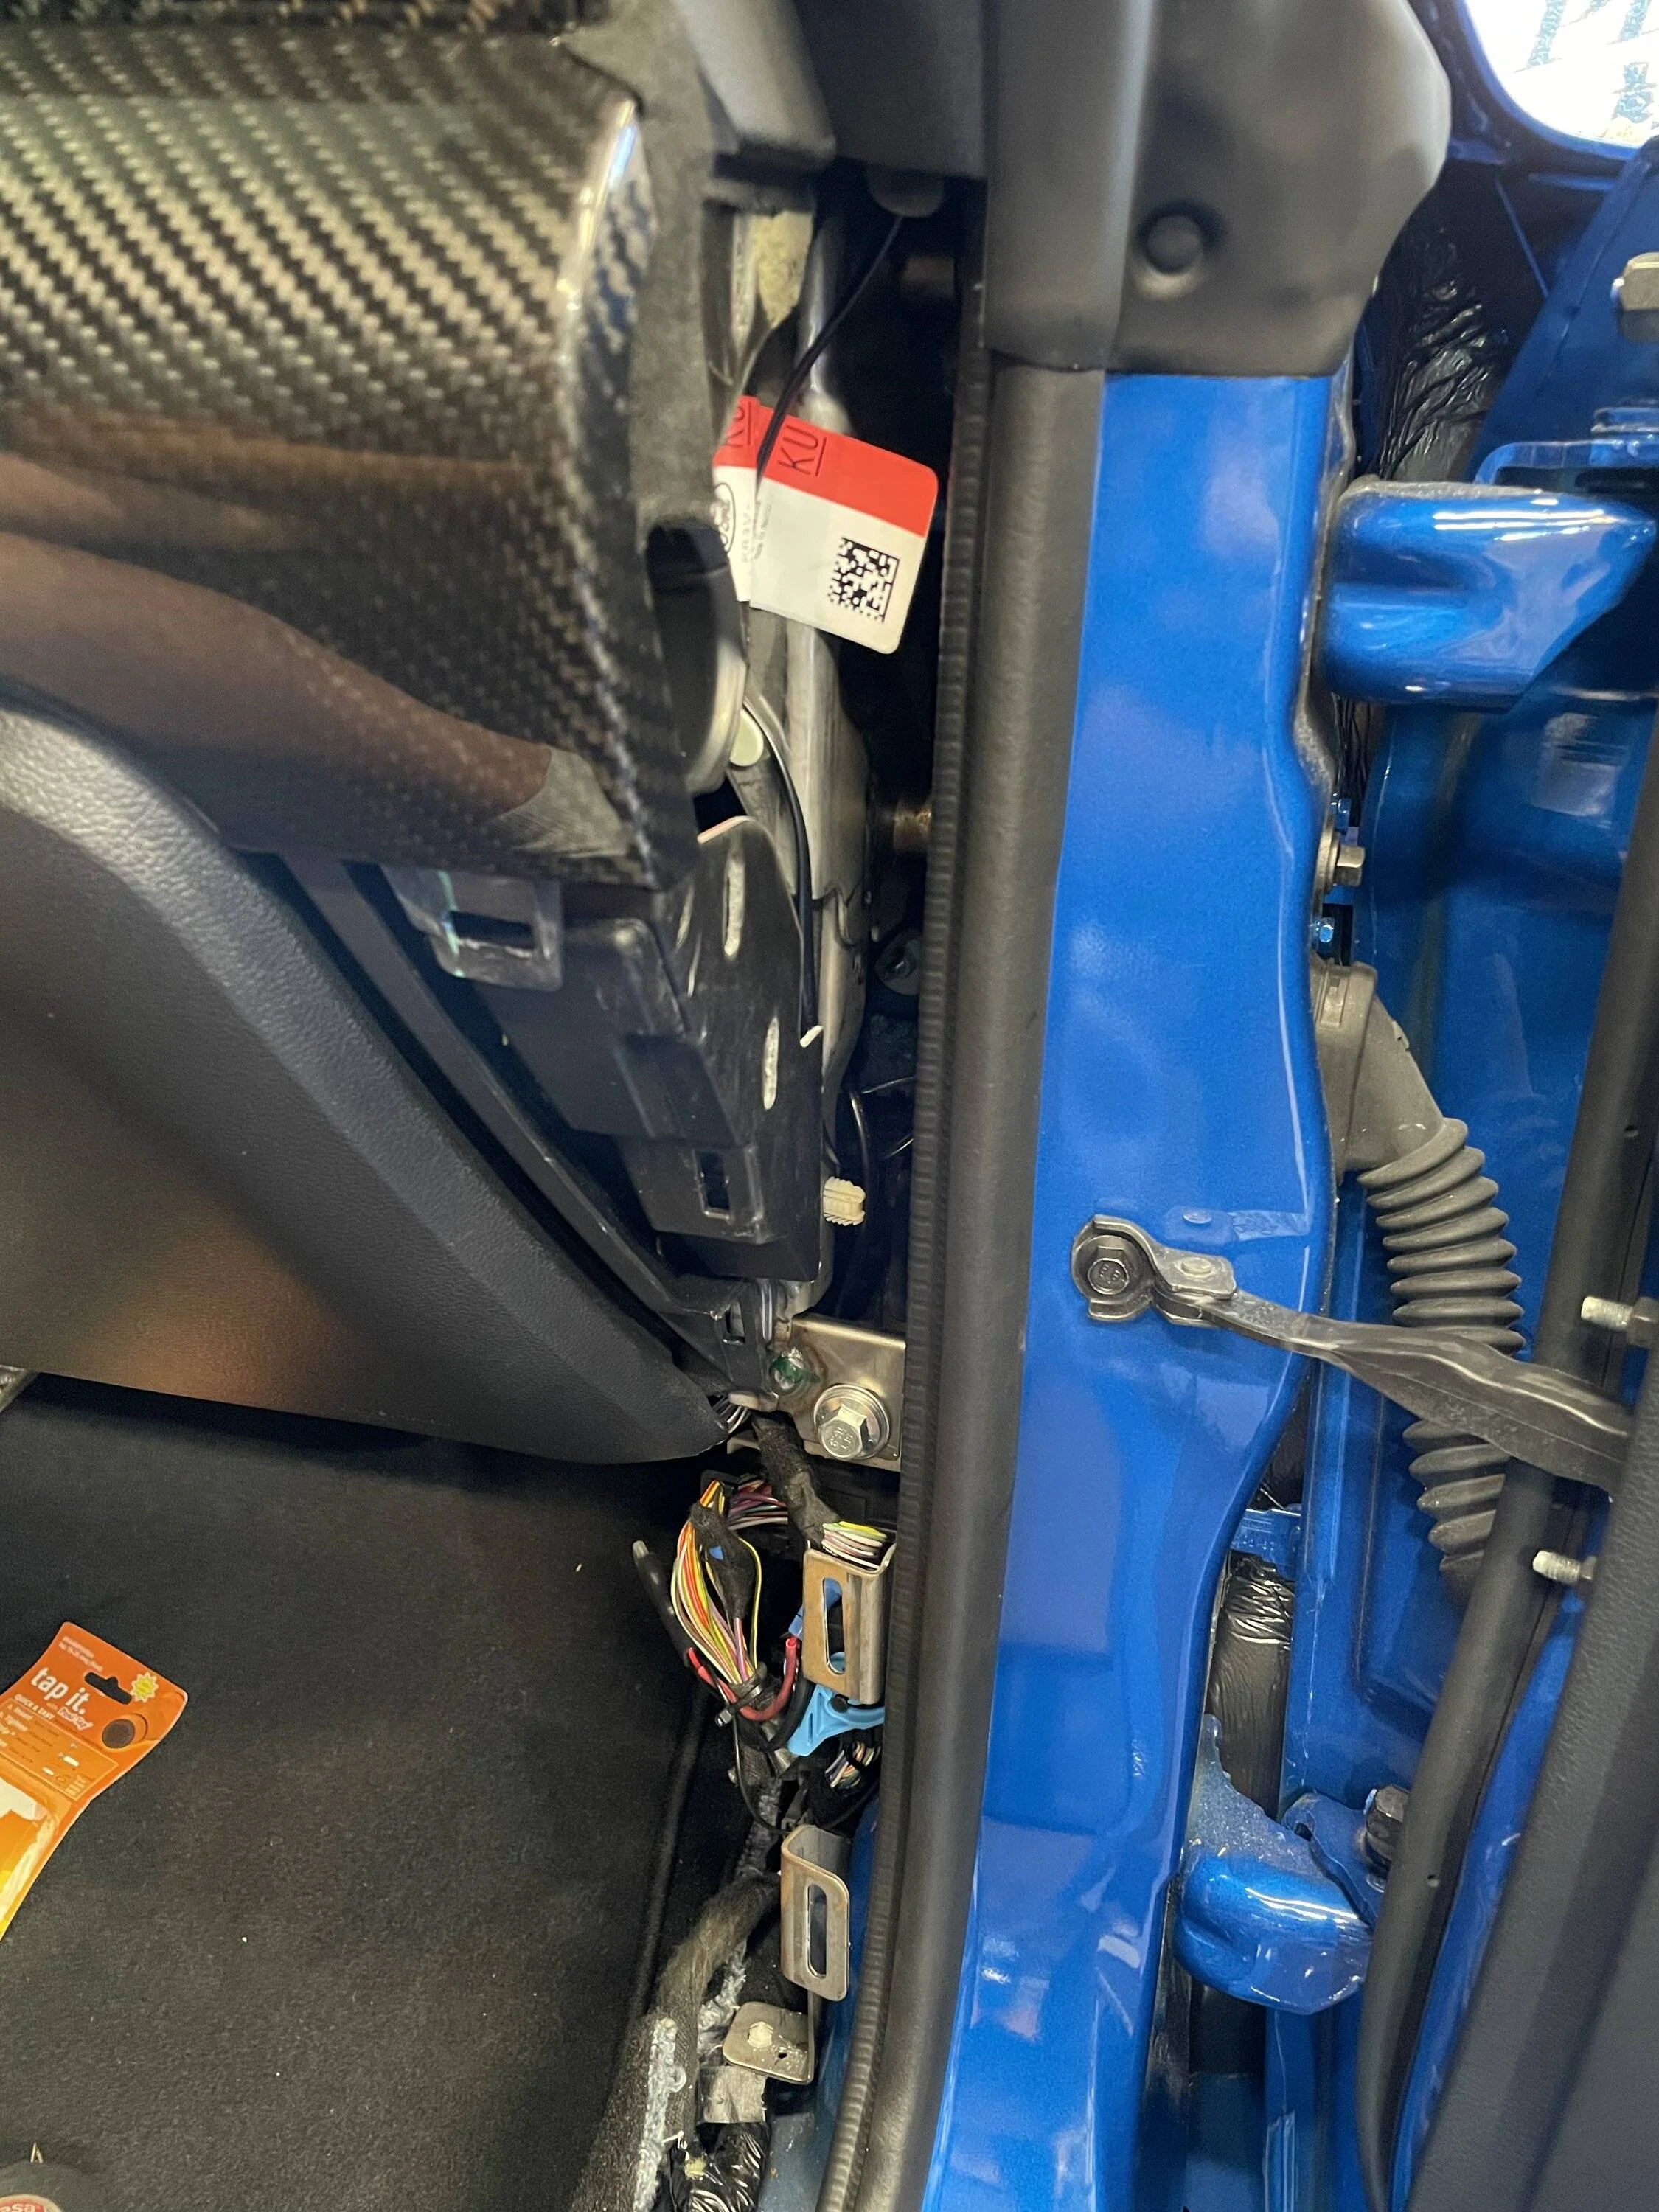
- run ground wire to exposed metal body nut (10mm)
- use a wire fishing tool to run the connector up from the fuse kick panel up through the A pillar (be sure to follow OEM wire paths to avoid clip mounting points and the airbag path.
-tuck the wire into the headliner and run it up towards the rearview mirror.
- there are two plastic OEM wire covers that take the wire from the headliner to the mirror. Gently pull the plastic trim towards the headliner away from the rearview mirror to remove it. Then you can run a new wire through the OEM pass through the plastic channel down around the rearview mirror clip.
- obviously check to ensure the detector powers up before running all of your wires and putting it together, just in case there was an issue with the wire or connections.
all in all the hardest part of this install was finding the 12 V switch source as there are so many wires and access is really tight in the kick panel


I looked for some instructions online and didn’t find any that were very good or that were specific to the 2020 mustang. So I put these together, I hope they help the community.
I opted not to use the more convenient mirror tap as I had continuity issues in my last build (but that was the older kit style and didn’t have the newer thin probes that work better).
I wanted a super clean install with near OEM look. I’m really happy with how it turned out. Here are the pics of my install and some helpful tools.
Items used:
- Flush cut zip tie cutter. A must have (no other method I have found gets the cut so clean)
- Tap IT wire taps
- plastic trim pry bar
- light
- wire stripper
- Tessa OEM style cloth wire harness tape (this stuff is the bomb for OEM installs)
- volt meter
- rubber mat to lay on as the door sill gets really sharp.
The TapIt brand wire taps make for a super secure and easy tap into the 12v switched wire. I found the ignition switched 12v source to be the yellow wire with a blue stripe. I read you can also use fuse 34 with an “add a fuse” micro adaptor. Show in the pics. But I have not verified myself.
Steps:
- remove trim from door sill, kick fuse panel, upper side HVAC trim, and A pillar. There are good videos out there but the key is to pull firmly but not bend the trim. Use the pry bar to gently lift it free. Don’t lose any trim clips.
- find 12v ignition on switched source wire (yellow with blue stripe)
- run ground wire to exposed metal body nut (10mm)
- use a wire fishing tool to run the connector up from the fuse kick panel up through the A pillar (be sure to follow OEM wire paths to avoid clip mounting points and the airbag path.
-tuck the wire into the headliner and run it up towards the rearview mirror.
- there are two plastic OEM wire covers that take the wire from the headliner to the mirror. Gently pull the plastic trim towards the headliner away from the rearview mirror to remove it. Then you can run a new wire through the OEM pass through the plastic channel down around the rearview mirror clip.
- obviously check to ensure the detector powers up before running all of your wires and putting it together, just in case there was an issue with the wire or connections.
all in all the hardest part of this install was finding the 12 V switch source as there are so many wires and access is really tight in the kick panel


Sponsored
Last edited: