jeffrey unck
Member
- Thread starter
- #1
Does anyone have info on how to remove the hood vents for an Xpel install?
Sponsored
From what year?Does anyone have info on how to remove the hood vents for an Xpel install?


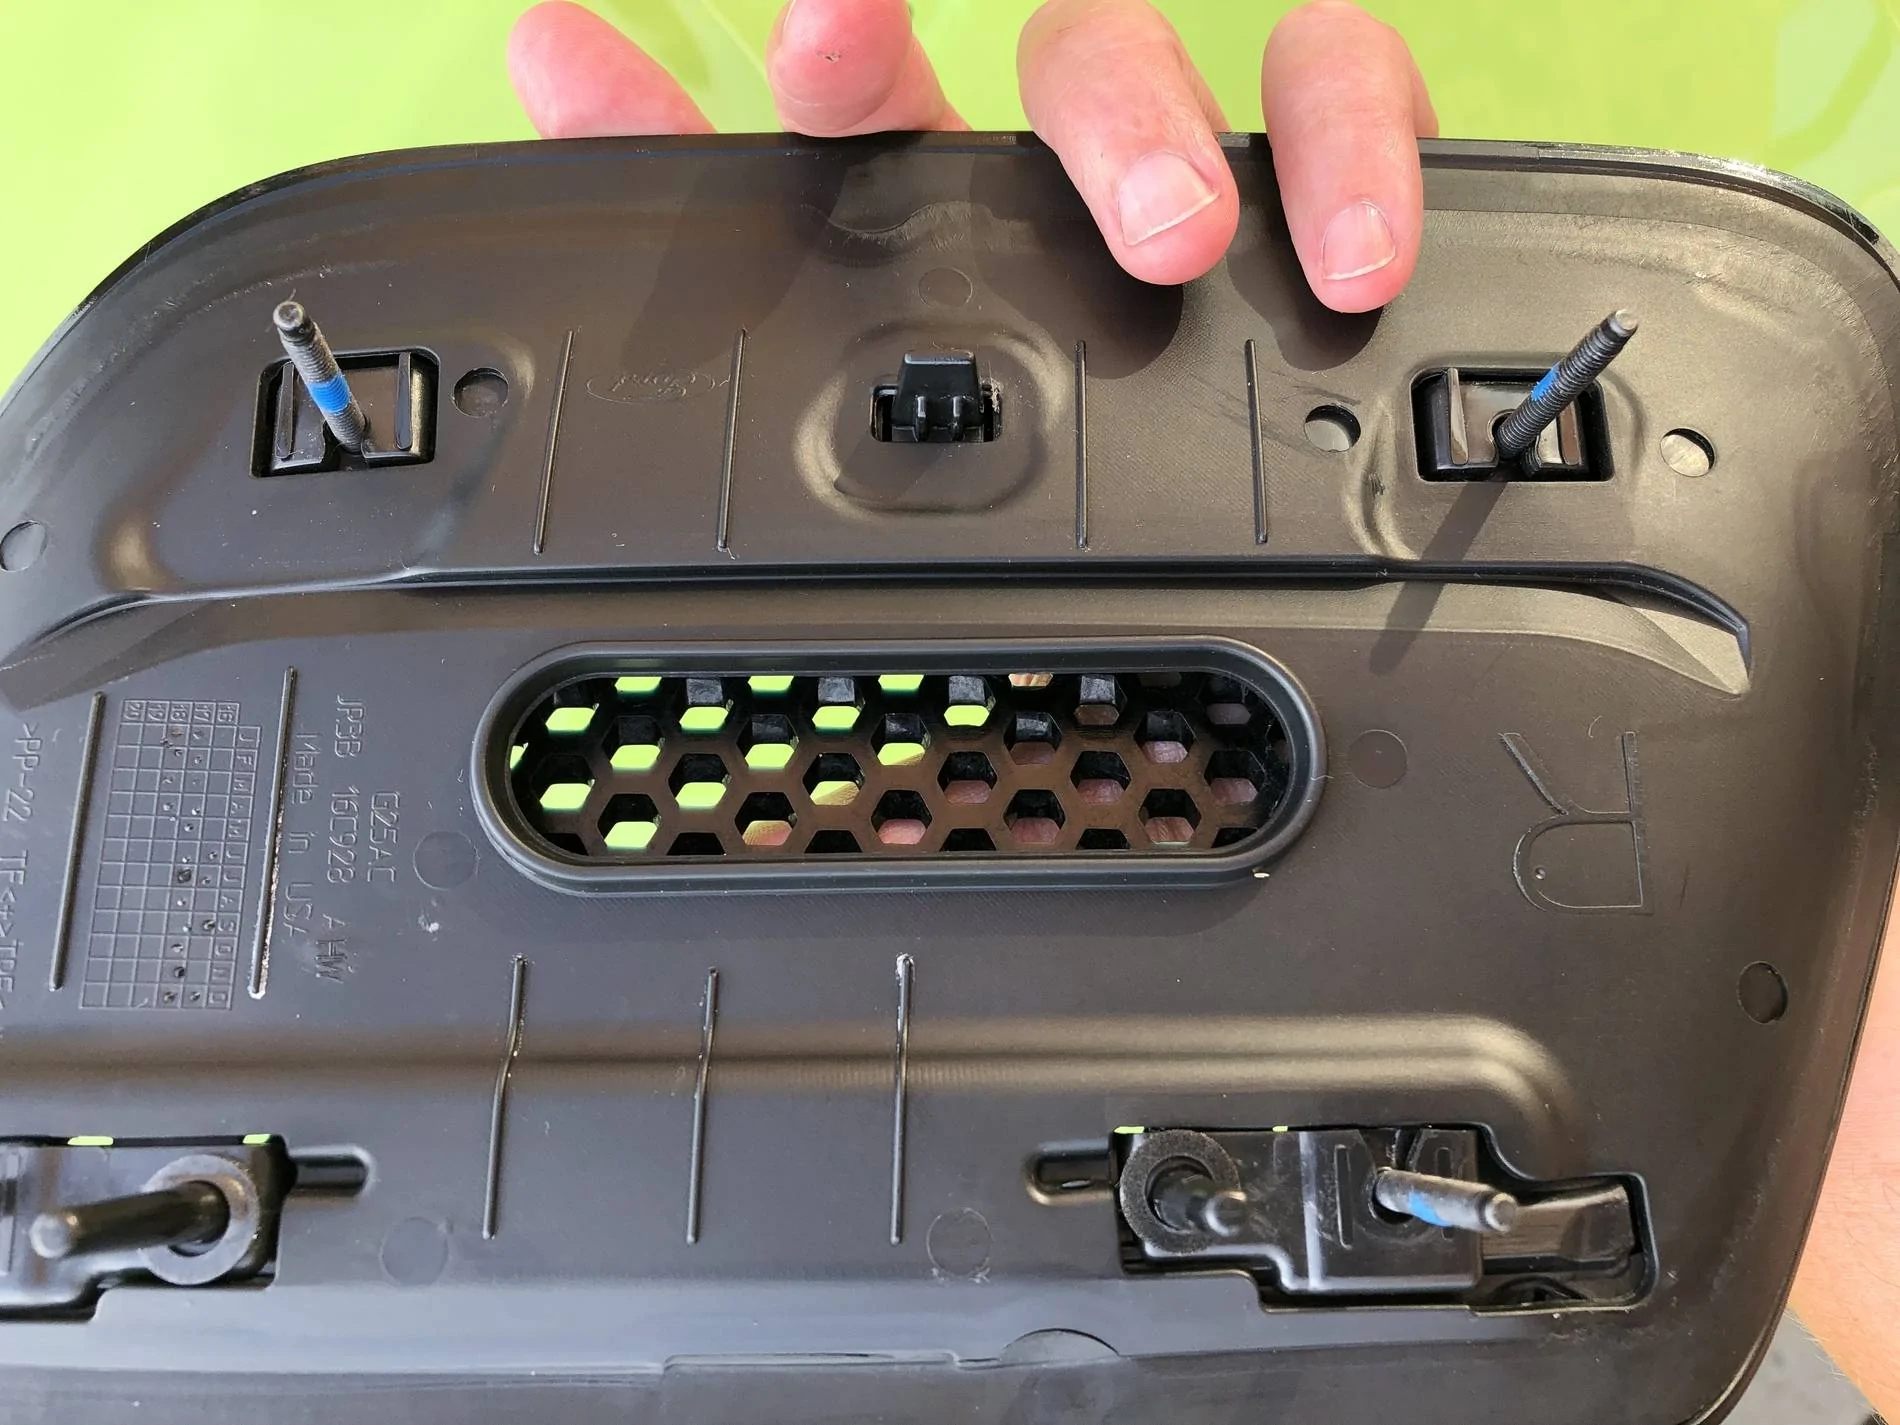
Yes, it is possible. All screws have what I assume is blue loc-tite on them. But if no glue, I'm not sure what would have broken them on removal. :-/From my amateur view, it sure looks like thread locker.
Edit: There appears to be a similar substance here.

What you applied JB weld on is made so that the stud can be removed, the pins locate the bottom pan. It does look like some one used Lock-tite on the threaded stud, & totally unnecessary
Inside the circle you can see some blue residue which I assume is glue. I don't understand why they would put glue there (though I guess it could also be blue loc-tite that was spilled), but it was similar on all four corners. When I lifted up the vents from the hood, part of the plastic material on some of the corners unfortunately broke. :-/
I did not see any traces of tape on my vents, though that would obviously have been much preferred.


Thanks, that's how I removed it the first time I think, and helped with a panel tool to be extra careful, but unfortunately things broke.What you applied JB weld on is made so that the stud can be removed, the pins locate the bottom pan. It does look like some one used Lock-tite on the threaded stud, & totally unnecessary
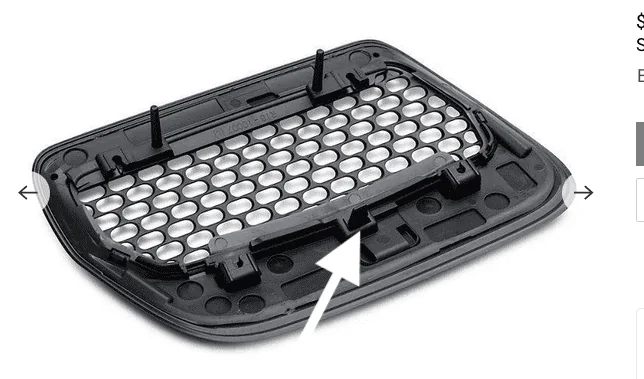
From the top side of the hood. Lower the heat extractor into place. The side with the pins seen in picture go in first and will seat or lay flush with the hood.
The side marked with the arrow will not. Note it has a clip, keeping pressure at that spot, not to the sides, push down it will pop into place.
Under the hood install nuts, do not over tighten just need hold things in place.

If ever you wish to remove these again. Remove 4 nuts, the clip will release the assembly, lift out.
Cheers
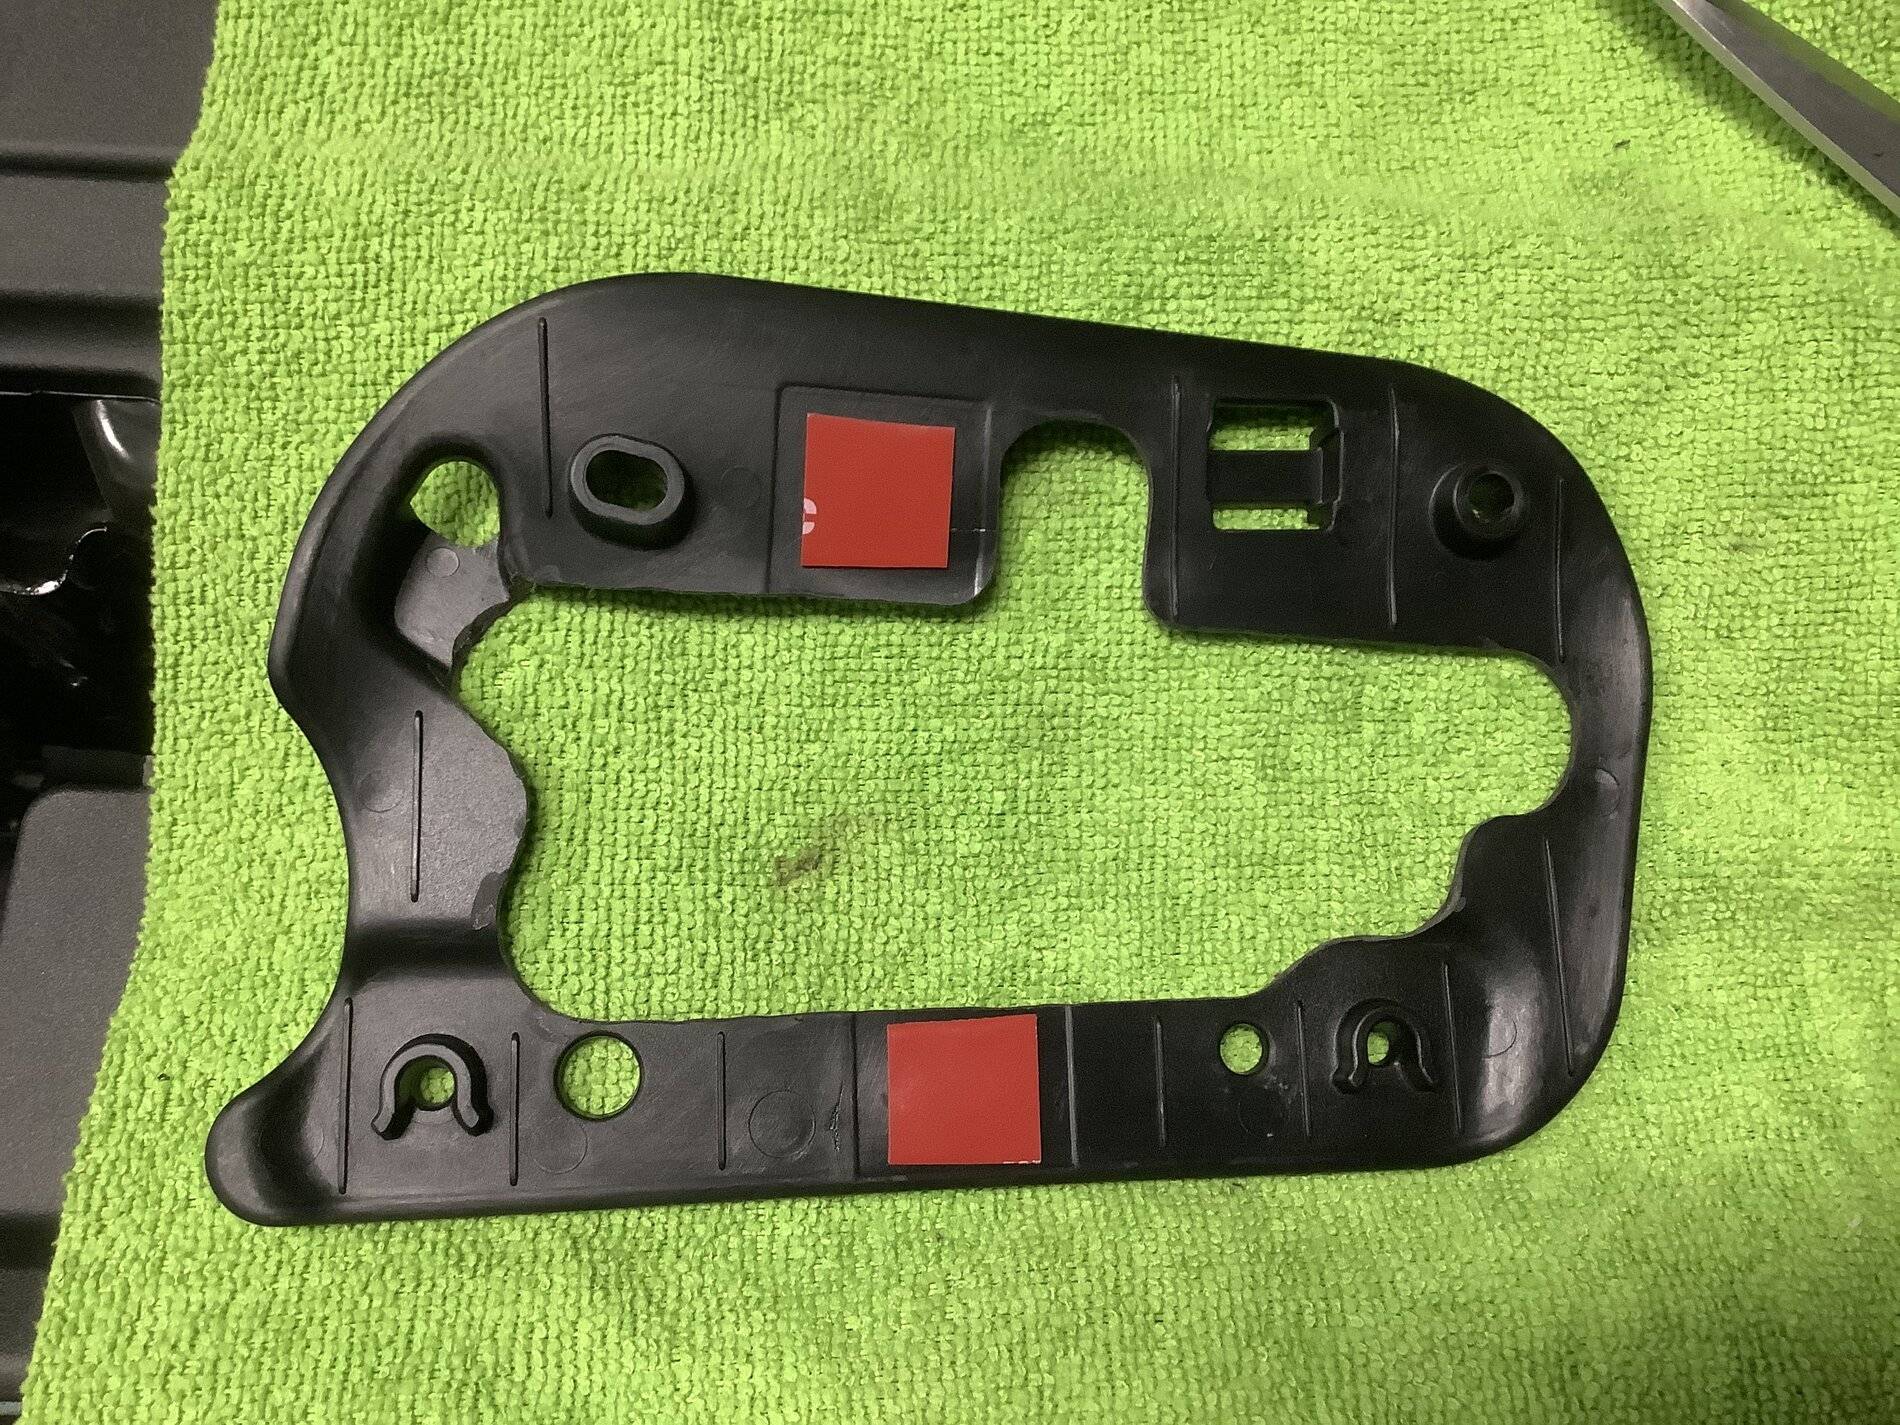
Hi, thank you for the warning. I will double check if the tiny raise created by me smearing jb-weld all over will cause a problem when fitting. If it does, hopefully I can cut or sand it down a bit on the top. Should probably do that anyway to reduce scratches on the hood when fitting.@Michael_vroomvroom - the top face of that plastic surface needs to sit flat on your hood, the epoxy you have in that area will cause the vent to sit proud
Edit to add this picture :

You can easily see in the dirt on the bottom right hand stud the impression of the plastic that you have broken - you can see how that area needs to sit flush on the hood
WD
Yeah, after thinking about it some more, I too think it's just threadlock as you guys suggested, and not glue as I suspected, and I think it must have been tightened down too hard at Ford without anybody noticing. The way it's designed it seems it's not so easy to notice if you brake the plastic covers while tightening the nuts.How did you go on with the fix ?
I popped my vents out again and the pre coat thread lock is very evident in this photo :
WD