- Thread starter
- Banned
- #1
Hey Guys & Gals,
Back in 2012, not long after the Gen 1 Coyote Mustangs began prowling the streets I saw a pearl White Mustang GT with what I would call kind of an "Ox Blood Red" leather interior. I thought it looked fantastic and I have wanted that color leather interior since then. The interior of that car may not have been a factory leather option?
Anyway, I bought my 2016 GT a little over a year ago, and I was pretty happy with the factory black leather interior. BUT, as my soon-to-be ex-wife would tell you, I can never leave my cars alone until they are my version of perrrrfect.
I was thinking of going with having my seats re-covered in Katzkins red leather, but that was going to cost me somewhere around $1,500 with materials and labor to have a local shop do it. I would rather put that money towards a ProCharger set-up sometime soon, so I decided to dye my leather seats from black to red.
There are many YouTube videos on how to dye leather seats, and I chose to go with a product called ColorBond.
https://www.amazon.com/gp/product/B00G6IHTYA/ref=oh_aui_detailpage_o00_s00?ie=UTF8&psc=1
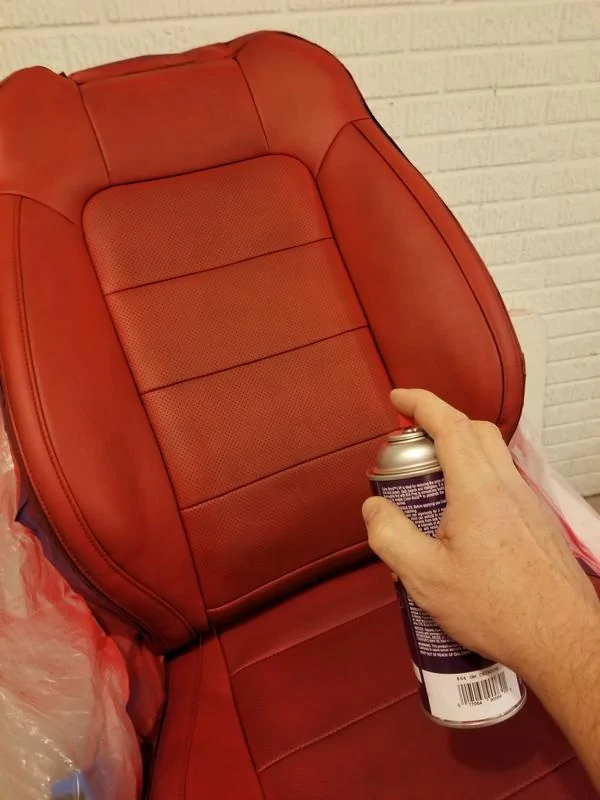
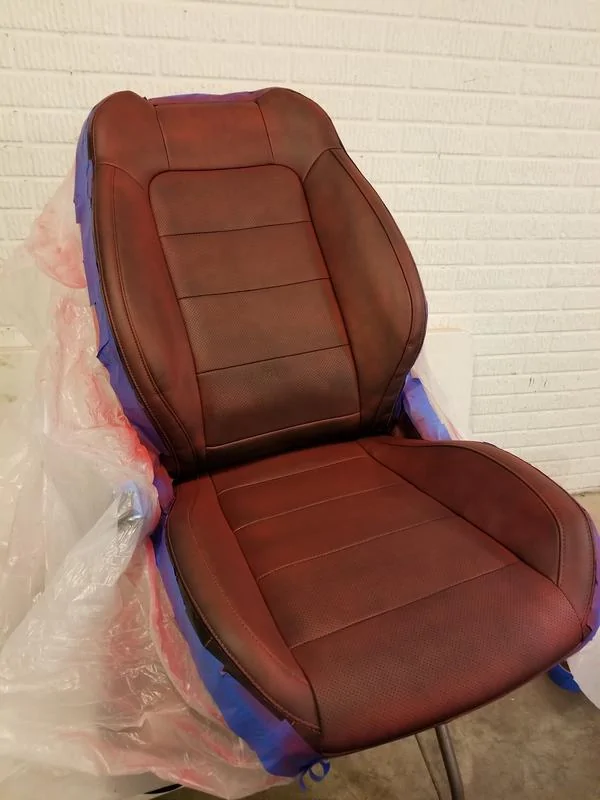
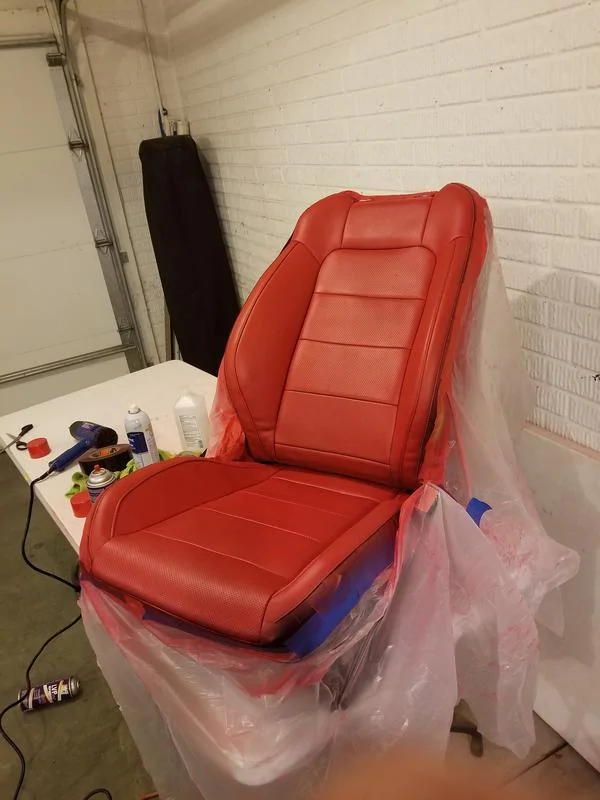
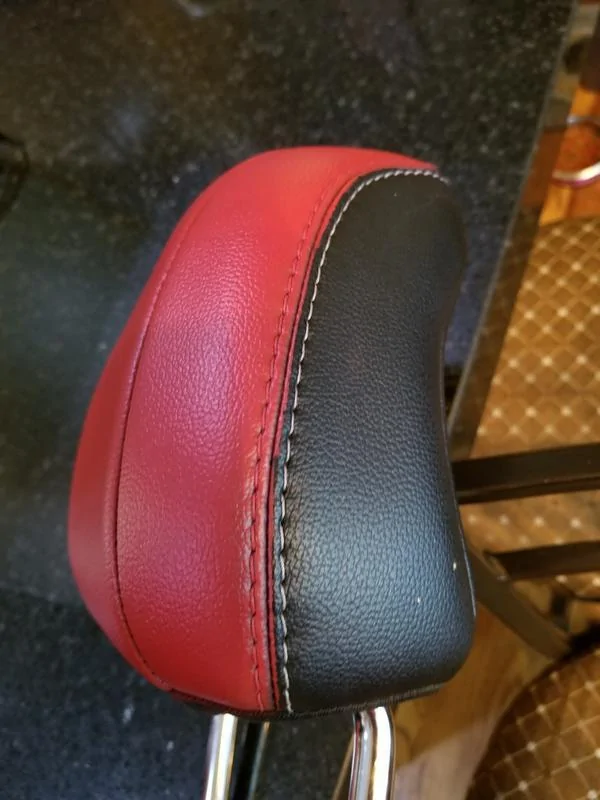
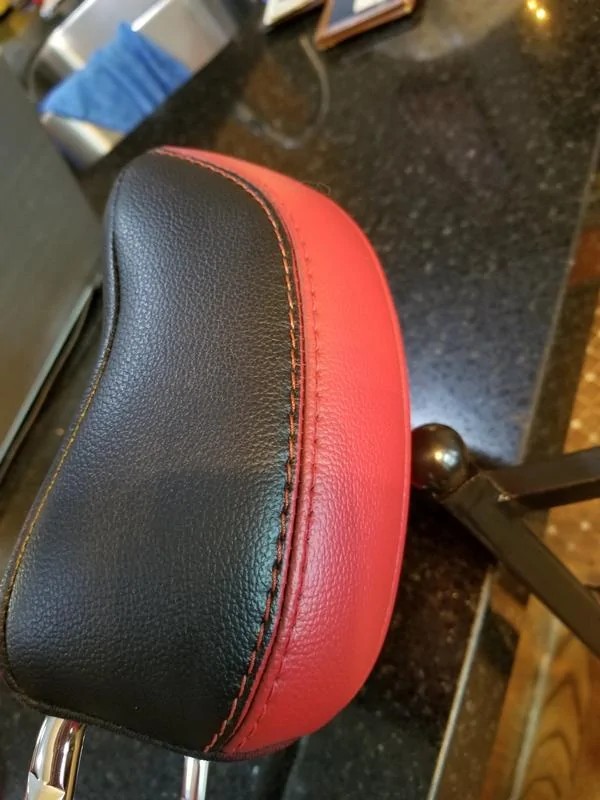
First off, I am very pleased with this color choice, but it is not as bright red as the factory 'red showstopper' leather interior, but it is more like the Ox blood red I mentioned above. ColorBond has many different reds/colors to choose from.
As we get started here are the materials I used:
1. 5 cans of ColorBond leather/vinyl dye (the front seats/headrests took me just over one full can)
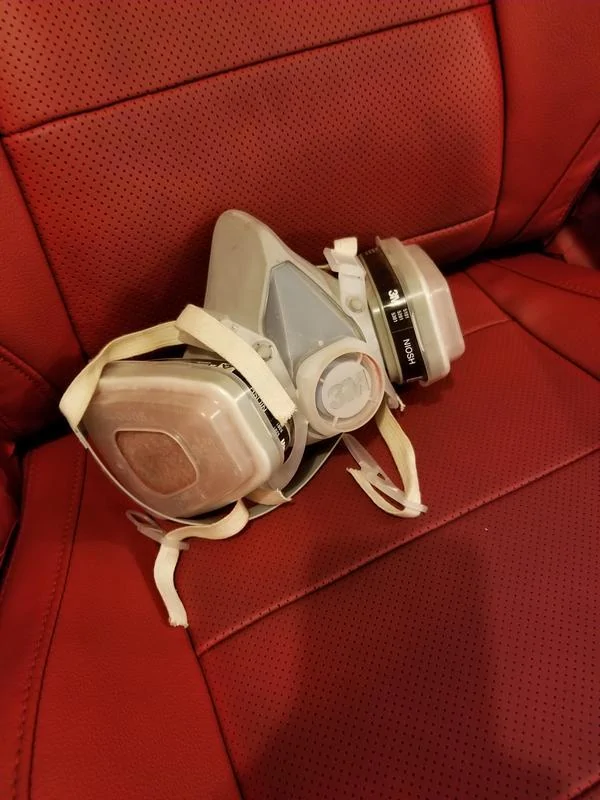
2. Respirator - absolutely necessary!!!!
3. Scotch-brite pad
4. Glass cleaner (with ammonia)
5. 91% - 99% rubbing alcohol
6. 2-3 Microfiber towels
7 Duct tape (Gorilla tape if you can find it in your area)
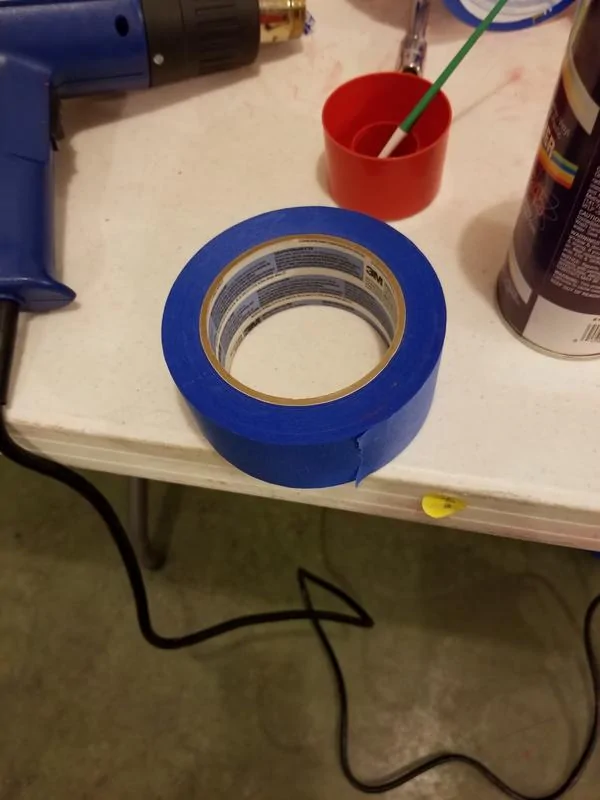
8. Masking tape
9. Heat gun/hair dryer
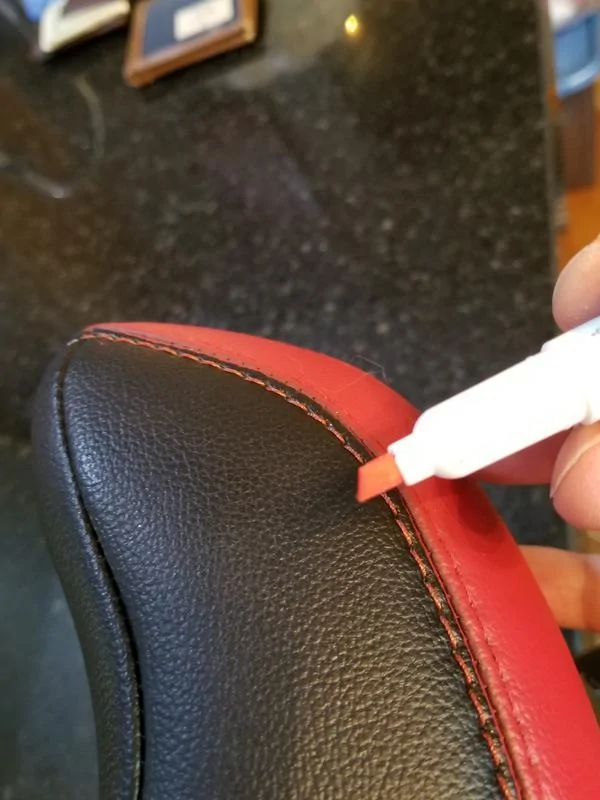
10. Fabric color marker, x2
11. Plastic sheeting, 9'x12', cut into sections
Remove the seats from the car. I'm not going to explain this, other than remove the headrests prior to removing the seats from the car. To remove the headrests, press the tabs on each side of the extension arms and pull up. Removing the headrests gives you more room to work with, and you will need to removed them for dying.
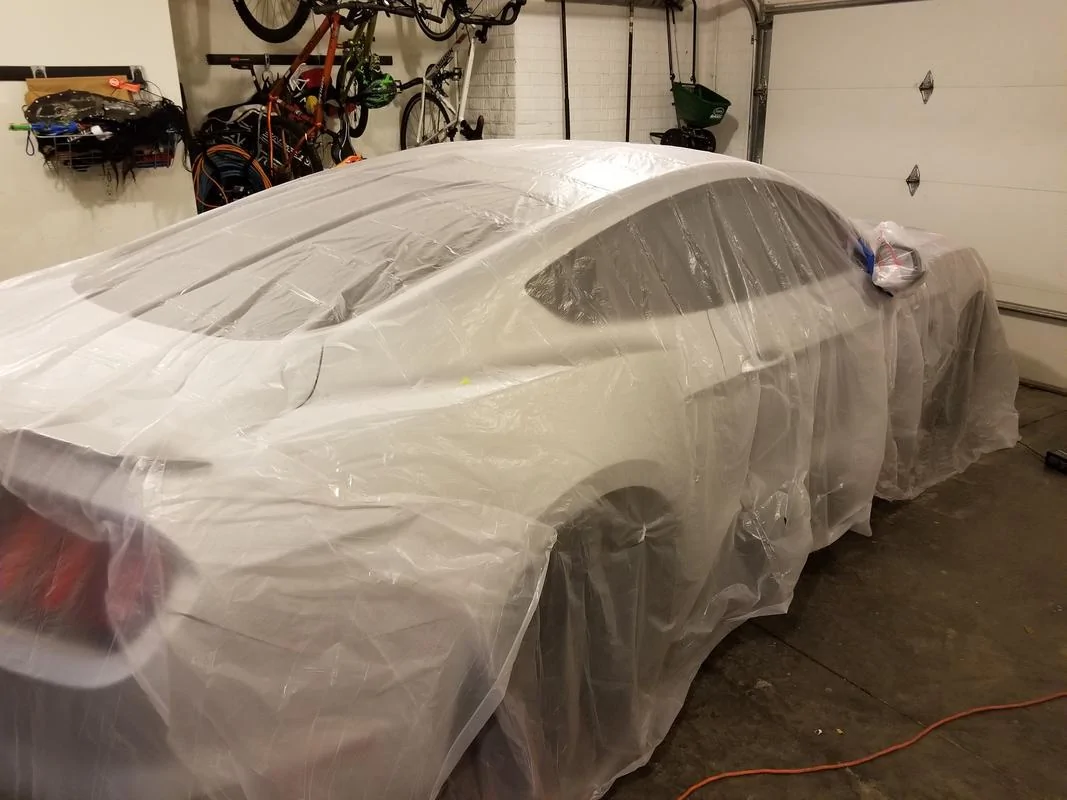
Cover anything else in the immediate vicinity of where you will be spraying the dye.

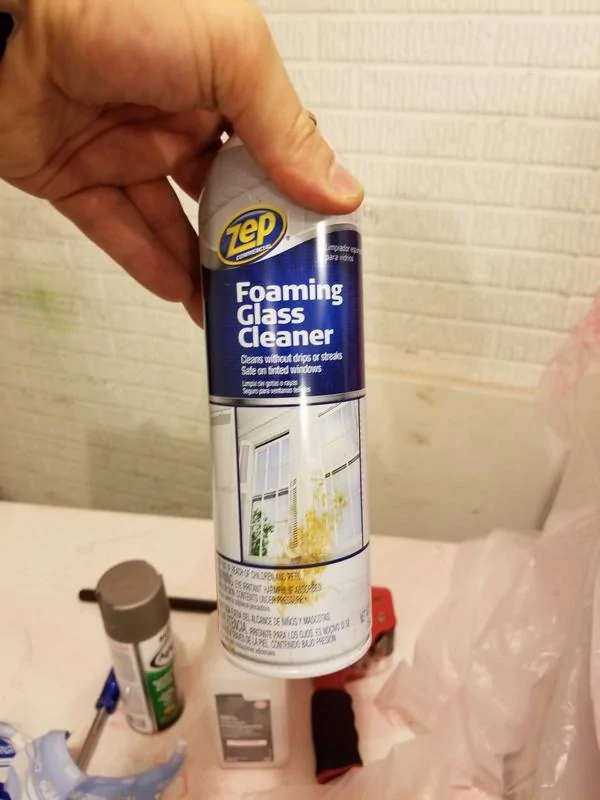
Once the seats are out, you will need to clean them before applying the dye. Use a clean microfiber towel, first spray the seats liberally with glass cleaner containing ammonia. The ammonia does a great job of removing grease/oils. Do this twice and then let the seats dry thoroughly. Use your heat gun/hair dryer to speed this up if you want.

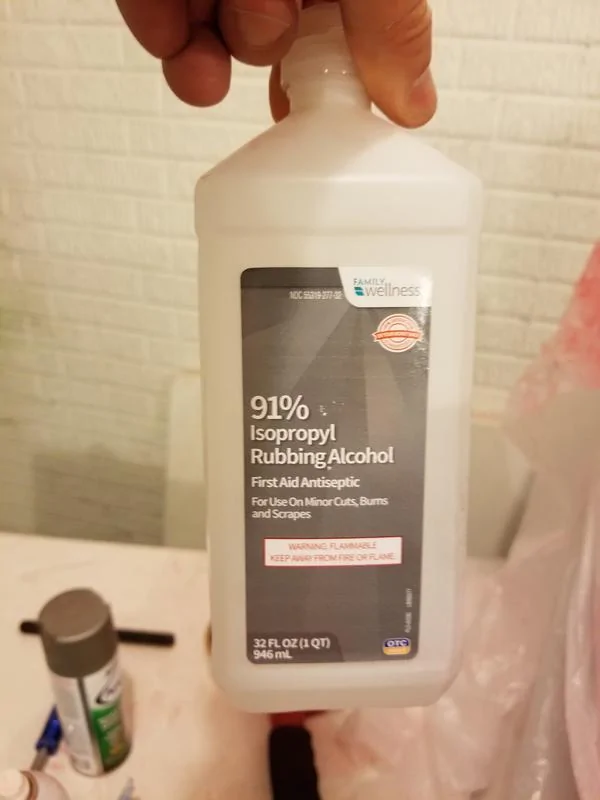
Do the same as above with another clean microfiber towel and rubbing alcohol. DO NOT pour rubbing alcohol directly on the seat; apply rubbing alcohol to your towel and then go over the entire seat with firm pressure. Do this at least twice, especially if you have recently moisturized your seats with some kind of leather conditioner.
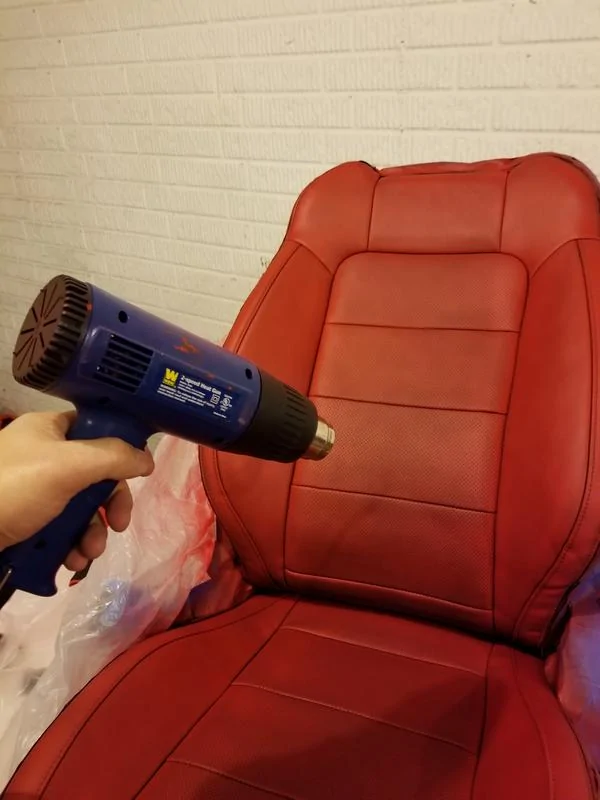
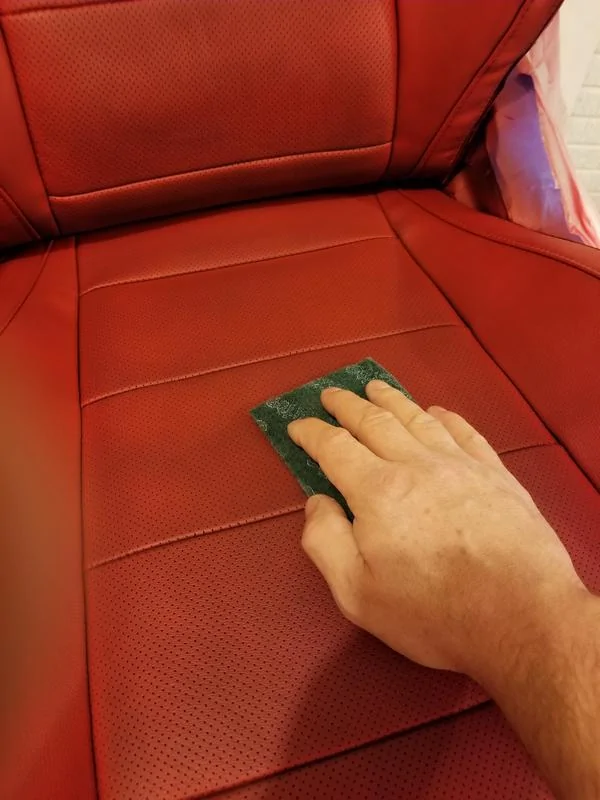
This part may seem a bit barbaric, but you need to do it. The only part of the front & rear seats of the factory "leather" interiors of our cars is the center sections of the FRONT seats. Everything else is vinyl. Now that the seats have been cleaned/degreased, you will need to scuff the leather center sections of the front seats with the Scotch-brite pad to prepare the leather to accept the new color. Don't worry about this; leather is very, very tough material that is why it has been in use for thousands of years. Only scuff the center sections of the seats. Do NOT scuff the vinyl sections of the seats!
You don't need to go crazy with this step, just a good scuffing. You'll notice in the picture, I have already started to re-dye the seat, that is because I forgot to take a pic before I started.
After scuffing the seats, wipe them down again with rubbing alcohol.
Now you are done with the prep phase...
Back in 2012, not long after the Gen 1 Coyote Mustangs began prowling the streets I saw a pearl White Mustang GT with what I would call kind of an "Ox Blood Red" leather interior. I thought it looked fantastic and I have wanted that color leather interior since then. The interior of that car may not have been a factory leather option?
Anyway, I bought my 2016 GT a little over a year ago, and I was pretty happy with the factory black leather interior. BUT, as my soon-to-be ex-wife would tell you, I can never leave my cars alone until they are my version of perrrrfect.
I was thinking of going with having my seats re-covered in Katzkins red leather, but that was going to cost me somewhere around $1,500 with materials and labor to have a local shop do it. I would rather put that money towards a ProCharger set-up sometime soon, so I decided to dye my leather seats from black to red.
There are many YouTube videos on how to dye leather seats, and I chose to go with a product called ColorBond.
https://www.amazon.com/gp/product/B00G6IHTYA/ref=oh_aui_detailpage_o00_s00?ie=UTF8&psc=1
First off, I am very pleased with this color choice, but it is not as bright red as the factory 'red showstopper' leather interior, but it is more like the Ox blood red I mentioned above. ColorBond has many different reds/colors to choose from.
As we get started here are the materials I used:
1. 5 cans of ColorBond leather/vinyl dye (the front seats/headrests took me just over one full can)
2. Respirator - absolutely necessary!!!!
3. Scotch-brite pad
4. Glass cleaner (with ammonia)
5. 91% - 99% rubbing alcohol
6. 2-3 Microfiber towels
7 Duct tape (Gorilla tape if you can find it in your area)
8. Masking tape
9. Heat gun/hair dryer
10. Fabric color marker, x2
11. Plastic sheeting, 9'x12', cut into sections
Remove the seats from the car. I'm not going to explain this, other than remove the headrests prior to removing the seats from the car. To remove the headrests, press the tabs on each side of the extension arms and pull up. Removing the headrests gives you more room to work with, and you will need to removed them for dying.
Cover anything else in the immediate vicinity of where you will be spraying the dye.
Once the seats are out, you will need to clean them before applying the dye. Use a clean microfiber towel, first spray the seats liberally with glass cleaner containing ammonia. The ammonia does a great job of removing grease/oils. Do this twice and then let the seats dry thoroughly. Use your heat gun/hair dryer to speed this up if you want.
Do the same as above with another clean microfiber towel and rubbing alcohol. DO NOT pour rubbing alcohol directly on the seat; apply rubbing alcohol to your towel and then go over the entire seat with firm pressure. Do this at least twice, especially if you have recently moisturized your seats with some kind of leather conditioner.
This part may seem a bit barbaric, but you need to do it. The only part of the front & rear seats of the factory "leather" interiors of our cars is the center sections of the FRONT seats. Everything else is vinyl. Now that the seats have been cleaned/degreased, you will need to scuff the leather center sections of the front seats with the Scotch-brite pad to prepare the leather to accept the new color. Don't worry about this; leather is very, very tough material that is why it has been in use for thousands of years. Only scuff the center sections of the seats. Do NOT scuff the vinyl sections of the seats!
You don't need to go crazy with this step, just a good scuffing. You'll notice in the picture, I have already started to re-dye the seat, that is because I forgot to take a pic before I started.

After scuffing the seats, wipe them down again with rubbing alcohol.
Now you are done with the prep phase...
Sponsored
Last edited: