THX 138
Well-Known Member
- Joined
- Jun 6, 2016
- Threads
- 18
- Messages
- 584
- Reaction score
- 615
- Location
- Brownsburg, IN
- Vehicle(s)
- 2016 GT350 Track Pack, 2002 Porsche Boxster S 3.8L
- Thread starter
- #1
I bought the Steeda cutting tool over the winter and have been waiting for the weather to warm up before tackling this project. It's the first weekend of spring, and my first track weekend this year is in 4 weeks, so time to get it done.
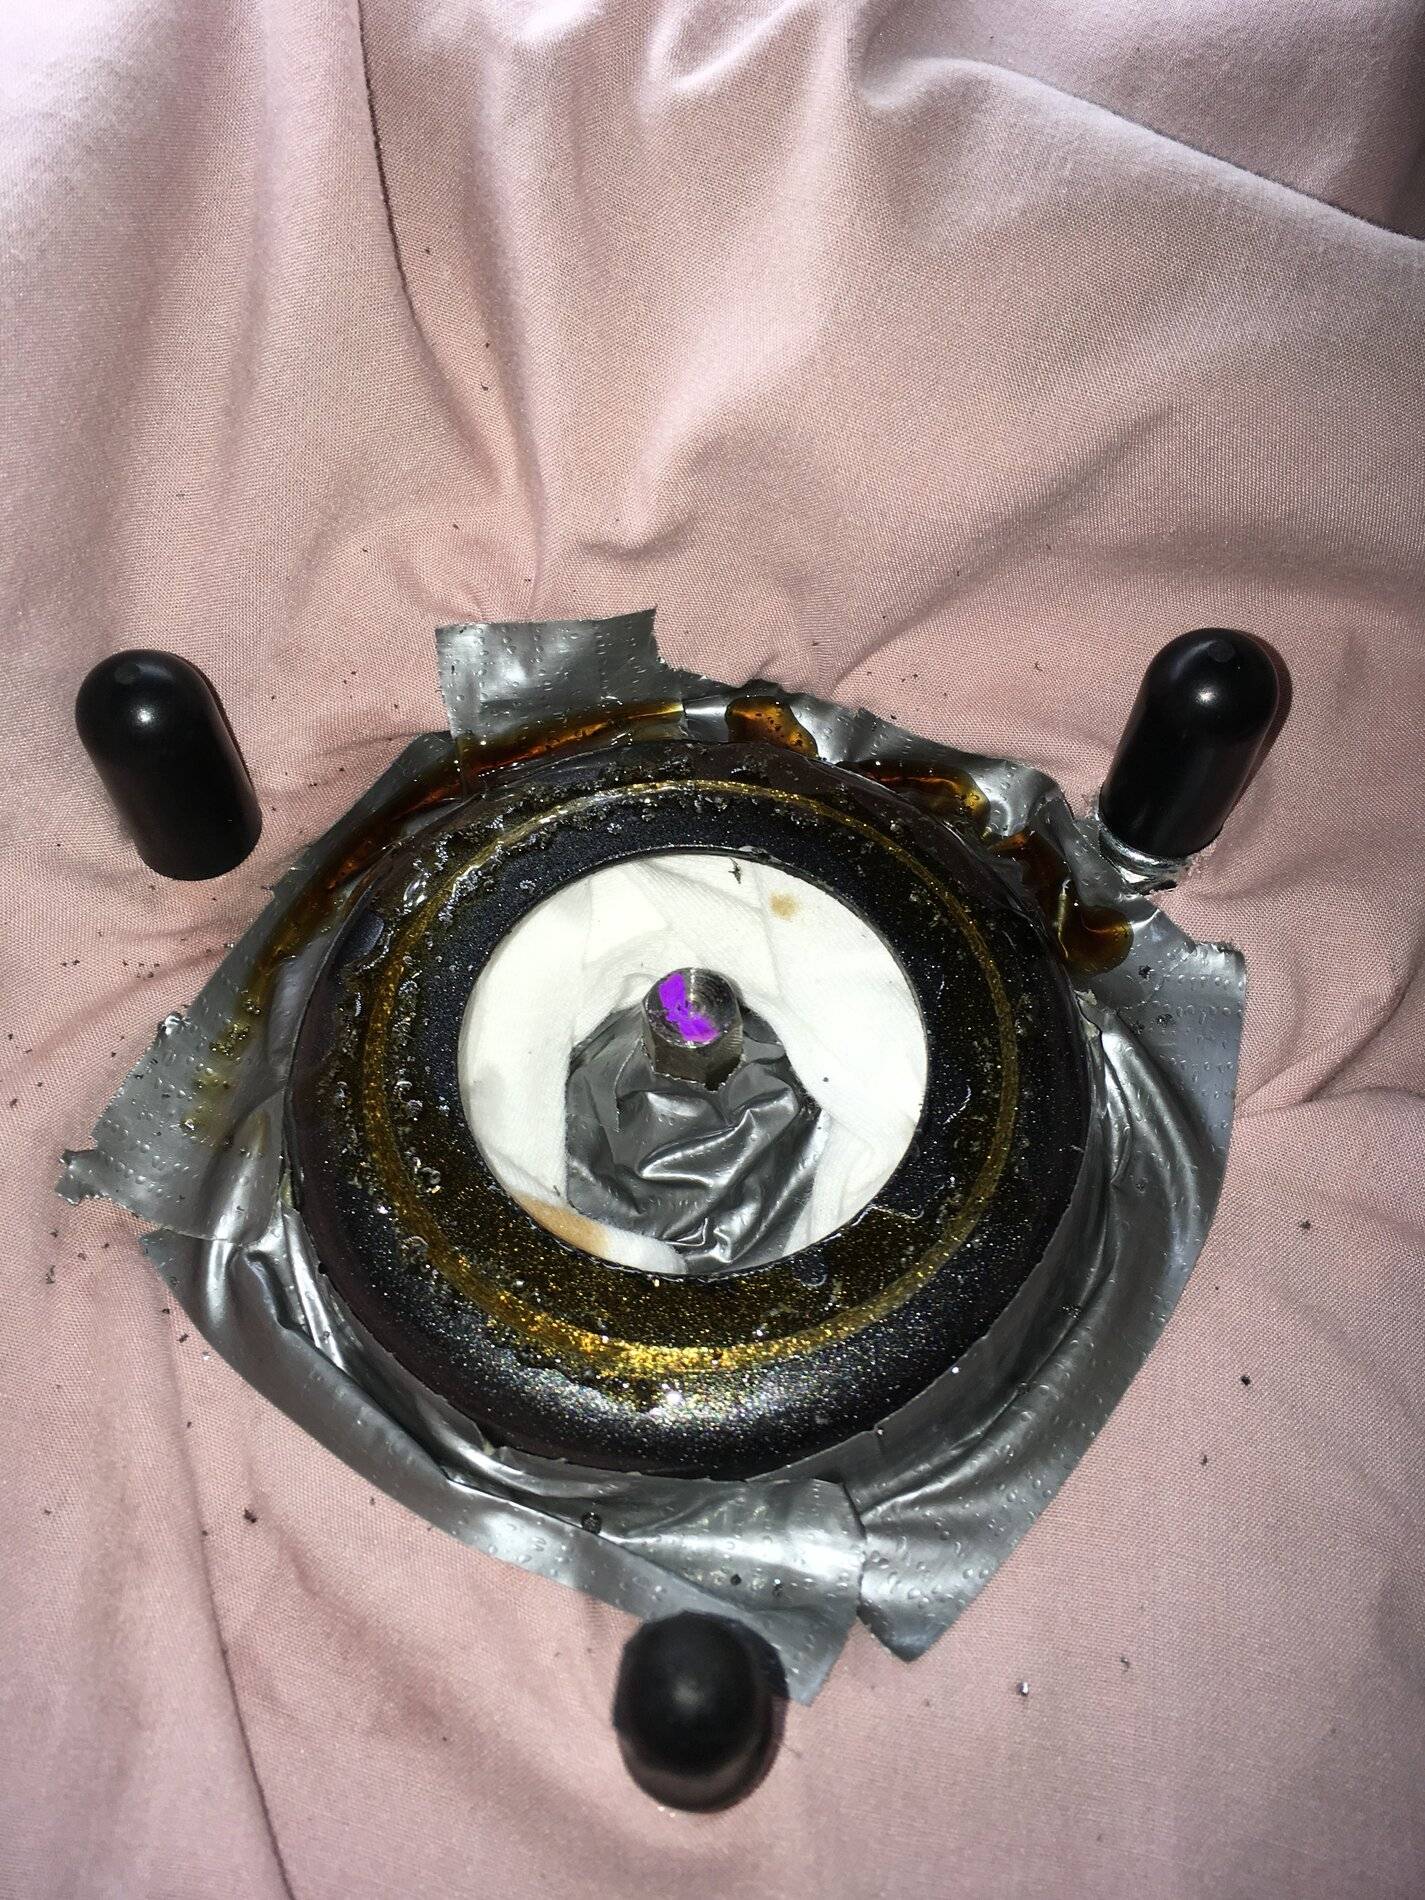
I wanted to keep the metal shavings in the engine compartment--and near the Vorshlag camber plates' spherical bearing--to a minimum, so I approached it like a surgical procedure. One thing I learned after doing the driver's side was that just stuffing a rag inside the opening wasn't sufficient to keep the metal shavings out. So on the passenger side, I covered the camber plate itself in duct tape.

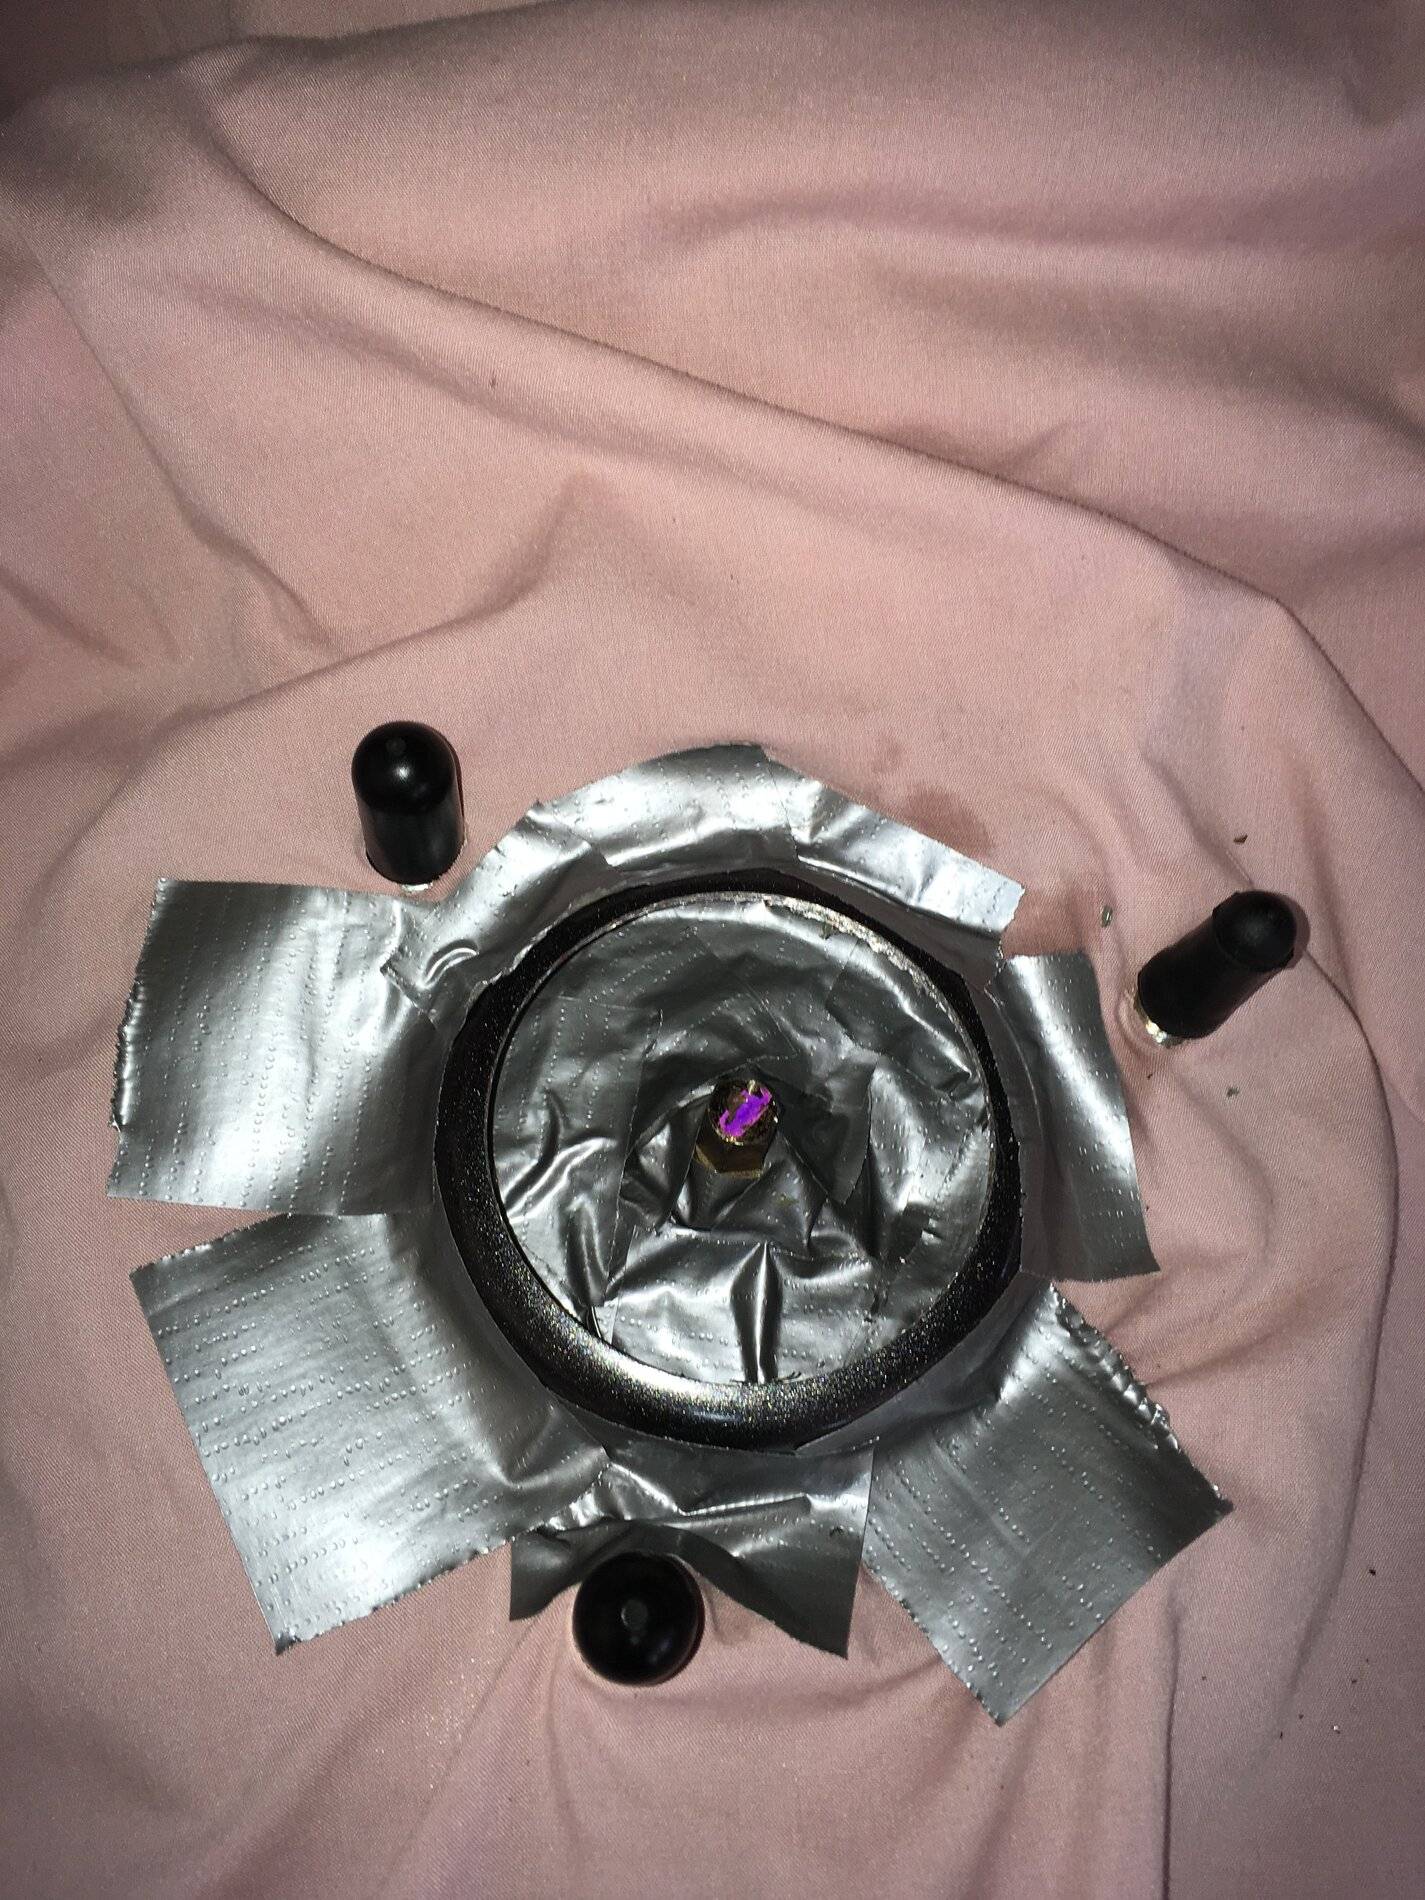
Next I took an old sheet and cut a hole in it to keep the shavings out of the rest of the engine compartment, securing it in place with the three upright bolts and more duct tape, with a small rag stuffed inside the opening to absorb some of the cutting oil.
Apply some cutting oil to the surface liberally, and set your drill to a SLOW speed. My Skil drill goes up to 800 RPM, with 12 speed increments. I started with the 2nd-slowest setting, and never got above the 4th slowest. Those settings were PLENTY fast for this job, and prevented damage to the hole saw. (Even after doing both sides, it's still sharp, and I only lost 1 tooth.) Go slow, and FREQUENTLY add thread cutting oil to the channel as you cut.
I used a Dremel with a deburring tool to remove the sharp edges of the hole, then went over it again with a sanding disk attachment. I used a Shop-Vac to pick up the big shavings after removing the sheet.
Despite my best efforts, I still ended up with metal shavings on the camber plate itself, so I carefully used toothpicks and cotton swabs soaked in isopropyl alcohol to remove them.
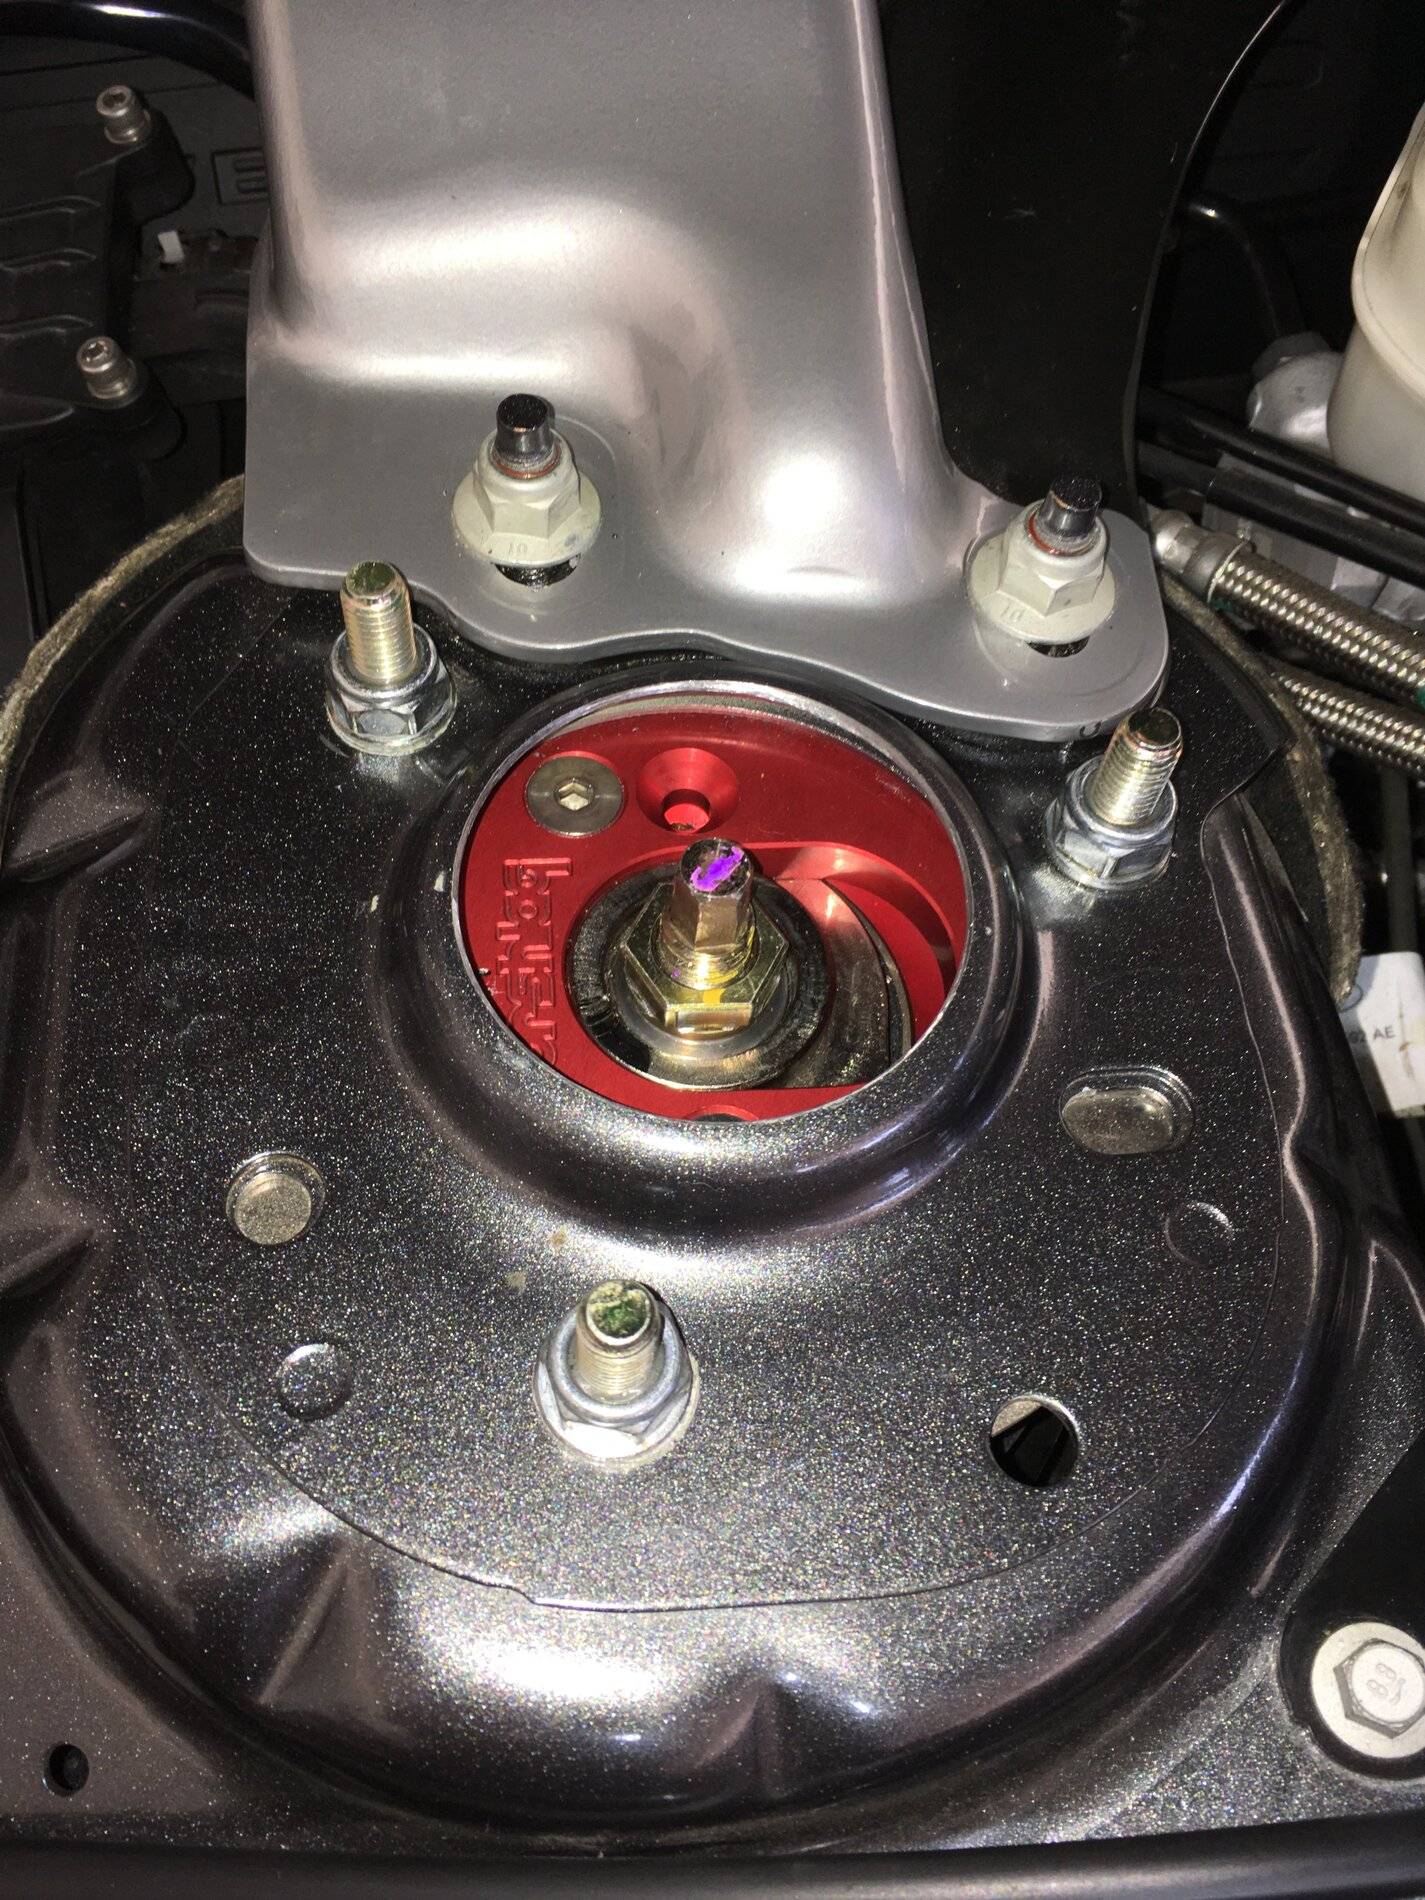
All in all, this turned out better than I was expecting, and I didn't run into any problems. Taking a break now, then I'll go back and prime & paint the exposed metal surfaces. Hope this tutorial is helpful to somebody.
I wanted to keep the metal shavings in the engine compartment--and near the Vorshlag camber plates' spherical bearing--to a minimum, so I approached it like a surgical procedure. One thing I learned after doing the driver's side was that just stuffing a rag inside the opening wasn't sufficient to keep the metal shavings out. So on the passenger side, I covered the camber plate itself in duct tape.

Next I took an old sheet and cut a hole in it to keep the shavings out of the rest of the engine compartment, securing it in place with the three upright bolts and more duct tape, with a small rag stuffed inside the opening to absorb some of the cutting oil.

Apply some cutting oil to the surface liberally, and set your drill to a SLOW speed. My Skil drill goes up to 800 RPM, with 12 speed increments. I started with the 2nd-slowest setting, and never got above the 4th slowest. Those settings were PLENTY fast for this job, and prevented damage to the hole saw. (Even after doing both sides, it's still sharp, and I only lost 1 tooth.) Go slow, and FREQUENTLY add thread cutting oil to the channel as you cut.

I used a Dremel with a deburring tool to remove the sharp edges of the hole, then went over it again with a sanding disk attachment. I used a Shop-Vac to pick up the big shavings after removing the sheet.
Despite my best efforts, I still ended up with metal shavings on the camber plate itself, so I carefully used toothpicks and cotton swabs soaked in isopropyl alcohol to remove them.
All in all, this turned out better than I was expecting, and I didn't run into any problems. Taking a break now, then I'll go back and prime & paint the exposed metal surfaces. Hope this tutorial is helpful to somebody.
Sponsored

") I've seen -3.7 be necessary and also less then -3. I currently run -3.1/-3.2 the most, but I do change it up depending on tires and track. A pyrometer is absolutely key, IMHO
I've seen -3.7 be necessary and also less then -3. I currently run -3.1/-3.2 the most, but I do change it up depending on tires and track. A pyrometer is absolutely key, IMHO