Sponsored

Removing deep water/sun spots from hood?

Type550

Well-Known Member
Joined
Jan 28, 2018
Threads
22
Messages
196
Reaction score
113
Location
Australia
Vehicle(s)
Absolute Black 2017 GT Fastback (Manual)
Hi guys,

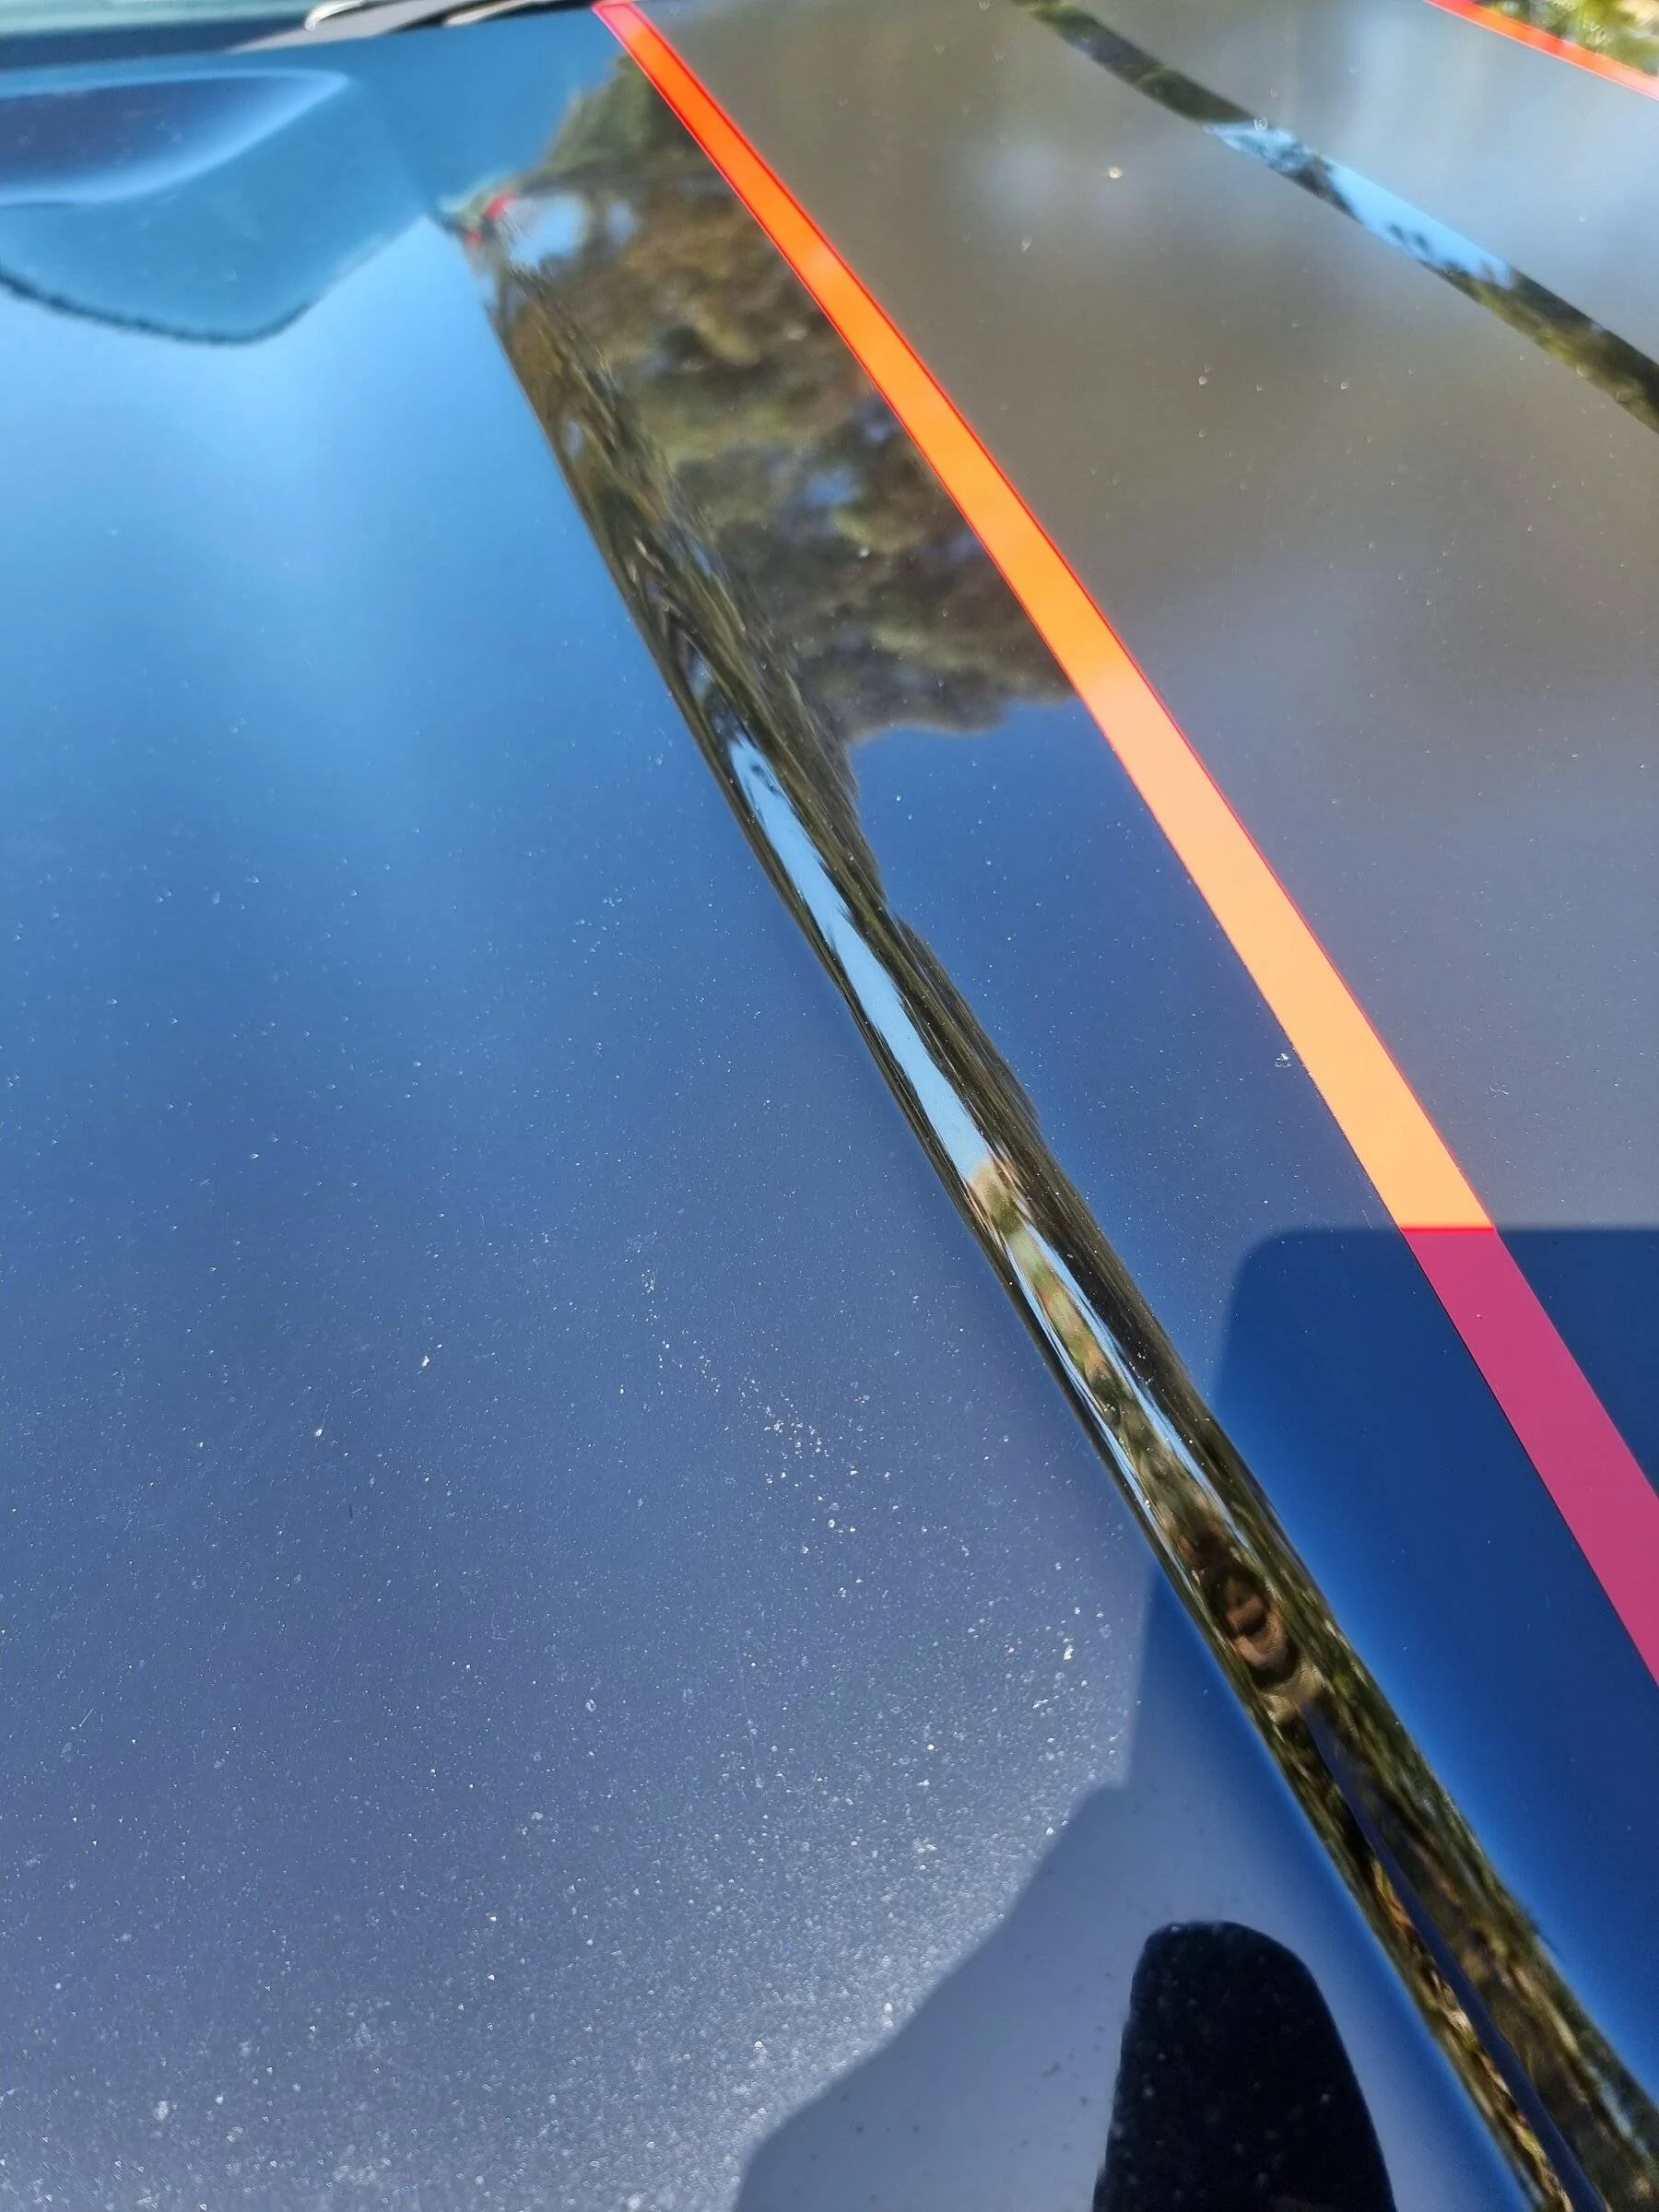
I've got an aftermarket GT350 hood on my GT which has some pretty bad water/sun spots on it as you can see from this picture. I never got ceramic coating done on the new hood, which was a bad mistake on my part!

Any tips / advice on what I can use to polish all the water spots out?

I have access to an orbital polisher, so I'm thinking I'll practice on my daughter's older car first before tackling the GT. 😁

I'm thinking I'll use a clay bar to decontaminate the hood surface first, then use a polishing compound.

Advice greatly appreciated 👍🏼

20220219_153318.jpg


Screenshot_20220217-092634_Gallery.jpg
Sponsored

 
Last edited:

Twister_Orange_5oh

Well-Known Member
Joined
Feb 1, 2022
Threads
11
Messages
73
Reaction score
201
Location
Illinois
First Name
Daniel
Vehicle(s)
'21 Mustang GT Premium
If you're going to do something, do it right the first time. Practicing is a good idea, but if you already own one I'm going to lean towards you being competent and responsible.

That said, I would take this opportunity to do it all at once with the paint correction and ceramic coating. To do so, you should follow these steps:

  1. Wash car
  2. Clay bar the hood. Remember to be liberal with the detailing spray and to be patient. Lift all of that grime up and off your car.
  3. Use brand new microfiber cloths to wipe down car after the clay bar is completed. Do not use any fancy detailing spray at this stage.
  4. Apply a compound to your orbital and get to work. We want to utilize a compound instead of polish to ensure we take off any scratches created by trying to clean the spots previously along with natural wear of the vehicle. I use Maguire's Compound when detailing. Be patient, and work in small areas liberally. While you want to work on a 2x2' area, that doesn't mean get mesmerized in a specific spot. Slowly maneuver the polisher over the area and work it in a row by row pattern. Then again perpendicular to it. Because it is the hood, it is going to be pretty easy to not burn down the clear coat from body lines. But still be careful (just don't be scared of the tool).
  5. if this step has not taken care of the spots, you will need to alter the brand you are using and get something more abrasive. Additionally, polishing pads are color coded. Research these codes and use the appropriate ones for the applications being done. I doubt you'll have issues getting the spots to lift off though.
  6. Move on to the polish. Again, I use Maguire's Polishing formula. I personally love it. Polishing will take those deeper abrasions you've made from the compound sanding down the imperfections and basically smooth them out. This is the step where the paint starts to get a glass like finish. Be patient, but purposeful in what you are doing. This should clear up any remaining imperfections. If not, revisit the compound step. Remember, when you apply compound, it is essential to use polish after. You can't (read: shouldn't) just use compound.
  7. Wipe down paint with clean microfiber. Then wipe down using isopropyl alcohol to remove any residue. It is now prepped for sealing, whether that be ceramic or wax.
Tips:
  • When using the orbital buffer, you will be a little nervous about the edges of the panels. You should be, but don't be scared of those edges. Either tape off and go over them, or yeet it and get the job done. I recommend masking and then going over by hand. What you do not want to do is forget about them. It will be obvious if you do the other steps correctly.
  • Do not forget to seal the paint after polishing. If you ceramic coat it, do so immediately as paint correction and prep is the hardest part of ceramic coating yourself. It goes on easy and is an easy process to complete.
  • If you ceramic coat,and later have to back to a part of the panel to polish and fix, you need to redo the whole panel. For this reason, wax should be considered if the car is daily driven.
  • Waxing allows you to fix areas when they become an issue and reseal just those areas. If this is a car you baby but also daily, waxing is superior. If it is a garage queen, ceramic coat it and marvel at the qualities that come with it.

Hope this helps.
 
OP
OP
Type550

Type550

Well-Known Member
Joined
Jan 28, 2018
Threads
22
Messages
196
Reaction score
113
Location
Australia
Vehicle(s)
Absolute Black 2017 GT Fastback (Manual)
WOW, thanks for the awesome, detailed instructions and advice. Noted! 👍🏼

Yeah, I've purchased McGuire's Ultimate Compound and Ultimate Polish too. I'm glad you've used this product and recommend it.

My daughter's car is a black 2009 Honda Accord, so I'll practice on hers first to gain confidence, then I'll do my car. 😅

A detailing shop quoted me $800 to fix up JUST the hood, which I think is excessive. I'd rather learn and do it myself (thanks to Youtube University) so I can do all my cars in future.

20220219_165509.jpg
 

Twister_Orange_5oh

Well-Known Member
Joined
Feb 1, 2022
Threads
11
Messages
73
Reaction score
201
Location
Illinois
First Name
Daniel
Vehicle(s)
'21 Mustang GT Premium
While that sounds pricey, it's exactly what I'd expect. Detailing (the correct way) requires attention to detail, patience, and knowledge. Just because it is something that can be learned online does not take away from the delicacy of the job itself.

Which makes knowing how to do it yourself priceless in my opinion. The highest compliment someone can get who loves detailing is to hear, "that looks brand new."

I've heard it about our 2015 Mazda6 and get it all the time for my 2003 Silverado.

IMG_20210605_154351_518.jpg
 

Firsttexan

Well-Known Member
Joined
Sep 7, 2021
Threads
16
Messages
1,214
Reaction score
1,039
Location
USA
First Name
Mike
Vehicle(s)
2011 GT500 '19 GT PP1 '13 GT500, 98 GT, 92 LX 5.0
Vehicle Showcase
1
Do a wet sand with 3000 grit. Then follow up with a 4 stage compound and polish job using a high speed buffer with the appropriate foam pads.

A clay bar won't phase deep water spots. Calcium is rock hard and imbedded.

Not for the shade tree detailer. But that's how a pro does it.
 

Sponsored

OP
OP
Type550

Type550

Well-Known Member
Joined
Jan 28, 2018
Threads
22
Messages
196
Reaction score
113
Location
Australia
Vehicle(s)
Absolute Black 2017 GT Fastback (Manual)
Thanks for tuning in and the advice guys 👍🏼
 

kilobravo

Well-Known Member
Joined
Aug 10, 2019
Threads
95
Messages
8,732
Reaction score
8,826
Location
Corpus Christi, TX
Website
kilobravo.com
First Name
KB
Vehicle(s)
'16 CT6, '18 SD, '20 GT 500
My two cents...

I always start out with what I think is the least abrasive option. I then find a small area like lower rear fender, for test purposes. Next, I use a paint thickness gauge to see how much paint is actually on the car. I divide that by three for the clear coat depth to be conservative.

Tape off a small section and buff. It's not possible to really get a good look at the spots in the paint from a photo but I'd start with a fine pad and M105. If after buffing, you clearly see an improvement, tape off another section and move up to a medium pad with 105. There's a fair chance that this will remove most of the problem. If so, I'd come back with a fine pad and Sonax Final Finish (or M205) until all the marks in the test area are gone and the gloss returned.

You may only have to do the two-step process on the bad hood areas while a single pass with Sonax or 205 and a fine pad will give you the clarity and gloss you want on the rest of the vehicle.

I would also check the paint thickness after the first aggressive pass to let me know how much clear I have left to work with.

Good luck..
 

Firsttexan

Well-Known Member
Joined
Sep 7, 2021
Threads
16
Messages
1,214
Reaction score
1,039
Location
USA
First Name
Mike
Vehicle(s)
2011 GT500 '19 GT PP1 '13 GT500, 98 GT, 92 LX 5.0
Vehicle Showcase
1
H
My two cents...

I always start out with what I think is the least abrasive option. I then find a small area like lower rear fender, for test purposes. Next, I use a paint thickness gauge to see how much paint is actually on the car. I divide that by three for the clear coat depth to be conservative.

Tape off a small section and buff. It's not possible to really get a good look at the spots in the paint from a photo but I'd start with a fine pad and M105. If after buffing, you clearly see an improvement, tape off another section and move up to a medium pad with 105. There's a fair chance that this will remove most of the problem. If so, I'd come back with a fine pad and Sonax Final Finish (or M205) until all the marks in the test area are gone and the gloss returned.

You may only have to do the two-step process on the bad hood areas while a single pass with Sonax or 205 and a fine pad will give you the clarity and gloss you want on the rest of the vehicle.

I would also check the paint thickness after the first aggressive pass to let me know how much clear I have left to work with.

Good luck..
No significant clear will be removed using 3000 or today's modern compounds.

No need for a paint gauge IMO. Unless you rape your finish?

Having done about 5000 cars personally I can tell up front whats required. Water spots that have any depth. Will need what I mentioned. Although I do a test area in hopes my appraisal is wrong. But 9 out 10 times it's a scuff.

There are some chemical water spot removers that work on light spots without having to do anything but a final polish. But they have their limitations.

If I scuff a panel with 3000 I do the whole panel. Gives it a show car finish in the process. 3000 used properly only scuffs the surface.

I never tape sections.

I can understand most don't have the eye for it

If you are less experienced and cannot use a high speed buffer VERY well? Then you should seek out a pro. For proper removal and swirl free paint correction.
 
Last edited:

TrackMustang

Banned
Banned
Banned
Joined
Nov 24, 2021
Threads
34
Messages
1,205
Reaction score
1,535
Location
SoCal
Vehicle(s)
2021 Mustang GT
Company Chemical Guys makes a water spot remover that I used on my wife’s car (6 months of the sprinklers dumping all over the drivers side) and it removed the spots. It took some elbow grease but I’m very happy with the results.
 
OP
OP
Type550

Type550

Well-Known Member
Joined
Jan 28, 2018
Threads
22
Messages
196
Reaction score
113
Location
Australia
Vehicle(s)
Absolute Black 2017 GT Fastback (Manual)
Company Chemical Guys makes a water spot remover that I used on my wife’s car (6 months of the sprinklers dumping all over the drivers side) and it removed the spots. It took some elbow grease but I’m very happy with the results.
Cool, thanks.

That might be OK for "fresh" water spots, however, mine have accumulated over a couple of years of exposure to the elements. I should have addressed them much earlier, but now I think a polishing compound is required.
 

Sponsored
OP
OP
Type550

Type550

Well-Known Member
Joined
Jan 28, 2018
Threads
22
Messages
196
Reaction score
113
Location
Australia
Vehicle(s)
Absolute Black 2017 GT Fastback (Manual)
BTW, these are the polishing products I'll be using.

20220220_111335.jpg
 

MNstang

Well-Known Member
Joined
Jan 6, 2021
Threads
30
Messages
416
Reaction score
279
Location
Minnesota
Vehicle(s)
2019 Mustang GT PP1
Vinager soak disolves all calcium.

CarPro Spotless Water Spot Remover has good reviews.
I have tried both of these on my car in the past 6 months - neither worked for me. They may work for others. I tried the vinegar first and then the carpro spotless - they both did absolutely nothing to remove water spots on my car. I think you will need to buff/polish as others have mentioned...
 

DFB5.0

Well-Known Member
Joined
Mar 15, 2017
Threads
92
Messages
5,417
Reaction score
15,588
Location
Australia
Vehicle(s)
Mustang GT Fastback
Vinager soak disolves all calcium.

CarPro Spotless Water Spot Remover has good reviews.
Using a water spot remover would be a great place to start before you proceed to polishing. This is in line with the "the least aggressive approach first" school of thought. I use CarPro Spotless but there are others on the market too.

https://www.autogeek.net/carpro-spotless-water-spot-remover.html
https://www.autogeek.net/gyeon-water-spot.html
https://www.autogeek.net/duragloss-water-spot-remover.html
https://www.autogeek.net/optimum-mdr-water-spot-remover.html

IMG_7202.jpg


These are acidic based products that work to removing the minerals that have caused the water spotting. They don't always work but it's worth trying before going to something more aggressive.

Check out this video at the 14.45 min mark on using water spot removers. Sandro used NV Shift in this case -

https://nvcarcareusa.com/collections/decontamination/products/nv-shift-water-spot-remover

 
OP
OP
Type550

Type550

Well-Known Member
Joined
Jan 28, 2018
Threads
22
Messages
196
Reaction score
113
Location
Australia
Vehicle(s)
Absolute Black 2017 GT Fastback (Manual)
Using a water spot remover would be a great place to start before you proceed to polishing. This is in line with the "the least aggressive approach first" school of thought. I use CarPro Spotless but there are others on the market too.

https://www.autogeek.net/carpro-spotless-water-spot-remover.html
https://www.autogeek.net/gyeon-water-spot.html
https://www.autogeek.net/duragloss-water-spot-remover.html
https://www.autogeek.net/optimum-mdr-water-spot-remover.html

IMG_7202.jpg


These are acidic based products that work to removing the minerals that have caused the water spotting. They don't always work but it's worth trying before going to something more aggressive.

Check out this video at the 14.45 min mark on using water spot removers. Sandro used NV Shift in this case -

https://nvcarcareusa.com/collections/decontamination/products/nv-shift-water-spot-remover

Thanks, I'll check it out for sure 👍🏼

I like the idea of least aggressive method first! 😀


Top