Sponsored

What's In DFB's Cabinet?

OP
OP
DFB5.0

DFB5.0

Well-Known Member
Joined
Mar 15, 2017
Threads
93
Messages
5,458
Reaction score
15,727
Location
Australia
Vehicle(s)
Mustang GT Fastback
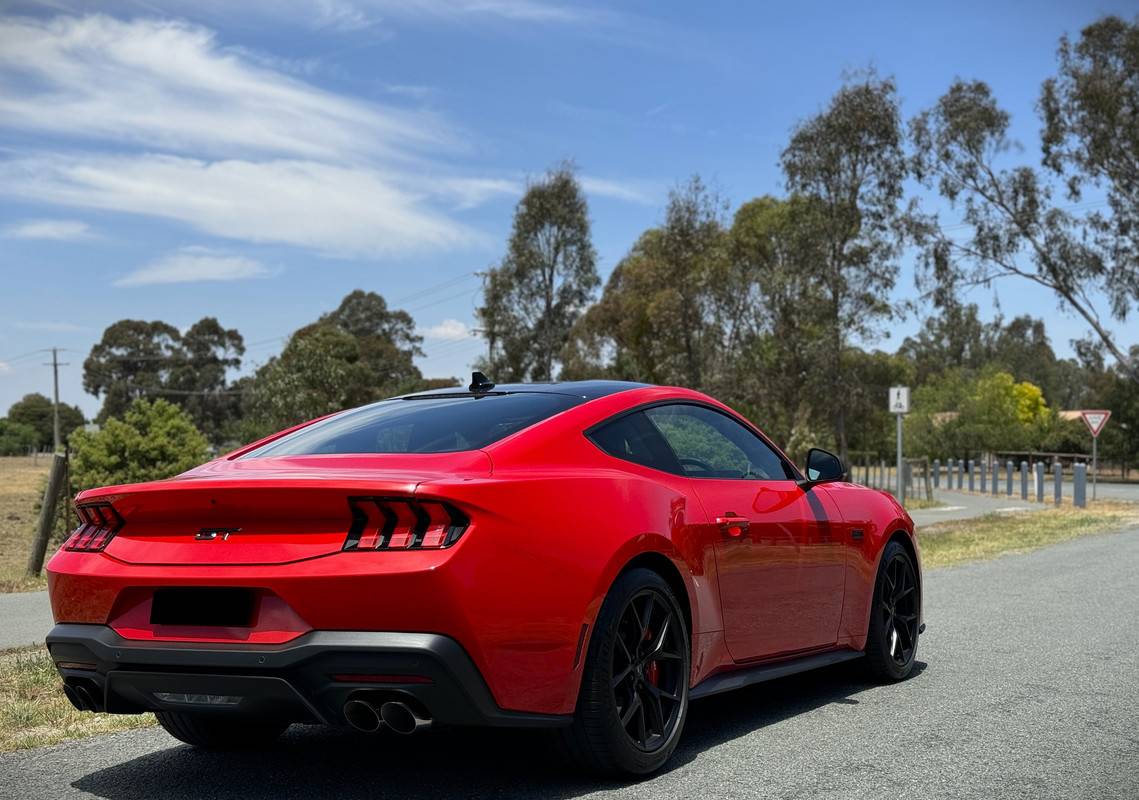
Ok, so I went for a little drive today and wow, Magneride paid for itself today!

Previous to today, my assessment of Magneride centered around how much it improves the ride quality in normal driving conditions. Sure, its still got an edge to it, but its much more refined than what I'm used to.

There is a short, sharp little road that I know of, different to what I have previously described and shown in the above videos. It was clearly designed by someone who likes to drive, the larger sweeping bends are connected to a series of tight lower speed corners that really test the steering response and chassis composure. This sort of road is not normal for this area, I live in a flat valley, winding mounting roads are few and far between.

The first run I did in with my Custom Mode 1, which uses the Normal base drive mode, meaning Normal Dampers, I then have the steering set to Comfort, the DSC on and the auto-stop-start turned off. Oh, and Track exhaust. 😉 With the gearbox in manual, I attacked the road and came away impressed, throttle response from this engine is superb, the steering kept up and the brakes brilliant.

I then decided to turn around and do the same run in Track mode. This puts everything to STUN, so the firmest dampers, firmest steering, sharpest throttle response, track exhaust. This does impact the ride, but WOW, the car felt tight and confidence inspiring, basically removing the body movement present in normal mode. This includes when accelerating, braking and cornering. I can't say that my previous Mustang could be described as confidence inspiring, it was more a case of hanging on.

I then went again in the tamer Sport mode, which is generally designed for on-road performance driving. This reverts to the quieter sport exhaust and dials the dampers down a notch to account for typical lumpy public roads. It keeps the heavier sport steering though. Important to note that Sport does not illuminate the DSC-off light on the dash like Track does, which is probably smart. In Sport mode, the car felt impressive, but not as tight as the Track mode damper setting, didn't have the same rev-match punch and the quieter exhaust was certainly noticed.

So, for driving like this, I have gone and made a separate Custom Mode. Track for the base drive mode, mainly for the damper selection, but also for the killer exhaust mode, sharper throttle response, sharper downshift blips. I then disable the stupid auto-stop-start. Ideally, I'd want comfort steering, but that is not changeable in this mode.

Take aways? Magneride rocks! If you are on the fence, just get order it. It has a two-fold benefit, superior ride for when cruising, but a much sharper feeling car when the red mist descends. So happy I chose this option. :rockon:

IMG-2910.jpg
Sponsored


50ALM

Well-Known Member
Joined
May 6, 2022
Threads
6
Messages
167
Reaction score
296
Location
Brisbane, Australia
First Name
Adam
Vehicle(s)
MY16 Toyota RAV4 Cruiser, MY24.50 S650 GT
Looks like PAN only lost 135 viewers on the day with his 2024 Awards video fallout.
(0.013%)

FWIW

 
OP
OP
DFB5.0

DFB5.0

Well-Known Member
Joined
Mar 15, 2017
Threads
93
Messages
5,458
Reaction score
15,727
Location
Australia
Vehicle(s)
Mustang GT Fastback
My routine of late has been to get a few things done in the morning, then jump in a car and go for a drive in the afternoon. Yesterday I picked up a GoPro head mount strap and was keen to get some footage of the new Mustang, nothing crazy, just a cruise and maybe a little squirt to showcase the sound of the engine.

I took several small videos, inspected the footage of the one I thought was the best and came home satisfied. After I uploaded the videos, non are them are usable. :facepalm: The camera was angled too high as I rested against the headrest, so the view of the gauges is limited to a slither at the bottom of the shot, the rest a view out the window and the headliner. :facepalm: With how the camera sits on your head, despite checking in the vanity mirror, it's hard to see the viewing screen to check your angles.

But that's video, for me anyway as I fumble my way around this new medium. I will reshoot the videos tomorrow, with a repositioned camera. If there is some consolation, the car looked and sounded great on camera.
 

Sponsored

skinnyb

Well-Known Member
Joined
Jun 25, 2022
Threads
12
Messages
3,663
Reaction score
9,270
Location
Knoxville TN
First Name
Alex
Vehicle(s)
21 Mach 1. FJG, Tremec
I put my Go Pro on my passenger head rest for interior shots one time, got a mount for the head rest post. Worked pretty well, I agree the head mount is a bit too high for POV inside the car. I have a hat mount too, might try it sometime. I ususally stick to the boring mount on the center of the dash that gets the hood in half the shot and outside in the other half. But the audio is on point though :)
 

GT 550

Well-Known Member
Joined
Sep 4, 2017
Threads
31
Messages
2,238
Reaction score
1,993
Location
Australia
Vehicle(s)
Black GT MT S550
IIRC I've seen a few YT folks using a suction cup for the window or windscreen and/or a tripod set up in the back seat and held in place with seat belts. Not sure if this is helpful:


skinnyb

Well-Known Member
Joined
Jun 25, 2022
Threads
12
Messages
3,663
Reaction score
9,270
Location
Knoxville TN
First Name
Alex
Vehicle(s)
21 Mach 1. FJG, Tremec
Take Two! Or is that Take Six? :wink:


Not perfect by any means, but I'm enjoying the challenge.
Very nice, love the POV view, and the car does sound great :) Makes me miss my 10 speed GT, it was so smooth and quick... However, I am still wierded out with everything being bass ackwards (to us US folk LOL)... But interesting nonetheless :) And the only other thing that would drive me absolutely bat shit crazy is the service sticker on the windshield. I always rip those things off when the dealer puts them on. Annoying to me they still use those things.
 
OP
OP
DFB5.0

DFB5.0

Well-Known Member
Joined
Mar 15, 2017
Threads
93
Messages
5,458
Reaction score
15,727
Location
Australia
Vehicle(s)
Mustang GT Fastback
Changing gears today..........................

IMG-2940.jpg


I have been planning this project for nearly a year, and I've had the parts sitting in the cabinet for months. This engine is off my very first lawn mower, one that made me a fortune over the years. It's been a smoker for a while now, so I thought I would have a go at re-ringing it. Not going to lie though, I've been apprehensive doing this.

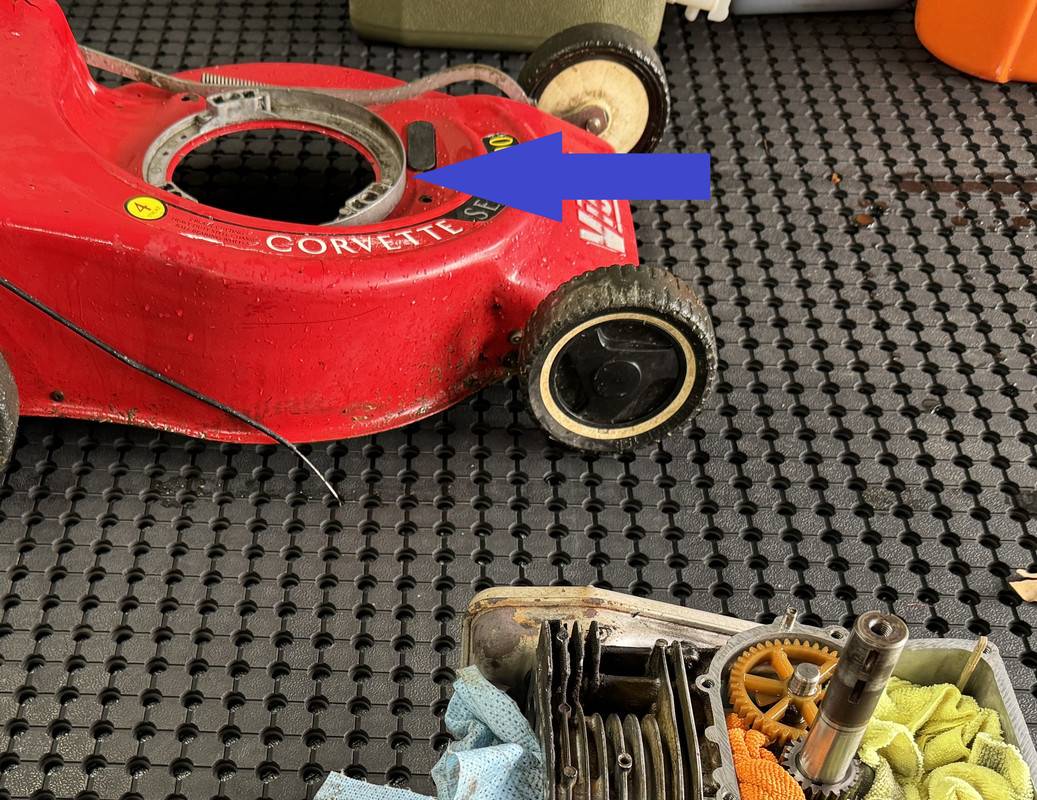
First up, I disconnected the throttle cable. On this era of Victa, the Briggs & Stratton engines had an alloy adaptor ring that sits between the deck and sump. This helps space the crankshaft to the correct height and accounts for the different mounting points between Briggs and the Victa engine. Removing the blade carrier first, you then remove the three bolts that secure the engine and adaptor ring to the chassis.

IMG-2937e.jpg


I then drained the oil and fuel from the engine.

I have to admit, the next step nearly had me backtracking and putting the project on ice. That next step being the blade disk boss that is press-fit onto the crankshaft. There are two ways to remove these, by hammer or puller. However, I don't have a vice or anvil to support the crankshaft to "shock" it off via hammer. So, I needed a puller. I had actually planned on buying a puller, but for some reason didn't bother. So, off I went to Total Tools to buy a puller.


Then, after a little bit of stuffing around, I was ready to quit. But, after consulting Youtube and a change in technique, the blade boss slid off the crankshaft as easy-peasy! I have said this before, but Youtube is such a brilliant resource for learning. At one point, I thought I was going to have to introduce heat, but not something I wanted to do for obvious reasons.


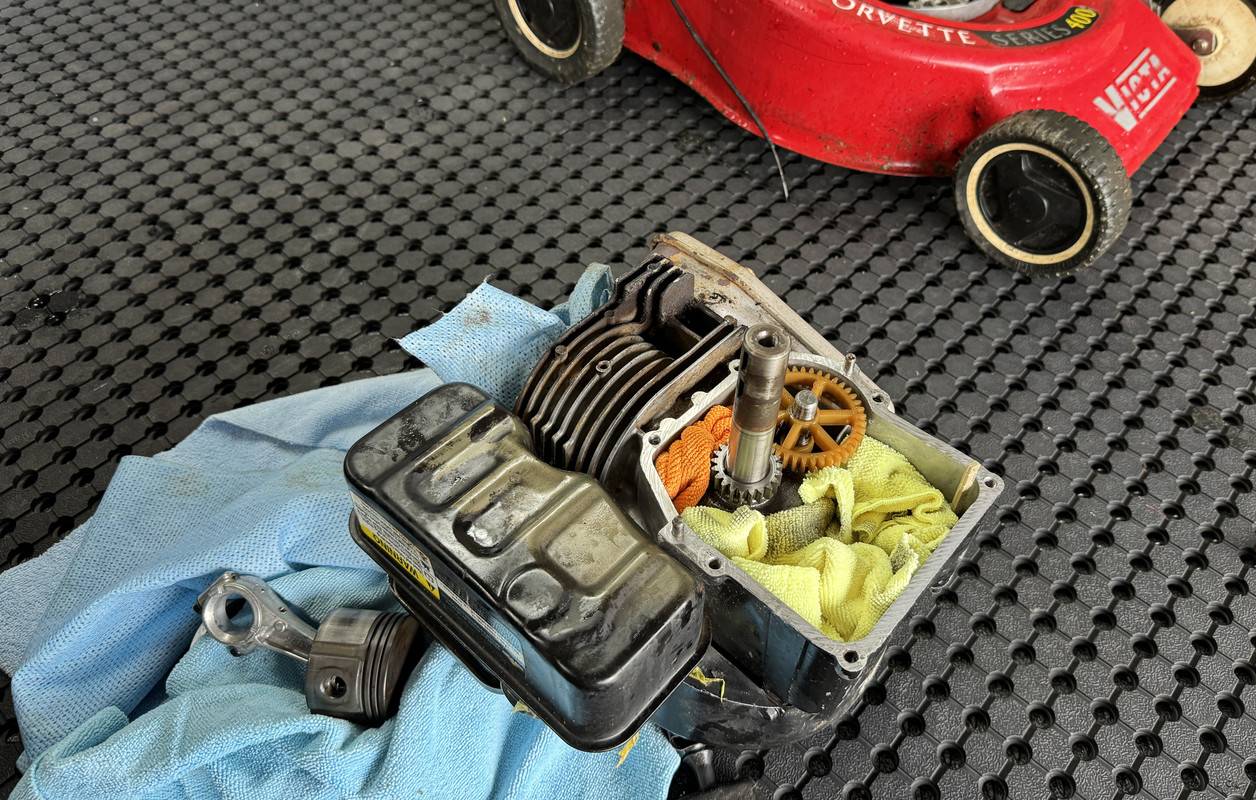
From here, things went relatively smooth. After cleaning off the 23 years' worth of crud from the underside of the engine, I then cracked the sump bolts loose. I then lightly tapped on the sump, which slid easily down and stopped. So, I tapped the sump back in place and lightly scuffed the crankshaft where the blade boss had been, the sump then slid off with ease. I then removed the cylinder head, making sure to keep track of the bolt locations as there are longer versions for around the valves. I then removed the oil slinger, cracked the conrod bolts, tapped off the cap, then pushed the piston out of the cylinder.

It was then clean, clean, clean. Starting with the piston, I removed the old rings, then started removing the buildup of carbon on the crown. Because of the oil consumption, there was also significant carbon deposits on the cylinder head and valves, the crankcase and sump were surprisingly clean, a testament to frequent oil changes. I then removed the old gasket material off the head and sump mating surfaces, followed by cleaning everything with kerosene and set aside ready for reassembly tomorrow.

The piston has some very mild scoring, but they are smooth and won't catch a fingernail, the cylinder likewise. There was plenty of blowby on the piston though. To be honest, I wasn't expecting anything more than that, the engine always had plenty of fresh oil in it, so the wear on the piston and cylinder is from use, not abuse.

Having done all that, I'm still apprehensive about the end result. At the very least, I'll be happy to have the engine back together and running, but ideally, I hope to have cured its smoking habit.
 

Sponsored

kilobravo

Well-Known Member
Joined
Aug 10, 2019
Threads
95
Messages
8,736
Reaction score
8,859
Location
Corpus Christi, TX
Website
kilobravo.com
First Name
KB
Vehicle(s)
'16 CT6, '18 SD, '20 GT 500
I have said this before, but Youtube is such a brilliant resource for learning.
I couldn't agree more, D and The Toob has saved my bacon more times than I'd care to admit.

Do hope the mower fires right up and no smoke. <smile>
 

larr12

Well-Known Member
Joined
Jul 9, 2020
Threads
17
Messages
1,123
Reaction score
1,723
Location
USA
First Name
Alberto
Vehicle(s)
2020 Mustang PP1
ADS with a 25% discount with code BF24

Car Supplies Warehouse with a 20% discount with code BF2024
 
Last edited:
OP
OP
DFB5.0

DFB5.0

Well-Known Member
Joined
Mar 15, 2017
Threads
93
Messages
5,458
Reaction score
15,727
Location
Australia
Vehicle(s)
Mustang GT Fastback
Work continued on the Sprint 375 rebuild this morning. With the hard work done yesterday, it was all about putting it back together.

I didn't fully disassemble this engine, the exercise was simply to replace the rings and see what that got me. Apart from burning oil, the engine started easily and was strong running. Despite working it to near death, it was always well maintained with fresh oil and clean air filters. If you can imagine a teenage DFB, well I looked after that engine like one of my cars today!

I hope you can tell the sentimental tone so far, because that is how I feel about this mower. It started my mowing business in my early teens and went on to make me a LOT of money over many years. Even after upgrading to bigger and better machines, I would often take this mower with me, its just so light and easy to use. It owes me nothing, and so I have kept it as a reminder of my youth. I haven't taken it on a job for a very long time now, but it gets the occasional run on my own lawns.

To be clear here, these engines were basically a throw-away item, rebuilding one is not an economically viable proposition. So unless you are sentimental like me and have the time and desire to do so, then you would be better served replacing the engine with a long block for as little as $250. In my case, I used about $70 in parts, a $40 puller, a $60 ring compressor and $20 for ring pliers, so yeah, an extra $60 would have bought me a new engine. :giggle:

Briggs & Stratton 3.75hp (575EX Series) Lawnmower Engine – Small Engine Warehouse Australia

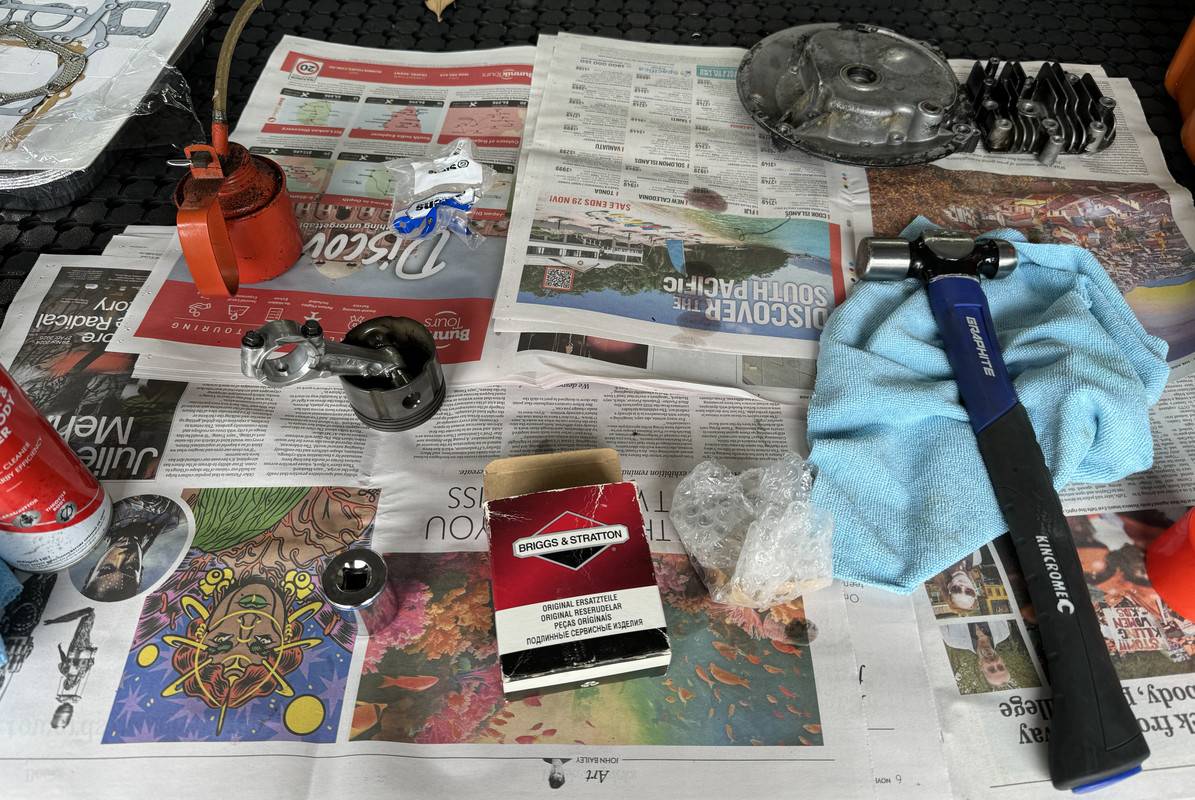
Parts for this partial rebuild involved piston rings, and the associated gaskets and seals. I decided to use OEM Briggs & Stratton rings, then aftermarket head and sump gaskets, and a new Stens lower crank seal.

IMG-2941.jpg


The first thing I did today was to remove the camshaft, lifters and crankshaft cam gear out of the crankcase to provide better access for reassembly. I didn't want to mess with these, but they simply lift out so easily that there was no reason not to. I then cleaned and inspected these parts and set them aside for later. The lifters and (plastic) cam had minimal wear, remarkable considering how much work this engine has done.

After giving everything a final clean down, including the cylinder and crankcase, I started by installing the new oil seal on the sump. I then lubed the piston and installed the piston rings, the hardest being the two-piece lower oil control ring which fought me a little. After each ring went on, I staggered the end gaps and clamped it in the ring compressor, which was a little tricky but I got there. Time for everything to go back together!

First up, installing the piston and rod back into the cylinder. After applying oil to the cylinder, the conrod big end and more on the piston, I lined up the piston and ring compressor with the cylinder, then gently tapped the piston down with the handle of my hammer. I don't know if its just me, but I love the tap-tap-tap sound of a piston being installed into a cylinder. The conrod was then lined up with the crankshaft, both with plenty of assembly oil. I then installed the end cap, again well oiled, then torqued in increments to 11.3 Nm. A quick spin over verified my work.

Next, re-installing the lifters, oiled for good measure. These simply slide back into place, the oiled camshaft then drops into its recess in the block, holding the lifters in place. The oiled crankshaft timing gear slides onto its key, making sure to rotate the crank first to align the timing marks on the gear and camshaft. The camshaft driven oil slinger then drops onto the top of the camshaft.

It was then time to start sealing the engine back up. The gasket kit comes with several paper sump gaskets in differing thickness, I just went with the standard 0.015" item. With the gasket lined up and held with the dowels in the block, I then oiled the crankshaft and oil seal and gently tapped the sump back down till it was nicely seated and flush. I then went around re-installing the sump bolts, firstly winding them down until they seated. Working in a cross pattern, the bolts were torqued down in increments to the 10.17 Nm spec, re-checking a few times to make sure it was all down square.

Next, the cylinder head. Using two of the bolts to hold the new gasket in place, I lined the head up with the block and wound the bolts down until they seated. With the rest of the bolts seated, I then torqued them to 16 Nm, again working in a cross pattern and in increments till the spec was achieved. The supporting bracket was then re-secured and the spark plug installed.

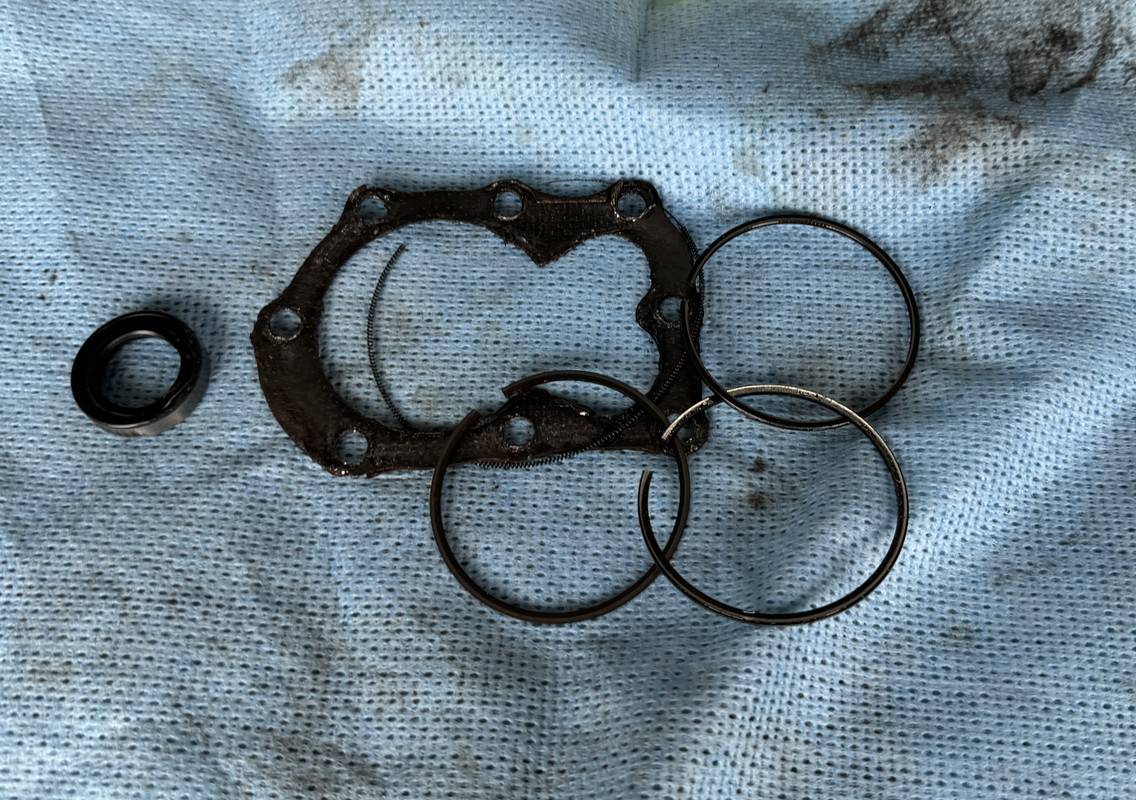
Old worn rings, head gasket and oil seal.

IMG-2943.jpg


Getting the engine back on the mower deck took a little patience to align the three bolts and adaptor plate. I then re-installed the blade boss and blade carrier, then connected the throttle cable. With 600ml of fresh Penrite SAE30 mineral oil in the sump and fuel in the tank, it was time to fire it up, fire it up, fire it up, fire it up...............................(sorry, a Taryl Fixes All reference).

After priming, the engine took three pulls to fire, accompanied by a small plume of smoke as the assembly oil burnt away, followed by some minor lingering smoke. I have to admit, I was a little concerned my efforts hadn't been completely successful at this point, however it was only a gentle waft rather than a constant stream, indicating that it was simply oil in the muffler burning off. After leaving the engine to run for 10 minutes, it was running clean, clear and strong...........no smoke!

I DID IT!! :rockon:


Apart from solving the smoking habit, the most noticeable result of this project was how much compression the engine now has, evident from the extra effort required to pull the engine over.

My biggest fear in the lead up to do this repair was getting everything back together in the right place. But this engine is so bloody simple, that when I stepped back and thought about it yesterday, it's almost impossible to put it back together the wrong way. The piston and rod assembly can only go one way, otherwise you wouldn't have access to the end cap bolts. The camshaft, lifters and timing gear are all recess fit, making it simple to remove and re-install correctly.

As I said earlier, you would never rebuild one of these engines unless its something you really wanted to do, simply because of the throwaway society we live in. And a small engine shop wouldn't want to do it either, the argument being that parts and labor to do so would probably buy you two brand new engines!

But that was not the point here. I wanted to do this for sentimental reasons, but also out of curiosity. As a bonus, I got to learn how to use a puller and piston ring compressor, while also putting my tools to good use. As a learning experience, I would call it a success. But to have also achieved the desired result, as in no more smoking, well that makes me very happy.

(Sorry about the lack of photos for this project. I was covered in oil and filth, which I didn't want all over my camera or phone, and I was also focused on the task at hand.)
Sponsored


Top