Sponsored

Quick Xineering downshift blip module install review

fatony618

Well-Known Member
Joined
Jun 29, 2020
Threads
7
Messages
90
Reaction score
68
Location
NJ
First Name
Tony
Vehicle(s)
2020 GT350R Heritage Edition
Totally agree with this. I used it at my last Road America Track day and it was a game changer for me. I didn't trust the module at first, but once I just relaxed and let it do it's thing it was great. I may go to the track 2-3 times a YEAR.. so for me it's worth it just to go fast, have fun and enjoy without being worried about it.
Alternative suggestion to removing it entirely- as I had the same issue.

After about a month, I decided to do manual heel toe myself - but rather than take out the entire mechanism- I just set the blip at about 15%. Now it mimics an automatic transmission in "S" mode that gives a tiny blip on braking. I got used to it and sounds pretty cool. This way if I ever do decide to track it I still have that option and would set it back to 55%.
Sponsored


Lorne34

Project Hidalgo
Joined
Jun 8, 2016
Threads
60
Messages
3,095
Reaction score
2,928
Location
Wisconsin
First Name
Lorne
Vehicle(s)
2019 GT350
Vehicle Showcase
1
I would probably never remove mine. I have the on/off switch so for the most part is is in the "off" position unless I am doing spirited canyon runs down south or on the track...
 

Biggsy

Well-Known Member
Joined
May 3, 2018
Threads
186
Messages
2,265
Reaction score
1,640
Location
MD
First Name
Warren
Vehicle(s)
'17 GT PP, '10 Tundra
What settings/parameters do you guys use at the track?
 

Lorne34

Project Hidalgo
Joined
Jun 8, 2016
Threads
60
Messages
3,095
Reaction score
2,928
Location
Wisconsin
First Name
Lorne
Vehicle(s)
2019 GT350
Vehicle Showcase
1
What settings/parameters do you guys use at the track?
I have it set to the default/built-in parameters. Not sure if it's too aggressive or not; it seemed to work just fine at Road America. I think on smaller tracks and/or spirited driving you may want to decrease the intensity. If you read the who thread there are comments about adjusting the settings and what has worked for other guys. I will know more myself when I use it again next track season.
 

Lorne34

Project Hidalgo
Joined
Jun 8, 2016
Threads
60
Messages
3,095
Reaction score
2,928
Location
Wisconsin
First Name
Lorne
Vehicle(s)
2019 GT350
Vehicle Showcase
1
I did the install on this as well. Overall not bad, but as noted by many, the clutch switch part is a :curse:! I'll give the spoiler alert up front, though - I went to Road Atlanta, used the module for the first two sessions, then at the urging of my instructor, I turned it off and went to heel and toe and never looked back. I think it would have taken just as much effort to tune the module and my driving for good rev matches as it did to heel and toe. I went the rest of the weekend without using it and this past weekend drove at Barber all weekend without using it as well. I'll be uninstalling the box and putting it up for sale if anybody is interested. Not looking forward to doing that clutch switch again 😡
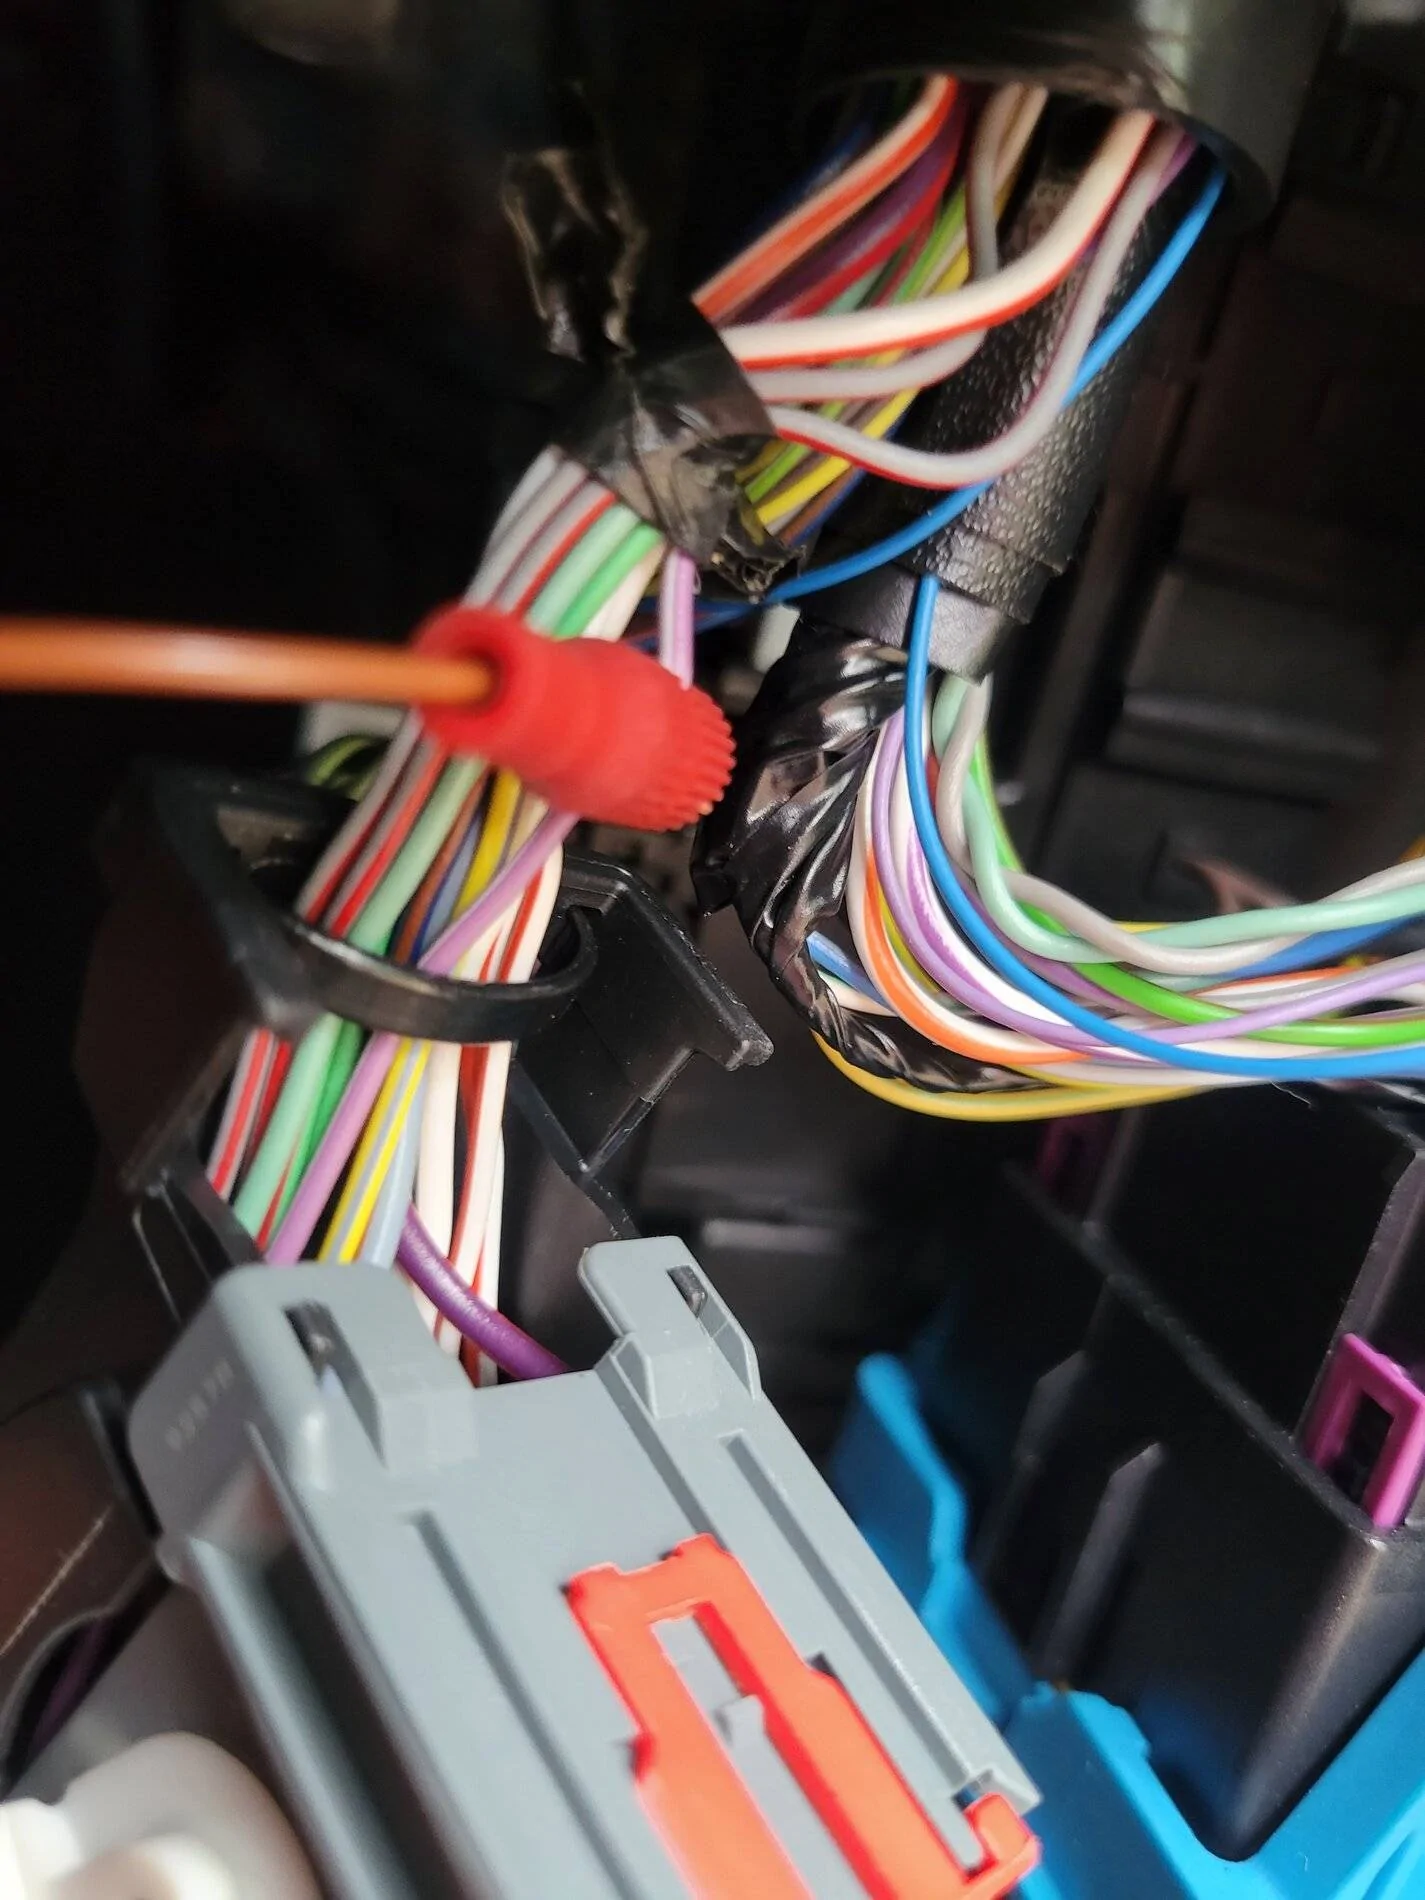
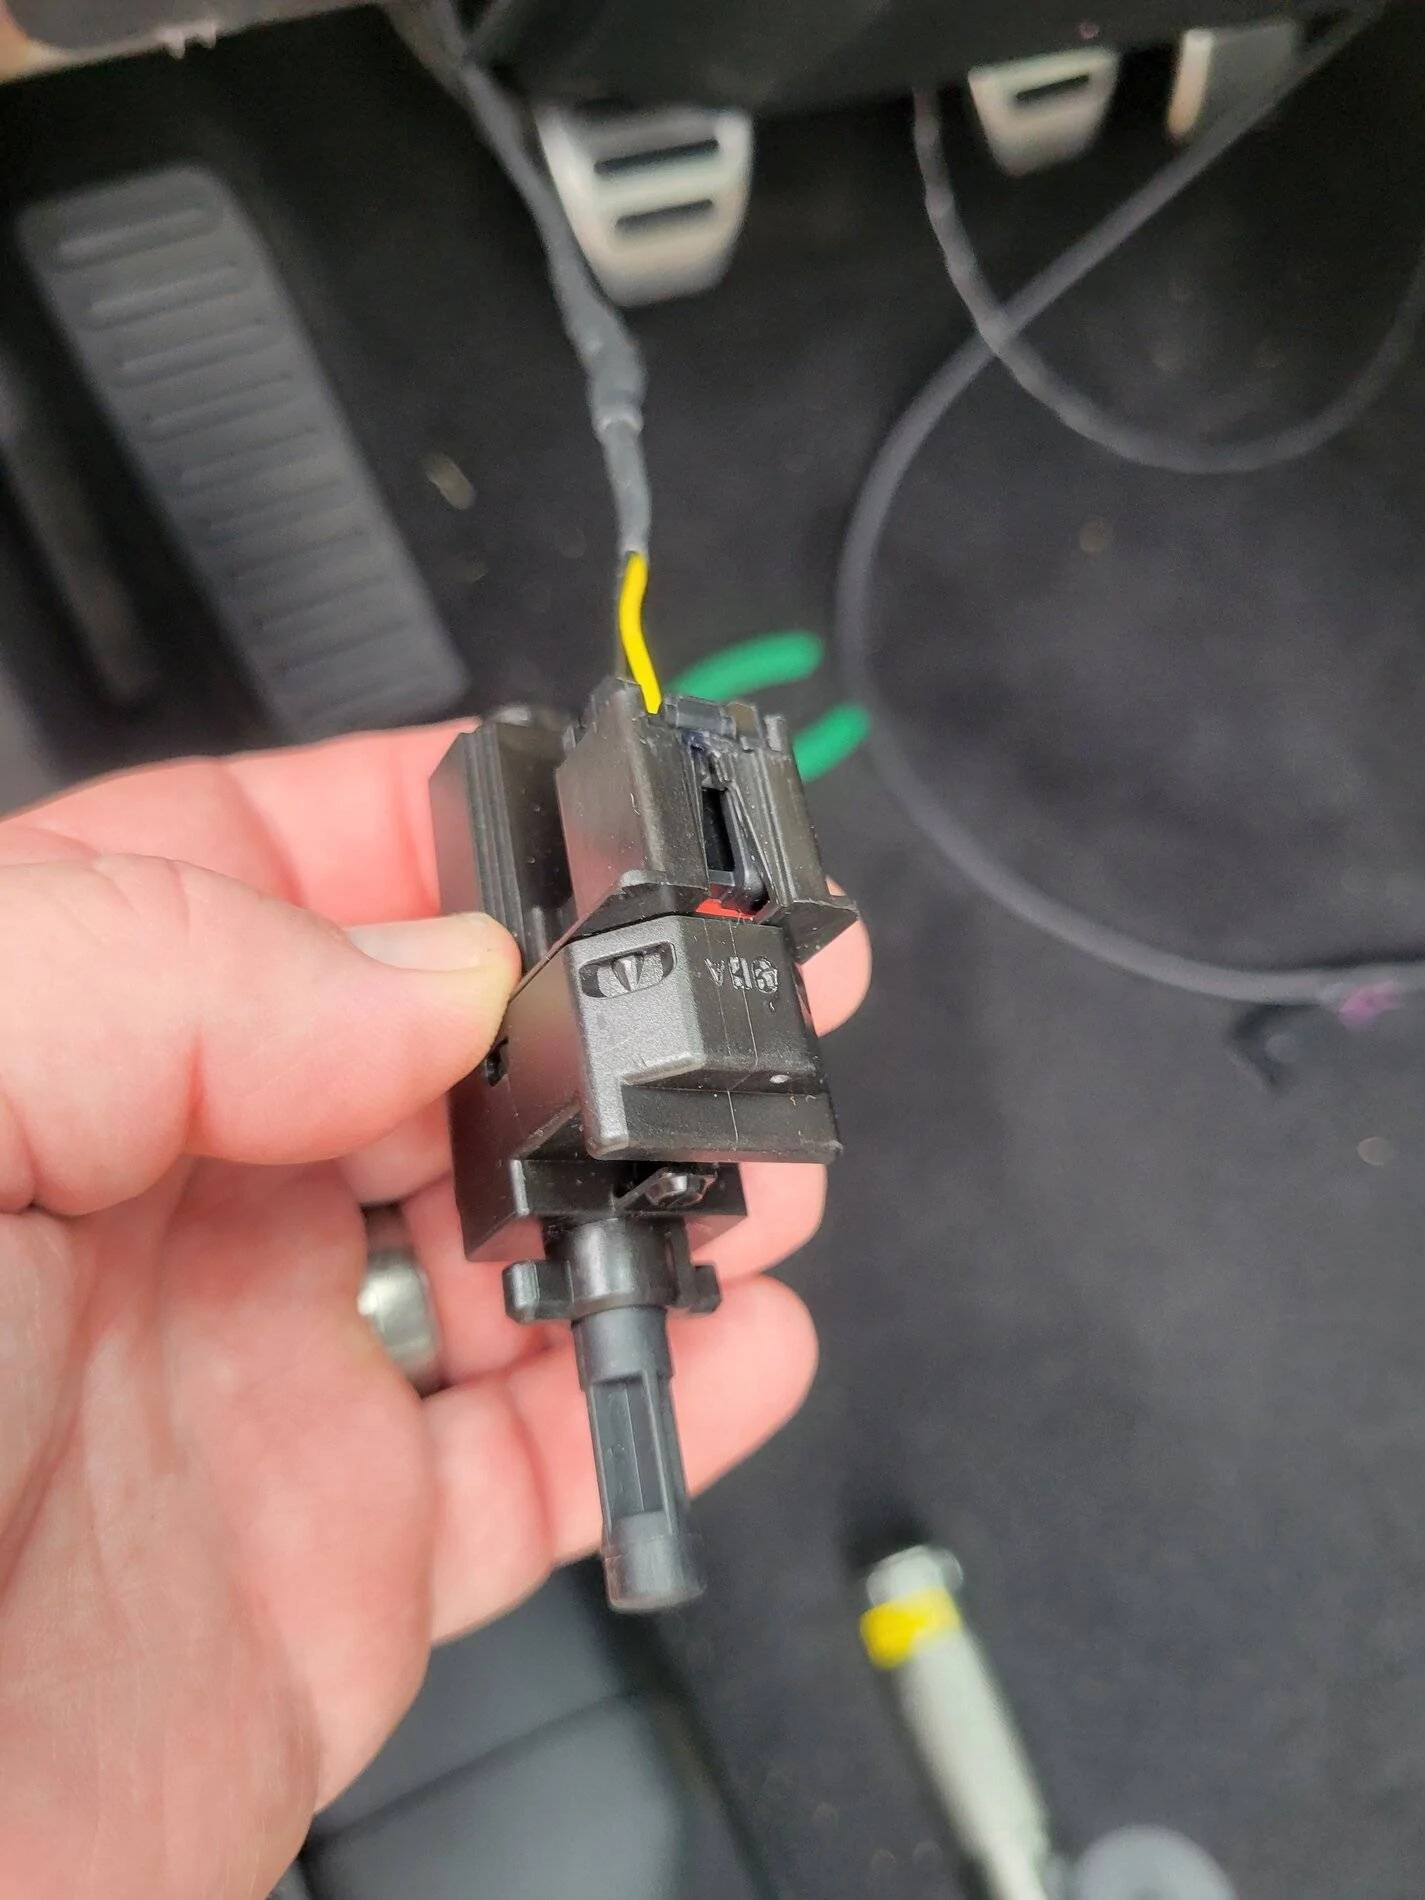
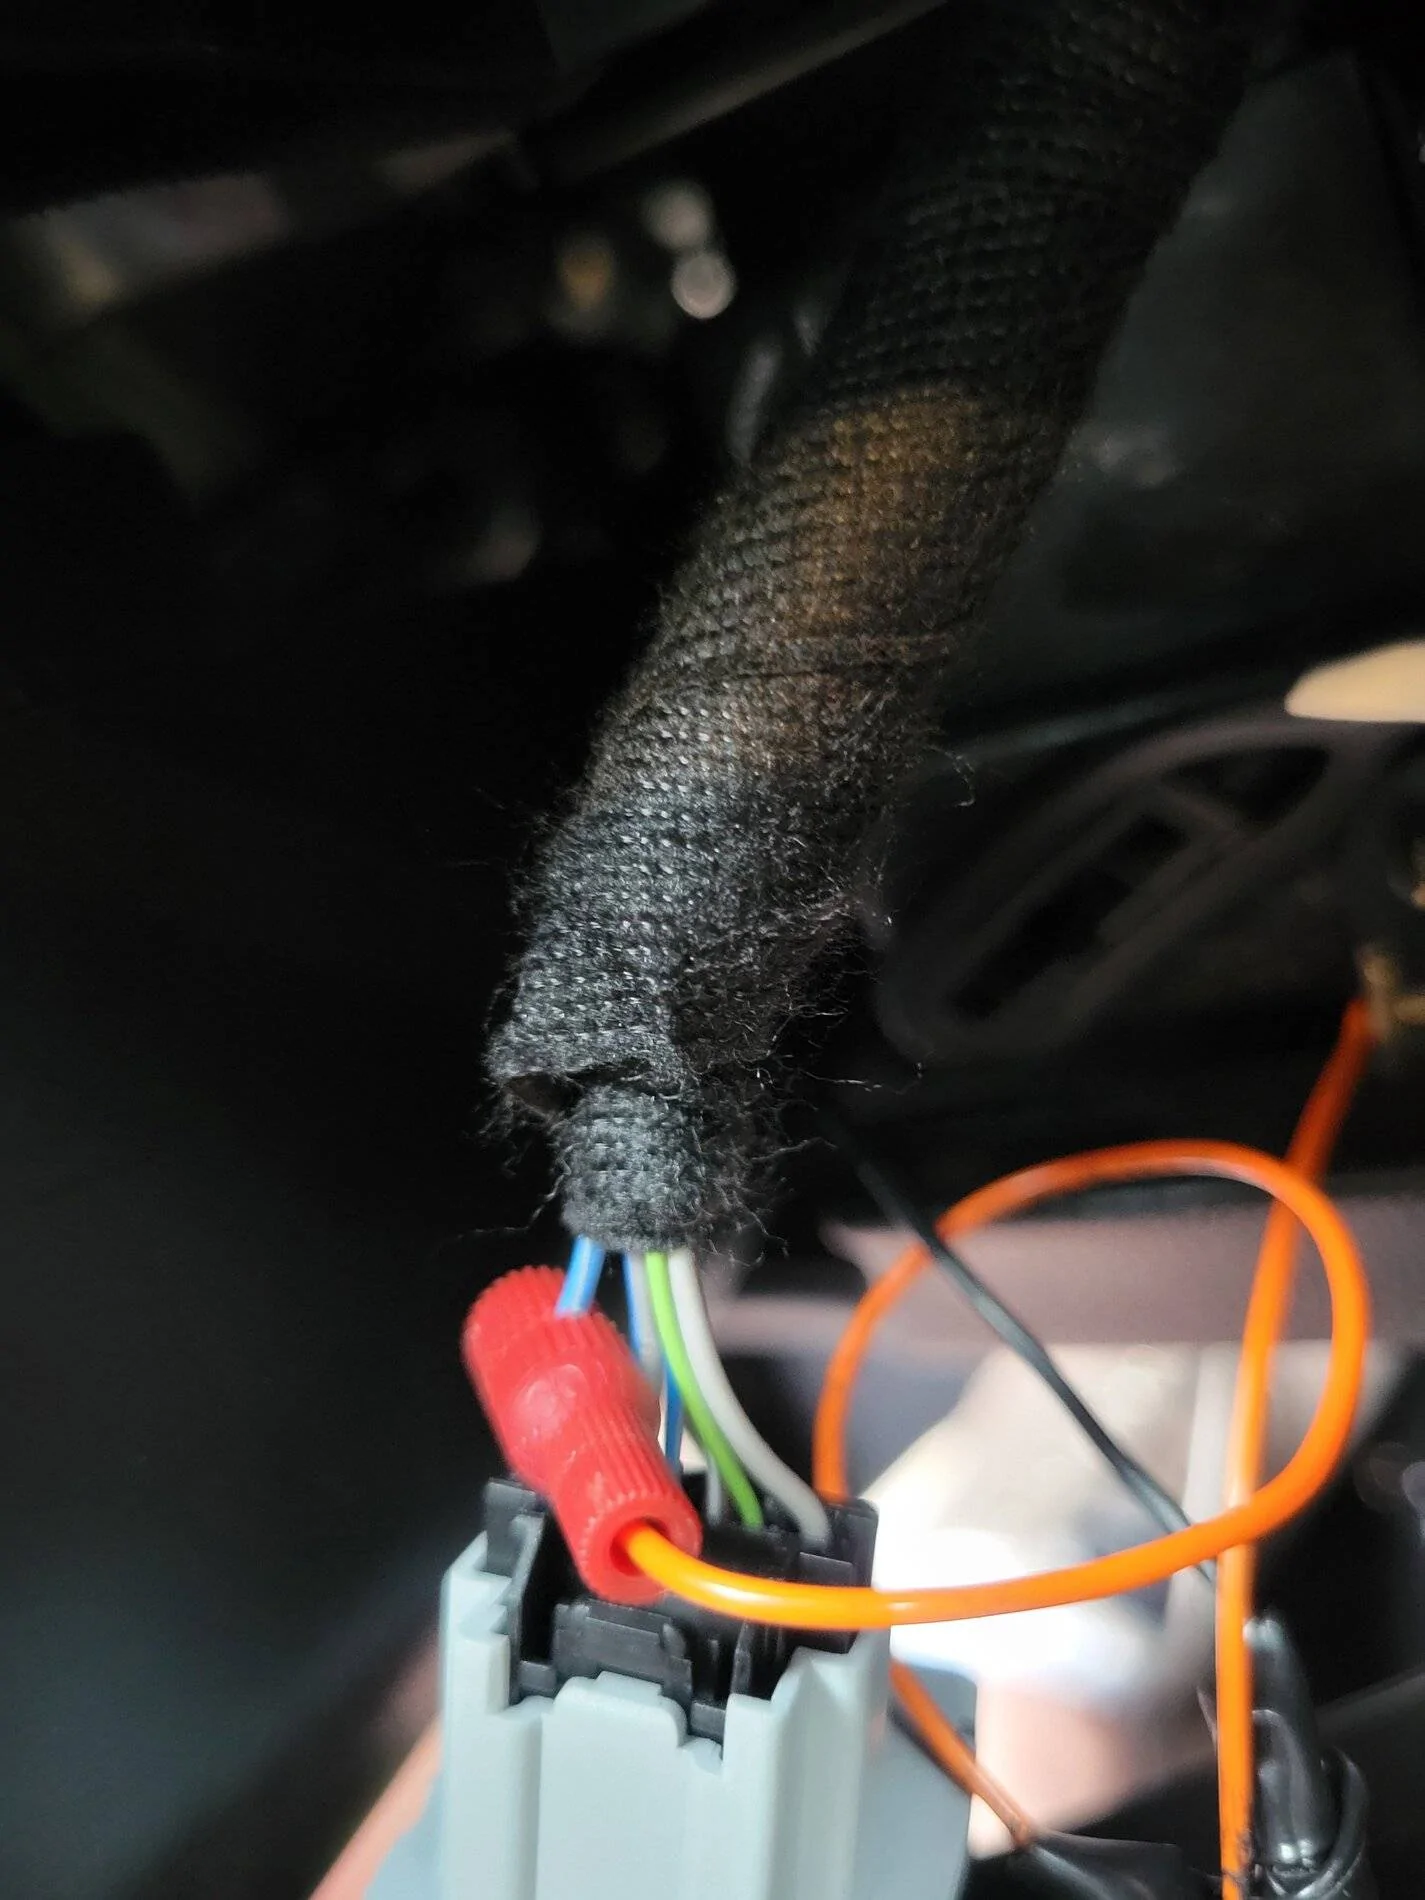
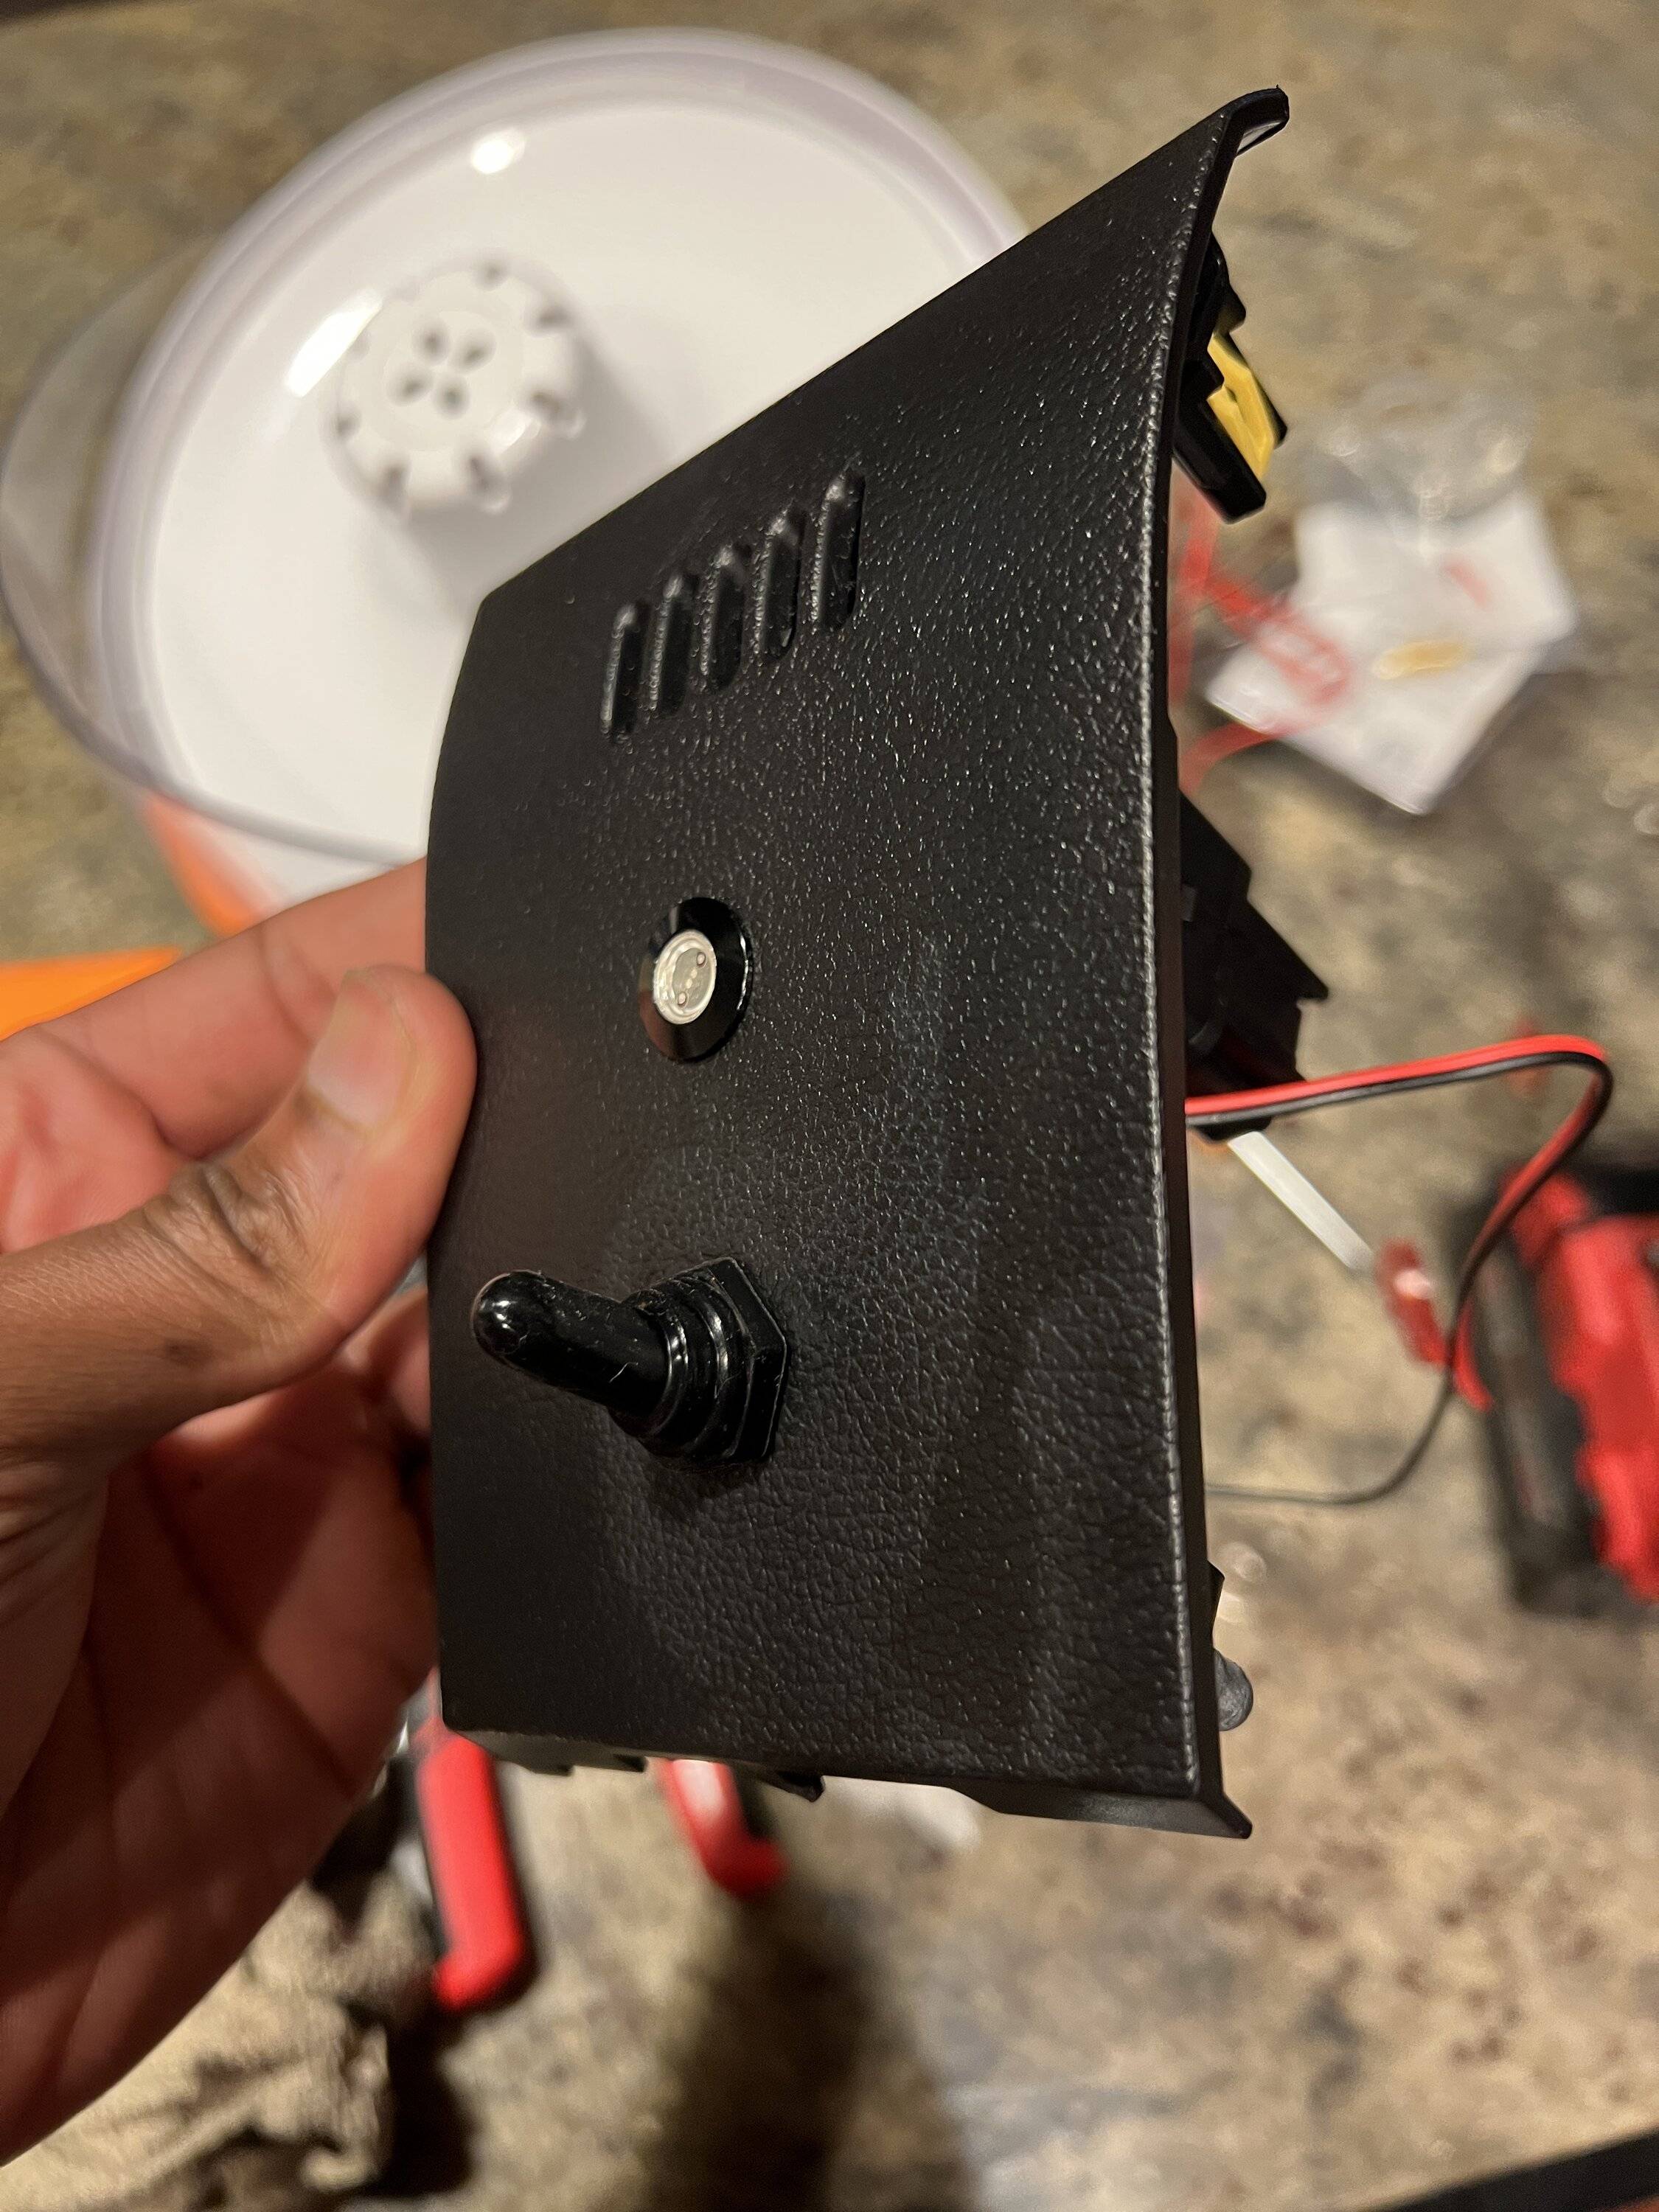
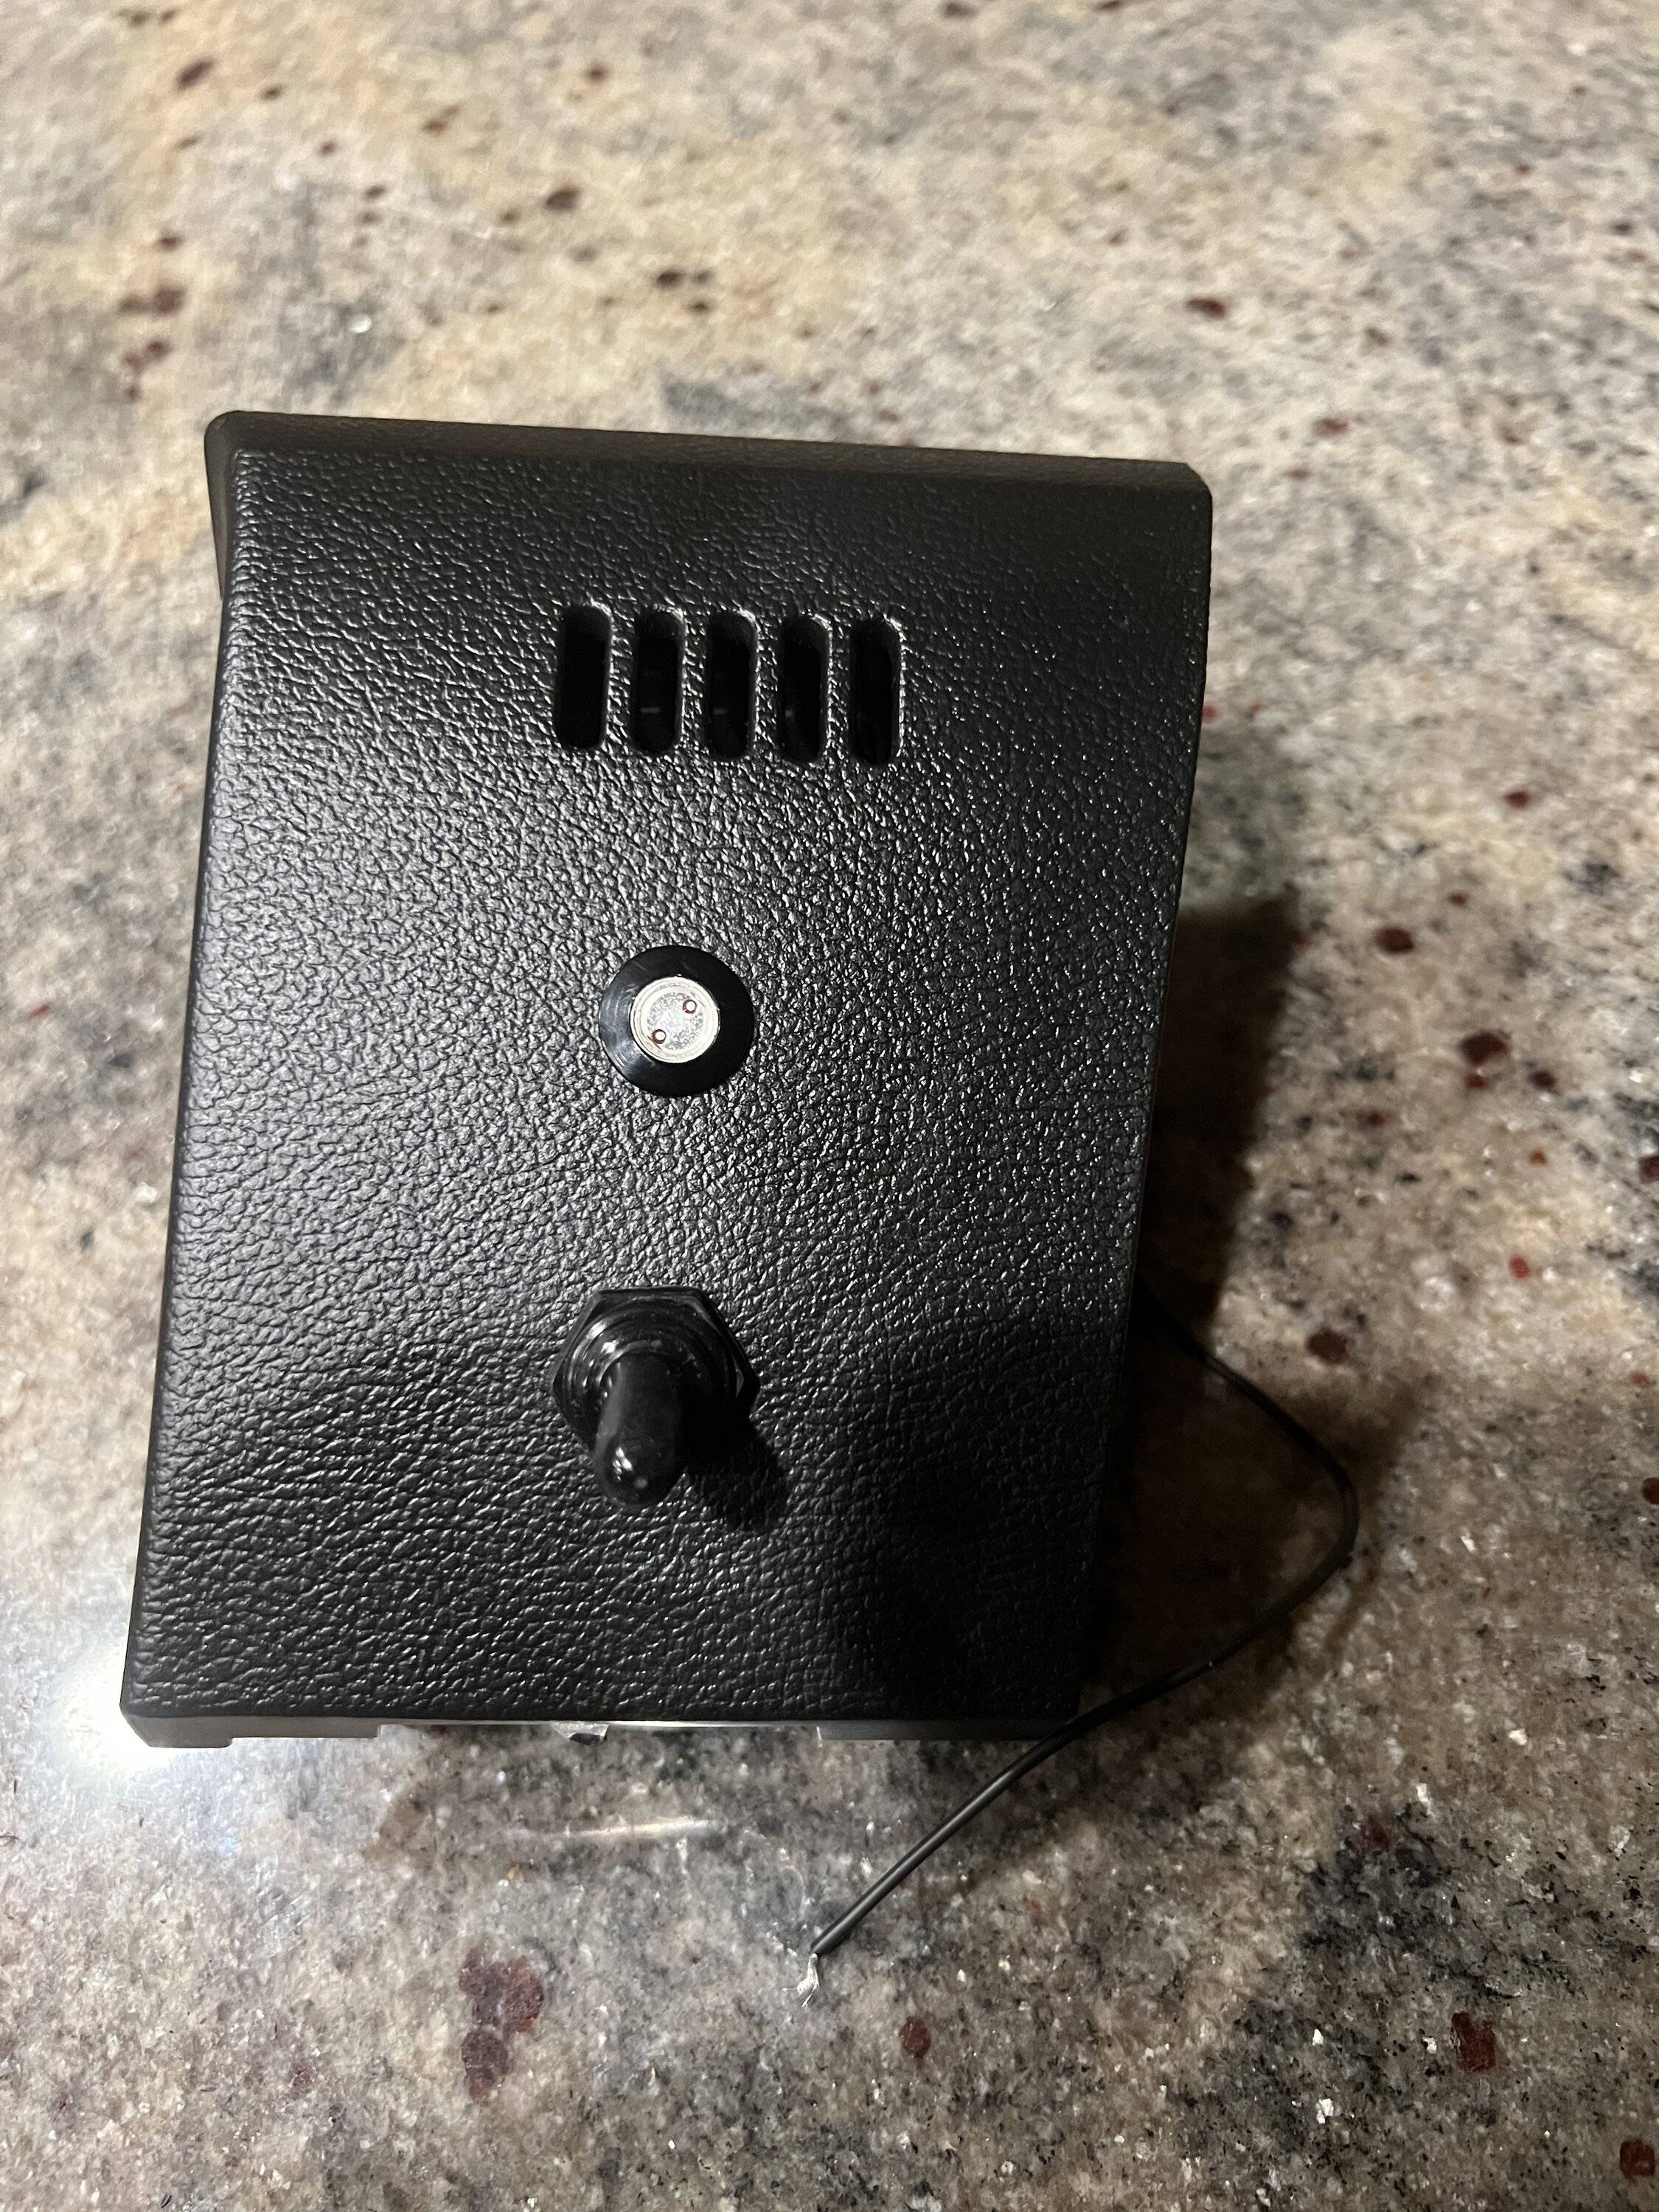
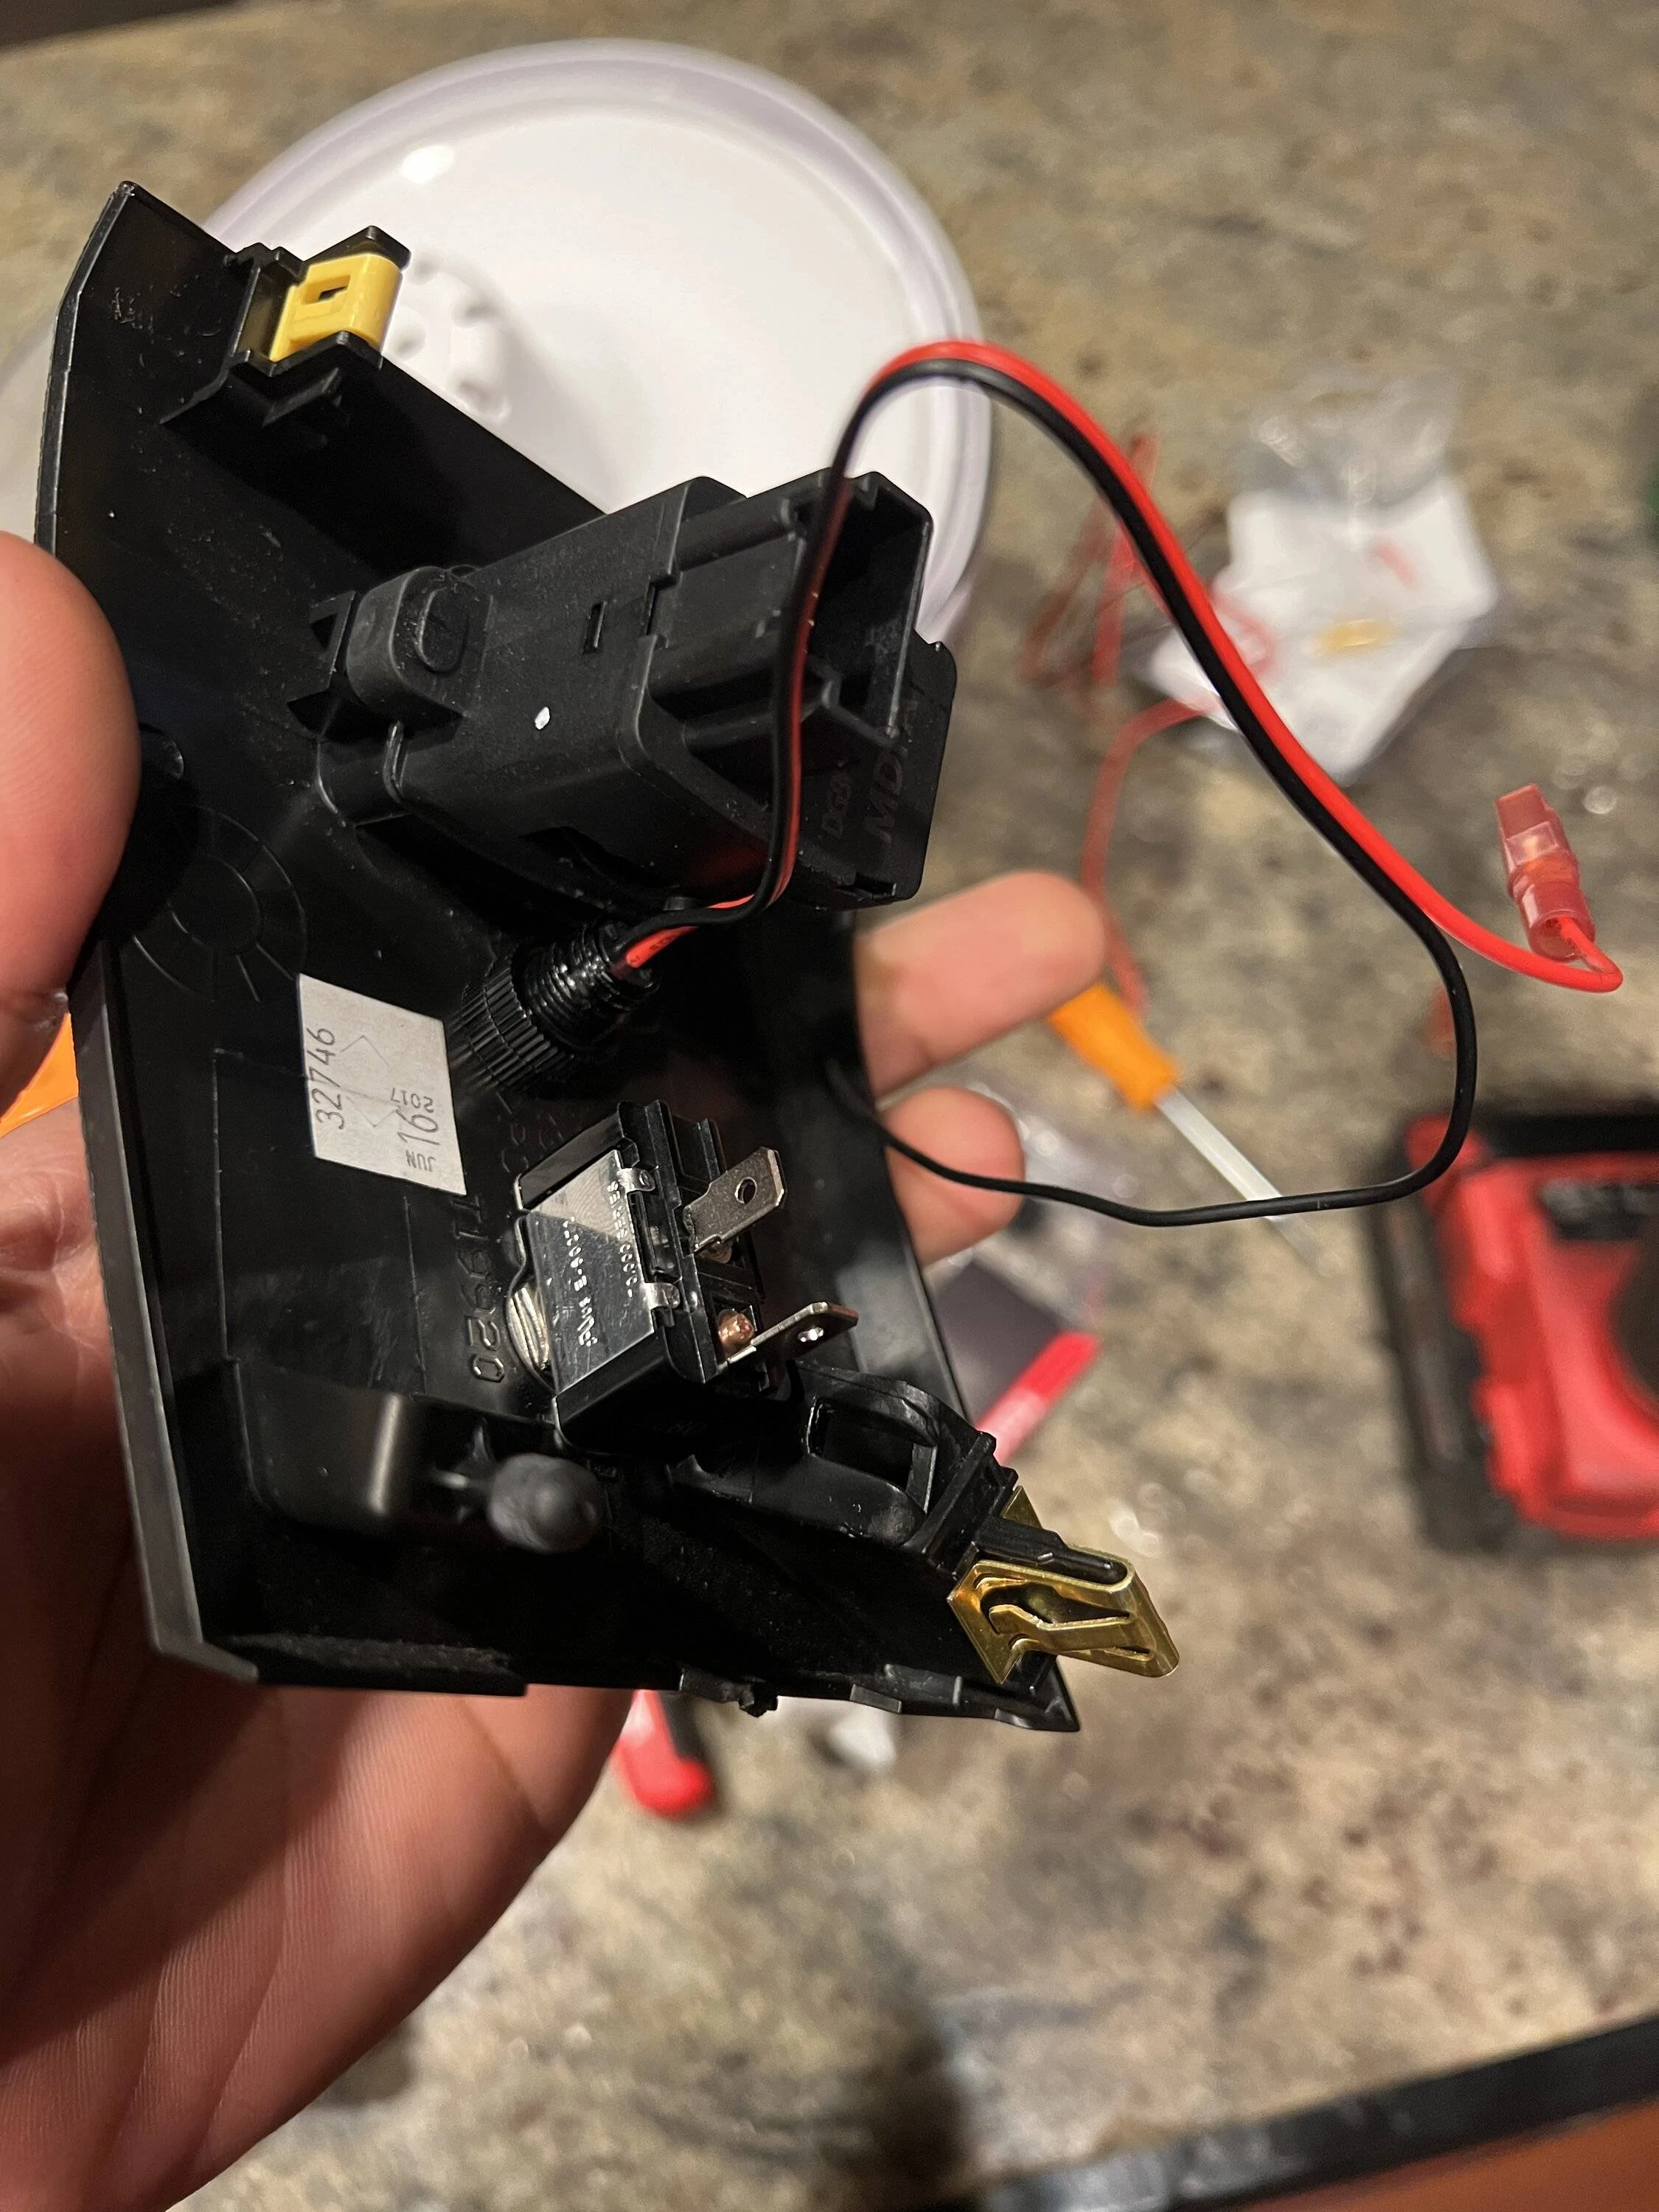
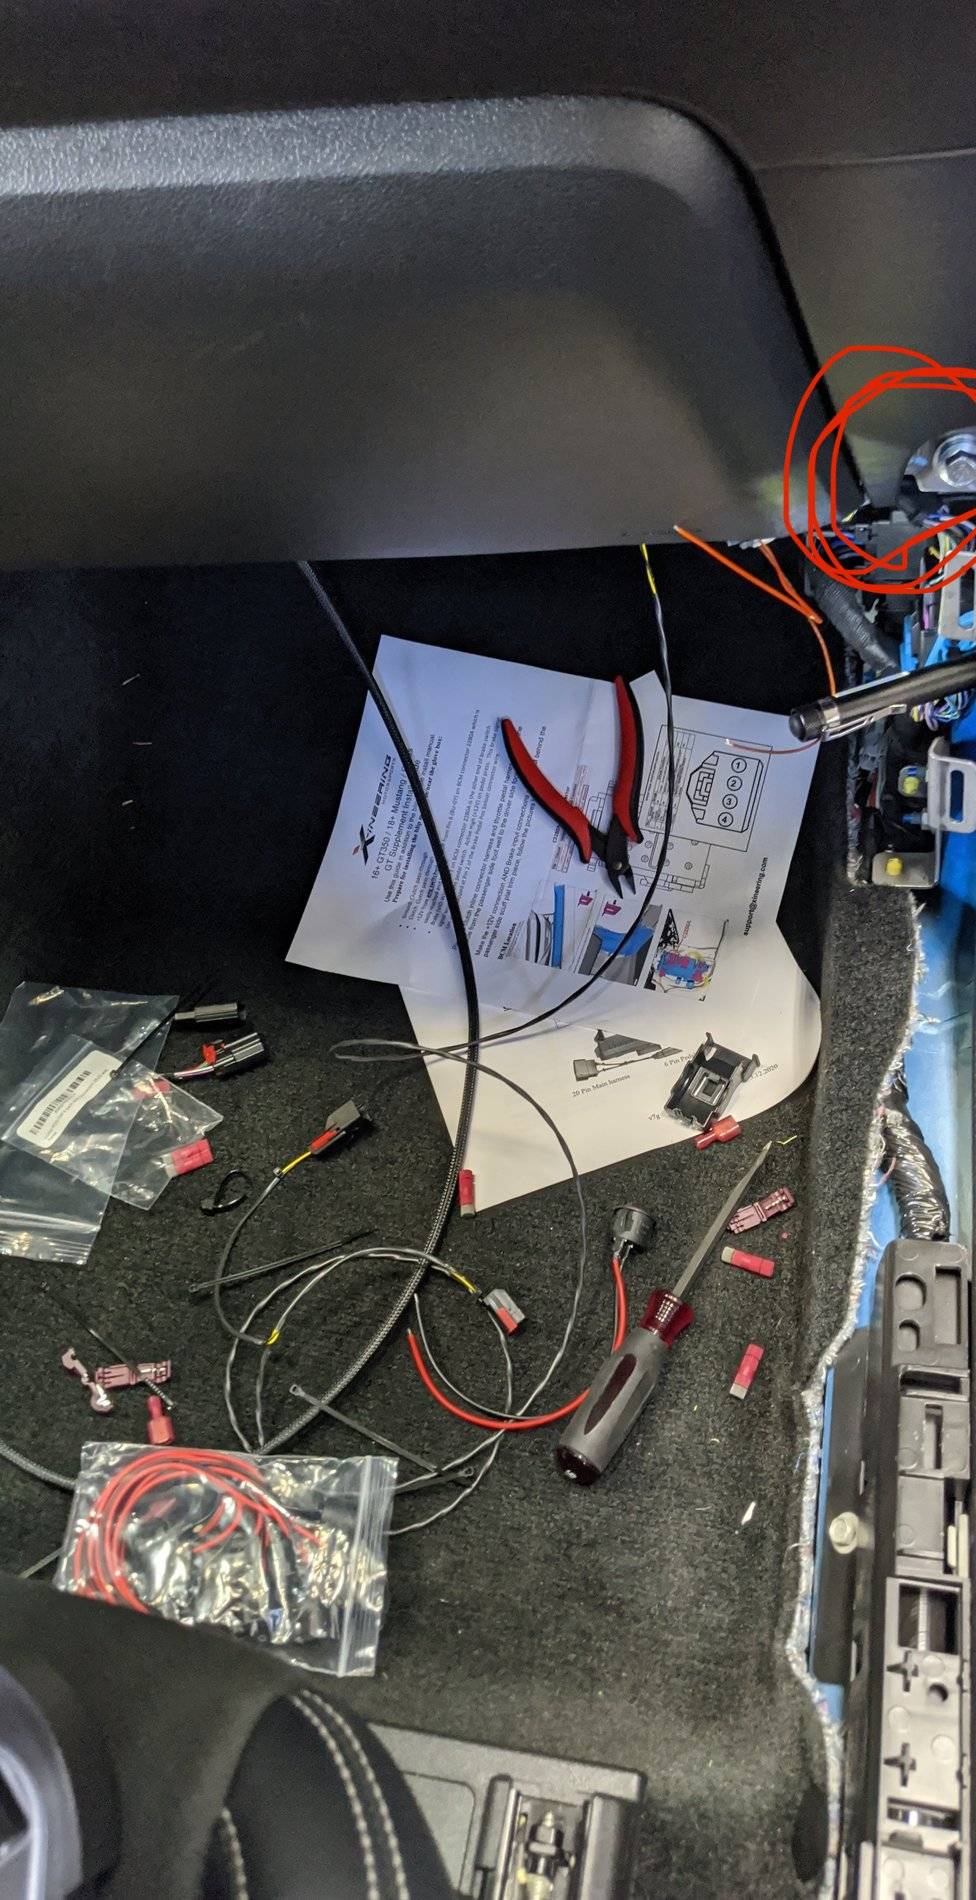
. All that said, for those who are interested in using the module, a couple of install notes and photos follow:

I mounted the Xineering module in the glovebox like so using velcro:

20210625_174718.jpg


Running the wires to the fuse box and across behind the center stack were straightforward.

20210625_173350.jpg


But this switch is the PITA:

20210625_144058.jpg


I pulled the left side panels from the dash:

20210625_141343.jpg


20210625_142556.jpg


and it did help get better access, but still, a royal pain.

Other note is that I installed a switch by the interior air temp sensor to the right of the steering wheel:

20210625_162811.jpg


20210625_163605.jpg


20210625_164120.jpg


Tapping into the wires was easy, I ran a ground to a nut behind the dash, and the lighted switch works perfectly.

20210625_173845.jpg


Everything functions just fine, I just found that it works better for me to heel and toe.
sorry to resurrect this thread, I am working on installing the toggle switch right now in that dash sensor panel to the lower right of the steering wheel. Can I ask where underneath did you connect the black ground cable and did you use some sort of loop connector on the ground or just the raw wire?
Any help would be appreciated!.
 

Sponsored

Biggsy

Well-Known Member
Joined
May 3, 2018
Threads
186
Messages
2,265
Reaction score
1,640
Location
MD
First Name
Warren
Vehicle(s)
'17 GT PP, '10 Tundra
I know you didn’t ask me but I did the same and ran a separate wire from the switch to the bolt on the passenger side kick panel near the fuse box. I got a ring terminal and used the bolt there.

8DF32139-47CD-41BC-A63B-07684500BA66.jpeg


6D988F1E-E42A-428E-AB38-078056806B5E.jpeg


BDE4F019-5AB1-47FB-BC68-D48890C614D1.jpeg
 

Biggsy

Well-Known Member
Joined
May 3, 2018
Threads
186
Messages
2,265
Reaction score
1,640
Location
MD
First Name
Warren
Vehicle(s)
'17 GT PP, '10 Tundra
See circled in the picture

5128F1BF-CAE5-432B-B41B-077A26A6B6F4.jpeg
 

Lorne34

Project Hidalgo
Joined
Jun 8, 2016
Threads
60
Messages
3,095
Reaction score
2,928
Location
Wisconsin
First Name
Lorne
Vehicle(s)
2019 GT350
Vehicle Showcase
1
When I hooked mine up, I used one of those little tiny taps to lift the switched power off the temp sensor on that panel. Since there was already an orange wire running from the switch to the wiring bundle, I just ran a second black wire along with it and used a second tap to connect it into the common wire on the Xineering harness.
HI hope you don't mind a few questions:
1. can you confirm that you tapped into the light blue wire on the temp sensor harness?
2. when you said you ran a second black wire back to the xineering harness, was that the ground wire from the on/off switch and not sure what you mean by "common wire" do you mean a black wire on the harness or the same wire you tapped the orange into?
appreciate it..
 

Lorne34

Project Hidalgo
Joined
Jun 8, 2016
Threads
60
Messages
3,095
Reaction score
2,928
Location
Wisconsin
First Name
Lorne
Vehicle(s)
2019 GT350
Vehicle Showcase
1
I know you didn’t ask me but I did the same and ran a separate wire from the switch to the bolt on the passenger side kick panel near the fuse box. I got a ring terminal and used the bolt there.

8DF32139-47CD-41BC-A63B-07684500BA66.jpeg


6D988F1E-E42A-428E-AB38-078056806B5E.jpeg


BDE4F019-5AB1-47FB-BC68-D48890C614D1.jpeg
I really appreciate the reply... I have the switch but it only has a 2 ft length of wire coming out of the back of it... I have to splice in a longer piece of black wire for the ground. I went to menards but the person had no clue as to what guage or wire I needed to splice in.. the other confusion is the ring terminals are really small for that guage of wire.. I am assuming you are unable to thread the bolt through the ring terminal but just pinching it on via the washer on the bolt??
.
20230311_205629945_iOS.jpg
 

Biggsy

Well-Known Member
Joined
May 3, 2018
Threads
186
Messages
2,265
Reaction score
1,640
Location
MD
First Name
Warren
Vehicle(s)
'17 GT PP, '10 Tundra
I really appreciate the reply... I have the switch but it only has a 2 ft length of wire coming out of the back of it... I have to splice in a longer piece of black wire for the ground. I went to menards but the person had no clue as to what guage or wire I needed to splice in.. the other confusion is the ring terminals are really small for that guage of wire.. I am assuming you are unable to thread the bolt through the ring terminal but just pinching it on via the washer on the bolt??
I did not tap into the sensor. I ran separate wires to the module and to the ground bolt. You are correct that the ring terminal for that gauge wire is too small so I had to use a larger gauge ring terminal. I folded the wire end to make it thicker and then crimped it. I used 18 AWG wire all around and 10-12 AWG ring terminal.

To extended the switch wire, I used the posi tap connectors
 

Sponsored

Lorne34

Project Hidalgo
Joined
Jun 8, 2016
Threads
60
Messages
3,095
Reaction score
2,928
Location
Wisconsin
First Name
Lorne
Vehicle(s)
2019 GT350
Vehicle Showcase
1
I did not tap into the sensor. I ran separate wires to the module and to the ground bolt. You are correct that the ring terminal for that gauge wire is too small so I had to use a larger gauge ring terminal. I folded the wire end to make it thicker and then crimped it. I used 18 AWG wire all around and 10-12 AWG ring terminal.

To extended the switch wire, I used the posi tap connectors
Thanks!
Can you please clarify where the two switch wires went on the module?
I know the orange wire coming from the Module joins with the load wire on the switch, but not sure about the other wire on the switch.. if I don't tap it into the sensor wire, what wire on the module matches to that one?
 

Biggsy

Well-Known Member
Joined
May 3, 2018
Threads
186
Messages
2,265
Reaction score
1,640
Location
MD
First Name
Warren
Vehicle(s)
'17 GT PP, '10 Tundra
Thanks!
Can you please clarify where the two switch wires went on the module?
I know the orange wire coming from the Module joins with the load wire on the switch, but not sure about the other wire on the switch.. if I don't tap it into the sensor wire, what wire on the module matches to that one?
So you have 3 pins. One is load like you said that goes to the module. Then the battery pin goes to the power source which according to the instructions is in the harness which you tap into for the brake signal or you could run it to the fuse box by the passenger foot area. The third should be ground which I ran to the bolt on the passenger side foot panel. The one I sent a picture of circled
 

Lorne34

Project Hidalgo
Joined
Jun 8, 2016
Threads
60
Messages
3,095
Reaction score
2,928
Location
Wisconsin
First Name
Lorne
Vehicle(s)
2019 GT350
Vehicle Showcase
1
So you have 3 pins. One is load like you said that goes to the module. Then the battery pin goes to the power source which according to the instructions is in the harness which you tap into for the brake signal or you could run it to the fuse box by the passenger foot area. The third should be ground which I ran to the bolt on the passenger side foot panel. The one I sent a picture of circled
Thanks.. sorry it's just not computing for me. I really wish xeneering would have offered the unit with an on/off switch and been more intentional with their instructions and video as to where the power source goes when installing a switch. I'm going to try the temp sensor wire that is connected to the panel where I am putting the round switch vs going all the way back to the BCM.
 

Biggsy

Well-Known Member
Joined
May 3, 2018
Threads
186
Messages
2,265
Reaction score
1,640
Location
MD
First Name
Warren
Vehicle(s)
'17 GT PP, '10 Tundra
Thanks.. sorry it's just not computing for me. I really wish xeneering would have offered the unit with an on/off switch and been more intentional with their instructions and video as to where the power source goes when installing a switch. I'm going to try the temp sensor wire that is connected to the panel where I am putting the round switch vs going all the way back to the BCM.
Do you have a link to where you bought the switch? Just wanna see how the pins are so I can map it out for you

But you can try the temp sensor.
 

Lorne34

Project Hidalgo
Joined
Jun 8, 2016
Threads
60
Messages
3,095
Reaction score
2,928
Location
Wisconsin
First Name
Lorne
Vehicle(s)
2019 GT350
Vehicle Showcase
1


Top