RBS550
Well-Known Member
- Joined
- May 10, 2015
- Threads
- 72
- Messages
- 645
- Reaction score
- 439
- Location
- Port St Lucie Fl
- Website
- www.youtube.com
- First Name
- RB
- Vehicle(s)
- 2015 Mustang GT
- Thread starter
- #1
Sorry I’ve been too busy to update.
Meet the RBS550 Pinion Support…..so I’ve been afraid to try my transbrake after seeing what happened to BMR Kelly in Bowling Green. Now I don’t have anywhere near the power of Kelly, but transbrakes are very hard on everything, in this case the front ears on the rear housing.
So I set out a VERY simple fix. Now this is NOT for the NVH crowd, I already have BMR solid cradle & diff bushings, so this won’t bother me in the least.
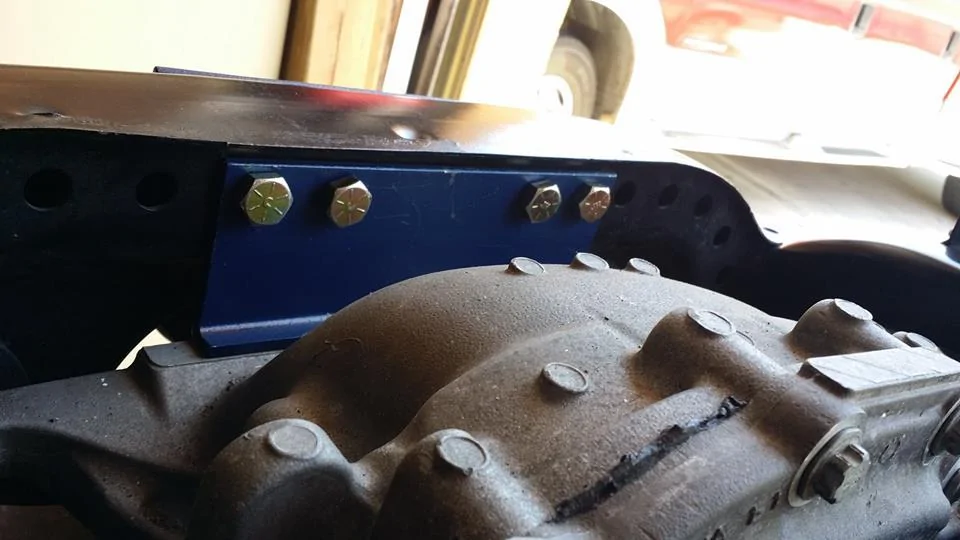
Now there are many ways to achieve this, but here’s the route I took….I used 3”x 3/16” angle, cut all but ½” off of one leg and used that piece to support the nuts from crushing the stamped steal cradle. The angle needs to be 9-1/4” long, the piece I had was a little short, as you will see on the driver’s side of the rear.
The cradle already has holes punched in it, the holes font to back do NOT line up, I drilled different hole locations in the front, in the end the two higher ones in the center are the way to go.
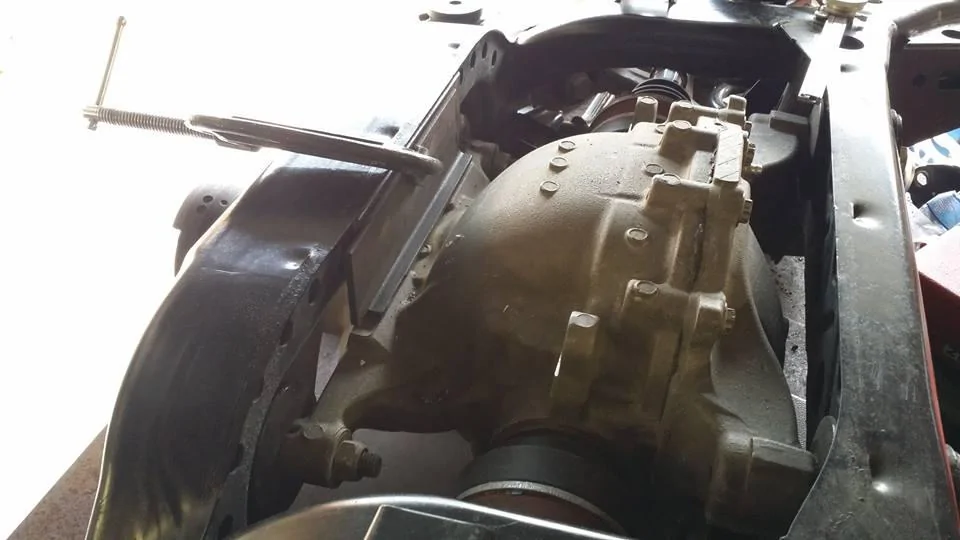
I used ½” x 4” Grade 8 bolts fine thread. I installed the bolts from the rear side of the cradle, this way the shank was taking the shear force rather than the threads taking the shear force. In doing this I had to remove the diff bolts to let the diff drop enough to get them in.
Now the holes in the cradle are larger than ½”, but careful placement of the ½” drilled holes in the angle made for a tight fit at the top of the existing holes in the cradle. This is where the upward movement of the pinion will be heading during launch.
Ironically my transbrake wouldn’t hold once I went above 2,000 rpms, so I didn’t get to use it and see how it all worked. I will be looking into the transbrake issue, one thing I’ve learned after many years, it’s usually something I did wrong.
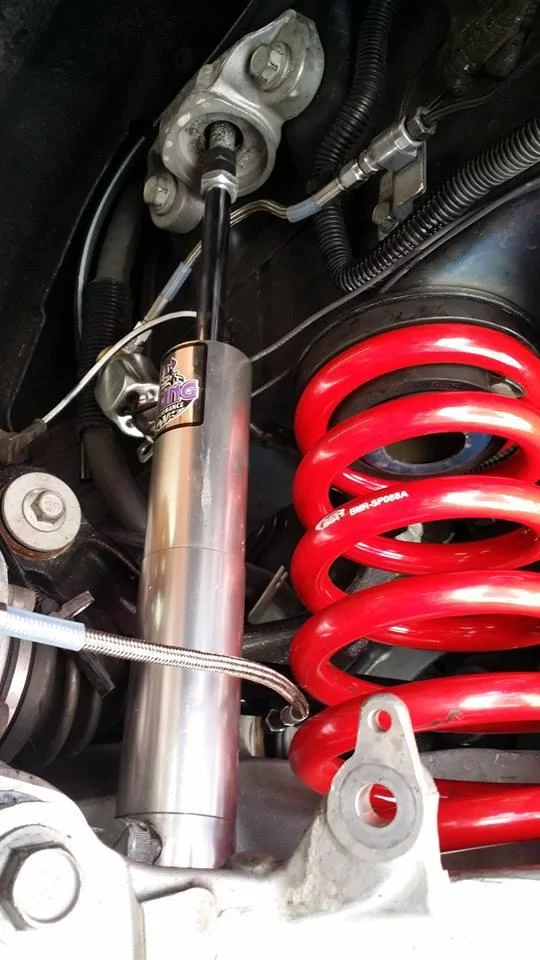
You can see I also installed BMR Drag Spring in the rear, I’m very happy with the performance and stance.
Here’s a slew of pics and some videos and in the videos you can see I launch foot brake just about 1,600+ rpms. DA was 1,100’.
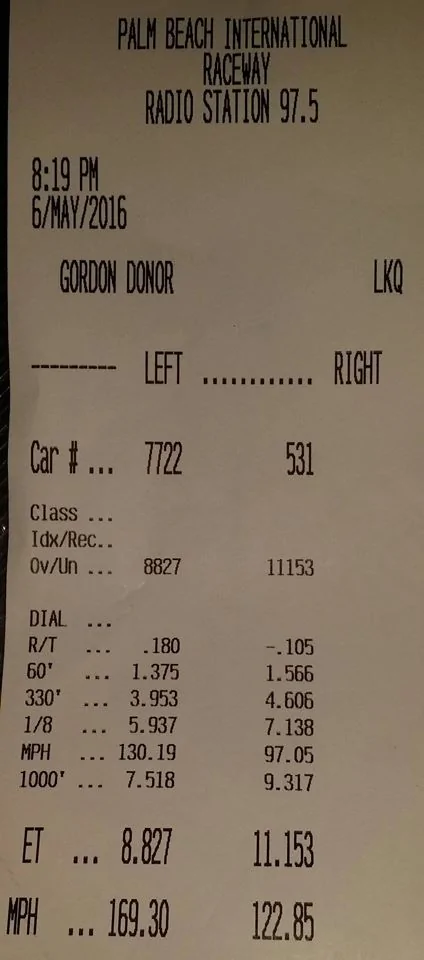
Oh and just another tid bit of info, last week in Maple Grove my car ran 11.30s @ 118, one week later in FL. PBIR I ran 11.15 @ 123, my point is don’t let bad time slips keep you down, climate & track make a BIG difference.
NOTE:
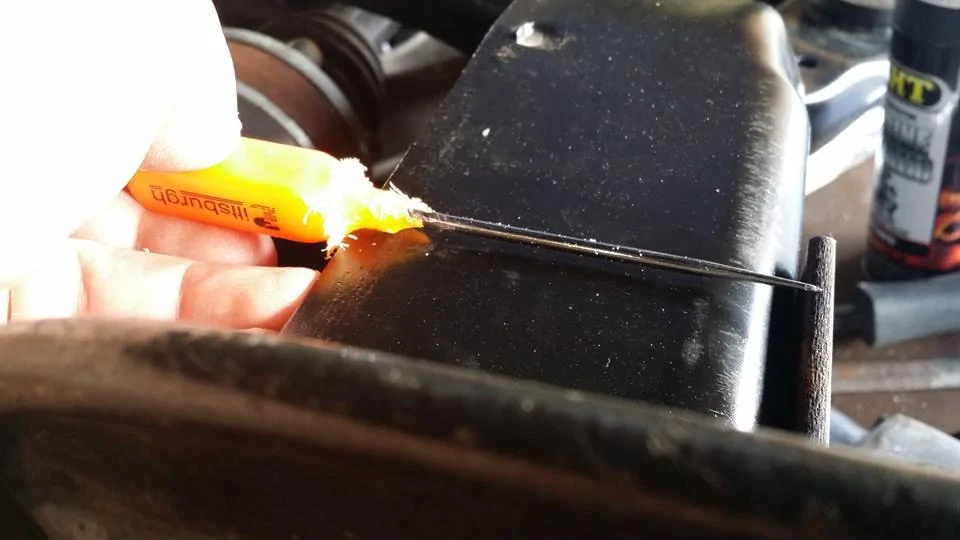
When drilling, start with a smaller drill, use cutting fluid and slow to medium speed with strong pressure, if you don’t see a steady stream of chips something needs to change. If you drilling high speed and all you hear is squealing, you are hardening the metal to a point in which the drill cannot drill and putting water on it will make it even harder.
Make sure to clean up all your drillings to keep peace in the house and out of little ones and pets feet/paws.
In the video with the burnout, you can see my driver tire stops spinning before the passenger side, when this happens its hard on the clutch packs in the posi. I can NOT wait till someone comes out with a really good posi.
[ame]


Meet the RBS550 Pinion Support…..so I’ve been afraid to try my transbrake after seeing what happened to BMR Kelly in Bowling Green. Now I don’t have anywhere near the power of Kelly, but transbrakes are very hard on everything, in this case the front ears on the rear housing.
So I set out a VERY simple fix. Now this is NOT for the NVH crowd, I already have BMR solid cradle & diff bushings, so this won’t bother me in the least.
Now there are many ways to achieve this, but here’s the route I took….I used 3”x 3/16” angle, cut all but ½” off of one leg and used that piece to support the nuts from crushing the stamped steal cradle. The angle needs to be 9-1/4” long, the piece I had was a little short, as you will see on the driver’s side of the rear.
The cradle already has holes punched in it, the holes font to back do NOT line up, I drilled different hole locations in the front, in the end the two higher ones in the center are the way to go.
I used ½” x 4” Grade 8 bolts fine thread. I installed the bolts from the rear side of the cradle, this way the shank was taking the shear force rather than the threads taking the shear force. In doing this I had to remove the diff bolts to let the diff drop enough to get them in.
Now the holes in the cradle are larger than ½”, but careful placement of the ½” drilled holes in the angle made for a tight fit at the top of the existing holes in the cradle. This is where the upward movement of the pinion will be heading during launch.
Ironically my transbrake wouldn’t hold once I went above 2,000 rpms, so I didn’t get to use it and see how it all worked. I will be looking into the transbrake issue, one thing I’ve learned after many years, it’s usually something I did wrong.
You can see I also installed BMR Drag Spring in the rear, I’m very happy with the performance and stance.
Here’s a slew of pics and some videos and in the videos you can see I launch foot brake just about 1,600+ rpms. DA was 1,100’.
Oh and just another tid bit of info, last week in Maple Grove my car ran 11.30s @ 118, one week later in FL. PBIR I ran 11.15 @ 123, my point is don’t let bad time slips keep you down, climate & track make a BIG difference.
NOTE:
When drilling, start with a smaller drill, use cutting fluid and slow to medium speed with strong pressure, if you don’t see a steady stream of chips something needs to change. If you drilling high speed and all you hear is squealing, you are hardening the metal to a point in which the drill cannot drill and putting water on it will make it even harder.
Make sure to clean up all your drillings to keep peace in the house and out of little ones and pets feet/paws.
In the video with the burnout, you can see my driver tire stops spinning before the passenger side, when this happens its hard on the clutch packs in the posi. I can NOT wait till someone comes out with a really good posi.
[ame]


Sponsored