Mikepol2
Well-Known Member
- Joined
- Jul 17, 2018
- Threads
- 140
- Messages
- 3,997
- Reaction score
- 7,125
- Location
- Pittsburgh, PA
- First Name
- Mike
- Vehicle(s)
- 2021 Mach 1, 2019 Ram 1500
- Thread starter
- #1
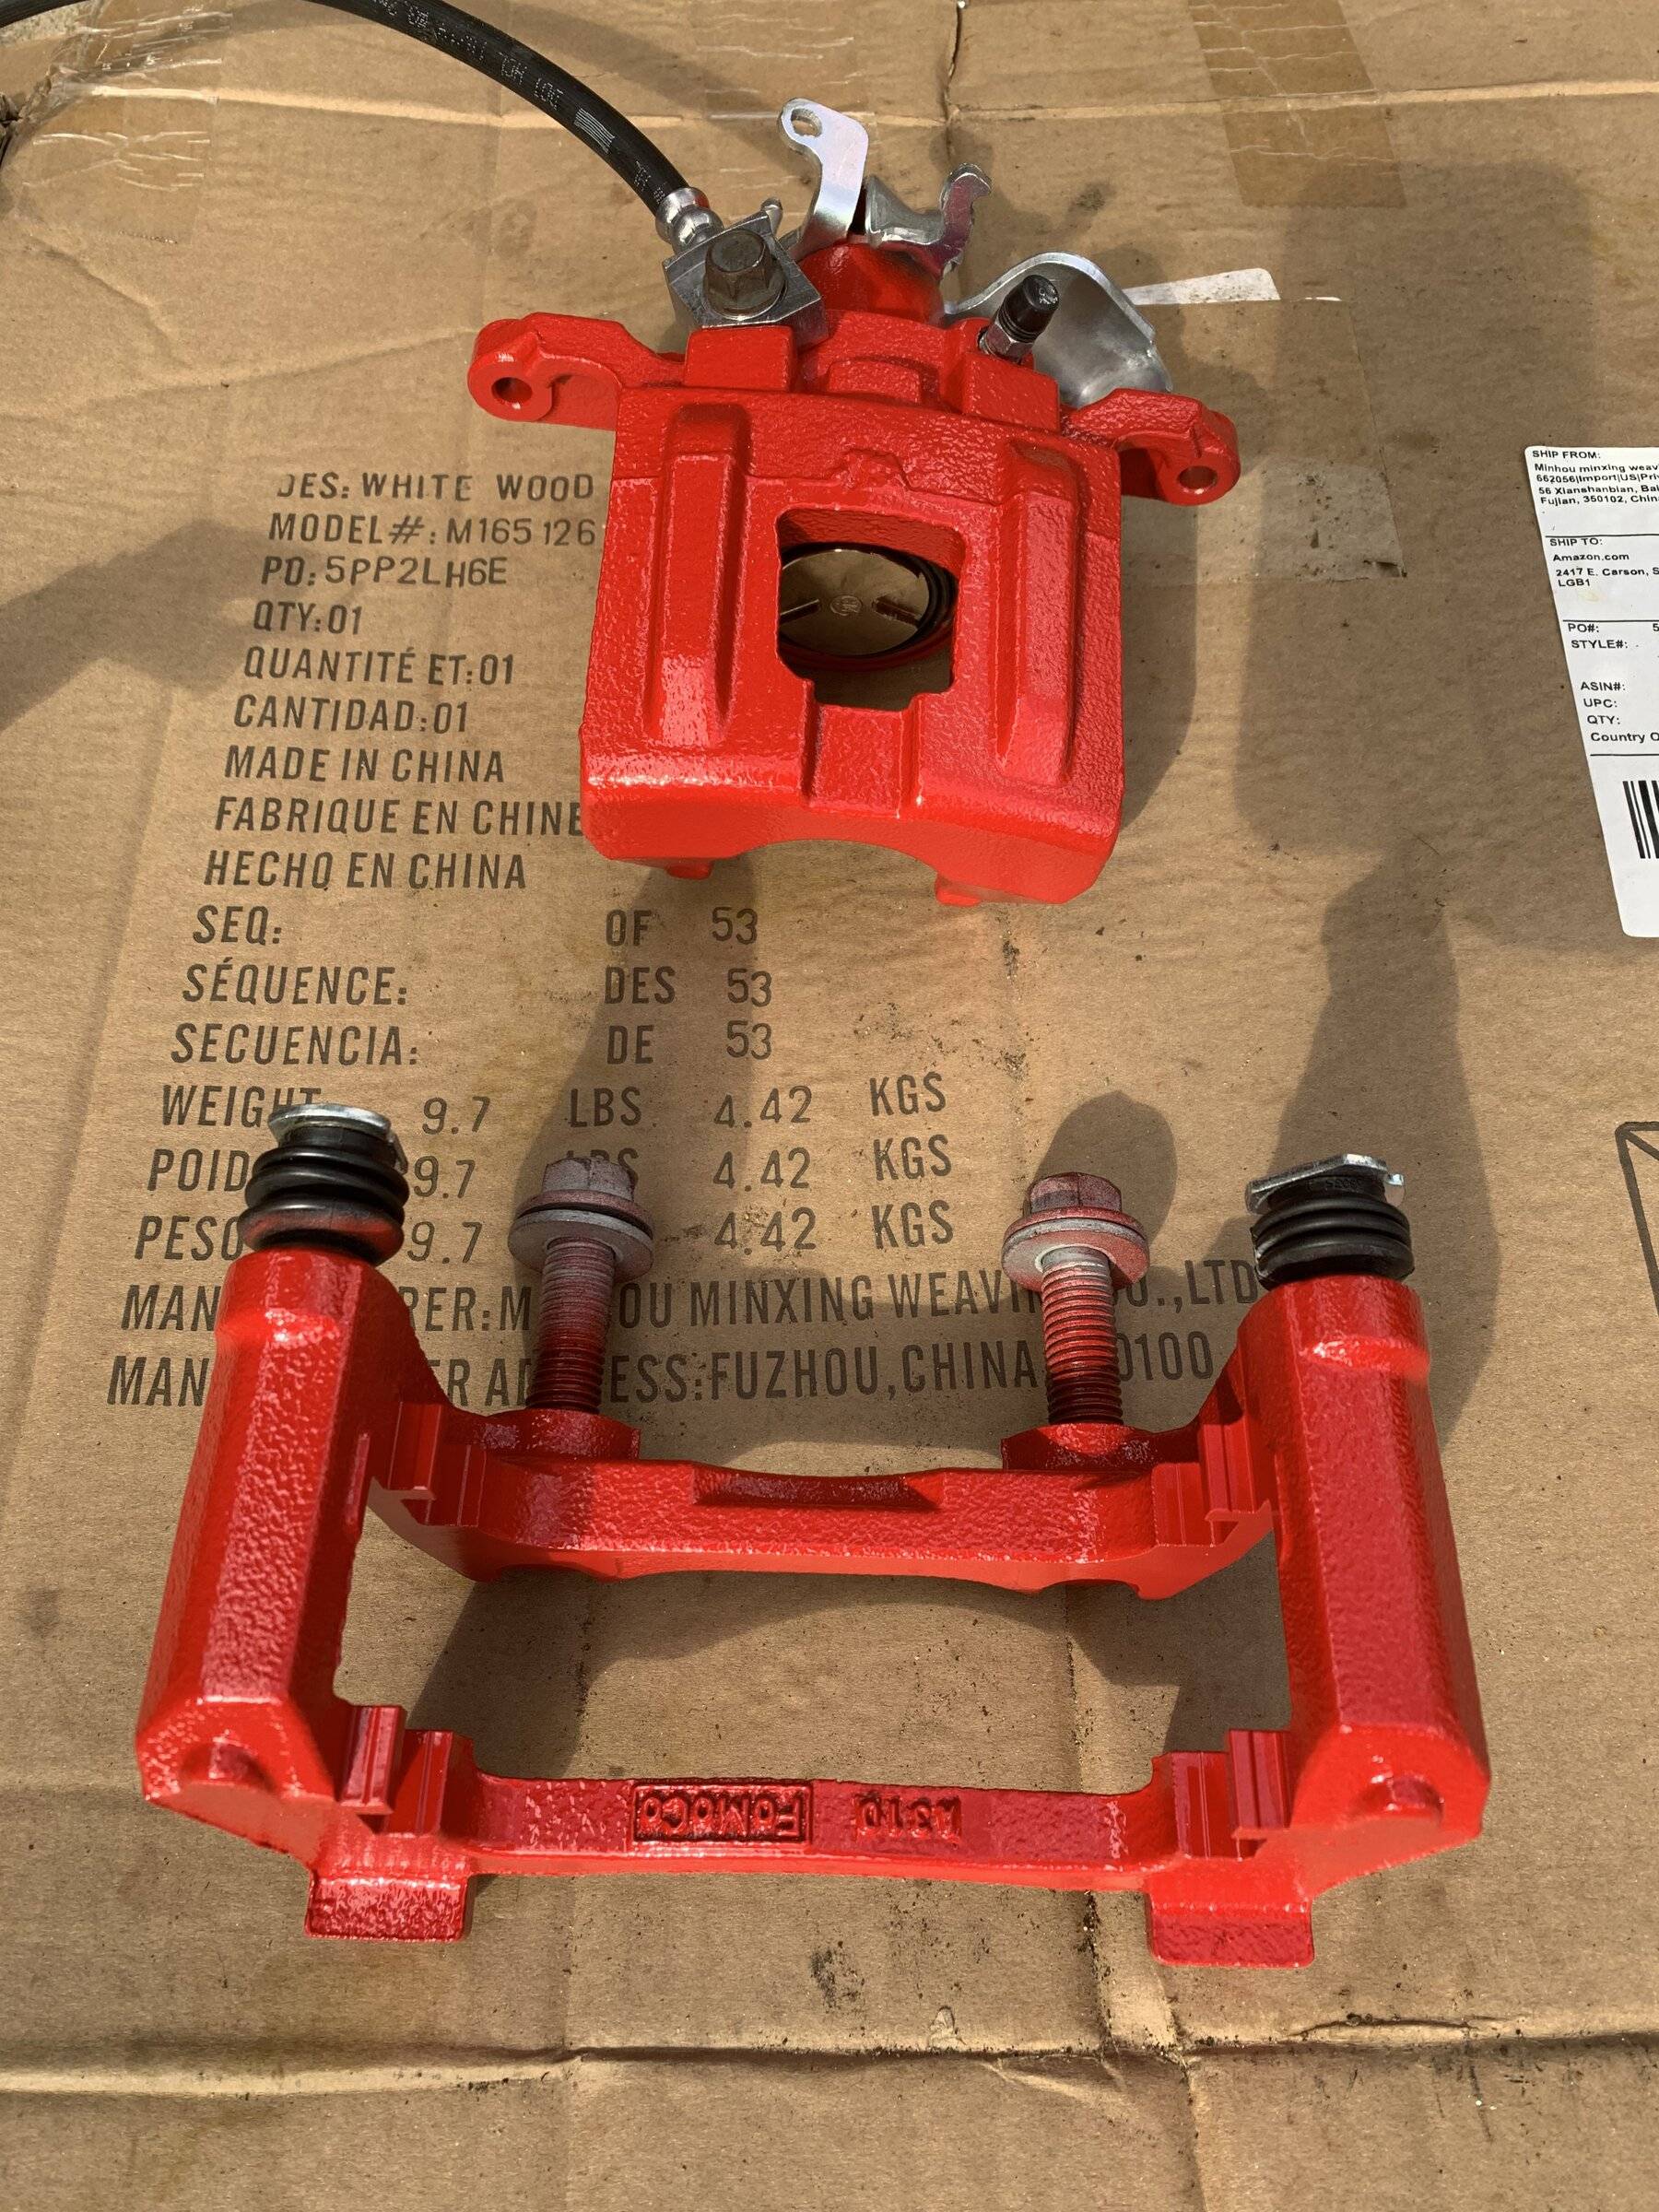
When I bought the Mach, $495 for red calipers seemed like a pretty hefty price so I didn't get them. Then after getting the car and catching the car show bug I regretted it. Sooooo.... today I painted them. About 10 hours of work, didn't expect it to take that long but I did some things that may not have been necessary. But really happy with the results.
Supplies were one can each of Dupli-Color red caliper paint, gray engine primer, and wheel clear coat; one bottle of Black Magic No-Scrub wheel cleaner; two 9 ft x 12 ft 0.7 mil clear plastic drop cloths; isopropyl alcohol; and painter's tape.
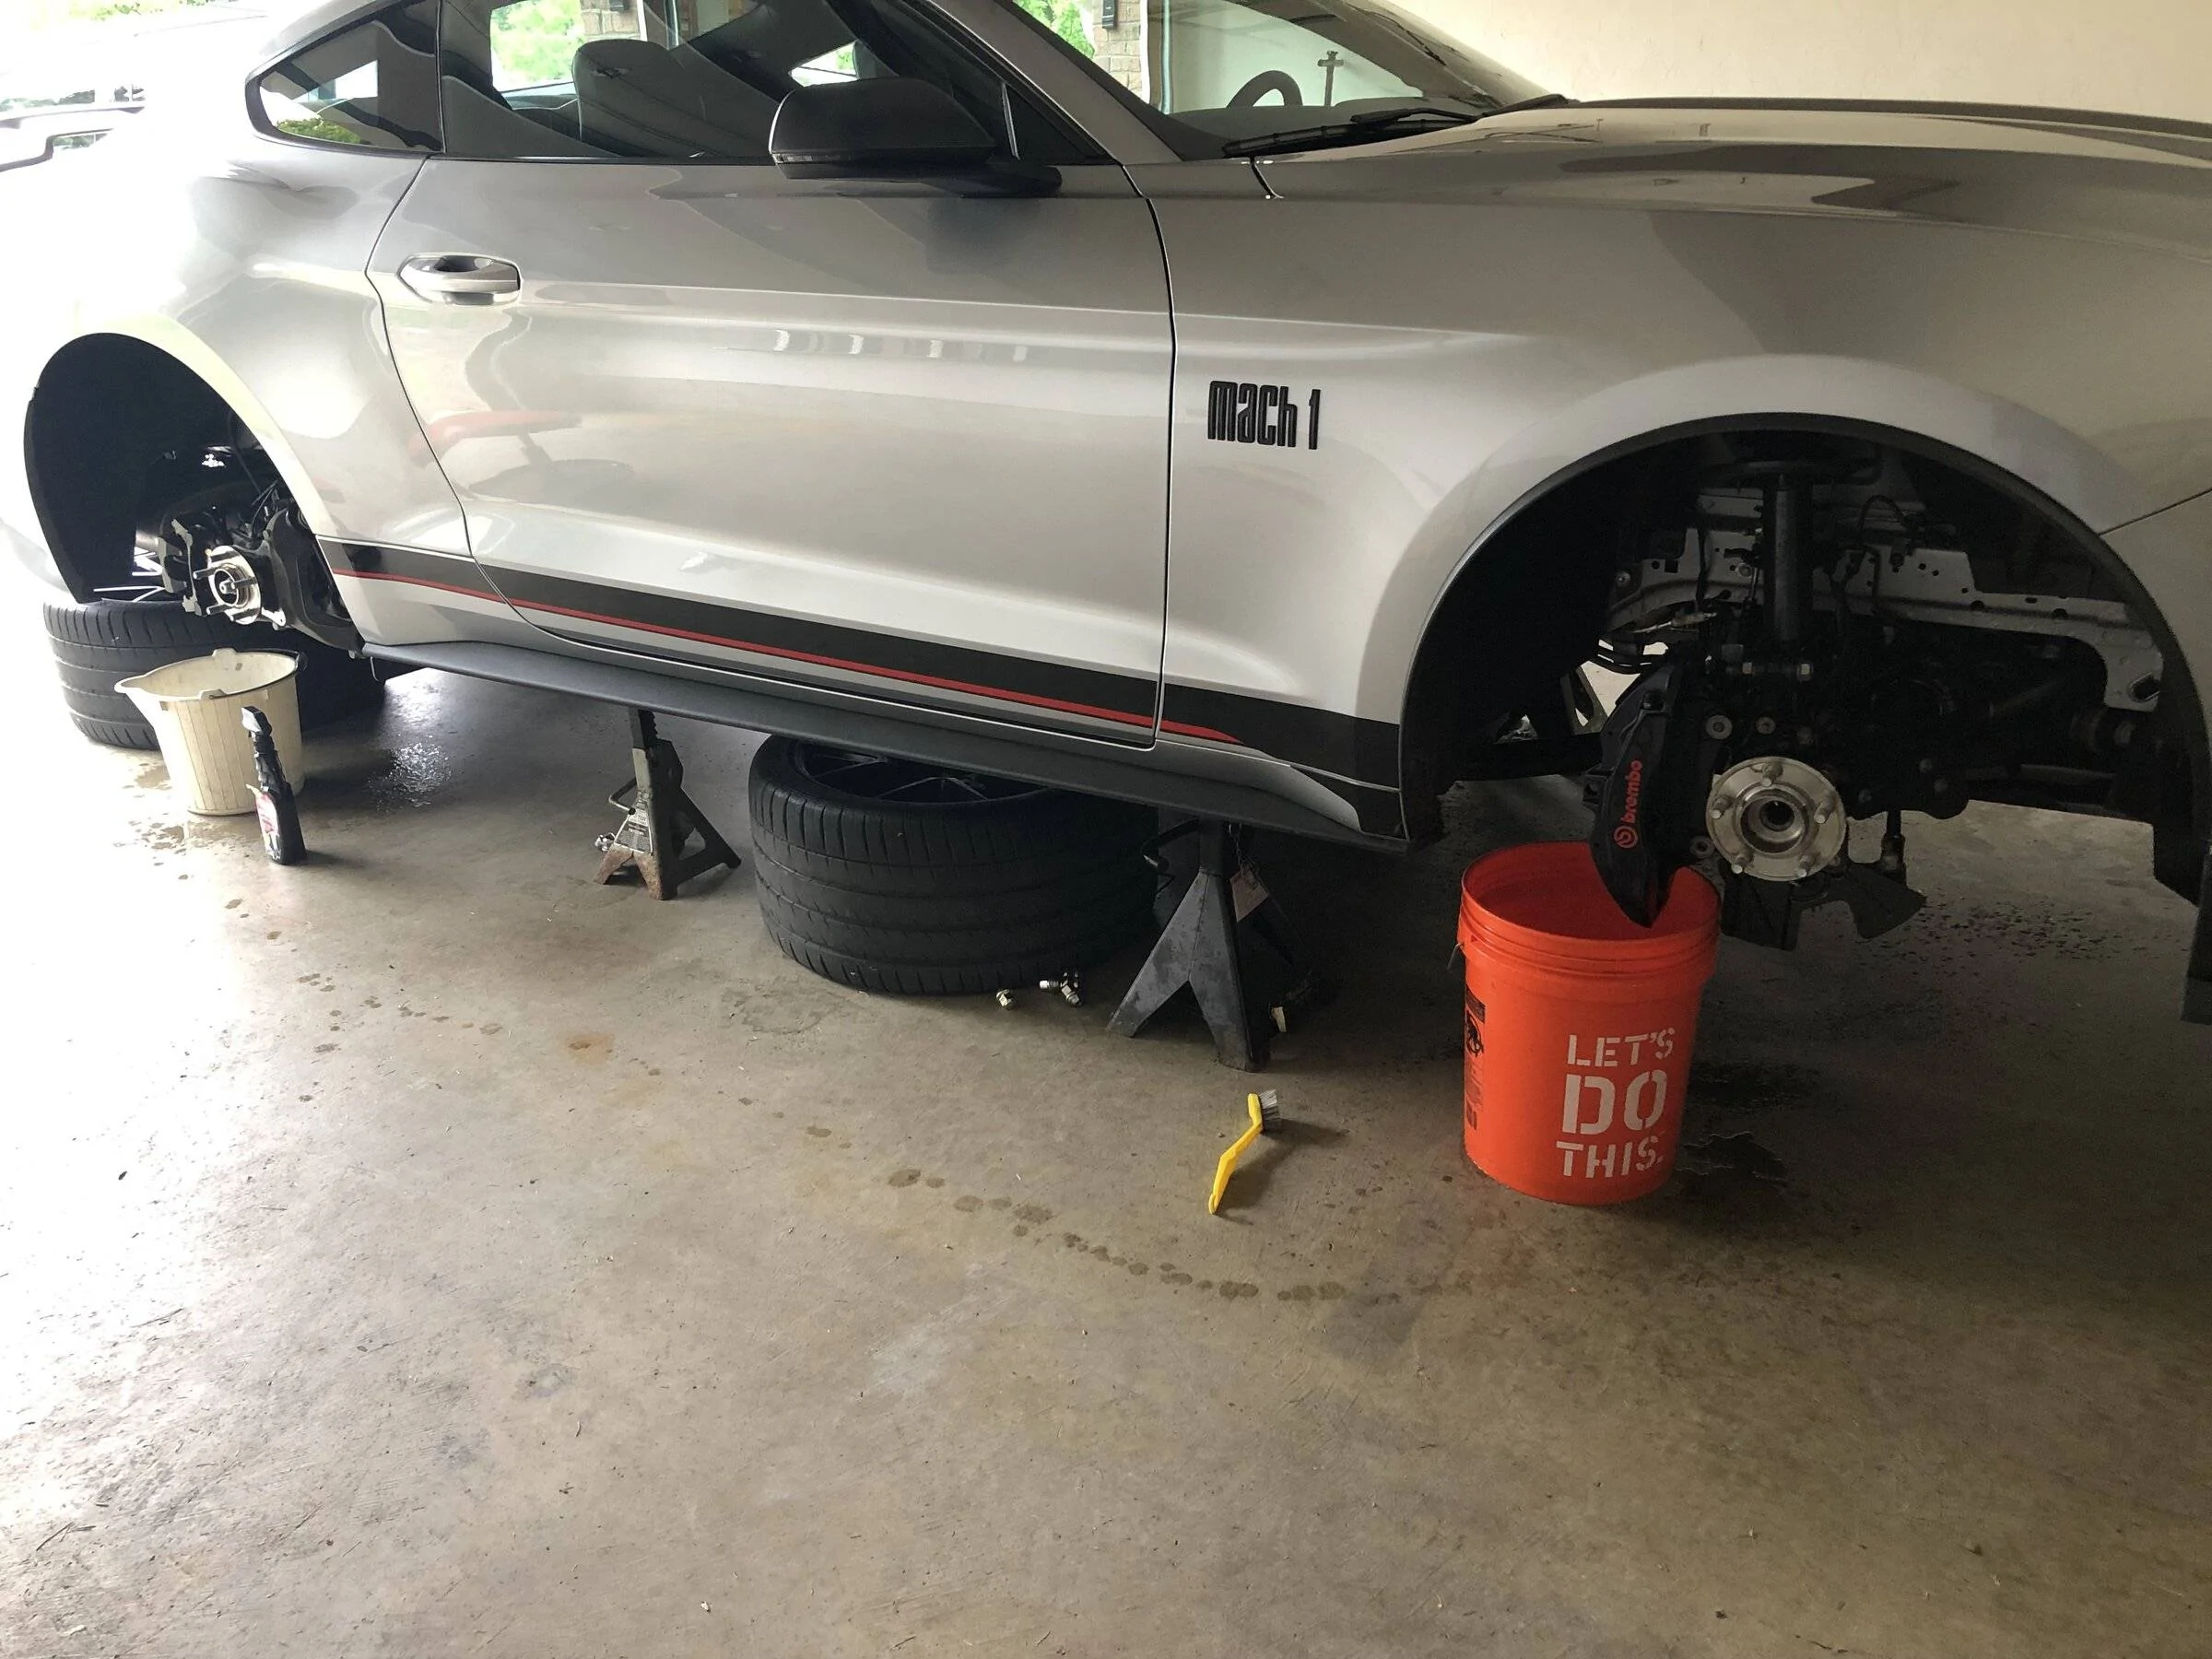
Watched some Youtube videos of guys painting their calipers on the car, without removing the pads or rotors, and didn't like the look of painted pads. So first step was pull the pads and rotors, and mount the calipers back on the car. The fronts have two pins holding the pads in place and a center stud, I took those out too so they wouldn't get painted. Then sprayed them with the wheel cleaner and scrubbed them with a brush, and rinsed them into a bucket. Dried them and went over them again with a brush and isopropyl. No, this is NOT the detailer's two bucket method LOL!


Now the part I hate most about paint jobs - masking. The two drop cloths covered most of the car, the grill and rear decklid were uncovered. Maybe unnecessary but I didn't want to take a chance on getting overspray on the paint. Cut holes in the dropcloths for the side view mirrors and covered them with grocery bags. Then cut small holes for each caliper and stretched the plastic around it. Used wadded up paper towels and painters tape to try to mask off the three holes in the front calipers, the bleeder valves, the pistons, etc.
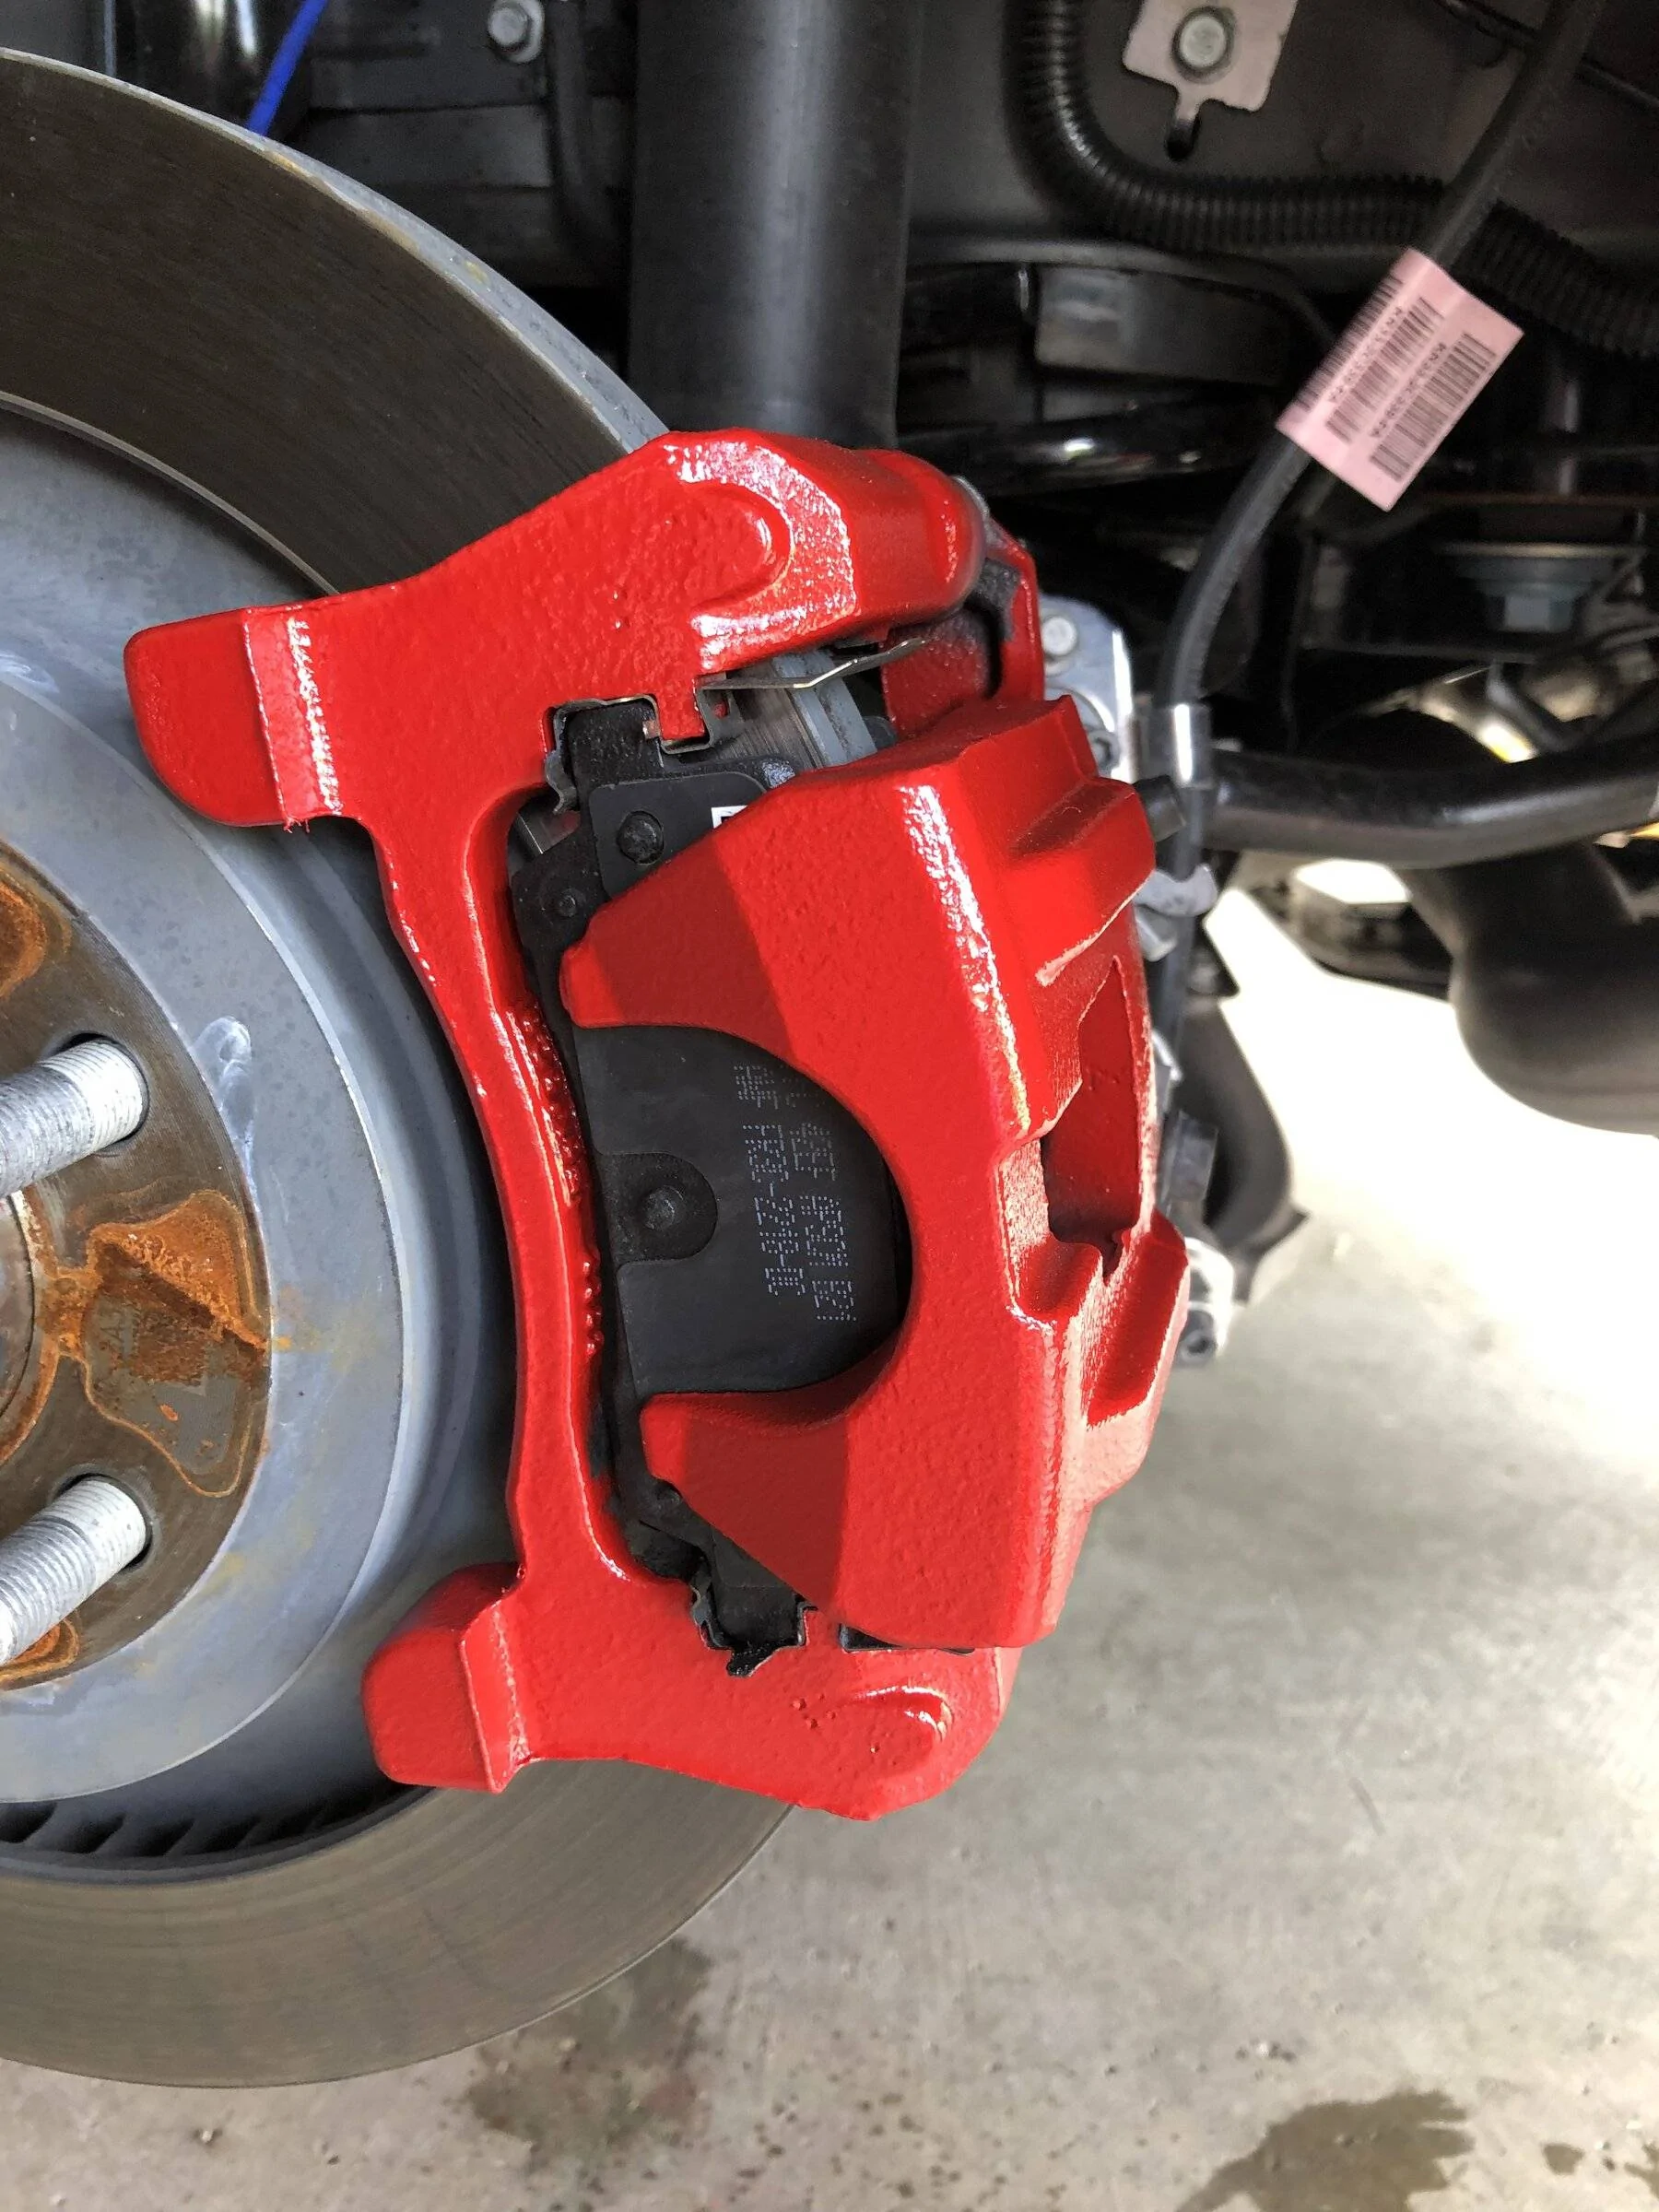
Finally. Time to start painting. Two coats of primer and three coats of red, waiting 10 minutes between each coat. Then let it sit 3 hours before reassembling the rears.
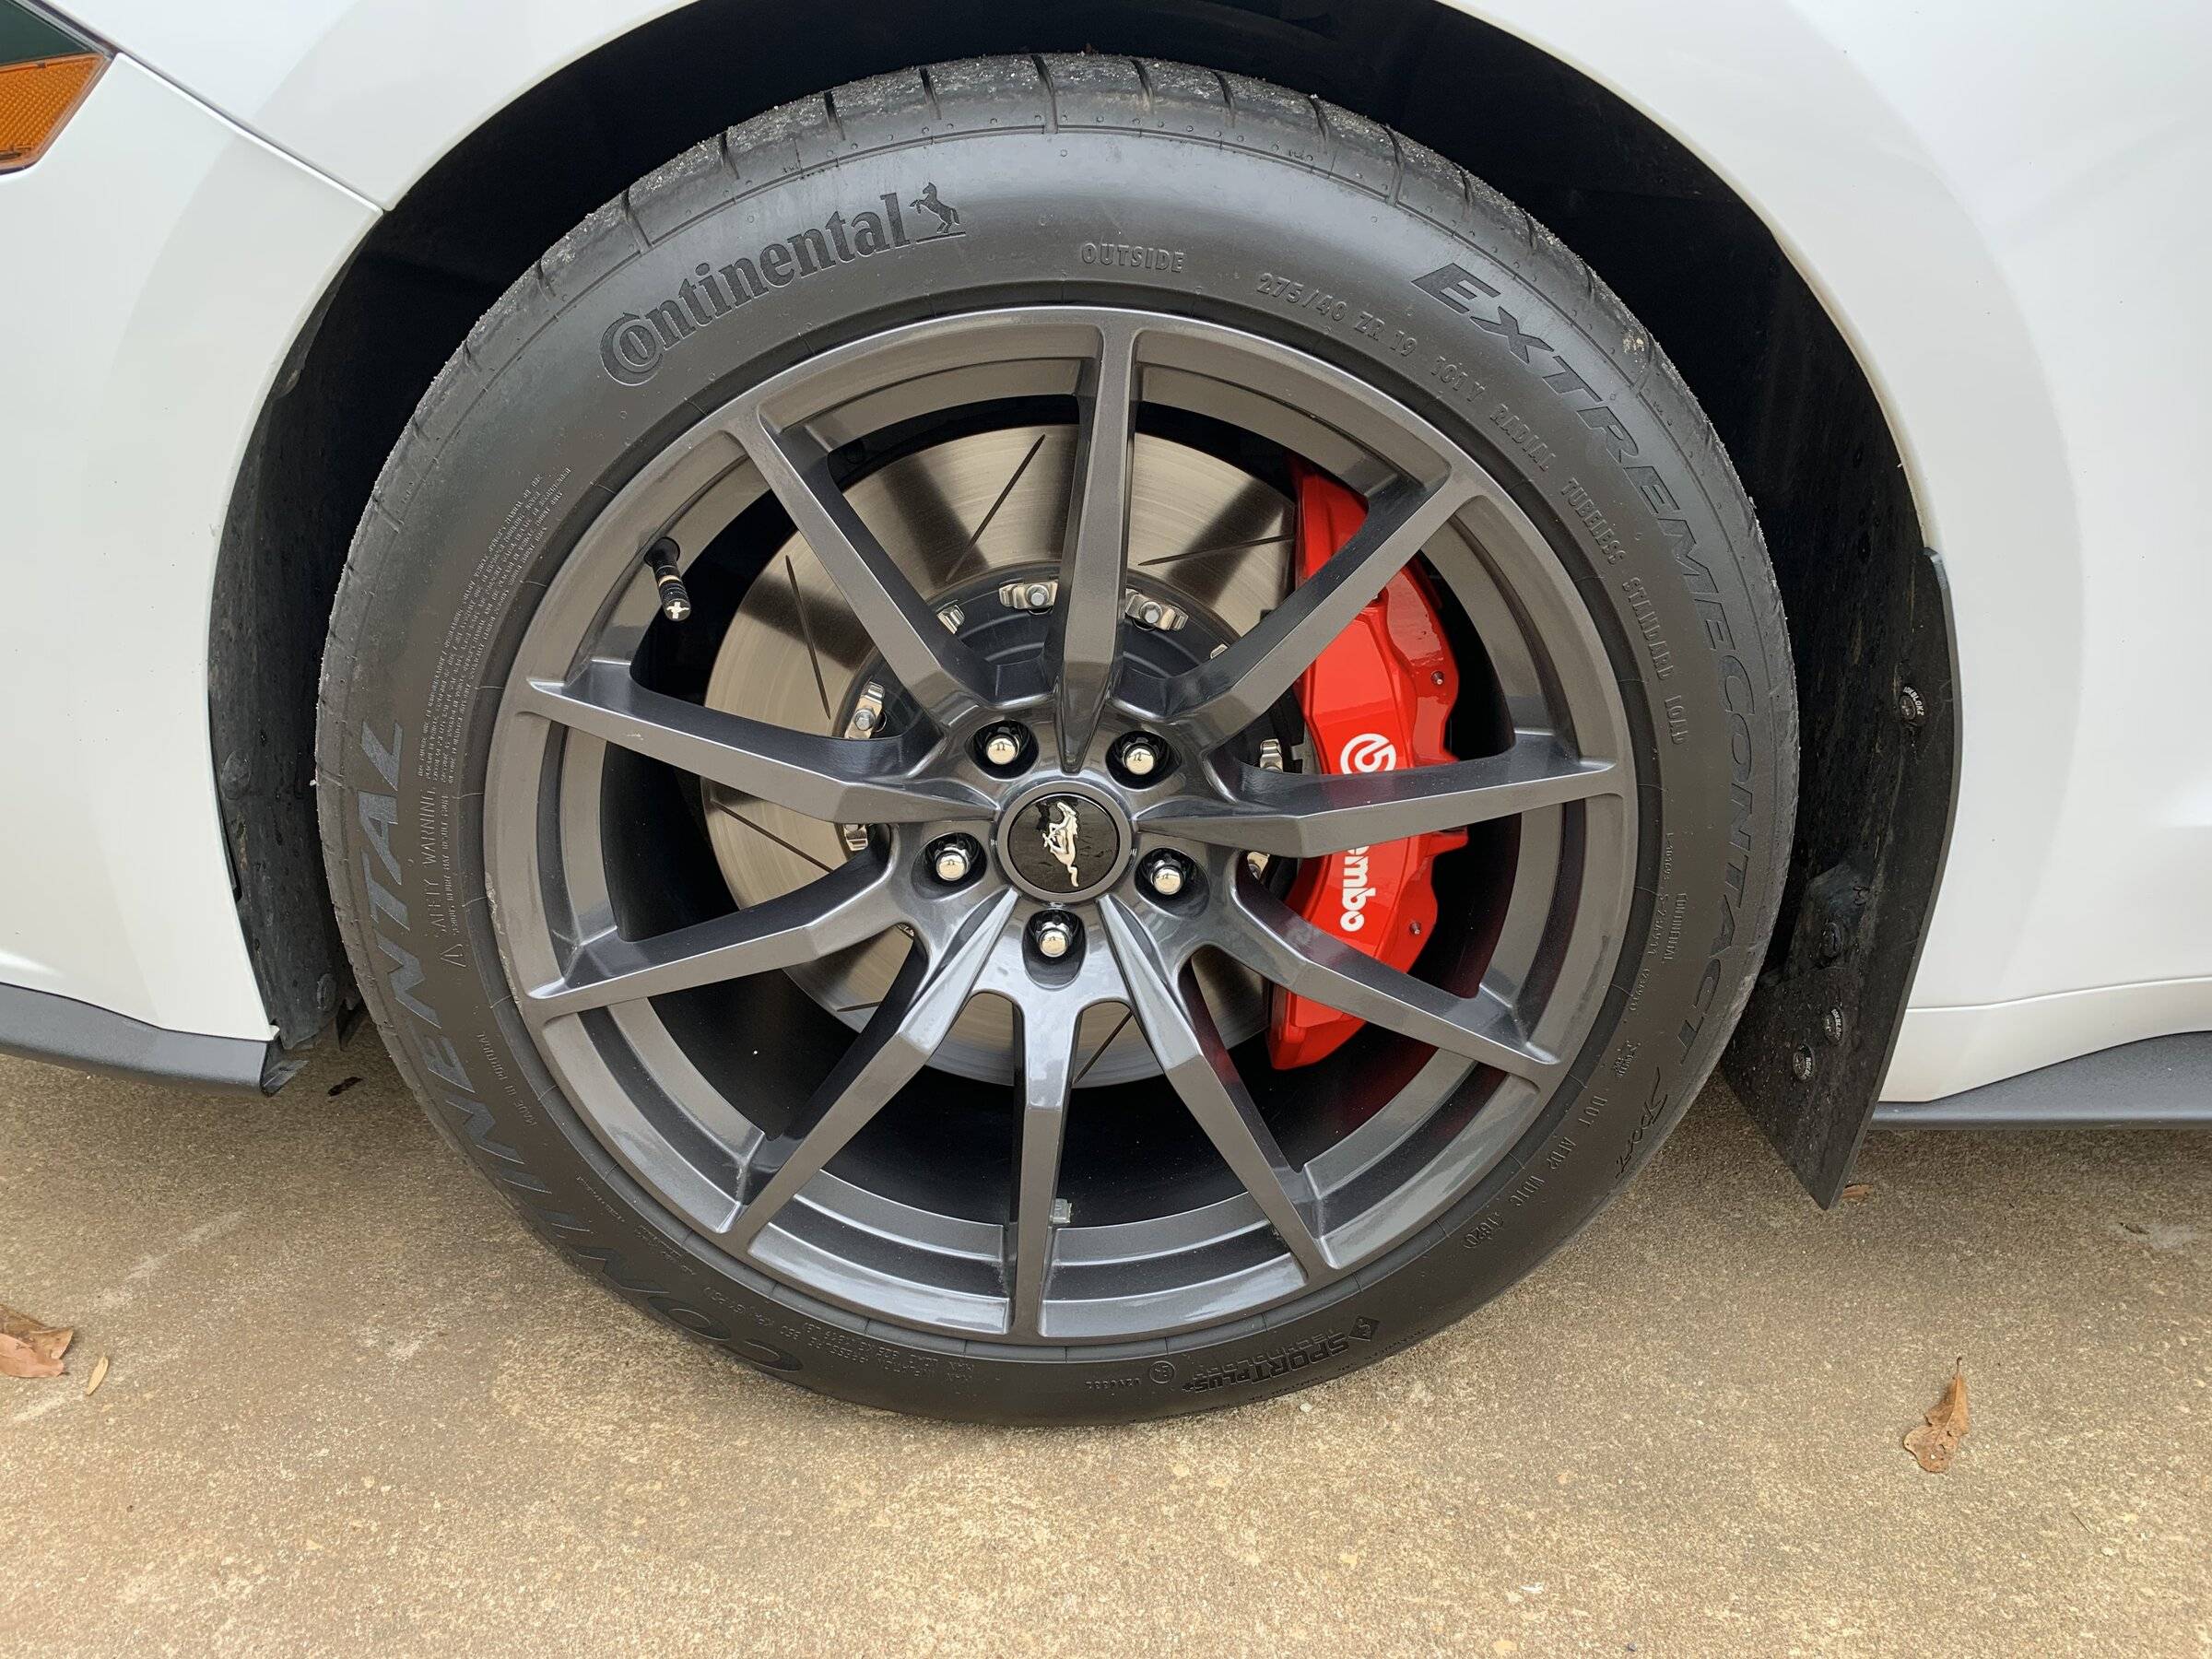
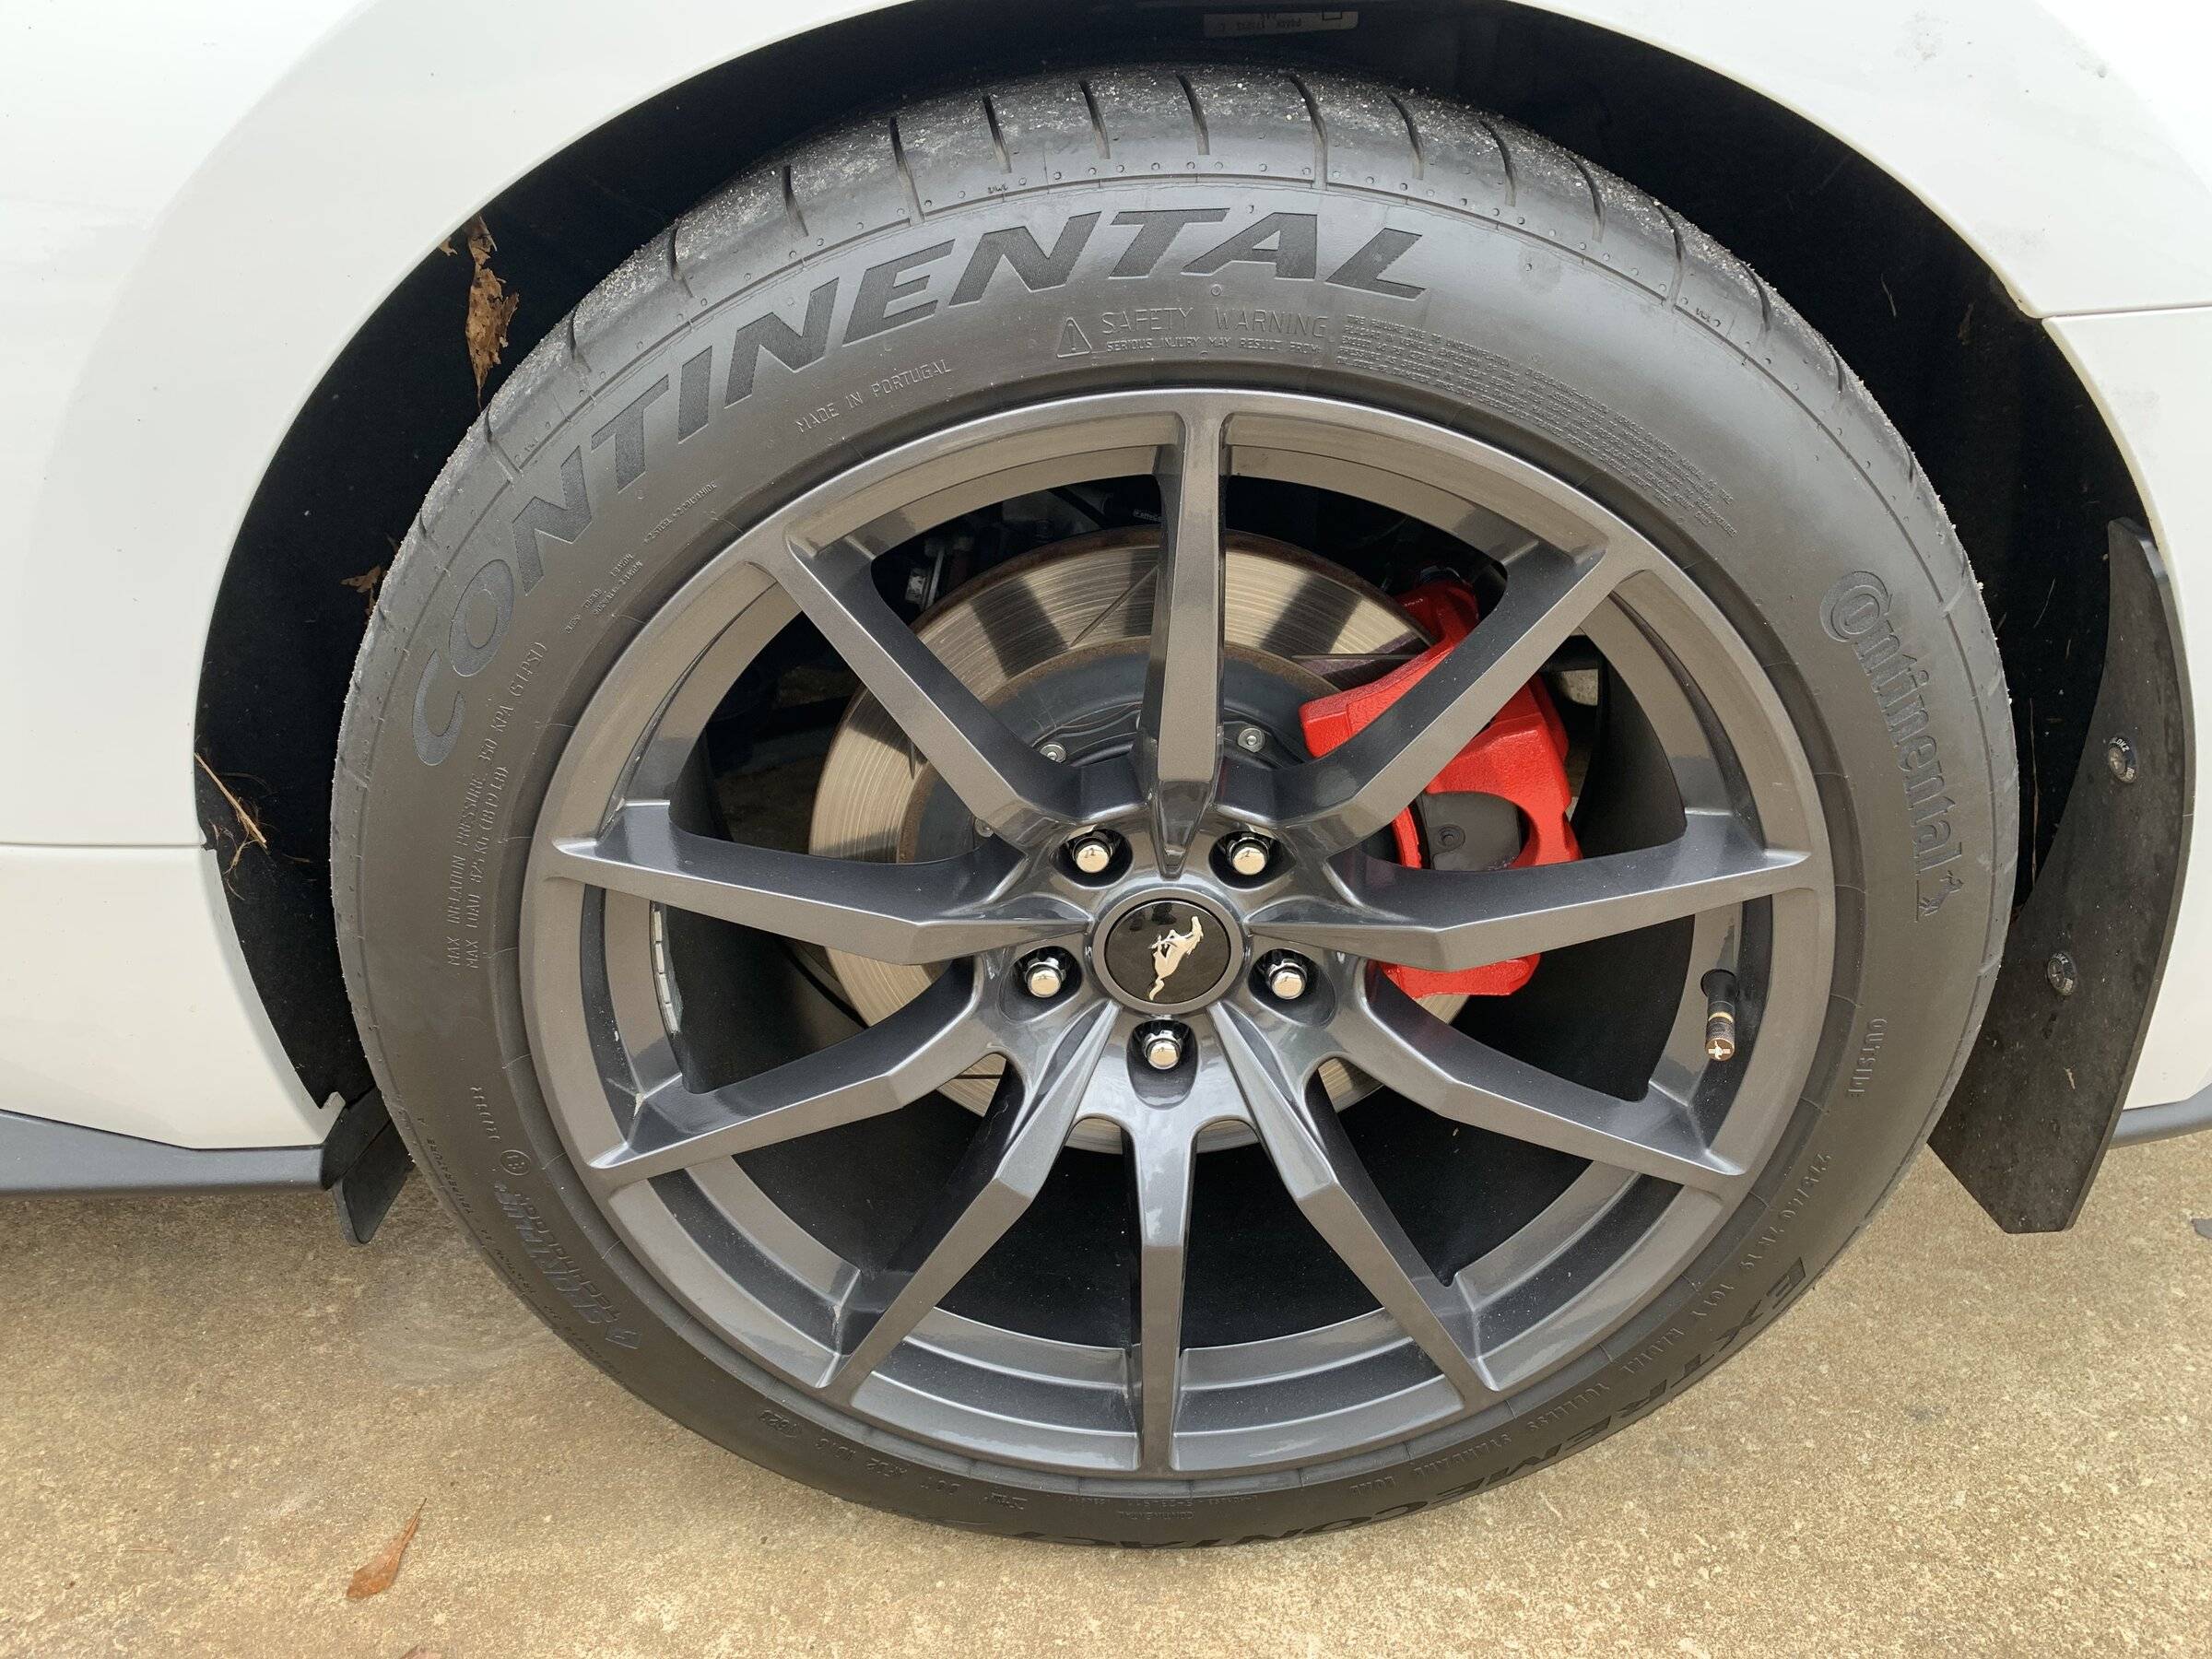
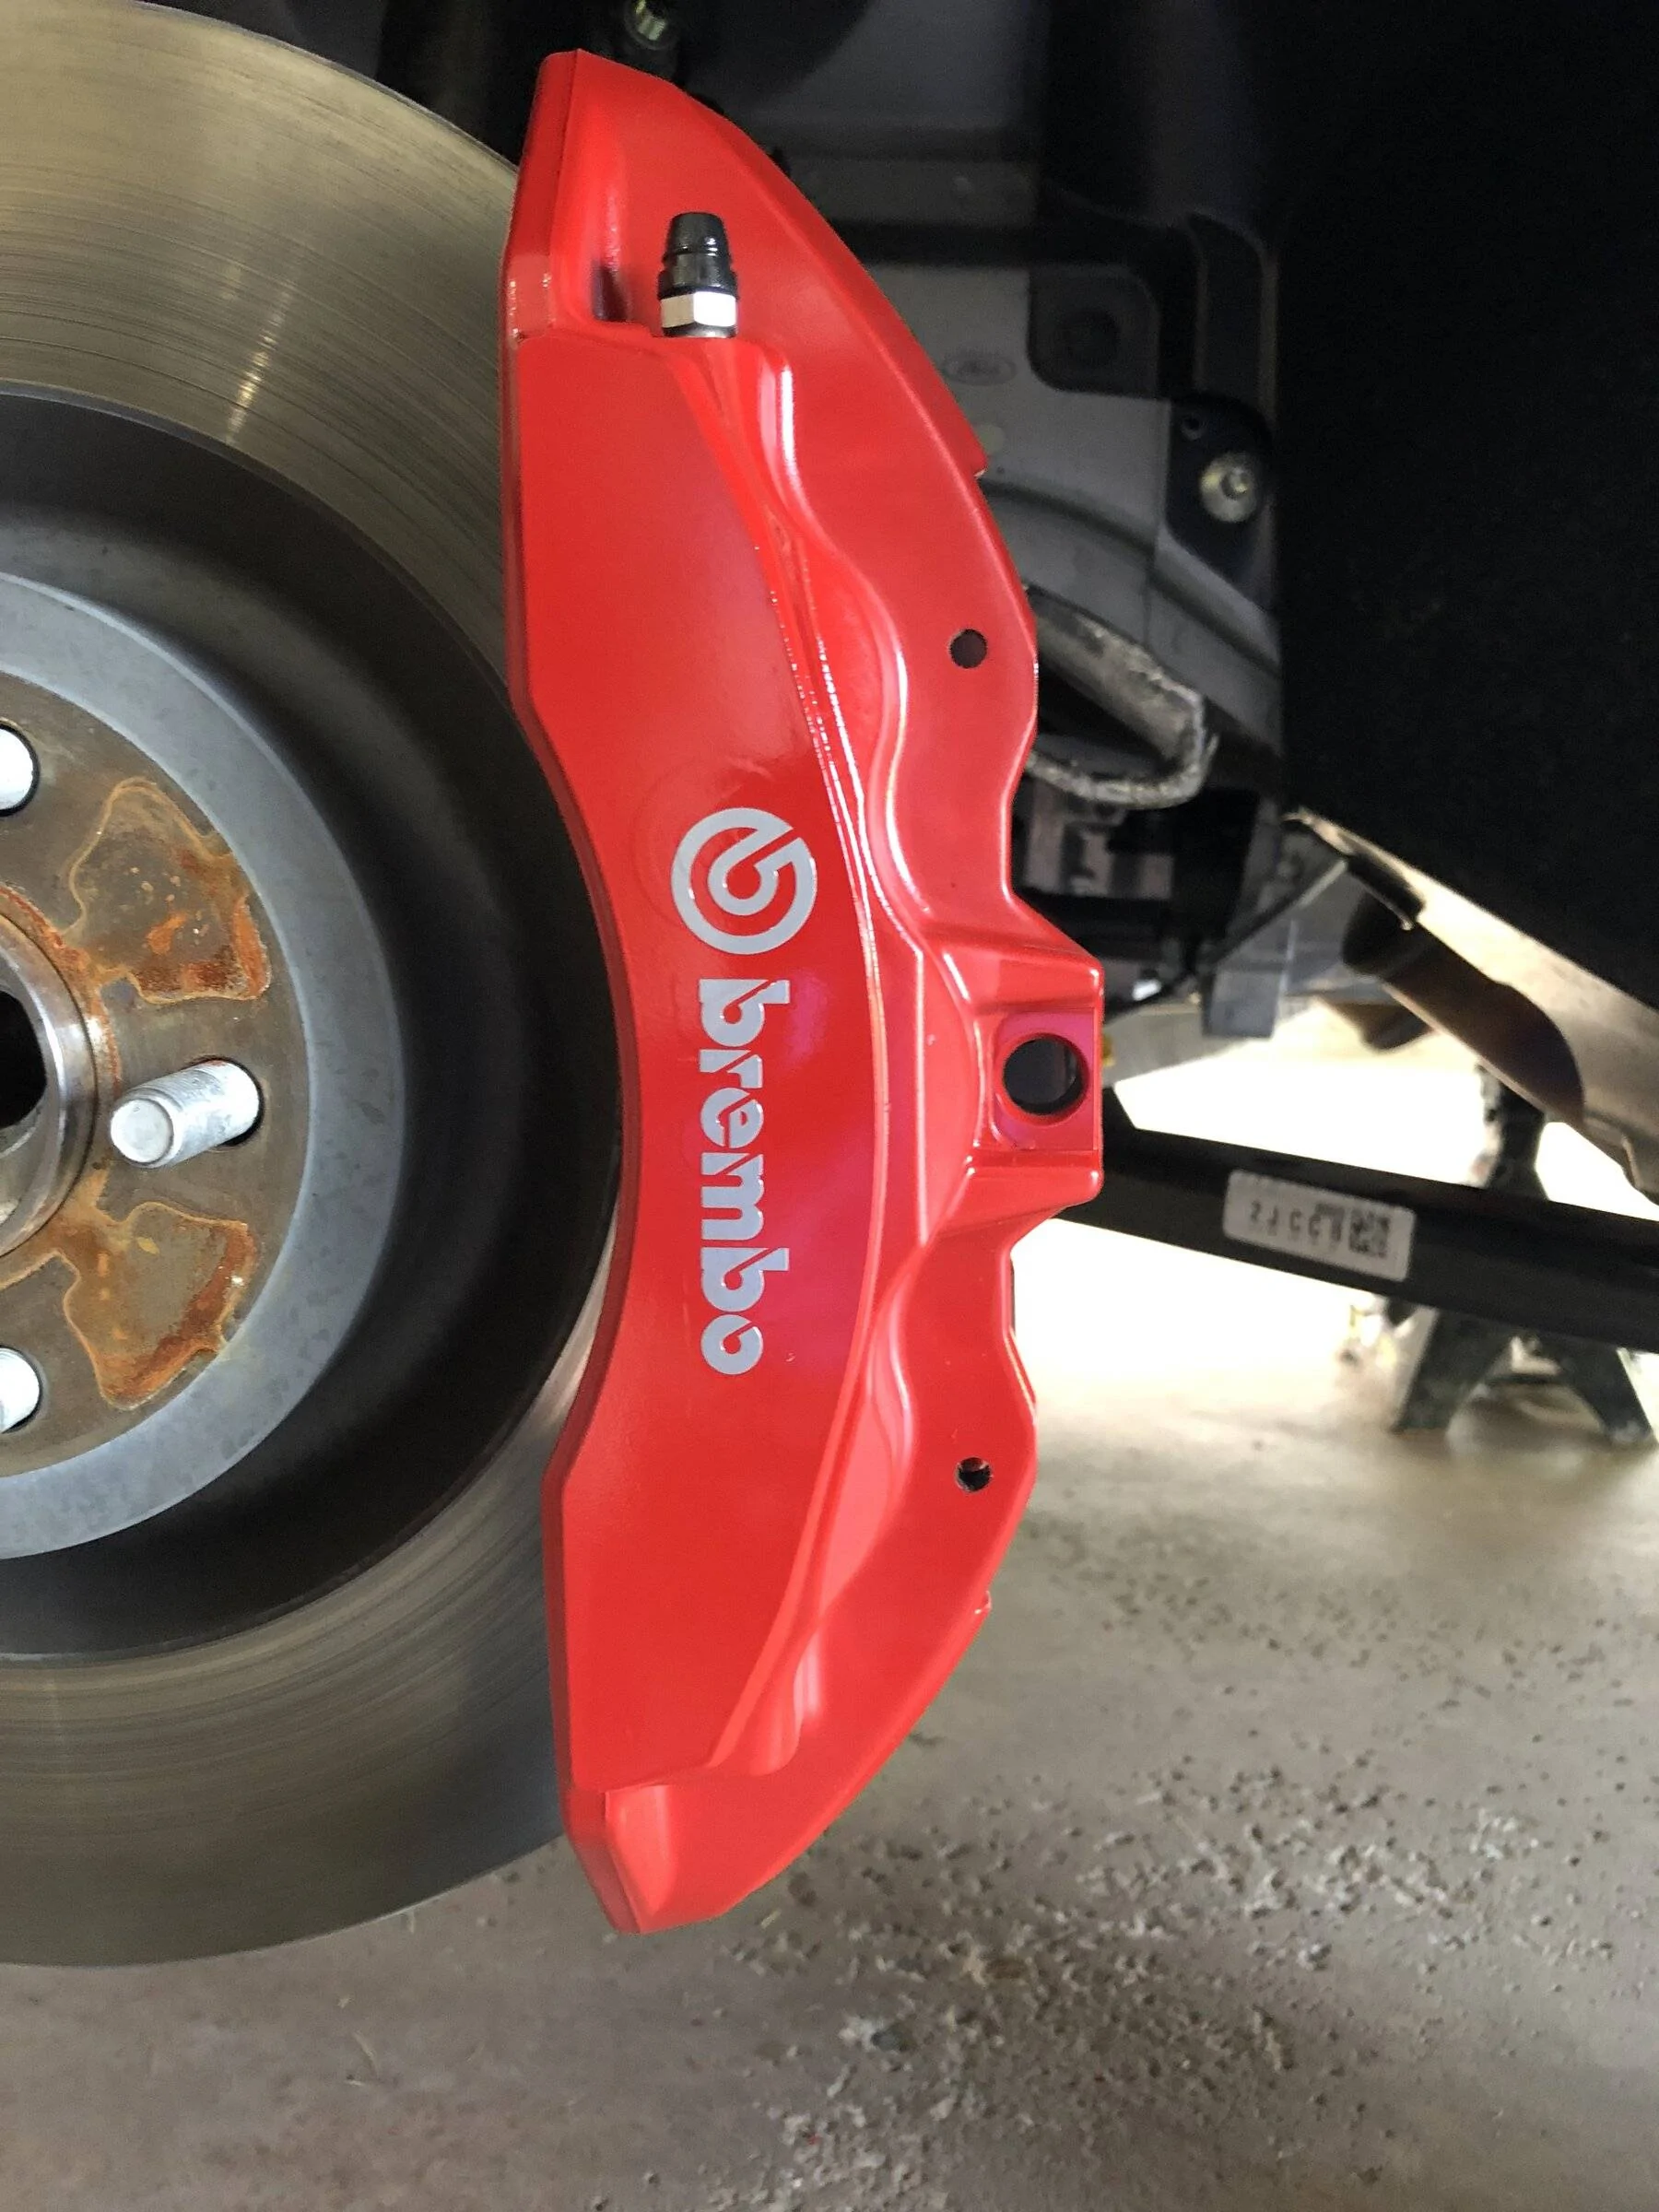
Then I reinstalled the front rotors and bolted on the calipers before applying silver Brembo decals, found them on Etsy, good guy:
https://www.etsy.com/listing/104991...f=sr_gallery-1-1&bes=1&organic_search_click=1
After applying the decals I hit them with two coats of clear coat and finished reassembly:
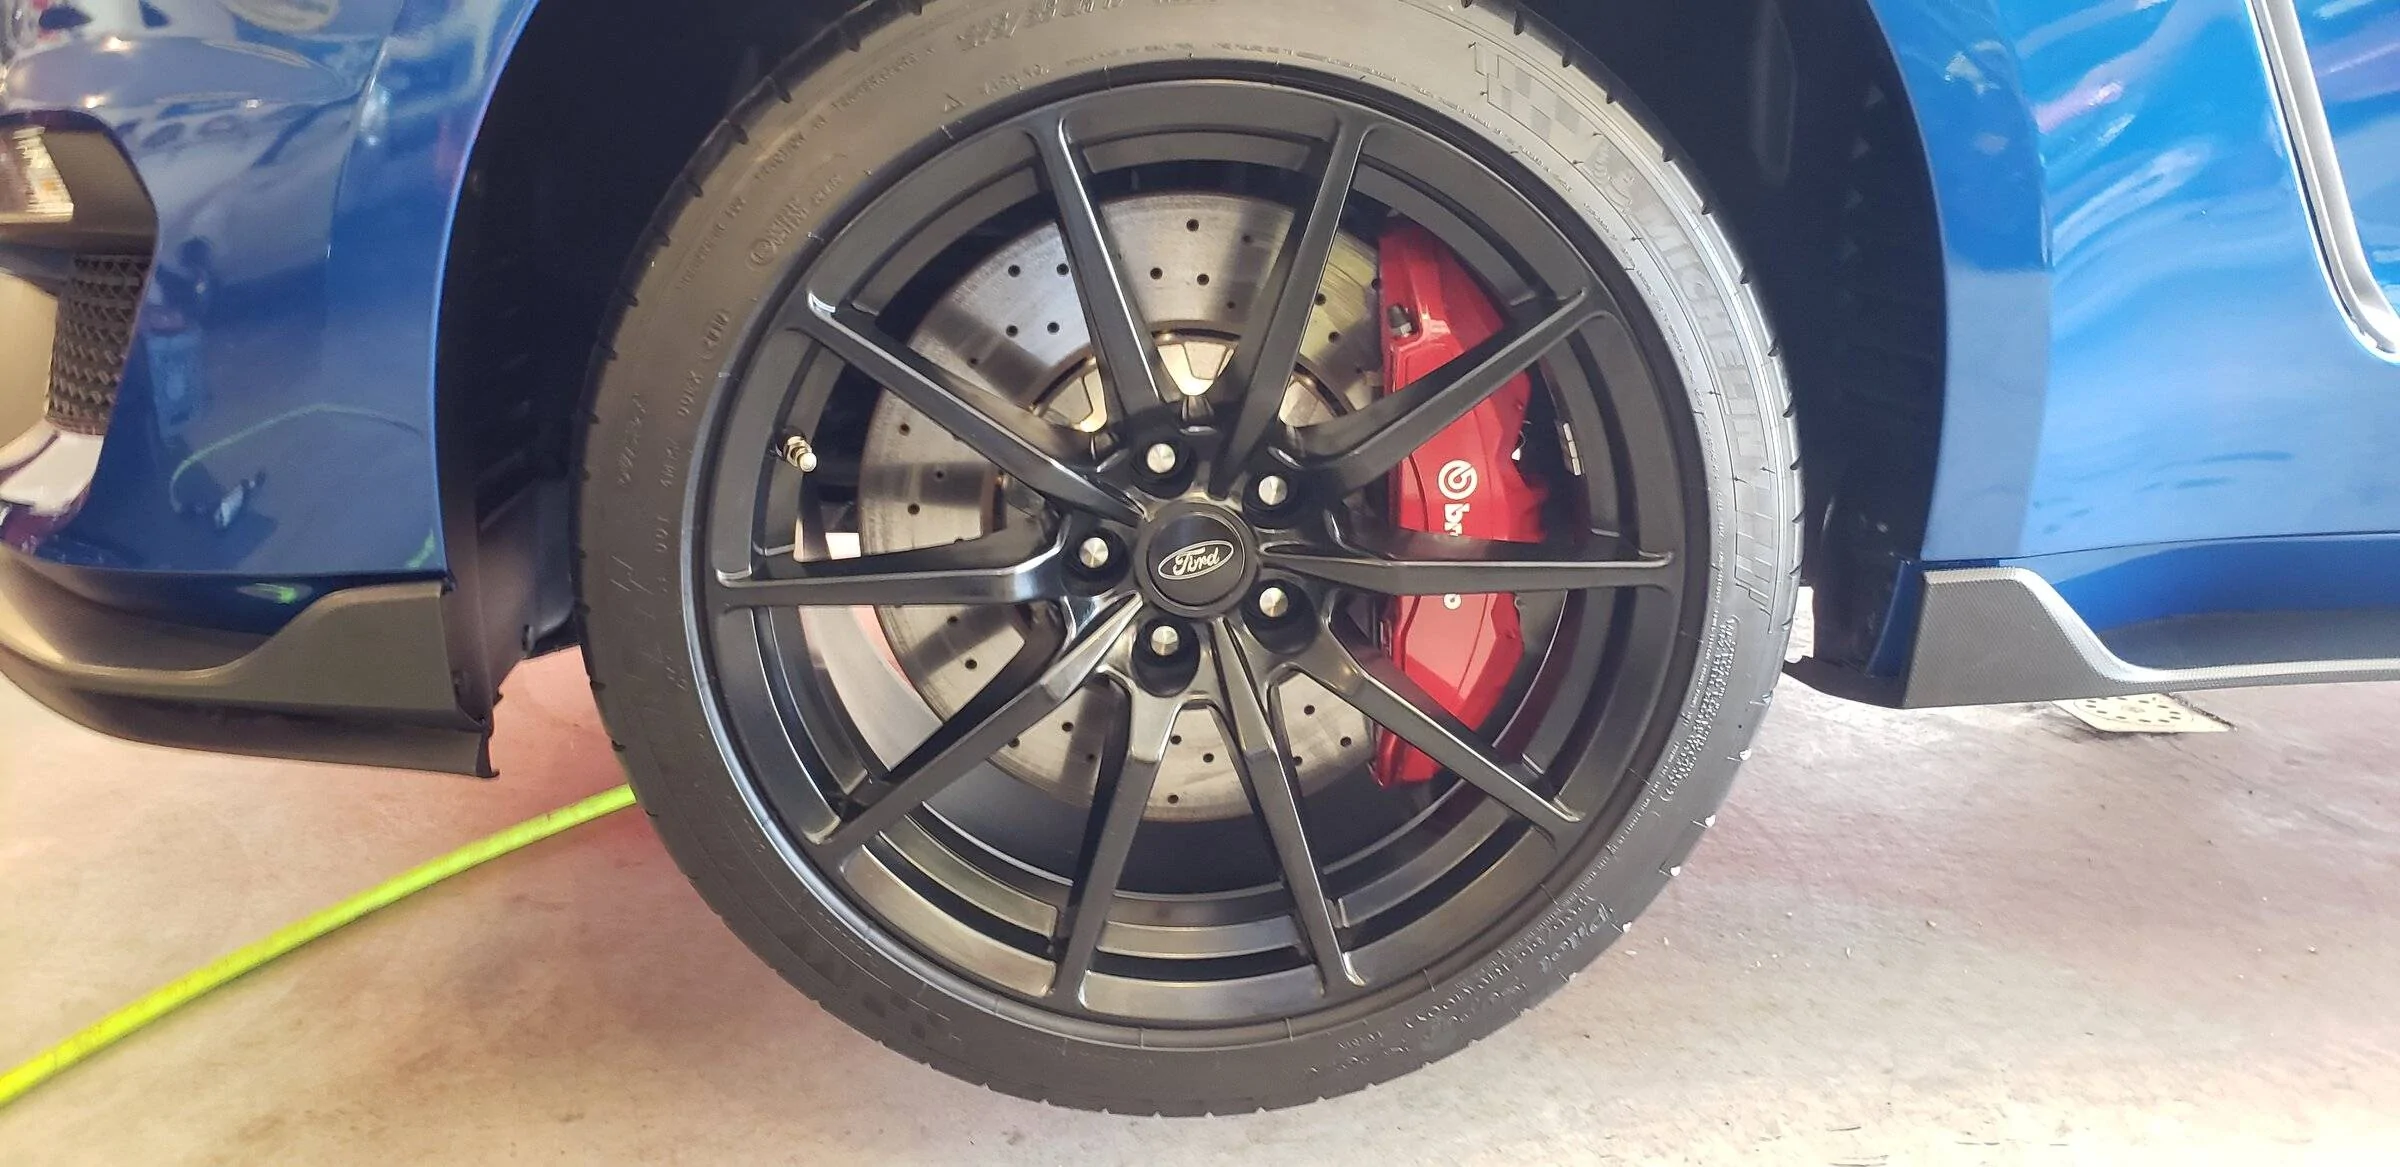
Super happy with the results. But I should have paid the $495 LOL, would have saved a lot of work!
Supplies were one can each of Dupli-Color red caliper paint, gray engine primer, and wheel clear coat; one bottle of Black Magic No-Scrub wheel cleaner; two 9 ft x 12 ft 0.7 mil clear plastic drop cloths; isopropyl alcohol; and painter's tape.
Watched some Youtube videos of guys painting their calipers on the car, without removing the pads or rotors, and didn't like the look of painted pads. So first step was pull the pads and rotors, and mount the calipers back on the car. The fronts have two pins holding the pads in place and a center stud, I took those out too so they wouldn't get painted. Then sprayed them with the wheel cleaner and scrubbed them with a brush, and rinsed them into a bucket. Dried them and went over them again with a brush and isopropyl. No, this is NOT the detailer's two bucket method LOL!


Now the part I hate most about paint jobs - masking. The two drop cloths covered most of the car, the grill and rear decklid were uncovered. Maybe unnecessary but I didn't want to take a chance on getting overspray on the paint. Cut holes in the dropcloths for the side view mirrors and covered them with grocery bags. Then cut small holes for each caliper and stretched the plastic around it. Used wadded up paper towels and painters tape to try to mask off the three holes in the front calipers, the bleeder valves, the pistons, etc.


Finally. Time to start painting. Two coats of primer and three coats of red, waiting 10 minutes between each coat. Then let it sit 3 hours before reassembling the rears.
Then I reinstalled the front rotors and bolted on the calipers before applying silver Brembo decals, found them on Etsy, good guy:
https://www.etsy.com/listing/104991...f=sr_gallery-1-1&bes=1&organic_search_click=1
After applying the decals I hit them with two coats of clear coat and finished reassembly:
Super happy with the results. But I should have paid the $495 LOL, would have saved a lot of work!


Sponsored

")