DFB5.0
Well-Known Member
- Thread starter
- #1
DFB’s Detailing Tips, Tricks & Shortcuts
The following tips I have written about many times, but quite often they are buried amongst countless separate posts. Most of these I have learnt from watching others, while some are my own discoveries. In any case, these tips can help streamline your process, make certain tasks more enjoyable, or deal with often difficult situations. With the same mindset, I’ve also included a few key products and tools.

WASHING & CLEANING
Basic Chemistry – I’m certainly not a chemist or scientifically inclined, but I have picked up on some basic principles that help when selecting a product to do certain things.
Alkalinity - For removing dirt and oily residue, alkaline chemicals are best suited. That means an alkaline soap will cut through dirt and mud much easier than pH neutral. You also need alkalinity to break down tyres dressings or removal of greasy/oily contamination.

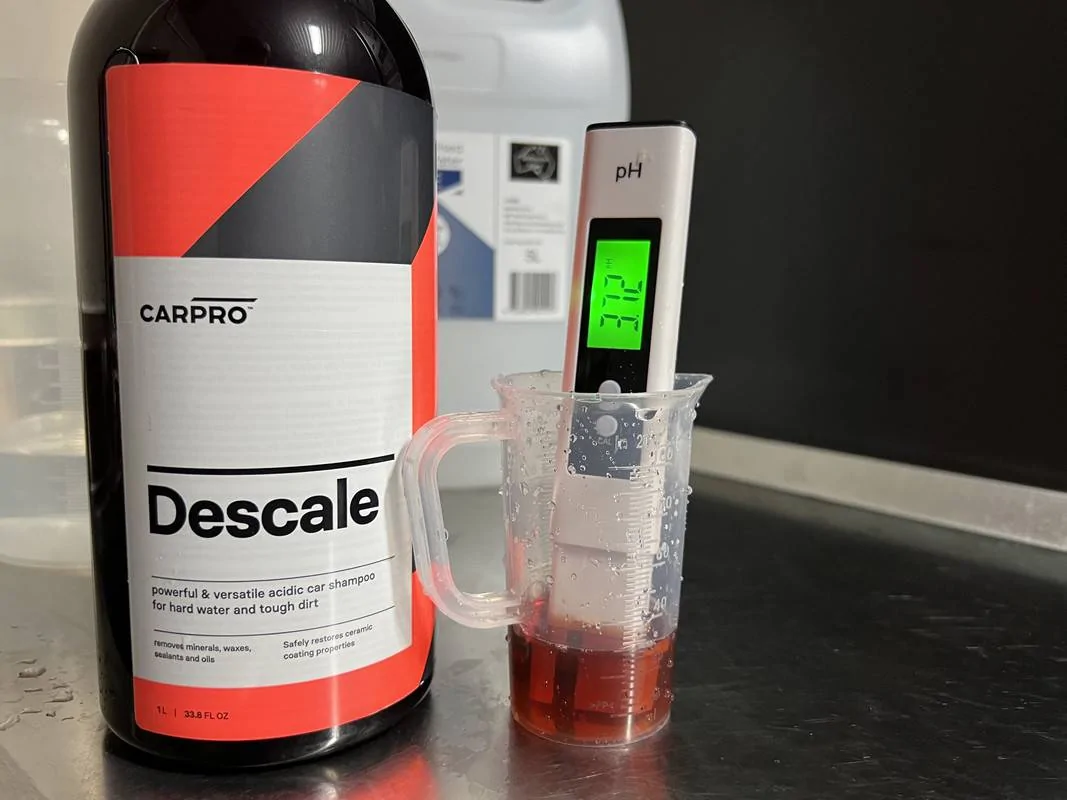
Acidity – For the neutralization and removal of mineral content, often displayed via hard water spots that have etched into the clear coat. Acidity counteracts these minerals, in turn dissolving them for easy removal. Acidity was only ever found in harsh wheel cleaners, however in recent years, there has been a rise in dedicated acidic soaps and water spot removers.
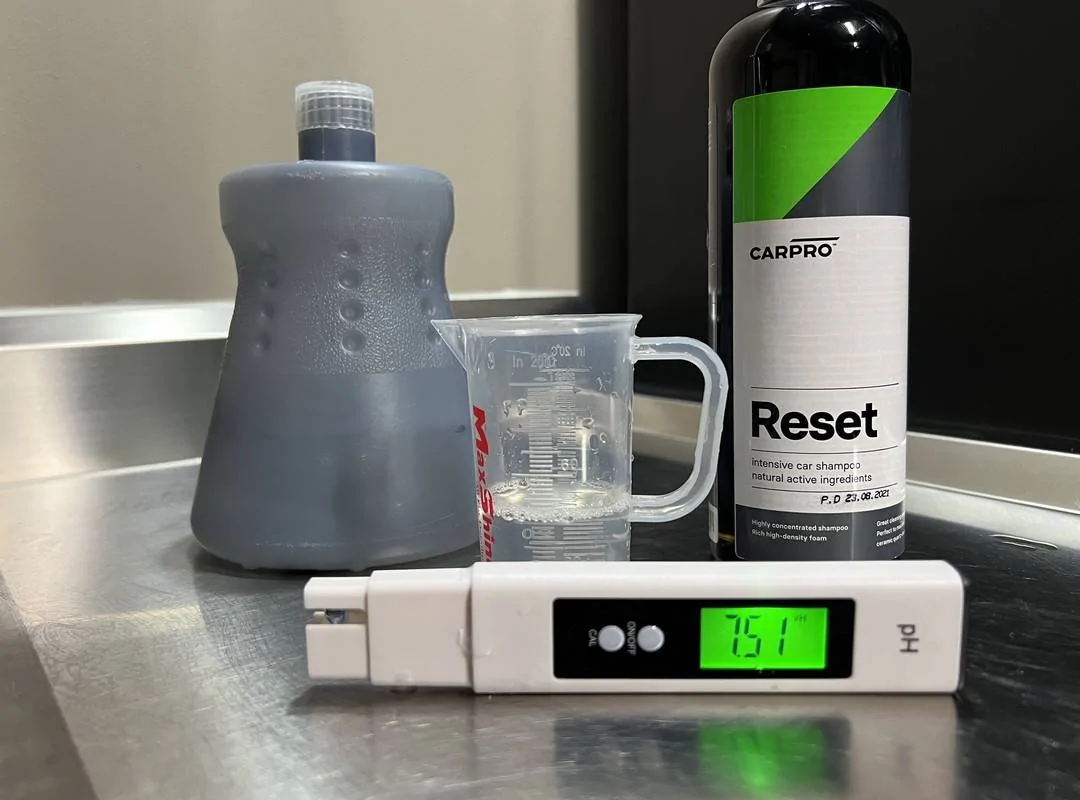
Neutrality – For the most part, pH neutral chemicals will be less harsh on the surfaces being treated. Soaps that are pH balanced will help preserve your wax or sealant and prevent premature aging of unpainted plastic and rubber trims. Iron removers are often pH neutral to slightly acidic. Leather cleaners should also be neutral.

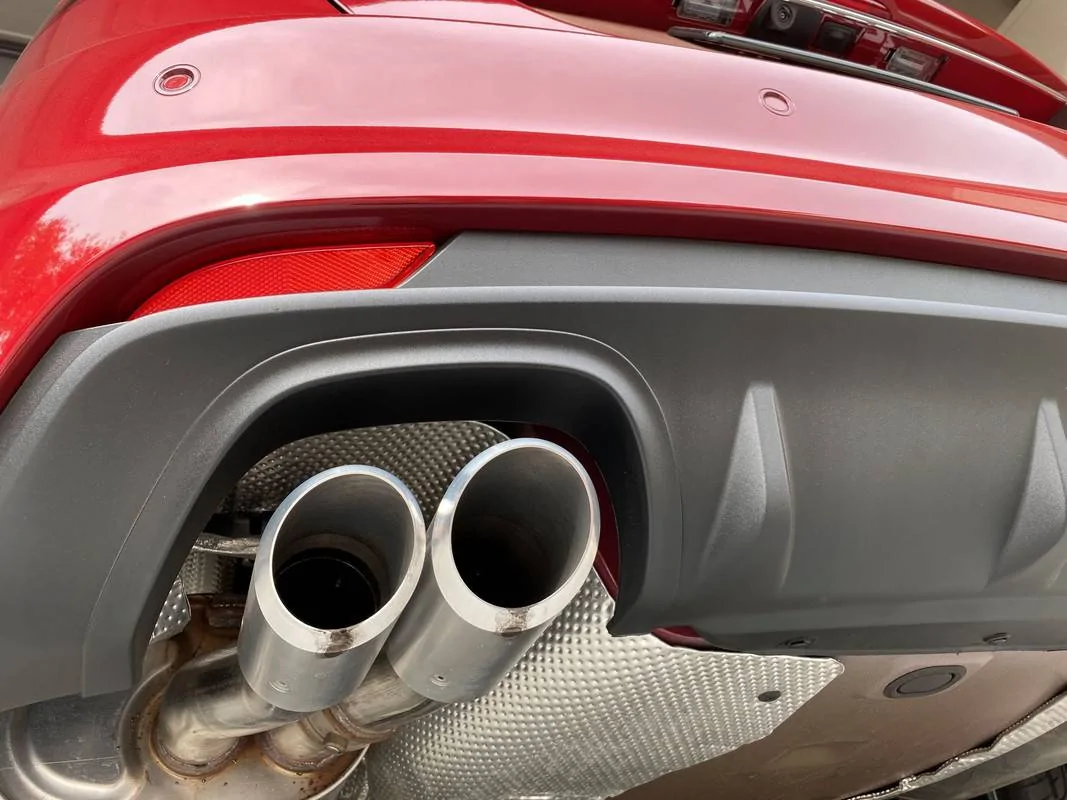
P21S Polishing Soap – I know I mention this quite often, but it's one of those super obscure products that has few competitors. While there are plenty of metal polishes on the market, they are messy and time consuming to use. This product both cleans and polishes in a single step. This also means you simply rinse to remove the residue, nor do you stain your hands or towel with black goop. Ideally suited for exhaust tips and chrome bumpers.


Carbon-Stained Exhaust Tips – Also on exhaust tips, if you have issues with carbon staining, then this one is for you. Quite common on vehicles with direct injection, to deal with baked on carbon, Stoner's Tarminator will easily remove this from chrome, stainless and aluminium tips.

Tyre Browning / Blooming – The rule of thumb when cleaning tyres is continue scrubbing and rinsing until the cleaner no longer turns brown. But…………….this can actually work against you. Round after round of cleaning removes the anti-ozone treatment, in turn causing more of that compound to rise to the surface, which causes the tyre to brown up again in short order. I’ve always said stop at three rounds, if you still have browning, progress to the method outlined next………………………..
Tyre Deep Cleaning – If you are struggling to get your tyres properly clean or stripped of old dressing, the use of a tar remover or mineral spirits will get that sorted for you. In both cases, these solvents will break down old dressing and tyre bloom with ease. To use, apply to an old towel (avoid applying directly), then scrub the sidewall clean. As the solvent evaporates, you will be left with a bare, matt surface. I use Stoner’s Tarminator, but mineral spirits is easier to find and just as effective. Choose your towel wisely though, you will completely ruin it doing this.
The Most Versatile Product You Can Buy – While I love having the exact product for EVERY detailing task, I know that can be just too much for some. So, if you want to slim down your product collection, then buying a rinse-less wash concentrate will replace the most products in your cabinet in one hit. In that I mean a rinse-less wash can serve multiple roles without compromise, some of which I will expand further below. I’d probably list ONR, McKee’s N-914 and DIY Detail as the best options for this, which can easily function in the following roles –
- Rinse-less Wash
- Water-less Wash
- Quick Detailer / Drying Aid
- Clay Lubricant
- Glass Cleaner
- General Cleaning (Door jambs, engine bays, benches ect)
- Polishing Pad Cleaner
- Interior Cleaner (see below)
- Windscreen Washer Fluid (see below)
Windscreen Washer Fluid – While there are plenty of washer additives on the market, I don’t like idea of those chemicals being misted onto paintwork. A safer and more cost-effective alternative would be to use one of the surfactant-based rinse-less wash products, say McKee’s N-914, Bowden’s Dry Spell or DIY Detail. In a jug, I mix up N-914 at the 128:1 waterless wash ratio, then add it to the reservoir. Being surfactant based, you get some mild suds to indicate it doing the job, but without being harsh should it dry on the paint. I would refrain from using the polymer-type products such as ONR and Absolute, likewise any of the ceramic versions like ADS Hero or Carpro ECH20. While I haven’t tried it, I suspect those products would be quite smeary in this role.
INTERIOR CLEANING
I much prefer exterior detailing, so I'm always on the lookout for anything that can help get these tasks done as quickly and as efficiently as possible.
Safe, Effective Interior Cleaner/Detailer – For a very safe but effective interior cleaner, a rinse-less wash works really well in this role. The key here is the multi-surface suitability, from plastics, glass, screens, gloss trims, chrome, carbon fibre, leather, vinyl, even cloth trim and carpet. While I believe a rinse-less won’t totally replace a dedicated interior cleaner, for maintaining an interior with regular mild cleaning and dusting, rinse-less will have you sorted without causing chemical build up or inducing shine. My go-to here is ONR, but with the exception of the ceramic/wax infused options, most rinse-less wash products would work using the standard 256:1 dilution.
Tornador – If you deal with a lot of sand or pet hair, using this air tool will help save you time by dislodging the debris from carpet, thus allowing it to be easily removed with the vacuum. Also great for blasting debris from between seats or hard to reach areas.
Vacuum Aid – Again, if you struggle with pet hair, grass and sand in carpets, then using a “vacuum aid” is worth trying. While an off-label use, something like P&S Paint Gloss or Meguiar’s Last Touch can be lightly misted onto carpet prior to vacuuming, which helps cut down static charge, and then makes removal quicker and easier. P&S have just released a dedicated product for this called Release, which also includes an odour neutraliser. (This tip is courtesy of Sydni from P&S)
Release Vacuum Aid – P & S Detail Products
Cleaning Fabric, Carpet & Alcantara – There are two things to remember when cleaning these materials, don’t oversaturate with cleaner, and make sure to remove the cleaner from the fabric. The cleaner helps dissolve the grime, in effect creating a cleaner+dirt emulsion. Failure to remove the emulsion, well, all you have done is move the grime around rather than remove it. Ideally, you would use an extractor, but wiping with a clean, damp towel and follow up vacuum will do the job as well.
Glass Cleaning – Don’t waste time attempting to clean glass in the full sun or if the glass is even remotely warm to touch. This causes the glass cleaner to evaporate too quickly, in turn leaving behind hazy residue. Where possible, always clean glass in the shade, under cover or from dead cold. If you have ended up washing in sunlight, move the car into the garage and attend to other tasks first, allowing time for the glass to cool.
Reach & Clean Tool – Also on glass, if your vehicle has an awkwardly steep or difficult to reach windscreen, using this tool will help you reach right down into the corners where your hand and towel won’t fit. You can also use this on the exterior, allowing you to easily reach right into the middle of the screen, which would be especially useful on tall and wide vehicles like Landcruiser’s or large pickups.
PAINT CORRECTION & PROTECTION
The following focuses on polishing, pad care and paint protection.
Post Decon Wash / Pre-Polishing Drying Aid – This tip is my own, something I decided to try one day and have continued to do so ever since. In fact, it influenced a high-profile influencer to try it for himself.
After the strip wash prior to polishing, water will sit completely flat on the paint, which makes a blower less effective when drying. You also don’t really want to use a drying aid that leaves something behind, which could potentially load up your pads quicker. Using your IPA-based prep spray after decon washing and before polishing has a few benefits -
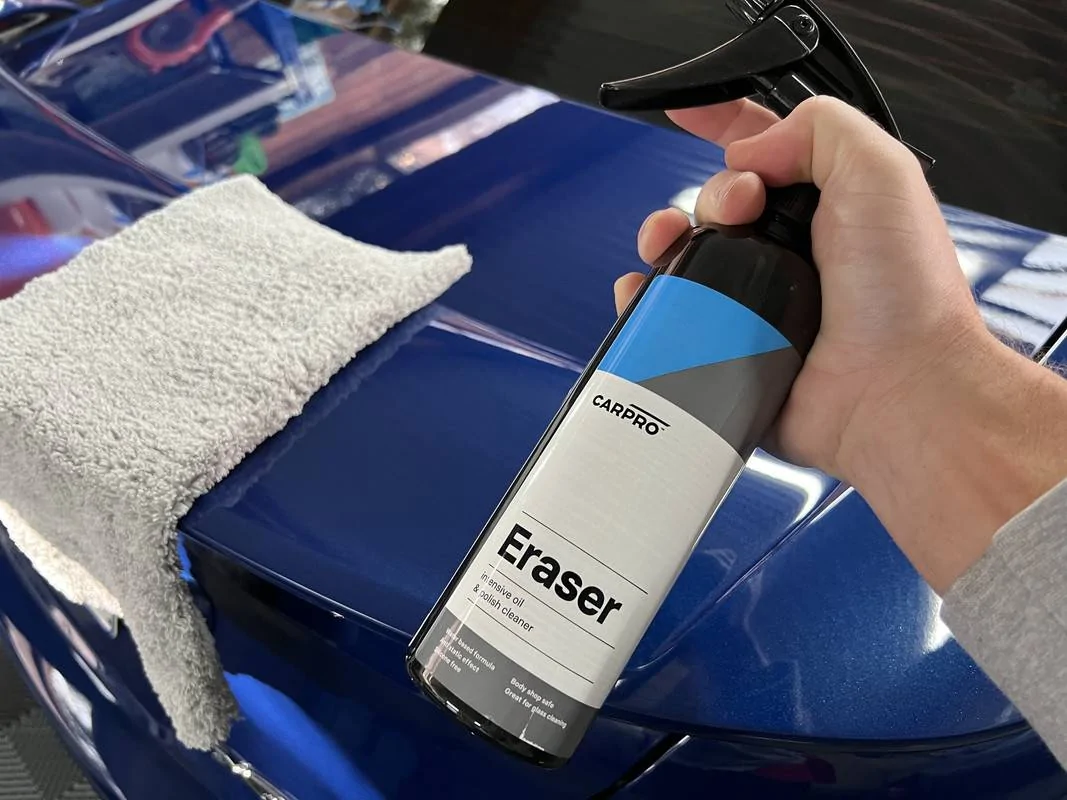
- Provides a lubricant between the towel and paint without leaving anything behind. In this case, you would go for Carpro Eraser or Gyeon Prep because of the included lubricant package, something not always provided by other similar products.
- Removes any lingering chemical residue, which helps provide a clearer picture of the paint during the inspection stage
- The IPA content helps deal with the flat water behaviour, as in assisting the evaporation rate.
- Helps during the masking stage, allowing tape to adhere better.
Compressed Air – Surely one of the best tools you can use during a polishing session, buffers aside. It starts by using an air gun to remove trapped water prior to taping and polishing, continues with pad blow outs between sections (in turn keeping the pad fresher and extending its working time before swapping), and finishes after polishing by helping to remove dust from cracks and crevices.

Prep, Prep, Prep – I hate this part because by the time I’ve done all the decon washing, I just want to get on with the job! But time spend now taping and protecting will make the whole process flow much smoother. So, spend the extra time and be rewarded down the track.
Something that I always hated about polishing was how dust would collect in all the grooves of the windscreen scuttle panel. A tip I learned from a fellow forum member, lay a towel/s down at the base of the windscreen to trap the polishing dust. Trust me, this is a genius move because it makes post-polishing clean up so much quicker.

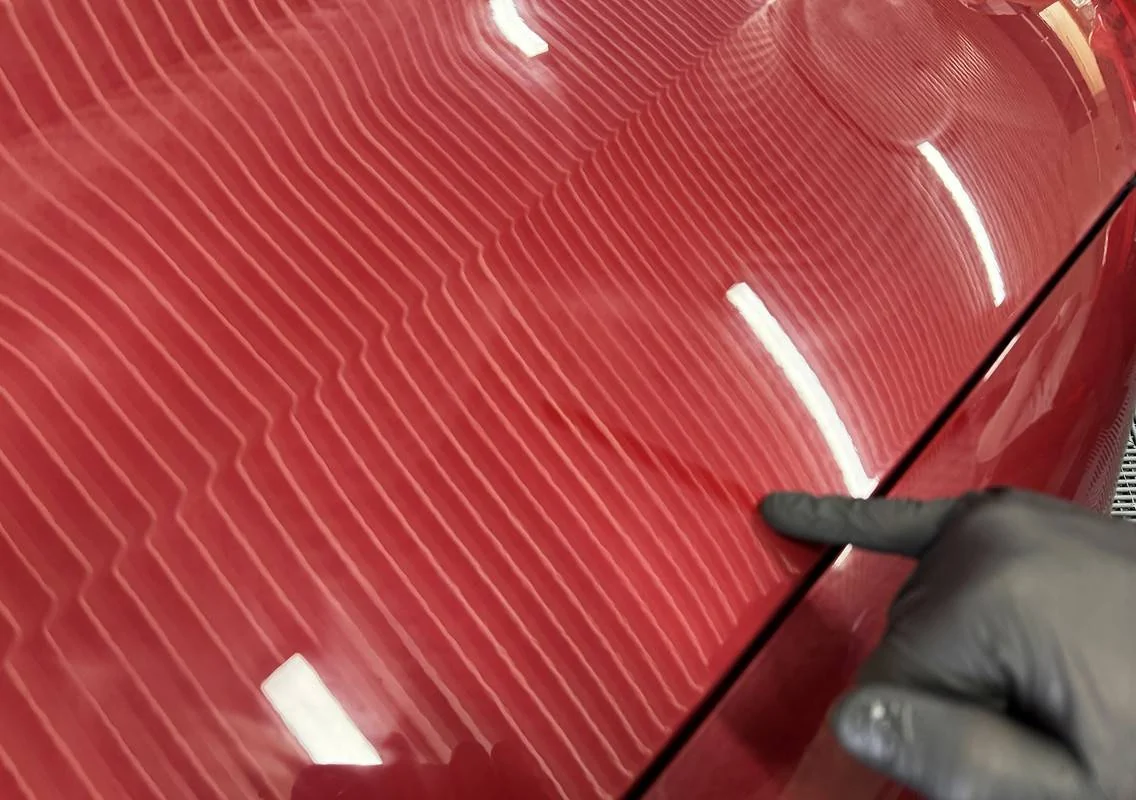
Edge Protection – When polishing panels with an adjacent edge, its good practice to protect that edge to reduce the risk of burning through the clearcoat on these vulnerable areas. This can be done with tape, or by propping an opening panel with a folded towel.
Wax & Sealant Application – For those like me who still like using these products, using your dual action polisher to apply a wax or sealant is desirable for a few reasons. Firstly, it’s the best way to get consistent, thin coverage. This means you minimise waste, less is often more with these products. The bonus advantage is that it makes the wipe off so much easier. And lastly, its overall much quicker.
For this, use a soft waxing pad (often black in colour depending on the brand) and use the lowest setting on the machine. Remember, you are not correcting here, so pad stall, arm speed, downward pressure or the number of passes is not a consideration. The goal is simply to get the product on paint.
You will still need a hand applicator for smaller, intricate areas such as the front bumper, wing mirrors ect.


Pad Cleaning – Surely one of the more tedious detailing related tasks, cleaning pads after a polishing session. The following tips will minimise the tedium………………..
- Don’t let the polish in the pad dry out, this will otherwise significantly alter your attempts at removal. Put them into a sealed empty bucket, or into a bucket of water with microfiber detergent until you are ready to properly clean them. This especially applies if you are using an all-in-one with a protectant, think Carpro Essence or Rupes Uno Advanced.
- My method of cleaning pads involves letting them soak overnight using warm-hot water with either APC (Green Star) or Decon Soap (Carpro Lift). From there, I rinse each under running warm water, then into the washing machine using Rags To Riches. Allow to fully air dry, then store in airtight containers.
- If you have used a polishing pad to apply a wax or sealant…………………..just bin it, you will spend more time trying to remove the residue than the pad is worth. And even if you spend the time, you still won’t remove it all.
Trim Protection – If you want something to protect and enhance trim without resorting to a trim coating, or the repeated hassle of using a trim dressing like 303, then split the difference by using a spray sealant such as Carpro Reload or Gyeon Cure. These products will provide UV protection (like 303), but will last longer than one or two washes (unlike 303). To me, this is the best way to protect and maintain trim without running the risk of a coating, or need to be applying something so often like a dressing. Just don’t expect to revive faded trim with these, for that you will need a trim restorer like Solution Finish.
Ceramic Coatings – DO NOT buy into the whole 6, 7………10-year coating thing. I can almost guarantee the car will need to be polished before reaching the end of that time frame, and polishing removes the coating.
Also, these coatings won’t last beyond 12-months unless properly maintained. It’s one of the biggest con-jobs of the detailing industry, one that creates un-realistic expectations and leaves customers wondering what happened because they are led to believe a ceramic coating means never having to wash the car. In the end, the customer never returns.
A ceramic coating needs just as much care and attention as a wax or sealant, the difference being the chemical resistance and ease of future cleaning.
Please don’t read this to mean I hate ceramic coatings, they have their place and can be a real time saver when it comes to washing. I also think having your wheels coated is well worth the effort. But they are not the be all and end all.


TOWELS, BRUSHES & ACCESSORIES
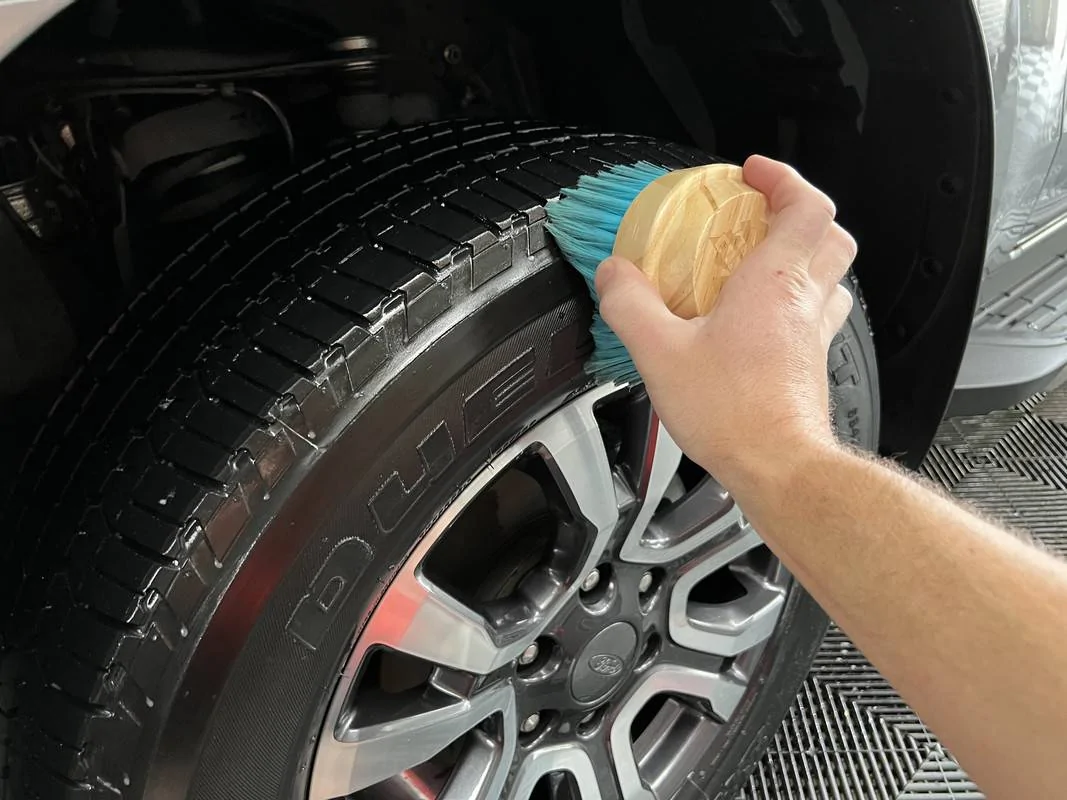
Dress to Impress – I almost always use a brush to dress tyres now. Not only is it cleaner, but I also find a brush quicker and easier. The XL sized Maxshine brushes are brilliant for this, and if you have large pickup or SUV tyres, a soft wheel face brush is absolutely brilliant! Brushes can also be cleaned as required and won't require frequent replacement like foam or microfiber.
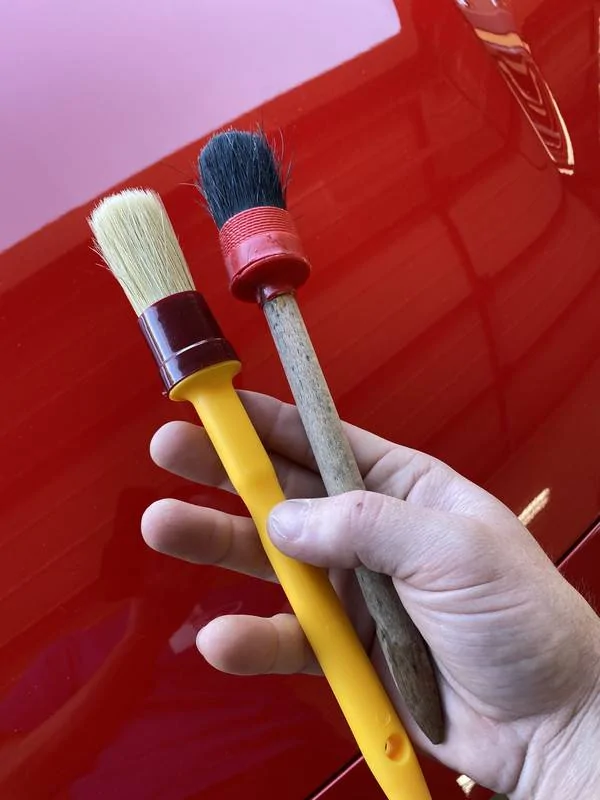
Get A Handle – Avoid buying detailing brushes with timber handles. I’ve found as the timber expands and contracts with exposure to moisture, it caused the plastic bristles holders to fatigue and ultimately split. Plastic is by far the way to go here, think Detail Factory, Work-Stuff, Race Glaze.

Tyre Brushes – For this, you want medium to stiff bristles to properly clean rubber. Too soft, the bristles will squash and won't do anything, to stiff and it won't conform to the various contours.
Engine Bay Cleaning – The EZ-Detail brushes were originally designed for cleaning wheels with limited access. However, that same attribute makes them ideal for engine bay cleaning as well, allowing you to easily clean between hoses, intake parts, wiring looms, the scuttle panel……….or anywhere a normal brush won’t fit or be effective.
Clean, Dirty Bucket – This one is from notable detailer Mike Phillips and involves having a CLEAN bucket to place DIRTY towels in as you work. In my case, I have a bucket with a sealed lid, which prevents towels from drying out while I'm working. Note that this is not for long term storage, see below.
Don’t Delay – Always clean used towels ASAP, ideally within a few hours of use. This is especially important for towels used with a spray sealant (Bead Maker, Amplify, Reload) or AIO polish (Uno Advanced, Essence). The last thing you want is those products drying in the fibres and making the towel hydrophobic. The sealed bucket buys you time while working, from here, they should go straight into the washing machine or bucket of water with detergent.

Microfiber Detergent – Always use a dedicated microfiber detergent to properly remove modern detailing chemicals, in turn extending the life of your towels. I know it might seem like a needless cash grab, but towels are what touch your paint, you want them in the best condition possible. Once I switched to a dedicated detergent, I noticed a significant improvement in towel softness and performance, to the point where it revived towels on the brink of replacement.
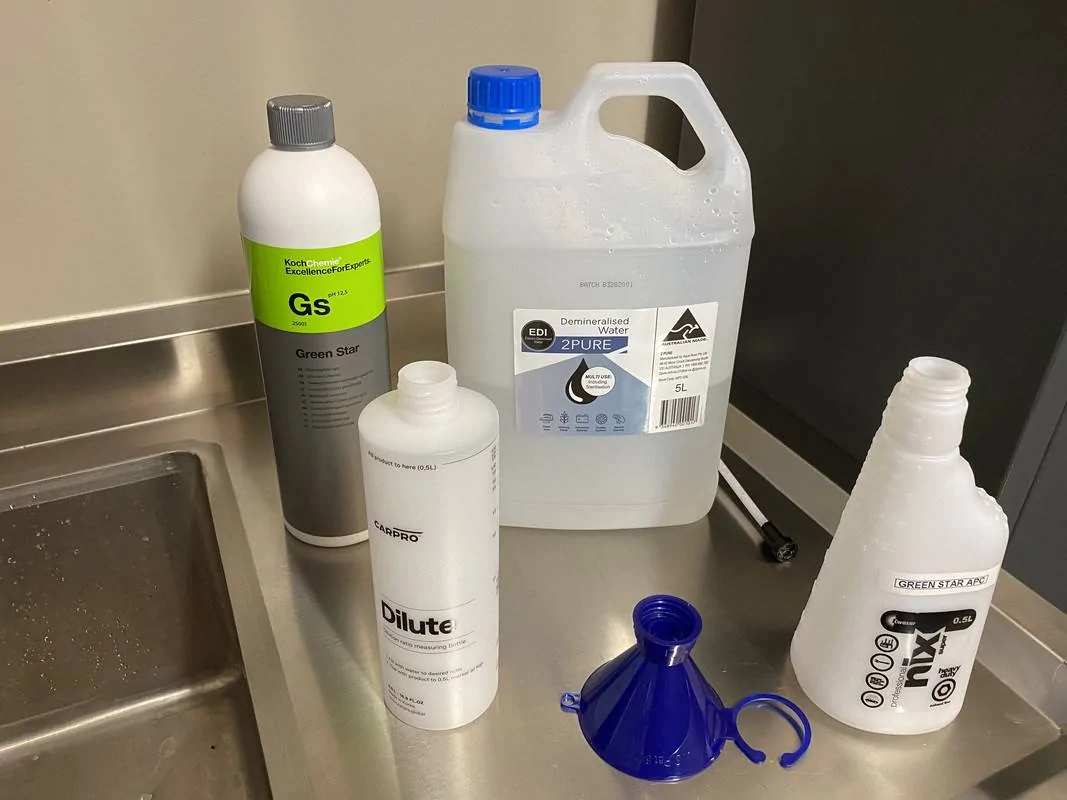
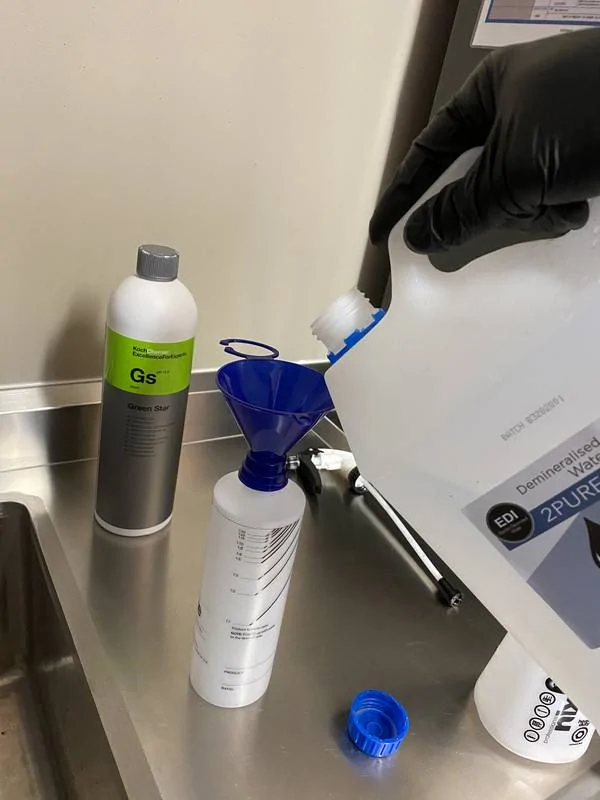
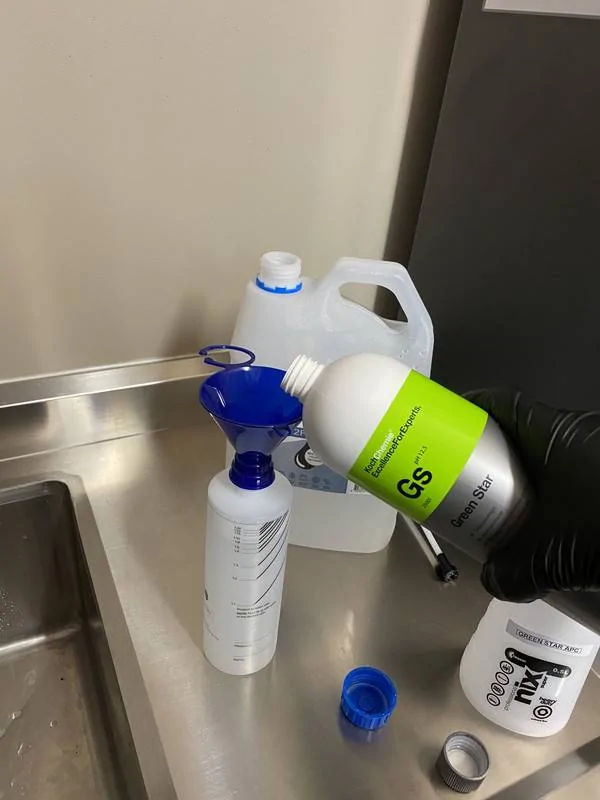
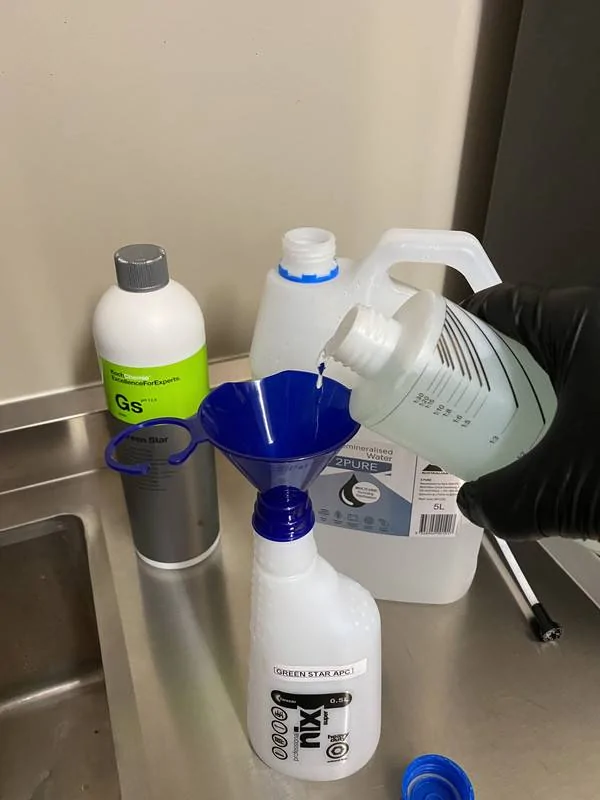
Dilutions – If you struggle with dilutions, the Carpro Dilute bottle comes in both 500 and 1000ml versions to make this task simple. While you can use these as a spray bottle, for me they are purely for measuring out the correct ratio of water to chemical, then emptied into a double action sprayer. Simply fill with water to the ratio line marking, then top off with the chemical. Otherwise, there are dilution ratio calculators available online or via phone apps.
PRESSURE WASHING
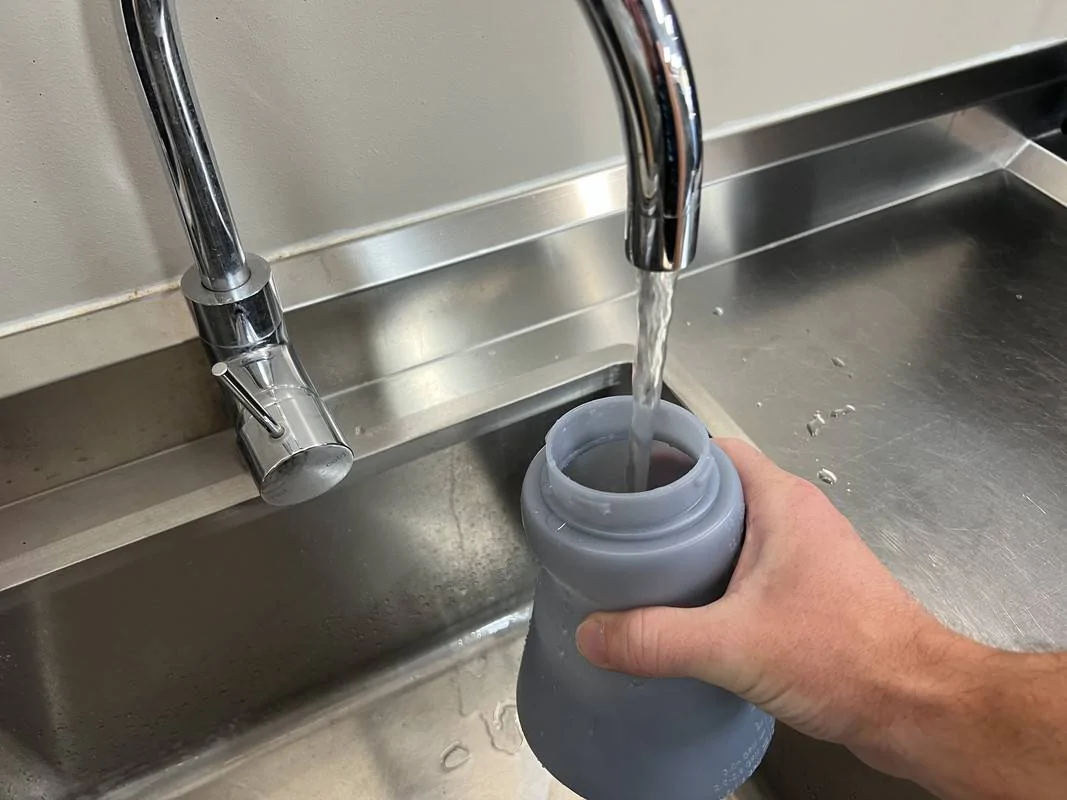
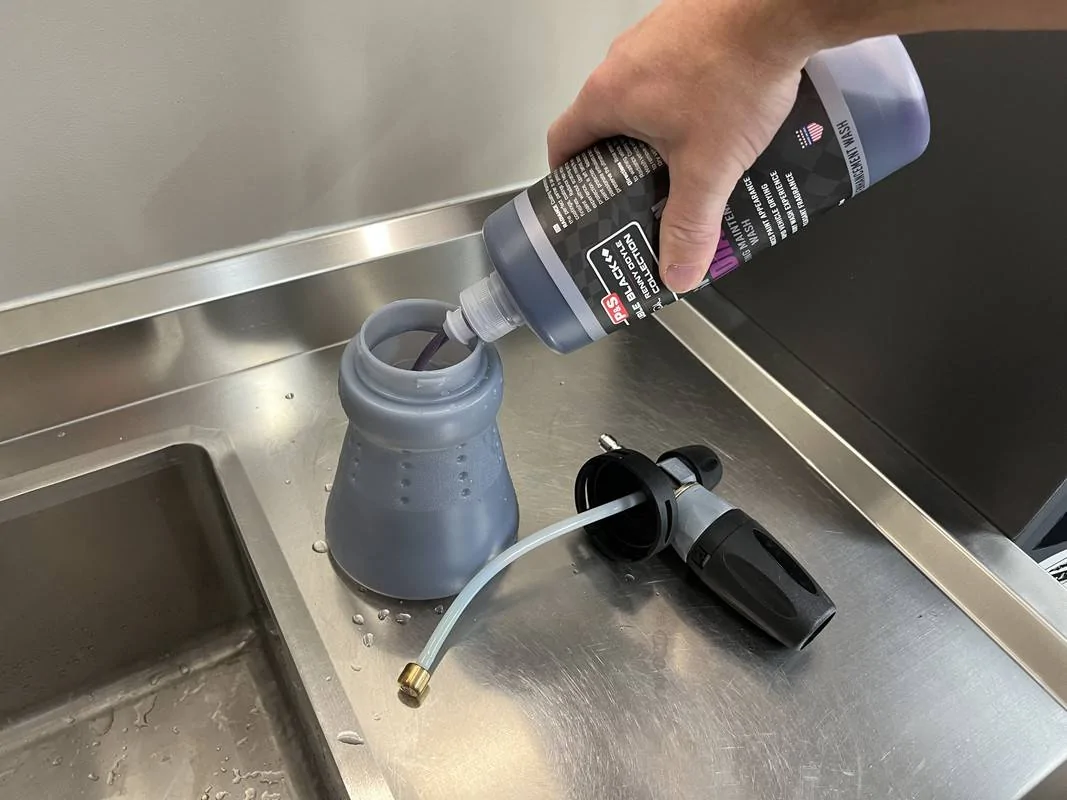
Foam Cannon Filling – I always fill a foam cannon with water first, then add soap. Doing it the other way around, you end up with the soap foaming up and preventing you from filling all the way with water, in turn altering your dilution ratio. The other option is to put the soap in first, then submerge the bottle in your rinse bucket to fill with water. I much prefer the first method as its quicker and easier.
Soap Storage – Try to avoid storing diluted soap solution in the foam cannon bottle for more than a day or two. This would apply if you have known hard tap water, the dissolved minerals can “attack” the chemistry of the soap, in turn hampering its ability to foam properly. Either mix up less or empty the remaining solution into your wash bucket.
Point Away – Whenever squeezing the gun trigger, always do this pointing AWAY from the car. It can take a little while to get into this habit, but it’s a worthwhile endeavour to avoid firing a projectile at your car should a nozzle or fitting fail to seat properly.
Flow, Not Pressure – Contrary to what you might think, it’s the flow output of a pressure washer that’s most important for car cleaning. Yes, you do need some pressure for the foam cannon to function, but it’s the flow that is doing the real work.
The best way I can describe this would be to take a garden hose, remove the fitting and place your thumb partially over the end of the hose. Doing this will hold back the flow but create a higher pressure. Then try rinsing soap with that and you notice how long it will take. Also note how fatiguing it will be on your thumb. Now, remove your thumb and allow the water to flow, you will notice how much quicker it will rinse soap from the vehicle, and how it doesn’t fatigue your thumb.
This same concept applies to pressure washing cars. Depending on the machine, when you wind back the pressure, you boost the flow rate of the pump and reduce stress on the motor. Aim for 1000 – 1500 psi and as close to 7.5 – 10 litres per minute as you can.
Final Thoughts -
The above is the result of living and breathing detailing for most of my woken hours. And I’m still learning. So, if you can add to this list, feel free to contribute.
Happy Detailing!
The following tips I have written about many times, but quite often they are buried amongst countless separate posts. Most of these I have learnt from watching others, while some are my own discoveries. In any case, these tips can help streamline your process, make certain tasks more enjoyable, or deal with often difficult situations. With the same mindset, I’ve also included a few key products and tools.

WASHING & CLEANING
Basic Chemistry – I’m certainly not a chemist or scientifically inclined, but I have picked up on some basic principles that help when selecting a product to do certain things.
Alkalinity - For removing dirt and oily residue, alkaline chemicals are best suited. That means an alkaline soap will cut through dirt and mud much easier than pH neutral. You also need alkalinity to break down tyres dressings or removal of greasy/oily contamination.

Acidity – For the neutralization and removal of mineral content, often displayed via hard water spots that have etched into the clear coat. Acidity counteracts these minerals, in turn dissolving them for easy removal. Acidity was only ever found in harsh wheel cleaners, however in recent years, there has been a rise in dedicated acidic soaps and water spot removers.
Neutrality – For the most part, pH neutral chemicals will be less harsh on the surfaces being treated. Soaps that are pH balanced will help preserve your wax or sealant and prevent premature aging of unpainted plastic and rubber trims. Iron removers are often pH neutral to slightly acidic. Leather cleaners should also be neutral.
P21S Polishing Soap – I know I mention this quite often, but it's one of those super obscure products that has few competitors. While there are plenty of metal polishes on the market, they are messy and time consuming to use. This product both cleans and polishes in a single step. This also means you simply rinse to remove the residue, nor do you stain your hands or towel with black goop. Ideally suited for exhaust tips and chrome bumpers.


Carbon-Stained Exhaust Tips – Also on exhaust tips, if you have issues with carbon staining, then this one is for you. Quite common on vehicles with direct injection, to deal with baked on carbon, Stoner's Tarminator will easily remove this from chrome, stainless and aluminium tips.

Tyre Browning / Blooming – The rule of thumb when cleaning tyres is continue scrubbing and rinsing until the cleaner no longer turns brown. But…………….this can actually work against you. Round after round of cleaning removes the anti-ozone treatment, in turn causing more of that compound to rise to the surface, which causes the tyre to brown up again in short order. I’ve always said stop at three rounds, if you still have browning, progress to the method outlined next………………………..

Tyre Deep Cleaning – If you are struggling to get your tyres properly clean or stripped of old dressing, the use of a tar remover or mineral spirits will get that sorted for you. In both cases, these solvents will break down old dressing and tyre bloom with ease. To use, apply to an old towel (avoid applying directly), then scrub the sidewall clean. As the solvent evaporates, you will be left with a bare, matt surface. I use Stoner’s Tarminator, but mineral spirits is easier to find and just as effective. Choose your towel wisely though, you will completely ruin it doing this.


The Most Versatile Product You Can Buy – While I love having the exact product for EVERY detailing task, I know that can be just too much for some. So, if you want to slim down your product collection, then buying a rinse-less wash concentrate will replace the most products in your cabinet in one hit. In that I mean a rinse-less wash can serve multiple roles without compromise, some of which I will expand further below. I’d probably list ONR, McKee’s N-914 and DIY Detail as the best options for this, which can easily function in the following roles –
- Rinse-less Wash
- Water-less Wash
- Quick Detailer / Drying Aid
- Clay Lubricant
- Glass Cleaner
- General Cleaning (Door jambs, engine bays, benches ect)
- Polishing Pad Cleaner
- Interior Cleaner (see below)
- Windscreen Washer Fluid (see below)

Windscreen Washer Fluid – While there are plenty of washer additives on the market, I don’t like idea of those chemicals being misted onto paintwork. A safer and more cost-effective alternative would be to use one of the surfactant-based rinse-less wash products, say McKee’s N-914, Bowden’s Dry Spell or DIY Detail. In a jug, I mix up N-914 at the 128:1 waterless wash ratio, then add it to the reservoir. Being surfactant based, you get some mild suds to indicate it doing the job, but without being harsh should it dry on the paint. I would refrain from using the polymer-type products such as ONR and Absolute, likewise any of the ceramic versions like ADS Hero or Carpro ECH20. While I haven’t tried it, I suspect those products would be quite smeary in this role.

INTERIOR CLEANING
I much prefer exterior detailing, so I'm always on the lookout for anything that can help get these tasks done as quickly and as efficiently as possible.
Safe, Effective Interior Cleaner/Detailer – For a very safe but effective interior cleaner, a rinse-less wash works really well in this role. The key here is the multi-surface suitability, from plastics, glass, screens, gloss trims, chrome, carbon fibre, leather, vinyl, even cloth trim and carpet. While I believe a rinse-less won’t totally replace a dedicated interior cleaner, for maintaining an interior with regular mild cleaning and dusting, rinse-less will have you sorted without causing chemical build up or inducing shine. My go-to here is ONR, but with the exception of the ceramic/wax infused options, most rinse-less wash products would work using the standard 256:1 dilution.

Tornador – If you deal with a lot of sand or pet hair, using this air tool will help save you time by dislodging the debris from carpet, thus allowing it to be easily removed with the vacuum. Also great for blasting debris from between seats or hard to reach areas.

Vacuum Aid – Again, if you struggle with pet hair, grass and sand in carpets, then using a “vacuum aid” is worth trying. While an off-label use, something like P&S Paint Gloss or Meguiar’s Last Touch can be lightly misted onto carpet prior to vacuuming, which helps cut down static charge, and then makes removal quicker and easier. P&S have just released a dedicated product for this called Release, which also includes an odour neutraliser. (This tip is courtesy of Sydni from P&S)
Release Vacuum Aid – P & S Detail Products
Cleaning Fabric, Carpet & Alcantara – There are two things to remember when cleaning these materials, don’t oversaturate with cleaner, and make sure to remove the cleaner from the fabric. The cleaner helps dissolve the grime, in effect creating a cleaner+dirt emulsion. Failure to remove the emulsion, well, all you have done is move the grime around rather than remove it. Ideally, you would use an extractor, but wiping with a clean, damp towel and follow up vacuum will do the job as well.
Glass Cleaning – Don’t waste time attempting to clean glass in the full sun or if the glass is even remotely warm to touch. This causes the glass cleaner to evaporate too quickly, in turn leaving behind hazy residue. Where possible, always clean glass in the shade, under cover or from dead cold. If you have ended up washing in sunlight, move the car into the garage and attend to other tasks first, allowing time for the glass to cool.
Reach & Clean Tool – Also on glass, if your vehicle has an awkwardly steep or difficult to reach windscreen, using this tool will help you reach right down into the corners where your hand and towel won’t fit. You can also use this on the exterior, allowing you to easily reach right into the middle of the screen, which would be especially useful on tall and wide vehicles like Landcruiser’s or large pickups.

PAINT CORRECTION & PROTECTION
The following focuses on polishing, pad care and paint protection.
Post Decon Wash / Pre-Polishing Drying Aid – This tip is my own, something I decided to try one day and have continued to do so ever since. In fact, it influenced a high-profile influencer to try it for himself.
After the strip wash prior to polishing, water will sit completely flat on the paint, which makes a blower less effective when drying. You also don’t really want to use a drying aid that leaves something behind, which could potentially load up your pads quicker. Using your IPA-based prep spray after decon washing and before polishing has a few benefits -
- Provides a lubricant between the towel and paint without leaving anything behind. In this case, you would go for Carpro Eraser or Gyeon Prep because of the included lubricant package, something not always provided by other similar products.
- Removes any lingering chemical residue, which helps provide a clearer picture of the paint during the inspection stage
- The IPA content helps deal with the flat water behaviour, as in assisting the evaporation rate.
- Helps during the masking stage, allowing tape to adhere better.

Compressed Air – Surely one of the best tools you can use during a polishing session, buffers aside. It starts by using an air gun to remove trapped water prior to taping and polishing, continues with pad blow outs between sections (in turn keeping the pad fresher and extending its working time before swapping), and finishes after polishing by helping to remove dust from cracks and crevices.

Prep, Prep, Prep – I hate this part because by the time I’ve done all the decon washing, I just want to get on with the job! But time spend now taping and protecting will make the whole process flow much smoother. So, spend the extra time and be rewarded down the track.
Something that I always hated about polishing was how dust would collect in all the grooves of the windscreen scuttle panel. A tip I learned from a fellow forum member, lay a towel/s down at the base of the windscreen to trap the polishing dust. Trust me, this is a genius move because it makes post-polishing clean up so much quicker.

Edge Protection – When polishing panels with an adjacent edge, its good practice to protect that edge to reduce the risk of burning through the clearcoat on these vulnerable areas. This can be done with tape, or by propping an opening panel with a folded towel.


Wax & Sealant Application – For those like me who still like using these products, using your dual action polisher to apply a wax or sealant is desirable for a few reasons. Firstly, it’s the best way to get consistent, thin coverage. This means you minimise waste, less is often more with these products. The bonus advantage is that it makes the wipe off so much easier. And lastly, its overall much quicker.
For this, use a soft waxing pad (often black in colour depending on the brand) and use the lowest setting on the machine. Remember, you are not correcting here, so pad stall, arm speed, downward pressure or the number of passes is not a consideration. The goal is simply to get the product on paint.
You will still need a hand applicator for smaller, intricate areas such as the front bumper, wing mirrors ect.

Pad Cleaning – Surely one of the more tedious detailing related tasks, cleaning pads after a polishing session. The following tips will minimise the tedium………………..
- Don’t let the polish in the pad dry out, this will otherwise significantly alter your attempts at removal. Put them into a sealed empty bucket, or into a bucket of water with microfiber detergent until you are ready to properly clean them. This especially applies if you are using an all-in-one with a protectant, think Carpro Essence or Rupes Uno Advanced.

- My method of cleaning pads involves letting them soak overnight using warm-hot water with either APC (Green Star) or Decon Soap (Carpro Lift). From there, I rinse each under running warm water, then into the washing machine using Rags To Riches. Allow to fully air dry, then store in airtight containers.
- If you have used a polishing pad to apply a wax or sealant…………………..just bin it, you will spend more time trying to remove the residue than the pad is worth. And even if you spend the time, you still won’t remove it all.
Trim Protection – If you want something to protect and enhance trim without resorting to a trim coating, or the repeated hassle of using a trim dressing like 303, then split the difference by using a spray sealant such as Carpro Reload or Gyeon Cure. These products will provide UV protection (like 303), but will last longer than one or two washes (unlike 303). To me, this is the best way to protect and maintain trim without running the risk of a coating, or need to be applying something so often like a dressing. Just don’t expect to revive faded trim with these, for that you will need a trim restorer like Solution Finish.


Ceramic Coatings – DO NOT buy into the whole 6, 7………10-year coating thing. I can almost guarantee the car will need to be polished before reaching the end of that time frame, and polishing removes the coating.
Also, these coatings won’t last beyond 12-months unless properly maintained. It’s one of the biggest con-jobs of the detailing industry, one that creates un-realistic expectations and leaves customers wondering what happened because they are led to believe a ceramic coating means never having to wash the car. In the end, the customer never returns.
A ceramic coating needs just as much care and attention as a wax or sealant, the difference being the chemical resistance and ease of future cleaning.
Please don’t read this to mean I hate ceramic coatings, they have their place and can be a real time saver when it comes to washing. I also think having your wheels coated is well worth the effort. But they are not the be all and end all.


TOWELS, BRUSHES & ACCESSORIES
Dress to Impress – I almost always use a brush to dress tyres now. Not only is it cleaner, but I also find a brush quicker and easier. The XL sized Maxshine brushes are brilliant for this, and if you have large pickup or SUV tyres, a soft wheel face brush is absolutely brilliant! Brushes can also be cleaned as required and won't require frequent replacement like foam or microfiber.


Get A Handle – Avoid buying detailing brushes with timber handles. I’ve found as the timber expands and contracts with exposure to moisture, it caused the plastic bristles holders to fatigue and ultimately split. Plastic is by far the way to go here, think Detail Factory, Work-Stuff, Race Glaze.
Tyre Brushes – For this, you want medium to stiff bristles to properly clean rubber. Too soft, the bristles will squash and won't do anything, to stiff and it won't conform to the various contours.


Engine Bay Cleaning – The EZ-Detail brushes were originally designed for cleaning wheels with limited access. However, that same attribute makes them ideal for engine bay cleaning as well, allowing you to easily clean between hoses, intake parts, wiring looms, the scuttle panel……….or anywhere a normal brush won’t fit or be effective.

Clean, Dirty Bucket – This one is from notable detailer Mike Phillips and involves having a CLEAN bucket to place DIRTY towels in as you work. In my case, I have a bucket with a sealed lid, which prevents towels from drying out while I'm working. Note that this is not for long term storage, see below.

Don’t Delay – Always clean used towels ASAP, ideally within a few hours of use. This is especially important for towels used with a spray sealant (Bead Maker, Amplify, Reload) or AIO polish (Uno Advanced, Essence). The last thing you want is those products drying in the fibres and making the towel hydrophobic. The sealed bucket buys you time while working, from here, they should go straight into the washing machine or bucket of water with detergent.
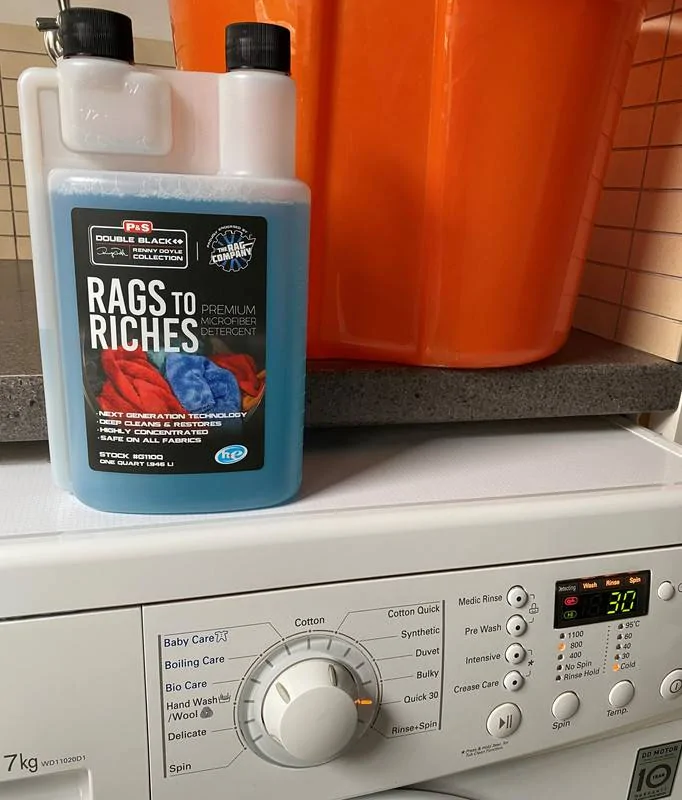
Microfiber Detergent – Always use a dedicated microfiber detergent to properly remove modern detailing chemicals, in turn extending the life of your towels. I know it might seem like a needless cash grab, but towels are what touch your paint, you want them in the best condition possible. Once I switched to a dedicated detergent, I noticed a significant improvement in towel softness and performance, to the point where it revived towels on the brink of replacement.

Dilutions – If you struggle with dilutions, the Carpro Dilute bottle comes in both 500 and 1000ml versions to make this task simple. While you can use these as a spray bottle, for me they are purely for measuring out the correct ratio of water to chemical, then emptied into a double action sprayer. Simply fill with water to the ratio line marking, then top off with the chemical. Otherwise, there are dilution ratio calculators available online or via phone apps.
PRESSURE WASHING
Foam Cannon Filling – I always fill a foam cannon with water first, then add soap. Doing it the other way around, you end up with the soap foaming up and preventing you from filling all the way with water, in turn altering your dilution ratio. The other option is to put the soap in first, then submerge the bottle in your rinse bucket to fill with water. I much prefer the first method as its quicker and easier.
Soap Storage – Try to avoid storing diluted soap solution in the foam cannon bottle for more than a day or two. This would apply if you have known hard tap water, the dissolved minerals can “attack” the chemistry of the soap, in turn hampering its ability to foam properly. Either mix up less or empty the remaining solution into your wash bucket.

Point Away – Whenever squeezing the gun trigger, always do this pointing AWAY from the car. It can take a little while to get into this habit, but it’s a worthwhile endeavour to avoid firing a projectile at your car should a nozzle or fitting fail to seat properly.
Flow, Not Pressure – Contrary to what you might think, it’s the flow output of a pressure washer that’s most important for car cleaning. Yes, you do need some pressure for the foam cannon to function, but it’s the flow that is doing the real work.
The best way I can describe this would be to take a garden hose, remove the fitting and place your thumb partially over the end of the hose. Doing this will hold back the flow but create a higher pressure. Then try rinsing soap with that and you notice how long it will take. Also note how fatiguing it will be on your thumb. Now, remove your thumb and allow the water to flow, you will notice how much quicker it will rinse soap from the vehicle, and how it doesn’t fatigue your thumb.
This same concept applies to pressure washing cars. Depending on the machine, when you wind back the pressure, you boost the flow rate of the pump and reduce stress on the motor. Aim for 1000 – 1500 psi and as close to 7.5 – 10 litres per minute as you can.

Final Thoughts -
The above is the result of living and breathing detailing for most of my woken hours. And I’m still learning. So, if you can add to this list, feel free to contribute.
Happy Detailing!


Sponsored
