Trackaholic
Well-Known Member
- Thread starter
- #1
So, I've been debating how to handle posting info about my experience with the car, modifications, track days, etc., and have decided that I'd like to do a running update similar to a build thread or "Bossing's Journey" thread. Not sure yet if it also makes sense to post the info in other threads and link to the post here, or just keep everything here, but I think it is pretty cool to have a bit of a history that one can go back and review later.
With that said, here was my first thread, about my delivery experience:
http://www.mustang6g.com/forums/showthread.php?t=42745
Last week, @ 2700 miles I had the oil changed and the car dyno'd. I used the OEM Motorcraft 5W-50 oil and OEM oil filter. I do feel that the 5W-50 seems a bit thick for normal use, since the car is running ~50-100 psi even when warm, but since that is what Ford recommends, that's what I'll stick with for now.
Here is a video of the dyno run:
[ame]
Here's a comparison shot of my run compared to a stock coyote:

Yesterday, I installed the UPR GT350 Oil Catch Can. It is a very impressive set of components. The quality and attention to detail in the design is very nice. The hoses are all quick release, there is a nice thumb-nut to allow easy removal of the can for cleaning, the mounting bracket hardware is nicely retained on the screws with o-rings, and the installation was very easy.
I followed these instructions for installation, with slight modifications due to the differences between the GT350 and standard Mustang:
http://lib.store.yahoo.net/lib/yhst-37354654005614/upr-products-5030-98-install.pdf
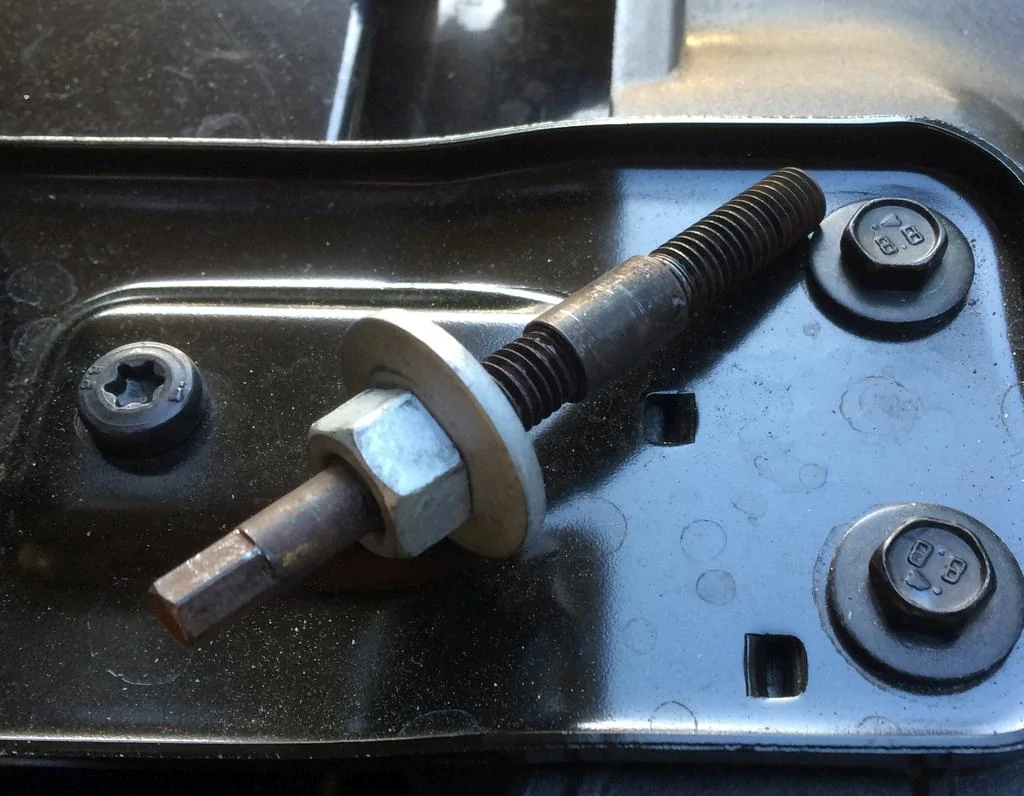
For the GT350 you can skip to Step 2 as there isn't a radiator cover. Also, when performing Step 2, the GT350 does not use a single bolt, but rather a stud with a nut. So you need a 13mm deep socket for the nut, and then a 7/32" socket to remove the stud.
I've attached some photos of the install below.
1. All the components next to a standard set of allen wrenches for scale.
2. The nut/stud component
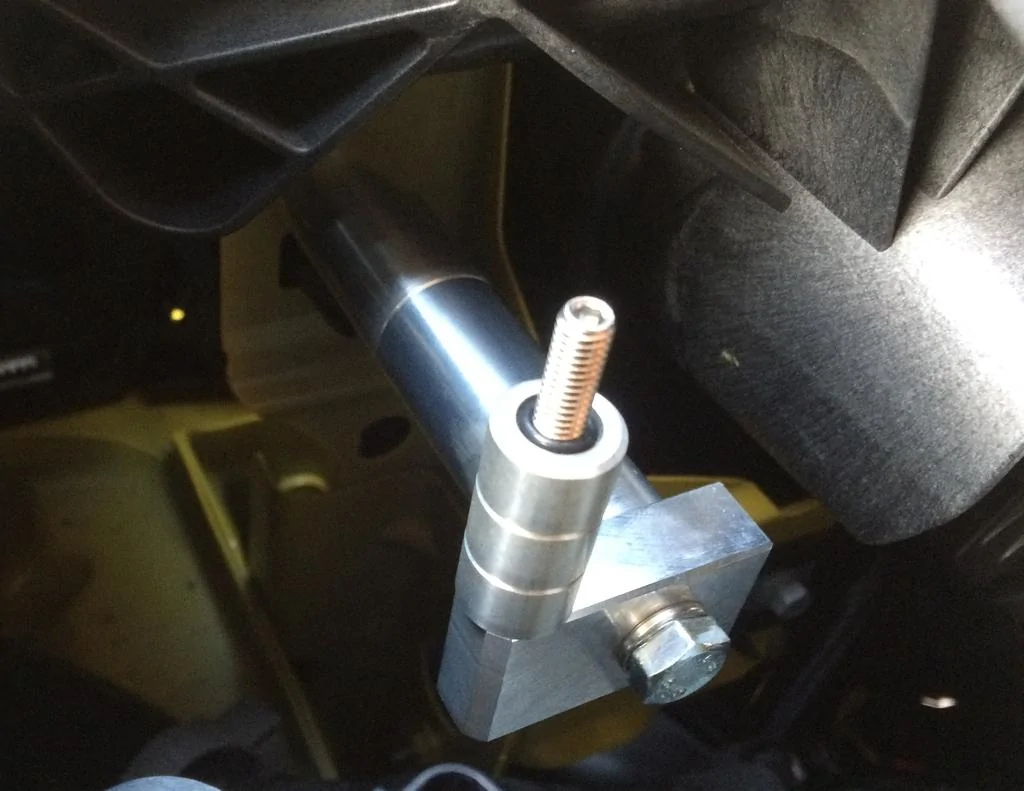
3. The mounting bracket installed
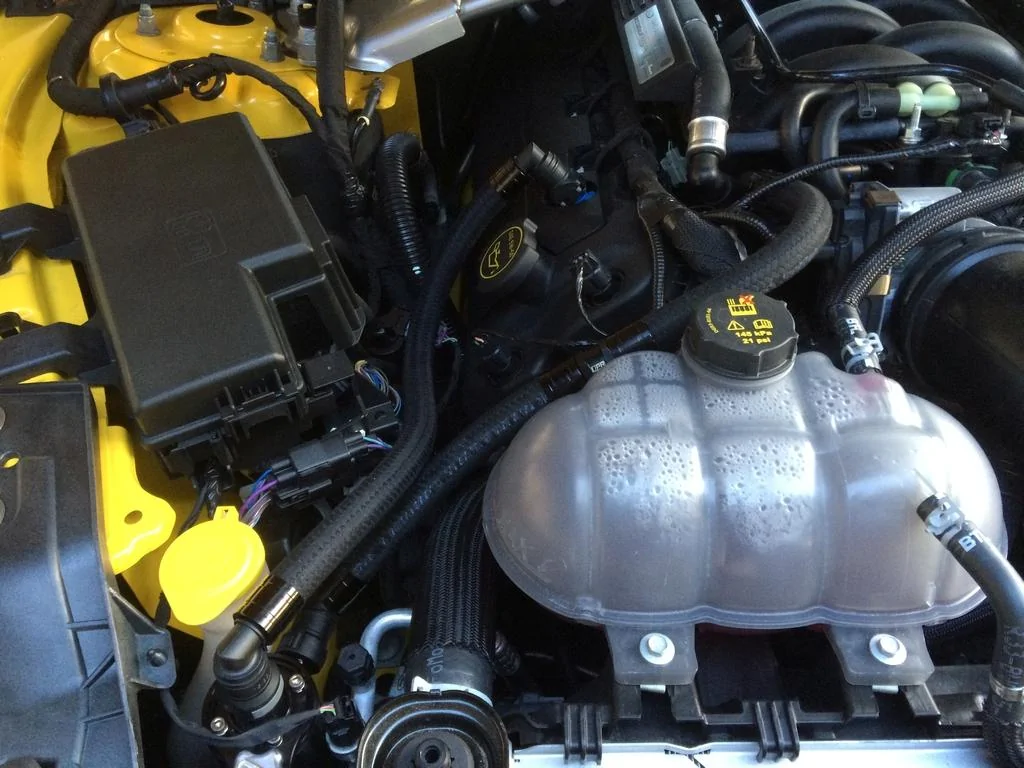
4. The routing of the PCV lines (note that I routed the clean line between the "fork" in the electrical harness @ the intake side. Trying to go over or under the harness did not work as well, and stressed the cables one way or the other.
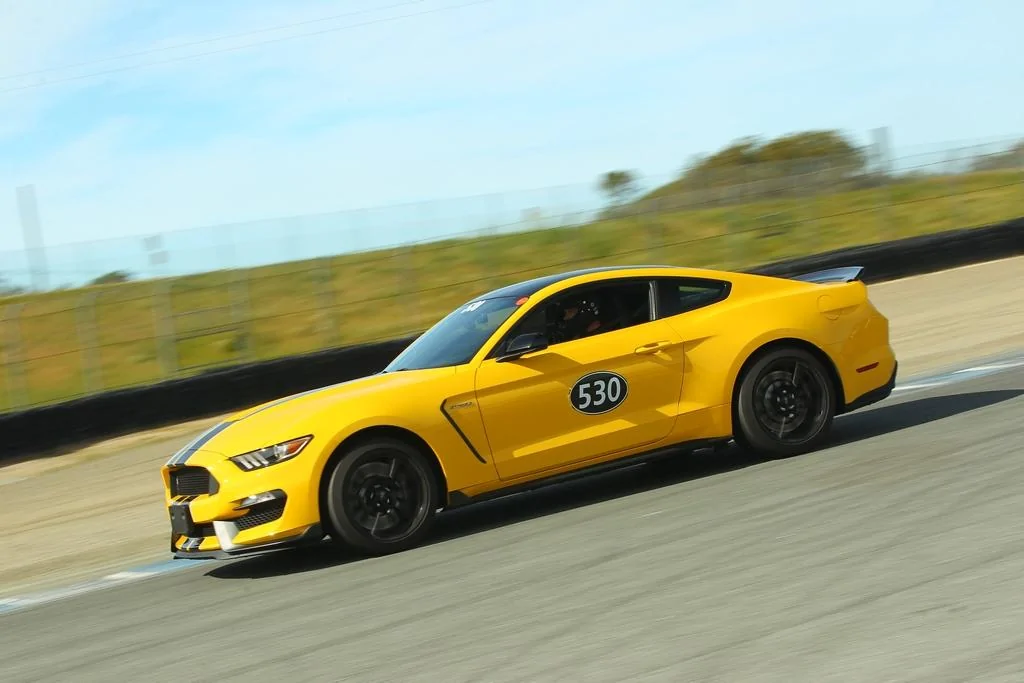
I also ordered some magnetic car numbers from these guys:
http://www.edecals.com/custom_decal_designer/instant-magnetic-number-ovals.html
I chose the 16 x 10 size, but I think I went too small. Should have gone with the 19 x 12 or 20 x 13. I chose a black background with white numbers and trim, which comes close to matching the stripes on the car. Don't have any photos of the numbers yet, but should have some next Friday after my track-day @ Laguna Seca. The numbers are vinyl on the magnetic base, and look quite nice. They stick well to the side of the car, but I also invested in some yellow painter's tape to help hold down the edges.
I think that covers things for now, but plan to update as I spend more time with the car.
-T


With that said, here was my first thread, about my delivery experience:
http://www.mustang6g.com/forums/showthread.php?t=42745
Last week, @ 2700 miles I had the oil changed and the car dyno'd. I used the OEM Motorcraft 5W-50 oil and OEM oil filter. I do feel that the 5W-50 seems a bit thick for normal use, since the car is running ~50-100 psi even when warm, but since that is what Ford recommends, that's what I'll stick with for now.
Here is a video of the dyno run:
[ame]
Here's a comparison shot of my run compared to a stock coyote:

Yesterday, I installed the UPR GT350 Oil Catch Can. It is a very impressive set of components. The quality and attention to detail in the design is very nice. The hoses are all quick release, there is a nice thumb-nut to allow easy removal of the can for cleaning, the mounting bracket hardware is nicely retained on the screws with o-rings, and the installation was very easy.
I followed these instructions for installation, with slight modifications due to the differences between the GT350 and standard Mustang:
http://lib.store.yahoo.net/lib/yhst-37354654005614/upr-products-5030-98-install.pdf
For the GT350 you can skip to Step 2 as there isn't a radiator cover. Also, when performing Step 2, the GT350 does not use a single bolt, but rather a stud with a nut. So you need a 13mm deep socket for the nut, and then a 7/32" socket to remove the stud.
I've attached some photos of the install below.
1. All the components next to a standard set of allen wrenches for scale.
2. The nut/stud component
3. The mounting bracket installed
4. The routing of the PCV lines (note that I routed the clean line between the "fork" in the electrical harness @ the intake side. Trying to go over or under the harness did not work as well, and stressed the cables one way or the other.
I also ordered some magnetic car numbers from these guys:
http://www.edecals.com/custom_decal_designer/instant-magnetic-number-ovals.html
I chose the 16 x 10 size, but I think I went too small. Should have gone with the 19 x 12 or 20 x 13. I chose a black background with white numbers and trim, which comes close to matching the stripes on the car. Don't have any photos of the numbers yet, but should have some next Friday after my track-day @ Laguna Seca. The numbers are vinyl on the magnetic base, and look quite nice. They stick well to the side of the car, but I also invested in some yellow painter's tape to help hold down the edges.
I think that covers things for now, but plan to update as I spend more time with the car.
-T

Sponsored