Sponsored

What's In DFB's Cabinet?

radar

Well-Known Member
Joined
Sep 28, 2016
Threads
15
Messages
566
Reaction score
553
Location
Melbourne AUSTRALIA
First Name
Ray
Vehicle(s)
2017 GT Convertible 5 Litre V8
Your friend’s passing makes us realize to wake up everyday, and treat it like our last, cos one day it will be.
Do what gives you pleasure - I love the soap and hand wash as my hand mitt glides over the massive rear pillar of our cars
Sponsored
 

radar

Well-Known Member
Joined
Sep 28, 2016
Threads
15
Messages
566
Reaction score
553
Location
Melbourne AUSTRALIA
First Name
Ray
Vehicle(s)
2017 GT Convertible 5 Litre V8
And on hand washing; I generally hand wash my cars twice each sitting.
There is so much foamy CarPro Reset remaining I’m reluctant to discard it.

Does anyone think a second coating adds anything in terms of gloss, protection or cleaning power?

I always notice on the second wash, an area I missed on the first pass.
No foam cannon so figure this partly compensates.

Adds an extra 15 minutes.
 
OP
OP
DFB5.0

DFB5.0

Well-Known Member
Joined
Mar 15, 2017
Threads
93
Messages
5,458
Reaction score
15,727
Location
Australia
Vehicle(s)
Mustang GT Fastback
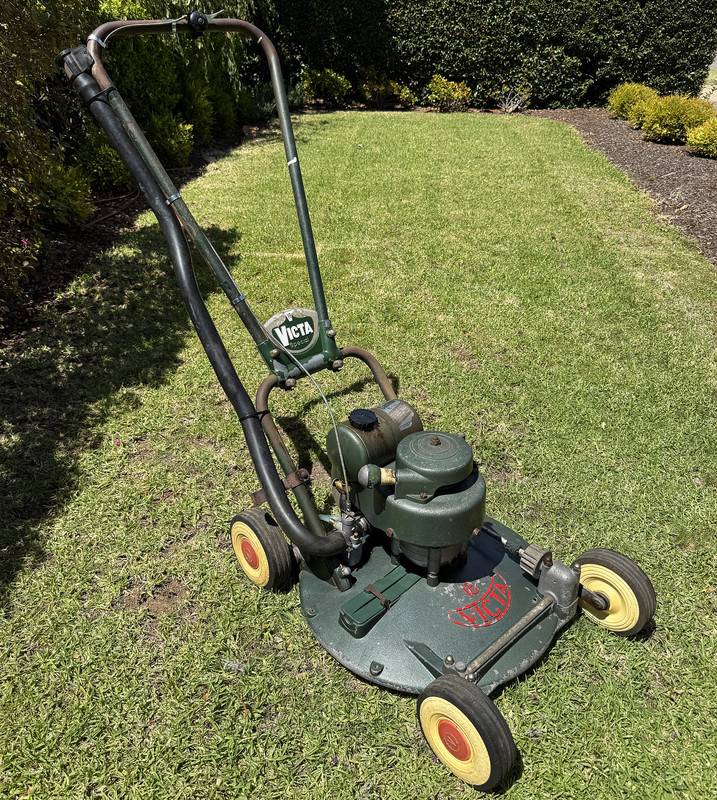
Some parts arrived for the Victa 18 today.

After getting my mowing run done, I was going to save rebuilding the carb for tomorrow, well, I couldn't resist.................

Over the last week, I couldn't begin to tally the number of hours I have been online reading and researching these early Victa's. For the most part, it's been to track down parts, but also to figure out how these things work. I've quickly determined that Victa were making so many of these things that often parts would be superseded without notice. Also consider how old these things are, the possibility of parts being replaced as needed without staying with original style parts is a high possibility. This especially applies to the air inlet tubing, filter and choke arrangement, more on that later. Having said all that, mine appears to be pretty faithful to how it left the factory.

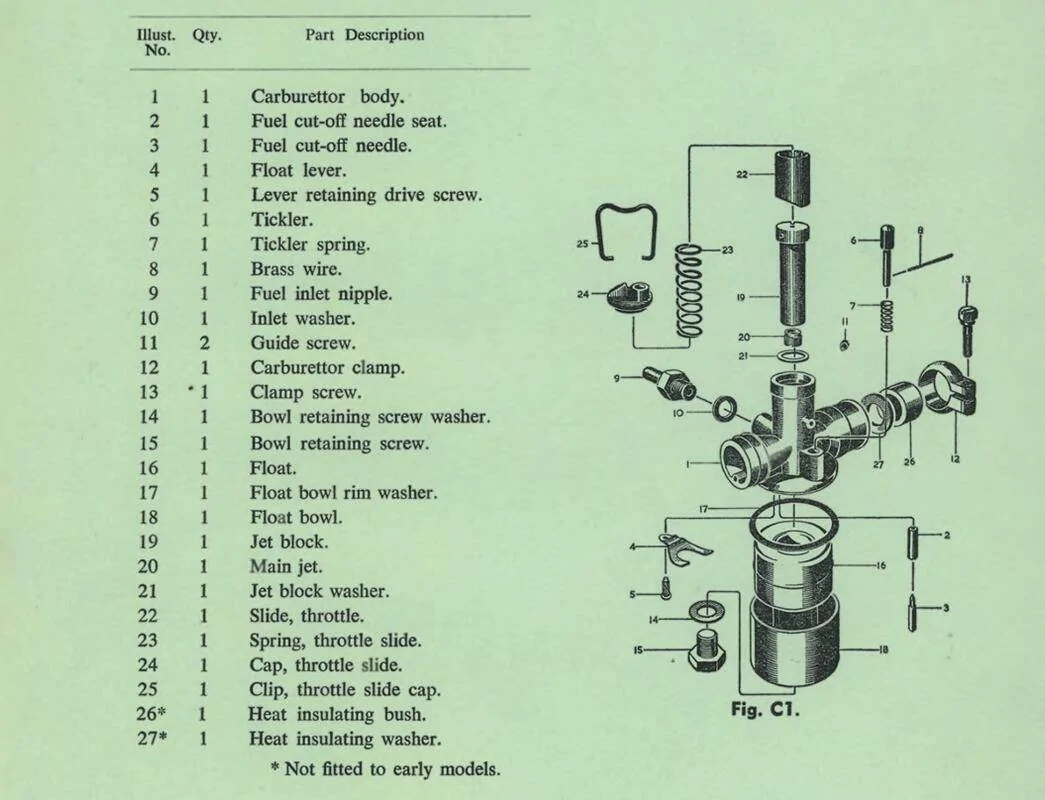
I've also been seeking out workshop manuals, which I've found very useful in regard to the carburetor, I've never rebuilt one like this before.

Screenshot-307.webp


To my surprise and delight, replacement gaskets are available for these Victa 3F carburetors. Several kits are available depending on what version of the carb you have, again there were changes along the way. Once you know which carb kit you need, you then chose which material you want to go with.

The standard 0.8mm orange/red fibre gaskets are the OEM spec, which are desirable for those restoring a machine to factory original.

https://www.ebay.com.au/itm/3535543...xhx58VYfgVF0lFhn11n5MgRFnP|tkp:Bk9SR8ywl82RZQ

The kit I chose has the 1.0mm blue fibre gaskets, which were designed to be softer and provide superior sealing on machines with wear or those that are still in regular use.

https://www.ebay.com.au/itm/3527548...FNOu0ixabDjYUqG8iMdoE+xwE=|tkp:Bk9SR6T7zM2RZQ


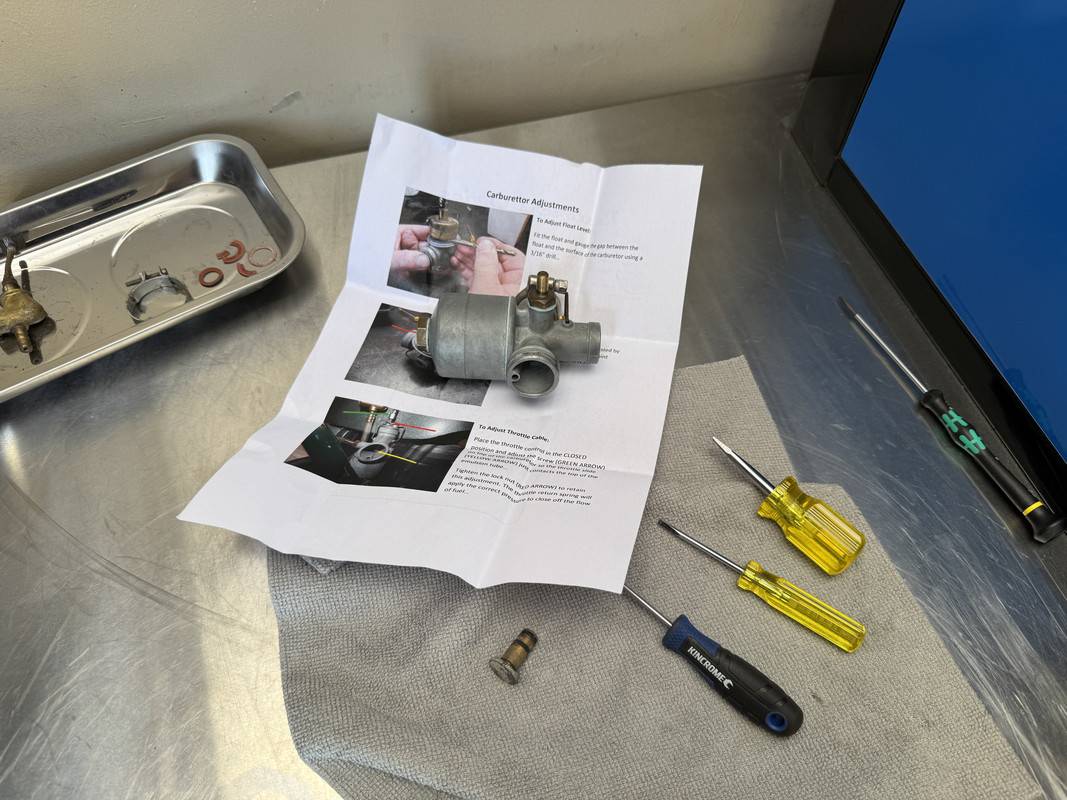
With the carb fully disassembled and cleaned, putting it back together was far less daunting than I was expecting. Helping the situation, the seller of the kit includes an instruction sheet. In my case, I didn't need to make an adjustment to the float level, which must be set at 3/16" (4.78mm) between the top of the float and the carb body. If an adjustment was needed, you'd gently bend the float lever to achieve the desired gap.

Being such fiddly work, I didn't take many images. This one displays the carb put back together, save for the throttle spring and top cap, which will be done once the carb is back on the machine and the cable reinstalled.

IMG-3912.jpg


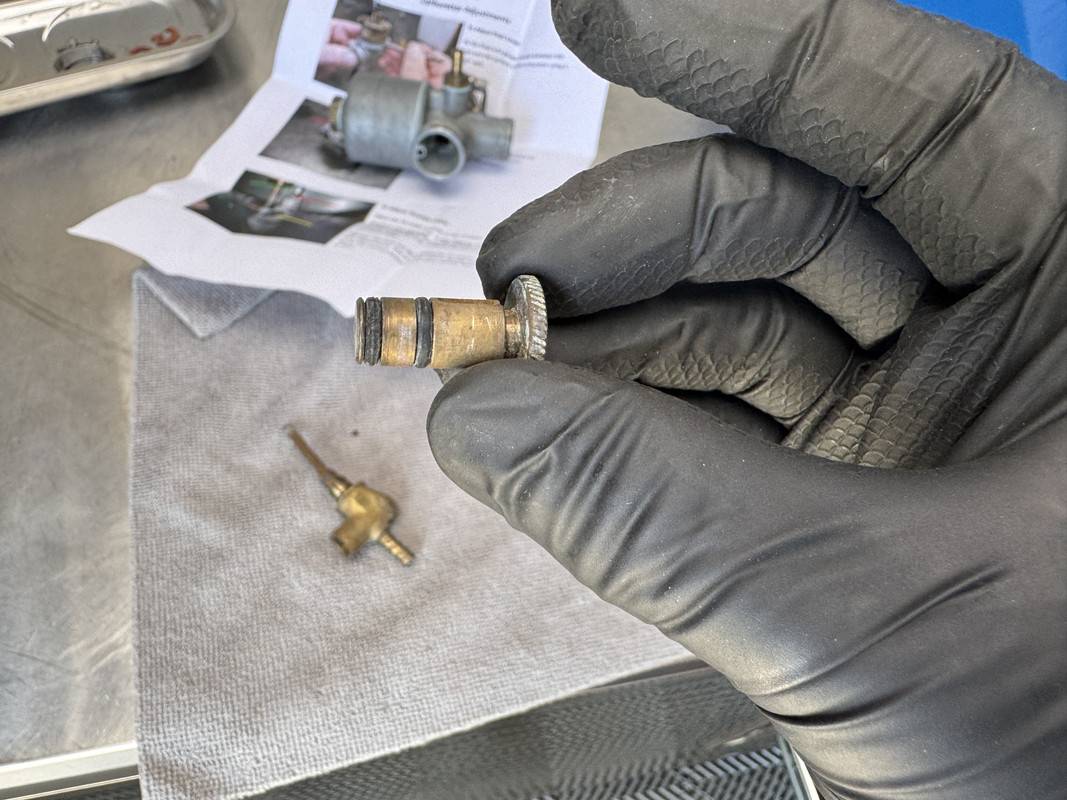
Next, the fuel tap. The carb kit includes two replacement o-rings for the inner slide, the originals were hard as a rock.

IMG-3917.jpg


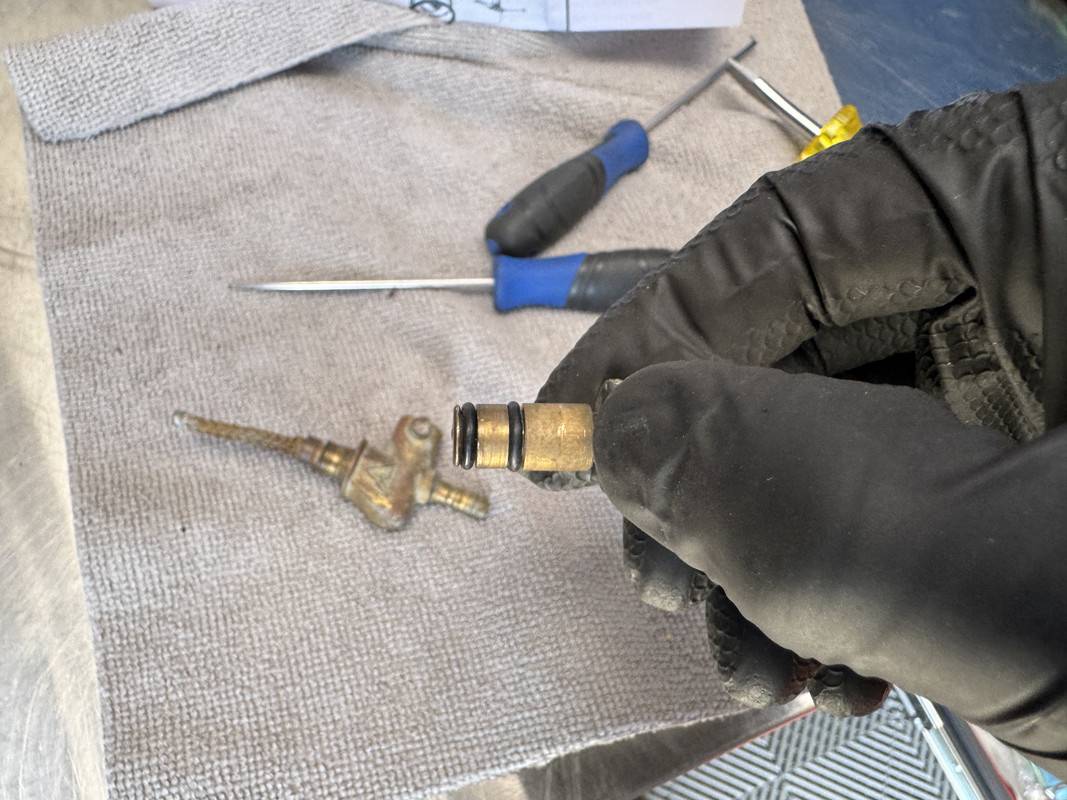
New o-rings installed, the slide was then reinserted into the brass body, followed by the holding screw. Initially, the new o-rings make the movement very tight, but with a bit of working, they free up and begin to function properly.

IMG-3918.jpg


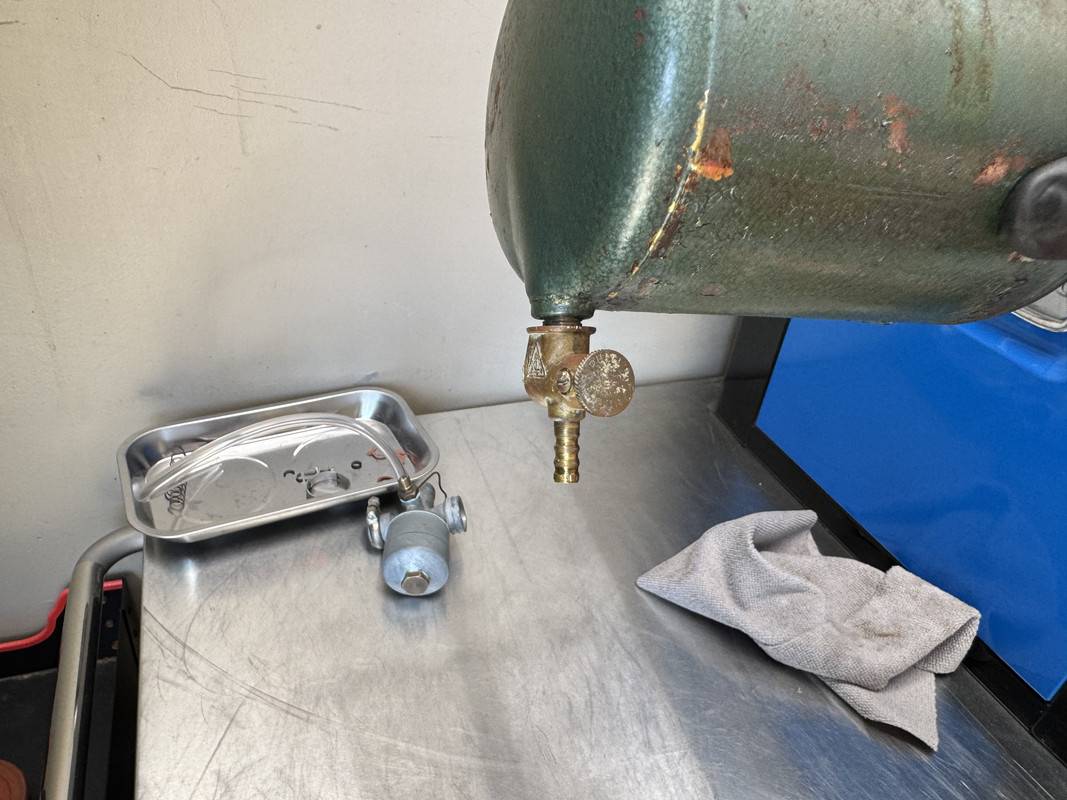
After rinsing out the tank with carb spray, I then reinstalled the tap, which are a tapered thread and go in very tight. Some fuel in the tank verified no leaks from the fitting or past the o-rings. Sucess!

IMG-3922.jpg


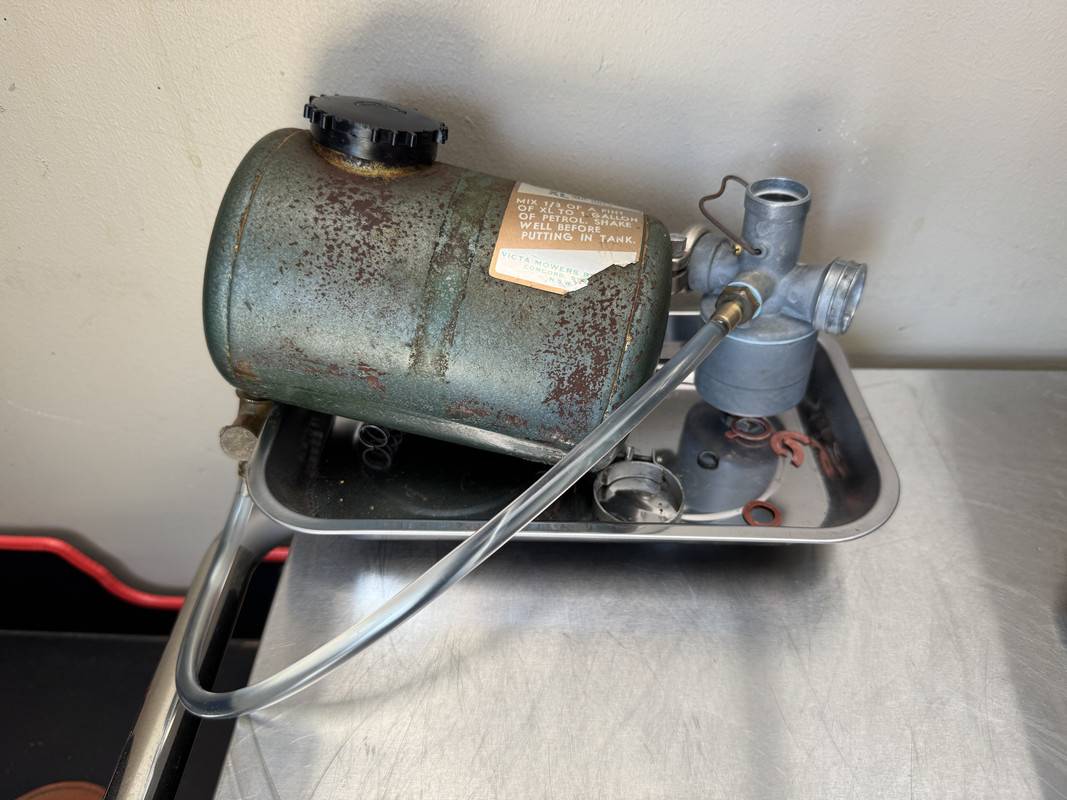
I then connected the new fuel line included in the kit, turned on the tap and filled the carburetor bowel with fuel. I even gave the tickler and tickle to verify it was working. Again, success! No leaks.

IMG-3924.jpg


Super pleased to get this step completed, let's just hope it works as it should.

Still to do -

- Refit the carb to the machine, re-install and adjust throttle spring, cable and cap.

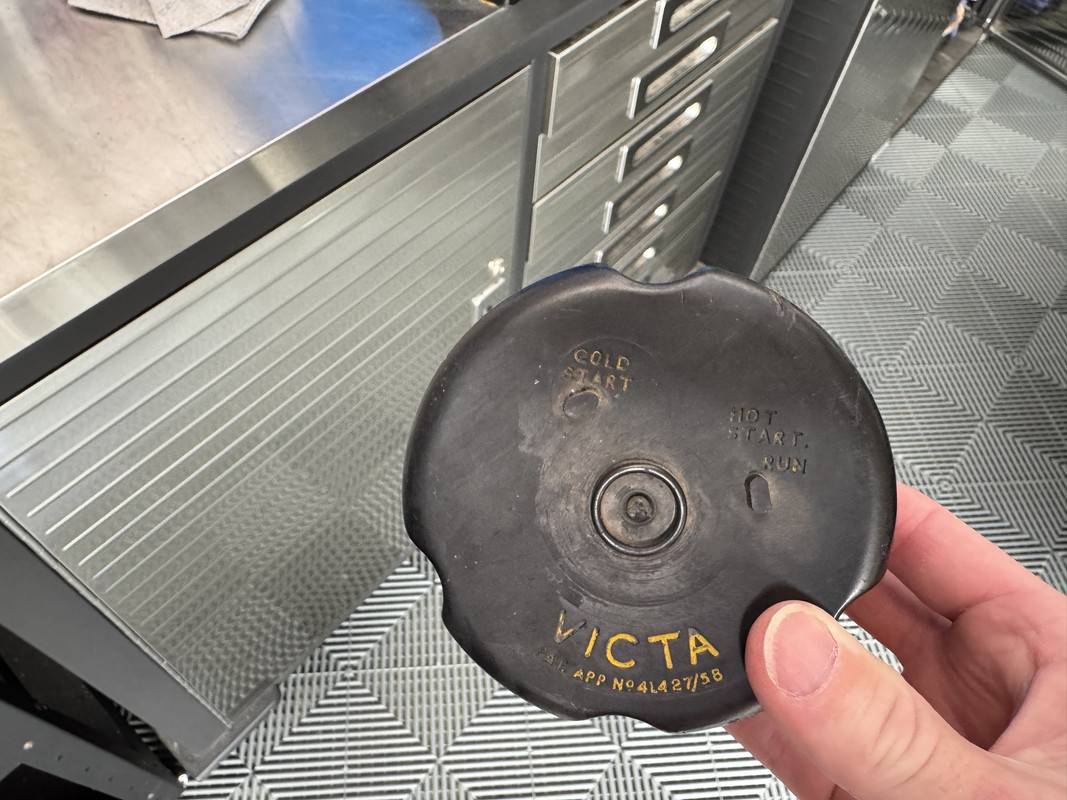
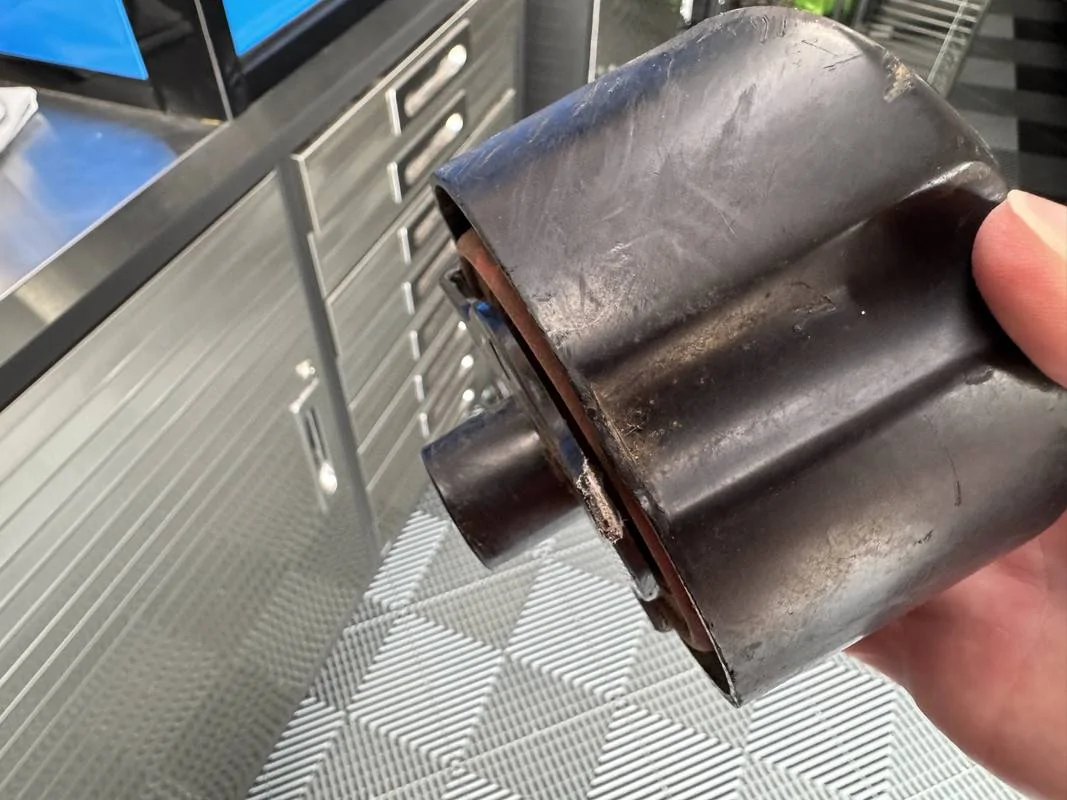
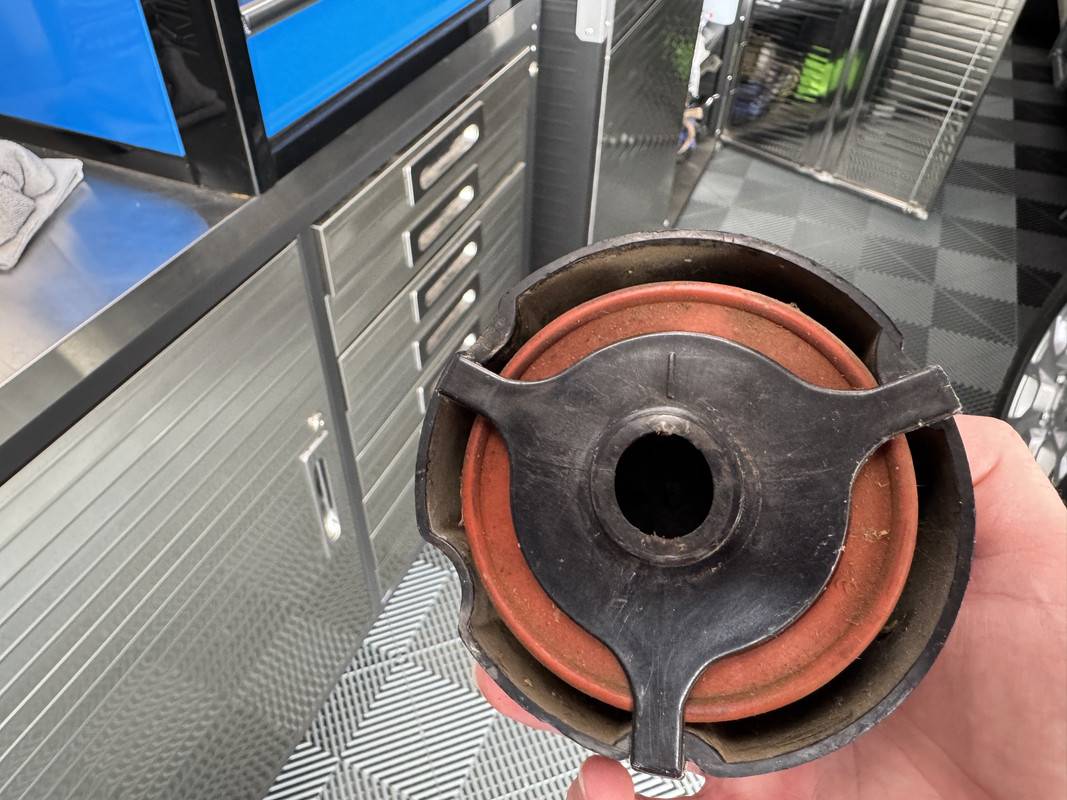
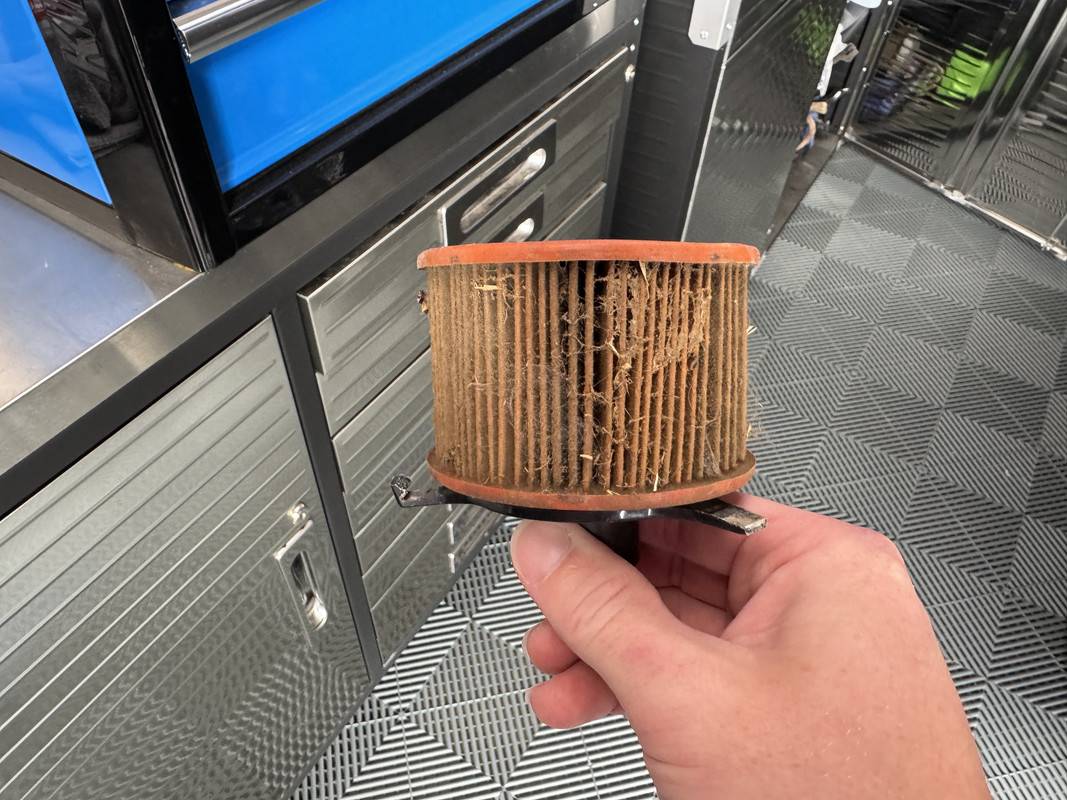
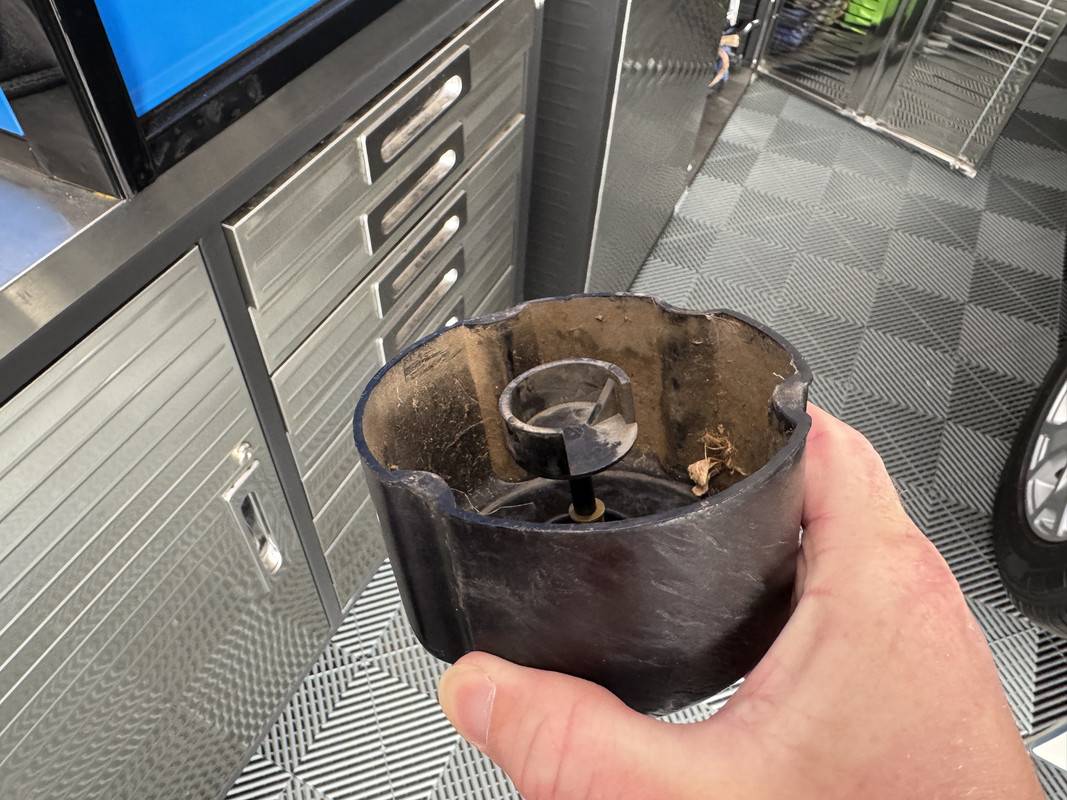
- Figure out what I'm going to do with the broken choke/run lever function. The switch on mine has been broken, meaning selection of choke/run is not possible without removing the air filter cap. Those air filter assemblies are hard to find and most of them are broken like mine.

IMG_3898.jpg


IMG_3899.webp


IMG_3900.jpg


Also, those round air filters are no longer available, of which I've tried to find an alternative, but dimensions need to be very similar to work properly in the housing.

IMG_3902.jpg


At the moment, I have an idea on how to modify the choke insert and rig up a makeshift switch. With the switch missing, the central choke insert simply pops out, so I'm thinking of cutting off the shaft, drilling out the centre of the cap, then use a long bolt to replace the shaft. I'm hesitant to butcher a relatively rare part, but its broken anyway, so what do I have to lose?

IMG_3904.jpg


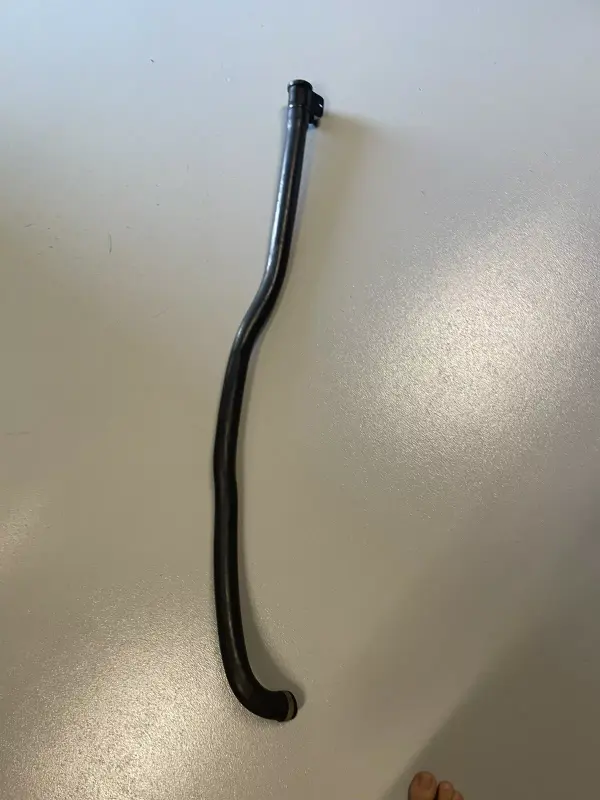
- Also of concern is the rubber intake tube. Considering the above, I went ahead and bought a long tube and the basic filter body, which Victa dealers were retrofitting to machines once those round air filters became NLA in the 1970's. The trouble here is there isn't a choke integrated on this particular one.


So, I'll decide on what setup I use depending on how my repairs pan out on the original choke switch.

The reason why I'm putting so much emphases on this aspect of the project is the filter assembly is necessary to the correct running of the engine. In effect, the carb needs restriction up stream to help form the right air-fuel ratio.

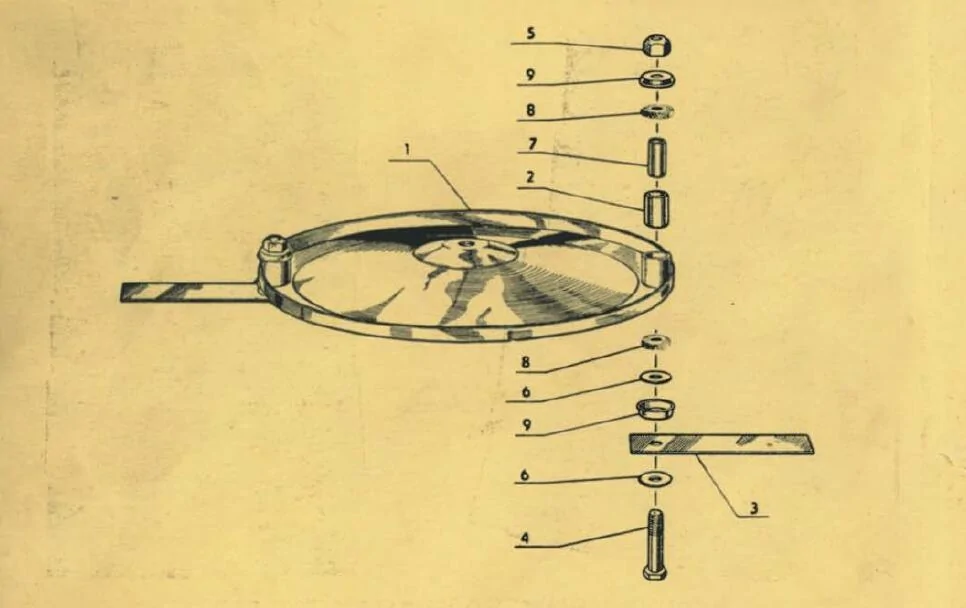
- Sorting out the blade situation. I ordered a replacement blade carrier disk and a set of NOS blades. However, the blades don't come with the bolts, nuts and washers. I just spent 30 minutes trying to remove the old blades from the old carrier, not necessarily to re-use, but to have something to match up with when I go shopping. I ended up having to cut the face of the bolt off as they were so worn down that I couldn't get a socket on them to stop it from spinning.

This blade arrangement is needlessly over complicated, with bolt, sleeve, washers and cupped washers. So, I'll see what the local bolt place can do for me.

Screenshot-309.webp


So, things are progressing, I'm kinda hoping to get it to run tomorrow.
 

prestj1

Well-Known Member
Joined
Nov 17, 2021
Threads
1
Messages
65
Reaction score
30
Location
Perth, WA
Vehicle(s)
2022 TBD
Question for the wise men on this thread :)

I have a Karcher K2 with the OEM hose and the OEM gun paired (with a quick connect adaptor) with a MTM Hydro PF22.3 with what I was told was 1.1 orifice installed which is correct for the Karcher, which has served me well and produced good quality foam.

I thought I'd take the plunge and upgrade to a better hose and a better gun for the Karcher.

I purchased the following

- MTM SG28 Gun
- ProPulse Uberflex 1/4" Pressure Washer Hose, 15m

I finally got around to testing my new hose and gun and I can't get my foam canon to produce foam, it just comes out as water so to speak, but with the Karcher hose and gun it foams perfectly.


So my question...

Does the new hose being 1/4" change the flow so I need a different orifice in the PF22.3 or is it the SG28 gun?

I can do a bit of trial and error to narrow it down a bit but I was hoping if anyone would know off the top of your head.

One thing I'm not 100% sure on is the 1.1 orifice in the cannon as originally I was told it was 1.4, but then was told 1.1 when I questioned it. Does zero foam indicate the orifice could be wrong, is there any way to determine easily what size it is as I dont have anything to compare it to.

Thanks in advance
 
OP
OP
DFB5.0

DFB5.0

Well-Known Member
Joined
Mar 15, 2017
Threads
93
Messages
5,458
Reaction score
15,727
Location
Australia
Vehicle(s)
Mustang GT Fastback
Question for the wise men on this thread :)

I have a Karcher K2 with the OEM hose and the OEM gun paired (with a quick connect adaptor) with a MTM Hydro PF22.3 with what I was told was 1.1 orifice installed which is correct for the Karcher, which has served me well and produced good quality foam.

I thought I'd take the plunge and upgrade to a better hose and a better gun for the Karcher.

I purchased the following

- MTM SG28 Gun
- ProPulse Uberflex 1/4" Pressure Washer Hose, 15m

I finally got around to testing my new hose and gun and I can't get my foam canon to produce foam, it just comes out as water so to speak, but with the Karcher hose and gun it foams perfectly.


So my question...

Does the new hose being 1/4" change the flow so I need a different orifice in the PF22.3 or is it the SG28 gun?

I can do a bit of trial and error to narrow it down a bit but I was hoping if anyone would know off the top of your head.

One thing I'm not 100% sure on is the 1.1 orifice in the cannon as originally I was told it was 1.4, but then was told 1.1 when I questioned it. Does zero foam indicate the orifice could be wrong, is there any way to determine easily what size it is as I dont have anything to compare it to.

Thanks in advance
The size of the hose shouldn't be affecting pressure like that, the machine will work up to its predetermined pressure.

A couple of things are happening here.

- Make sure you have the top dial wipe open? I'm assuming so given you got good foam previously, but best to check anyway.

- The orifice is incorrect.

This is from Detailing Shed's website -

" All MTM Hydro foam cannon models come with a 1.25mm (3.5 sized orifice) installed. "

Waxit Counter that by saying the following -

"They are also factory fitted with a 1.1mm orifice. Larger pressure washers may require a larger orifice."

So something is wrong here. I suspect you actually have the 1.25 fitted, and you should have received a 1.1 with the foam cannon unless Waxit have removed it. The orifices aren't labeled either, so you would need a torch tip cleaner to gauge to the size.

- The mesh filter is blocked, but considering how new it is, I'd say that's unlikely.

I'm fairly sure it has something to do with the orifice. Which shouldn't have happened if Waxit went ahead and fixed it for you.

Let me know how you go, it's not normally this complicated.
 

Sponsored
OP
OP
DFB5.0

DFB5.0

Well-Known Member
Joined
Mar 15, 2017
Threads
93
Messages
5,458
Reaction score
15,727
Location
Australia
Vehicle(s)
Mustang GT Fastback
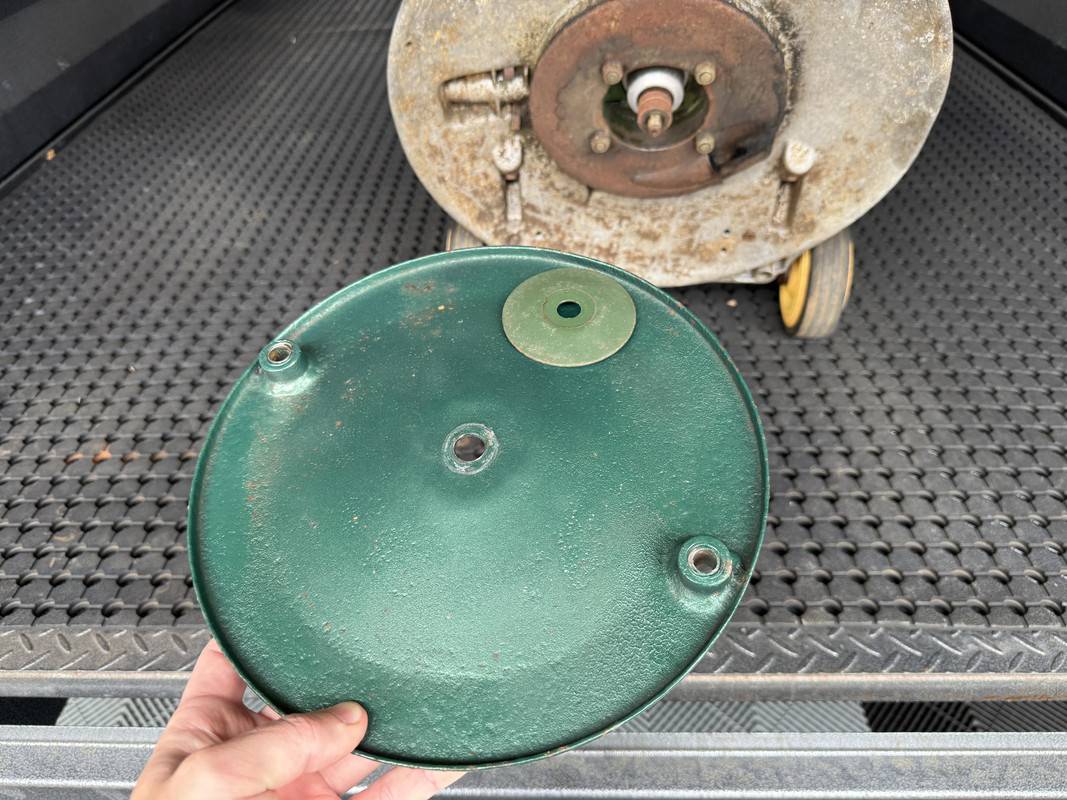
Starting on the Victa 18 this morning, I fitted a replacement blade disk in anticipation of getting the engine running. I'm waiting for a set of bolts to arrive, so the blades will go on later.

IMG-3932.jpg


Next, I reinstalled the fuel tank, followed by refitting the carburetor, throttle and a temporary intake. From here, I trimmed the new fuel line to length and connected it up, then added some fuel to the tank. Time for the moment of truth.

Fuel tap on, throttle opened halfway, a pull of the starter and ziiiiiing, she was alive. This initial off camera run was super promising, taking a moment to clear its throat but was eventually started to run nice and strong. I then shut it off and set up the camera and things went downhill. The engine just wouldn't run clean.....................


After that video, it only got worse until it wouldn't restart. I pulled the plug and it seemed quite dry, so I'll have to dig into the carb again. The plug itself was quite worn but was delivering some spark, I have a replacement Champion N21 on the way so I'll see if that helps the matter.

I have to say, I'm a little disappointed, but that's what you get playing with old vintage stuff. I'm fairly sure its fuel related as it was running very well initially and the engine has excellent compression. I do also wonder if having the incorrect intake is playing a part too.
 

prestj1

Well-Known Member
Joined
Nov 17, 2021
Threads
1
Messages
65
Reaction score
30
Location
Perth, WA
Vehicle(s)
2022 TBD
The size of the hose shouldn't be affecting pressure like that, the machine will work up to its predetermined pressure.

A couple of things are happening here.

- Make sure you have the top dial wipe open? I'm assuming so given you got good foam previously, but best to check anyway.

- The orifice is incorrect.

This is from Detailing Shed's website -

" All MTM Hydro foam cannon models come with a 1.25mm (3.5 sized orifice) installed. "

Waxit Counter that by saying the following -

"They are also factory fitted with a 1.1mm orifice. Larger pressure washers may require a larger orifice."

So something is wrong here. I suspect you actually have the 1.25 fitted, and you should have received a 1.1 with the foam cannon unless Waxit have removed it. The orifices aren't labeled either, so you would need a torch tip cleaner to gauge to the size.

- The mesh filter is blocked, but considering how new it is, I'd say that's unlikely.

I'm fairly sure it has something to do with the orifice. Which shouldn't have happened if Waxit went ahead and fixed it for you.

Let me know how you go, it's not normally this complicated.
Hey D, thanks for the reply, lets chalk this one up to user error hahaha. I tested it again today and it all worked fine, but I disconnected all the hoses connections etc and reconnected so I either had a leak somewhere which is now fixed or a kink in the hose I didnt notice. Which impacting the amount of pressure hence no foam.

All foaming nicely now :)

Thanks for the help
 

GT 550

Well-Known Member
Joined
Sep 4, 2017
Threads
31
Messages
2,238
Reaction score
1,993
Location
Australia
Vehicle(s)
Black GT MT S550
I have to say, I'm a little disappointed, but that's what you get playing with old vintage stuff.
Miracles only happen on YouTube mate. Except you'd have 'bought it online and found it has an INSAAAAAANE built motor, was one of only two made in this configuration, and is signed by the maker himself...and thus priceless etc :giggle:
 
OP
OP
DFB5.0

DFB5.0

Well-Known Member
Joined
Mar 15, 2017
Threads
93
Messages
5,458
Reaction score
15,727
Location
Australia
Vehicle(s)
Mustang GT Fastback
Hey D, thanks for the reply, lets chalk this one up to user error hahaha. I tested it again today and it all worked fine, but I disconnected all the hoses connections etc and reconnected so I either had a leak somewhere which is now fixed or a kink in the hose I didnt notice. Which impacting the amount of pressure hence no foam.

All foaming nicely now :)

Thanks for the help
Happens to us all, glad you got it sorted. :like:
 

Sponsored

OP
OP
DFB5.0

DFB5.0

Well-Known Member
Joined
Mar 15, 2017
Threads
93
Messages
5,458
Reaction score
15,727
Location
Australia
Vehicle(s)
Mustang GT Fastback
Well, well, well.................................... :rockon:

Despite the bad news that the house air conditioning system is fu.ked and needs total replacement as we approach 42-degrees on Monday, I did have some luck today. Garage therapy and a lovely mild summer day, a blissful recipe!

Working on the Victa 18 yesterday was a mixture of pleasure and pain. Getting the carburetor refitted and fueled up, then getting the engine to fire off for the first time in decades was very satisfying. But then the frustration of it getting more and more erratic to the point where it wouldn't refire. Very deflating. Rather than pulling it all to bits right then and there, I decided to put it aside and let things cool, both me and the machine.

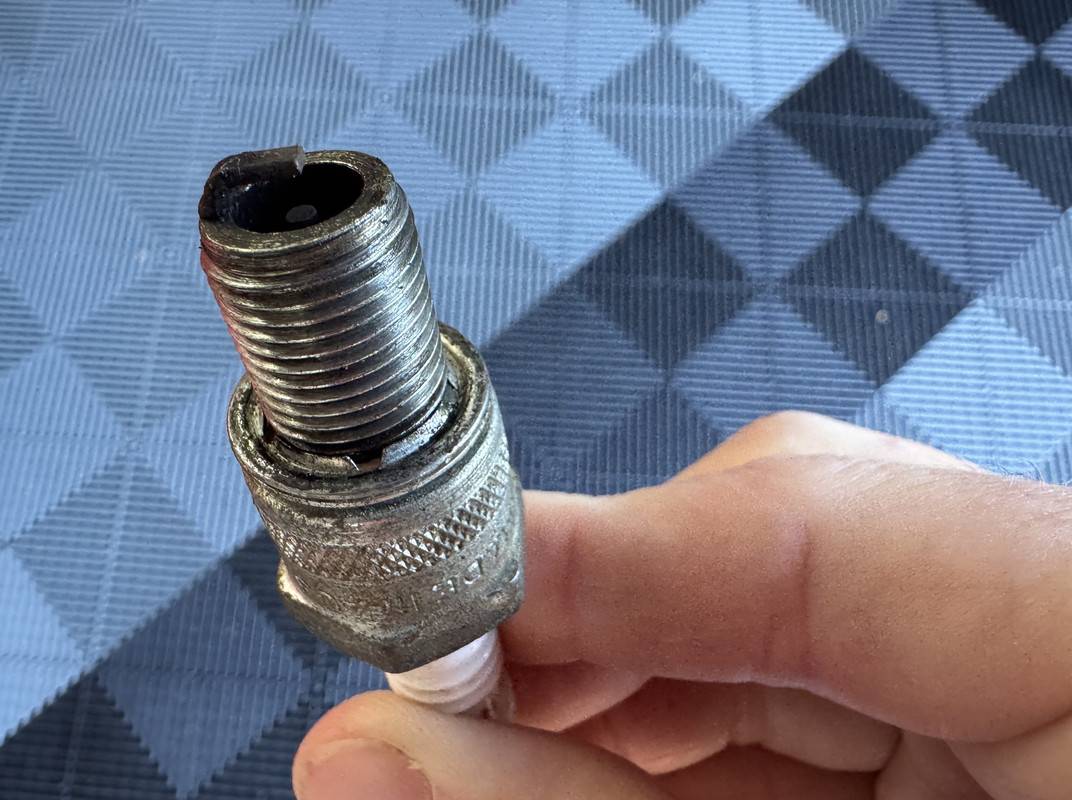
Initially, I assumed it was a fueling problem. The engine would rev up, then break down, rev up and choke............rinse and repeat. Thinking about it, the fact I could get it to rev right up indicated it was getting enough fuel to do so. Changing tact, I removed the spark plug and immediately noticed what the problem was................................

IMG-3940.jpg


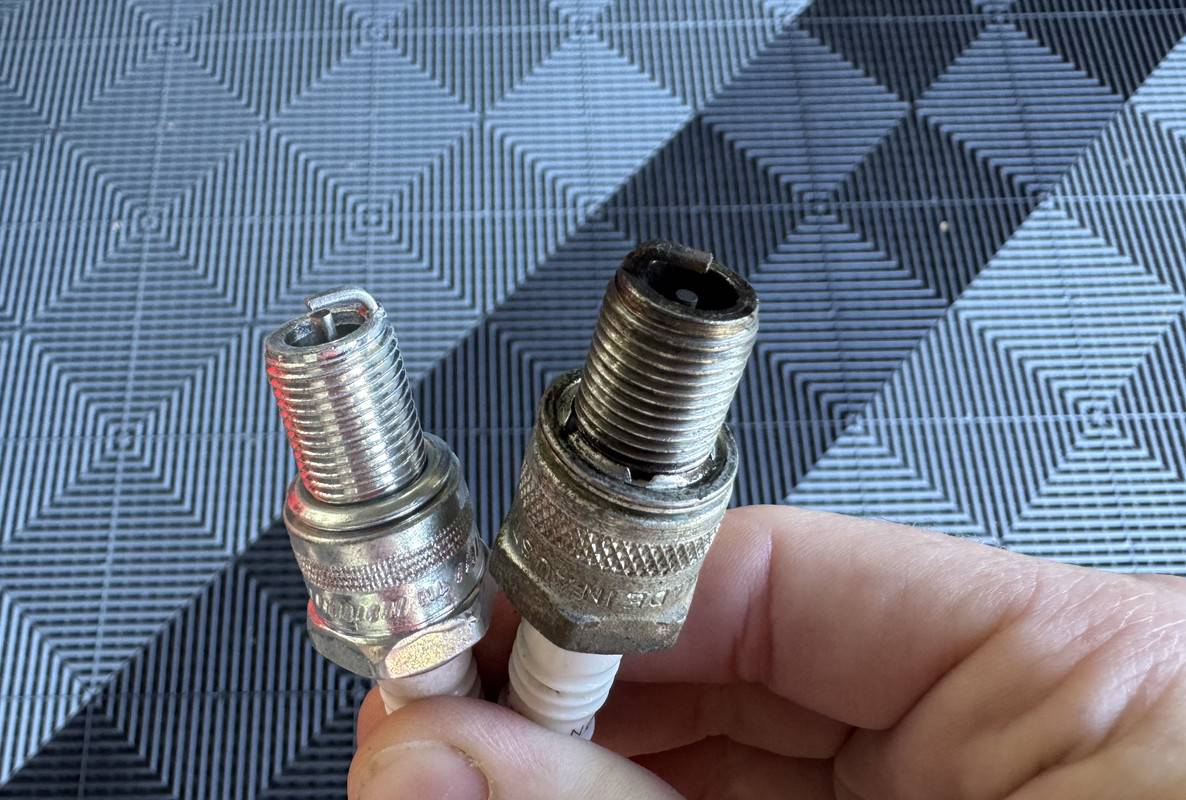
"There's your problem......." a spark plug well out of spec. :facepalm:

With the plug lead still connected and the turned over, I was getting an erratic blue and orange spark. I then removed the wire and connected it to another plug, this delivered nice blue spark. So yeah, it just wasn't getting enough or consistent spark.

As luck would have it, the brand-new plug I ordered showed up this morning. This Champion N21 plug, and its alternatives, are not a commonly stocked these days, so I had to order it rather than popping down to the auto store.

Champion N21 Plug fits Early Victa 125 2 Stroke Motors Rotomo & 18 Special's

IMG-3943.jpg


Included in that order was a new spark plug boot, the original crumbled in my fingers when I needed to remove the plug wire to access the fuel tank.

Spark Plug Cover fits Victa 2 Stroke Lawn Mowers Brushcutters Chainsaws

IMG-3948.jpg


With the fuel turned on, throttle half way, the rope pulled once, then twice..................off she went, settling into a nice stable idle. Once it was warmed up, I cracked the throttle open and ziiiiiiiiiiinnnng, that classic 2-stoke scream! After several restarts spread over a few hours, it seems like I have the engine running well. So, a simple spark plug solved the problem. :rockon:


Reinvigorated, I therefore decided to keep fettling.....................

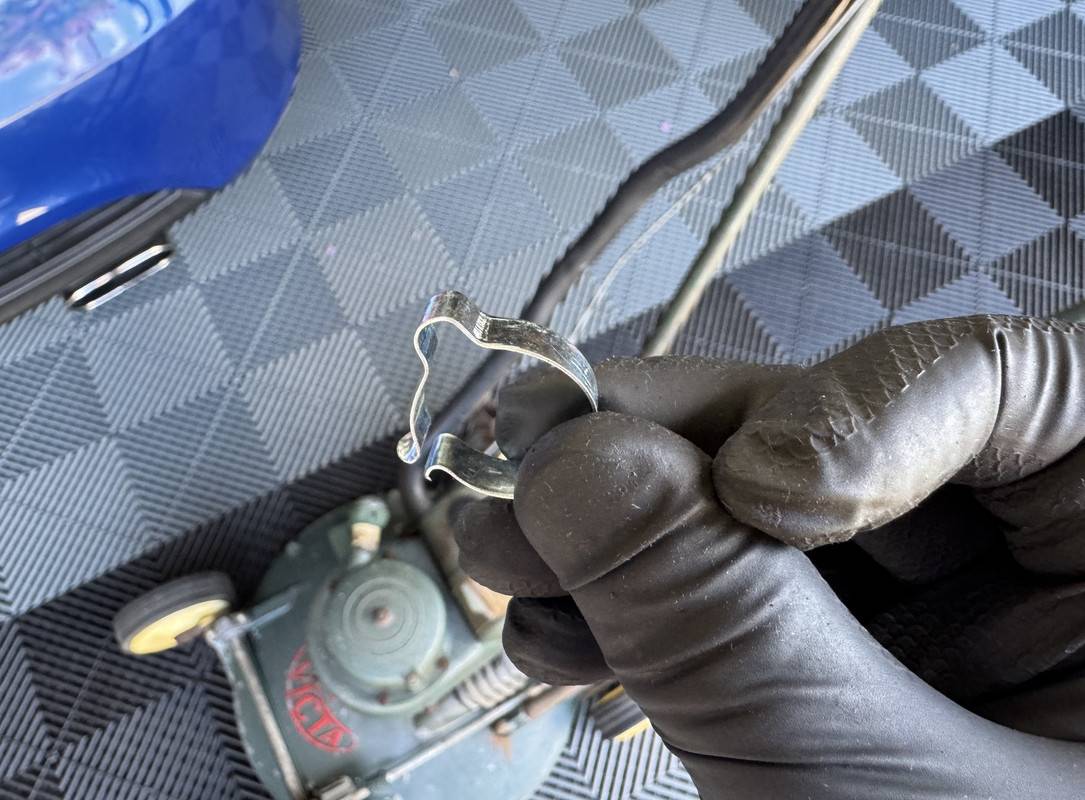
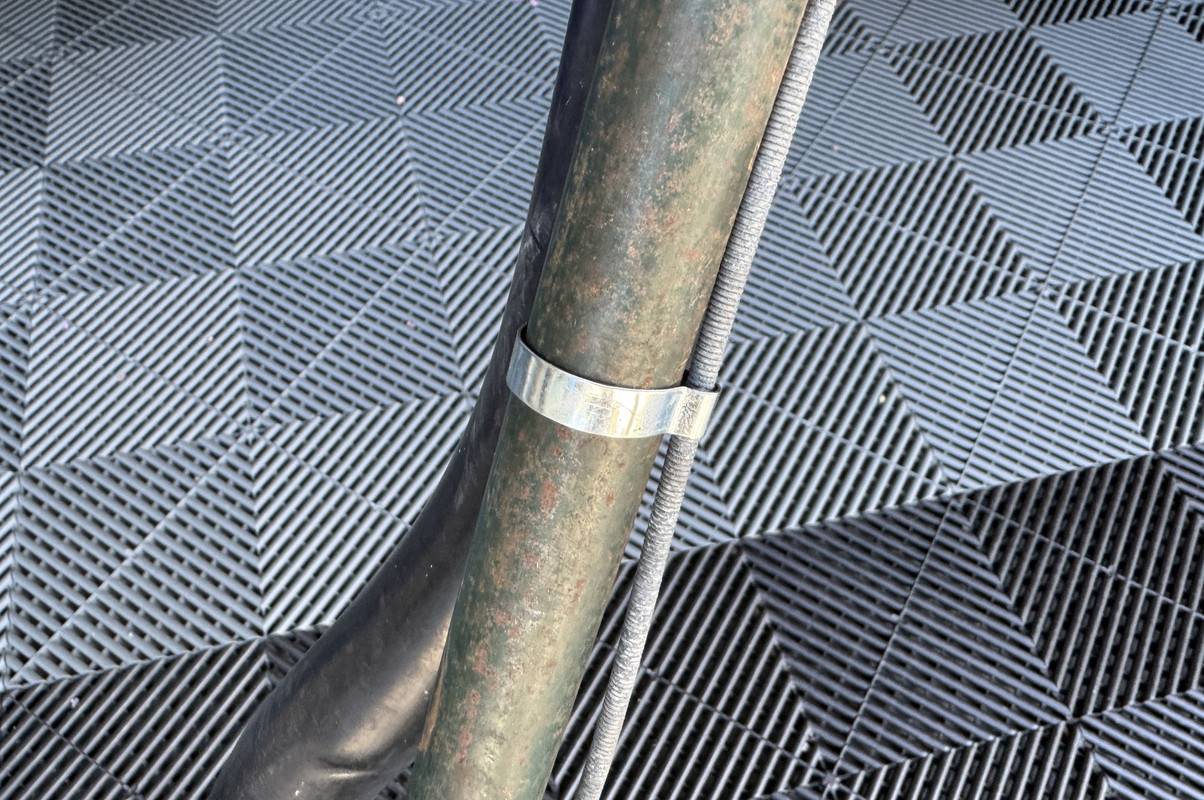
The original owner had used electrical tape to secure the throttle cable to the handle.............yeah, that's not DFB-Spec! So, I went and tracked down some vintage cable clips. Even though they came from an eBay store selling vintage bicycle parts, these ones are for a Scott Bonner and work just as well on the little Victa.

Scott Bonnar Clutch Cable Clips X 4 fit 7/8" & 1" Tubing | eBay

IMG-3950.jpg


In preparation, I actually stripped the remains of the fabric sheath surrounding the cable for a cleaner look. These clips really tidy up the look of the mower, as well as solving the issue I was having with the throttle lever popping the retainer out of place, thus preventing the cable from functioning properly. A double win here! :rockon:

IMG-3953.jpg


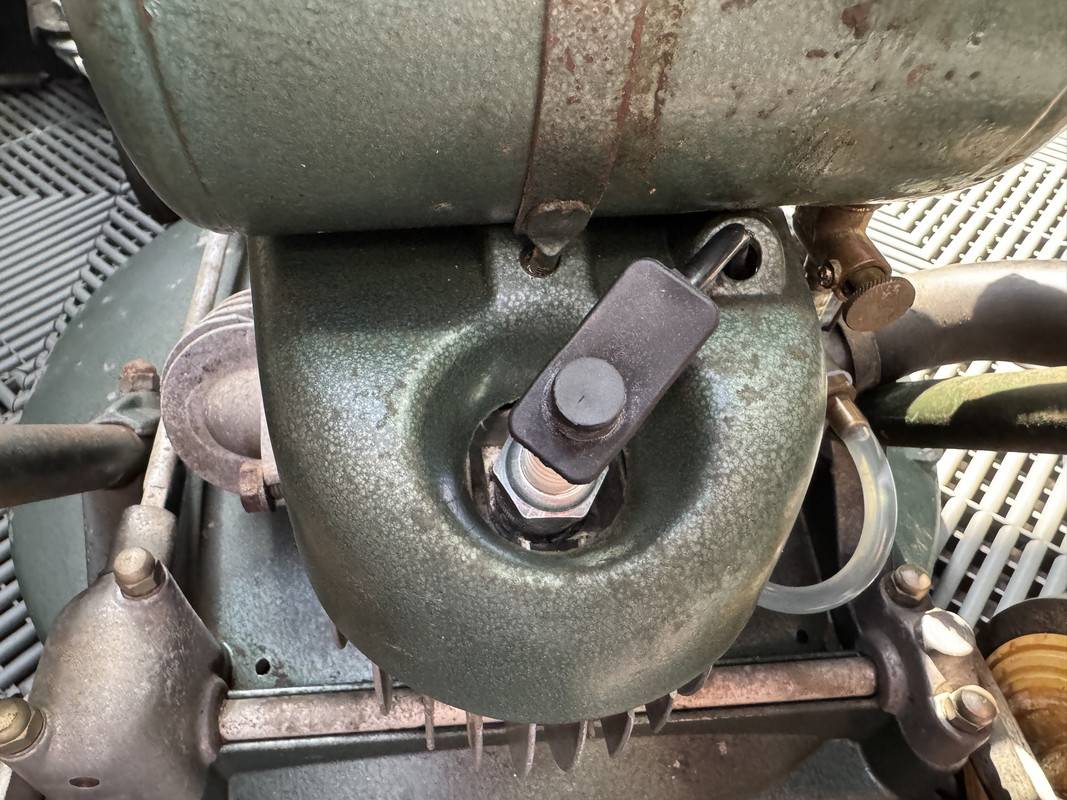
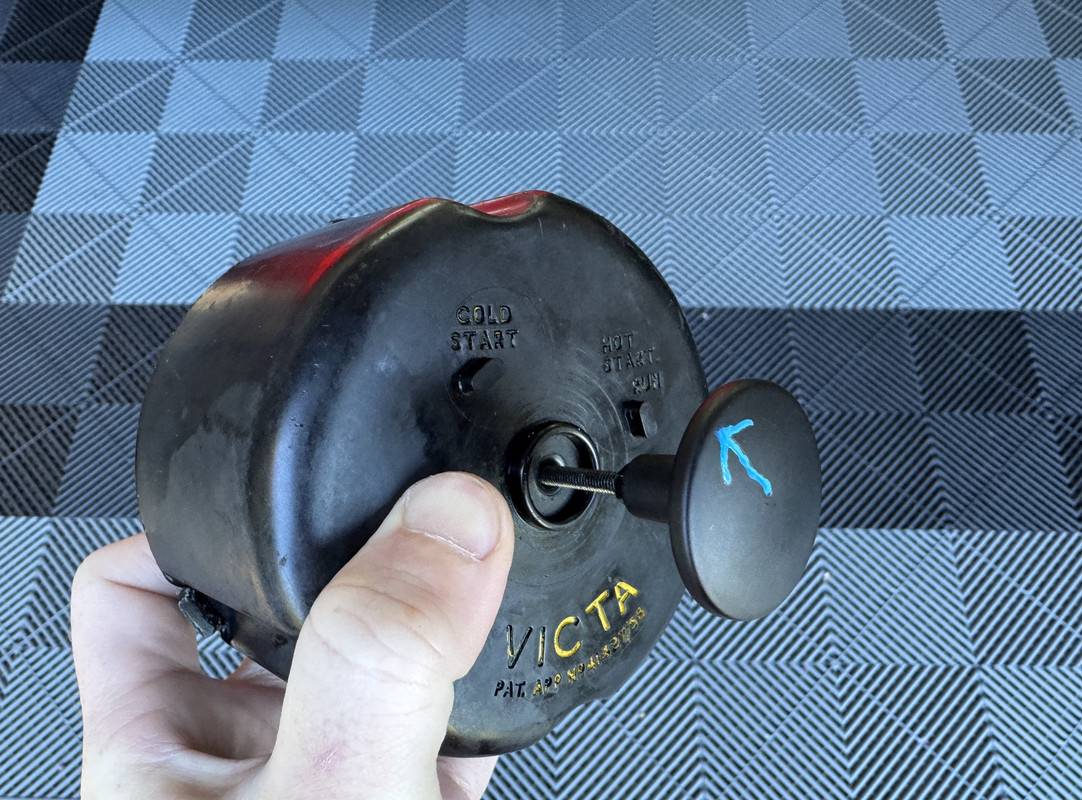
I also had a play around with the choke selector on the original pod filter housing. For this, I cut the leg off the choke, drilled out the circular piece then inserted an 80mm M4 bolt, locking it in place with a nut and washers. I then double-nutted the bolt about halfway down to set the correct height and installed the refurbished choke into the housing. Next, I installed another nut to help lock a small doorknob in place for the selector. I then orientated the choke into the lower housing and marked the knob for direction. I'm just waiting for the correct size tube and I'll give it a whirl. The reality is, the engine is starting pretty easy without a choke.

Pinnacle M4 x 80mm Black Ruspert® Round Head Bolts And Nuts - 6 Pack - Bunnings Australia
Taskmaster 30mm Matte Black Cabinet Knob - Bunnings Australia

IMG-3944.jpg


The tidied-up cables and temporary cable ties for the intake tube have really smartened up the look..................

IMG-3958.jpg


Still to come, some blade bolts so that I can actually cut some grass. And the above-mentioned correct intake tube so that I can make it look right. I also need to put an inline fuel filter on it. From there, I'll have to figure out the height adjusters. But.........................I'm super happy to have revived this piece of Australian history.
 

50ALM

Well-Known Member
Joined
May 6, 2022
Threads
6
Messages
167
Reaction score
296
Location
Brisbane, Australia
First Name
Adam
Vehicle(s)
MY16 Toyota RAV4 Cruiser, MY24.50 S650 GT
IMG-3940.jpg


"There's your problem......." a spark plug well out of spec. :facepalm:
I'm hardly a mechanic, more of an electronics nerd, but that looks like a bit too much gap to my uneducated eye. :giggle:

Nice find. :like:
 
OP
OP
DFB5.0

DFB5.0

Well-Known Member
Joined
Mar 15, 2017
Threads
93
Messages
5,458
Reaction score
15,727
Location
Australia
Vehicle(s)
Mustang GT Fastback
I'm hardly a mechanic, more of an electronics nerd, but that looks like a bit too much gap to my uneducated eye. :giggle:

Nice find. :like:
I mean, I'm a bit worried where the rest of the electrode went, or is it just a case of extreme wear/age.
 
OP
OP
DFB5.0

DFB5.0

Well-Known Member
Joined
Mar 15, 2017
Threads
93
Messages
5,458
Reaction score
15,727
Location
Australia
Vehicle(s)
Mustang GT Fastback
Ok, for those waiting for the detailing to return, here we go..............................

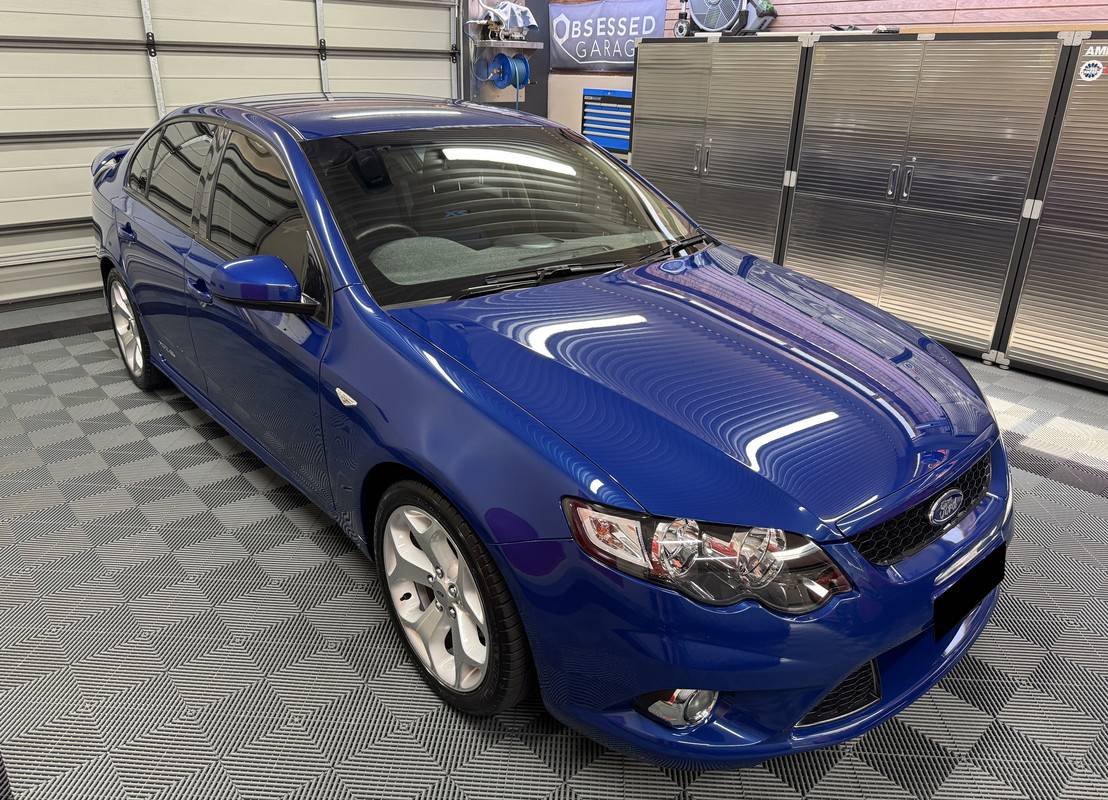
After finishing up on the Victa, I was feeling super pumped and felt like indulging in a little detail therapy. In line today, the blue rocket.

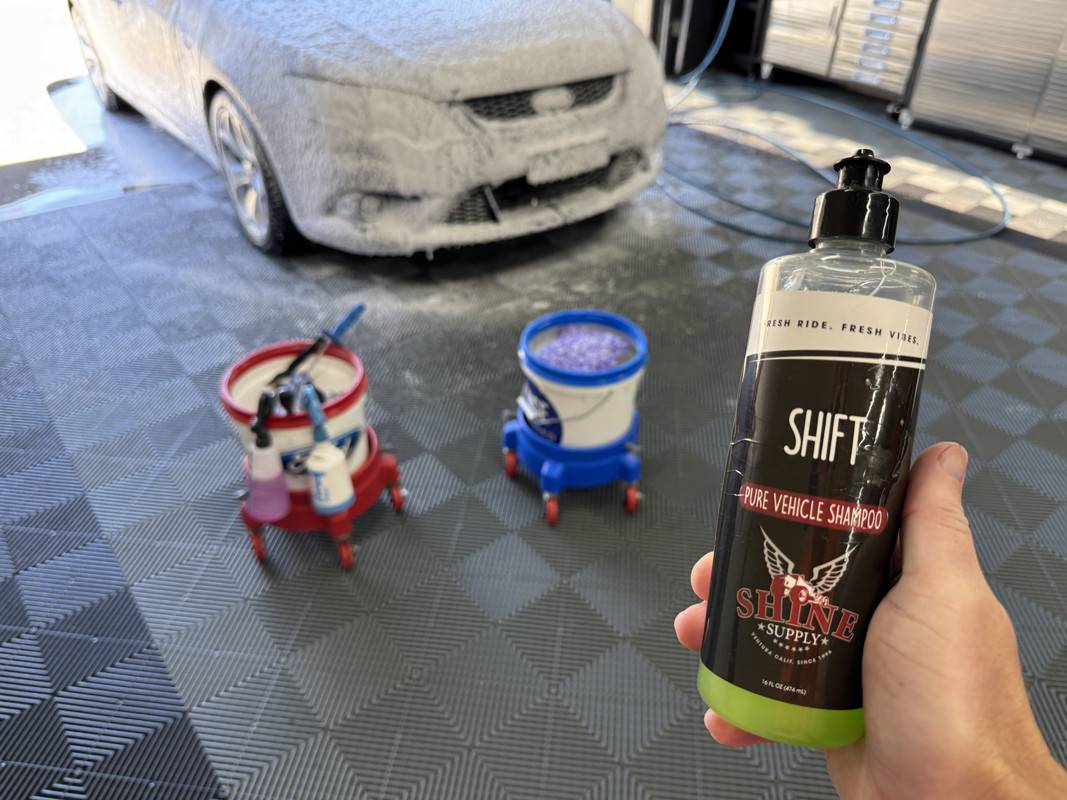
In the cannon today, the thoroughly delightful Shine Supply Shift. Out of all the soaps in my collection, I regard this one to be the mildest. As we know, Reset can be a little aggressive, likewise Megs Hyper Wash and NV Snow. Shift on the other hand is a great for light maintenance washing, providing great lubrication, plenty sudsy foam and just enough cleaning ability. I also love the coconut lime fragrance. Shift was used on the wheels and paint, and a little Brake Buster for the tyres.

IMG-3961.jpg


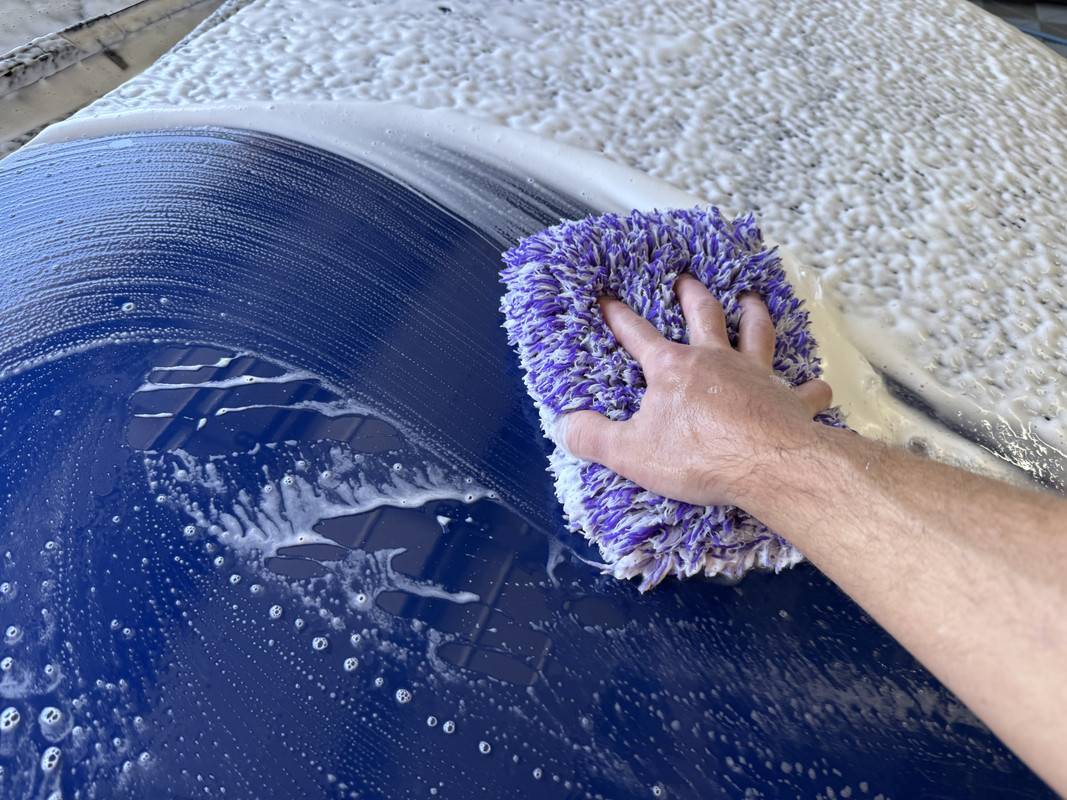
Wash media today was the TRC Cyclone Mini......................

IMG-3969.jpg


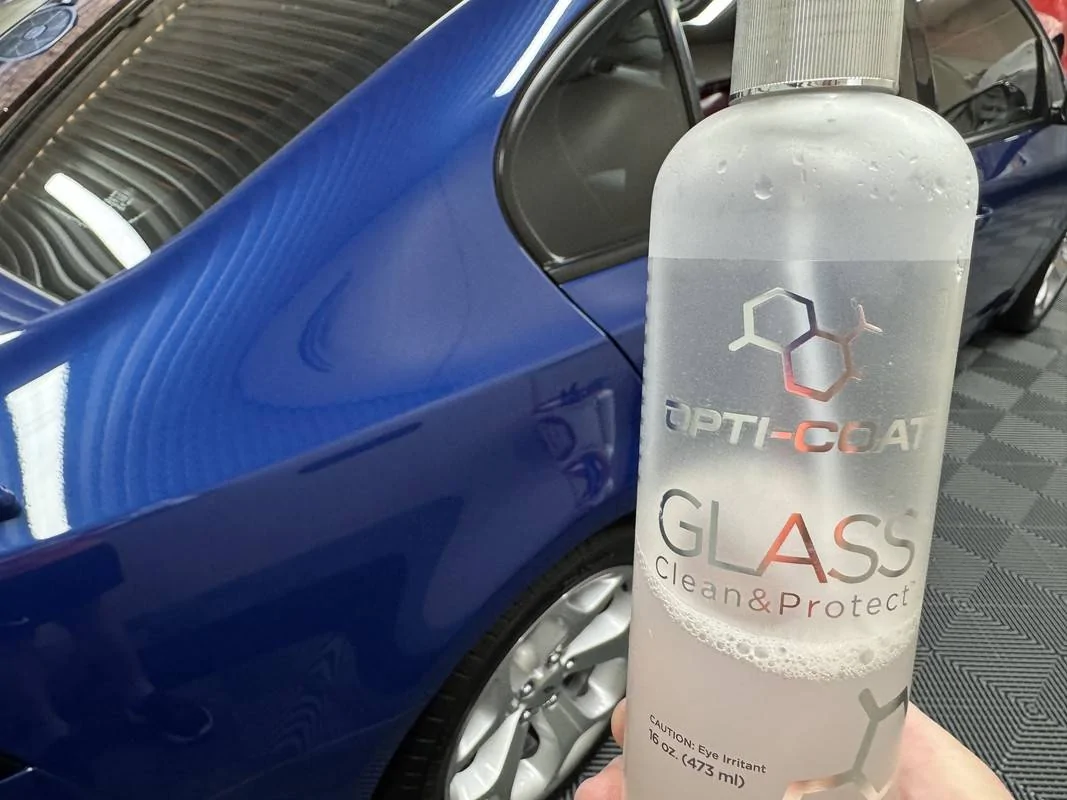
Drying aid was, you guessed it, ADS Amplify, which I also used on the door jambs. Next, the engine bay was wiped down with ECH20, followed by the wheels with Amplify. Tyres coat a coat of Swissxax Pneu. For the interior, a very quick once over with ADS Pilot. For the exterior glass, I went with Opti-Coat Glass Clean & Protect, which is on another page when compared to Carpro ClarifyPhobic, not streaking or special treatment required.

IMG-3972.webp


IMG-3977f.jpg


Back to spec and ready for its cover.
Sponsored


Top