Bearstang
New Member
- Thread starter
- #1
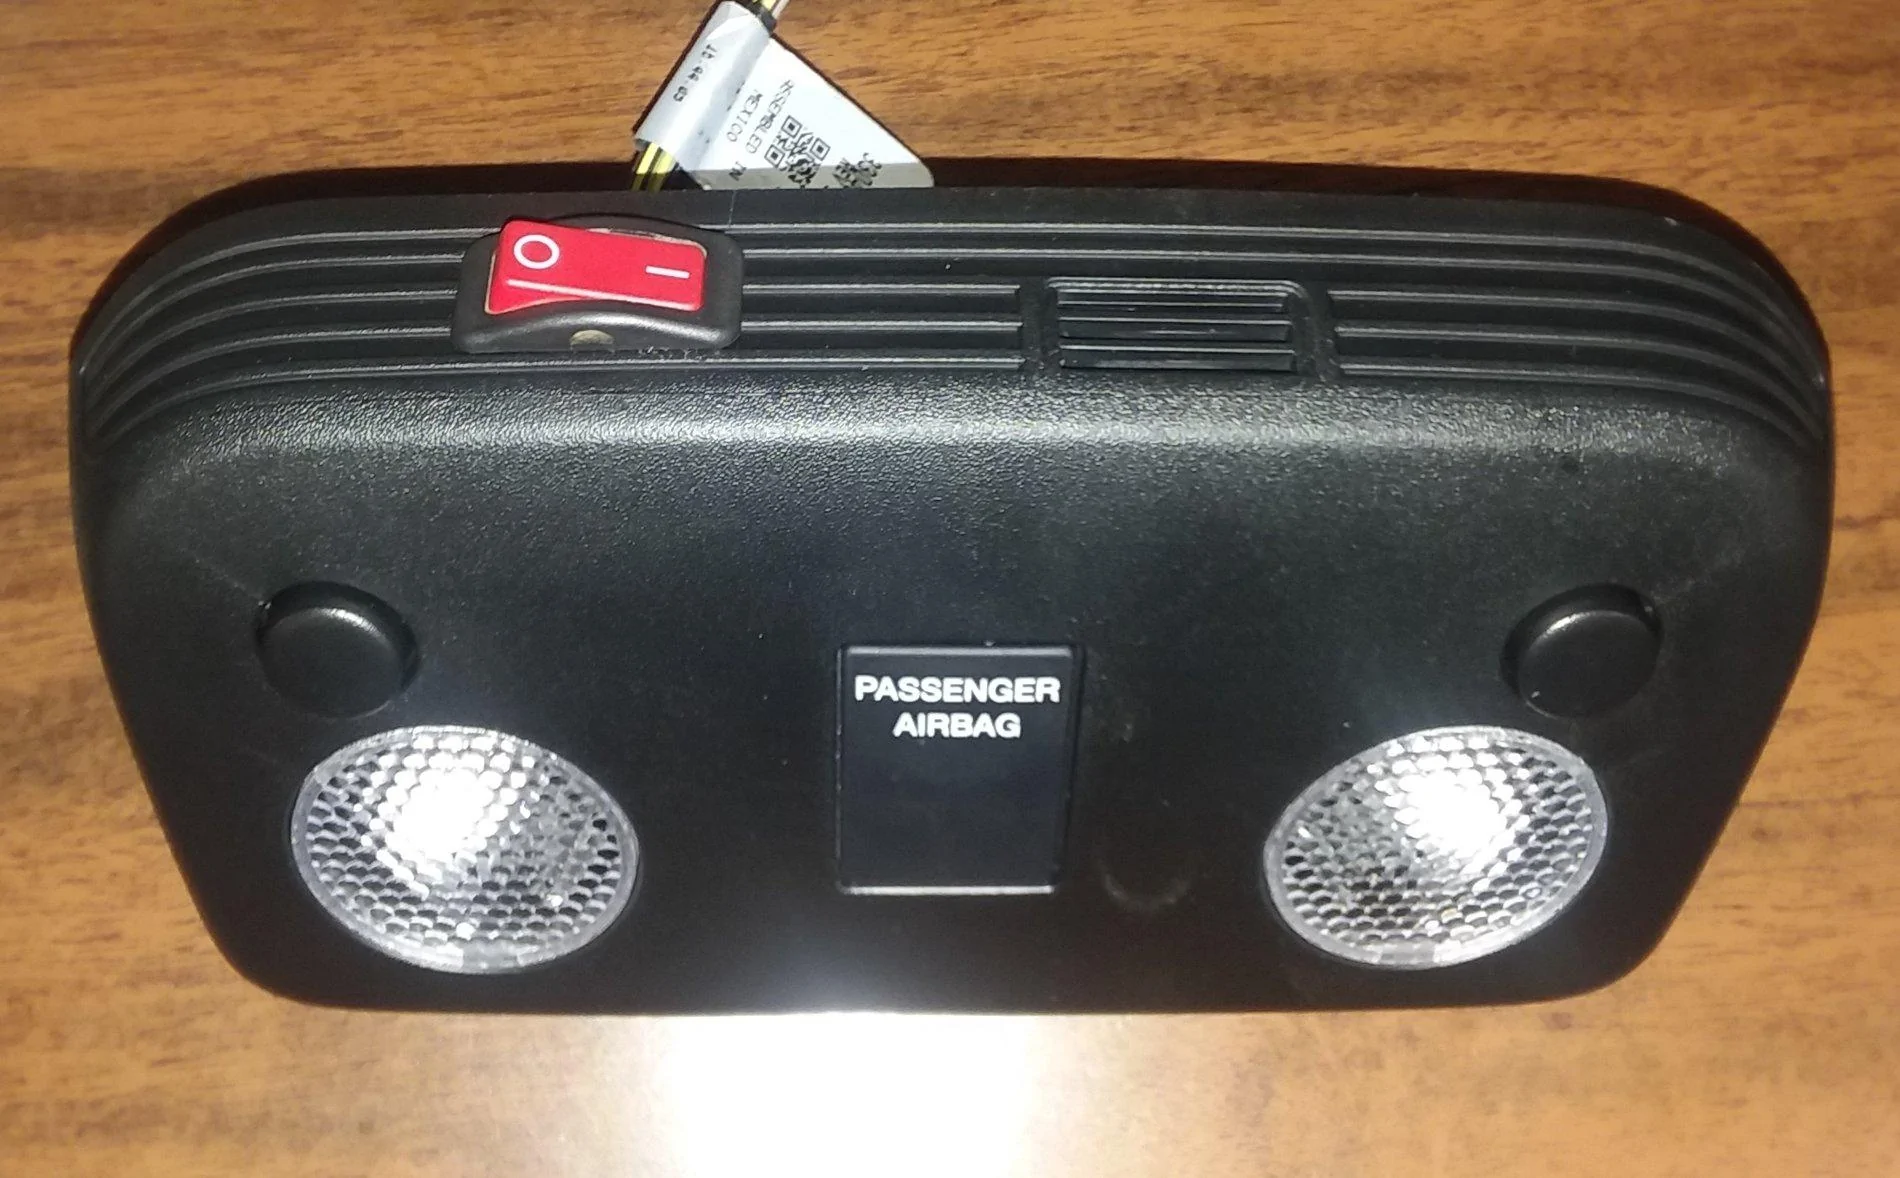
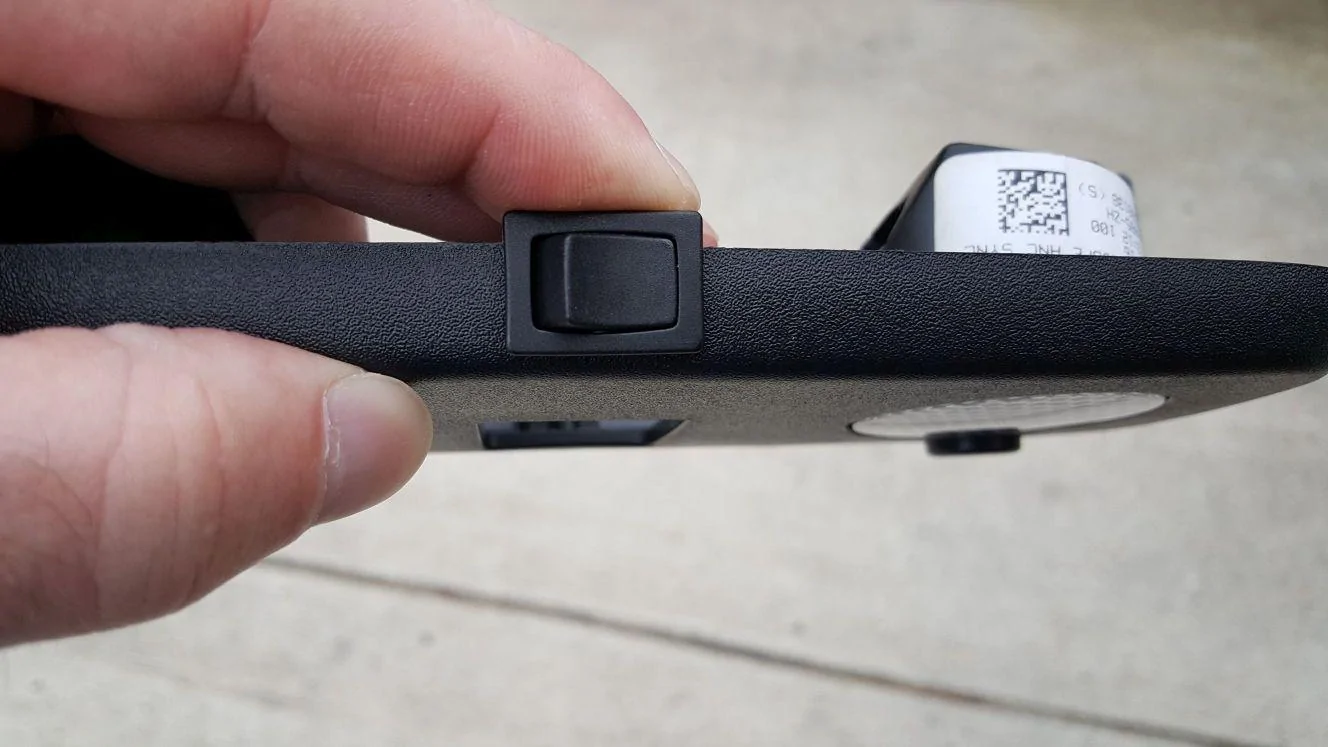
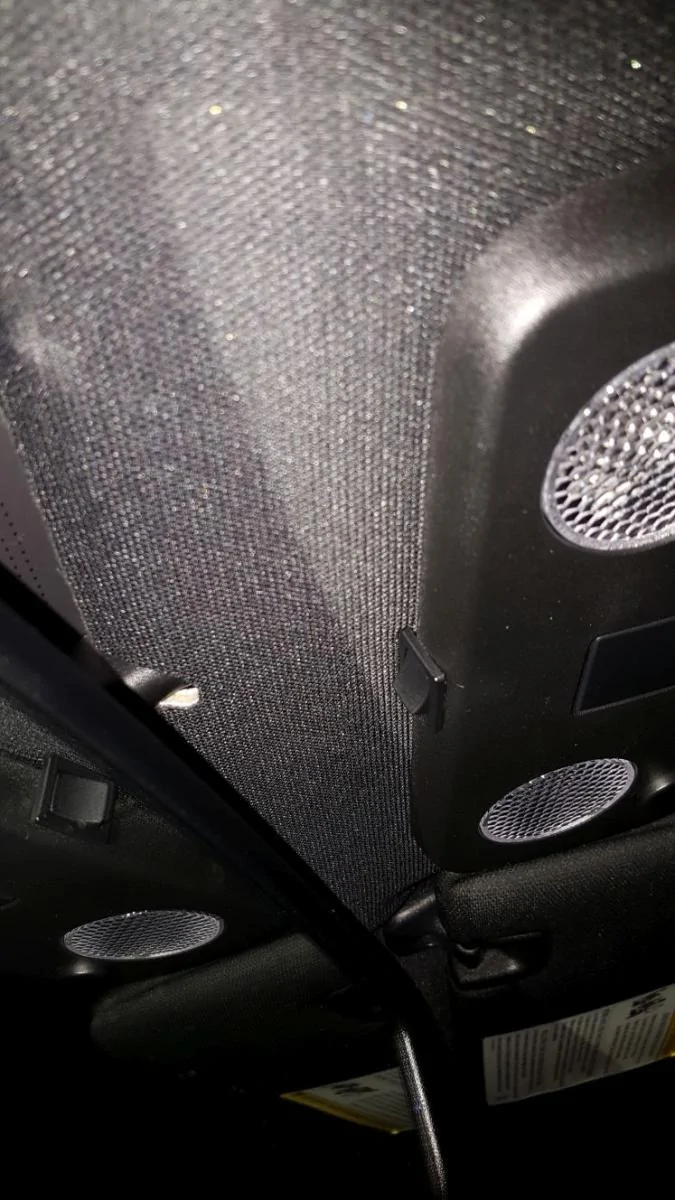
Hey guys, I've been following this forum for a while, but just signed up. I wanted to show you guys how to install a dome light cutoff switch. I decided to place the switch on the front side of the panel facing the windshield to preserve the factory look of the car. This way you can't see the switch, but you can reach up and feel it. Anyway, here are the steps....
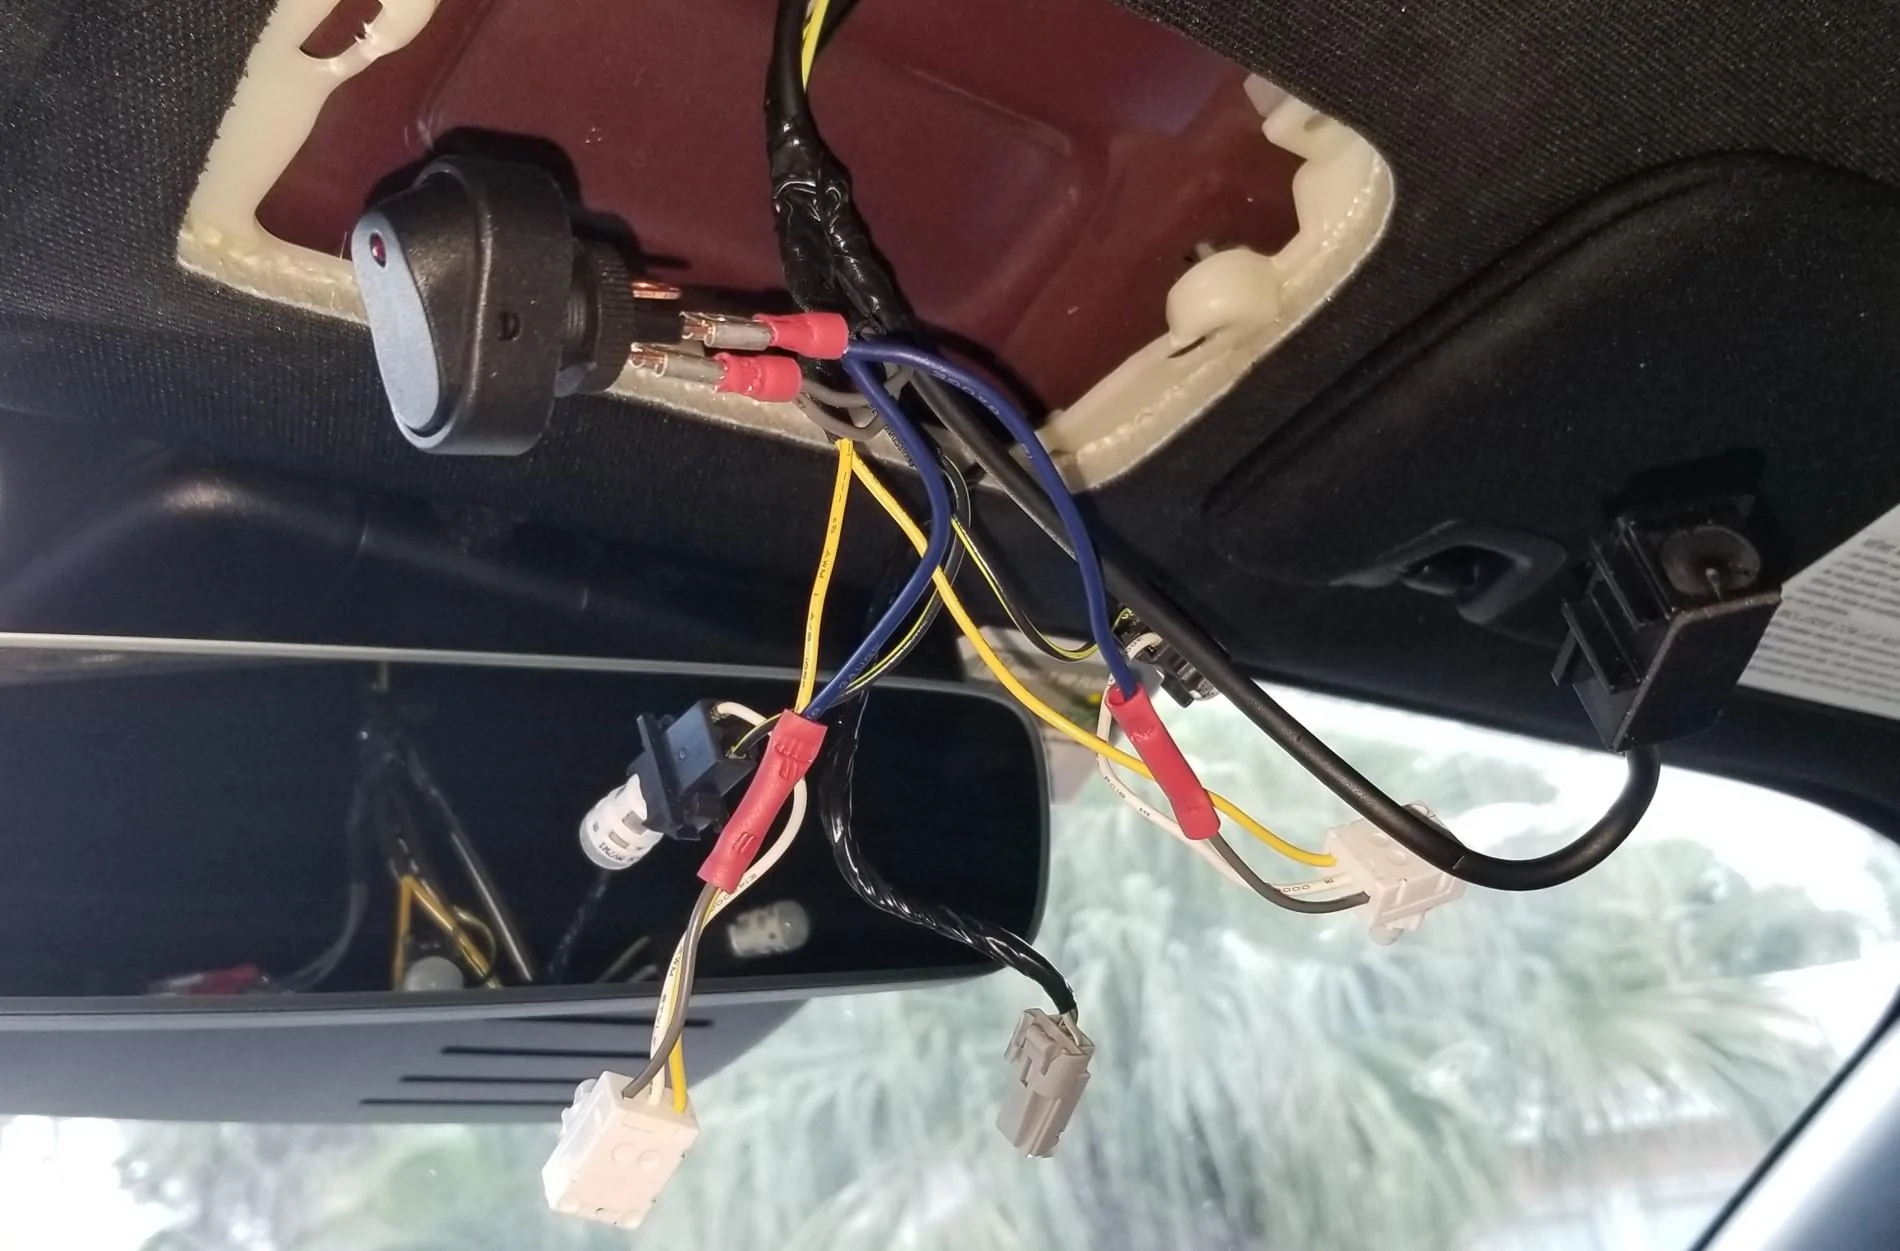
1. First remove the map/dome lamp panel by pulling down (its held in place using two push/pull clips on either side). Disconnect all the wiring (bulbs, map light switches, airbag indicator (use a T10 Torx driver), temp sensor and microphone (if equipped)) from the panel and cut out a hole for the switch. I decided to use this switch from DelCity...https://www.delcity.net/store/Non!illuminated-Mini-Rocker-Switch/p_788765.h_788770
The one you want is the SPST (Single Pole Single Throw).
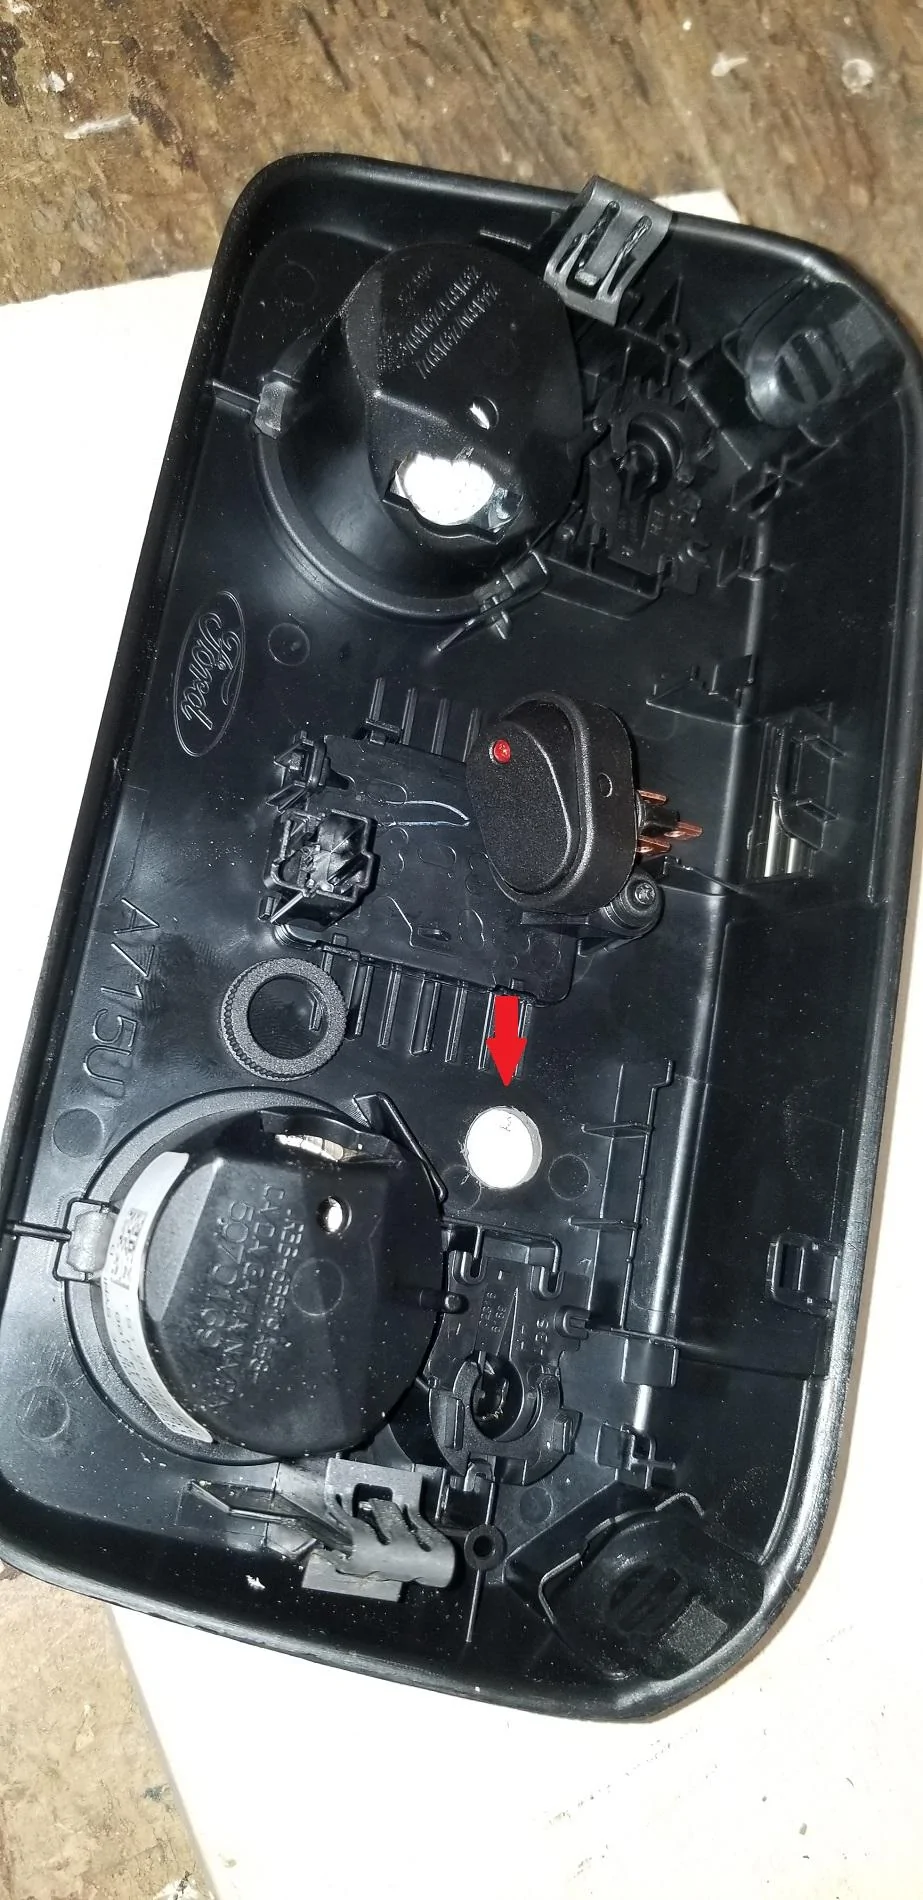
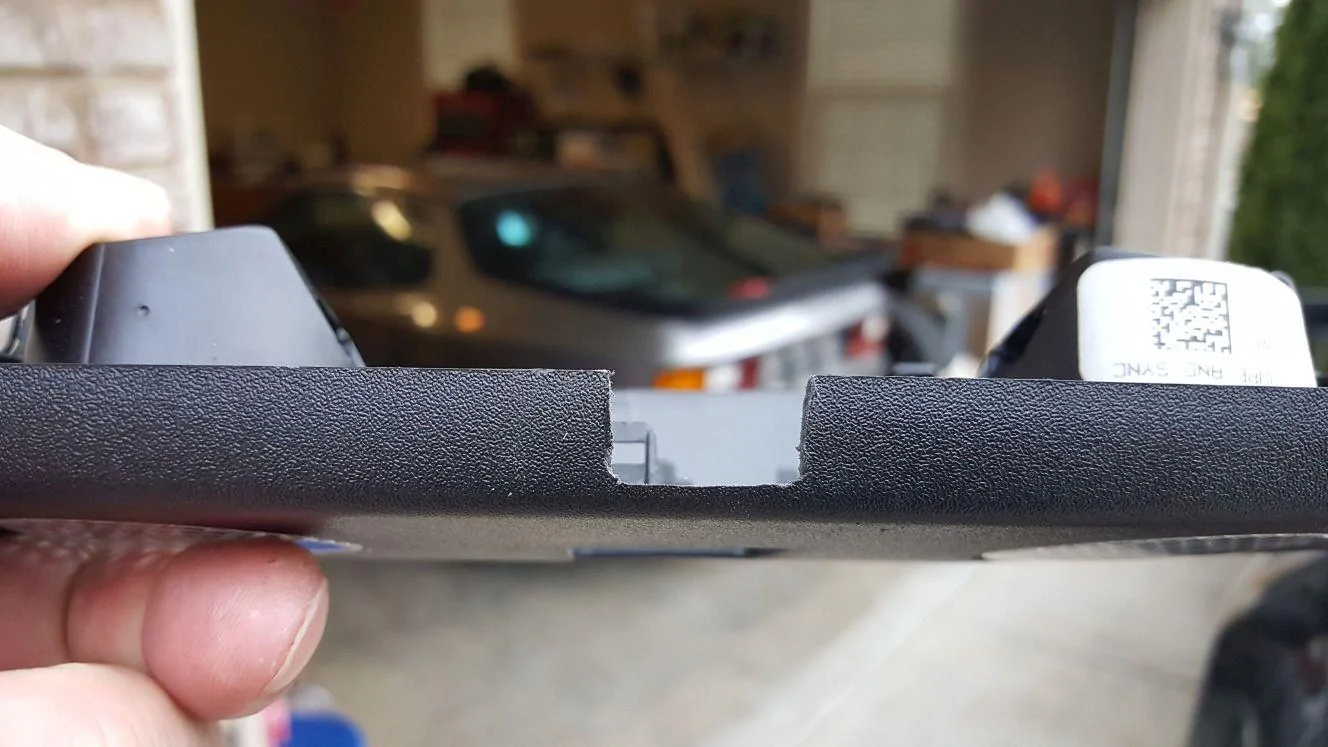
2. As far as cutting the hole, I used tin snips to get started then a hand file to shape it into a square. The switch was a little too tall for the hole, but the headliner was soft enough that it just pushed into the headliner and helped hold the switch in place. You might use a slimmer switch if you want. I placed the cutout in the center of the lamp panel, but really it would be better to place the hole to the right of where I put it (where the "A715U" is stamped) since it was a tight fit around the airbag indicator.
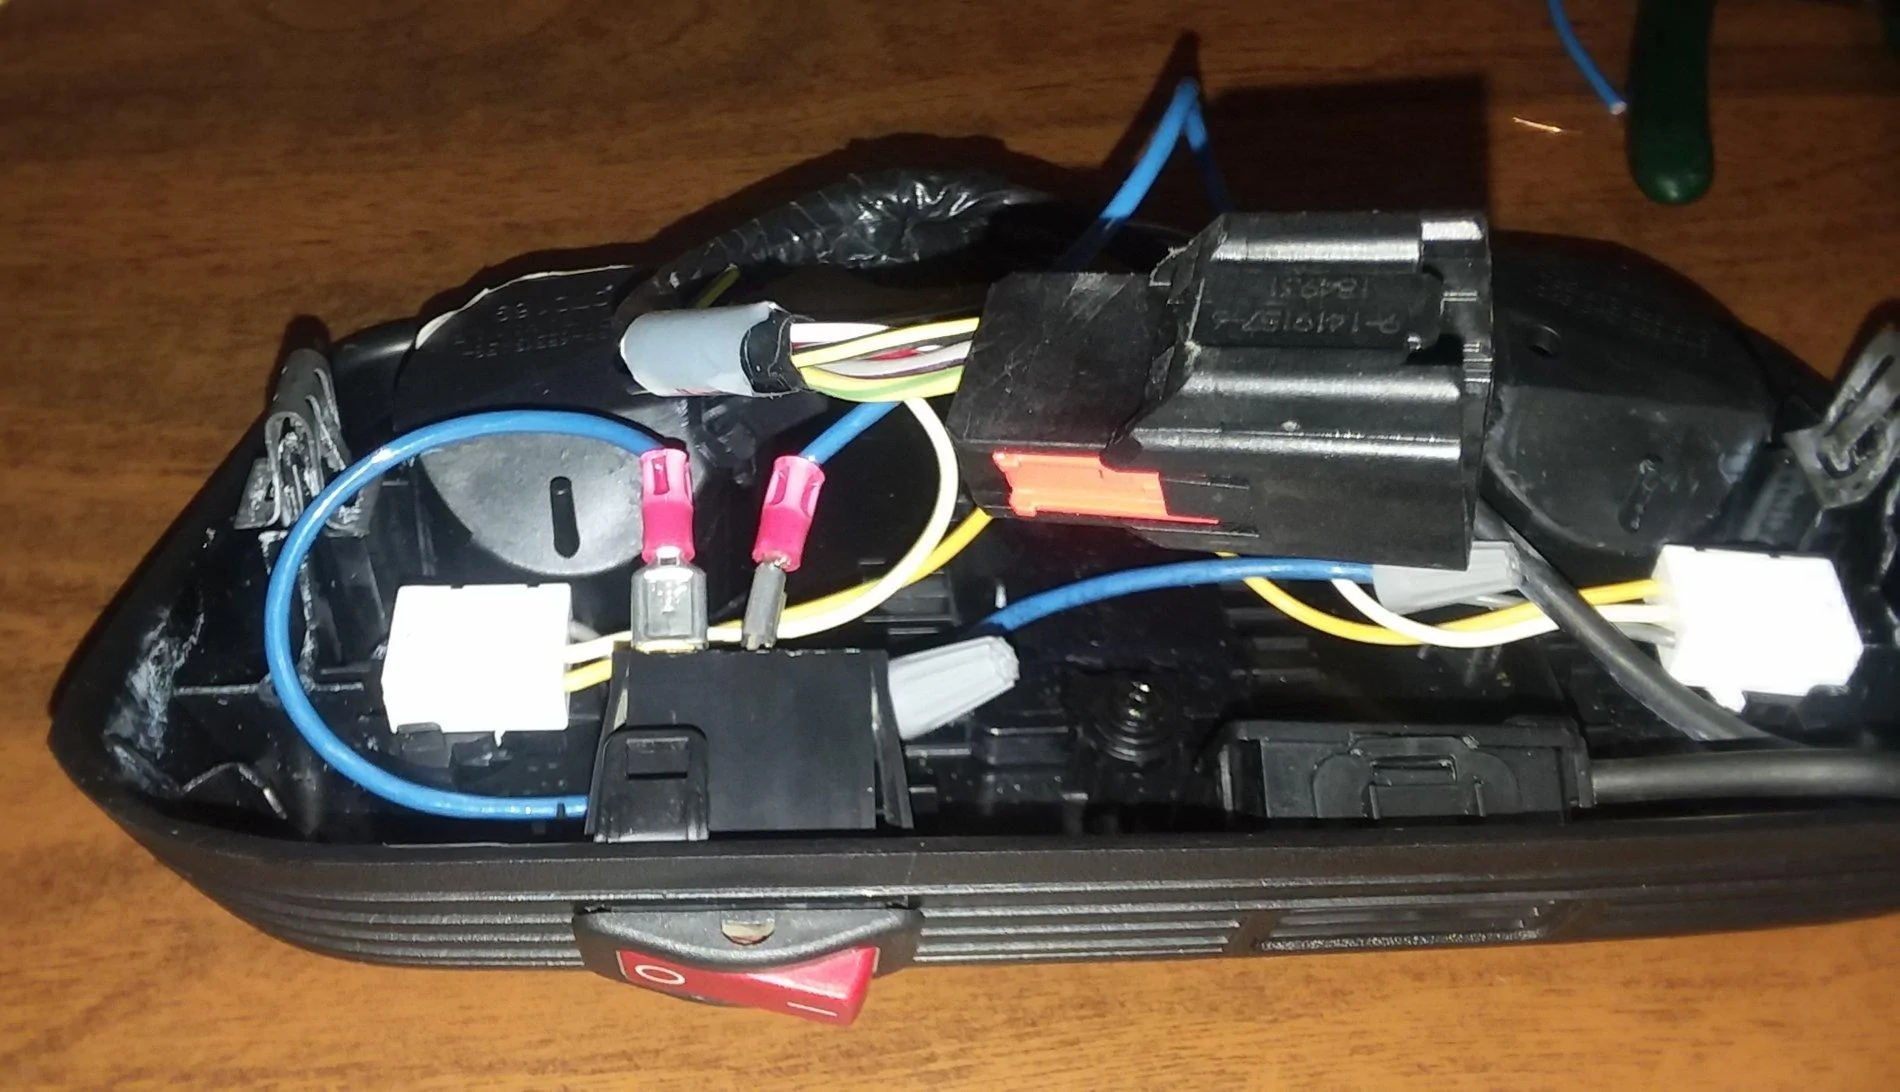
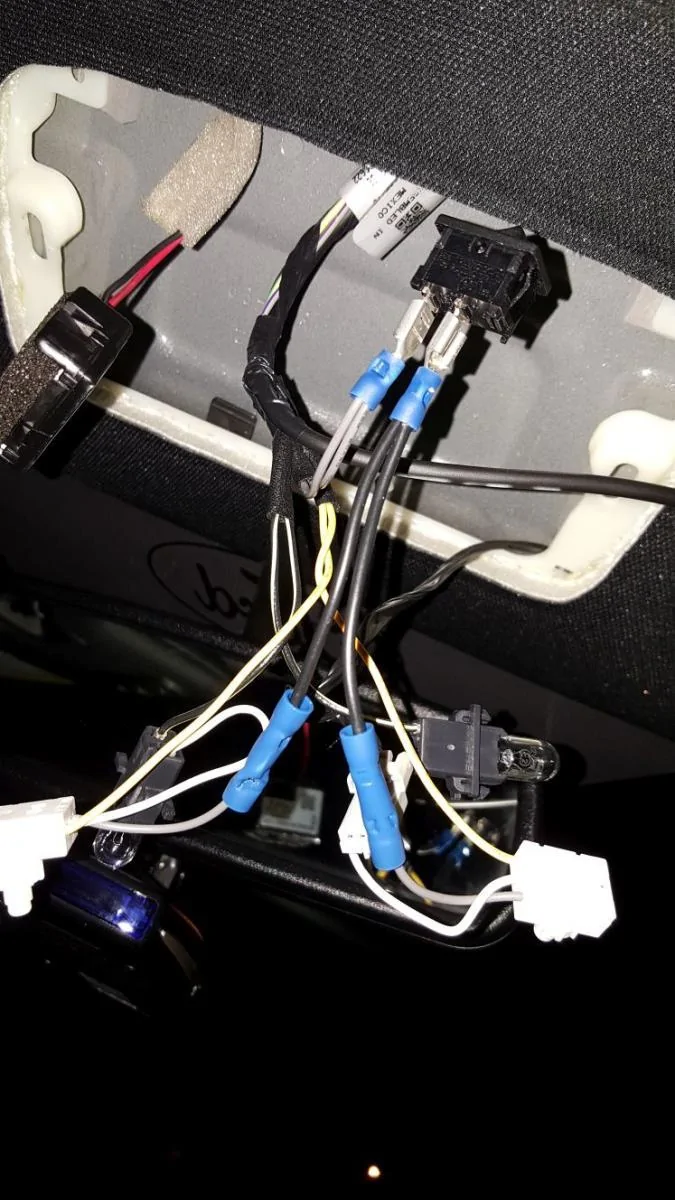
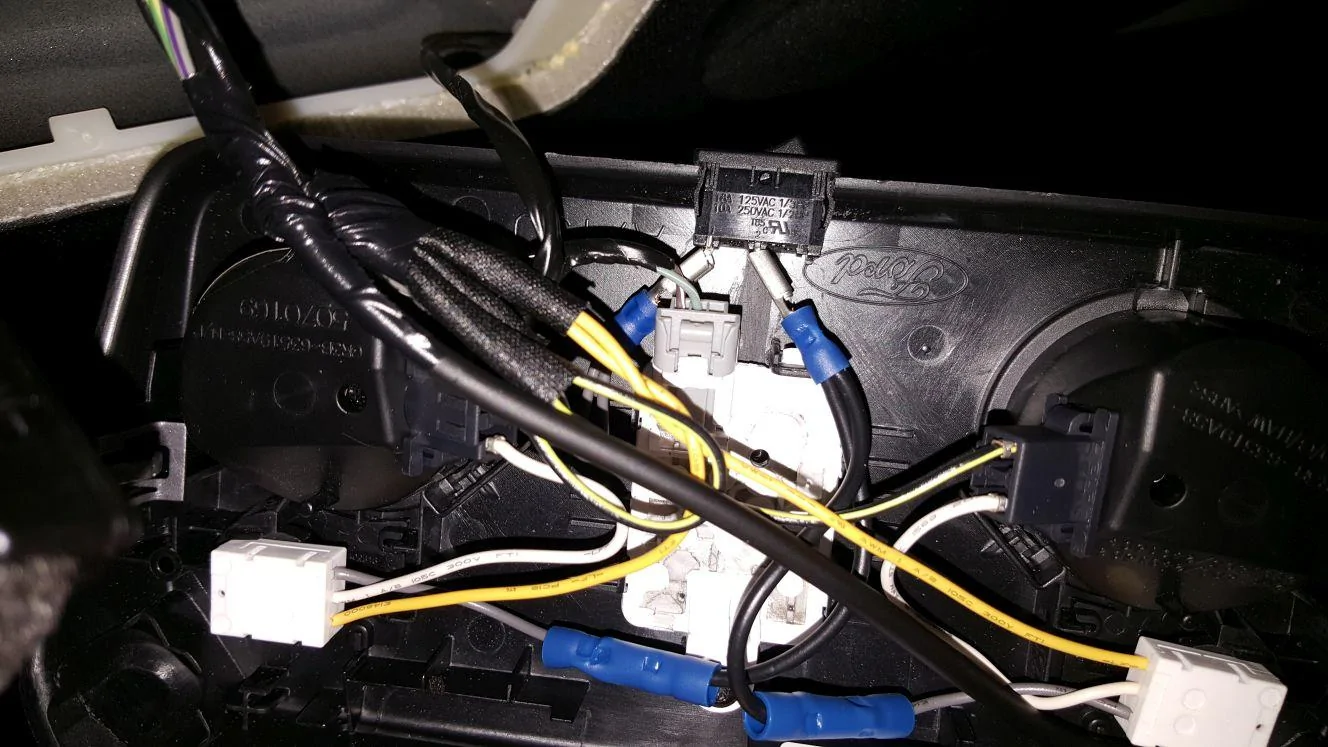
3. Next is the wiring. You'll need to cut ONLY the GREY wire lead from each map light. Just cut it in two somewhere in the middle. This is the power feed for the dome light function. By doing it this way, you preserve the map light function, which means you can still switch the map lights on and off with the push buttons while having the dome light switched off.
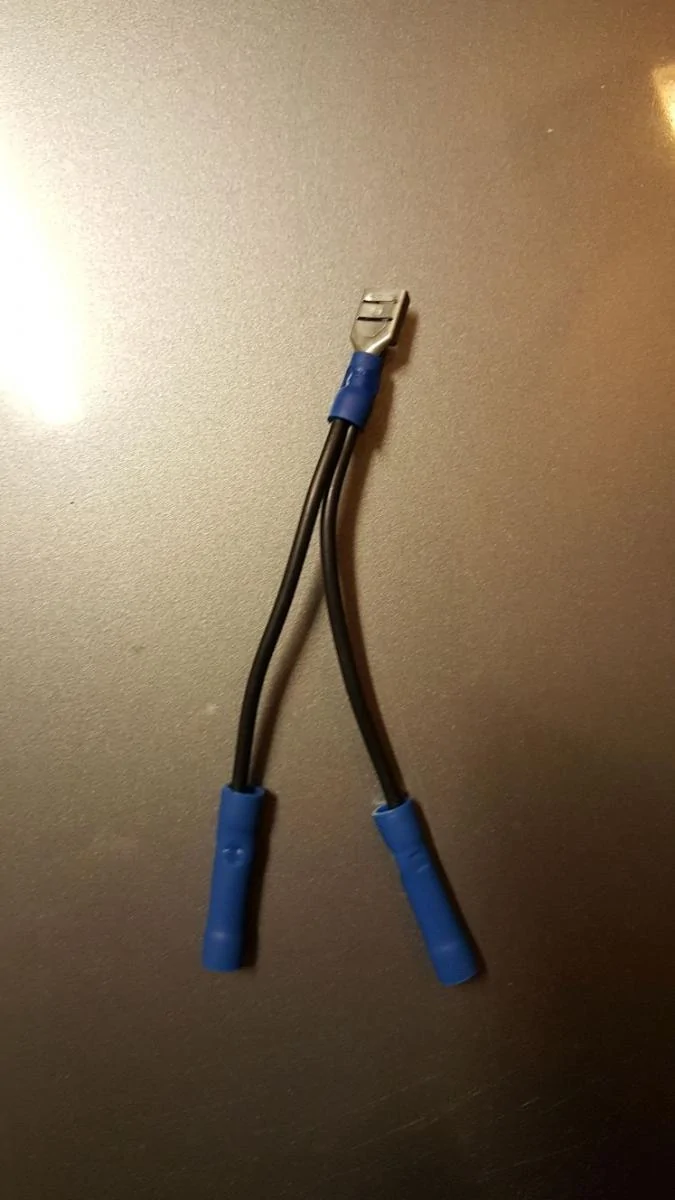
4. More wiring... Cut two sections of wire and make a pigtail with one blade connector for the switch and two splice connectors which will go to each of the grey wires on the map lights you just cut. Connect (crimp) the grey wires to the splice connectors (one to each map light).
5. Strip the two remaining cut grey wires and twist them together (these will be the grey dome light feeds coming out of the headliner). Insert both wires into one blade connector and crimp. That's all the wiring. Push the two blade connectors onto the two blades (prongs) of the switch. Note: you can swap connectors on the blades to change the switch rocker orientation if you want.
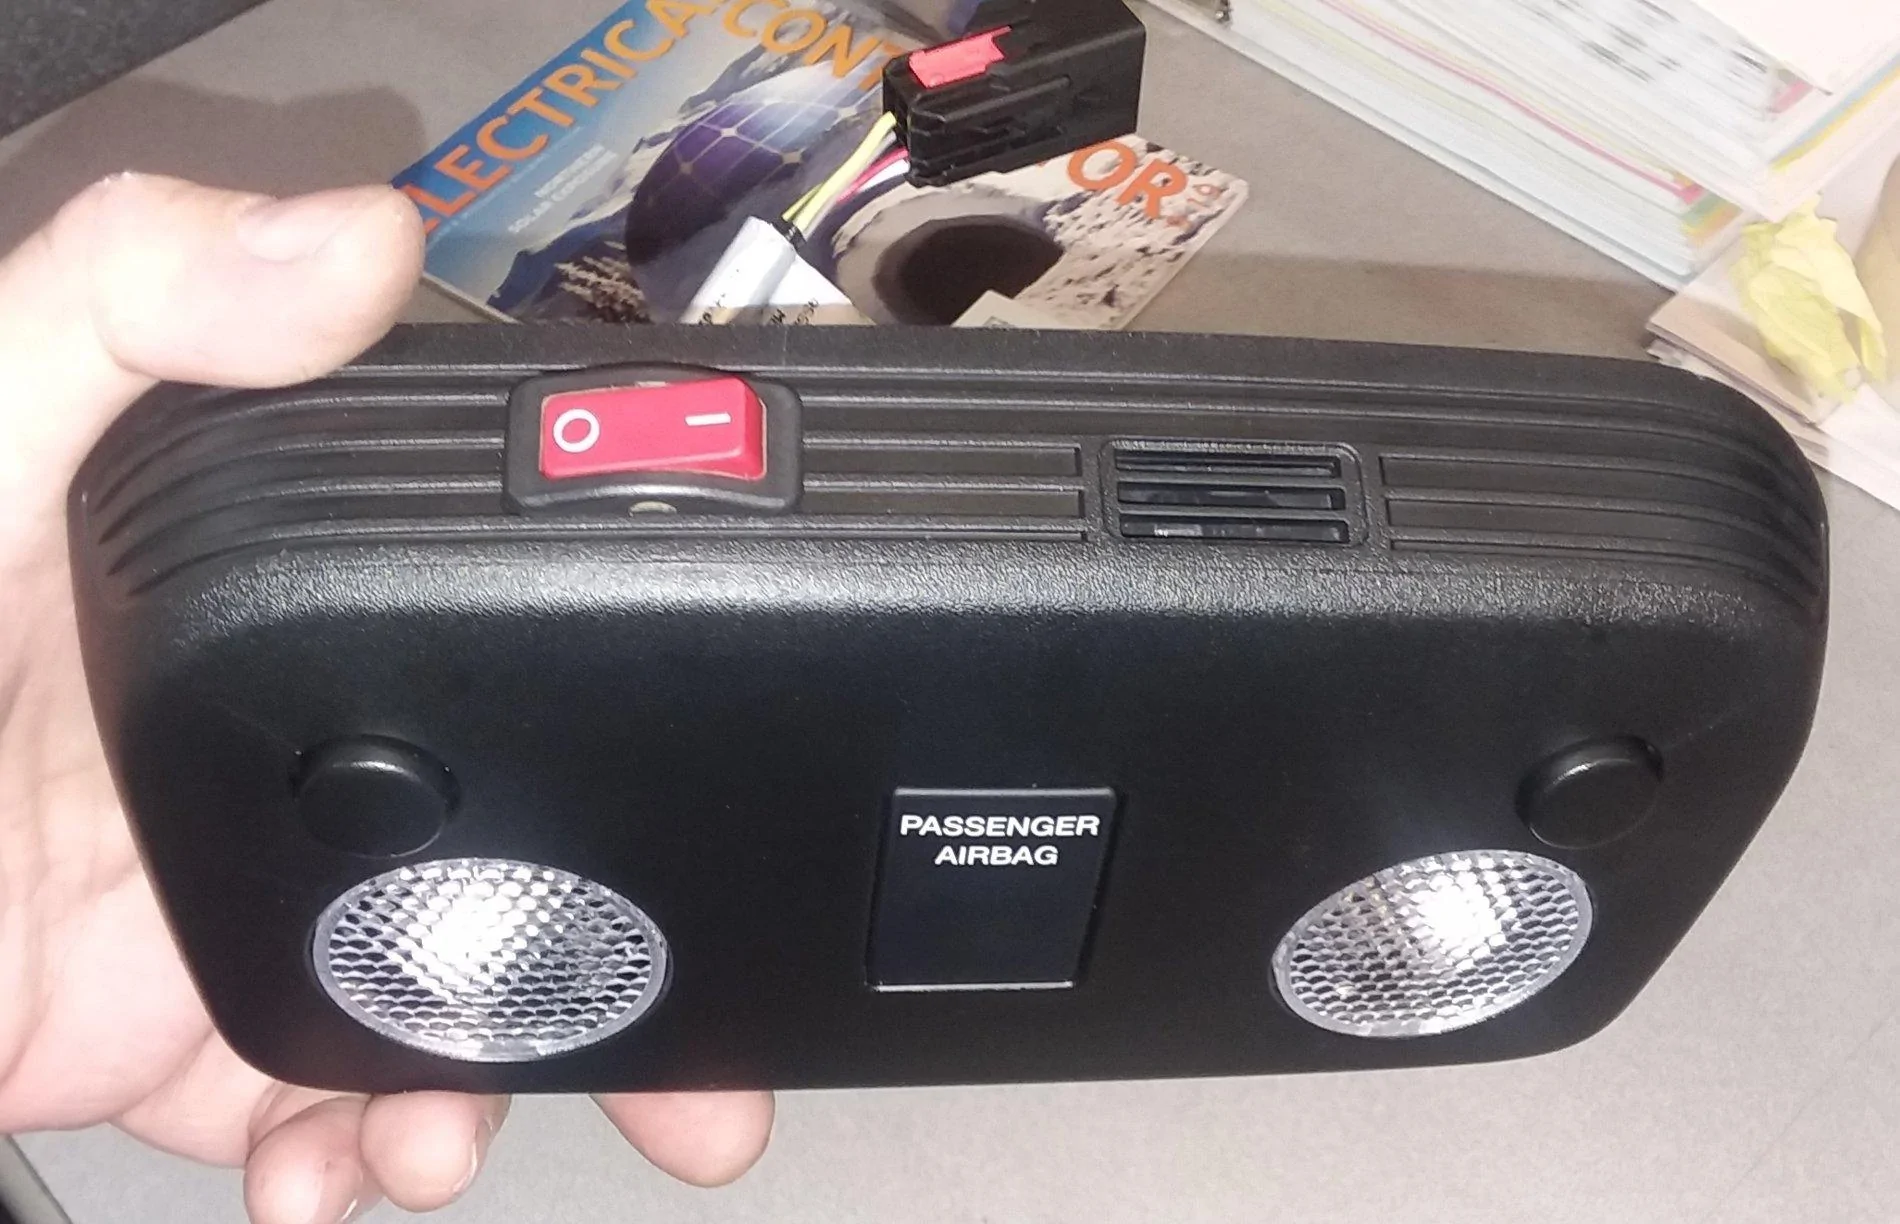
6. Reinstall the bulbs, map light switches, airbag indicator, temp sensor and microphone (if equipped), and put the switch in place. Press the lamp panel back into the headliner with the clips and you're done. Enjoy guys!


1. First remove the map/dome lamp panel by pulling down (its held in place using two push/pull clips on either side). Disconnect all the wiring (bulbs, map light switches, airbag indicator (use a T10 Torx driver), temp sensor and microphone (if equipped)) from the panel and cut out a hole for the switch. I decided to use this switch from DelCity...https://www.delcity.net/store/Non!illuminated-Mini-Rocker-Switch/p_788765.h_788770
The one you want is the SPST (Single Pole Single Throw).
2. As far as cutting the hole, I used tin snips to get started then a hand file to shape it into a square. The switch was a little too tall for the hole, but the headliner was soft enough that it just pushed into the headliner and helped hold the switch in place. You might use a slimmer switch if you want. I placed the cutout in the center of the lamp panel, but really it would be better to place the hole to the right of where I put it (where the "A715U" is stamped) since it was a tight fit around the airbag indicator.
3. Next is the wiring. You'll need to cut ONLY the GREY wire lead from each map light. Just cut it in two somewhere in the middle. This is the power feed for the dome light function. By doing it this way, you preserve the map light function, which means you can still switch the map lights on and off with the push buttons while having the dome light switched off.
4. More wiring... Cut two sections of wire and make a pigtail with one blade connector for the switch and two splice connectors which will go to each of the grey wires on the map lights you just cut. Connect (crimp) the grey wires to the splice connectors (one to each map light).
5. Strip the two remaining cut grey wires and twist them together (these will be the grey dome light feeds coming out of the headliner). Insert both wires into one blade connector and crimp. That's all the wiring. Push the two blade connectors onto the two blades (prongs) of the switch. Note: you can swap connectors on the blades to change the switch rocker orientation if you want.
6. Reinstall the bulbs, map light switches, airbag indicator, temp sensor and microphone (if equipped), and put the switch in place. Press the lamp panel back into the headliner with the clips and you're done. Enjoy guys!


Sponsored
Last edited: