Sponsored

DFB's Gardening Thread

OP
OP
DFB5.0

DFB5.0

Well-Known Member
Joined
Mar 15, 2017
Threads
92
Messages
5,400
Reaction score
15,541
Location
Australia
Vehicle(s)
Mustang GT Fastback
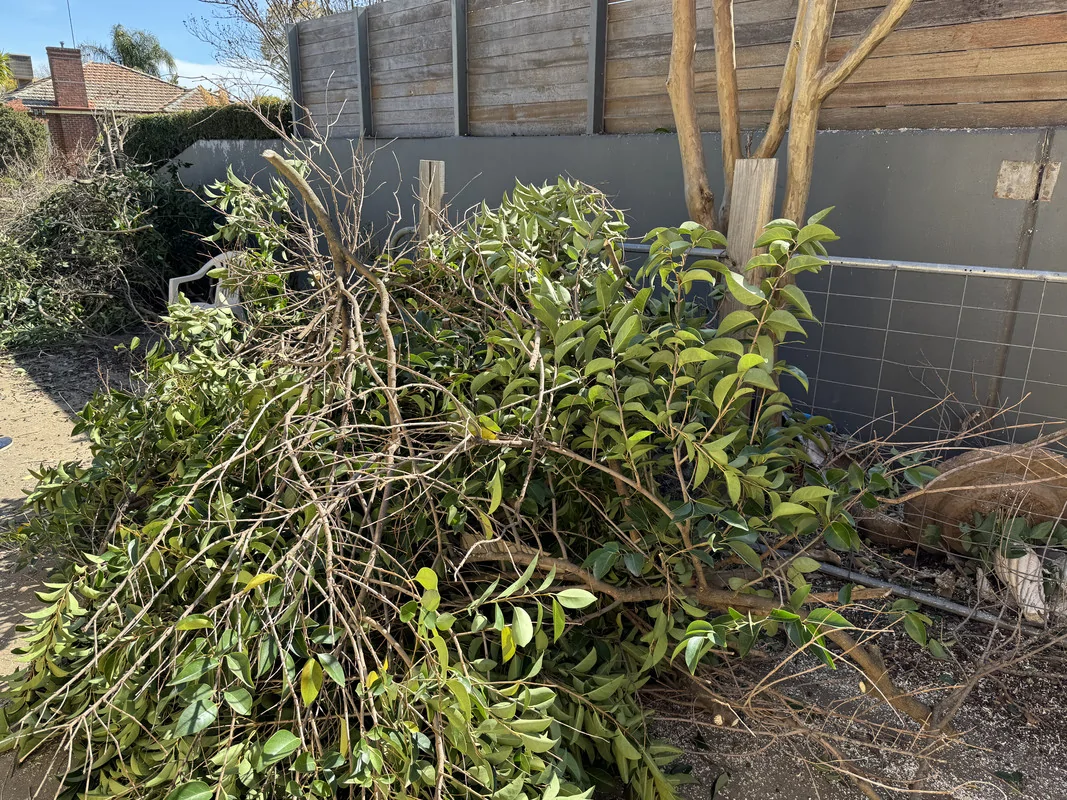
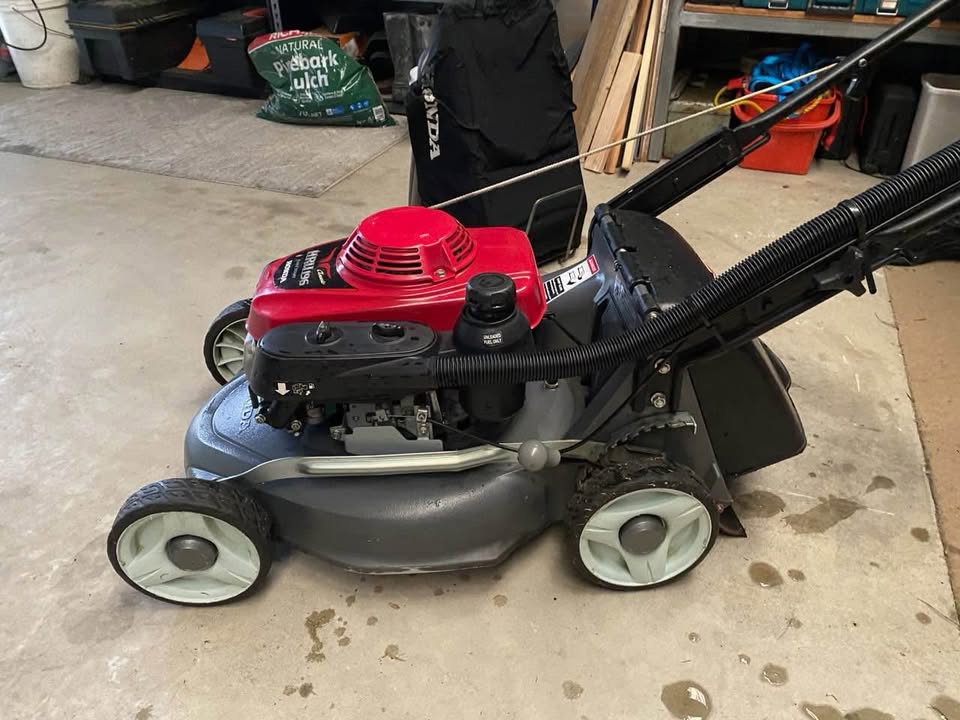
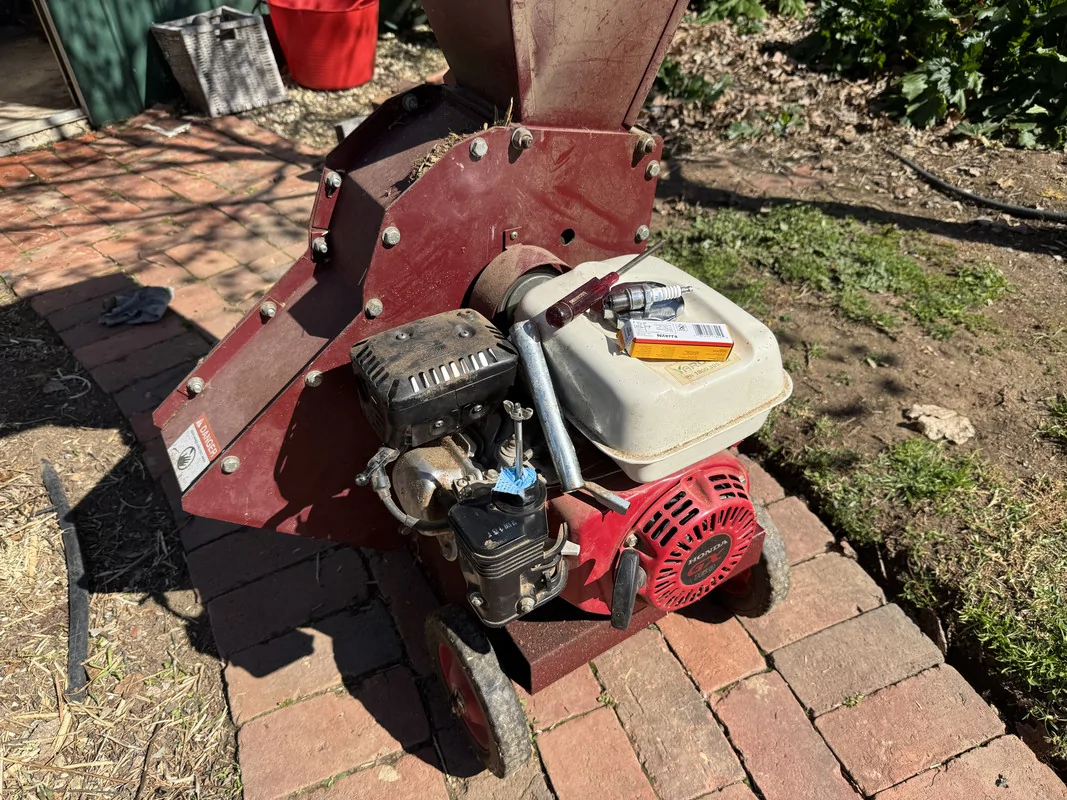
I had the shredder out the other day to process the material removed from two large Buddleja plants, which I prune heavily once a year. You have to pick your mark with this thing, try to shred material that's too wet and all you do is create a headache. That tends to rule out a lot of stuff removed from this garden. Rose pruning's are not nice to feed through it either. It's also time consuming, although you do get free mulch from it at the end.

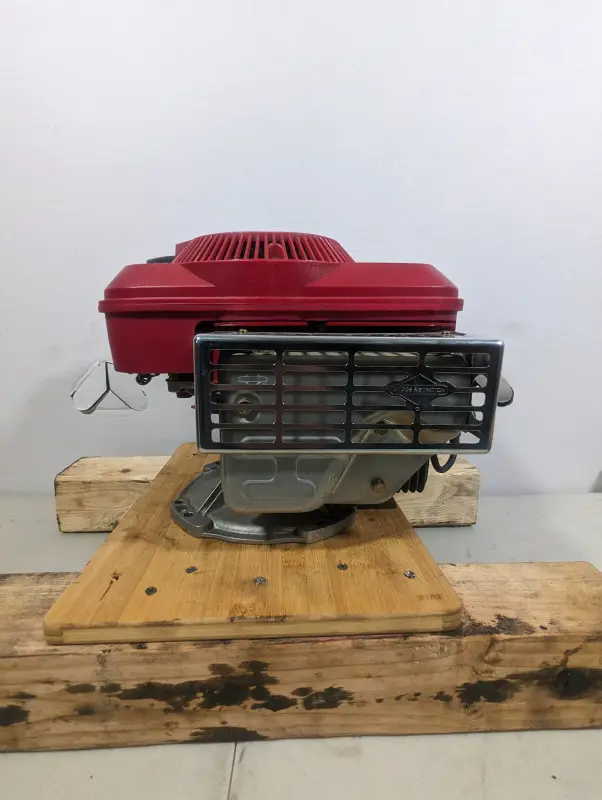
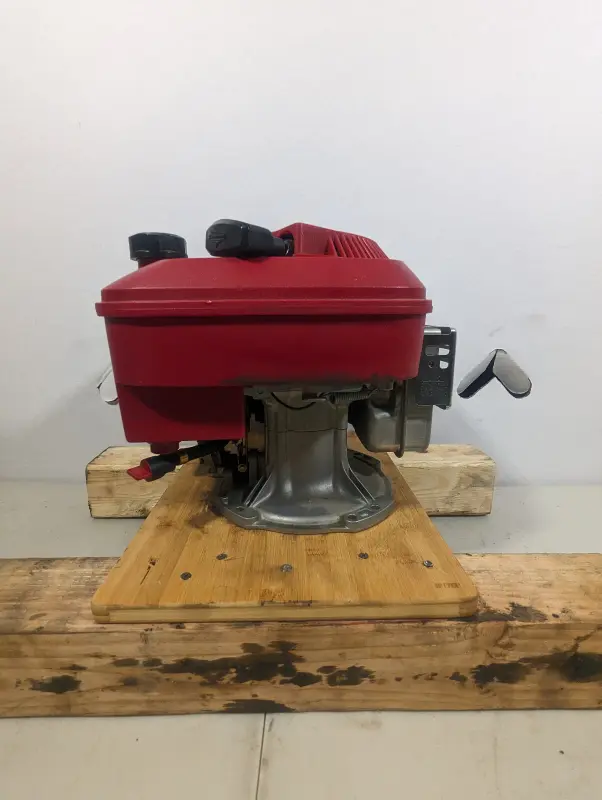
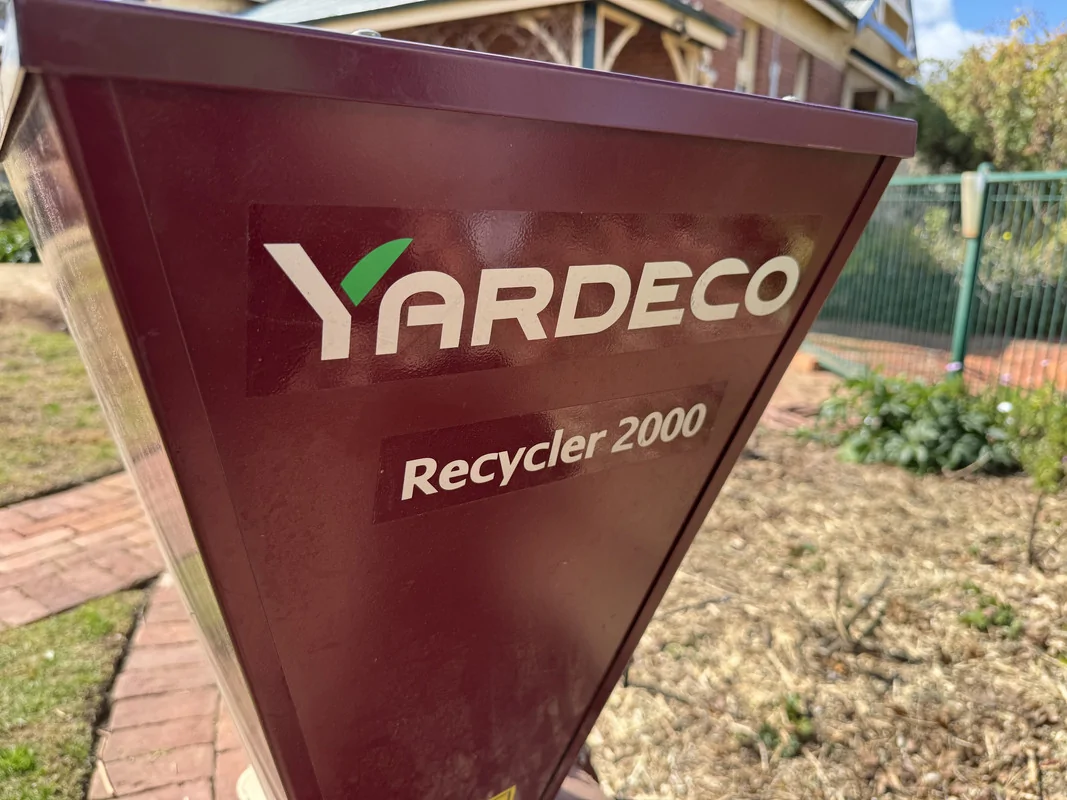
The shredder in question is a Yardeco Recycler 2000 fitted with the 5hp Honda GX 160 engine. These are Australian designed and engineered and were available with Briggs & Stratton or Honda engines, thankfully, the owner went with the Honda engine (I hate Honda machines but like their commercial engines). It would appear the Yardeco brand no longer makes shredders, but still offers garden scratchers (tillers), powered wheelbarrows, and log splitters.

Yardeco

However, it would appear that the same machines are now branded TruYard, even the promotional video is the same. The Briggs engines have made way for crappy Krohler's, and the Honda engines upped to the GX 200.

TRUYARD

IMG-6979.webp


IMG-6976.webp


After using it the other day, I figured the engine has never been serviced since it was bought at least a decade ago. Not that it's been run constantly over that period, even so, it's probably well overdue for an oil change.

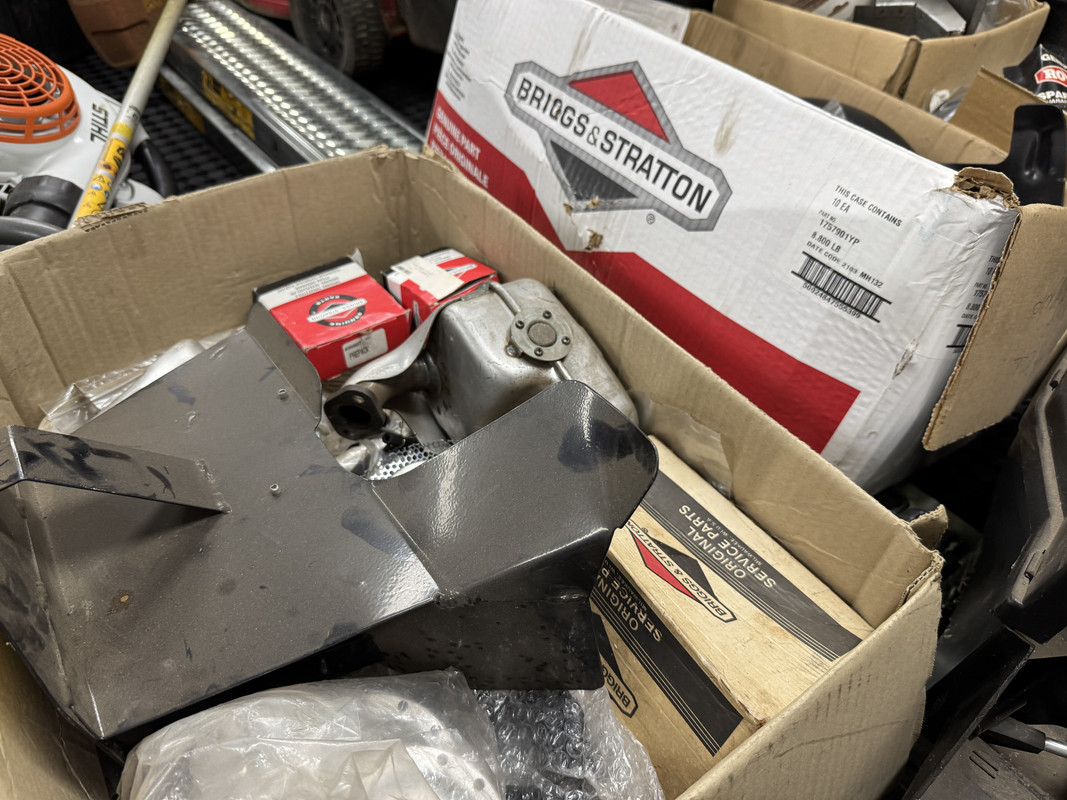
Because of the size, weight and awkwardness of the machine, draining the old oil is not easy. To get around that, I used my small Briggs & Stratton oil extractor. A B&S tool used to service a Honda! 🤔

The old oil wasn't too bad, a dark gold-brown, but well worth refreshing. I refilled with Penrite Small Engine 10w30, which is semi-synthetic. From what I can see, the Honda-branded oil offered in Australia is a mineral based 10w30, although there is a synthetic 5w30 offered overseas.

I also replaced the original spark plug, an NGK BPR6ES.

IMG-6968.webp


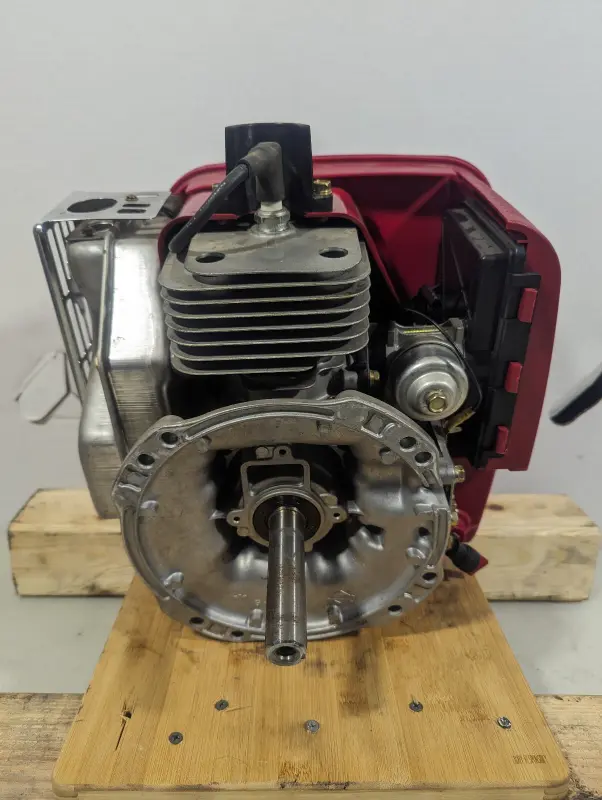
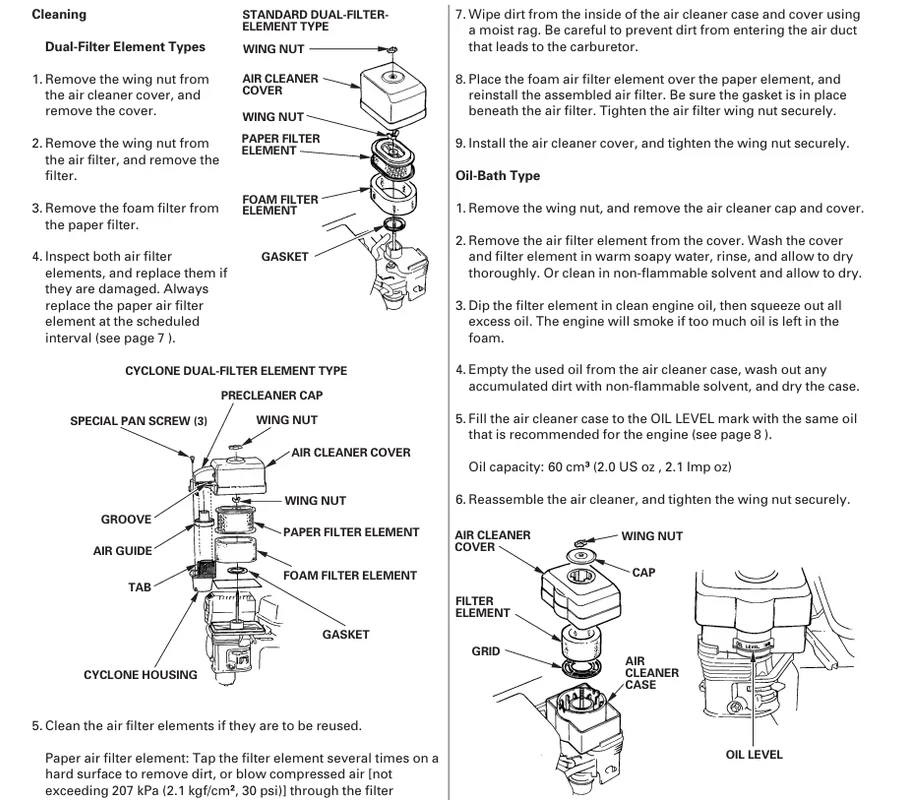
Honda makes three different air filter types for these engines. The first two are conventional, either a low-profile foam sock, or an oval paper cartridge with a foam pre-filter. On this particular GX 160, it has the third type, an oil bath filter. I've never worked on an engine with a filter like this, a design I thought was confined to the early days of small engines, but clearly not.

Screenshot-532.webp


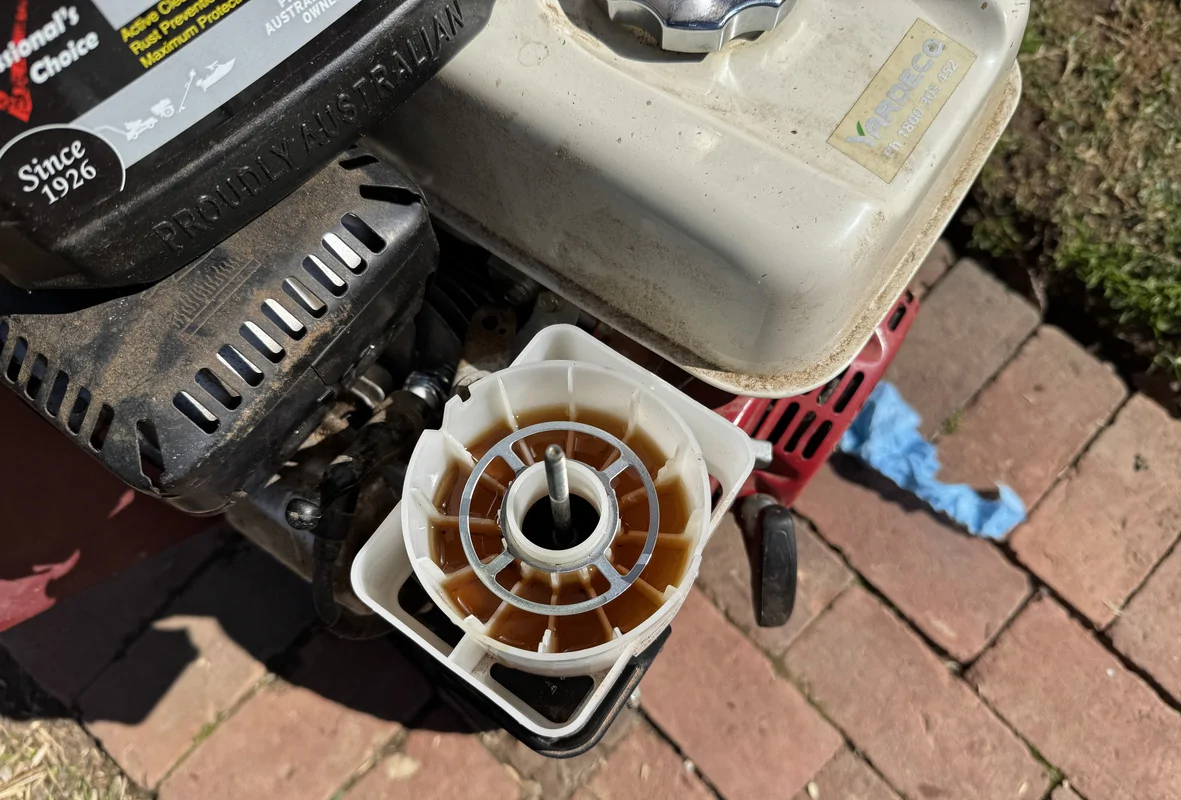
In conjunction with a conventional oiled foam filter, the idea here is to trap debris in the oil reservoir. Over time, that oil becomes loaded with dust and debris and needs to be drained and refreshed. On this occasion, I drained the oil, then cleaned out the reservoir with Surfex and water, then left to dry in the sun while I finished elsewhere. The foam element was blown out and re-oiled. Once dry, the reservoir was refilled using the same Penrite oil that went in the engine.

IMG-6971.webp


I have to say, this is an unnecessarily complicated and messy filtration system. You can't just install a new filter and be done with it, as such I'd much prefer the standard dual-element paper/foam type.

Because of the infrequent use, I have no idea how old the fuel in the tank was. While the engine (eventually) started and ran fine earlier in the week, the exhaust gas smelt stale. After use, I actually shut off the fuel and let the engine run dry. So, the final step today was to drain and discard the fuel left in the tank. I also have no idea when I'll use this machine again, so leaving the fuel any longer wouldn't do the engine any good.
Sponsored

 
OP
OP
DFB5.0

DFB5.0

Well-Known Member
Joined
Mar 15, 2017
Threads
92
Messages
5,400
Reaction score
15,541
Location
Australia
Vehicle(s)
Mustang GT Fastback
My last job of the day and I just couldn't resist taking a photo of a couple of favorites in full bloom at the moment.

The first sits at the entrance to the property, standing proud above the fence, Magnolia Soulangeana.

IMG-7011.webp


IMG-7007.webp


IMG-7009.webp


This property is in an older area of town, clearly this small slow growing tree was a popular choice in the 50's and 60's. Nearly every second home in this area has one of these Magnolia's in the front garden, much like everyone planting Magnolia Little Gem, Pyrus Ussuriensis or Maple Autumn Blaze today. The reality is, these old-fashioned Magnolia's would be considered too slow growing and too messy for people these days. Sad really.

And of course, it wouldn't be late winter without Camellia Japonica's in flower. This variety is most likely 'Emperor of Russia Variegated'. These variegated varieties have always fascinated me, they have so much variance from flower to flower that no bloom is identical. As you can see below, the amount of white variation is different for each bloom, while some will show off yellow stamin more than others.

IMG-6999.webp


IMG-7003.webp


IMG-7005.webp


Again, this is an older and well-established plant that is such a treat to see in flower. And because there are literally 1000's of buds on the plant, the display will carry on well into spring.
 
OP
OP
DFB5.0

DFB5.0

Well-Known Member
Joined
Mar 15, 2017
Threads
92
Messages
5,400
Reaction score
15,541
Location
Australia
Vehicle(s)
Mustang GT Fastback
Today I got to use my new Stihl MS 500i for the first time with a purpose, as in, not just cutting cookies on a sawhorse. :giggle:

This job entailed the heavy pruning of an established Crepe Myrtle, removal of a Loquat tree, and removal of a developing Privet tree. But the main task was removal of a larger, well-established Privet that was causing issues against the house and dropping considerable mess.

The majority of this job was completed with my little MSA 140C, it's light weight and ease of handling much appreciated here. It's also nice not having the saw running all the time when stuck up a tree. That said, for this sort of work, a top-handle saw is probably a better companion as it permits safer single-handed use. My method here was to use the 140C to prune each offender back to a main framework. For the Crepe Myrtle, that's where I stopped, but for the Privet's and Loquat, something bigger would be required.

IMG-4374.webp


Something I've found with battery saws is they tend to guzzle the juice when being used for sustained cutting on larger sized cuts. Considering I was making several cuts up to about 80mm, the battery life was excellent. My larger 4 Ah battery did the majority of the work before depletion, the smaller 2 Ah battery was only needed to finish things off, of which used half a charge.

IMG-7105.webp


With the limbing done, it was time to fire up the big, bad 500i. :rockon:

Primer pressed 12 times, decomp valve in, a couple of love taps on the rope, one full, then she fired up on the second to a lovely stable idle. After letting it warm up, off it went to destroy some wood! Fu.k yeah! This thing rips!

IMG-7104.webp


I will say, the chain type and extreme throttle response makes it a little aggressive at times, either at the very start of the cut or right at the end. But then that throttle response is super nice in that you can tap-tap-tap the throttle when coming to the end of cut and trying to control the drop. And the power! Yes, Privet is super soft, but the way the saw digs in on bigger cuts and just rips through as if it was butter was impressive.

IMG-7108.webp


The customer wanted to keep the larger cuts for firewood, although I'm not sure you'd want to burn this stuff. Either way, less for me to cart away.

IMG-7110.webp


This little job was also a good chance to let the saw retune itself after I'd fitted the Bark Box. Because the 500i has electronic fuel delivery, West Coast Saw suggest the engine will be tuned to the muffler by the third or fourth cut after installation. Now, I've made a few cuts with it since adding the Bark Box, but not with the bar buried deep in a cut like I did today. Without the fuel injection or M-Tronic, you'd have to retune your carburetor manually to prevent a lean running condition. I certainly noticed the engine feeling sweeter towards the end of its job today.


IMG-7113.webp


See, I do actually use them...............................sometimes. :giggle:
 
OP
OP
DFB5.0

DFB5.0

Well-Known Member
Joined
Mar 15, 2017
Threads
92
Messages
5,400
Reaction score
15,541
Location
Australia
Vehicle(s)
Mustang GT Fastback
Just look at this stunner that I found poking out from behind one of my Camellias.

IMG-7531.jpg


Freesia's are supposed to be highly scented, but this one sadly isn't. Robbed!
 
OP
OP
DFB5.0

DFB5.0

Well-Known Member
Joined
Mar 15, 2017
Threads
92
Messages
5,400
Reaction score
15,541
Location
Australia
Vehicle(s)
Mustang GT Fastback
The first rose bloom of the season, this being a climbing form of "Gold Bunny". Sadly, this is a non-scented floribunda rose, however it is a healthy repeat flowerer. With so much fresh growth, what you can't see is the massive infestation of green aphids, which was swiftly given a dose of systemic insecticide. Actually, if you look closely at the foliage, it has a shiny appearance, that is the secretions from the aphids, which will often attract ants as well.


This particular garden has a large quantity of roses in bush, climbing, standard forms. Each year, I stagger the pruning over a couple of weeks, usually early to mid-August. This is something I would stress to customers, avoid pruning roses at the very start of winter. I even have an ex-colleague who starts her rose pruning services at the same time. For many, the calendar will tick past June 1st and therefore assume it MUST be winter, well, it's just far too early for rose pruning.

There are a few key reasons why you should delay rose pruning -

- Being in a frost prone area, often into spring, pruning too early risks damage to fresh shoots, in turn setting the plant back.

- Quite often, roses will still be in full leaf and even flower well into June and July. That means the plant is NOT dormant. "Oh, but the rose plants in the store don't have leaves on them"...............that's because they are sprayed with a defoliant to shock them into an early dormancy. This is also why you don't buy roses from Big W or Bunning's.

- Pruning too early does not mean an early return to flowering. There just isn't enough sunlight and warmth for strong regrowth.

Why am I repeating all of this information? Because the above rose was the LAST to be pruned in mid/late-August. And yet, it was the FIRST to flower and the plant that bounced back much, much stronger than all of the others that were pruned earlier in August.
 

Sponsored

HoosierDaddy

Well-Known Member
Joined
Jan 2, 2016
Threads
263
Messages
4,565
Reaction score
8,963
Location
Winchestertonfieldville (ok, Scottsdale), AZ
First Name
Randy
Vehicle(s)
2016 GT Premium PP, 2023 Tesla Model 3 Performance, 1978 Trans Am WS6, etc.
Can you still order large numbers of "ladybugs"? I apologize for gender assumption.
 
OP
OP
DFB5.0

DFB5.0

Well-Known Member
Joined
Mar 15, 2017
Threads
92
Messages
5,400
Reaction score
15,541
Location
Australia
Vehicle(s)
Mustang GT Fastback
Well, I kinda bought a lawn mower shop here.......................

IMG-7581.jpg


This all came from the lawn mower shop I have spoken about here many times. This shop was my go-to for many years, be that for the purchase of lawn mowers and spare parts, but also for equipment repair. Once it changed hands, I was burnt twice on two repairs with the new owner, which turned into a messy situation and dispute with Victa head office. I have since bought parts and mowers elsewhere, and then fixed stuff myself.

When the business was being sold, the new owners were instructed by an accountant to not include/accept parts more than a year old within the sale. So, boxes and boxes of old parts were taken with the previous owners and have sat in his shed ever since.

Now, a lot of this stuff is going to be completely useless to me. Some of it is suuuuper old, some of it is for larger ride-on engines, some of it I don't even know what it's for. There is everything from replacement valves, thousands of different gaskets, pistons, piston rings, complete carburettors, carburettor kits, governor springs and links, air filters, even two fuel tanks, one of which would have come in handy on a recent project.

IMG-7583.jpg


IMG-7586.jpg


IMG-7587.jpg


IMG-7589.jpg


IMG-7590.jpg


IMG-7591.jpg


IMG-7592.jpg


IMG-7593.jpg


The fun part from here will be going through and sorting out what I want to keep, what is worth selling, what is simply better off going in the bin (old foam filters for example). Some of the vintage Briggs & Stratton packaging is worth having just to look at. :giggle:

This was the same mower shop that I remember going to with my dad to buy parts for the family's ailing Morrison, which we eventually rebuilt together and subsequently taught me how engines work. Every time I would go into that shop, young or old, I'd be gazing beyond the counter and into the spare parts room thinking, geez, I'd love to have a look in there. Now I have a significant collection of parts that would have sat on those shelves the whole time. Some of them decades old.
 
OP
OP
DFB5.0

DFB5.0

Well-Known Member
Joined
Mar 15, 2017
Threads
92
Messages
5,400
Reaction score
15,541
Location
Australia
Vehicle(s)
Mustang GT Fastback
Jumped into the parts abyss this morning and WOW, what an interesting exercise!

My goal for today was to look through each box and sort everything into defined collections. For the most part, the seller had already grouped many similar parts together, however not a methodically as I'd like. I also wanted to properly see what I had, which would then allow me to determine what I want to keep, what I'd like to sell, and what would ultimately go into the bin.

IMG-7597.jpg


The majority of boxed parts were put into large cardboard boxes, which were labeled with a category and a list of contents. In some cases, I also wrote down part numbers. This will help when I work through each box for keep/sell process. Category groups include internal engine parts, fuel system & carb parts, electrical and dipsticks, air filters, governor springs/linkages, crankcase and engine gasket kits, starters and recoil parts, fuel tanks and wheels.

IMG-7613.jpg


IMG-7615.jpg


IMG-7616.jpg


IMG-7618.jpg


For the smaller stuff, I went and got a collection of containers from Bunnings. These include valve cover gaskets, intake/exhaust/breather gaskets, head gaskets, assorted unknow gaskets, oil seals, bearings, screws and fasteners, assorted hardware.

IMG-7599.jpg


IMG-7602.jpg


As mentioned yesterday, there is a lot of random parts here that will never get used by me, many are not even labeled. There are hundreds of head gaskets, most being for flat head engines and will be useful to someone. I do wonder about the paper sump gaskets, some are 40+ years old, so I'm wondering if they would even be usable? The same applies to the crankshaft oil seals, apart from most not being labeled, I do question if the rubber would be serviceable, chime in please if you can help on that front.

Some stuff went into the bin, mostly deteriorated items, but also random parts that would have no use to me or be worth selling.

The funny thing is, I can easily identify many of these parts and where they go on the engine before even reading the part description, which helped massively with my sorting process. I also spotted a variety of parts that I've had to buy in the past, such as gaskets, carb kits, oil seals, fuel tanks, even a complete carburettor. These were diverted into my usual parts store.

From here, I have the notion of creating a spreadsheet to help find out what will fit my engines (and future engines), then help assign part numbers to the stuff I want to sell.
 
OP
OP
DFB5.0

DFB5.0

Well-Known Member
Joined
Mar 15, 2017
Threads
92
Messages
5,400
Reaction score
15,541
Location
Australia
Vehicle(s)
Mustang GT Fastback
A few notable treasures I came across yesterday –

- An oil pan, which is from a 1220-series OHV horizontal shaft engine.

IMG-7594.jpg


- A flywheel for a vertical 3.5 – 5hp engine.

IMG-7595.jpg


- Quantum fuel tanks, the red one would have been for an IC engine.

IMG-7590.jpg


- Lower crank seals for a Victa, being 20mm means they are for a later full-crank 125 and 160cc engines. I can’t find that particular part number online, so I think the wrong number has been put on it.

IMG-7605.jpg


- Five vintage fuel caps, which would have been fitted to a variety of engines from the 60’s to 80’s, think the 3.5hp engines with the metal fuel tank. Being a spare part, these are bare silver in colour. (Briggs & Stratton paint engines after assembly. That’s why spare parts come in undercoat, unpainted or natural plastic).

IMG-7611.jpg


- Rocker cover and valve-plate gaskets for the Intek engine I picked up a few weeks ago. I ended up buying these parts, so these come three weeks too late. These two were identified by look alone, then verified by the parts numbers.

IMG-7608.jpg


- A complete carburettor to fit said Intek above. I’m told these are hard to come by now as they were unique to the Intek, so Quantum equivalents don’t fit. What are the odds.

IMG-7620.jpg


- I immediately knew what these are for, only because of watching the legendary Taryl Dactal. This little kit consists of a small roll pin and a Teflon washer, which was used to combat warping on the metal fuel tank used on 3.5hp vertical shaft engines. The pin and washer prevent fuel leaking into a specific chamber on the tank that would cause a running issue. Briggs implemented these parts as a repair kit. These would be rarely used today, only for those restoring engines.

IMG-7622.jpg


- A bag full of replacement points and condensers to suit 2 – 8 hp engines. Again, these would only be of interest to those restoring older engines.

IMG-7624.jpg


- Two Magnetron kits. These were used to convert an older points and condenser ignition coil to electronic ignition, effectively eliminating the need for points maintenance. Briggs started using Magnetron electronic ignition at some stage in the early to mid- 1980’s, which was a fully integrated system. However, they implemented this retrofit kit for dealers to adapt older coils to the more reliable electronic ignition. Instead of replacing the coil, the module clips over the existing one and new kill wire routed. The points and condenser are disconnected and left in place. No more messing with points.

Again, another Taryl discovery for me.

IMG_7629.jpg


IMG-7628.jpg


Now begins the process of collating part numbers.
 
OP
OP
DFB5.0

DFB5.0

Well-Known Member
Joined
Mar 15, 2017
Threads
92
Messages
5,400
Reaction score
15,541
Location
Australia
Vehicle(s)
Mustang GT Fastback
Ooops........................... :facepalm:

IMG-7640.jpg


IMG-7641.jpg


IMG-7646.jpg


I had a feeling this would happen. After loading up the parts I took earlier in the week, I told the guy if he found anything else that I'd most likely take that stuff as well. This morning I was sent a bunch of photos and a message asking if I wanted this as well. Is the Pope catholic!? I said I'd take the lot and save him the hassle of listing them and playing the Facebook marketplace game. A win-win for both parties.

The key reason why I WANTED this lot was for the Rover snorkel kits. I think most of them are for Honda GXV engines, which was a popular move for contractors running Honda's to fit these Rover kits for added filtration. I also found a couple of Victa versions.

IMG-7642.jpg


IMG-7647.jpg


hsk02.jpg


This is a Rover snorkel kit that would adapt to the Briggs & Stratton 3.5/Sprint/Quattro/Classic engines (see pic). Instead of being an additional filter, these bolted down into the carb throat and replaced the OE filter box and oiled foam element.

IMG-7651.jpg


rsk03.jpg


rsk04.jpg


For some reason, the mower and engine manufacturers have stopped offering snorkel kits, be that as an optional extra or standard fitment. For residential work, I get it. But for commercial, a snorkel makes a massive difference in keeping the filter clean at the engines intake. It's also a bit cheeky to ask the customer to pay more for this kit on a $2000+ mower. Shorter engine life = you buy something new more often.

The rest will need going through, but I've already found a few gems.

Victa and Rover hub caps.

IMG-7648.jpg


A collection of mufflers, including this classic cigar type for an early Briggs and a brand-new Quantum dog-leg type.

IMG-7649.jpg


Chrome Rover hub caps, which will go on my recently acquired Supercut.

IMG-7652.jpg


IMG-7145.jpg


Several self-propel drive gear sets.

IMG-7654.jpg


I literally just bought some of these, now I have 15 of them! :facepalm:

IMG-7655.jpg


A box full of throttle and drive cables, some of which will fit my Rover ProCut's.

IMG-7656.jpg


More bloody head gaskets!

IMG-7657.jpg


Several mower axles, this one is for 18-inch Rover's.

IMG-7658.jpg


An assortment of Victa parts, including chassis parts, gaskets and carb parts.

IMG-7659.jpg


These are cork clutch disks for Rover and Scott Bonnar Model 33 and 45 mowers.

IMG-7644.jpg


And as a little surprise, a Victa ignition coil for a 1988 - 1996 Powertorque engine. A quick search reveals these are worth over $100.

IMG-7665.jpg


With Rover parts getting harder and harder to find, I'm extremely excited to have landed on this stuff. Again, I'll need to get everything out and sort through it.
 

Sponsored
OP
OP
DFB5.0

DFB5.0

Well-Known Member
Joined
Mar 15, 2017
Threads
92
Messages
5,400
Reaction score
15,541
Location
Australia
Vehicle(s)
Mustang GT Fastback
I'm the sort who frets when I don't have everything under control or have a lot in front of me, especially when it comes to my normally well organised garage and the things that go in it. Having just got on top of the first lot of parts but still needing to find a home for it all, the bomb site I created yesterday with the second load made it feel like I'd lost control. So, as you can imagine, I was quite keen to sort out some of the chaotic mess and reclaim my garage.

Because there was soooo much small stuff in this lot, I went out and bought more carboard boxes and parts trays first thing. That meant no double handling, simply a case of picking something up, identifying it, then putting it into the appropriate box or tray. This also needed to be balanced with what I had already sorted through last week, some of which has already been cataloged. That meant having a separate box for those items, basically a temporary measure until they have been logged.

I needed to be somewhat ruthless here, there was just so much random and unlabeled crap that would never be of any use...............it had to go. I ended up filling a large box with stuff to throw out, which included the following -

- While I saved some of the labeled stuff, I threw out thousands of lose/unlabeled paper gaskets and carb diaphragms. With how cheap that stuff is new, and the fact its actually labeled, there was no reason to keep this stuff. Most of it was for small 2-stroke equipment that's long since been thrown in the tip (Talon, Homelite sh.t).

- Random brackets, again not labeled or having a part number.

- Plastic air filter cover for what I think was one of those crappy rebranded Victa trimmers.

- Random electrical wires and connections.

- An old and cracked SupaSwift catcher.

- Plastic tubes from an unknown blower/vac.

- A bunch of corroded, rusty and water damaged height adjuster plates, axles and bearings.

- Two gasket/breather kits for the Victa V40 engine. Victa used that engine on a price-point mower in the mid 2000's, which was basically another generic Chonda. I have no intention of buying a mower with that engine, and I suspect no one is repairing such a thing now. Out they went.

- Old/aged fuel system parts.

- Flexible drive shafts for trimmers. Those can be costly to buy, to the point where a new machine is often the better financial solution, but again, they weren't labeled.

- Two steel mulch plugs that I simply cannot find what they are for. They are labeled but the numbers don't register. No point in keeping them, which is shame because they are very well made.

With the sorting complete, it was then a matter of finding a home for the blue parts bins. All of this is what I've determined worthy of keeping at home, the rest in cardboard boxes will be put into storage.............for now. Those blue bins are two deep on that shelf.

IMG-7683.jpg


IMG-7686.jpg


IMG-7688.jpg


This one of the boxes that will go into storage. This one has a bunch of throttle controllers and cables, most of which are the generic curved plastic items fitted to entry Victa's and Bushranger's. However, I did find two Victa Pro-Control throttle levers, which are quite expensive and much nicer to use than the basic ones. Also, a stack of Victa 2-Stroke cables than run inside the intake tube.

IMG-7695.jpg


This one has a variety of chassis parts, from axles to springs, handlebars to height adjusters.

IMG-7696.jpg


This one made my day, a Victa Powertorque muffler.

IMG-7692.jpg


Briggs & Stratton Super Lo-Tone Quantum muffler.

IMG-7694.jpg


There was also three large ziplock bags full of Victa specific parts, mostly G4 carburettor parts, blade boss hardware, throttle levers and knobs, ignition parts, spark plug terminals, and the old fashioned spark plug boots. Then these gems, a bunch of vintage fuel caps, of which I was needing for my little 18 Special. Not valuable but nice to see.

IMG-7698.jpg


There is a bunch of these, I'm told these are governor vacuum tube pick up points for the G4 carb.

IMG-7701.jpg


IMG-7702.jpg


Victa fuel filters................

IMG-7704.jpg


That's on top of two trays full of blades, bolts and bushings. Some much needed Rover axle bushings, and two large assorted hardware bins.

I've still a bit to do, and that's before I start trying to sell some it. But I'm also feeling more in control of the situation.
 
OP
OP
DFB5.0

DFB5.0

Well-Known Member
Joined
Mar 15, 2017
Threads
92
Messages
5,400
Reaction score
15,541
Location
Australia
Vehicle(s)
Mustang GT Fastback
Slowly chipping away at creating a parts inventory spreadsheet. While I know the role of each part, identifying what part goes with what engine is another thing entirely. In other words, putting a name to a face.

Each storage box will ultimately have a contents list. Rather than rifling through boxes, this inventory will quickly determine if I have a part in stock, or if I need to place an order. I can then use it to mark off what has been used or sold. This will mostly apply to the stuff that will go into storage, potentially saving time looking for something doesn't exist.

Have I mentioned I like a good spreadsheet?

Screenshot-643.png
 
OP
OP
DFB5.0

DFB5.0

Well-Known Member
Joined
Mar 15, 2017
Threads
92
Messages
5,400
Reaction score
15,541
Location
Australia
Vehicle(s)
Mustang GT Fastback
I finally bought a pole saw this morning, something I’ve been meaning to do for years.

When I bought a KM 56 RC-E Combi powerhead many years back, it was originally bought to run the hedger attachment. I then added the trimmer and edger attachments, with intentions of adding the chainsaw to the mix as well.

KM 56 RC-E KombiSystem Engine | STIHL Australia

esd.jpg


The issue I found with running the Combi system was excessive weight, be the powerhead or the attachments. For example, the line trimmer felt very unbalanced, that combo being 5.8kg. My Husqvarna 522L trimmer is only 4.2 kg. With a combined 6.5 kg, the pivoting hedger attachment was uncomfortable to use and caused a lot of shoulder and neck pain. And I never even used the edger attachment as I ended up buying a Honda powered Atom. Because of the above, I wasn’t in a hurry to get the chainsaw attachment, and having used petrol powered pole saws in the past, I really didn’t like how heavy and cumbersome they were. So, early last year I sold the Kombi with the three attachments to one of my bosses. (Those numbers might not sound much, but trust me, with regular extended use, they really do put unnatural stress on your body.)

Another reason why I had held out on a pole saw, I was kinda hoping Stihl would create an attachment for the HLA 56 pole hedger that I bought a few years ago. The split-boom design would have made adding a saw an easy and logical solution, but Stihl obviously want you to another unit entirely.

HLA 56 Battery Long-Reach Hedge Trimmer | STIHL Australia

IMG-4535.jpg


IMG-4536.jpg


And so, the HTA 50 pole saw enters the equation. This uses the same mid-tier AK battery system that I use in the HSA 56 and HLA 56 hedge trimmers, a MS 140C chainsaw and the (crappy) BGA 56 leaf blower. The AK10 and AK20 batteries are now over 6-years old and are (touch wood) still doing the job.

HTA 50 Battery Pole Pruner | STIHL Australia

IMG-7786.jpg


IMG-7789.jpg


IMG-7791.jpg


IMG-7801.jpg


The key to these battery powered units is the reduction in weight and vastly superior weight distribution. A petrol-powered unit has the majority of the weight at the engine. On an electric, the battery is at one end and the motor at the other. So while the battery is heavy, it’s balanced by having the motor at the end of the shaft. They can also run a smaller, more efficient motor as there is no power loss from a long driveshaft and clutch. The actual weight figures paint the rest of the picture................................

The HTA 50 comes in at a claimed 3.6 kg. This figure is vague as it doesn’t indicate if it includes the battery, I would assume not because its being sold as a skin. What’s stupid is that the number doesn’t include a bar and chain, despite the unit being sold with both. If I add the weight of the AK10 (0.8kg) or AK20 battery (1.2kg), the number becomes 4.4 kg or 4.8 kg.

The combined weight of the KM 56 Combi head (4.2 kg) with the HT chainsaw attachment (1.9 kg) comes in at 6.1 kg. As mentioned earlier, its not just the added weight, but rather how it forces your body to compensate for the weight being concentrated at one end.

The HTA and HLA both share a very similar battery/throttle/handle end, so I’m not entirely sure why they didn’t create an attachment for the HLA, other than wanting to extract more money from the sale of another tool.

IMG-7794.jpg


This unit uses a 10-inch bar with a ¼-inch PM3 chain. Note the “branch hook” extending down from the “clutch cover”, which is to aid removal of stuck branches. The transparent oil tank is nice to have as well.

IMG-7807.jpg


IMG-7811.jpg


IMG-7793.jpg


Unlike some pole saws, the HTA 50 is not telescoping. That means a total length fixed at 280cm, but there is also an optional 50cm extension shaft to push that out to 330cm, I probably won’t bother.

In no way will this HTA 50 out cut a petrol powered equivalent, or even the AP professional battery series from Stihl or the excellent Husqvarna battery gear. Having said that, other than the blower, I’ve been pleased with the rest AK-powered tools in my arsenal.
 
OP
OP
DFB5.0

DFB5.0

Well-Known Member
Joined
Mar 15, 2017
Threads
92
Messages
5,400
Reaction score
15,541
Location
Australia
Vehicle(s)
Mustang GT Fastback
One of the more interesting discovers sifting through the boxes of new-old-stock parts was finding several Briggs & Stratton 2-stroke parts. I knew Briggs had dabbled in 2-strokes, but I wasn't aware they were making them right up into the early 2000's. The parts that I've come across are for the vertical shaft 095700 and 096700 series made from 1988 to 1991. With a 141cc capacity, these were made under contract with Komatsu Zenoah. Featuring a cast-iron cylinder, they were marketed as an Industrial Commercial (I/C) engine for lawn mowers. There was also a horizontal shaft version for snow blowers.

s-l400.jpg


A couple of months ago, I came across a listing for one of these engines that didn't actually refer to it being a 2-stroke. I just assumed it was a Quantum, but I was thrown because the muffler and carburettor were revered, as was the fuel cap. After finding several parts for these engines, then doing a little research, what I was seeing in the photos made more sense.


Check out the size of the muffler, no doubt an attempt to curtail some of the inherent noise from the 2-stroke design.


These used a Quantum-style float carburettor, pleated paper filter and mechanical governor. The similar capacity 148cc L-Head 4-stroke used a diaphragm carburettor, oil-soaked foam filter, and air vane governor. And unlike the Victa Powertorque, these were a full crankshaft design, which combined with the conventional carburettor, made them smoother, more responsive to the throttle and had a more stable idle.


So there you go, always interesting to learn new things.
 
OP
OP
DFB5.0

DFB5.0

Well-Known Member
Joined
Mar 15, 2017
Threads
92
Messages
5,400
Reaction score
15,541
Location
Australia
Vehicle(s)
Mustang GT Fastback
Rover ProCut 560 – Spring Service

It’s now been a year since I found this beauty, and its been working hard!

When the Rover came to me, it was in remarkable condition for a 10-year-old mower. The previous owner had inherited the machine after his father passed away, both clearly kept it well maintained. Even still, I did a reset on it by changing the oil, plug and air filter. I also had to refresh some of the drive system parts, but overall, I had a near new ProCut 560 for half the price I paid for one new in 2015.

IMG-3688.jpg


After a busy 2024/2025 spring/summer, in February this year I gave it an oil change and a set of new blades. I also replaced the useless fuel tap with a fuel filter. Now that the weather has warmed up and the grass is growing again, I want this mower in top condition for the season ahead. Look after your tools and they will look after you……………………..

IMG-7885.jpg


Blades –

The current set of blades have been on the mower since February, and while they looked ok at a glance, I had been noticing a decline in cut quality. On closer inspection, they were well worth replacing.

IMG-7890.jpg


IMG-7892.jpg


IMG-7894.jpg


IMG-7896.jpg


As per most Rover stuff now, finding OEM has become hard. I’ve noticed that when I’ve put the OEM Rover blades on the mower, they seem to last longer than the aftermarket stuff from GA Spares or Jak Max. Depending on where you get them, they will come pre-packaged or drawn from bulk lots of blades and hardware. The Rover branded ones come pre-packaged in sets of two. In this case, I’m using the Jak Max versions.

Rover OE Part Numbers -
333-100-0002 (Blade & Bolt Kit)
742-04413 (Blades only)
712-0130 (Nuts only)
736-04618 (Tension washers only)
738-04547 (Bolts only)
787-02071 (D Plates only)

GA Spares -
BNC7881 (Blade & Bolt Set)
BBN443 (Bolt, Nut, Washer Set)
BLH277D (D-Washer)

The orientation of the blade-bolt-washer-plate is critical for the blades to function as intended, as in swinging away from obstacles, but without being too sloppy. Do it wrong and you end up with poor cutting, increased noise or damage the blade carrier and deck.

IMG-7911.jpg


Despite acquiring a box full of blades and hardware in the NOS parts haul, none of the blades were suitable for a ProCut. Actually, I’ve since found four sets of mounting hardware, which consists of a bolt, nyloc nut and spring washer, so I’ve gone and ordered the corresponding number of blades without hardware. I’ll have healthy supply of blades going forward.

Deck –

While I had the blade carrier off, I took the opportunity to scrape off the accumulation of dirt and grass. Nothing special or glamorous here, just a paint scraper, wire brush………………….. and a giant mess afterwards.

IMG-7899.jpg


Oil Change –

Briggs normally specify SAE 30 oil, which I use in their older engines or for break-in. Otherwise, I’m using Penrite 10W-30 semi-synthetic. For the big block 850-series, you need 590 – 600ml of oil.

If Penrite is good enough for a Bathurst win last weekend, its good enough for my lawn mowers. …………………

IMG-7909.jpg


I normally drain or suck the oil out via the dipstick tube. On this occasion, with the blade carrier removed, I decided to remove the sump plug instead. I’ve actually never done it this way, in fact Briggs & Stratton have removed the drain plug from their engines in recent years.

IMG-7904.jpg


Victa’s fitted with this engine are pressure lubricated via an oil pump, which is ran through an external oil filter. Those little filters are extremely expensive at $19.95 each, twice the price of some automotive filters. For the ProCut, Rover went for the basic splash lubrication, which saves me $20 per service.

Cleaning –

With the oil change finished and the blade carrier reinstalled, I decided to give the unit a clean. Shine Supply Wise Guy was sprayed on, left to soak, then rinsed with the pressure washer. A little Hydr02 for the deck, and some Hyper Dressing for the plastics, I then used my blower to dry it off.

IMG-7914.jpg


Spark Plug –

The plug was last changed 12-months ago when I got the mower. I could have just cleaned it, but I had them in stock so just went ahead with a new one. I went with the Champion plug.

Champion – RC12YC
NGK - BCPR5ES

IMG-7923.jpg


Air Filter –

For whatever reason, finding OEM Briggs parts is hit and miss in Australia. Most shops and online suppliers stock the aftermarket Stens, GA Spares or Jak Max equivalents. What’s frustrating is how they use OEM product images, then have “non-genuine” or “quality aftermarket replacement” in the fine print. That’s not to say the aftermarket parts are junk, just be careful to read each product description to avoid paying OE prices for AM parts. In my case, I’m using the Stens-branded item.

Stens –
Early Models (Long-type) - 100-673 (Filter + Pre-Filter)
Late Models (Triangle-type) – 320-012 (Filter + Pre-Filter)

Briggs & Stratton -
Early Models (Long-type) – 795066 (Filter) + 796254 (Pre-Filter)
Late Models (Triangle-type) – 595853 (Filter) + 597266 (Pre-Filter)

I’m actually a little disappointed in myself for not checking the filter sooner. I normally tap them out weekly, but for whatever reason I had let it go. No wonder the engine was running rich.

IMG-7917.jpg


IMG-7919.jpg


Fuel Filter –

With these, you need to make sure you have the correct one. The white 75-micron filters are for engines with a fuel pump, the red 75-micron ones are for gravity fed. The red ones are universal, but the white ones need a fuel pump to draw through the finer filtration material. These pancake filters use a metal screen, which is superior to the paper cartridge style filters that can sometimes break down and send filter material into the carburettor. Both are unidirectional for ease of installation.

Briggs & Stratton – 298090S
Stens - 120-188

OEM vs Aftermarket –

I touched on this earlier, but I feel like its worth expanding on. Where possible, there are a few instances where staying with the OEM part is beneficial.

Fuel Filters – Quite often, the super-cheap aftermarket filters found on Amazon don’t provide a micron rating, so how does one gauge the effectiveness? So, even though you put a new filter on, it may not be doing its job. Evidence suggests that the cheap aftermarket filters often fail prematurely and allow filter material to pass into the carburettor. The trap here being the AM part is often half the price of the OEM or Stens branded equivalent.

Air Filters – The quality and quantity of oil, and the fitment and condition of the air filter determines how long your engine will last. From what I have seen and heard, the ultra-cheap aftermarket air filters do not fit properly and compromise the effectiveness. This is especially so on the smaller OHV Briggs mower engines with the oval shaped white paper filters, the rubber throat doesn’t seal tightly against the intake. So, where possible, I stick with OEM or Stens branded air filters.

Carburettors – Aftermarket replacement carburettors are hit and miss. Sometimes, they will work right out of the box and solve your running issue. But more often than not, they will need tedious fine adjustments, and that’s if you actually get the engine running. If you don’t stick with OEM, I would suggest looking at the HIPA brand, they seem to be the pick of the bunch.

Quite often, the above parts come packaged together in carburettor kits found on Amazon and eBay. There is a reason why these kits are cheap, and its not because the seller is being generous.

Service Cost –

Below is the parts cost to complete this service. If I add my labour rate to that, it would come out at about $177. So I saved about $90 - $100 by doing it myself.

Blade Kit - $39.95
Oil (590ml) - $7.45
Spark Plug - $8.95
Air Filters - $19.30
Fuel Filter - $9.95
Shop Supplies (Towels, Carb Spray) - $2.00

TOTAL - $87.60

IMG-7927.jpg


Ready for Work –

A quick test fire and the ProCut is ready for the peak mowing season.

IMG-7928.jpg


IMG-7930.jpg


IMG-1569.jpg


This mower also represents the beginning of a massive change to my daily life. I went to pick this mower up on the first day of my long-service leave, and what a sigh of relief that was. In the two weeks leading up to leave, I had a very upsetting and uncalled for interaction at work. I held it together and forged on, so walking out on my last day and the little road trip to buy this mower was the beginning of a new life. Two weeks later, my new car arrived. A month later I landed in hospital, no doubt my body finally giving in, the recovery ate up a month of my leave. Another month on and I resigned, finally putting end to a long running and constant drain on my mental health.

So, every time I use this mower, I’m reminded of how it was the catalyst for change and the feeling of freedom.
Sponsored


Top