Sponsored

Tail light panel emblem repair

DrumReaper

Well-Known Member
Joined
May 17, 2015
Threads
114
Messages
4,985
Reaction score
3,706
Location
South East
Vehicle(s)
1971 429CJ Mach 1, 2012 Boss 302
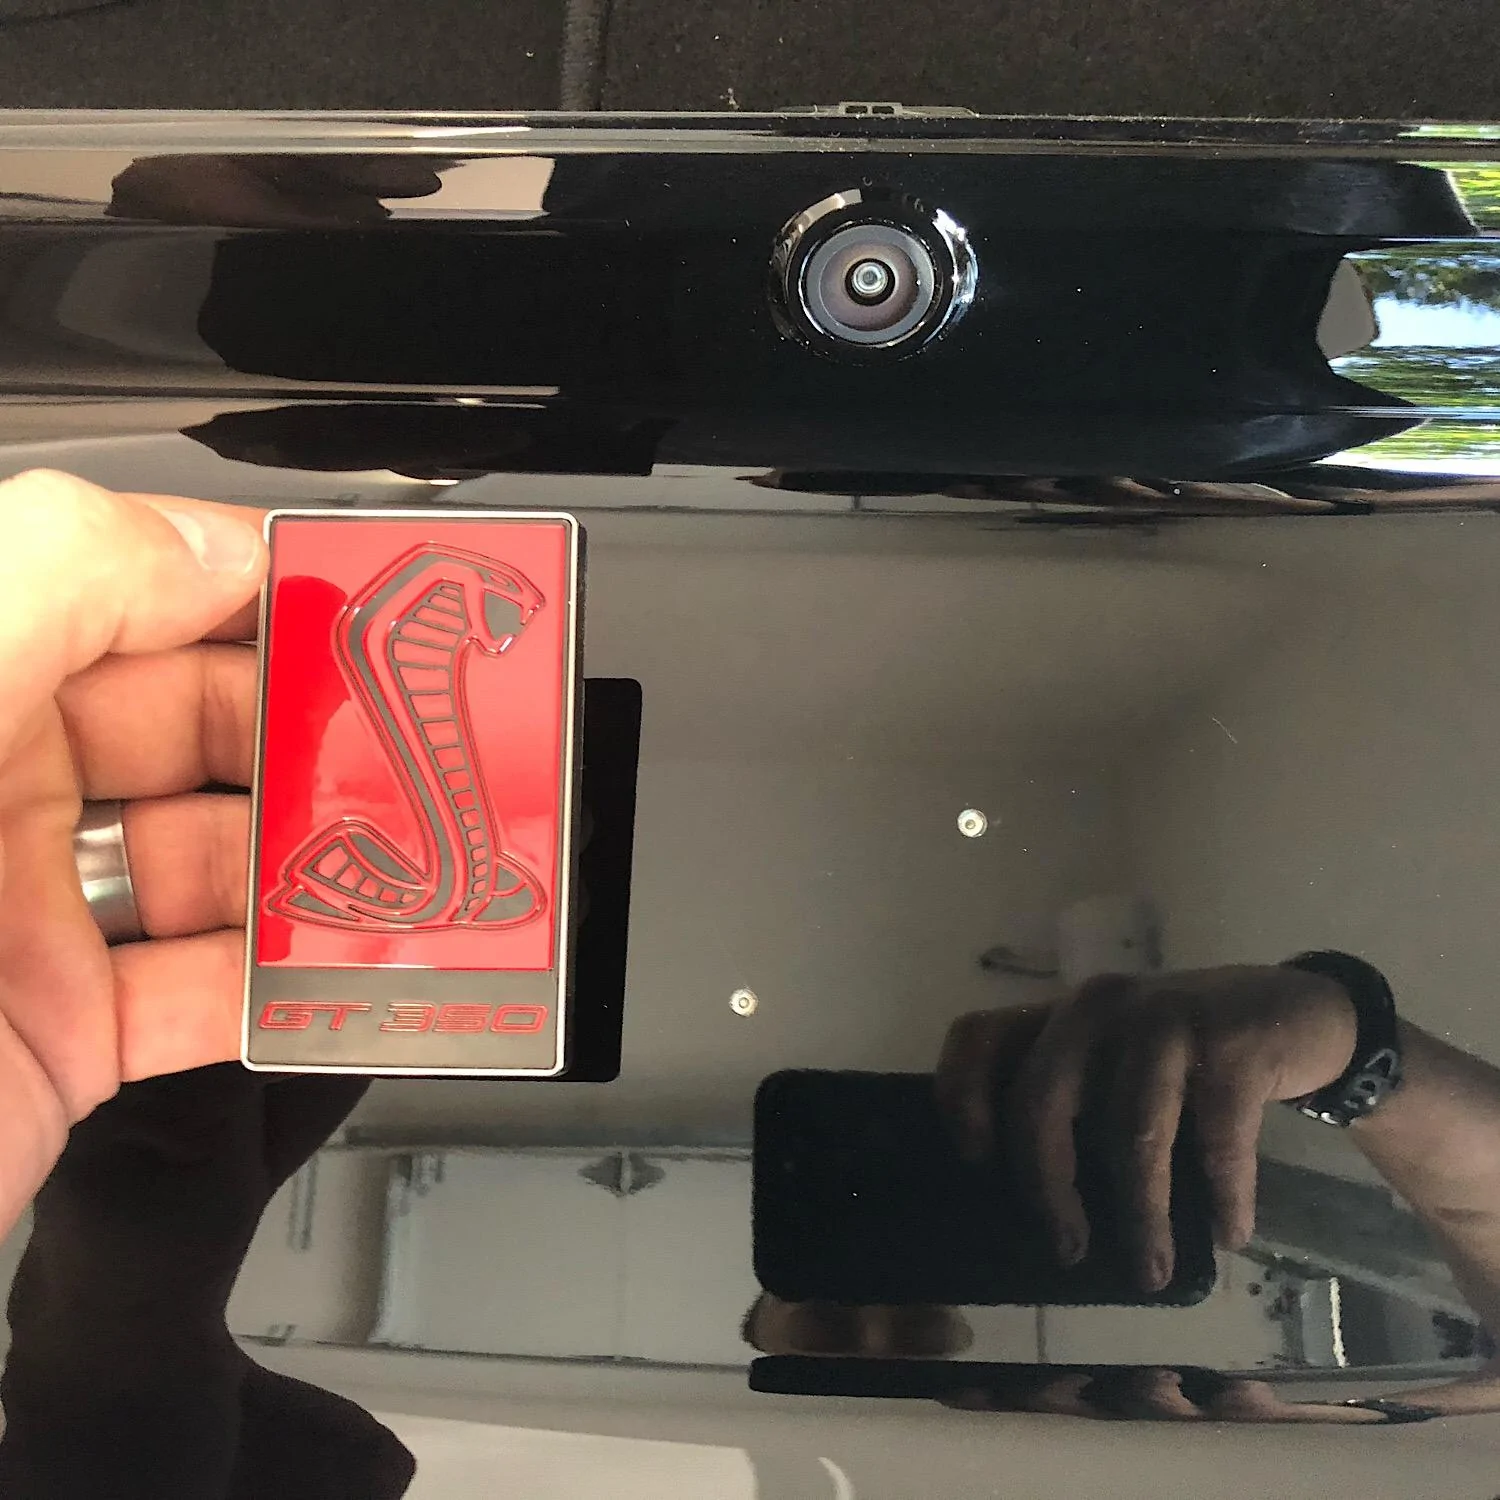
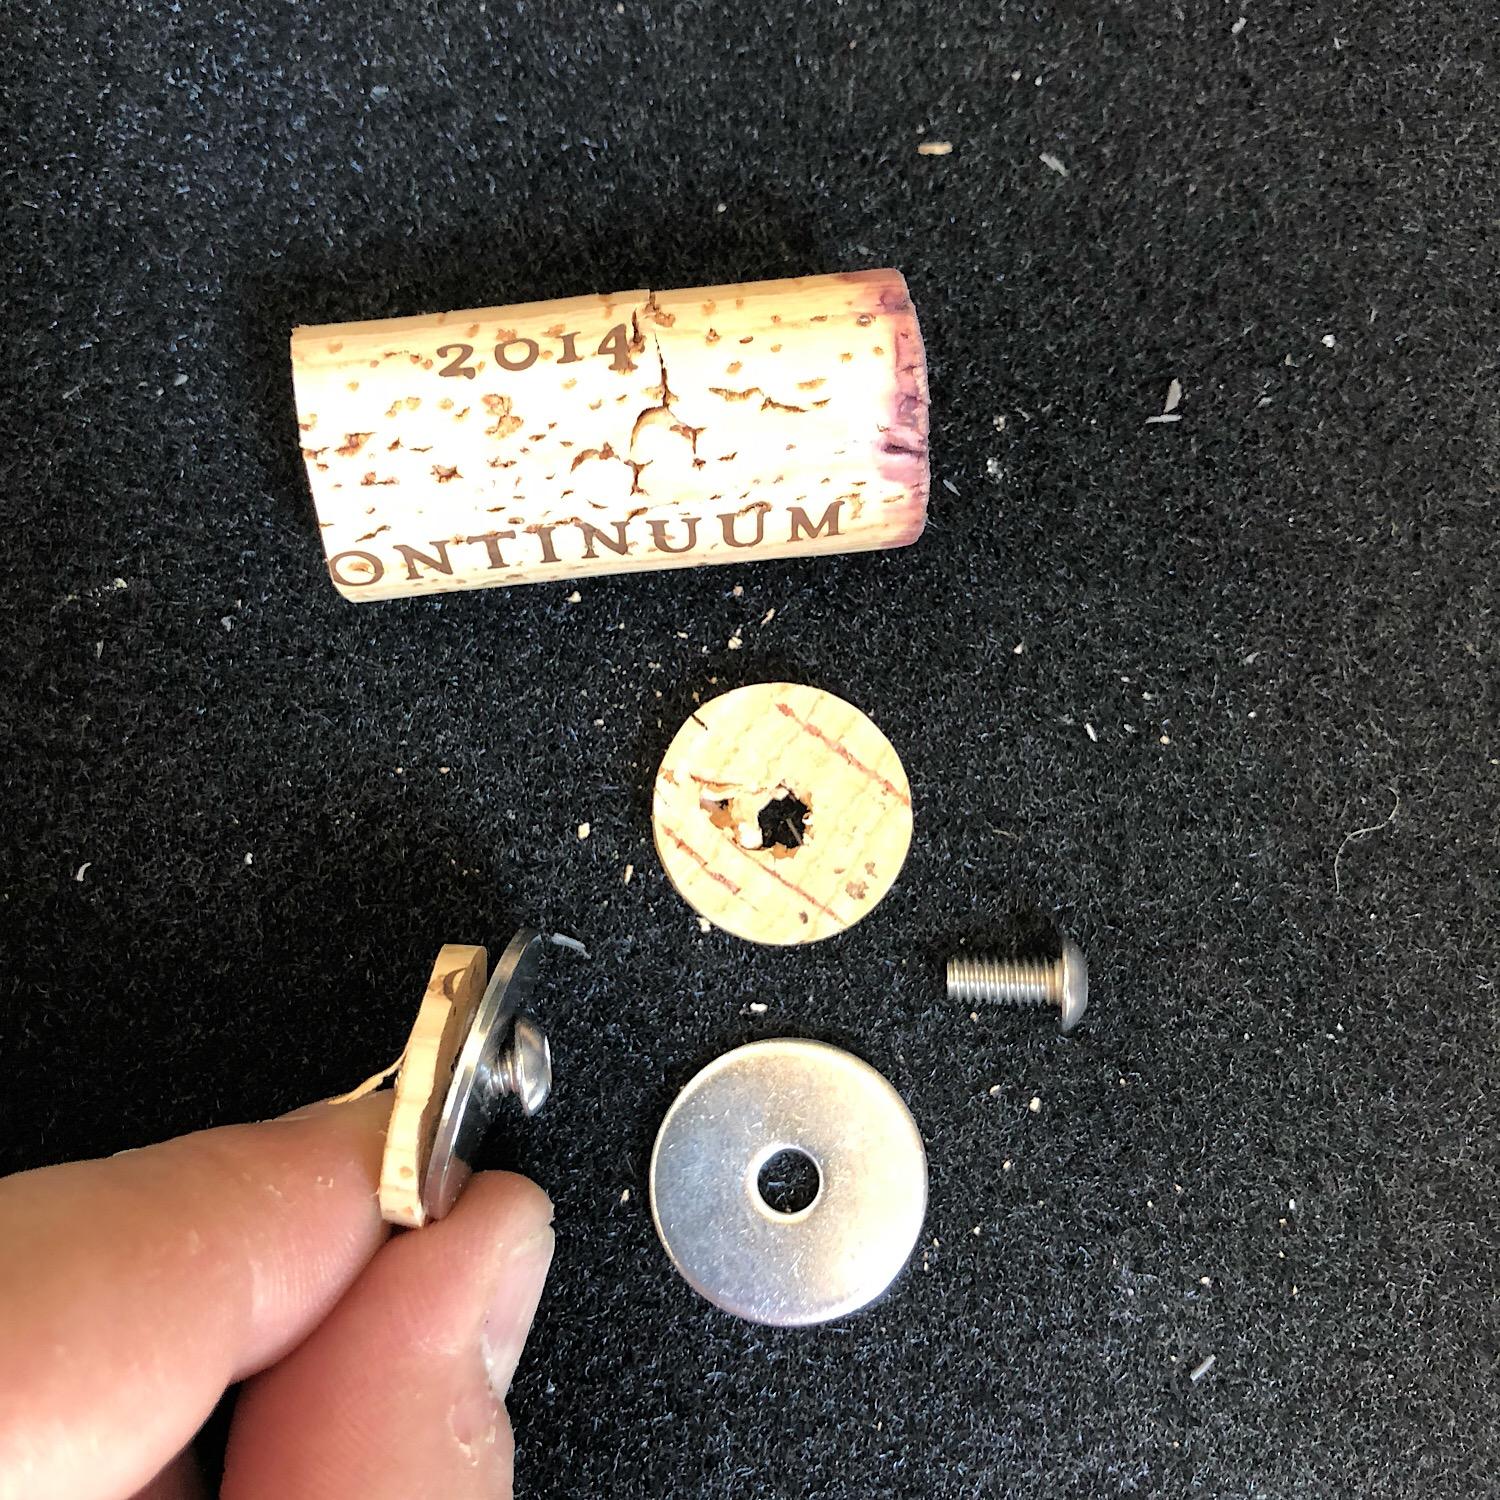
Well, I was told that Ford didn’t want to warranty my tail light panel broken emblem so I decided to fix it myself. This is not a hard repair to do so don’t get stressed if it seems to be a lot.

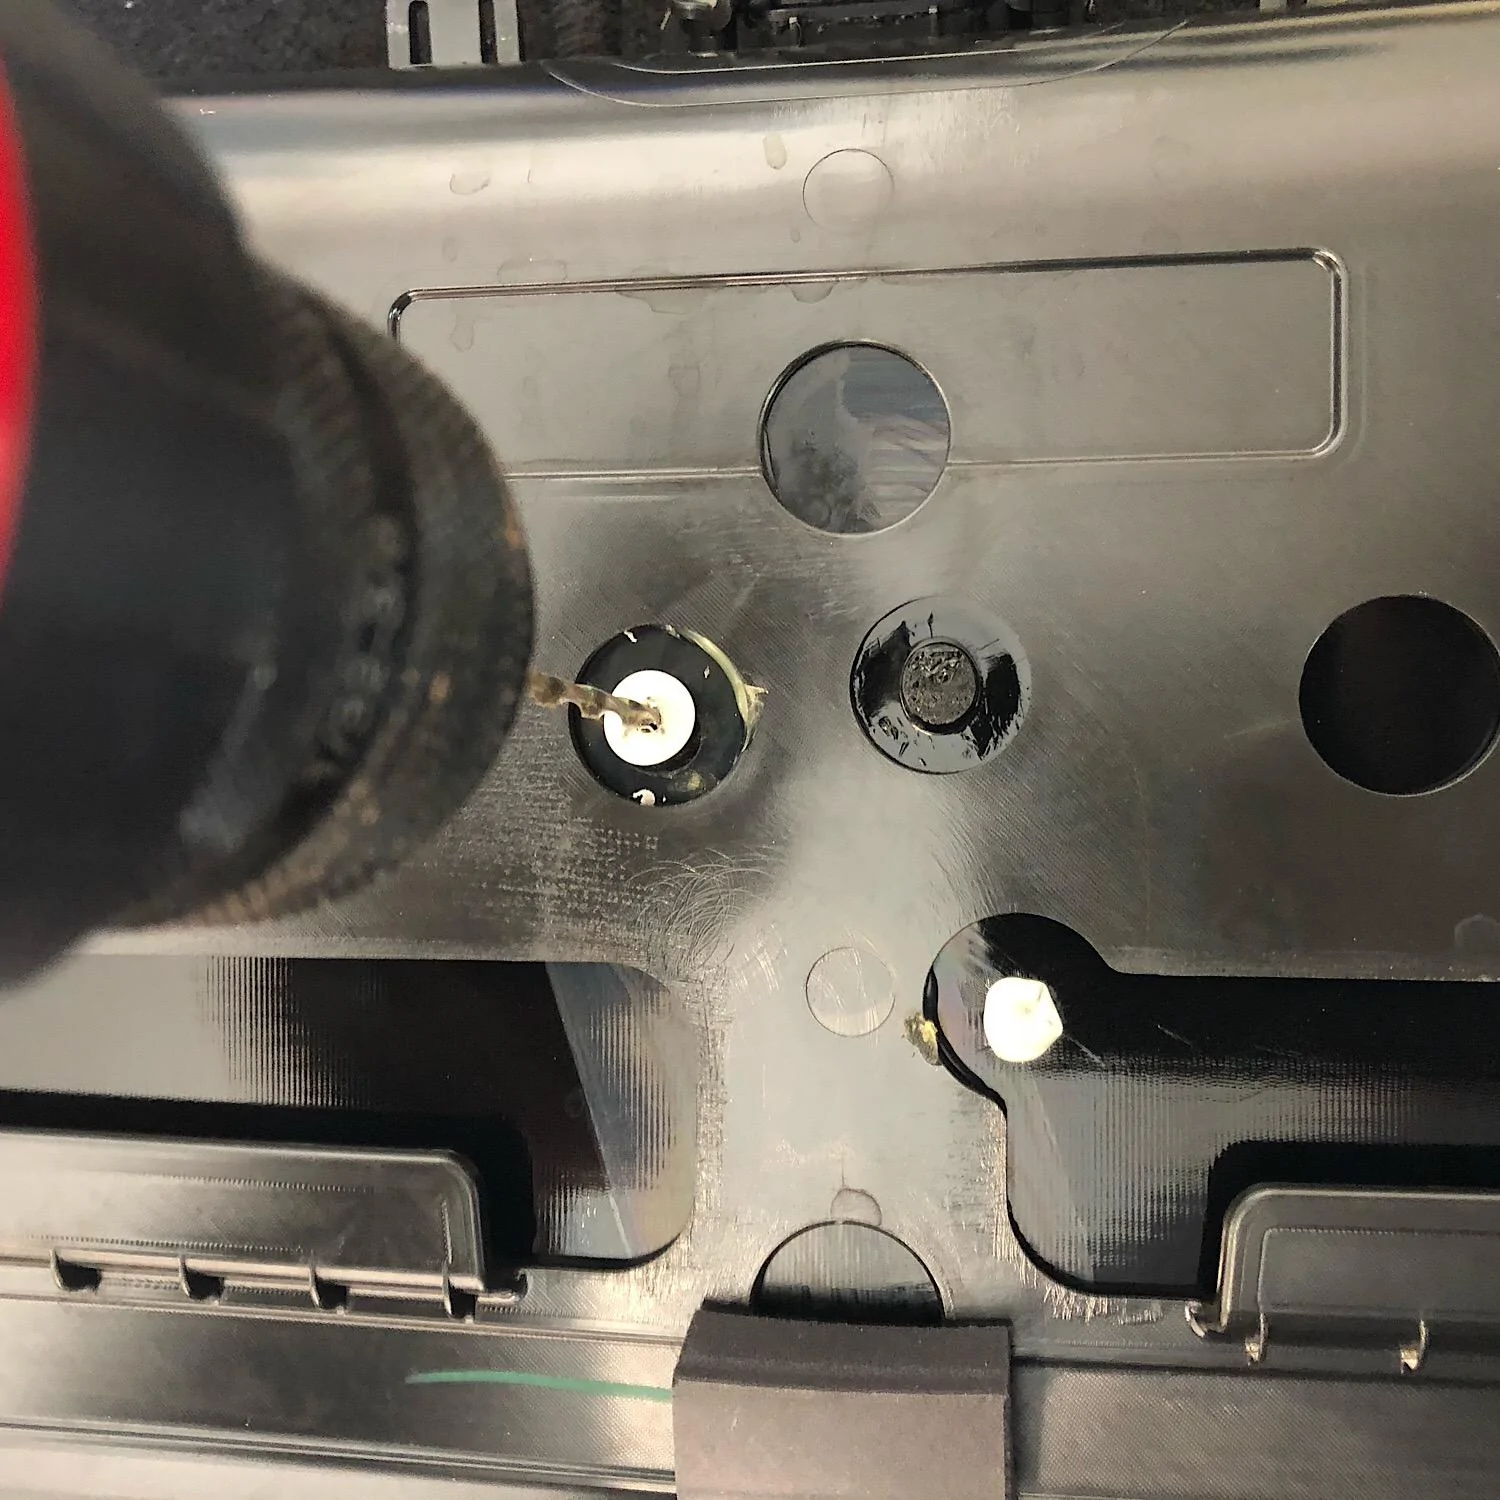
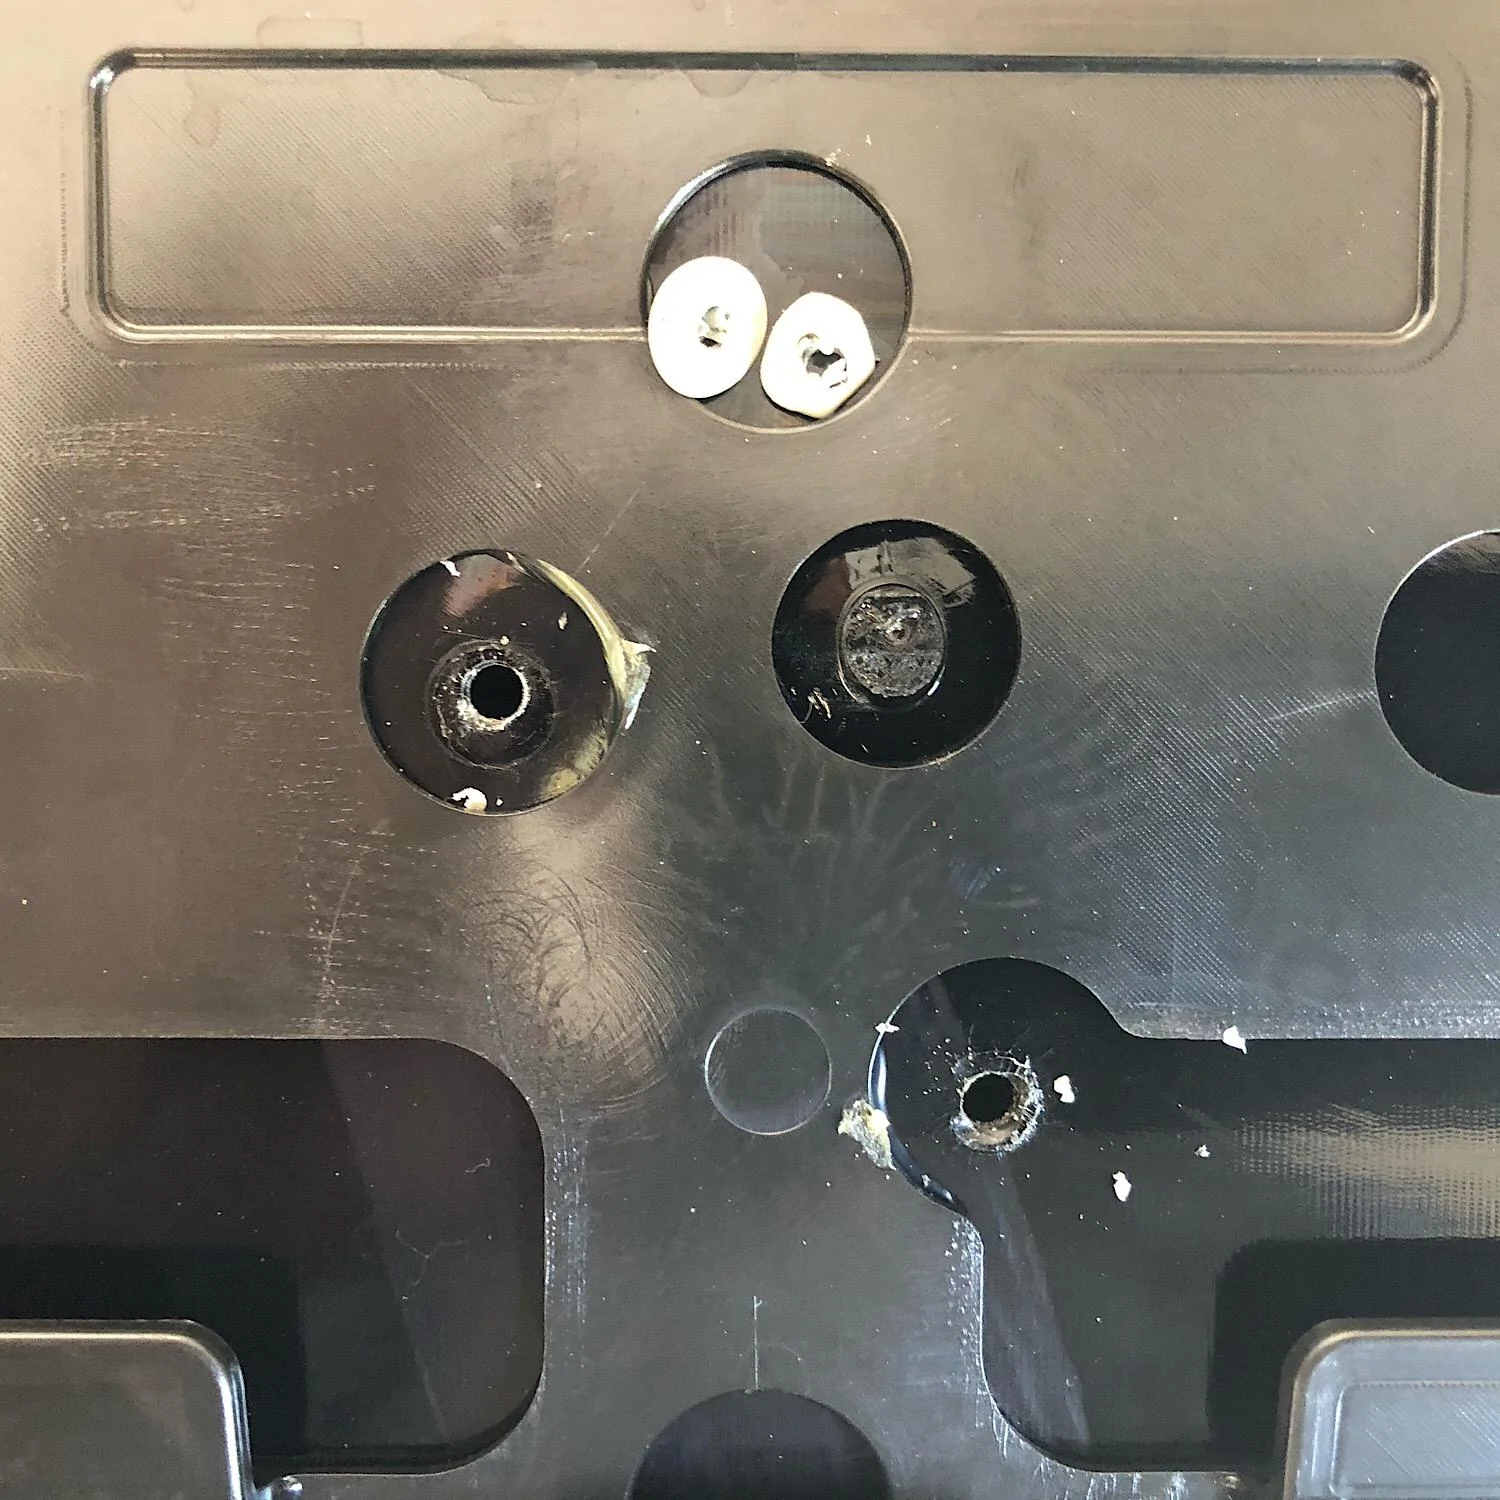
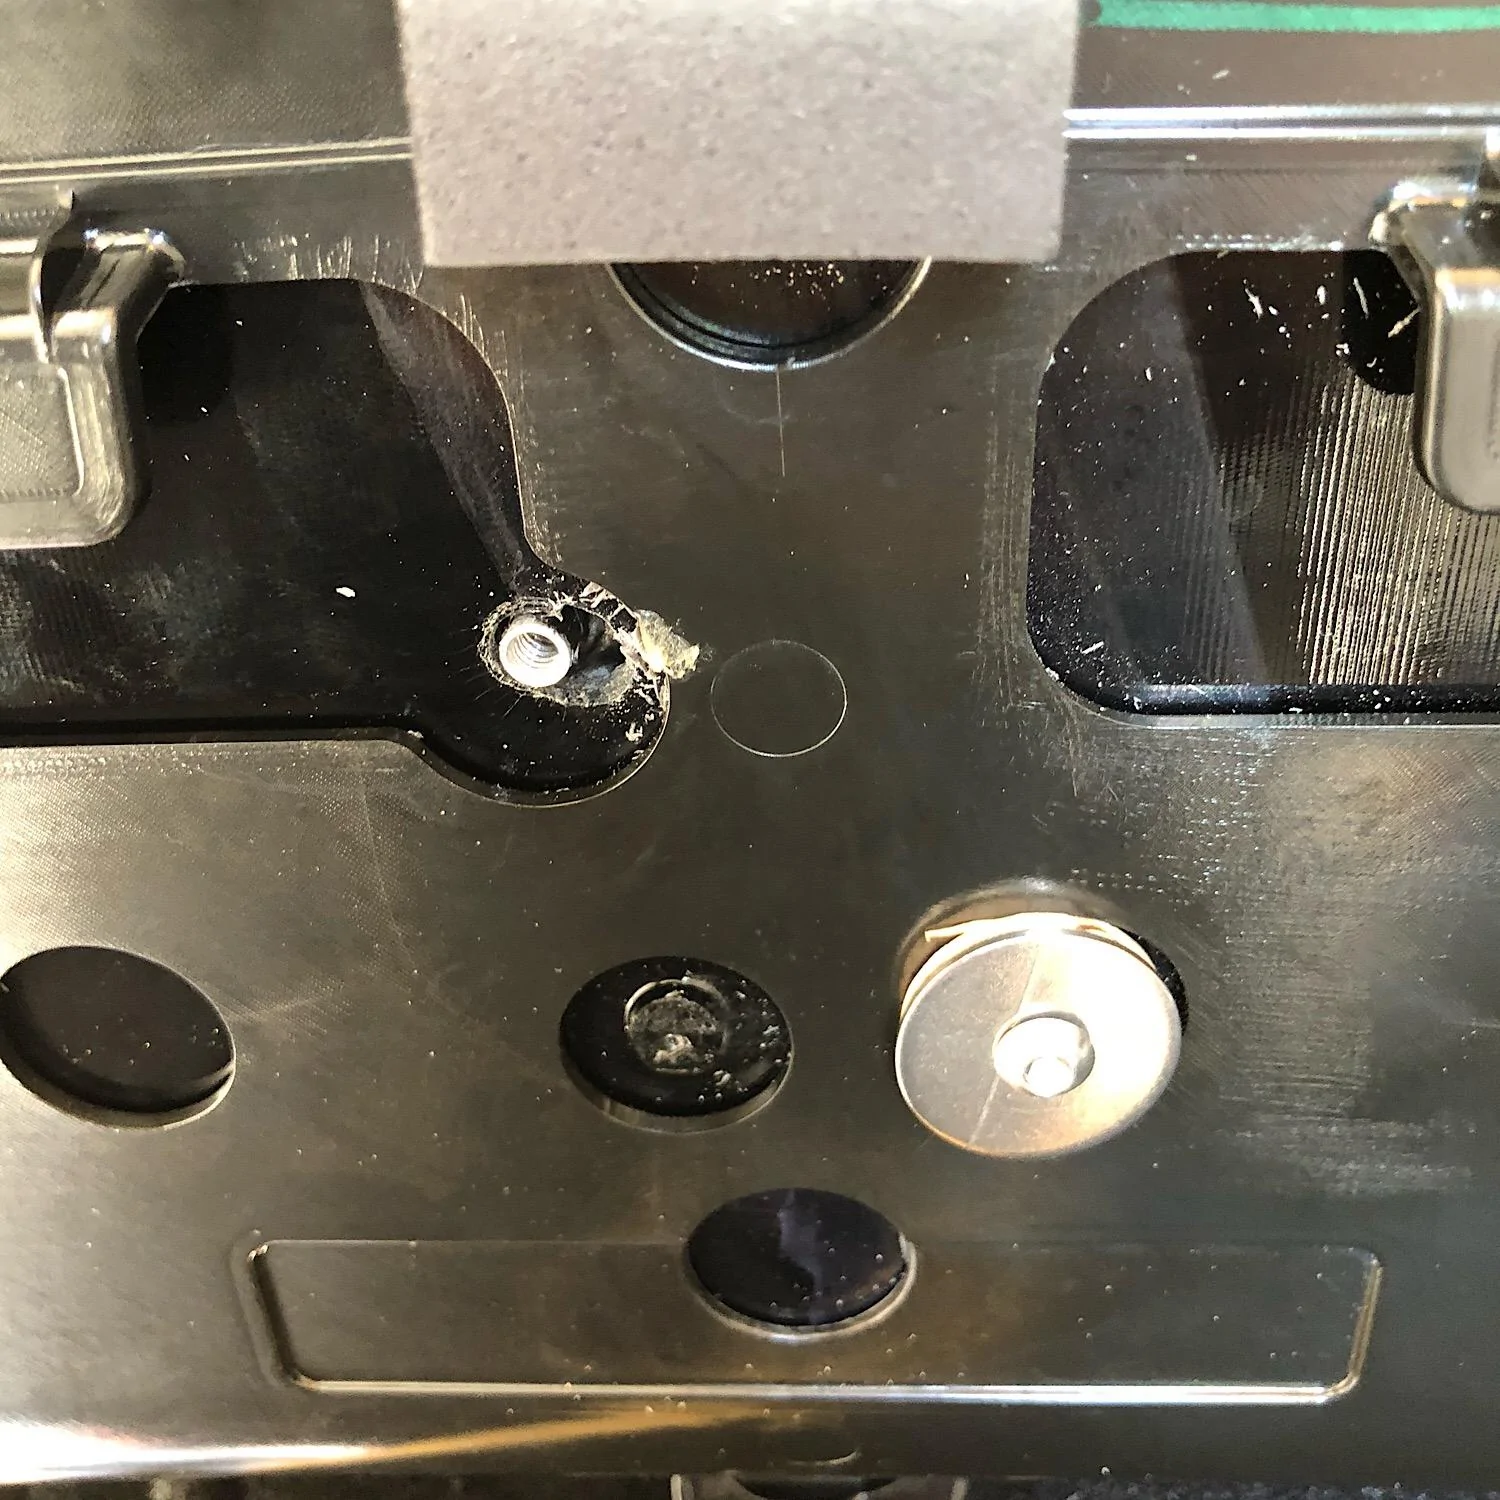
Prep work is key... I suggest that when you remove your tail light panel to lay it down on something soft and then tape the edges so that you don’t scratch anything up.

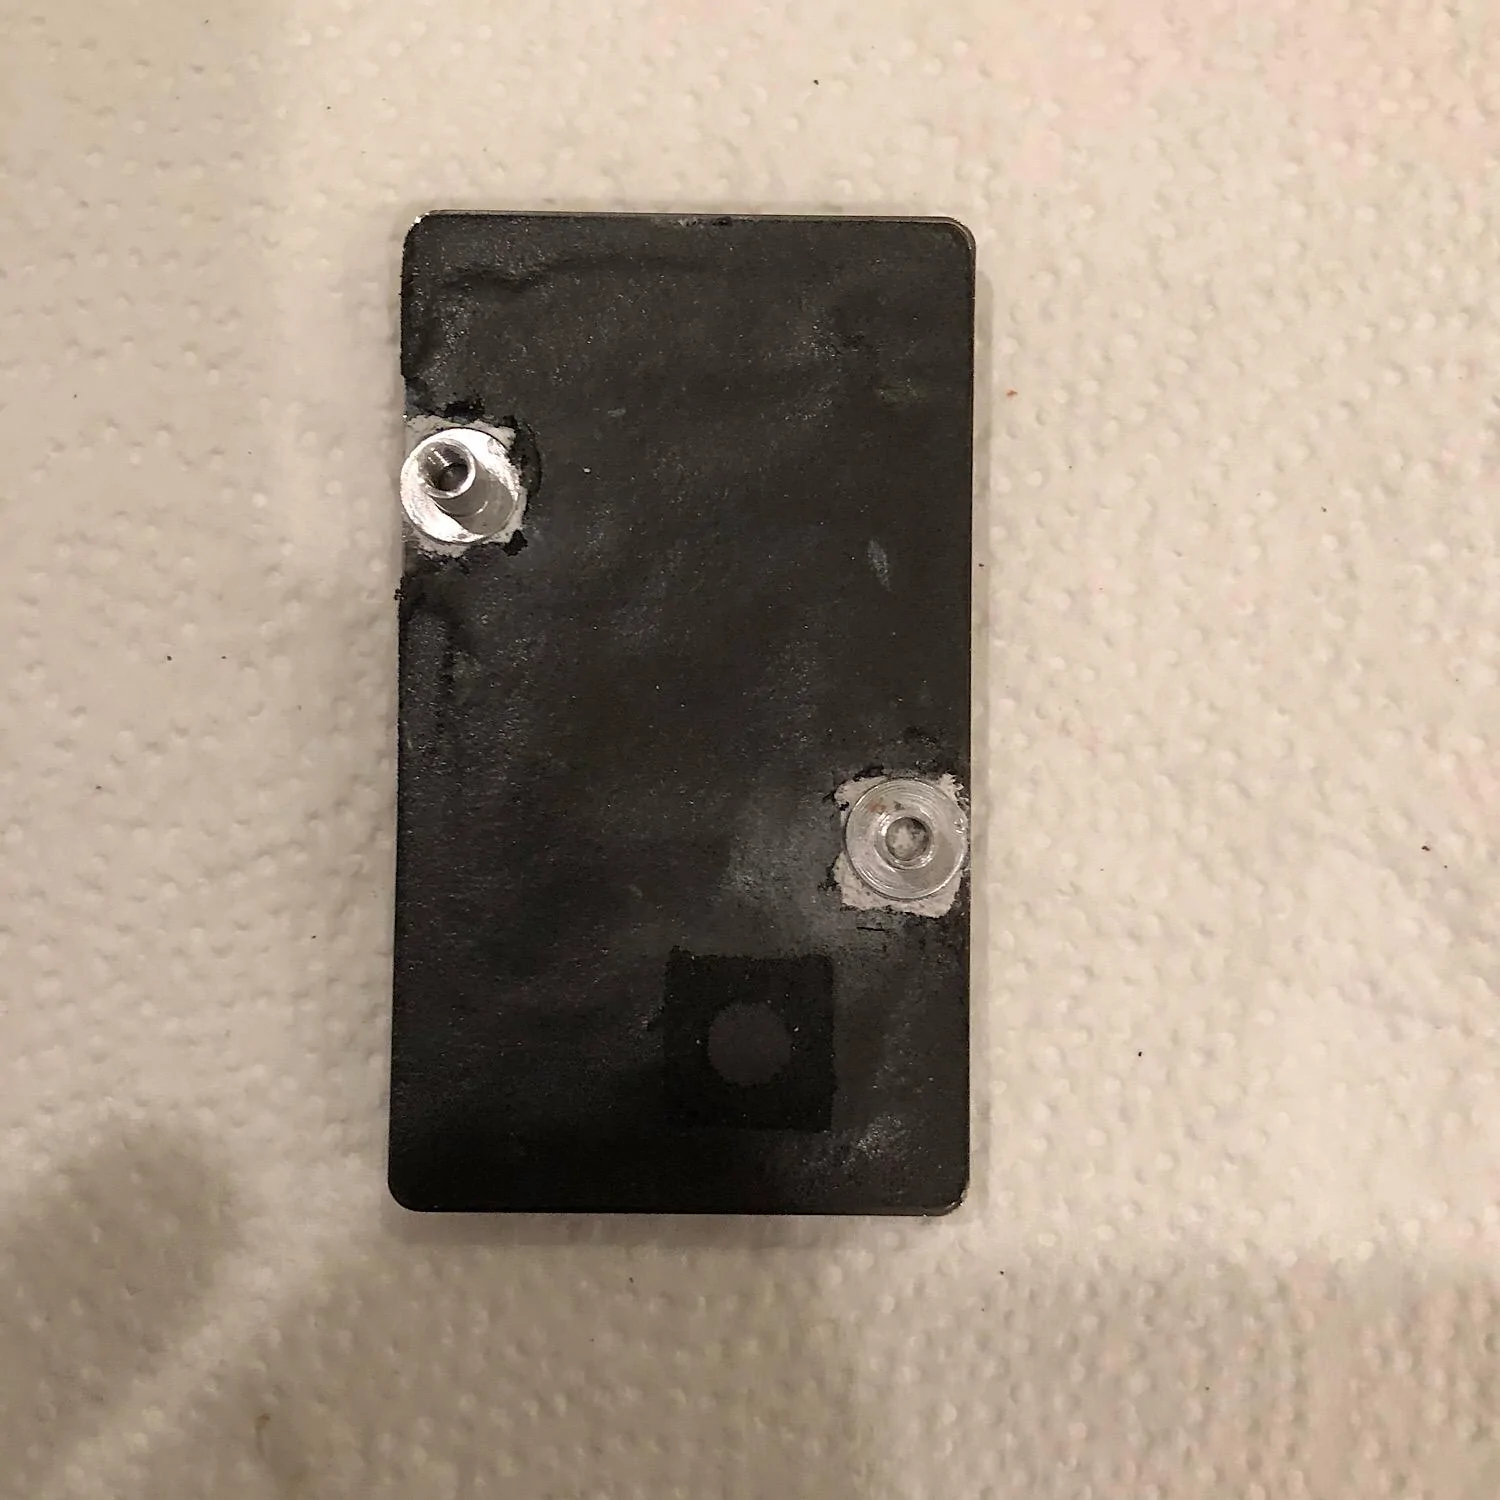
When you do remove your emblem, I’d suggest taping off the exposed side of the emblem to protect that as well.

Lastly, try to get it warrantied if your car is still under warranty... if it is out, you can use this approach, or whatever works for you.

Cheers.:cheers:

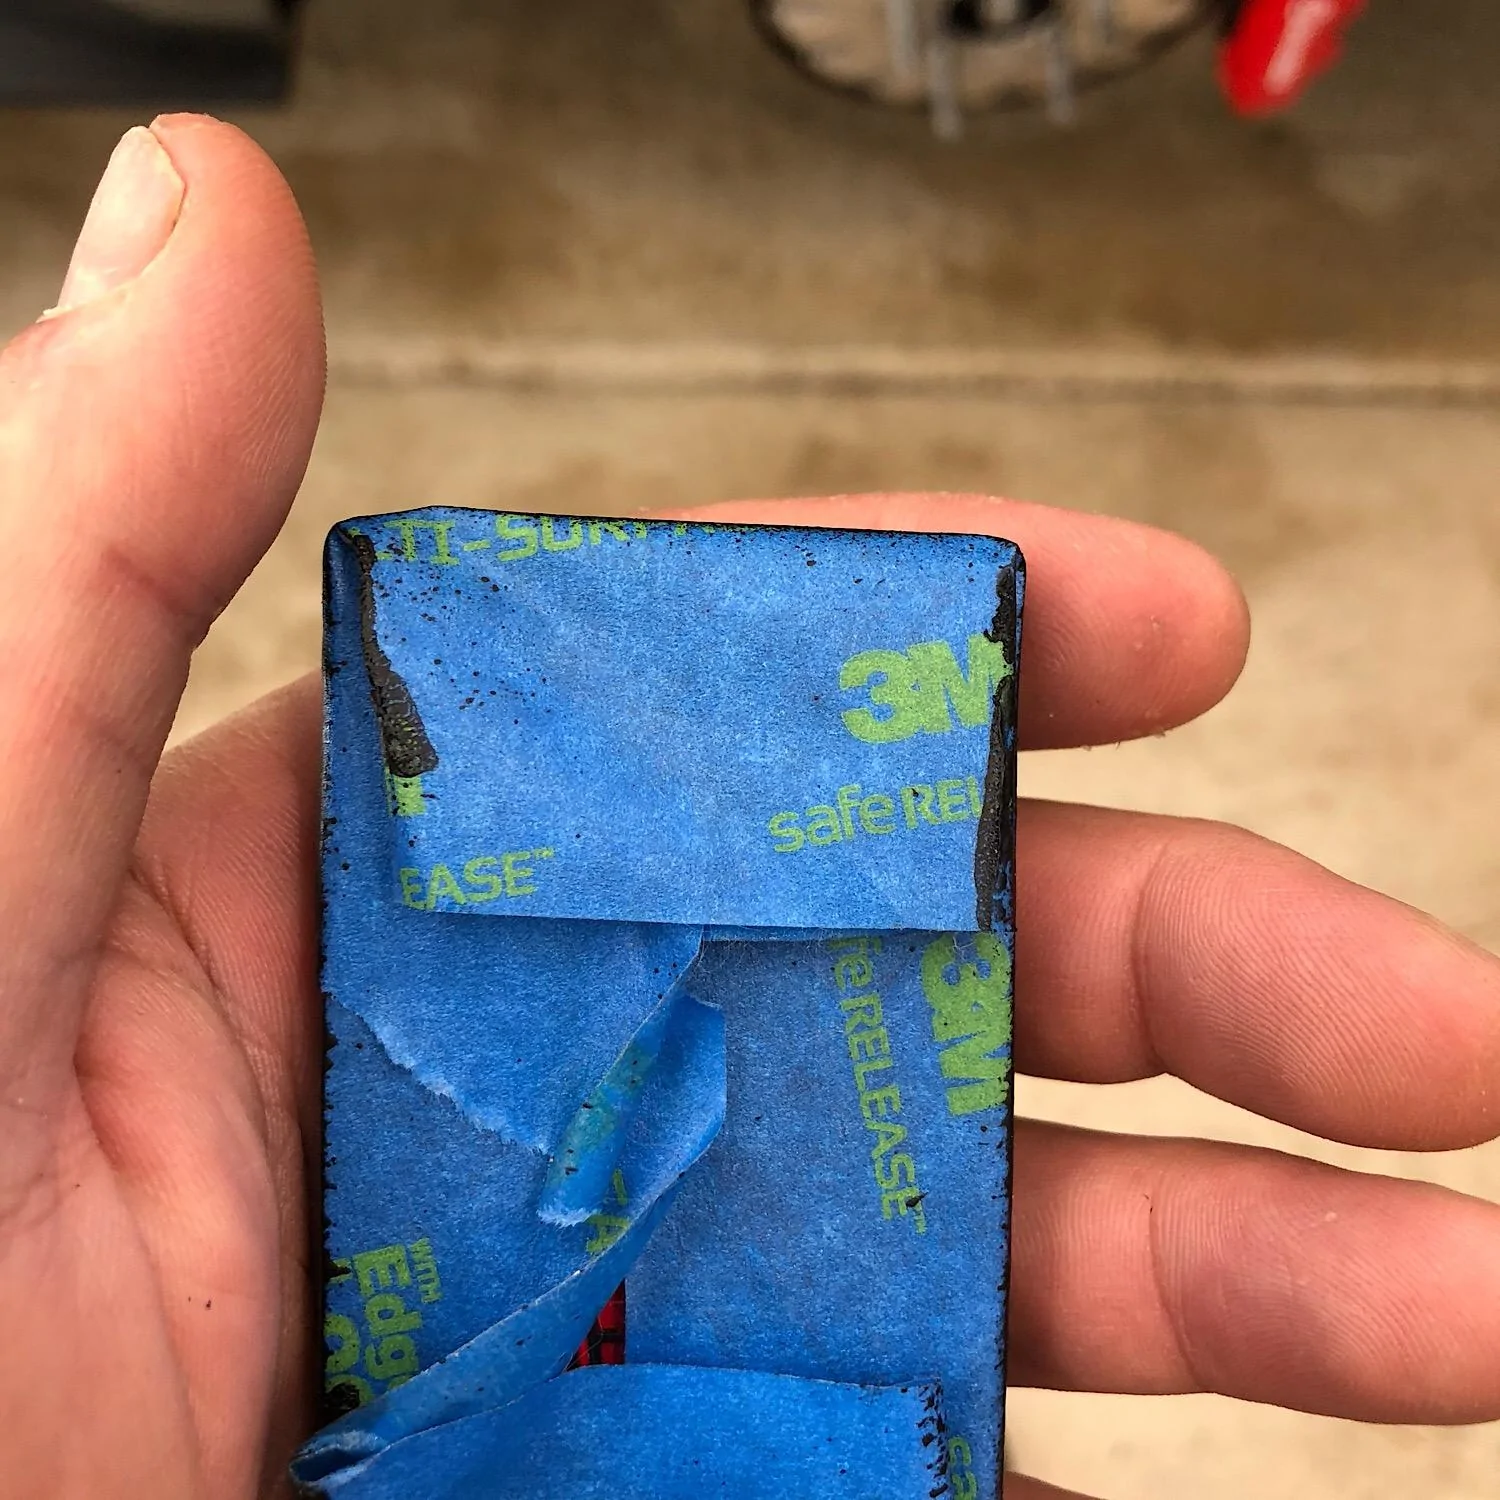
This is what I started with. The 7 o’clock plastic support broke.
57D54E16-1A01-4152-BA07-159228A7FC87.jpeg
Sponsored

 
Last edited:
OP
OP
DrumReaper

DrumReaper

Well-Known Member
Joined
May 17, 2015
Threads
114
Messages
4,985
Reaction score
3,706
Location
South East
Vehicle(s)
1971 429CJ Mach 1, 2012 Boss 302
This is how the reverse of the tail light panel looks so you can see how the emblem aligns and is attached.
0A98AE1D-1AB4-45AA-8672-856C5A992911.jpeg

1955E828-215B-46F3-82F3-D59A3B8D8F44.jpeg
 

Tomster

Beware of idiots
Joined
Feb 20, 2016
Threads
278
Messages
15,573
Reaction score
15,687
Location
FL
First Name
Tom
Vehicle(s)
'20 RR GT500R(CFTP), 18 OW GT350R Base, '17 AG GT350R Electronics Pack, '97 PG Cobra Convertible
So was it the wife or kids that smacked into it?
 
OP
OP
DrumReaper

DrumReaper

Well-Known Member
Joined
May 17, 2015
Threads
114
Messages
4,985
Reaction score
3,706
Location
South East
Vehicle(s)
1971 429CJ Mach 1, 2012 Boss 302
Drill out the remaining plastic on the reverse of the emblem as well as the tabs in the tail light panel. After doing this, it would’ve been easier just to use a Dremel and grind the tabs flush on the back of emblem.
E82CC3FA-6119-46B0-8BE2-E3B95862951E.jpeg

0B35EA17-7973-4458-BD5A-032E55E6FA6E.jpeg

6740D287-E4FF-4946-92C5-84C8E60E3694.jpeg

F5875441-9486-41A5-9FB6-9BBD99CE7FE1.jpeg
 
OP
OP
DrumReaper

DrumReaper

Well-Known Member
Joined
May 17, 2015
Threads
114
Messages
4,985
Reaction score
3,706
Location
South East
Vehicle(s)
1971 429CJ Mach 1, 2012 Boss 302
Open up the holes in the tail light panel to accommodate the 8/32 female post nuts.
C698BFE9-541D-4B3F-8239-EF7339CEB2BF.jpeg
 

Sponsored

OP
OP
DrumReaper

DrumReaper

Well-Known Member
Joined
May 17, 2015
Threads
114
Messages
4,985
Reaction score
3,706
Location
South East
Vehicle(s)
1971 429CJ Mach 1, 2012 Boss 302
Now, trim away the tacked down foam padding, while the surface with alcohol and then glue down nut using Gorilla Super Glue. I scuffed up both surfaces for good grip and used a little baking soda to help harden the union.
15B91142-ACD9-400F-9FA8-C610A6948FB8.jpeg
 
OP
OP
DrumReaper

DrumReaper

Well-Known Member
Joined
May 17, 2015
Threads
114
Messages
4,985
Reaction score
3,706
Location
South East
Vehicle(s)
1971 429CJ Mach 1, 2012 Boss 302
Now lay the masked emblem on its frontside and spray over good with a can of Flex Seal. This was the best medium I could find to act as a barrier between the emblem and the panel, as the foam backing has been removed in some places.
EB822FB6-F3AD-420D-821F-4C907E1142C0.jpeg

86FED04B-822E-4E2D-9EDF-B5DF76D8EA6D.jpeg
 
OP
OP
DrumReaper

DrumReaper

Well-Known Member
Joined
May 17, 2015
Threads
114
Messages
4,985
Reaction score
3,706
Location
South East
Vehicle(s)
1971 429CJ Mach 1, 2012 Boss 302
I used two 8/32 female post nuts, two 8/32 x 3/8” stainless screws and two 3/4” washers as the mounting hardware. Since this car makes so much vibration, I drilled a wine cork and then cut slivers and placed between the washers and the panel to help absorb shock.
AE9F8CB0-4588-4ACB-836B-29D8F3BE5487.jpeg

5432C09E-7512-449D-BAF1-29BF78D120D2.jpeg
 
OP
OP
DrumReaper

DrumReaper

Well-Known Member
Joined
May 17, 2015
Threads
114
Messages
4,985
Reaction score
3,706
Location
South East
Vehicle(s)
1971 429CJ Mach 1, 2012 Boss 302
Here is the finished product. I was able to align my panel gaps between the lights a little better. While I was at it, I cleaned my rear hubs and calipers.
3B139263-ABC5-4446-80EC-6C35ADC2E803.jpeg

B8812EA4-593C-472F-85A0-DF02A1AB7AB1.jpeg
 

Sponsored

Demonic

Well-Known Member
Joined
Feb 21, 2017
Threads
19
Messages
1,118
Reaction score
1,201
Location
Boston
First Name
Austin
Vehicle(s)
GT350R
Nice work. Pretty hardcore solution compared to the original attachment method.
 
OP
OP
DrumReaper

DrumReaper

Well-Known Member
Joined
May 17, 2015
Threads
114
Messages
4,985
Reaction score
3,706
Location
South East
Vehicle(s)
1971 429CJ Mach 1, 2012 Boss 302
Thanks [MENTION=29009]Demonic[/MENTION]. The factory deal is pretty flimsy given the NVH of these cars. Hopefully it will last a while. If not, back to the drawing board.
 

ThreeFiveO

Chassis #1356
Joined
Sep 21, 2015
Threads
4
Messages
662
Reaction score
418
Location
Milton, Ga
Vehicle(s)
2016 Gt350 Track Pack
I used to use the badge to close the trunk with. No more after seeing the flimsy attachment. Nice work Drum. I guess us beer drinkers will have to settle for rubber washers.:cheers:
 

Tomster

Beware of idiots
Joined
Feb 20, 2016
Threads
278
Messages
15,573
Reaction score
15,687
Location
FL
First Name
Tom
Vehicle(s)
'20 RR GT500R(CFTP), 18 OW GT350R Base, '17 AG GT350R Electronics Pack, '97 PG Cobra Convertible
Nice , why didn't they want to fix that under warranty?
Yea, especially if those NVH vibrations did it.
Sponsored


Top