GTP
Deutsche Pony
- Joined
- May 27, 2015
- Threads
- 263
- Messages
- 5,994
- Reaction score
- 3,895
- Location
- Indy
- Website
- www.BambergAudio.com
- First Name
- Philip
- Vehicle(s)
- 2019 GT PP1 A10 Outrageous Orange HPDE mods
- Thread starter
- #1
Initial setup
Jack up the front of the car.

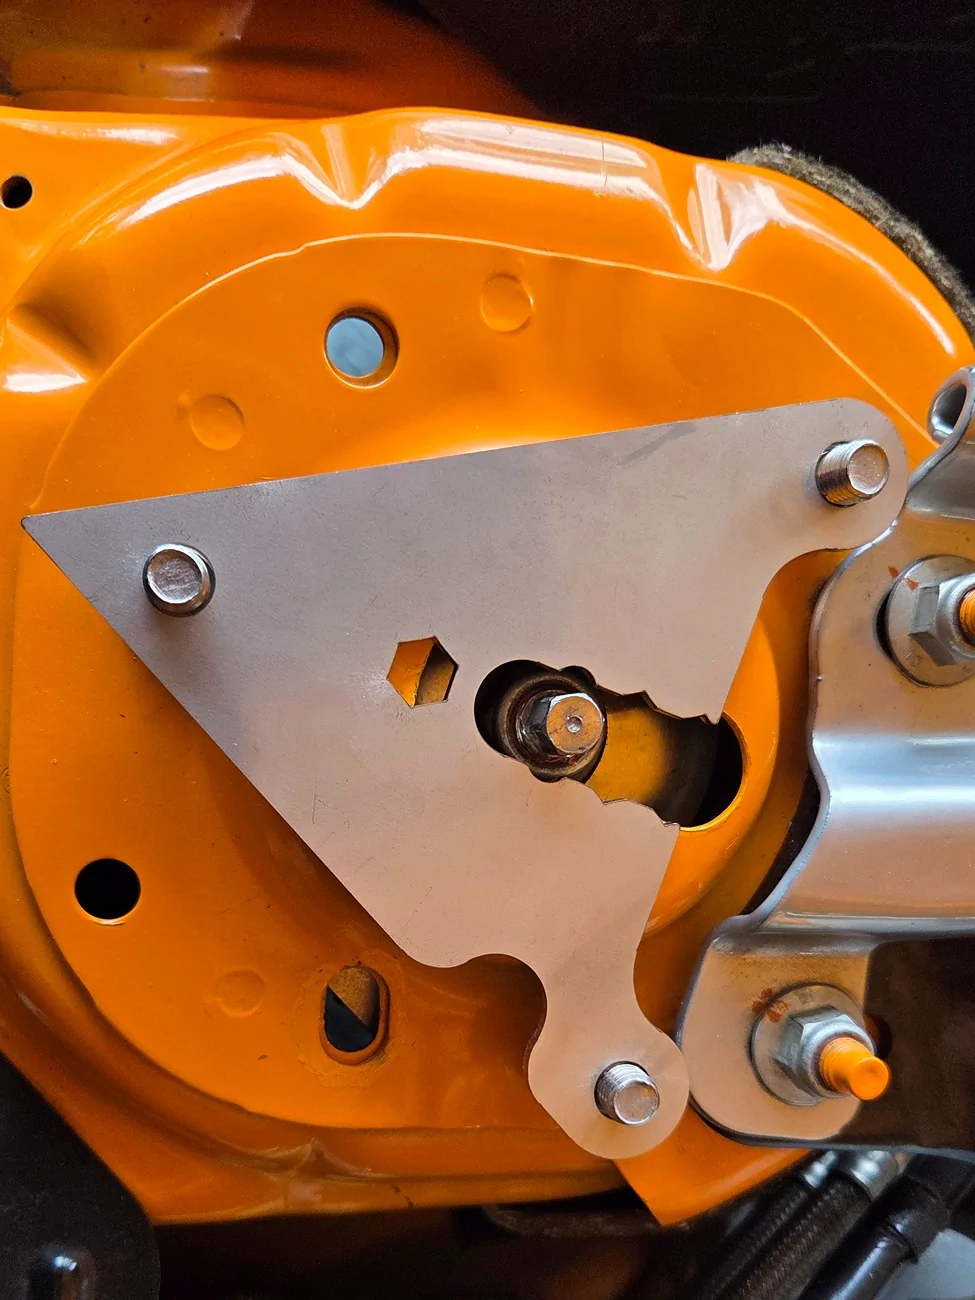
Place the gauge onto the 3 studs, pointing outboard.

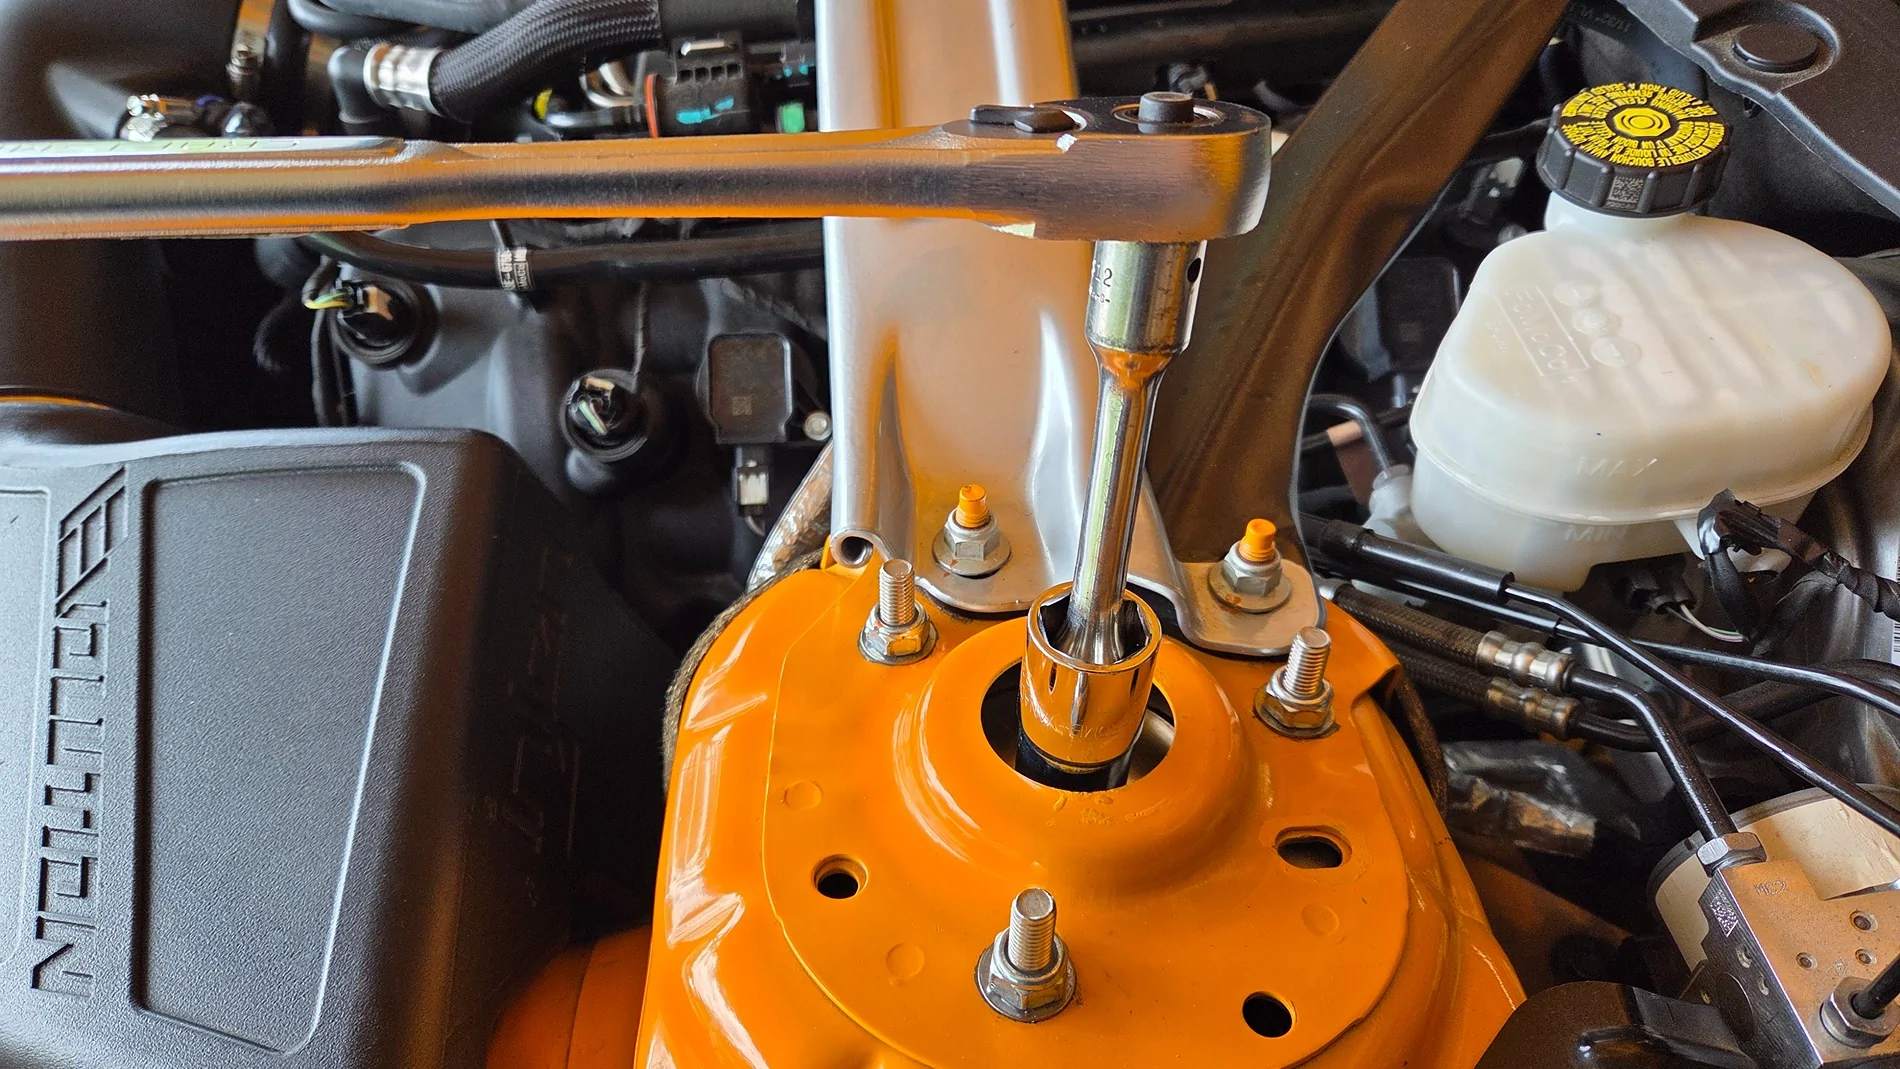
The strut top hex flats need to align parallel with the two inboard studs. The strut shaft can be rotated with a deep 21mm socket and ratchet handle. Rotate the shaft until the alignment looks good visually.
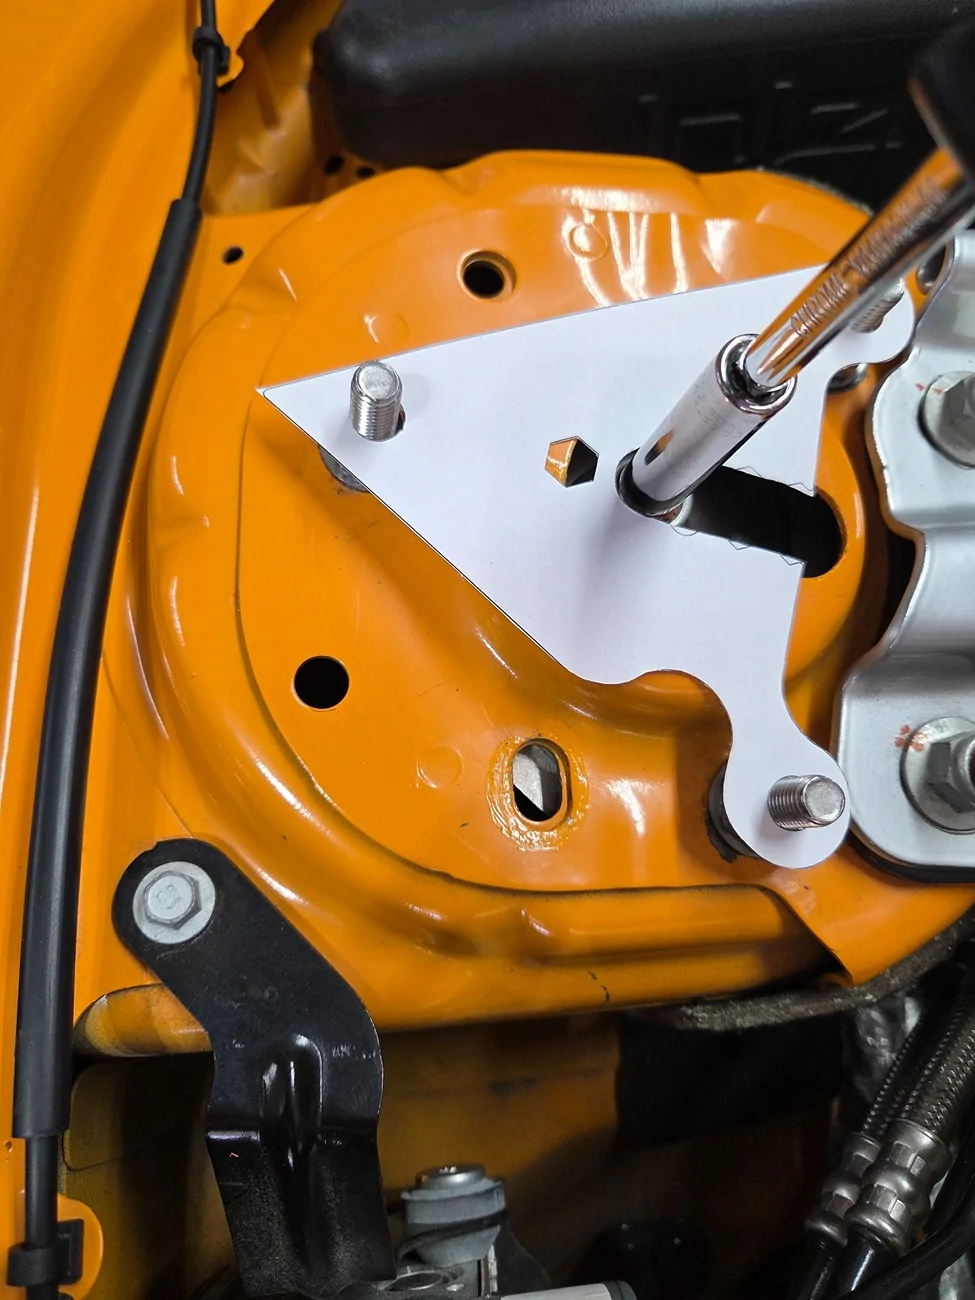
Now verify the alignment by placing the gauge over the shaft at the hex hole, with the gauge pointing forward. Use the inboard edge of the gauge to judge the alignment to the two inboard studs. Rotate the shaft as needed until the alignment is good.
The shaft will not rotate again while driving, so this is a one-time adjustment.
Street Alignment
OEM alignment is when the strut hex points to the gauge’s semi-circular notch. This is the center of the tower hole. Nominally this is -1.5°.
Using the gauge at the track
If you plan to start out with maximum negative camber, you can simply loosen the three stud nuts and then turn the steering wheel slowly back and forth. This causes the camber plates to move to their maximum inboard locations. There is no need to jack up the car. See also Tips for easily adjusting Camber and Toe between street and track settings
For intermediate camber positions, or to return to street camber, you must lift the front wheels off the ground. Loosen the stud nuts each by one turn. Use a 10mm deep socket on a nutdriver handle to push/pull the strut to the new camber setting.
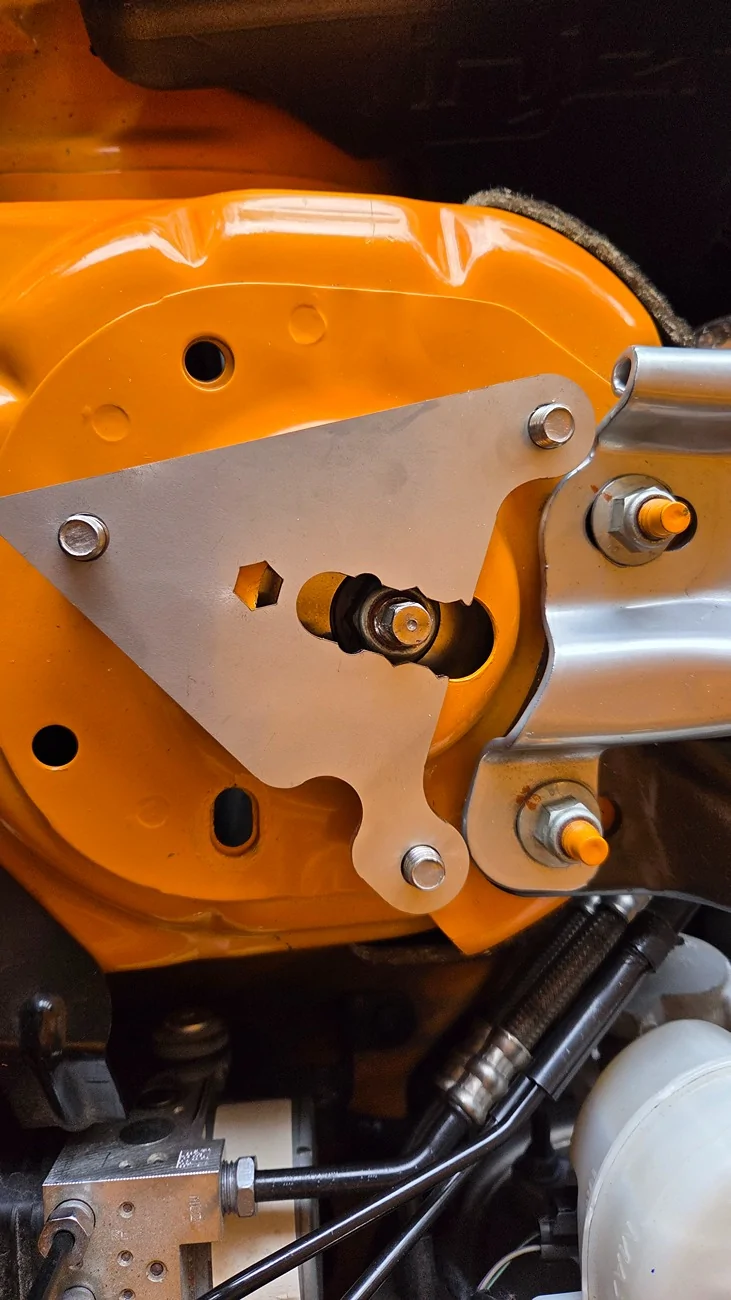
First triangle notch (from center) is -1.0° additional negative camber, or -2.5° (nominal)

Second triangle notch (from center) is -2.0° additional negative camber, or -3.5° (nominal)
The gauge flats between the triangle notches represent half-degree increments. This photo shows OEM + first flat = -1.5 + -0.5 = -2.0°.
Be aware that toe changes with camber
Toe out increases with negative camber. Therefore, shorten the tie rods when increasing negative camber. I determined that rotating each tie rod by one flat per half degree camber is about right.
1st flat -> Rotate tie rod 1 flat
1st triangle -> Rotate 2 flats
2nd flat -> Rotate 3 flats
2nd triangle -> Rotate 4 flats
DON’T FORGET TO REMOVE THE GAUGE BEFORE GOING ON TRACK!
You may wish to paint the gauge a bright color as a reminder, such as fluorescent green.
Up next: DIY strut nut socket & better method for tightening the top strut nut
Jack up the front of the car.

Place the gauge onto the 3 studs, pointing outboard.
The strut top hex flats need to align parallel with the two inboard studs. The strut shaft can be rotated with a deep 21mm socket and ratchet handle. Rotate the shaft until the alignment looks good visually.
Now verify the alignment by placing the gauge over the shaft at the hex hole, with the gauge pointing forward. Use the inboard edge of the gauge to judge the alignment to the two inboard studs. Rotate the shaft as needed until the alignment is good.

The shaft will not rotate again while driving, so this is a one-time adjustment.
Street Alignment
OEM alignment is when the strut hex points to the gauge’s semi-circular notch. This is the center of the tower hole. Nominally this is -1.5°.

Using the gauge at the track
If you plan to start out with maximum negative camber, you can simply loosen the three stud nuts and then turn the steering wheel slowly back and forth. This causes the camber plates to move to their maximum inboard locations. There is no need to jack up the car. See also Tips for easily adjusting Camber and Toe between street and track settings
For intermediate camber positions, or to return to street camber, you must lift the front wheels off the ground. Loosen the stud nuts each by one turn. Use a 10mm deep socket on a nutdriver handle to push/pull the strut to the new camber setting.
First triangle notch (from center) is -1.0° additional negative camber, or -2.5° (nominal)
Second triangle notch (from center) is -2.0° additional negative camber, or -3.5° (nominal)

The gauge flats between the triangle notches represent half-degree increments. This photo shows OEM + first flat = -1.5 + -0.5 = -2.0°.

Be aware that toe changes with camber
Toe out increases with negative camber. Therefore, shorten the tie rods when increasing negative camber. I determined that rotating each tie rod by one flat per half degree camber is about right.
1st flat -> Rotate tie rod 1 flat
1st triangle -> Rotate 2 flats
2nd flat -> Rotate 3 flats
2nd triangle -> Rotate 4 flats
DON’T FORGET TO REMOVE THE GAUGE BEFORE GOING ON TRACK!
You may wish to paint the gauge a bright color as a reminder, such as fluorescent green.
Up next: DIY strut nut socket & better method for tightening the top strut nut
Sponsored
Last edited: