Sponsored

2023 GT Premium - My Twin Turbo Build

OP
OP
AcceptableNebula

AcceptableNebula

Well-Known Member
Joined
Apr 5, 2023
Threads
19
Messages
335
Reaction score
927
Location
Massachusetts
First Name
Jake
Vehicle(s)
2023 Ford Mustang GT Premium
Well while waiting for some wiring stuff to arrive, as usual I’m working on 3-4 things at the same time.

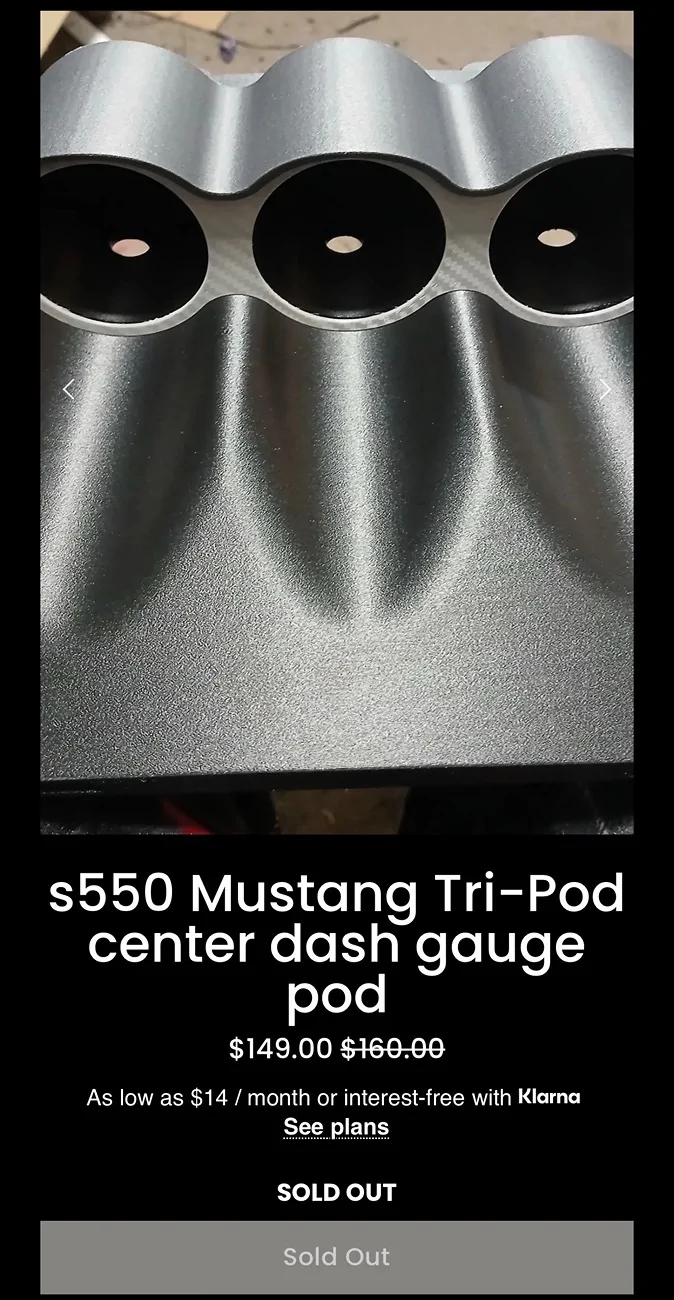
After getting in that triple gauge pod for the dash, I’ve spent weeks trying to find gauges that “fit” the car. Since I’ve been putting gauges in cars for 25+ years, I’ve rarely found gauges that are just awesome. While I have the Banks iDash in my trucks, that is more functionality over looks but I will say it’s a decent balance. Especially with a legit pod in the right place it’s a good fit. However, using another Canbus style gauge reading the same data that my HPTuners is already logging isn’t really beneficial. By the time you get all the add ons for the data monster expansions, you have this insane hunk of modules to bury in the dash. Here is the Banks idash in my F350 Platinum for those who aren’t familiar.

IMG_3114.webp


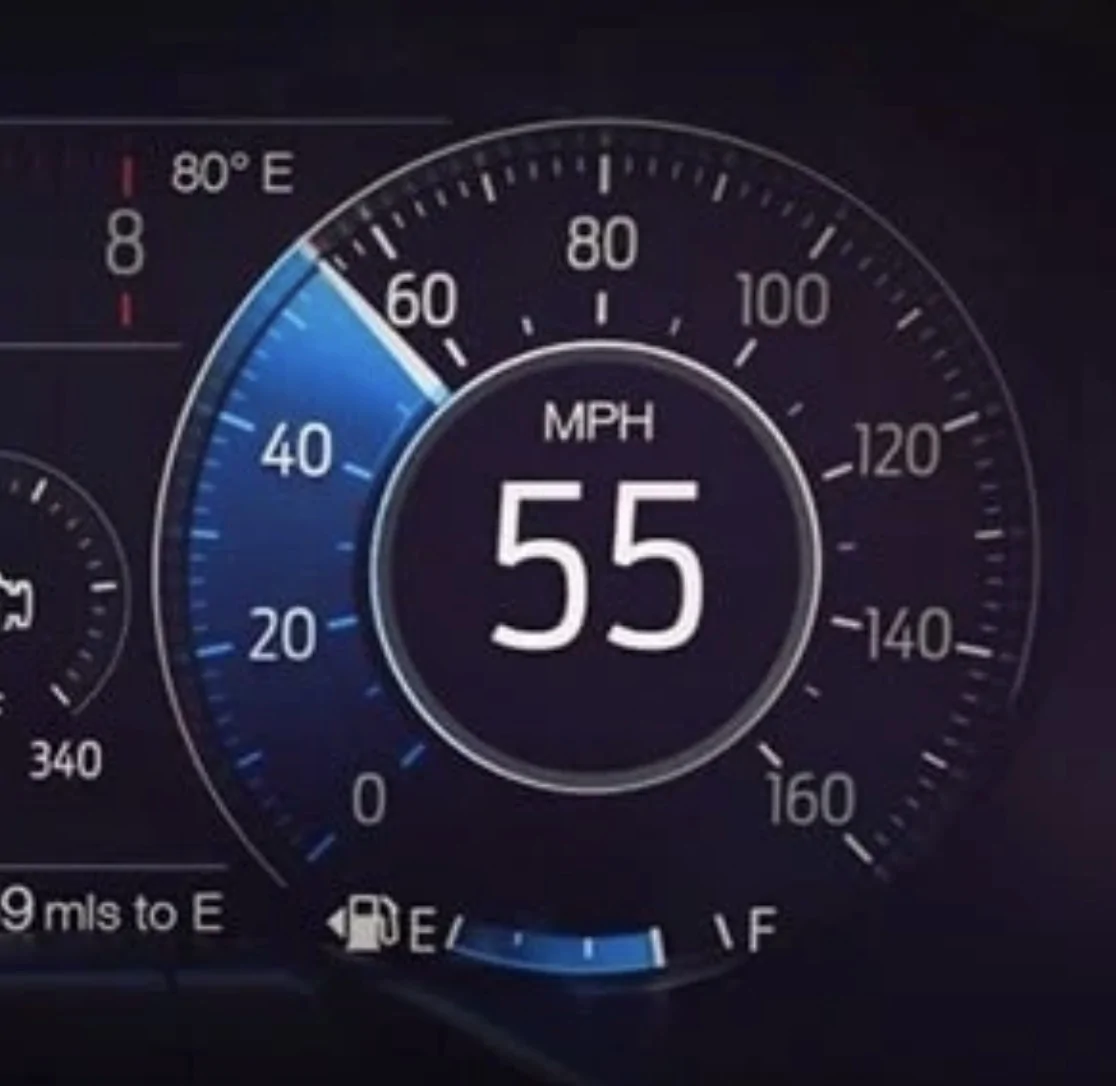
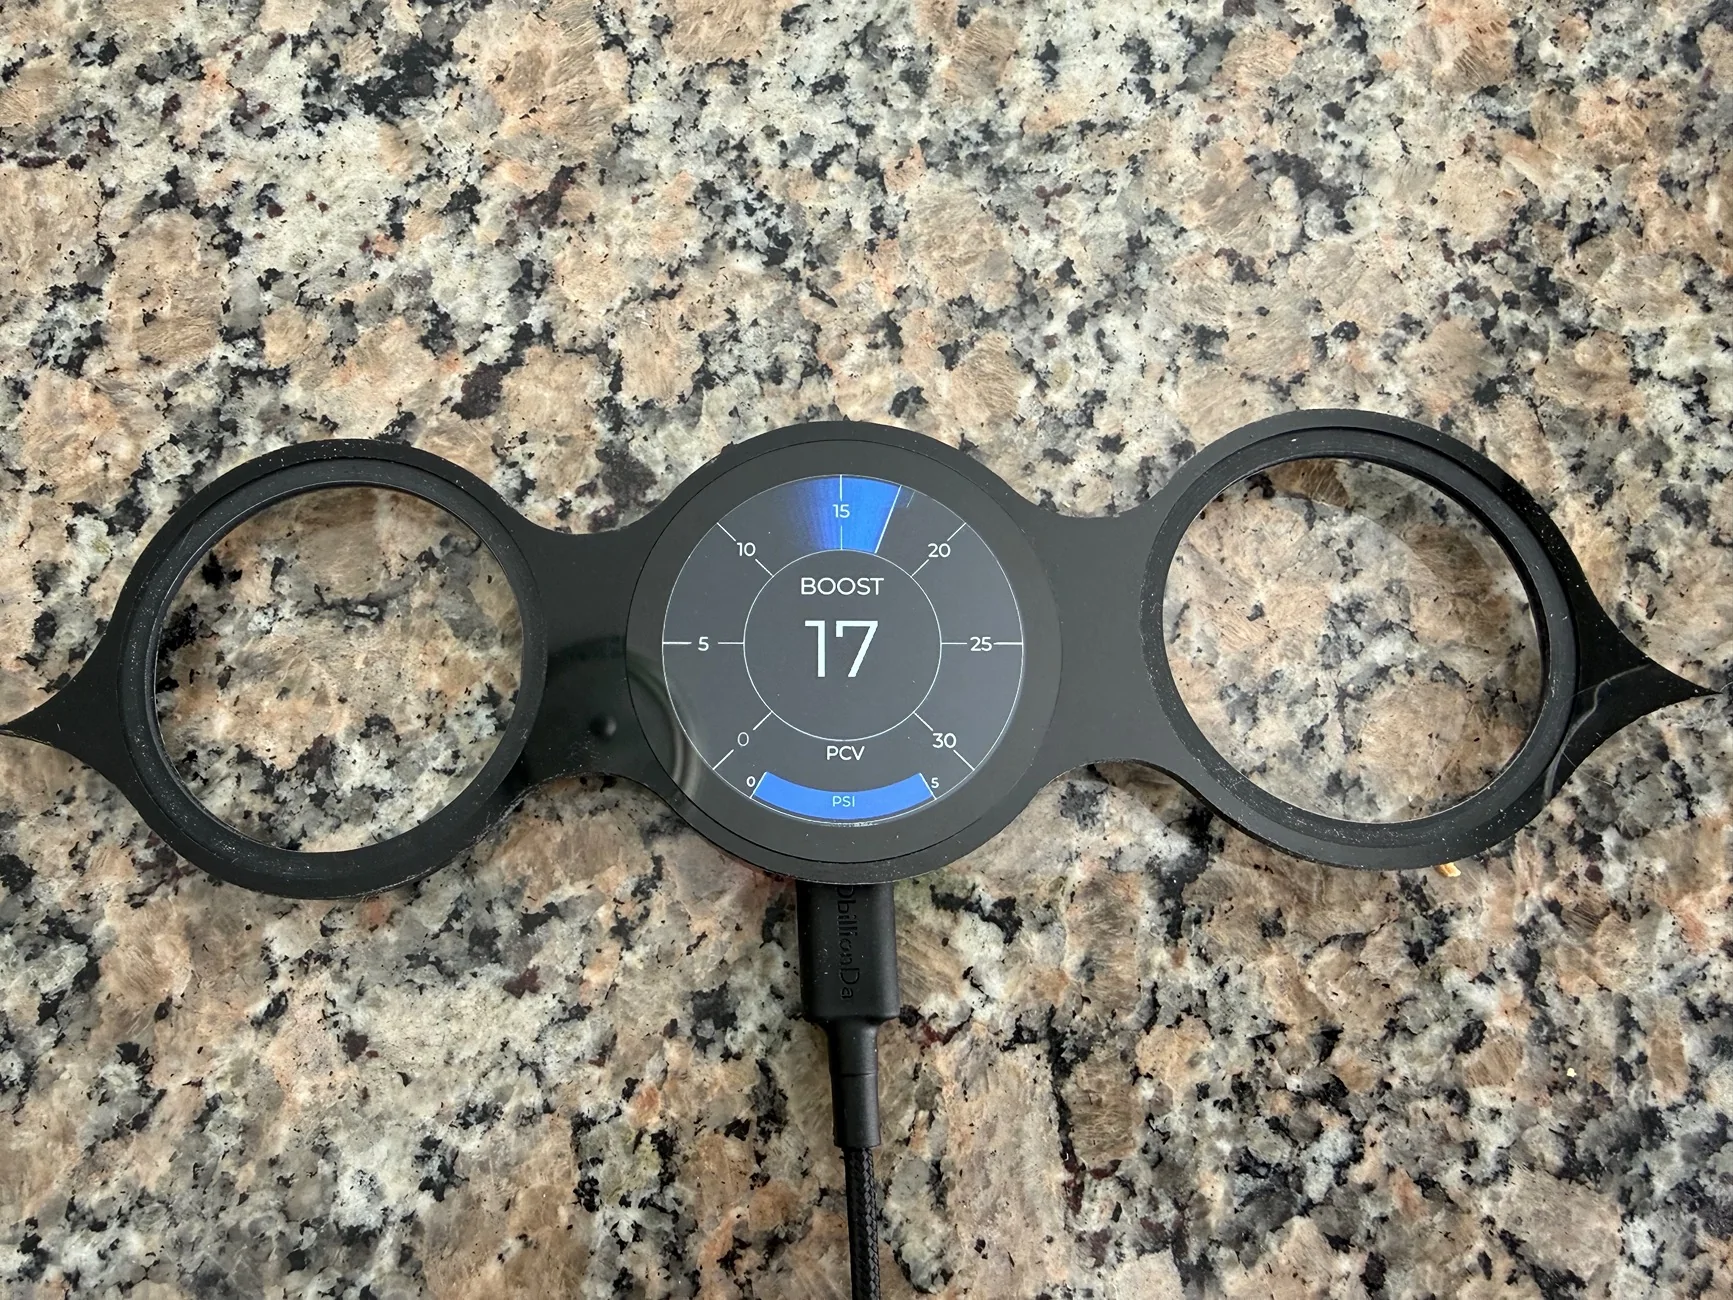
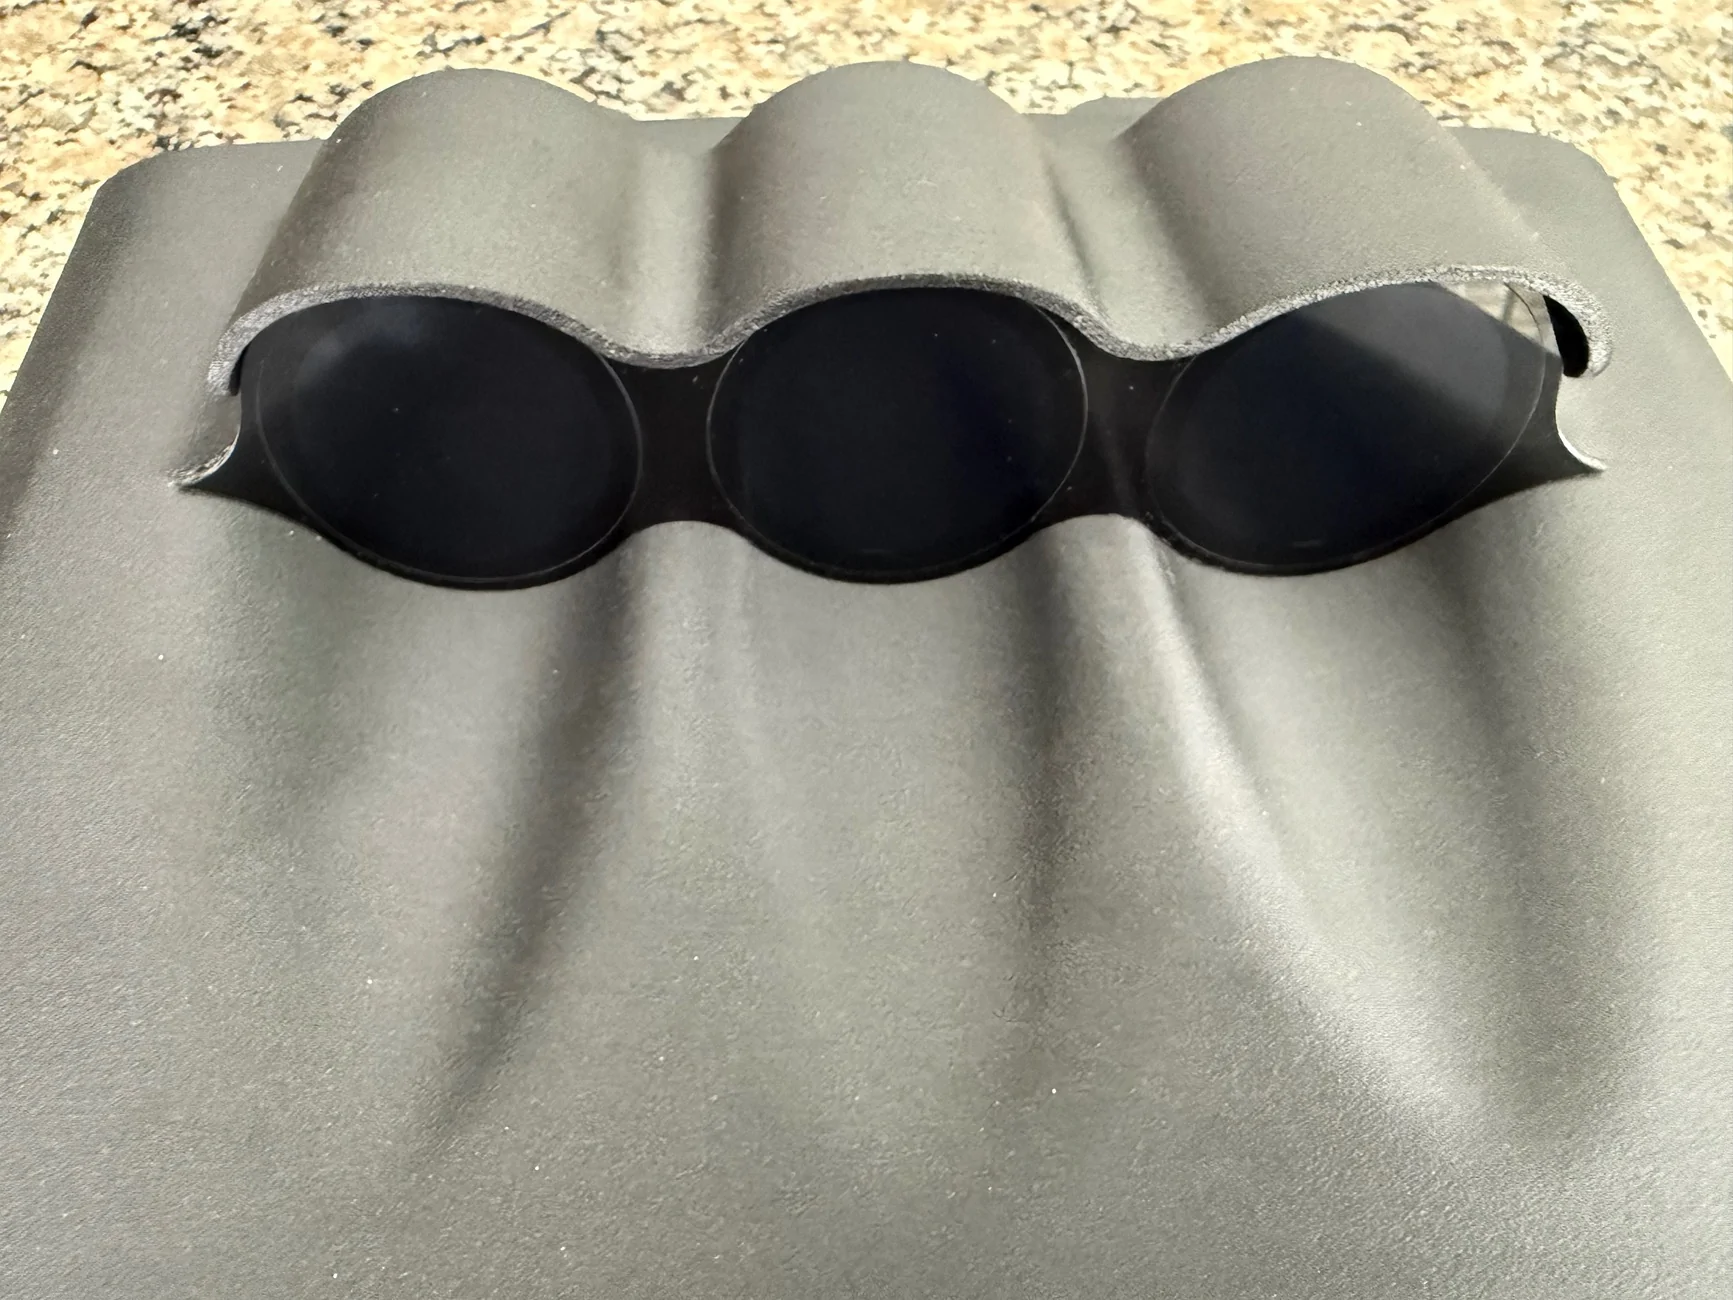
I came to the conclusion that what I really wanted just didn’t exist and I’ll have to make it myself. What I wanted was something that looks like it belongs with the car or better yet it came that way from the factory. Also bonus points if I could make these gauges monitor stuff the car typically can’t view and write that data to an SD card for later review. So I decided to try to match the factory cluster to a functional level. After designing the first gauge face in Photoshop, and many nights of getting the coding correct, this is what I came up with. While this is not viewing sensors yet, it’s just running simulated increasing data. Just a quick glimpse of the concept. I’ll be able to monitor 2 sensors per gauge for a total of 6. Things like crankcase pressure, pre intercooler pressure, turbo temp etc will be handy info.


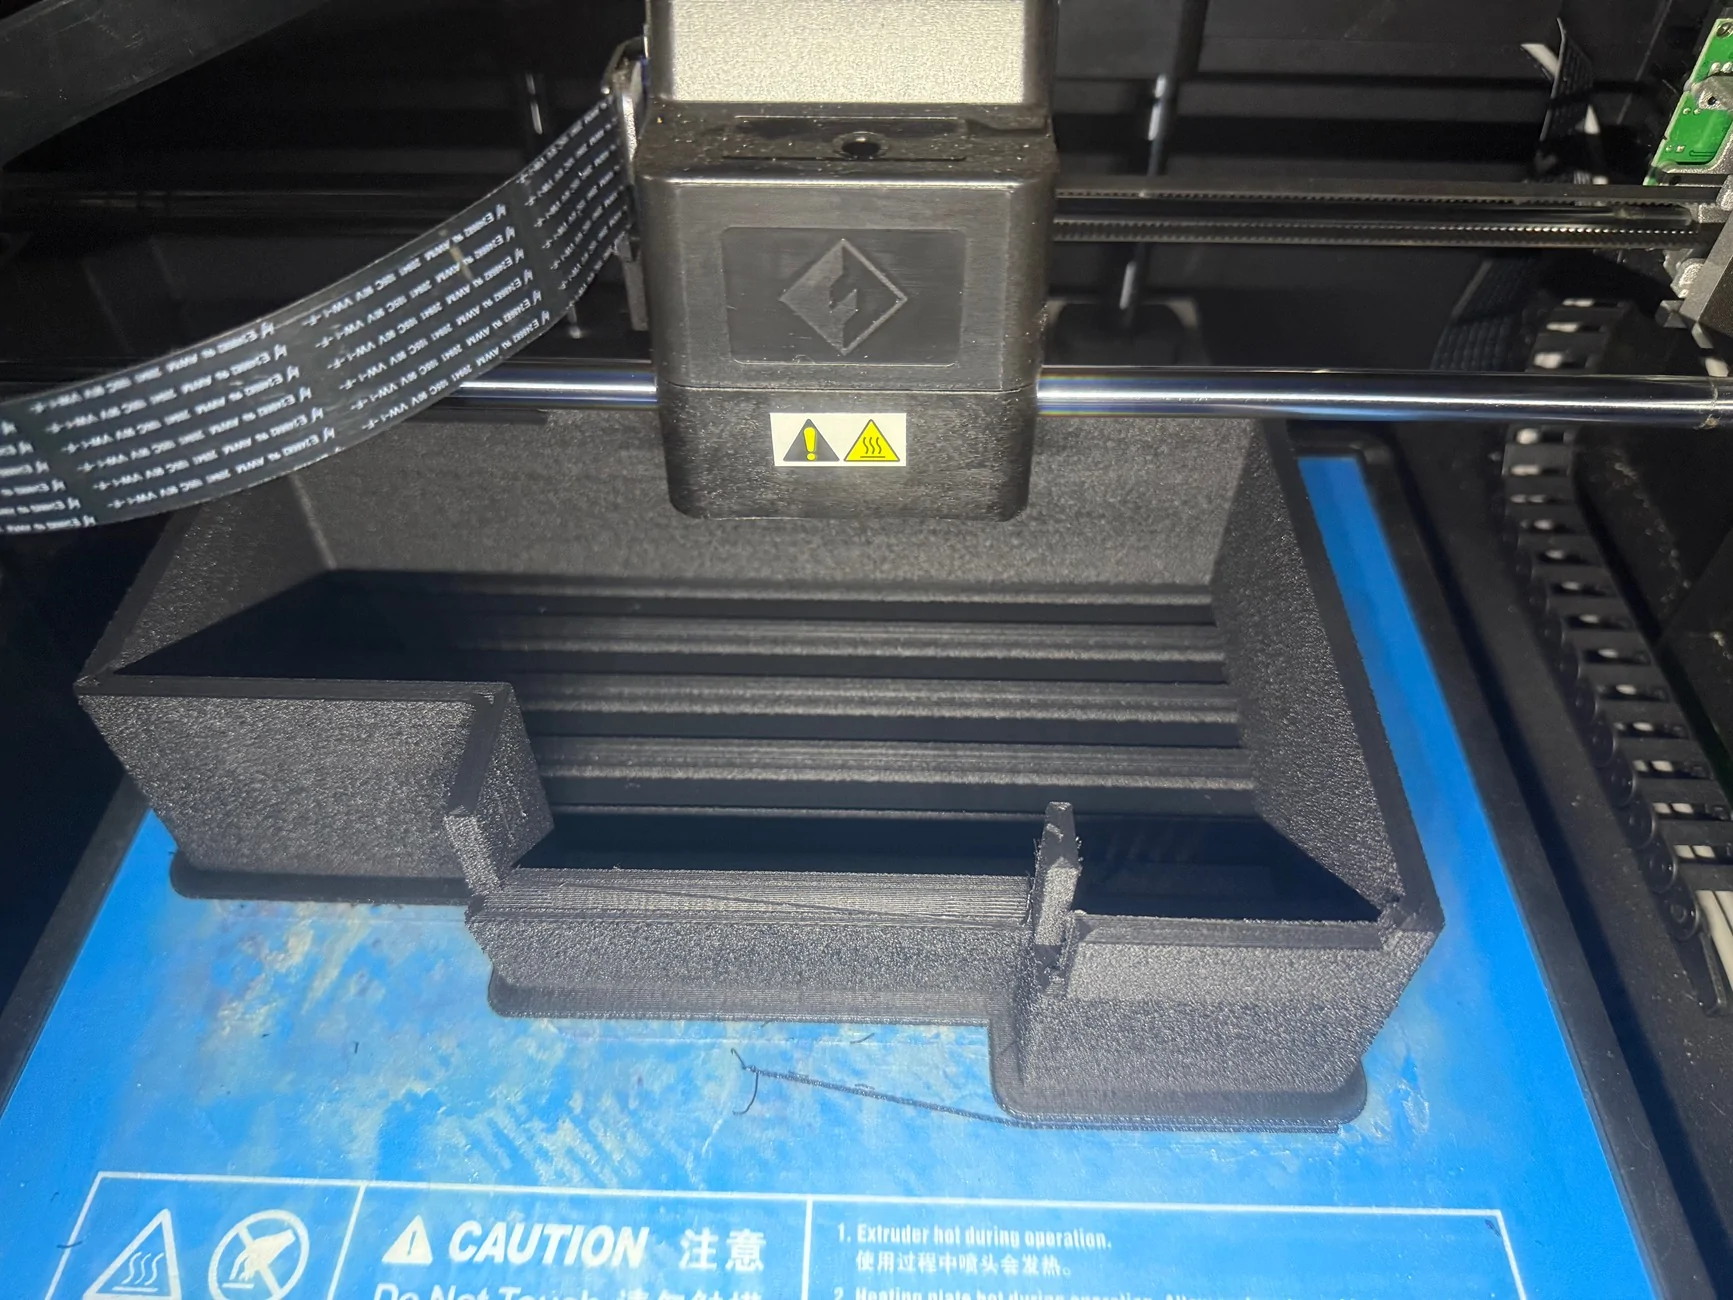
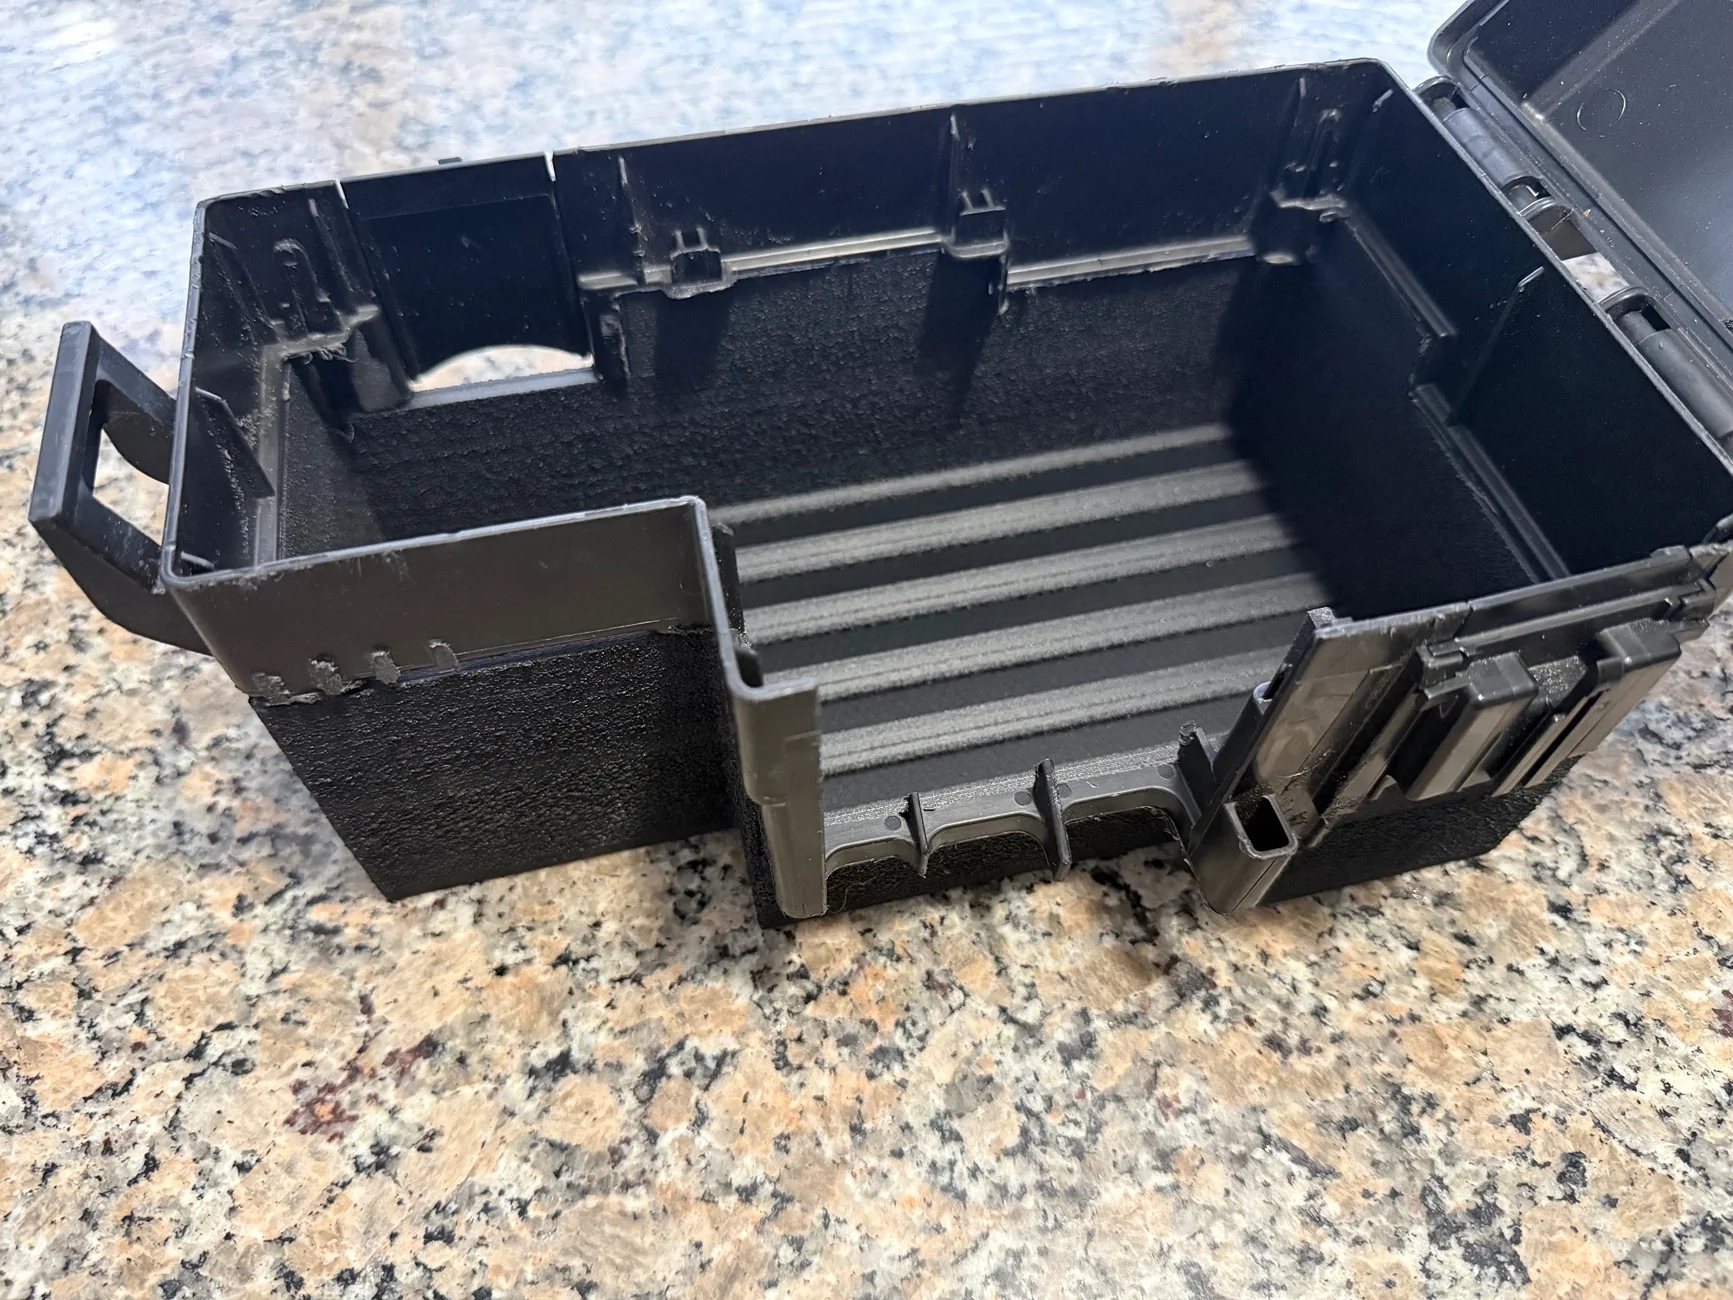
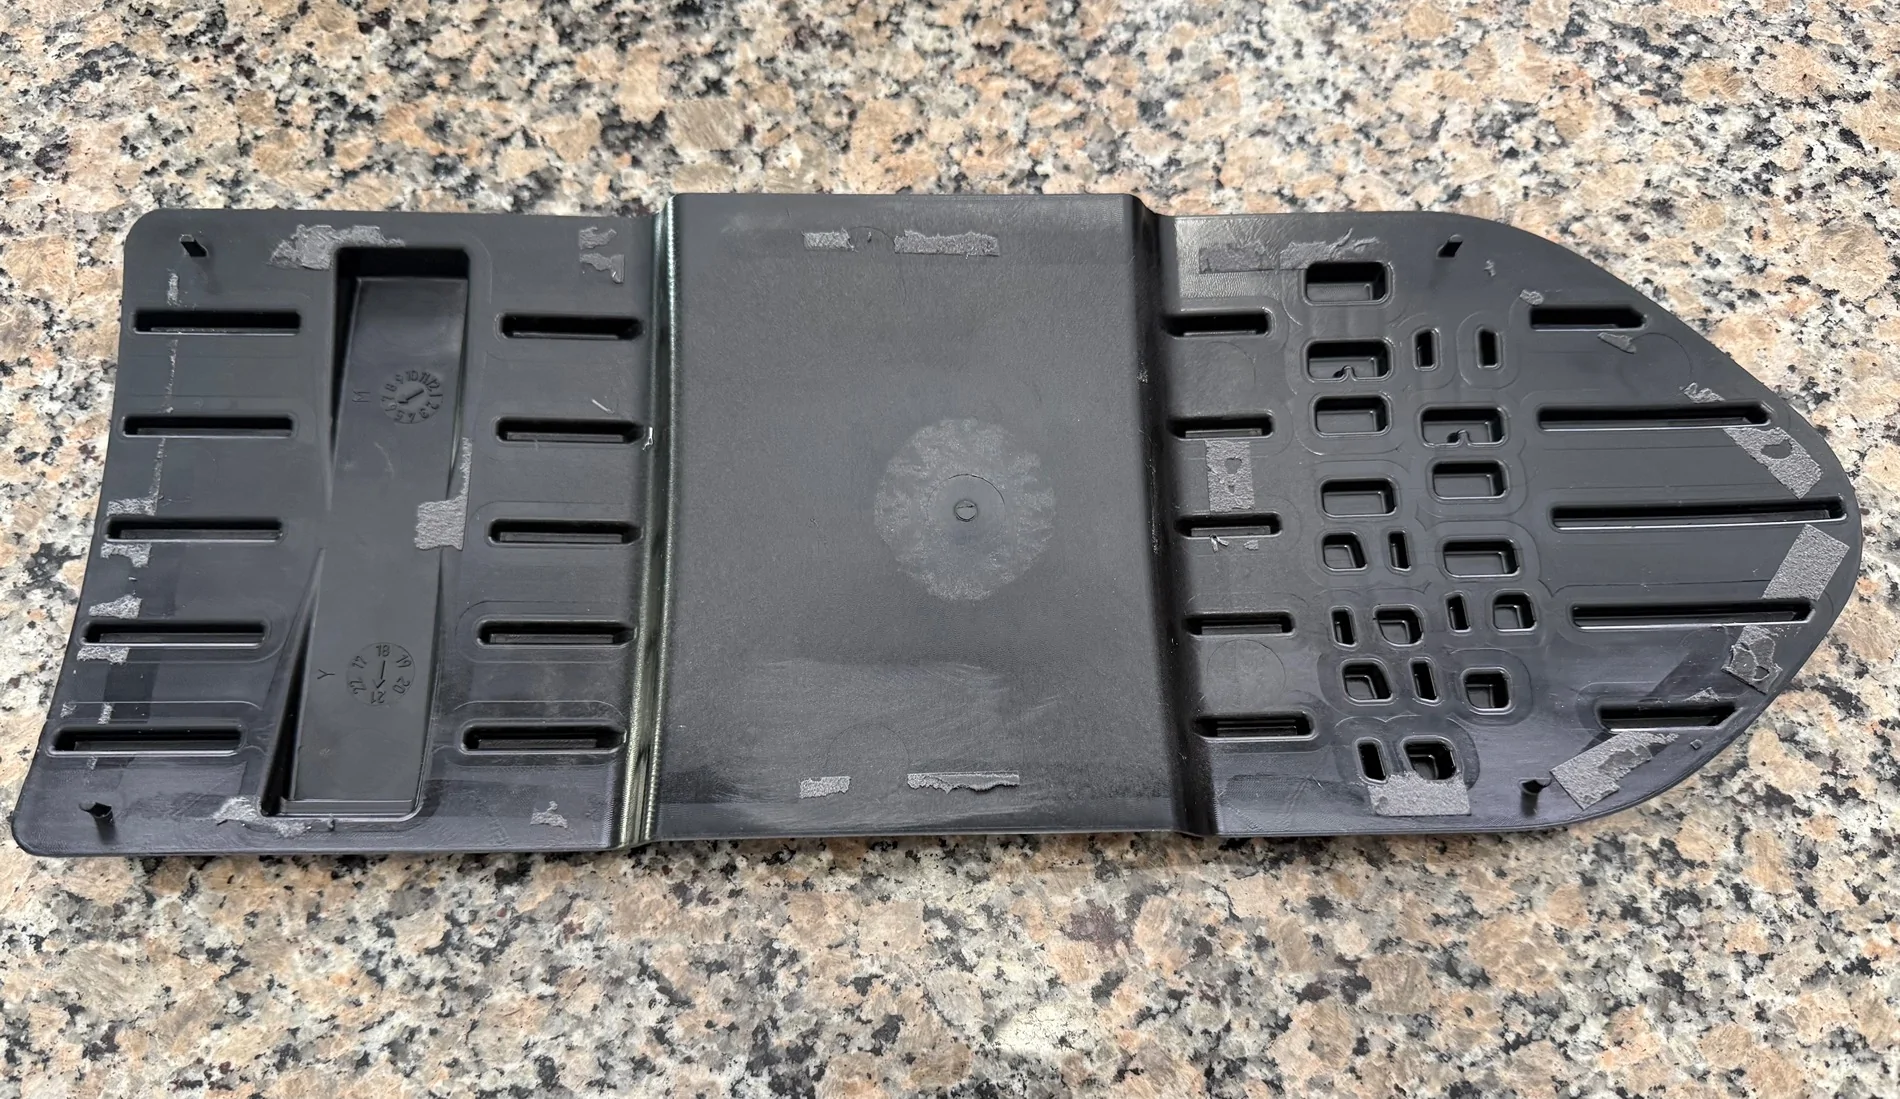
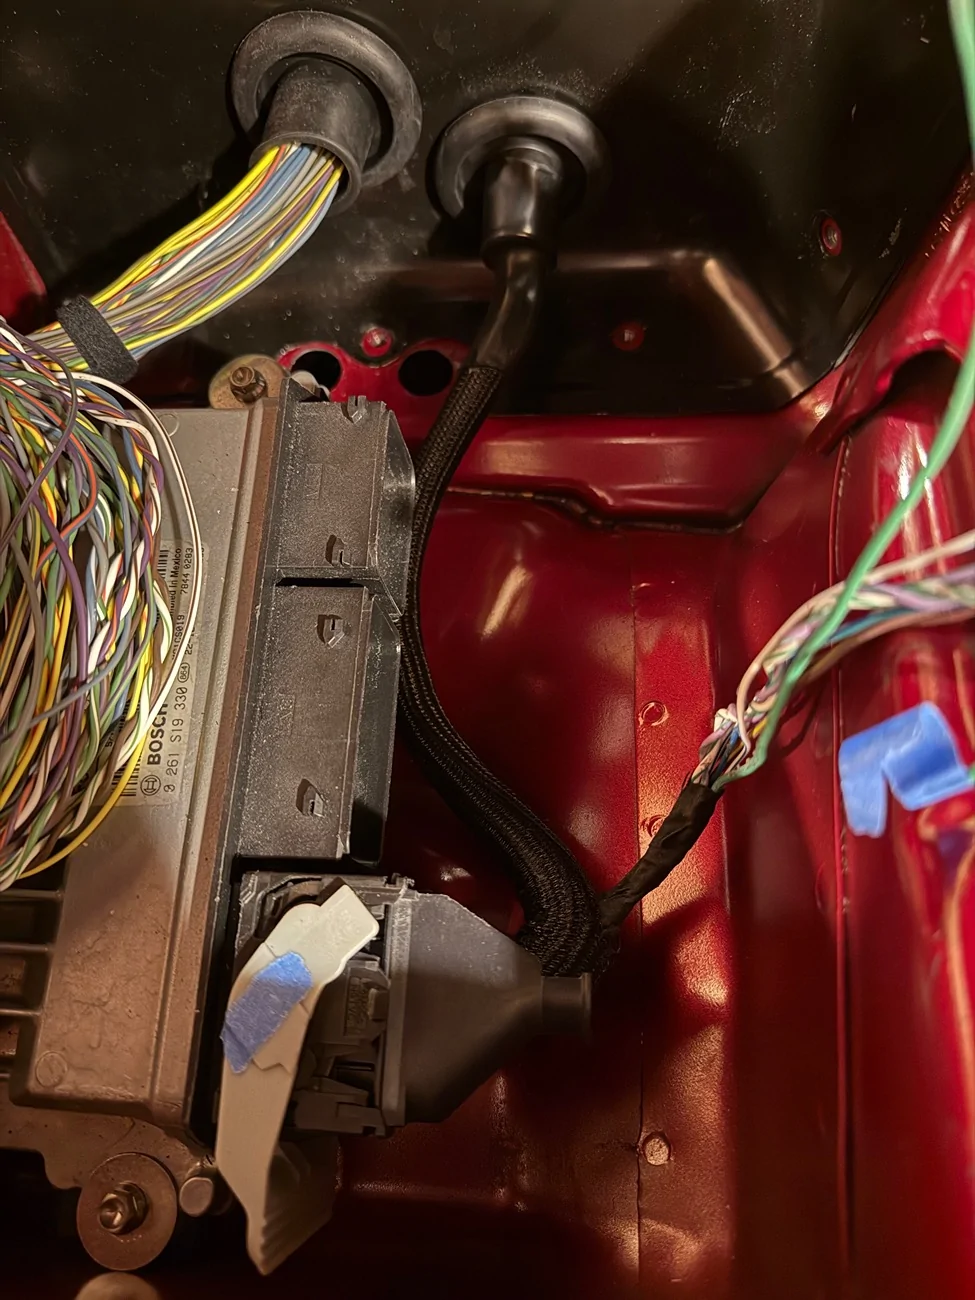
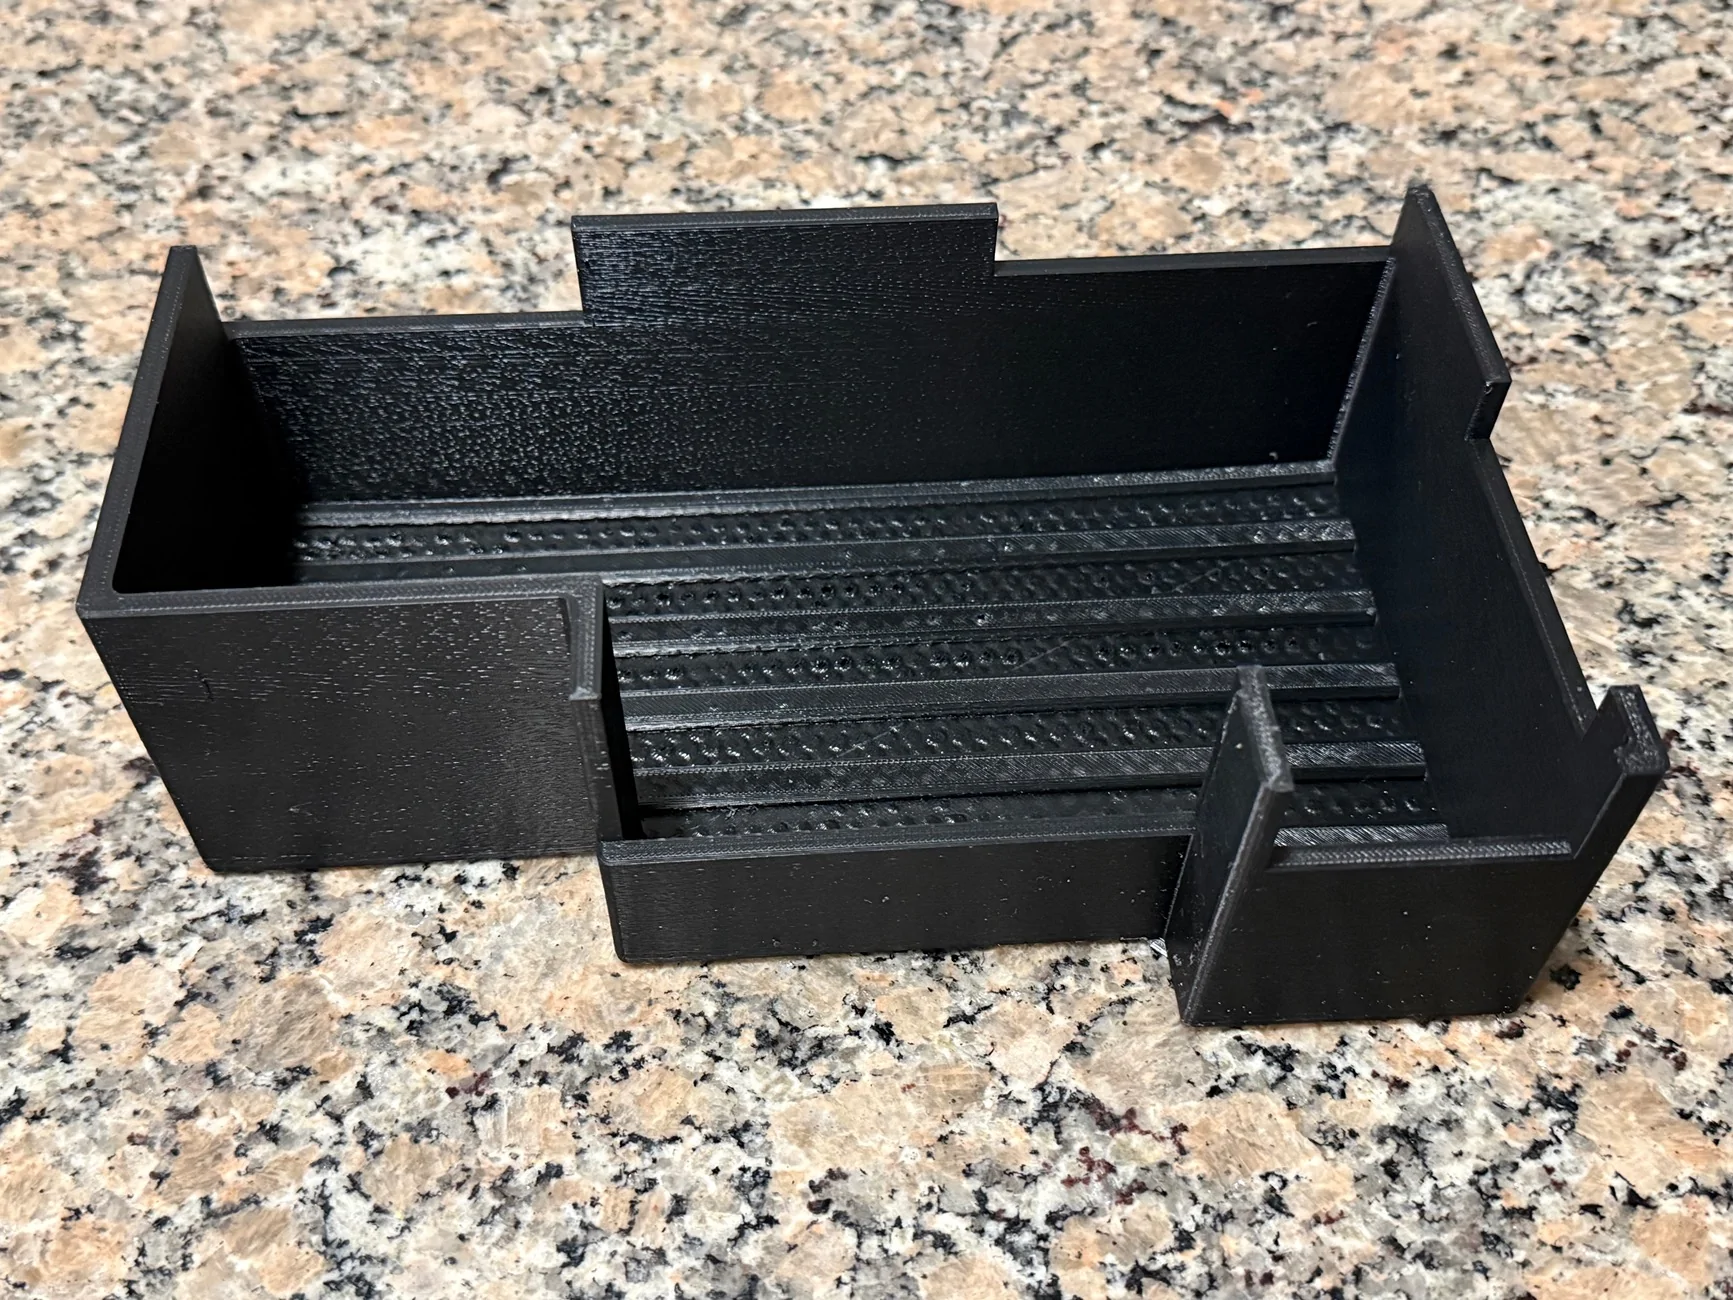
The next issue is my fuse box. The factory bottom was edited to get it in the first location, and the bottom isn’t exactly mount friendly as it has all sorts of angles. Add in the fact that ford literally zip ties the wires into a “stepped on hot pocket” configuration. I wanted to add a flat bottom and an extra space under the fuse holders to make running the wires easier. So I designed my own bottom and 31 hours later it was done printing in ABS. I have more trimming on the factory top to get the fit just right but it’ll be pretty good.

IMG_4342.webp


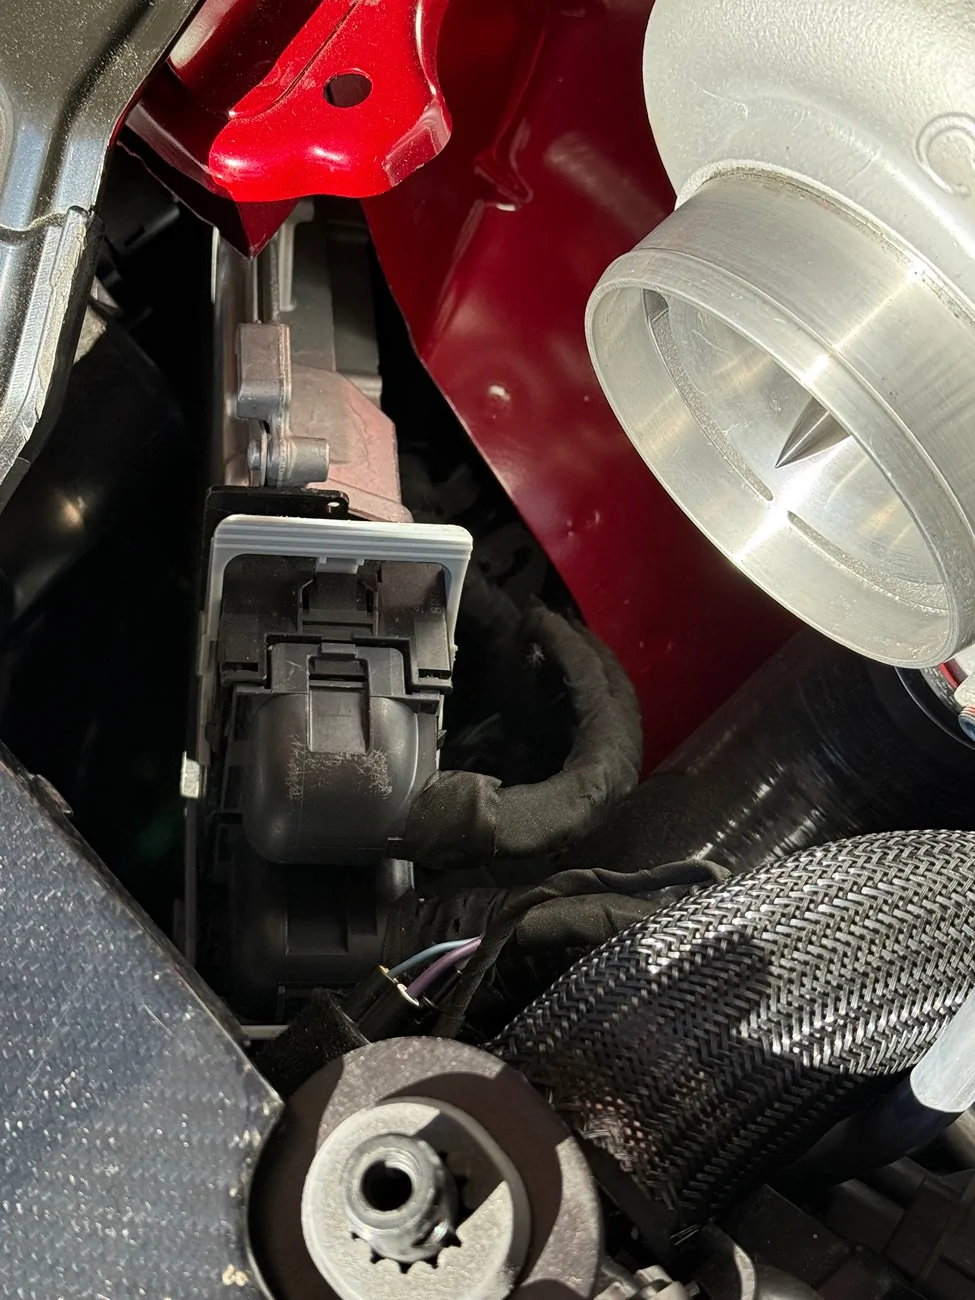
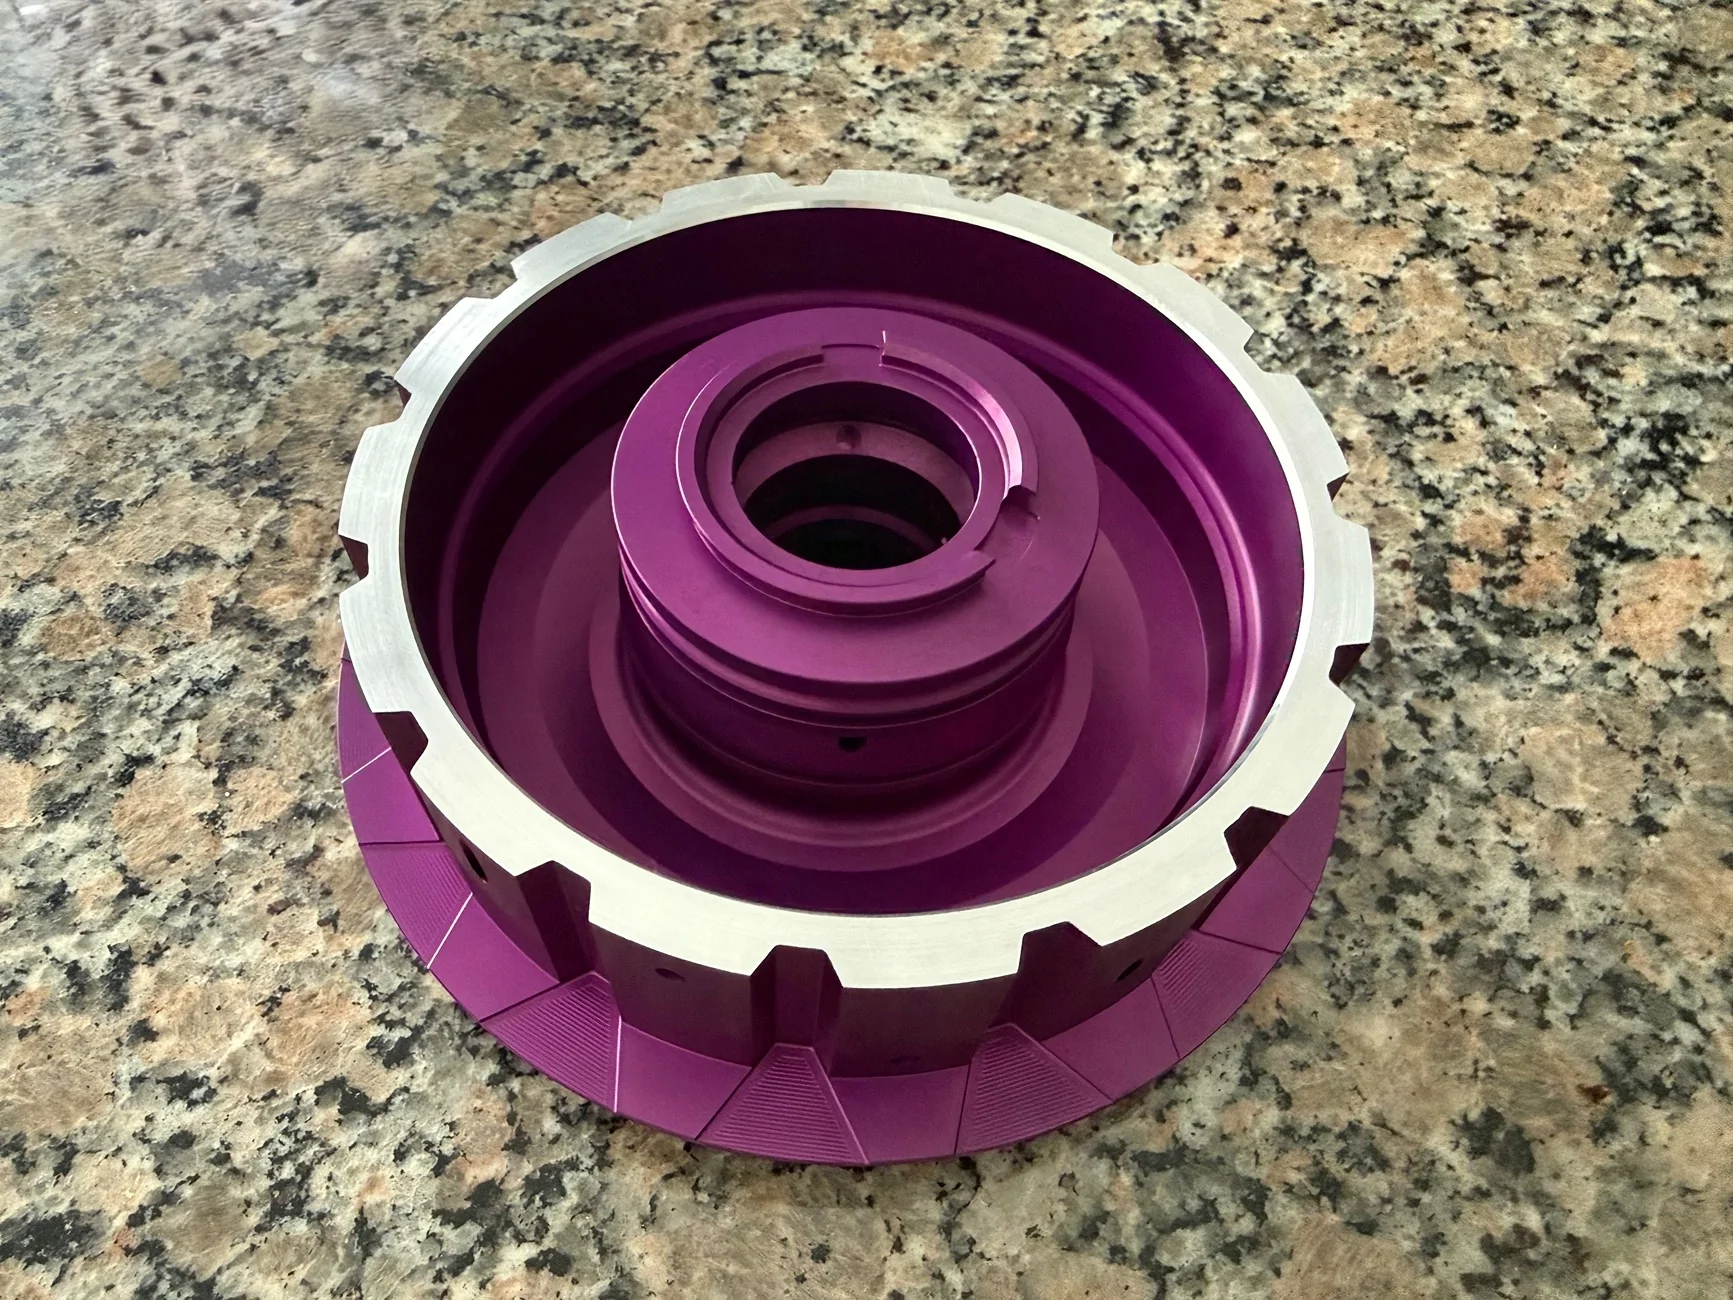
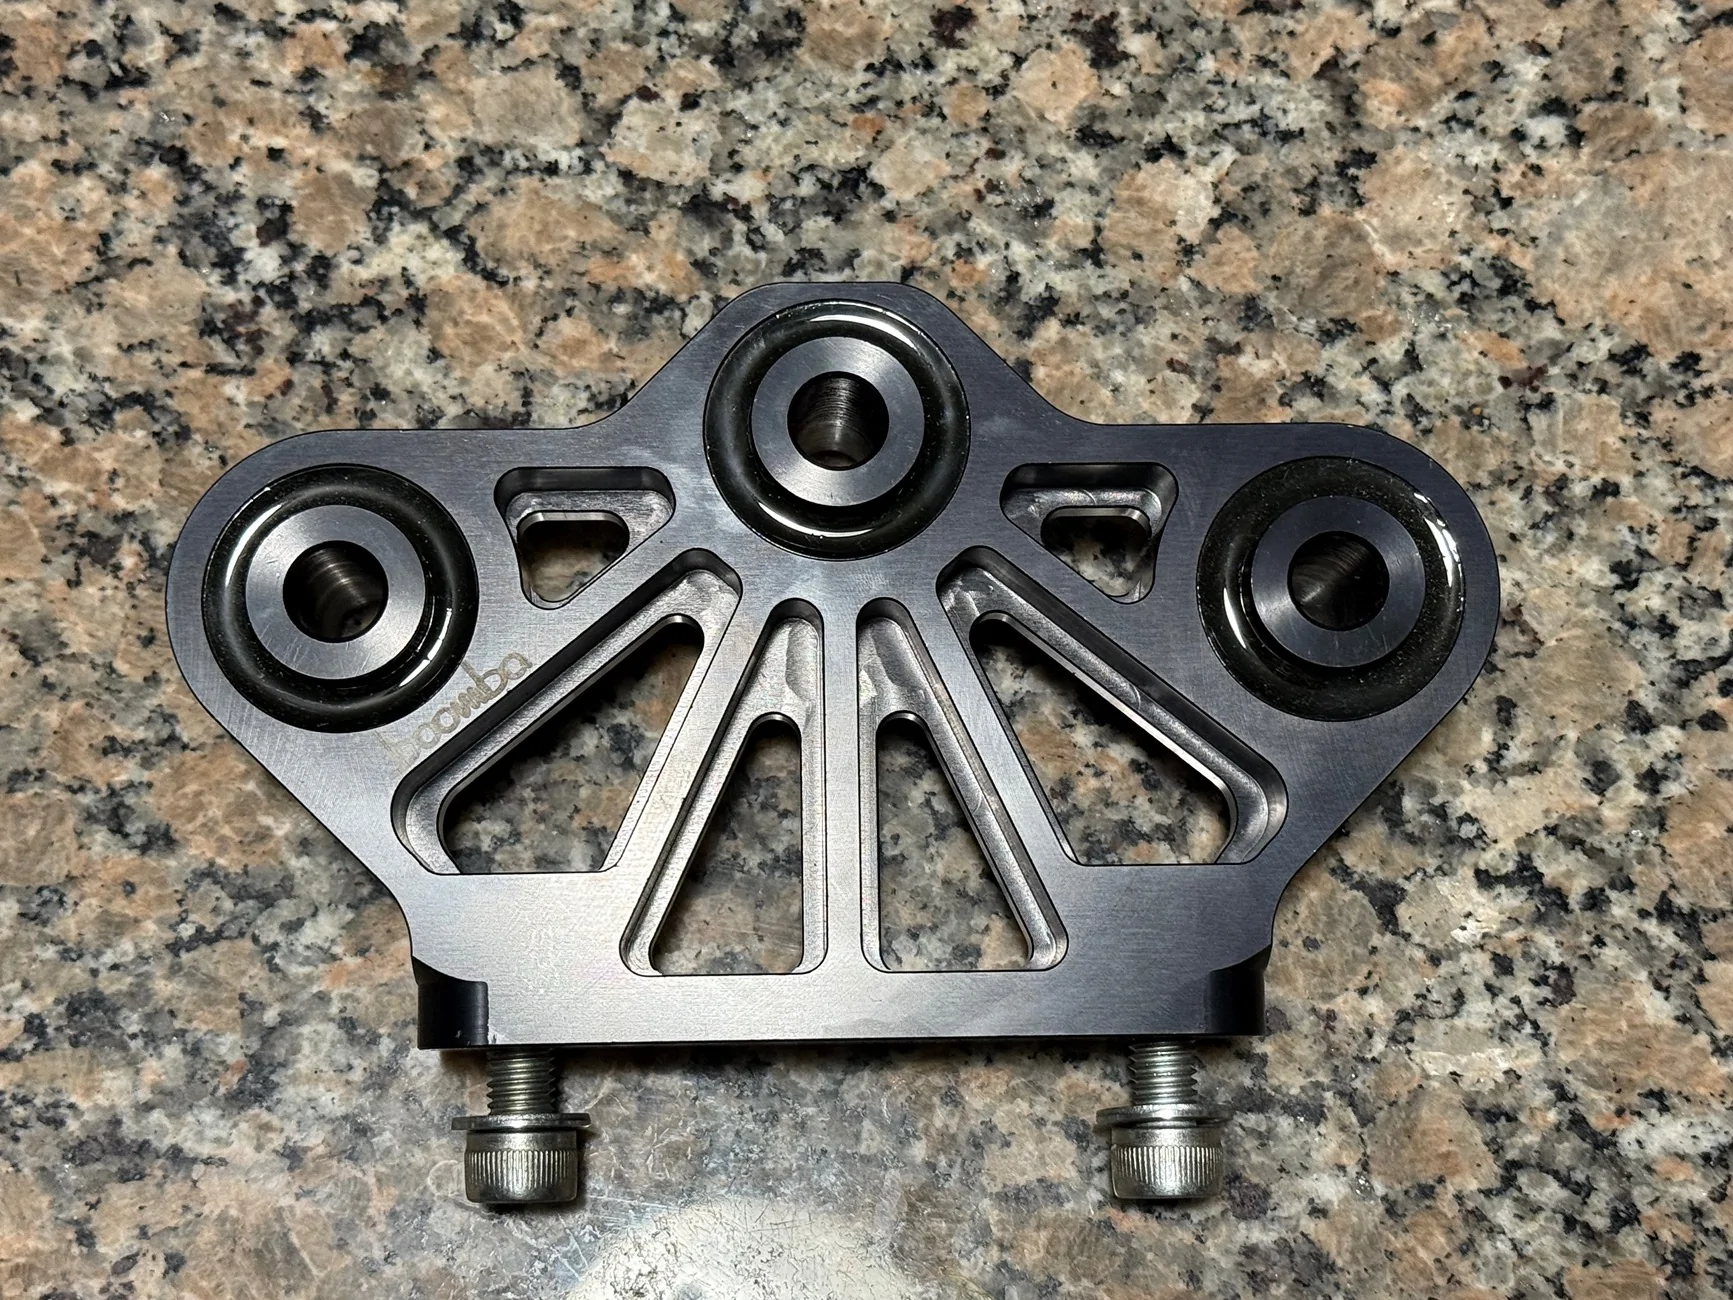
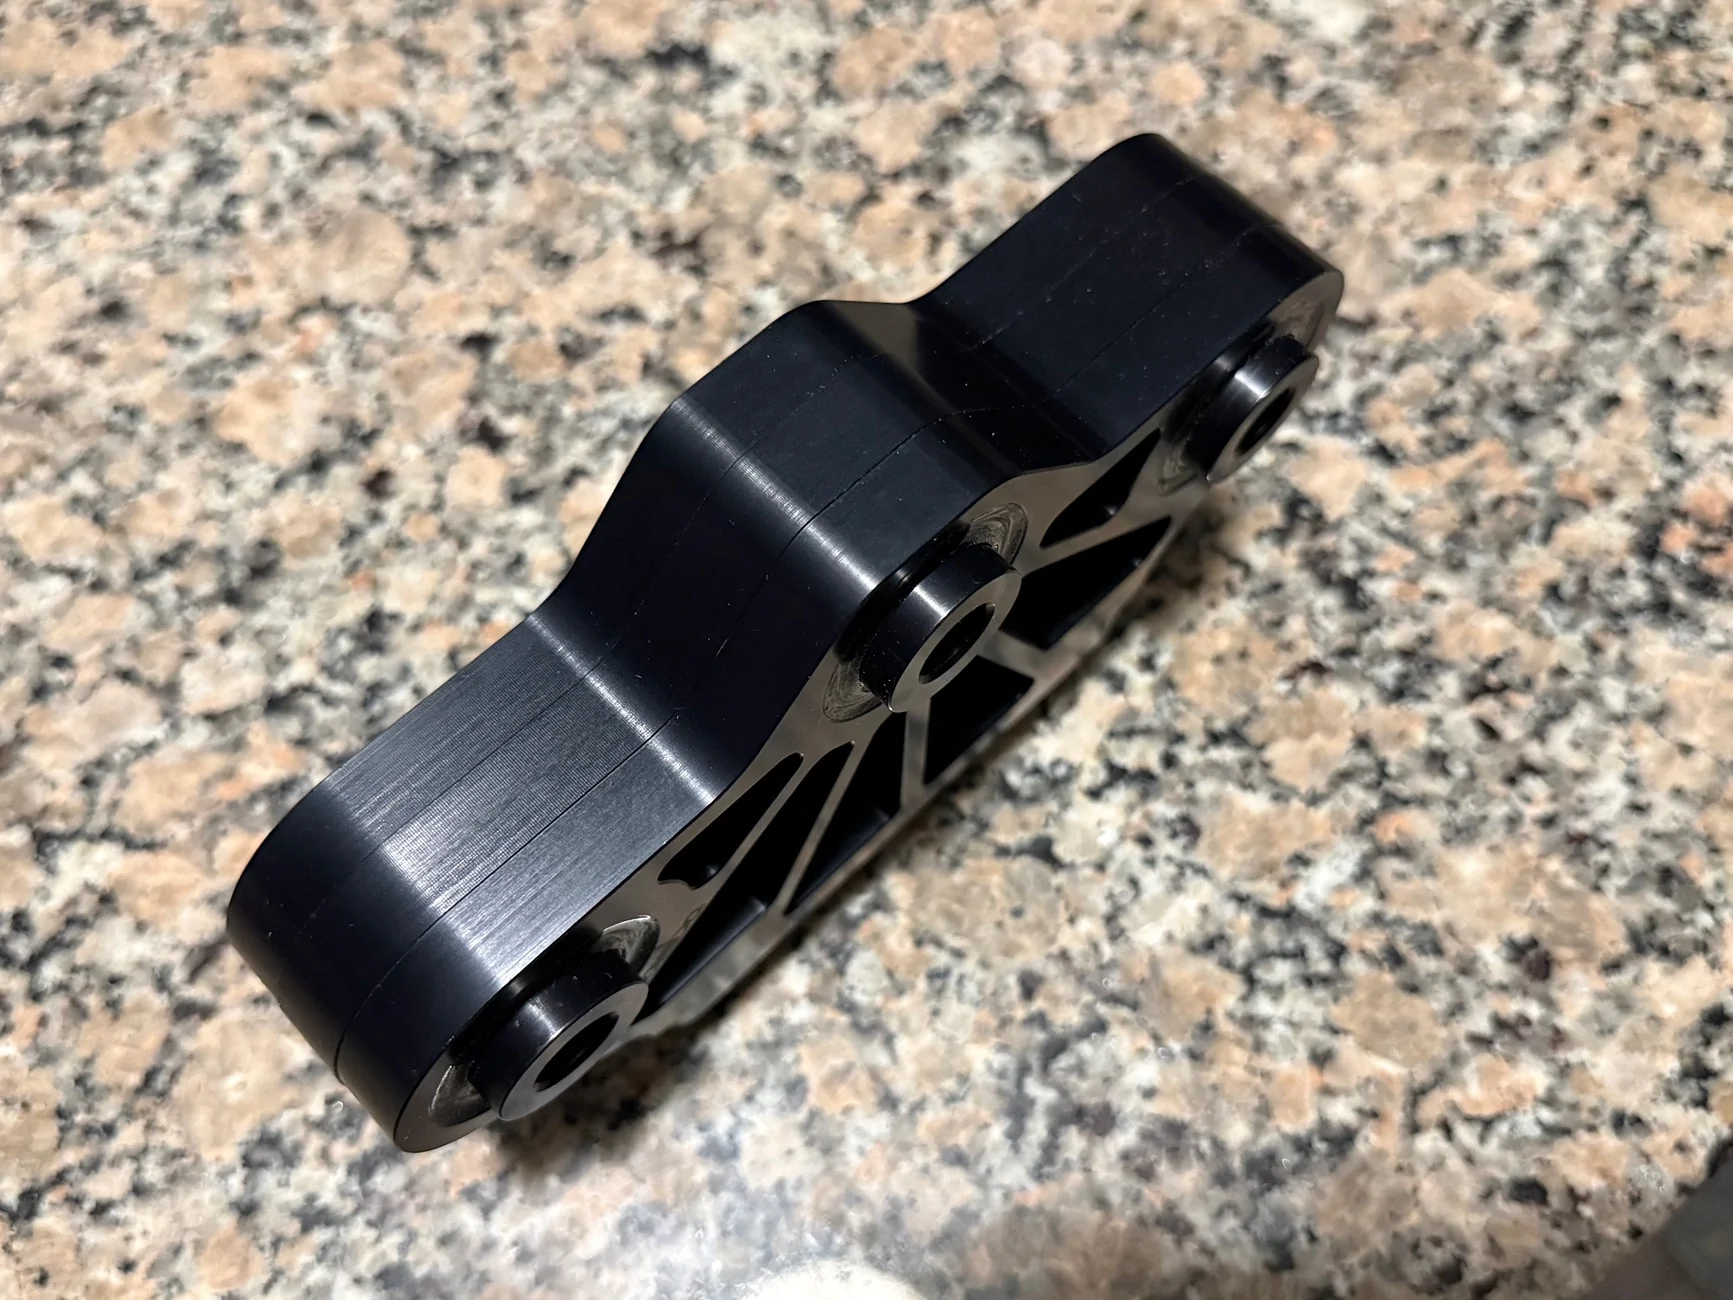
Also I got this new transmission mount in from a fellow forum member. Looks very promising. It’s always bugged me I stiffened the front mounts a lot and never addressed the rear mount. This was far easier than making my own.

IMG_4343.webp


IMG_4344.webp
Sponsored

 
Last edited:
OP
OP
AcceptableNebula

AcceptableNebula

Well-Known Member
Joined
Apr 5, 2023
Threads
19
Messages
335
Reaction score
927
Location
Massachusetts
First Name
Jake
Vehicle(s)
2023 Ford Mustang GT Premium
Apparently the nice gentleman from Flowstate liked my idea…

IMG_4347.webp
 
OP
OP
AcceptableNebula

AcceptableNebula

Well-Known Member
Joined
Apr 5, 2023
Threads
19
Messages
335
Reaction score
927
Location
Massachusetts
First Name
Jake
Vehicle(s)
2023 Ford Mustang GT Premium
Well a little more progress tonight. Ended up having to generate a larger font to get the numbers correctly sized to be closer to the OEM one. Also decided to ditch the decimal point accuracy for a math equation that just rounds to the nearest whole number. Should be more at a quick glance gauge and not something I have to stare at. Tomorrow on to tweaking the sweep coding to get a little closer to OEM.

IMG_4297.webp


IMG_4365.webp


My Accusump arrived today. I will feel a lot better about starting the car after it sits for anywhere up to 6-7 months. Just gotta find a spot to mount it. Hopefully my BMR subframe has given me enough real estate for it.

IMG_4360.webp
 
OP
OP
AcceptableNebula

AcceptableNebula

Well-Known Member
Joined
Apr 5, 2023
Threads
19
Messages
335
Reaction score
927
Location
Massachusetts
First Name
Jake
Vehicle(s)
2023 Ford Mustang GT Premium
I think I’m finally happy with the graphical side of it. I attempted to get the tail to mimic the OEM sweep as much as I could. Since I never drive the car, I actually had to watch videos of other people driving their cars on YouTube to get an idea of the basic behavior. If I am driving it, it’s usually at a track and the last thing I’m worried about is the sweep algorithm. Of course, it doesn’t actually read any sensors yet but that’s a minor detail since the car doesn’t run yet. Making a scaled 3.3v sensor work is the easy part.


Also had 1 cylinder head arrive. Of course when I need them, Ford has a factory back order on the passenger side head. Edit: Found one!
IMG_4367.webp


I wanted to change a couple things on the fuse box lower that I made. The fit was 9/10 but I decided to make the little tweaks then reprint it. I also wanted to try ASA Carbon Fiber Filament. It’s the same material that Flow State used to make the gauge pod. It’s further heat resistant, prints at over 530F, and is UV/Weather Resistant so I’ll give it a go. Has about 5 hours left printing at the moment.

IMG_4392.webp
 
Last edited:

Sponsored

hojo_5oh

Member
Joined
Feb 10, 2020
Threads
1
Messages
12
Reaction score
62
Location
Maryland
First Name
Andrew
Vehicle(s)
17 Grabber Blue Premium GT
This is the only spot I could think of. It is literally resting in it, but I used sliced rubber hose in 3 spots that lock it in place. Someday I’ll buy another engine harness and re route it from the back of the engine and put the PCM in the little cubby in the lower wheel well close to the door. I don’t like that the main harness passes by my wastegate on the passenger side. By the scuffs on my harness connector, it appear my air filter on that turbo is a 4th item holding it in place 😂

IMG_4101.webp

Mounted mine right on the frame rail. I myself at some point will buy another harness and re do it and learn from my “mistakes”
IMG_0694.webp
IMG_0744.webp
 

JTM88

Well-Known Member
Joined
Aug 14, 2024
Threads
3
Messages
135
Reaction score
344
Location
Tulsa, OK
First Name
Jason
Vehicle(s)
'20 Mustang GT ESS G3/G4 PP1
First off, amazing build. I may have missed it, but what is the screen your using for your gauge?
 
OP
OP
AcceptableNebula

AcceptableNebula

Well-Known Member
Joined
Apr 5, 2023
Threads
19
Messages
335
Reaction score
927
Location
Massachusetts
First Name
Jake
Vehicle(s)
2023 Ford Mustang GT Premium
First off, amazing build. I may have missed it, but what is the screen your using for your gauge?
Waveshare LCD 1.85”. Initially I started with an AMOLED display as it’s more vibrant with better resolution but after some research I learned they are not as robust for car applications and static images can burn into the display long term.
 
Last edited:
OP
OP
AcceptableNebula

AcceptableNebula

Well-Known Member
Joined
Apr 5, 2023
Threads
19
Messages
335
Reaction score
927
Location
Massachusetts
First Name
Jake
Vehicle(s)
2023 Ford Mustang GT Premium
@hojo_5oh You already moved your fuse box so that was the smart move.
 

Sponsored
OP
OP
AcceptableNebula

AcceptableNebula

Well-Known Member
Joined
Apr 5, 2023
Threads
19
Messages
335
Reaction score
927
Location
Massachusetts
First Name
Jake
Vehicle(s)
2023 Ford Mustang GT Premium
The fuse box finished overnight. The outer layer is a bit rough but overall the print is perfect. The outer layer pass slows down a lot for a good melt-in but where it was printing fast it was smooth. So in the future I’ll speed up the shell passes. I will likely just have to try to either sand the faces or try a brushing them with solvent to smooth it out. The inside will get coated in something as sandpaper texture and wires likely won’t mix well.

IMG_4398.webp


IMG_4397.webp


IMG_4399.webp
 

HKusp

Well-Known Member
Joined
Jul 22, 2021
Threads
37
Messages
2,228
Reaction score
2,876
Location
Hampton, Md.
First Name
Jason
Vehicle(s)
2018 Mustang GT
I am amused by what you term "the easy part". The skillset you have is such a high level compared to most of us reading this thread it's nuts.
 
OP
OP
AcceptableNebula

AcceptableNebula

Well-Known Member
Joined
Apr 5, 2023
Threads
19
Messages
335
Reaction score
927
Location
Massachusetts
First Name
Jake
Vehicle(s)
2023 Ford Mustang GT Premium
Well this week wasn’t very productive as I spent the week in Florida. Was pretty amazing tho being in 80 degree weather while the northeast got pounded with snow.

I got lucky and found a new RH cylinder head online. I ordered that up at an inflated price but it is likely one of the few available. It arrived before I got back. Now I have to strip those today so I can get them out for CNC porting. I’m leaning towards Livernois as they actually publish flow numbers after, and the increase seems pretty substantial. L&M just says they do the biggest port possible, but I couldn’t find flow numbers. Against my better judgement I put the porting service from MMR in the cart, but wanted to call them to confirm timelines and pricing. The guy said he thought it was correct, didn’t know the flow numbers. When I went back to my cart the price more than doubled lol. Needless to say I expected some surprise as that’s what I always get from them. Maybe the site was outdated, perhaps they have my number flagged as a PITA customer.

IMG_4482.webp


This morning I milled out the new bezel for the gauges. I decided to pivot from the Carbon Fiber plate and went with black polycarbonate plastic. I wanted to put a counterbore in the bezel to a very slight interference fit. There was no way to avoid the lines but I thought perhaps when the displays are off, it would look like a solid lens.

IMG_4496.webp


IMG_4499.webp


IMG_4498.webp


My new Boss 302 intake also arrived. I’ve seen the Boost Proof model out there that has good success but I want to tackle that concept on my own. Since the upgrade is only $100, there isn’t much getting done, even though it is definitely effective.

I did take the top cover off and to my surprise it’s just double sided taped on there. So my guess is perhaps they bond the top plate on and that would definitely stiffen the lid. I’m still running down my thoughts and I’ll eventually have a solution. Almost looked like the BP model has something that appears to be squeeze out from under the Boss 302 plate, so it’s plausible.

IMG_4481.webp


IMG_4480.webp
 
Last edited:
OP
OP
AcceptableNebula

AcceptableNebula

Well-Known Member
Joined
Apr 5, 2023
Threads
19
Messages
335
Reaction score
927
Location
Massachusetts
First Name
Jake
Vehicle(s)
2023 Ford Mustang GT Premium
Well the heads are stripped and on their way to Livernois. Should have them back in 2-3 weeks.

I finally got all the connectors depinned and numbered along with the pinout maps created. I ordered a couple Haltech firewall grommets and it seems like they will work out well. So with the wires thru, I have isolated about 6-7 wires I will have to extend from the engine harness. As you can see, I have quite a few to shorten. By quite a few, I mean 108 just for the Engine and Transmission harnesses.

IMG_4555.webp


I hit a little speed bump with the engine connector for the PCM. Since the latching mechanism is part of the wire dress cover and it’s also offset from center, so it cannot be reversed in any way. I thought perhaps I could flip the terminal lock upside down and repin the connector in that orientation but it won’t latch to the PCM. So I figured if 2288538-1 is facing vertically, perhaps 2288538-2 faces down. Well that quickly hit a dead end as it’s an OEM locked item and you can’t even view the drawings. So I checked the F150, Expedition, and Super Duty PCM harnesses and they were either the same exact connector and wire dress cover or completely different. I took a long shot on the Explorer and although the 2.3 uses a different connector, I think I stuck gold with the 3.0 Explorer. It’s the same 126 cavity connector but it’s flips the connector 180 degrees (which helps me) and it’s got a wire dress cover that offsets to the side. So I ordered a new 20-24 Explorer engine harness so fingers crossed that pans out. I can use the wires from it to extend the ones I need to extend.

IMG_4532.webp


IMG_4534.webp


My billet E Hub came in today also. This is the last piece to get the max number of clutches into my 10r80 which will essentially be a 10r90 with between 6 and 8 clutches from B thru F. Should be a massive upgrade over stock. They also have a billet CDF drum for $2000 that would give me 1 more D clutch than I will have with the 10r90 drum but I don’t see a need for that yet. We haven’t seen any wear on the reaction shell or damage to the CDF drum so we will see.

IMG_4550.webp
 
Last edited:
OP
OP
AcceptableNebula

AcceptableNebula

Well-Known Member
Joined
Apr 5, 2023
Threads
19
Messages
335
Reaction score
927
Location
Massachusetts
First Name
Jake
Vehicle(s)
2023 Ford Mustang GT Premium
I got the transmission harness pinned back into the connector and the harness wrapped. I can’t secure it in its location until the other 2 harnesses are done.

IMG_4559.webp


While sorting the harness out on the passenger side head, I realized the coil feed wires are pretty lame. One 16 ga wire feeds a buss and it spiders out to the coils. When you do the math it’s a bit alarming.

Stock 7,400 rpm x 8 cylinders divided by 2 = 29,600
That equals about 493 spark events per second.
So basically somewhere in the engine a cylinder is firing every 2.03 milliseconds. Moving that up to 8,500 rpm cuts that window to 1.76 milliseconds or about 13% less. That totals about 14.12ms total time between a single cylinder firings. Obviously commanded dwell is not that long, so in theory it’s fine. I felt like upsizing that as I am anticipating finding better coils that have been reliability that the common choices I see in aftermarket coils. I upsized all the branches to 18ga from 20ga and each head will have its own 14ga feed. I’ll have some pics tomorrow night after I wrangle the spaghetti a bit more.

Finding grommets for the Engine and Transmission was fairly easy but to run the body and fuse box wires thru the wiper cowl proved to be a bit harder. I decided to pick up some TPEE filament and make a flexible insert for the factory grommet. TPEE is a flexible plastic but has a much higher heat resistance than others like TPU. The hole for the grommet is good sized but only allows about a 5/8” sized harness thru it. So I cut out the center and made an insert with a 3/4”, 1/2”, and 3/8” holes with sleeves to get the 3 total harnesses into the wiper cowl.

IMG_4570.webp


IMG_4569.webp


IMG_4568.webp
Sponsored


Top