OP
OP
NGOT8R
Well-Known Member
- Thread starter
- #241
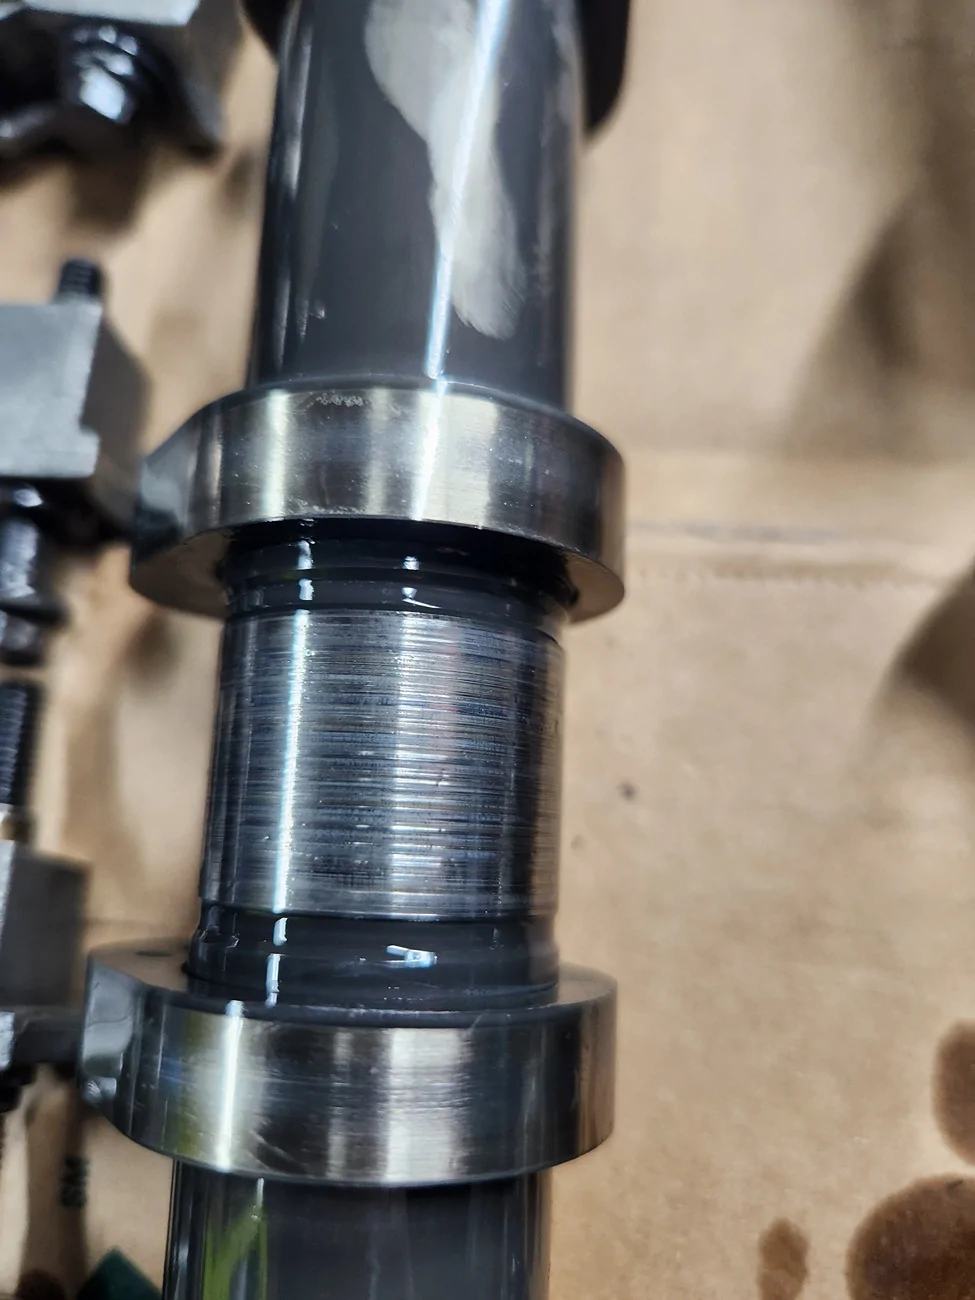
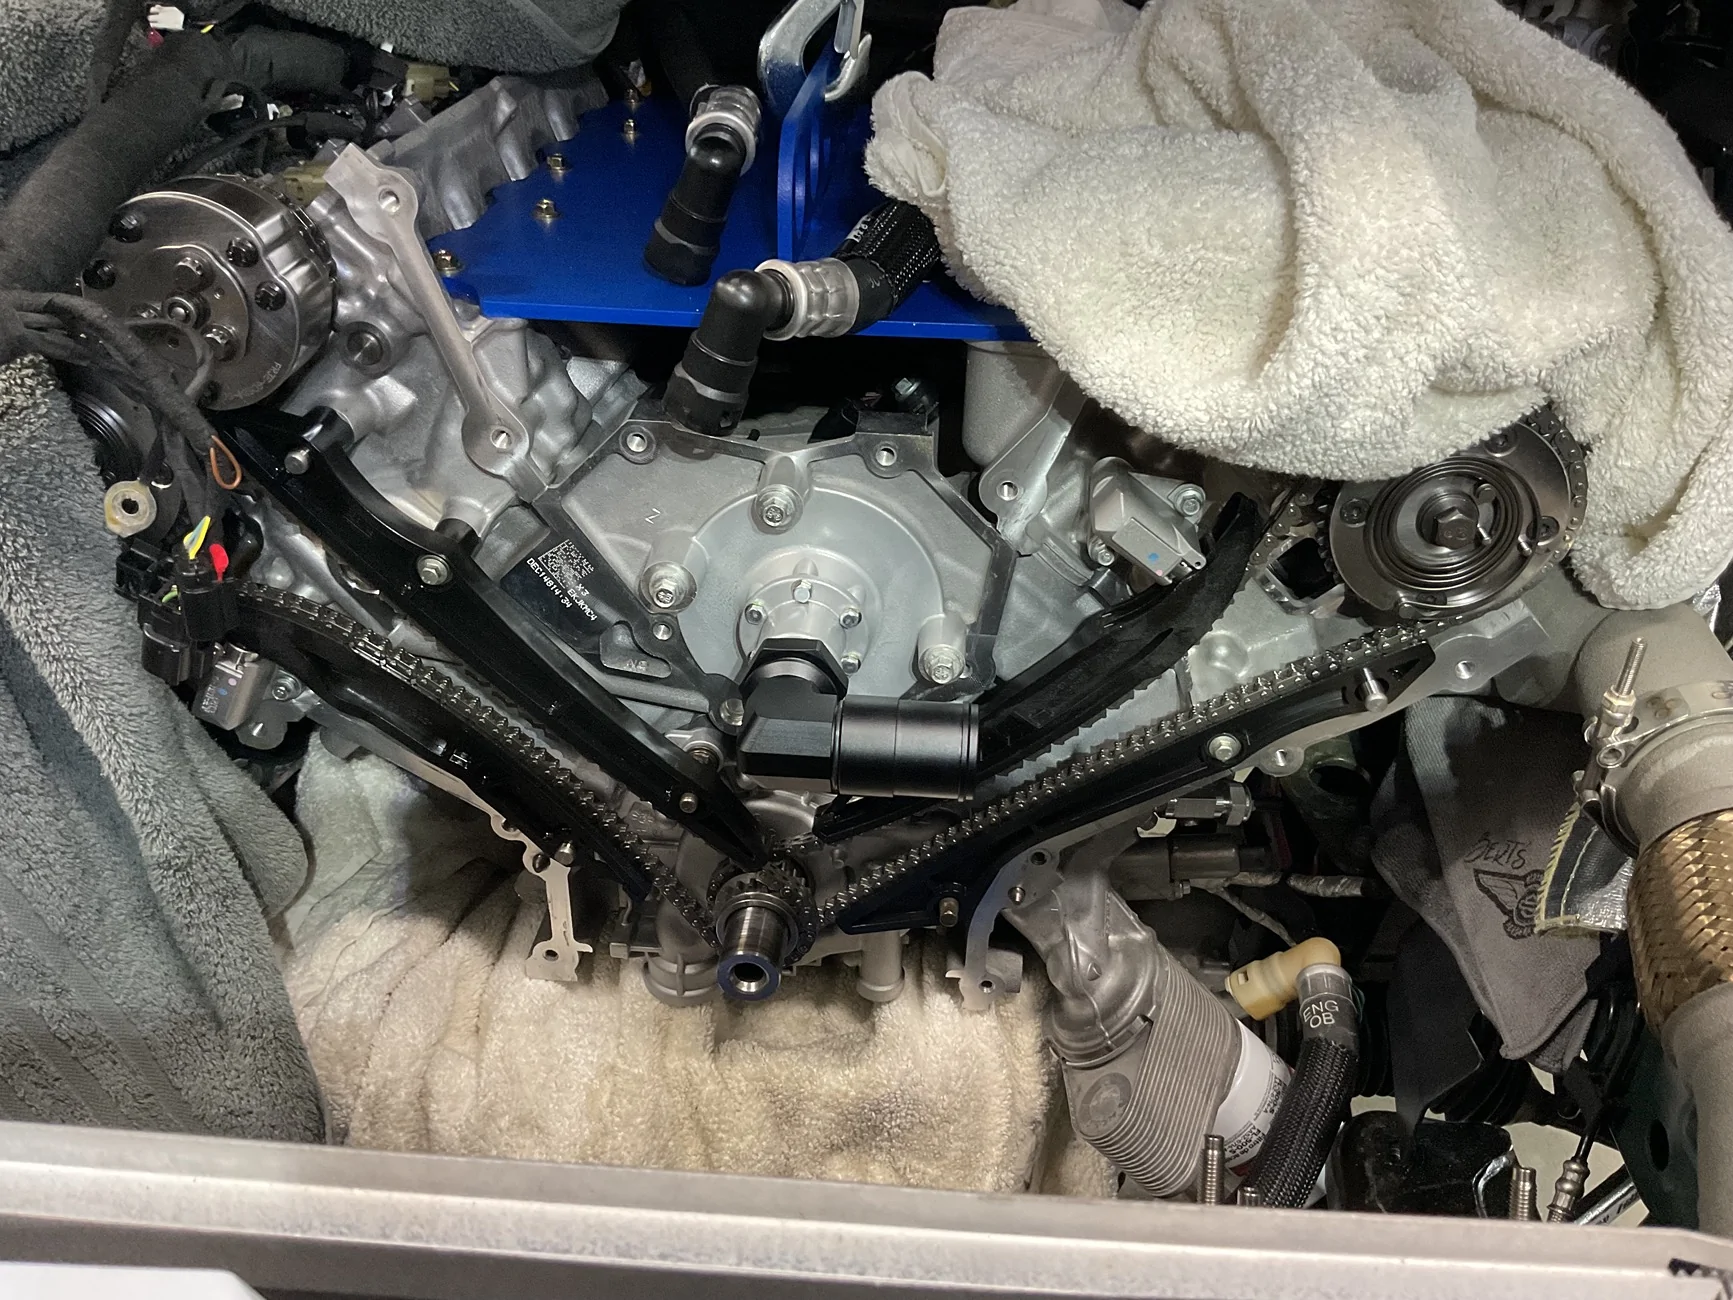
I see exactly what you’re saying there. It is indeed a tricky procedure. I keep going back rechecking myself because I “NEED“ this to be right on the first go. If I were to have to pull everything back off because I’m off a tooth, it would be almost like starting from scratch again for me once the turbo installation is complete.Well, when it says 5 o'clock what's exactly 5 o'clock? It could be 4:50 or 5:10 on a clock dial, it doesn't take much to be a tooth off.
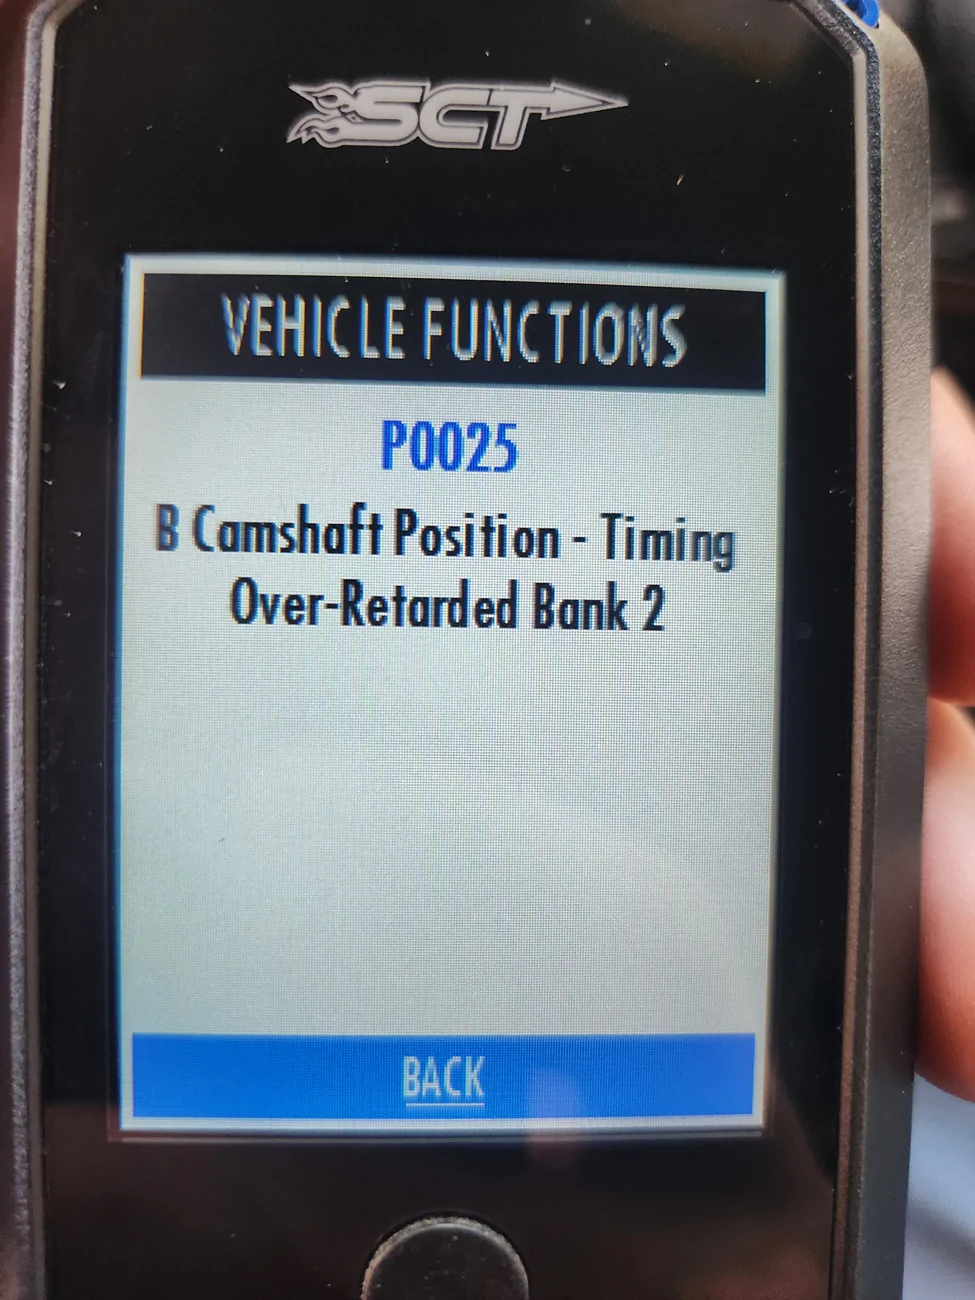
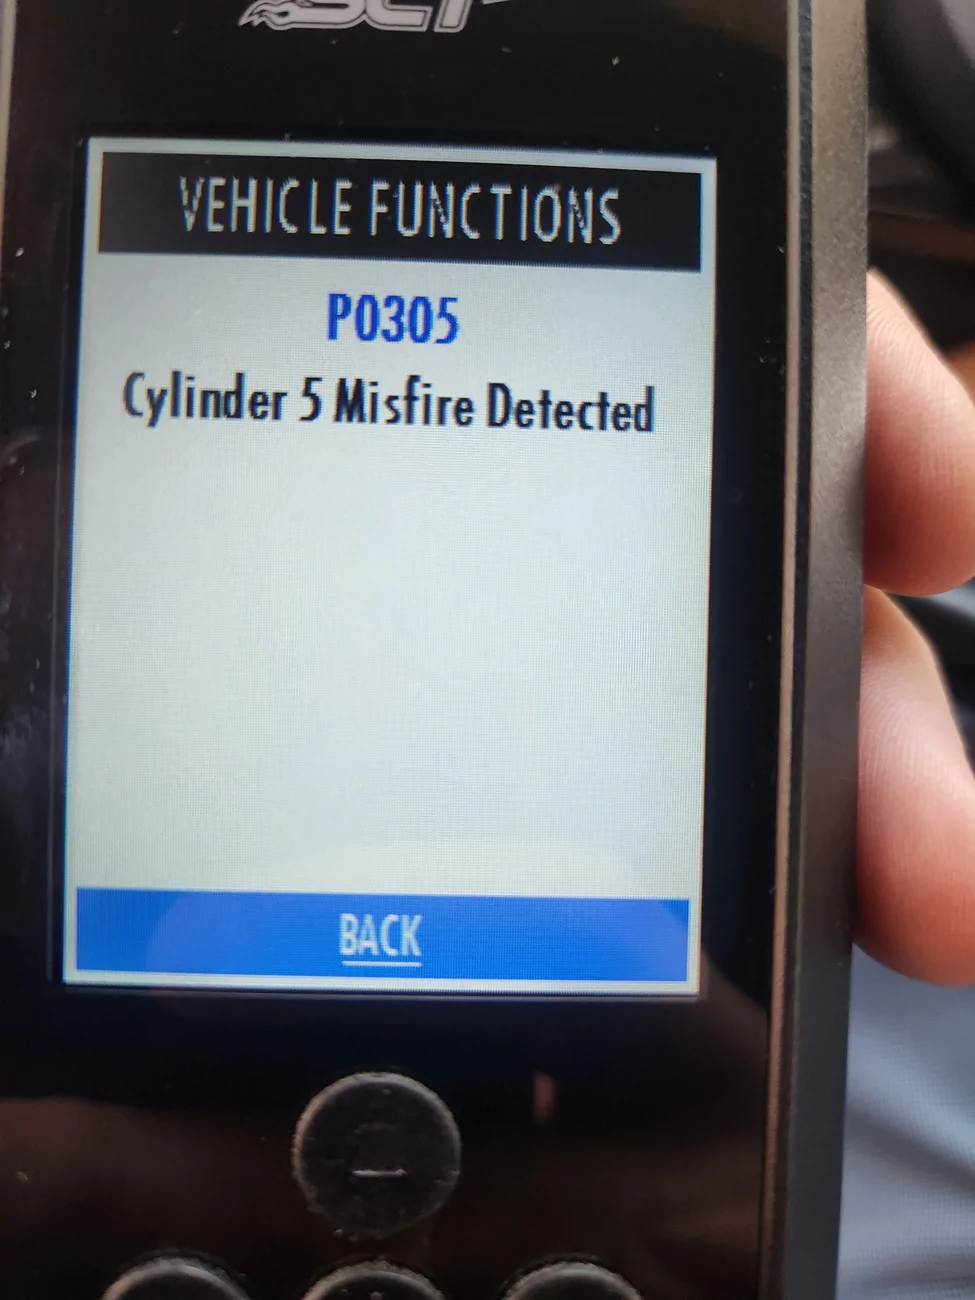
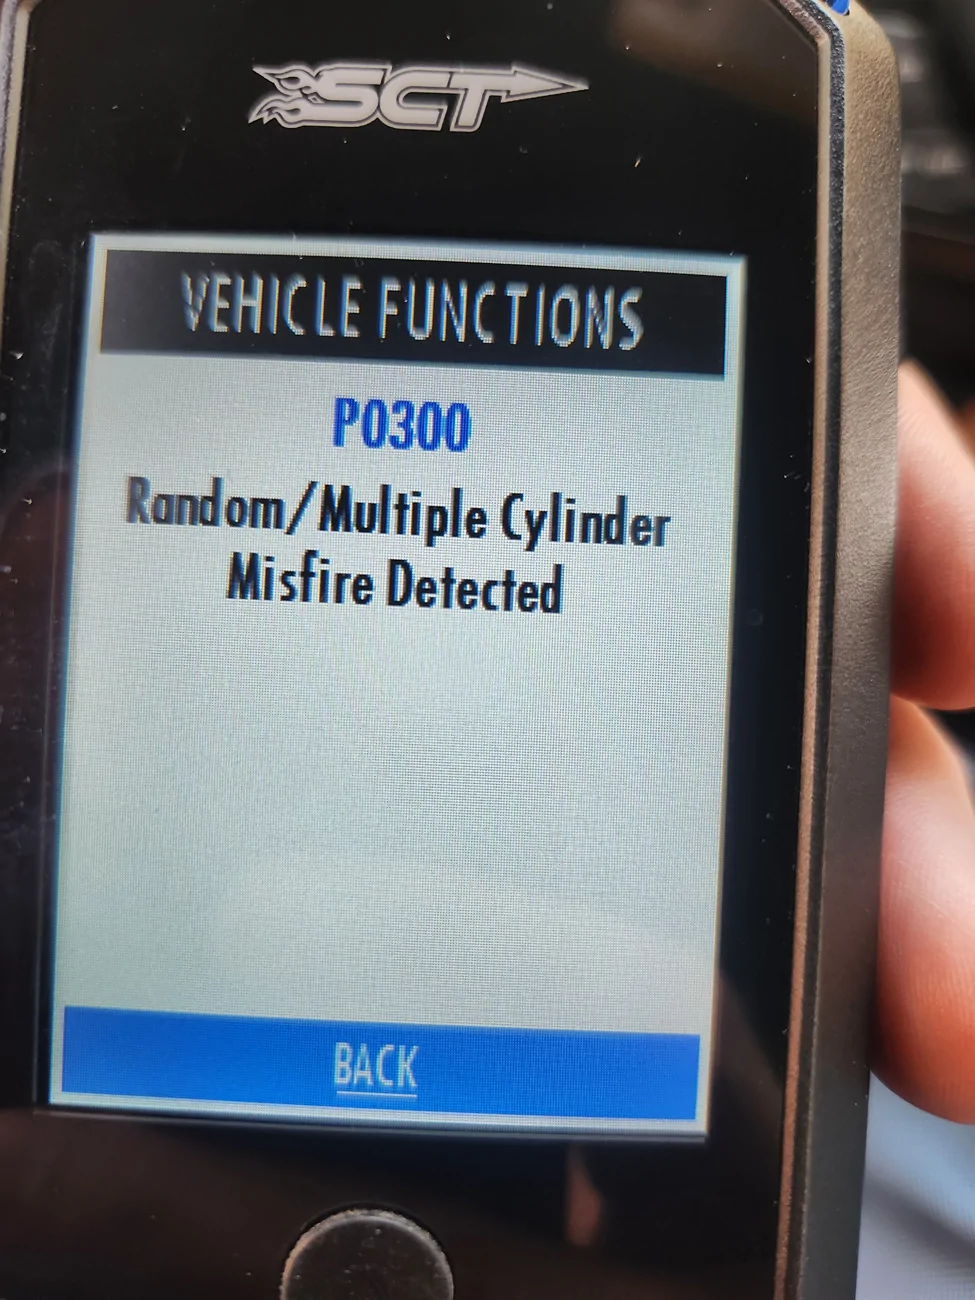
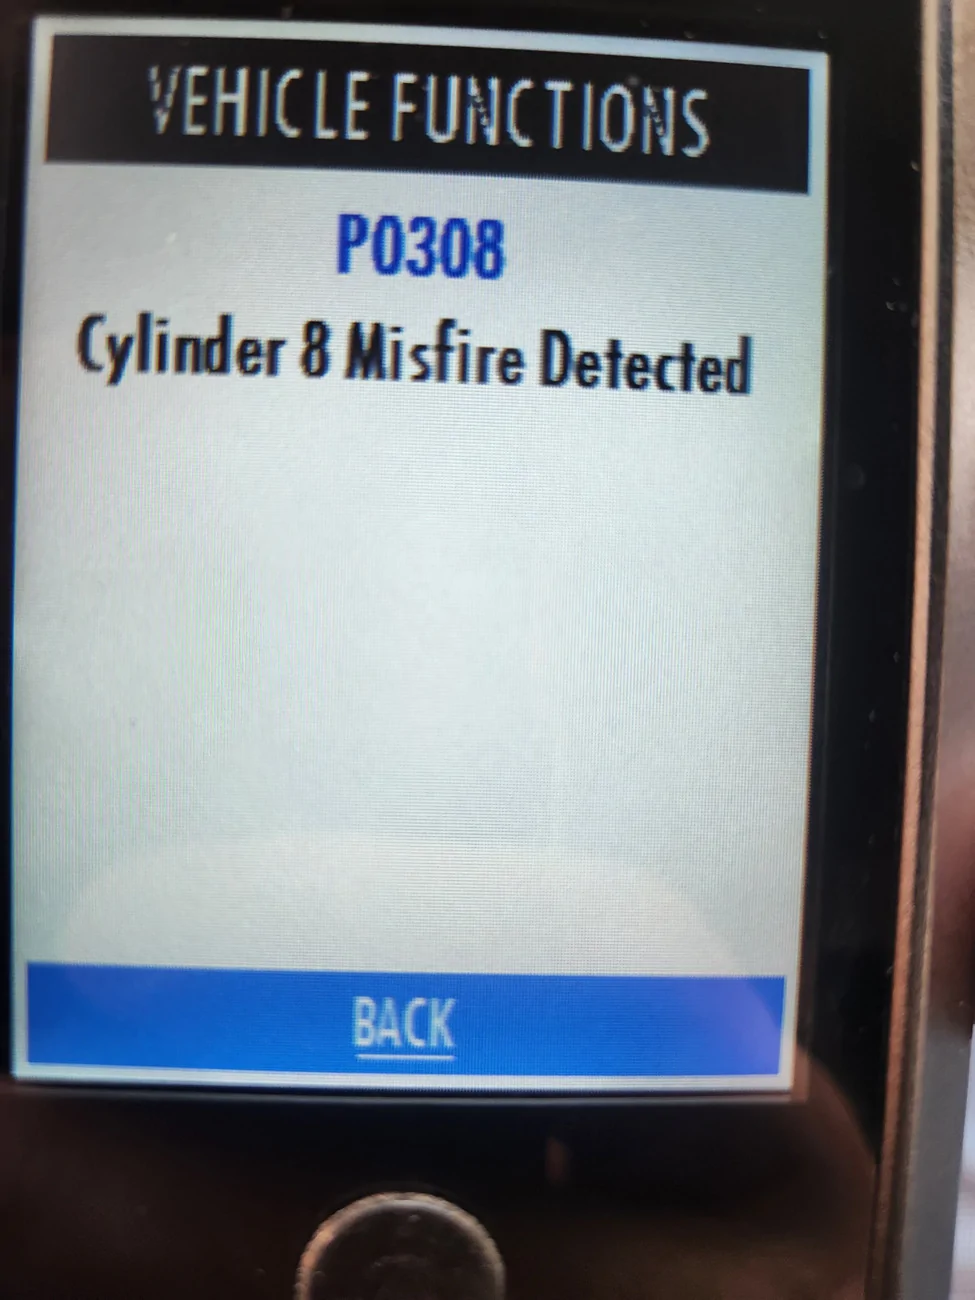
What codes did you get on yours the three times you’ve had to retime the motor?
Sponsored