papinist
The Italian Pony
- Joined
- Nov 30, 2014
- Threads
- 47
- Messages
- 3,188
- Reaction score
- 781
- Location
- Tuscany, Italy
- First Name
- Stefano
- Vehicle(s)
- Mustang EcoBoost MT Race Red EURO - NO MORE
- Thread starter
- #1
Here I am again with a new saturday morning project 
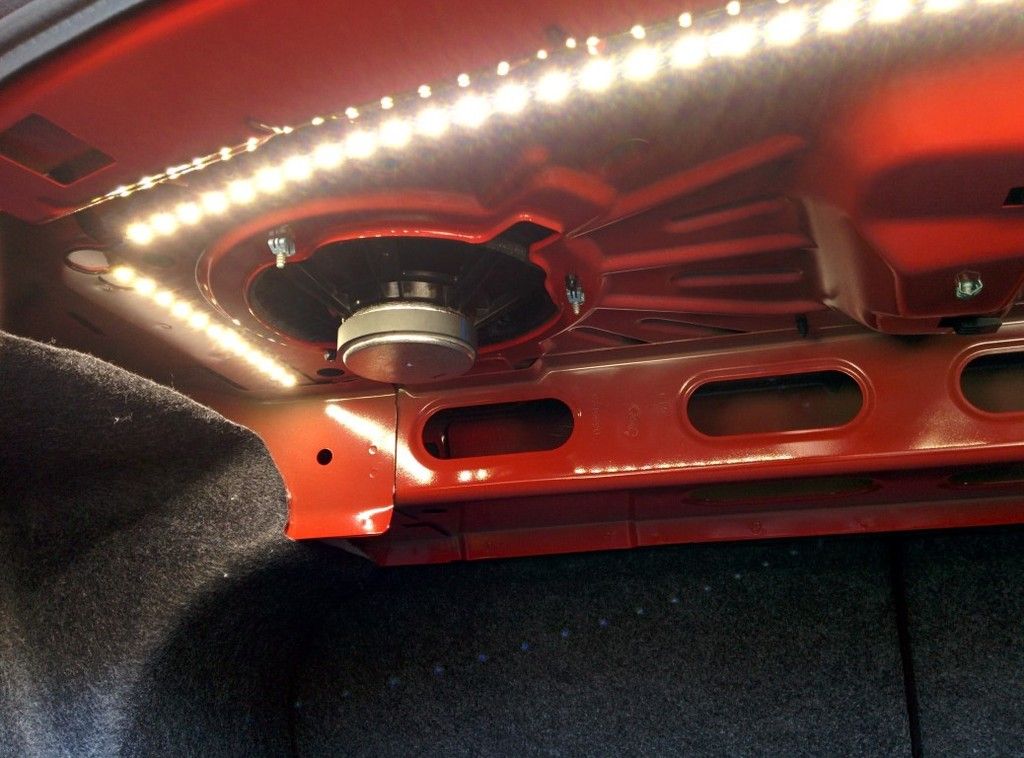
Found this cool idea in DIY section: replace the poor trunk light with a set of led strips!
You won't see the strips from outside since they are recessed in trunk roof but you'll gain great visibility.
As always, I get the idea and try to do something better\simplier with less stuff\work. So I made a new thread to not clutter the other one with too much pics of my setup.
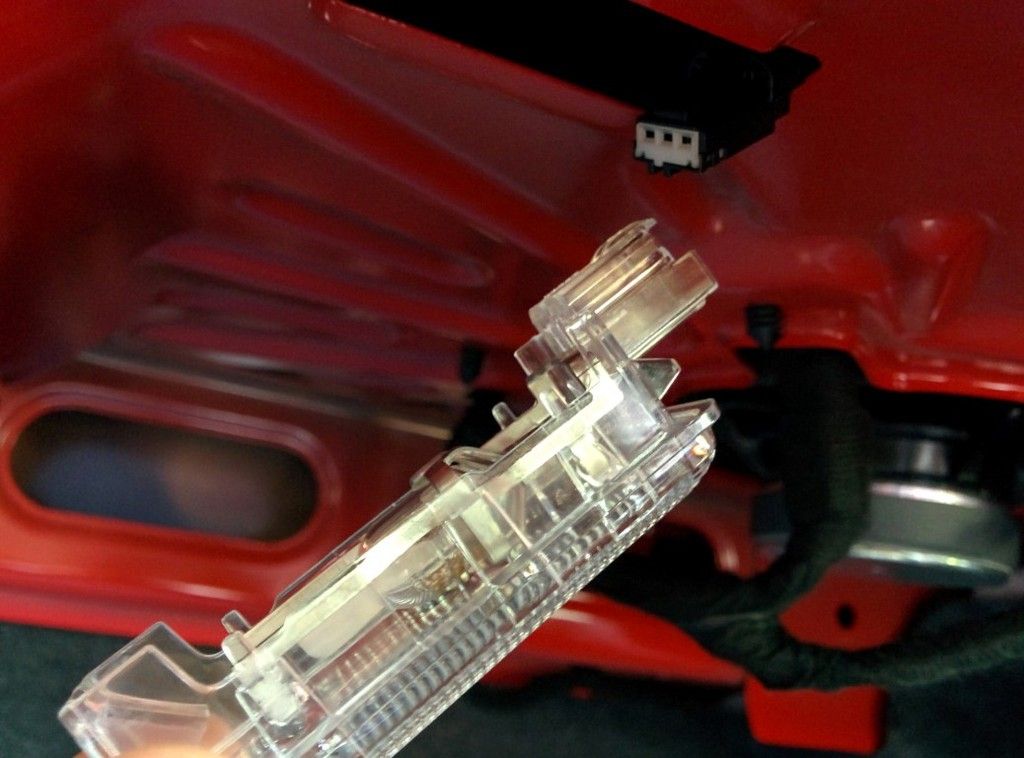
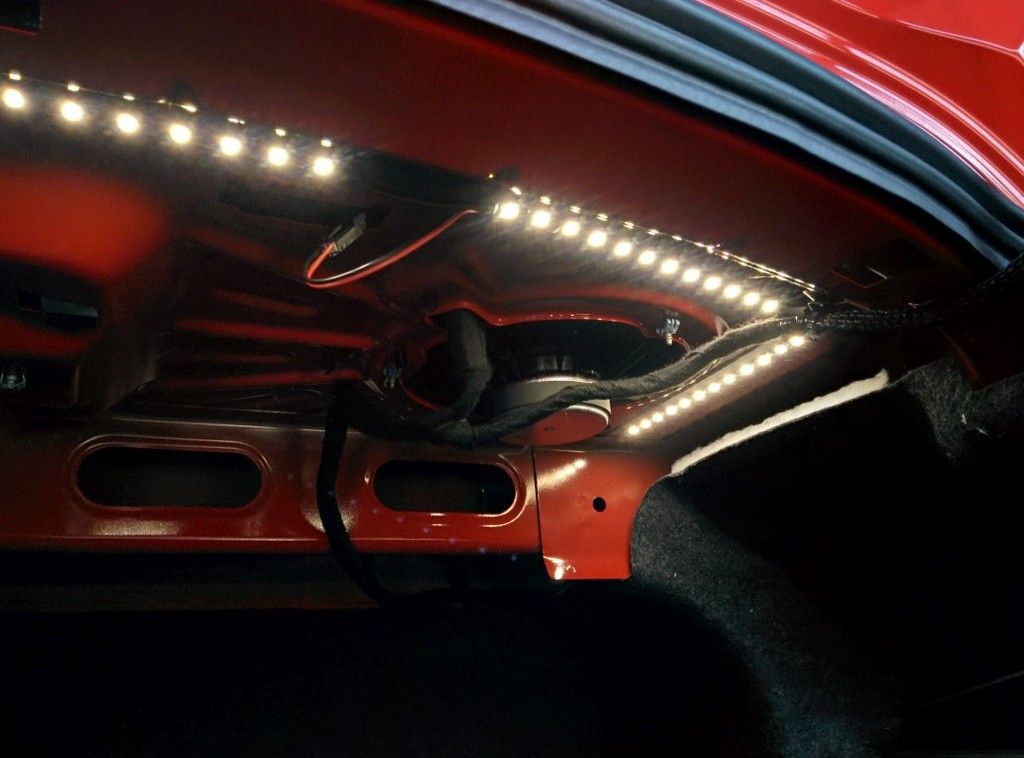
Our mate used a specific connector, but after having bought it I realized that it's not needed. Simply cover the wire tips with solder tin and then push them in trunk light connector.
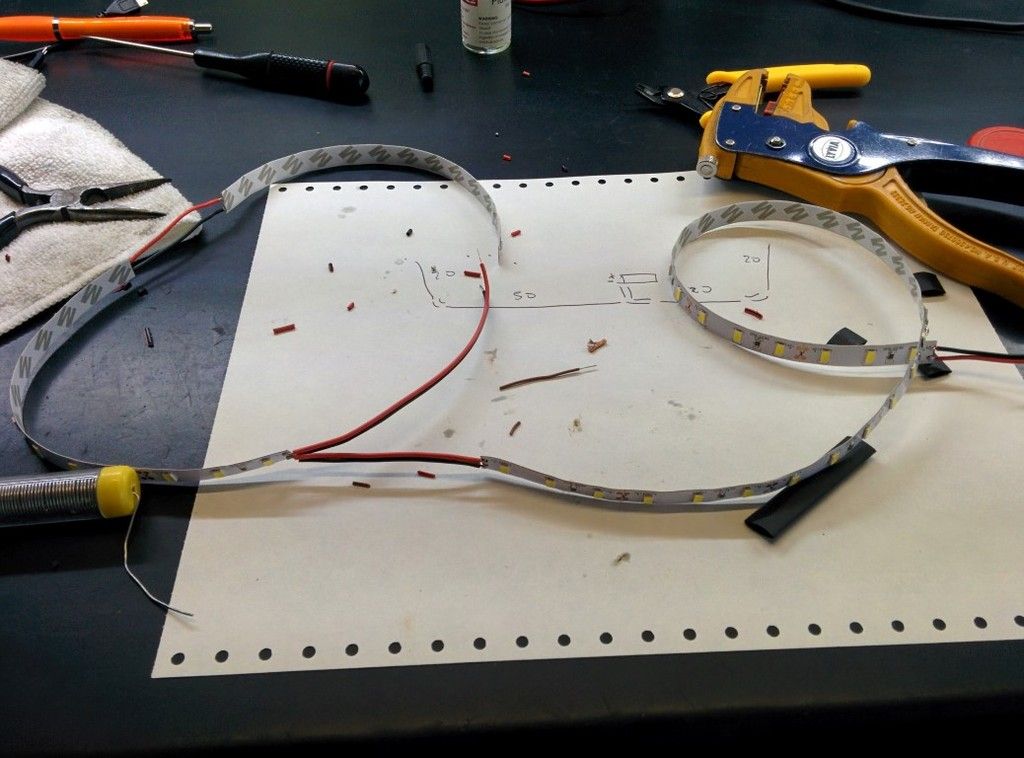
I also used more led strips (about 110 cm) since I have some spare laying around. Yes I know that I used a non waterproof strip, but the waterproof one I bought it's not bright enough and don't want to buy again..
This is a really easy job, but you will get great results
You will need:
- led strips (about 110-120 cm) - a brighter one! I bought 5050 led strips but wasn't too excited with the brightness, So I have some spare 5630 led strips way brighter and I used this. Better if you use a waterproof one, but IMO it's not mandatory. This is the exact led strips I used (5630 leds natural white) http://www.ebay.it/itm/12V-5M-300LE...-Light-2015-/261915966505?hash=item3cfb687c29, it's only 6 USD for 5m and free shipping
- some spare wires
- solder iron and tin
Starting setup (I forgot to take a pic of the illuminated trunk with stock bulb)
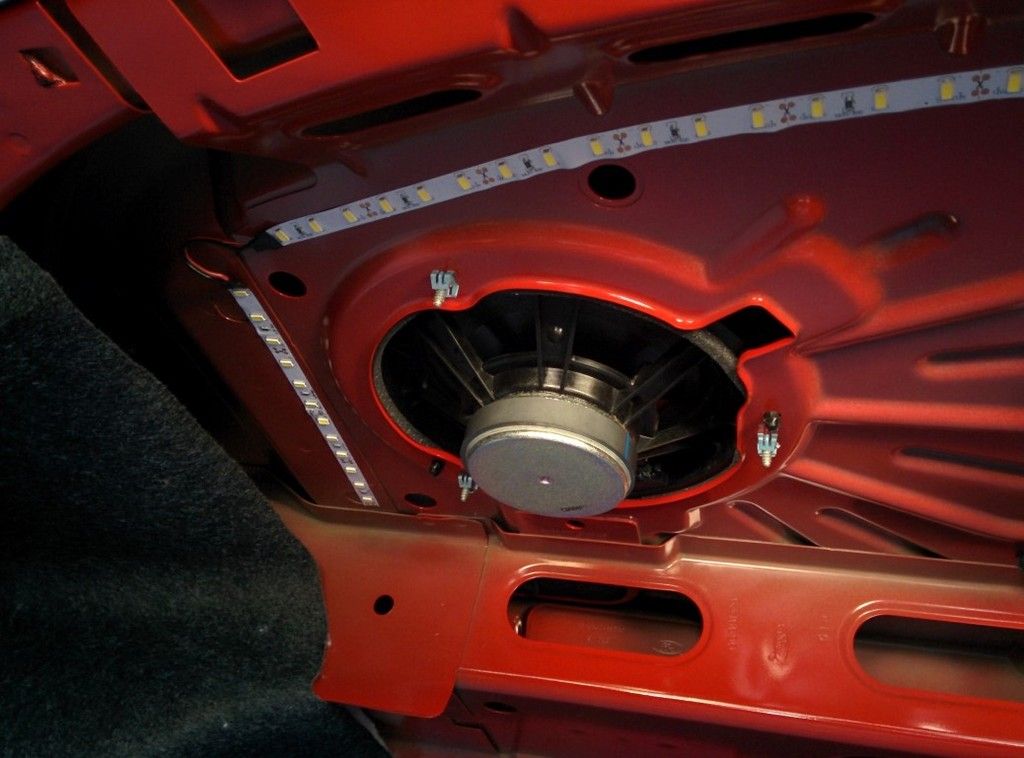
First of all, remove the trunk light housing. Simply push it out with a flat head screwdriver on the left side (the one opposite the subwoofer) and disconnect the connector (there is a lip to be pushed)
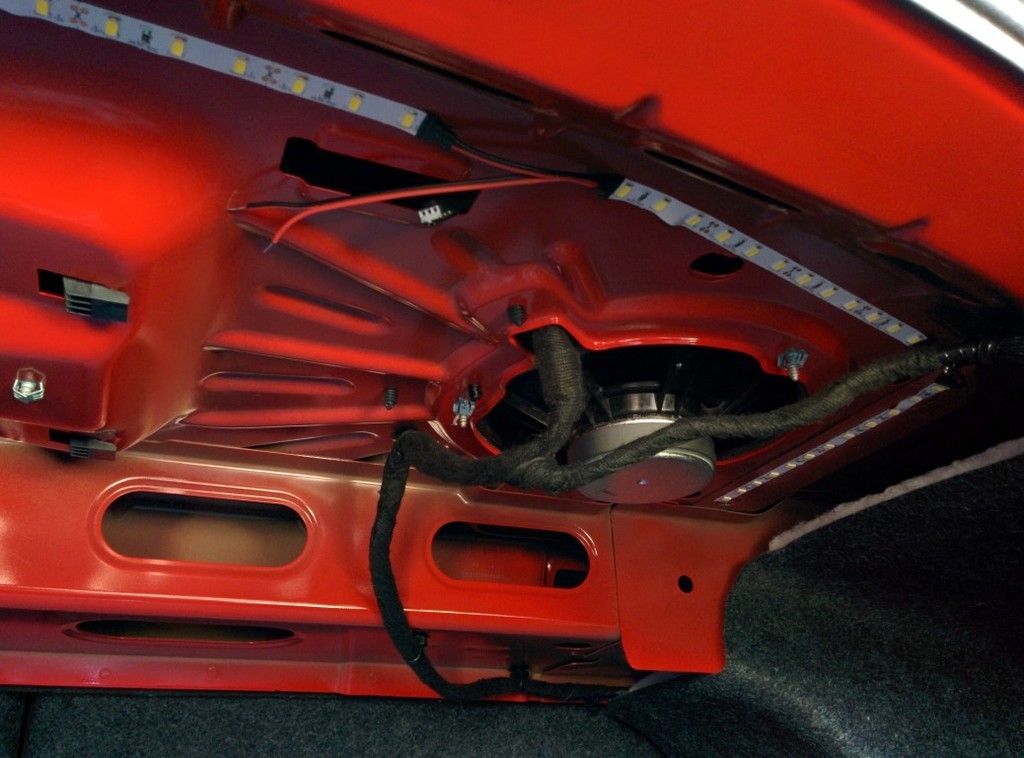
I took all measurements and finished with a 20-50-20-20 cm setup. The wider side is divided in two to allows soldering wires from power source. If you want to put the sun in your trunk, put another 70-80 cm strip on the other side of this 'rectangle' (you can see my schematics in the paper on the workbench)
Then with you solder ability ;) you need to solder some spare wires between the strips to allow them to be angled. You can also buy the specific angled connector, but I don't want to buy other unneeded stuff.
I also covered the soldered joints with heat shrink tube, though it's not needed.
Ready to be installed!
Peel over the back protection and place the strip on the trunk roof - you can curve it a bit where needed.
(this 20 cm chunk could be 30 cm)
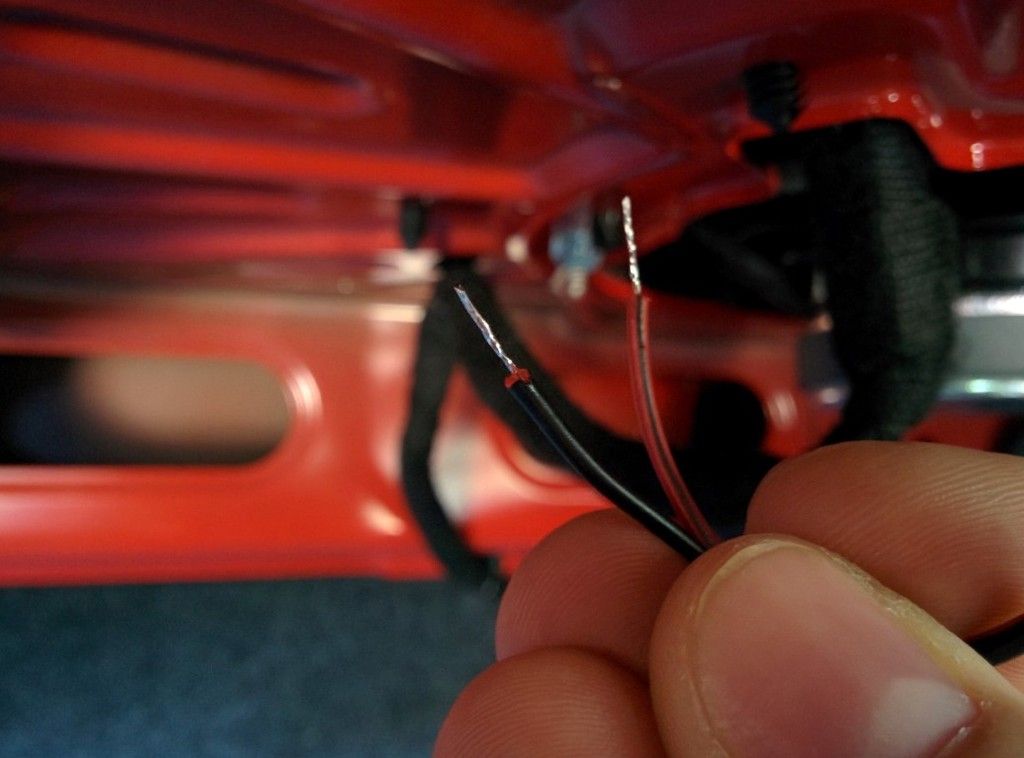
Then put the tinned tips..
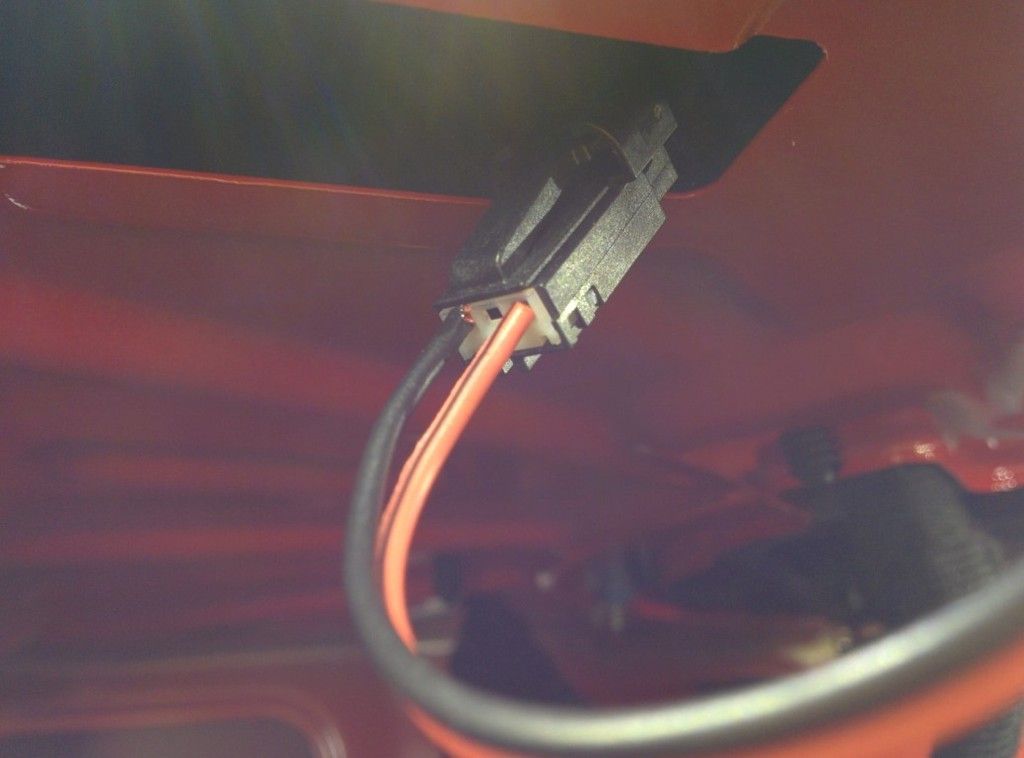
..inside the connector
and voilà, your trunk is now a concert stage!
Don't forget to put some electrical tape onto the connector to avoid the wires to fall off.
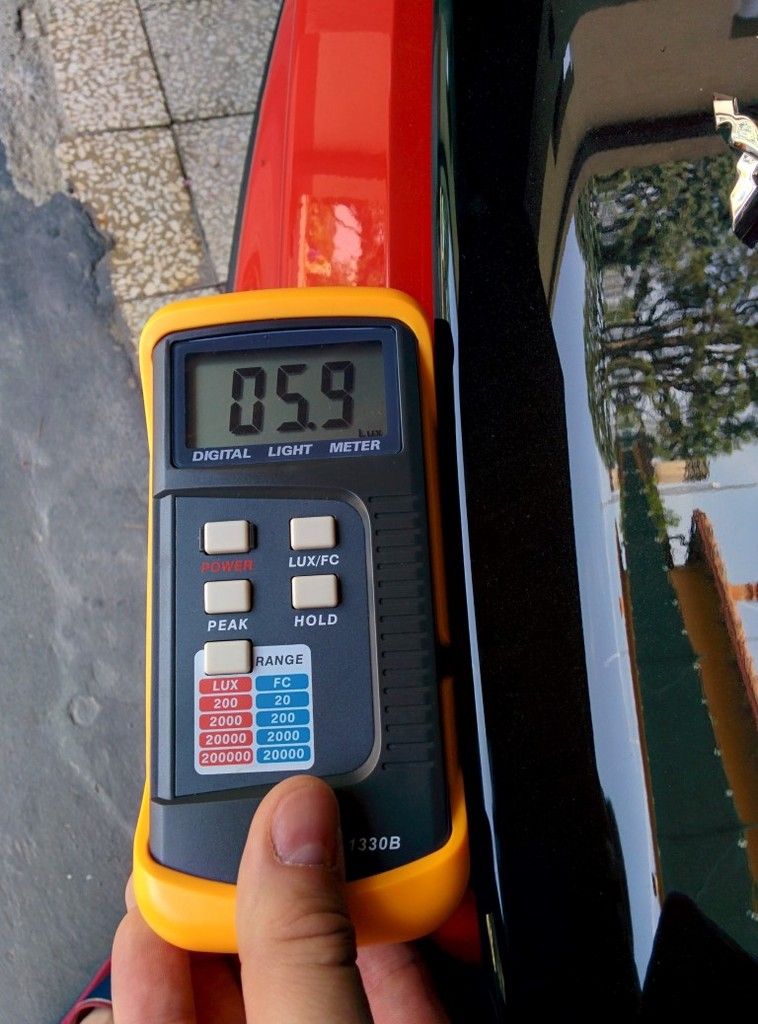
Even if the improvment is clear, I wanted to have the concrete evidences of it and took some measurements:
Stock light
LED strips
Now... I don't know how much a LUX is, but I know that 311 lux are WAY MORE than 5,9 lux :headbonk: :clap2:
:cheers:
Found this cool idea in DIY section: replace the poor trunk light with a set of led strips!
You won't see the strips from outside since they are recessed in trunk roof but you'll gain great visibility.
As always, I get the idea and try to do something better\simplier with less stuff\work. So I made a new thread to not clutter the other one with too much pics of my setup.
Our mate used a specific connector, but after having bought it I realized that it's not needed. Simply cover the wire tips with solder tin and then push them in trunk light connector.
I also used more led strips (about 110 cm) since I have some spare laying around. Yes I know that I used a non waterproof strip, but the waterproof one I bought it's not bright enough and don't want to buy again..
This is a really easy job, but you will get great results
You will need:
- led strips (about 110-120 cm) - a brighter one! I bought 5050 led strips but wasn't too excited with the brightness, So I have some spare 5630 led strips way brighter and I used this. Better if you use a waterproof one, but IMO it's not mandatory. This is the exact led strips I used (5630 leds natural white) http://www.ebay.it/itm/12V-5M-300LE...-Light-2015-/261915966505?hash=item3cfb687c29, it's only 6 USD for 5m and free shipping
- some spare wires
- solder iron and tin
Starting setup (I forgot to take a pic of the illuminated trunk with stock bulb)
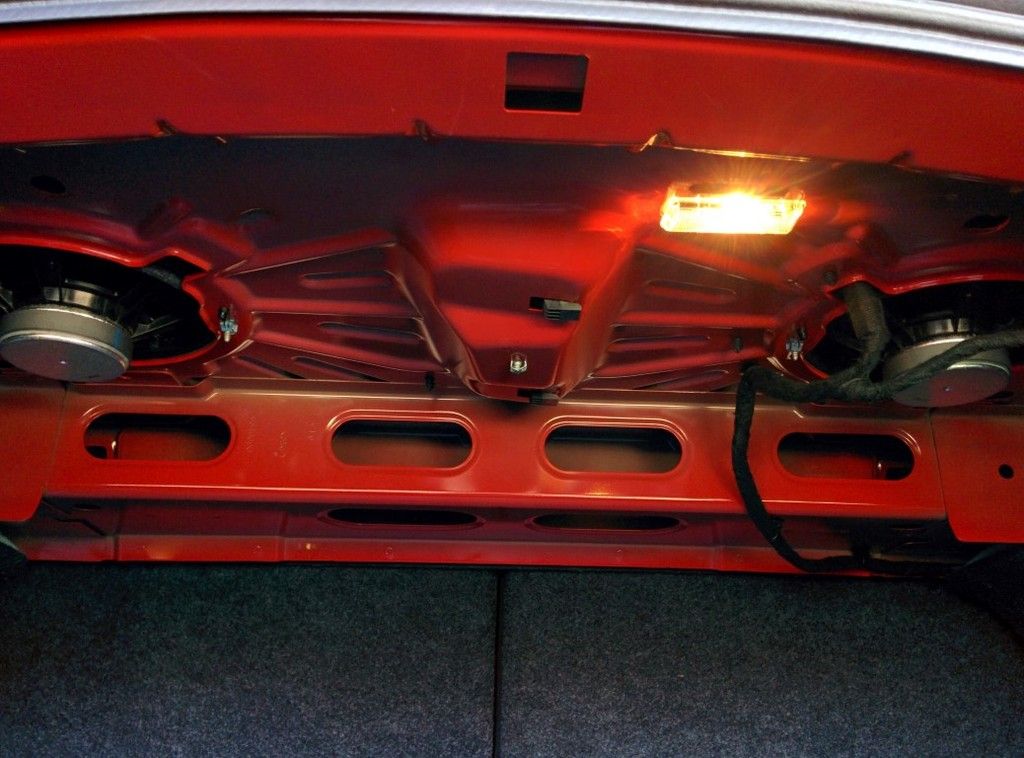
First of all, remove the trunk light housing. Simply push it out with a flat head screwdriver on the left side (the one opposite the subwoofer) and disconnect the connector (there is a lip to be pushed)
I took all measurements and finished with a 20-50-20-20 cm setup. The wider side is divided in two to allows soldering wires from power source. If you want to put the sun in your trunk, put another 70-80 cm strip on the other side of this 'rectangle' (you can see my schematics in the paper on the workbench)
Then with you solder ability ;) you need to solder some spare wires between the strips to allow them to be angled. You can also buy the specific angled connector, but I don't want to buy other unneeded stuff.
I also covered the soldered joints with heat shrink tube, though it's not needed.
Ready to be installed!
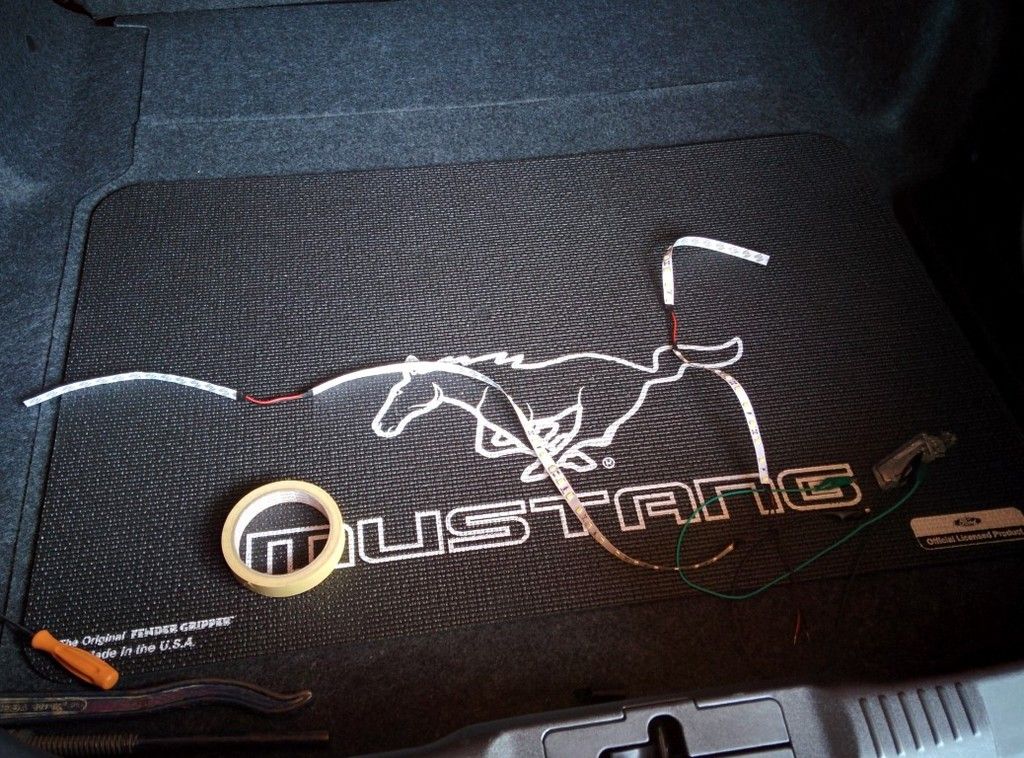
Peel over the back protection and place the strip on the trunk roof - you can curve it a bit where needed.
(this 20 cm chunk could be 30 cm)
Then put the tinned tips..
..inside the connector
and voilà, your trunk is now a concert stage!
Don't forget to put some electrical tape onto the connector to avoid the wires to fall off.
Even if the improvment is clear, I wanted to have the concrete evidences of it and took some measurements:
Stock light
LED strips
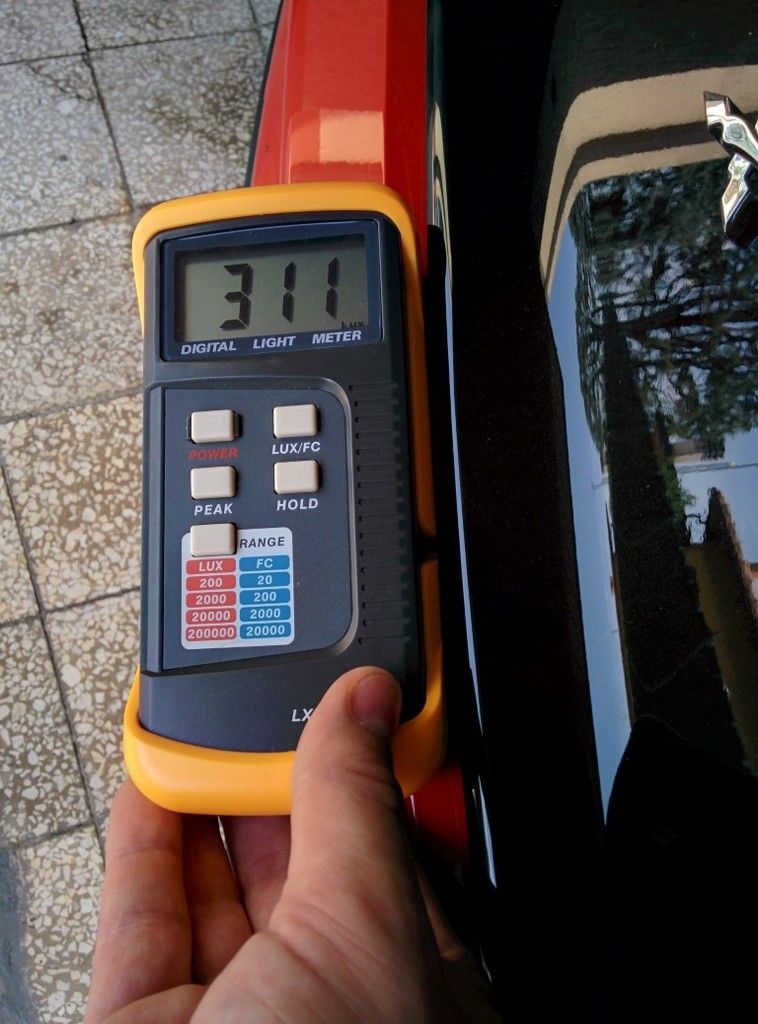
Now... I don't know how much a LUX is, but I know that 311 lux are WAY MORE than 5,9 lux :headbonk: :clap2:
:cheers:
Sponsored
Last edited: