Sponsored
Let's see those garages!
- Thread starter Crowd Hunter
- Start date
- Watchers 31
DFB5.0
Well-Known Member
And nine months later, my garage got a new floor yesterday.I LOVE these threads.
Although not as pretty as the awesome examples here, I call my garage the "Therapy Centre", it is very much my happy place.

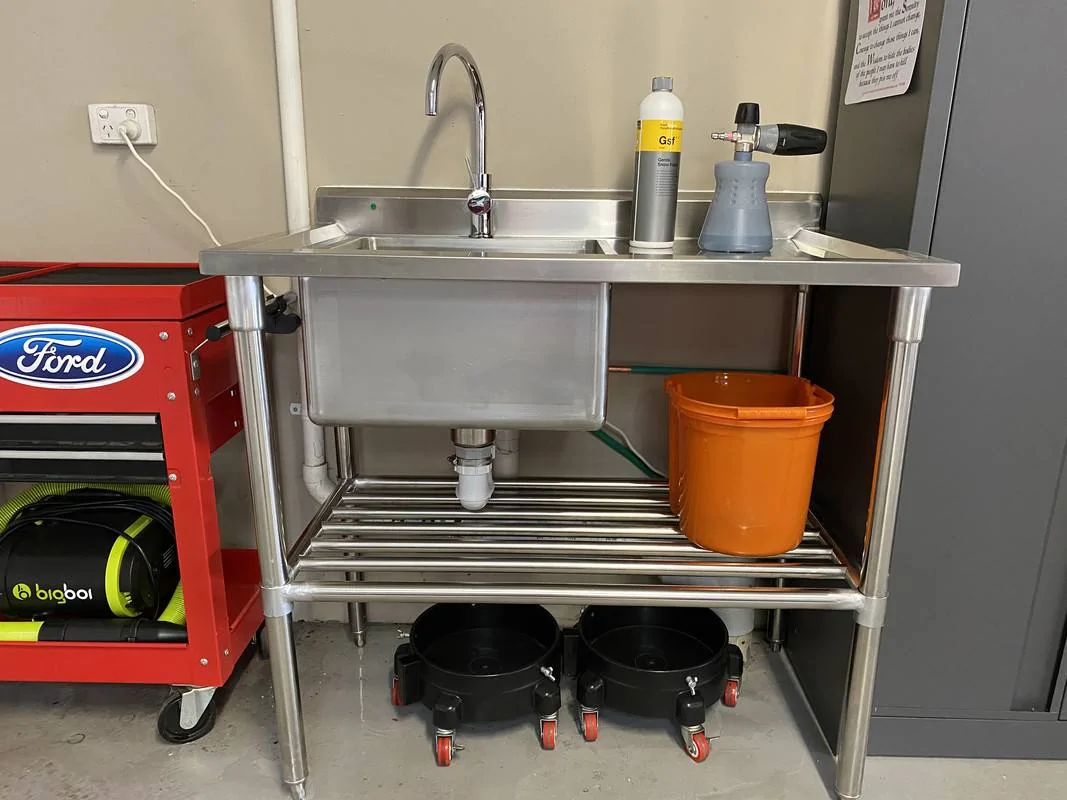
Four cars call this home and I have set the left side up for my tools of trade, the right side for my detailing gear.

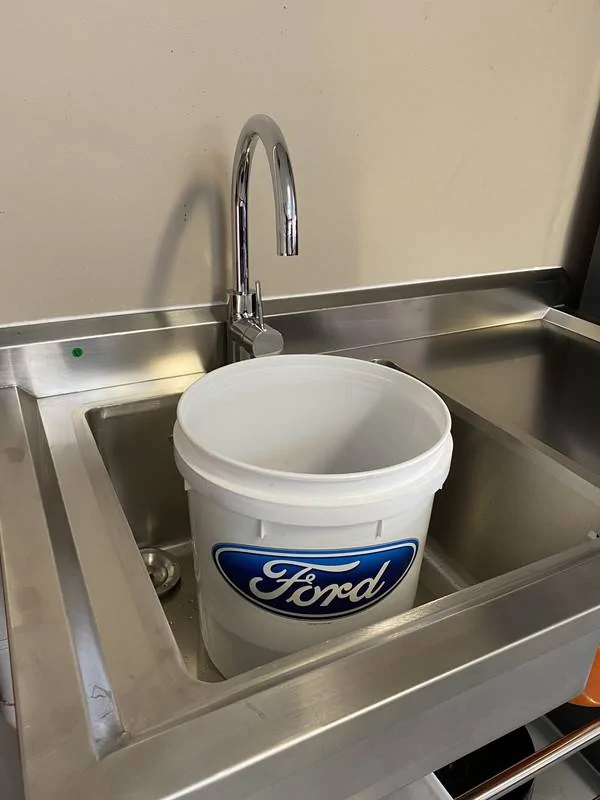
Late last year I had a sink installed and I can't begin to explain how happy that made me. This little addition has been so handy for filling buckets, washing detailing brushes and measuring out chemicals.

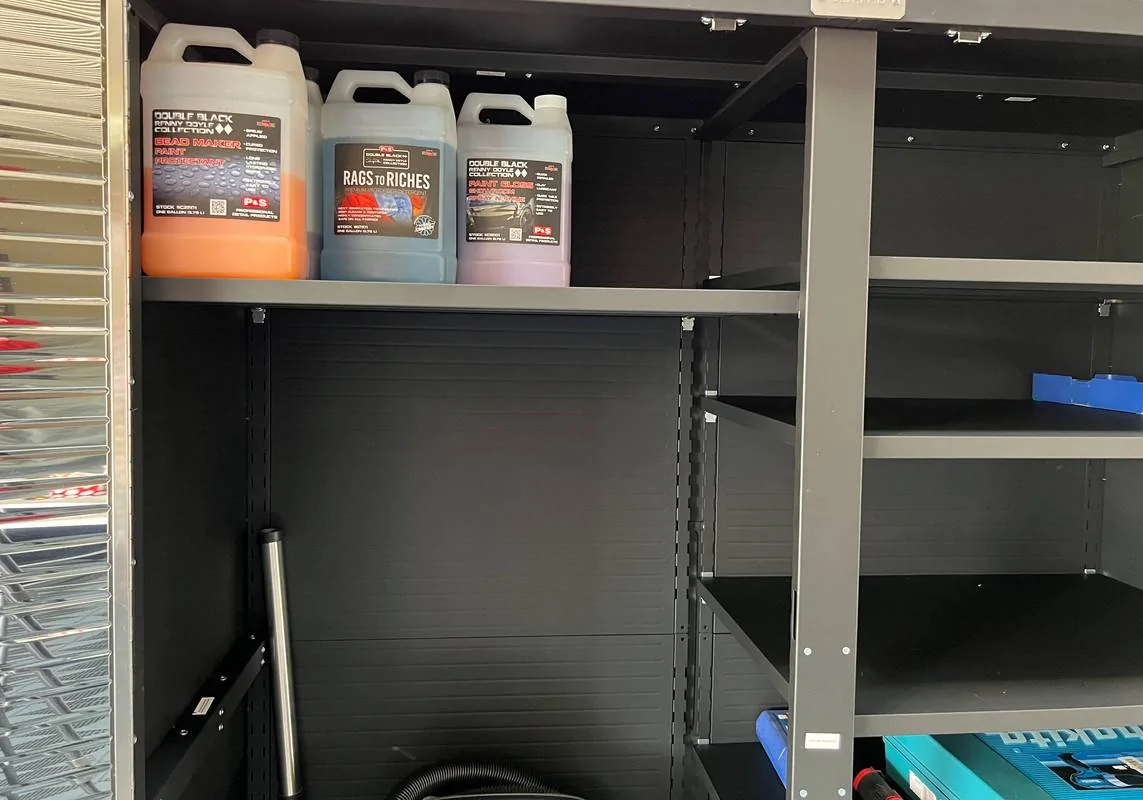
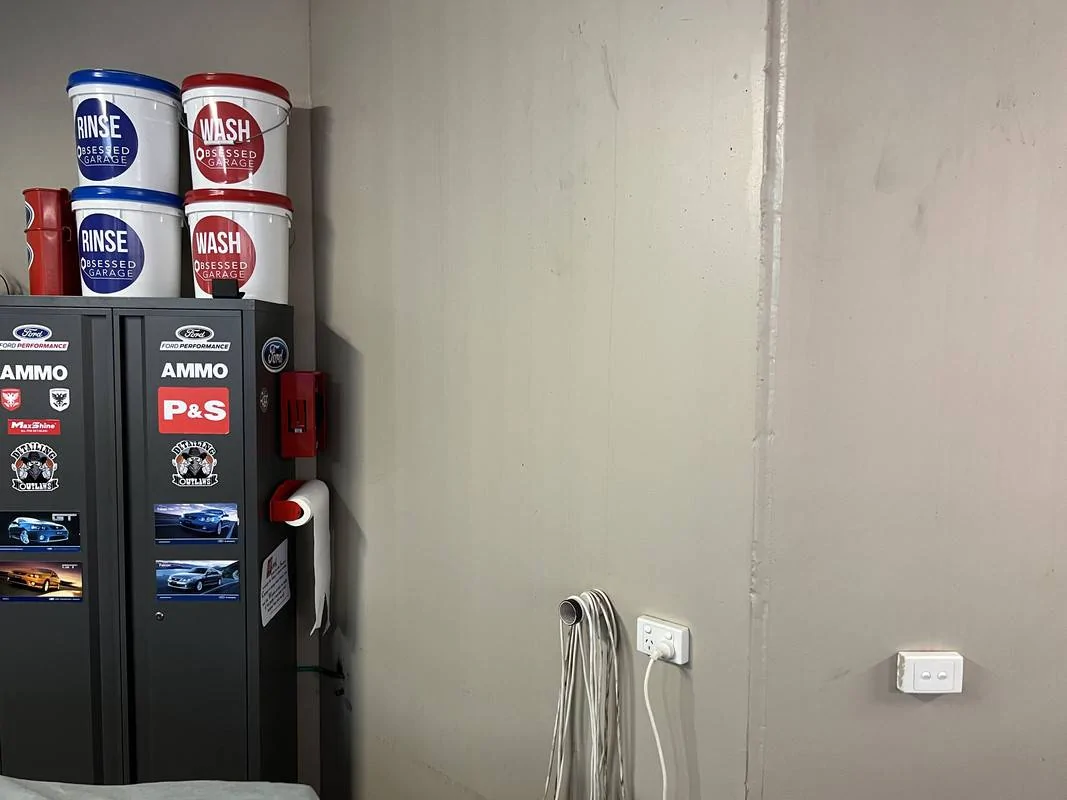
The two cabinets are bursting at seams with detailing products and towels.

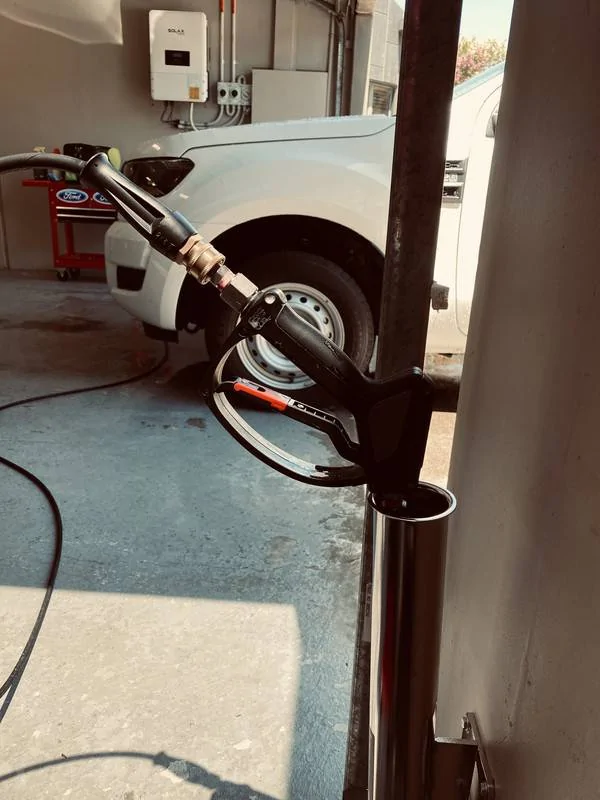
I also recently added a stainless steel holder for my pressure washer wand/gun.
This is when I'm at my happiest, out tinkering in the garage.
At some stage, I want to get the floor up to scratch too.


Before with it's hideous peeling painted concrete -
(This image was actually taken in November 2020, it only got worse from here)

The install process took me and my father 8 hours, plus another couple of hours today tidying up -
24 boxes of Swisstrax, which we unloaded into my truck to streamline the install -


Setting up the layout -


From there, we continued to work back and across to fit the bulk of the tiles prior to making the cuts -


Up until now, the progress was swift. With the bulk of the floor down, it was time to start moving stuff to gain access to the walls and start cutting. This is where the project slowed down -


Having been working flat out all day with my head down/bum up, I didn't really appreciate how good it looked until the last tile went down and everything moved back into place -


I'm an incredibly active guy, always on my feet, but after a day spent crouching up and down, I am completely exhausted with aching muscles.
The result is the culmination of 2 years of procrastination, 2 months of planning and 8 hours of installation. The cost to do this was significant, and in the lead up to the installation, I often questioned whether I was doing the right thing. I spend a lot of time in that garage, occasionally using to generate some income via detailing. I also don't drink, smoke, take expensive holidays or eat out. I work hard and this is what makes me happy at the end of a long day. To say I am incredibly happy and proud of the result would be an understatement.
Mike Pfeifer
Well-Known Member
- Joined
- Feb 4, 2021
- Threads
- 11
- Messages
- 1,541
- Reaction score
- 1,888
- Location
- Wesley Chapel, FL
- First Name
- Mike
- Vehicle(s)
- 2019 Ruby Red Mustang GT A10
Beautiful!And nine months later, my garage got a new floor yesterday.
Before with it's hideous peeling painted concrete -
(This image was actually taken in November 2020, it only got worse from here)
The install process took me and my father 8 hours, plus another couple of hours today tidying up -
24 boxes of Swisstrax, which we unloaded into my truck to streamline the install -

Setting up the layout -


From there, we continued to work back and across to fit the bulk of the tiles prior to making the cuts -
Up until now, the progress was swift. With the bulk of the floor down, it was time to start moving stuff to gain access to the walls and start cutting. This is where the project slowed down -
Having been working flat out all day with my head down/bum up, I didn't really appreciate how good it looked until the last tile went down and everything moved back into place -


I'm an incredibly active guy, always on my feet, but after a day spent crouching up and down, I am completely exhausted with aching muscles.
The result is the culmination of 2 years of procrastination, 2 months of planning and 8 hours of installation. The cost to do this was significant, and in the lead up to the installation, I often questioned whether I was doing the right thing. I spend a lot of time in that garage, occasionally using to generate some income via detailing. I also don't drink, smoke, take expensive holidays or eat out. I work hard and this is what makes me happy at the end of a long day. To say I am incredibly happy and proud of the result would be an understatement.
DFB5.0
Well-Known Member
This next garage project has been on the slow burner for a while. I pre-ordered this extra large cabinet back in November, shortly after I ordered the flooring.
Due for release at the end of December, mine was not dispatched until mid January. And of course it arrived after the public holiday last week, which means it sat in the box for another 5 days. But it's here now and, after being held back a few hours due to doctor appointments, is now assembled and stocked.
It would have just fit the space next to the sink and ultimately replace my current chemical and microfiber cabinets. I decided to leave that beast alone for now, allowing me to find a home for various tools that were displaced by removing the array of cabinets along the left side of the garage. Those particle board cabinets were water damaged and just not what I wanted so were re-located to my storage facility.
A big cabinet meant two large boxes and a lot of pieces, which I sorted into their sections and emptied the assorted screws and bolts into some bowls. Hope you like the poka-dots!

Then it was a case of following the assembly guide, slowly and carefully. Piece by piece, the assortment of panels started to turn into a cabinet.


As mentioned, this cabinet will hold general household and automotive tools, fixings, my vacuum and...............................a surplus of gallon size chemicals!


And the best bit? I have freed up space for more products in the cabinet and under the sink!


GT 550
Well-Known Member
Looking good!But it's here now and, after being held back a few hours due to doctor appointments, is now assembled and stocked.
Ah so you've found a Dr who likes detailing but needs help so you've been back a few times to sort out their issues. That can be annoying so I hope you're charging accordingly for home visits. Having your Dr pay for your detailing 'therapy'....priceless

20c says eventually Sir Vacuum gets his own place outside the cabinet.
Sponsored
FreePenguin
Well-Known Member
I wish I had room for another chest like that, thats beautiful, im lucky to say my basic wood shelves that I still use that was here before I got the house has seem to hold up many gallons of soaps etc without falling off the wall. but if they ever do come down, im going to rip out the shelves and put an entire cabinet set up in the back.
DFB5.0
Well-Known Member
The quest to make my garage more functionally efficient continues.
I have a extreme hatred of untidy, messy cables and hoses.............it drives me nuts!
You know the sort of thing, always at the hands of someone else..............
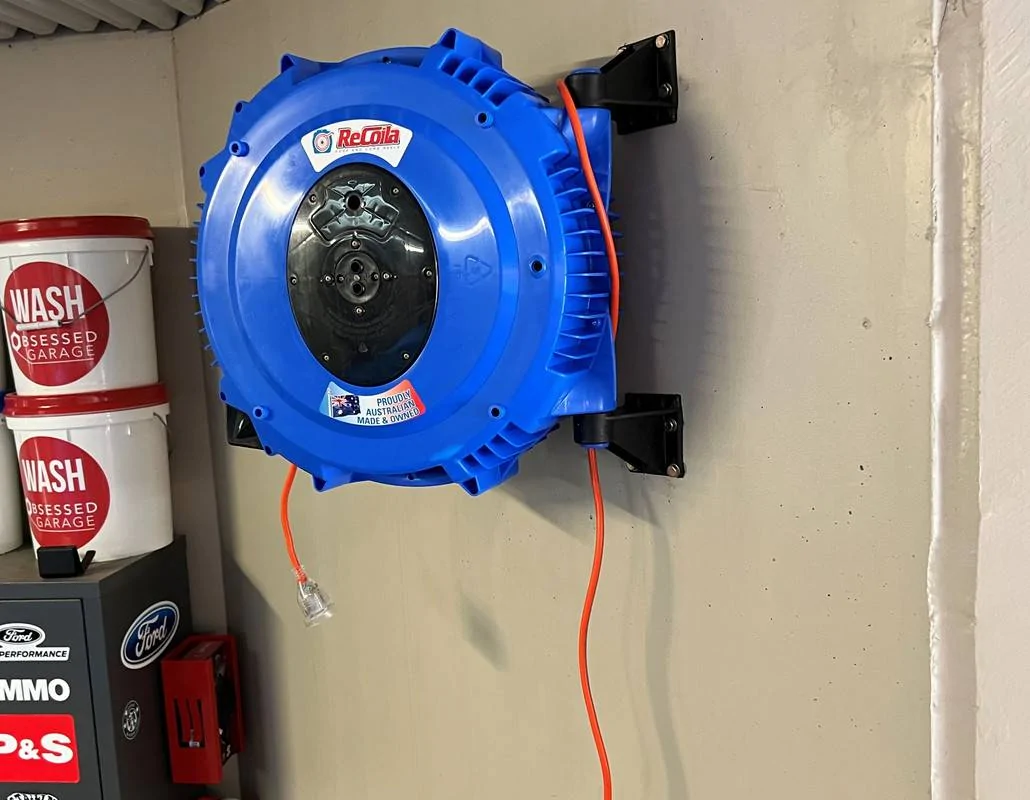
My solution is a retractable power reel. Ideally, I would have preferred a metal style reel, but these are just too far out of the budget for what they are. My choice ended up being this Recoila version made here in Australia. I like that when ready, I can add the compressed air version and have them match. Form is equally important as function.


A blank wall and a power outlet right below made the perfect spot for this addition.
The box contains a template for easily locating the drilling points.
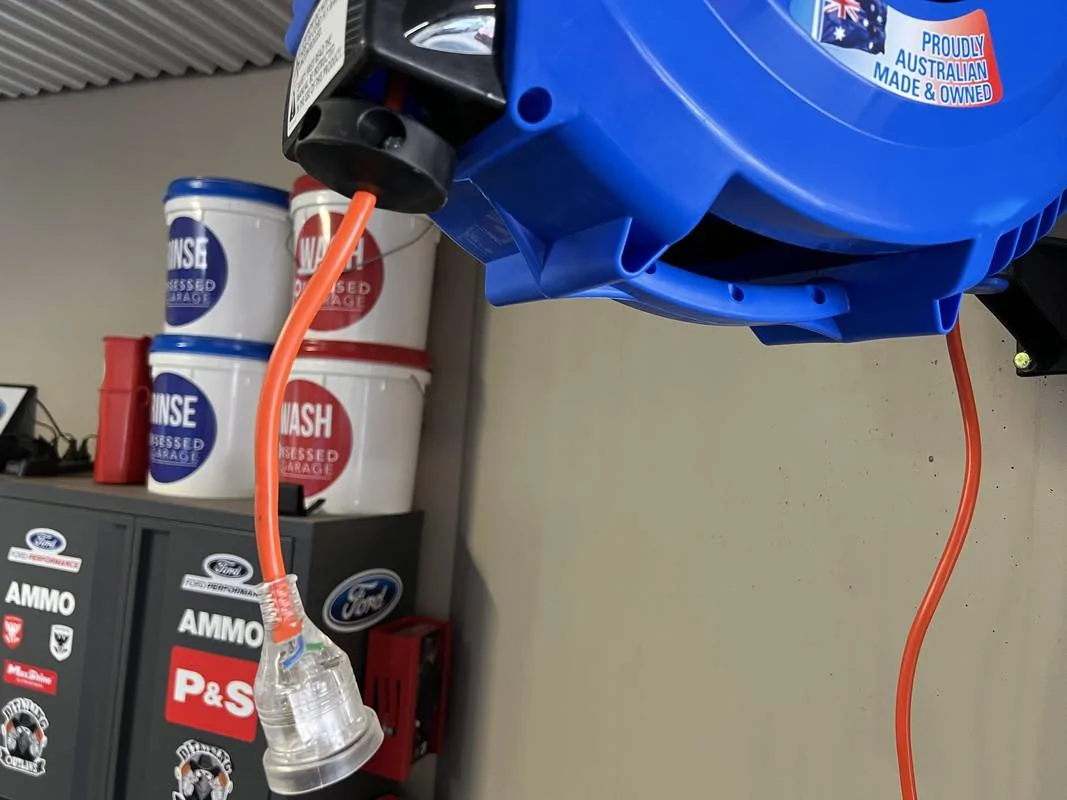
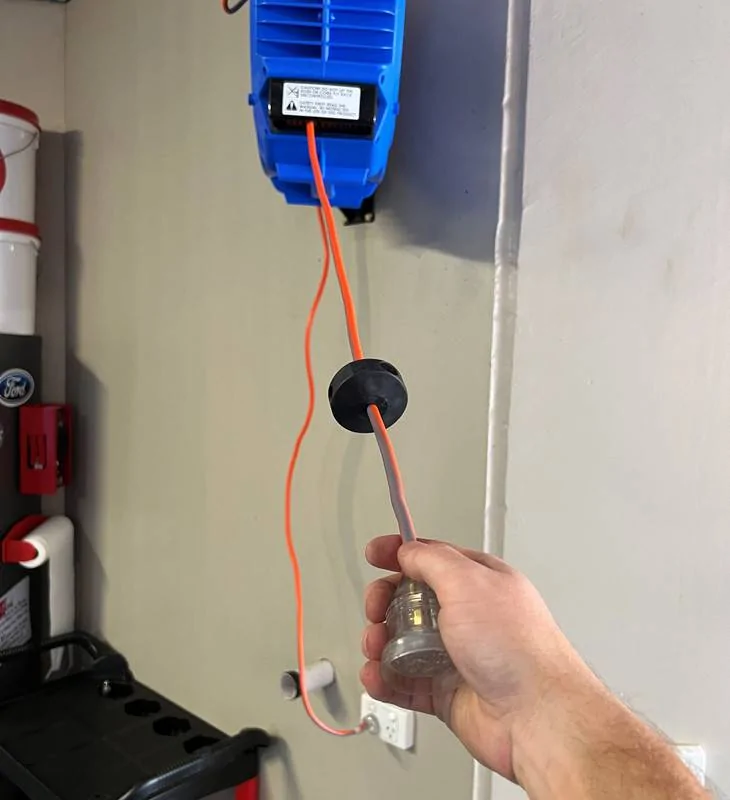
I chose to mount this up high to keep it out of the way, doing so requires the 'mouth piece' to be relocated to the lower section. This is done by removing a few screws, popping the black plastic mouth piece out, removing the plastic stopper, feeding the cord and mouth piece down into the lower position before snapping into place and replacing the screws.
Now, I had some help with the drilling portion of this project. The two brackets need 8 holes and 8 dyna bolts to hold them position. This is a concrete wall so a Hilti heavy duty hammer drill is needed for this job. Let's just say the installation was somewhat testing, although for a change it was me who was calmer and less stressed.
If/when I do this again, I think I'll mount the reel to a cleat and attach the cleat to the wall instead for a smoother installation.
Either way, it's installed and should work quite well.


I have a extreme hatred of untidy, messy cables and hoses.............it drives me nuts!
You know the sort of thing, always at the hands of someone else..............


My solution is a retractable power reel. Ideally, I would have preferred a metal style reel, but these are just too far out of the budget for what they are. My choice ended up being this Recoila version made here in Australia. I like that when ready, I can add the compressed air version and have them match. Form is equally important as function.


A blank wall and a power outlet right below made the perfect spot for this addition.
The box contains a template for easily locating the drilling points.


I chose to mount this up high to keep it out of the way, doing so requires the 'mouth piece' to be relocated to the lower section. This is done by removing a few screws, popping the black plastic mouth piece out, removing the plastic stopper, feeding the cord and mouth piece down into the lower position before snapping into place and replacing the screws.
Now, I had some help with the drilling portion of this project. The two brackets need 8 holes and 8 dyna bolts to hold them position. This is a concrete wall so a Hilti heavy duty hammer drill is needed for this job. Let's just say the installation was somewhat testing, although for a change it was me who was calmer and less stressed.
If/when I do this again, I think I'll mount the reel to a cleat and attach the cleat to the wall instead for a smoother installation.
Either way, it's installed and should work quite well.


NGOT8R
Well-Known Member
Is Race Deck really durable and worth the cost? I‘m in the process of having my garage re-epoxied by the builder, so that it finally matches. Two coats of oil based clear coat still have to be applied over the next two days. The problem is, while it looks good, it’s not the best epoxy job (in terms of durability). I learned this from the painter, who told me that the builder was cheap and didn’t want to pay for him to perform a diamond grind floor prep service, therefore, they just etch the floor with muriatic acid and power wash it. The epoxy coating didn’t hold up very well the first two times (they did half of the floor at a time, so that I could shift tool boxes and other things from side to side). The colors also didn’t match and tire tracks were visible within a very short time.
I’m wondering how Race Deck would look around my motorcycle lift pit which has been trimmed out with a stainless steel insert? Would it be best to stop it 2-3” short around the perimeter of the insert and put finished edging around it? How about trimming out around thr columns of a 2 post lift? Better to install the lift and then trim out around the columns?

I’m wondering how Race Deck would look around my motorcycle lift pit which has been trimmed out with a stainless steel insert? Would it be best to stop it 2-3” short around the perimeter of the insert and put finished edging around it? How about trimming out around thr columns of a 2 post lift? Better to install the lift and then trim out around the columns?


Les
Well-Known Member

I installed this Race Deck flooring in April of 2014. I’m very happy with it. Extremely easy to clean, very chemical resistant. These pictures are from a month ago. Instant gratification, no waiting for sealant to dry. If I built another garage I’d install without a second thought.
Sponsored
NGOT8R
Well-Known Member
How easy is it to make precise cuts where needed? Once cuts are made, does that affect the ability to add the finished trim like what is typically seen at the threshold?
I installed this Race Deck flooring in April of 2014. I’m very happy with it. Extremely easy to clean, very chemical resistant. These pictures are from a month ago. Instant gratification, no waiting for sealant to dry. If I built another garage I’d install without a second thought.
Les
Well-Known Member
How easy is it to make precise cuts where needed? Once cuts are made, does that affect the ability to add the finished trim like what is typically seen at the threshold?


NGOT8R
Well-Known Member
Copy that. Thank you! Was it necessary to cut out the tile around the garage door tracks? How is cleanup if you spill something or just need to do a general cleaning from dirt/dust? Once a panel has been cut you can’t add the threshold to that side. Those sides would be against the walls about 1/2 inch in. Little tabs stick out along the panel to attach the threshold or another panel. The panels cut like butter with a table saw. I finished my garage floor by myself in 6 hours. My legs and back were sore from bending and squatting.
Les
Well-Known Member

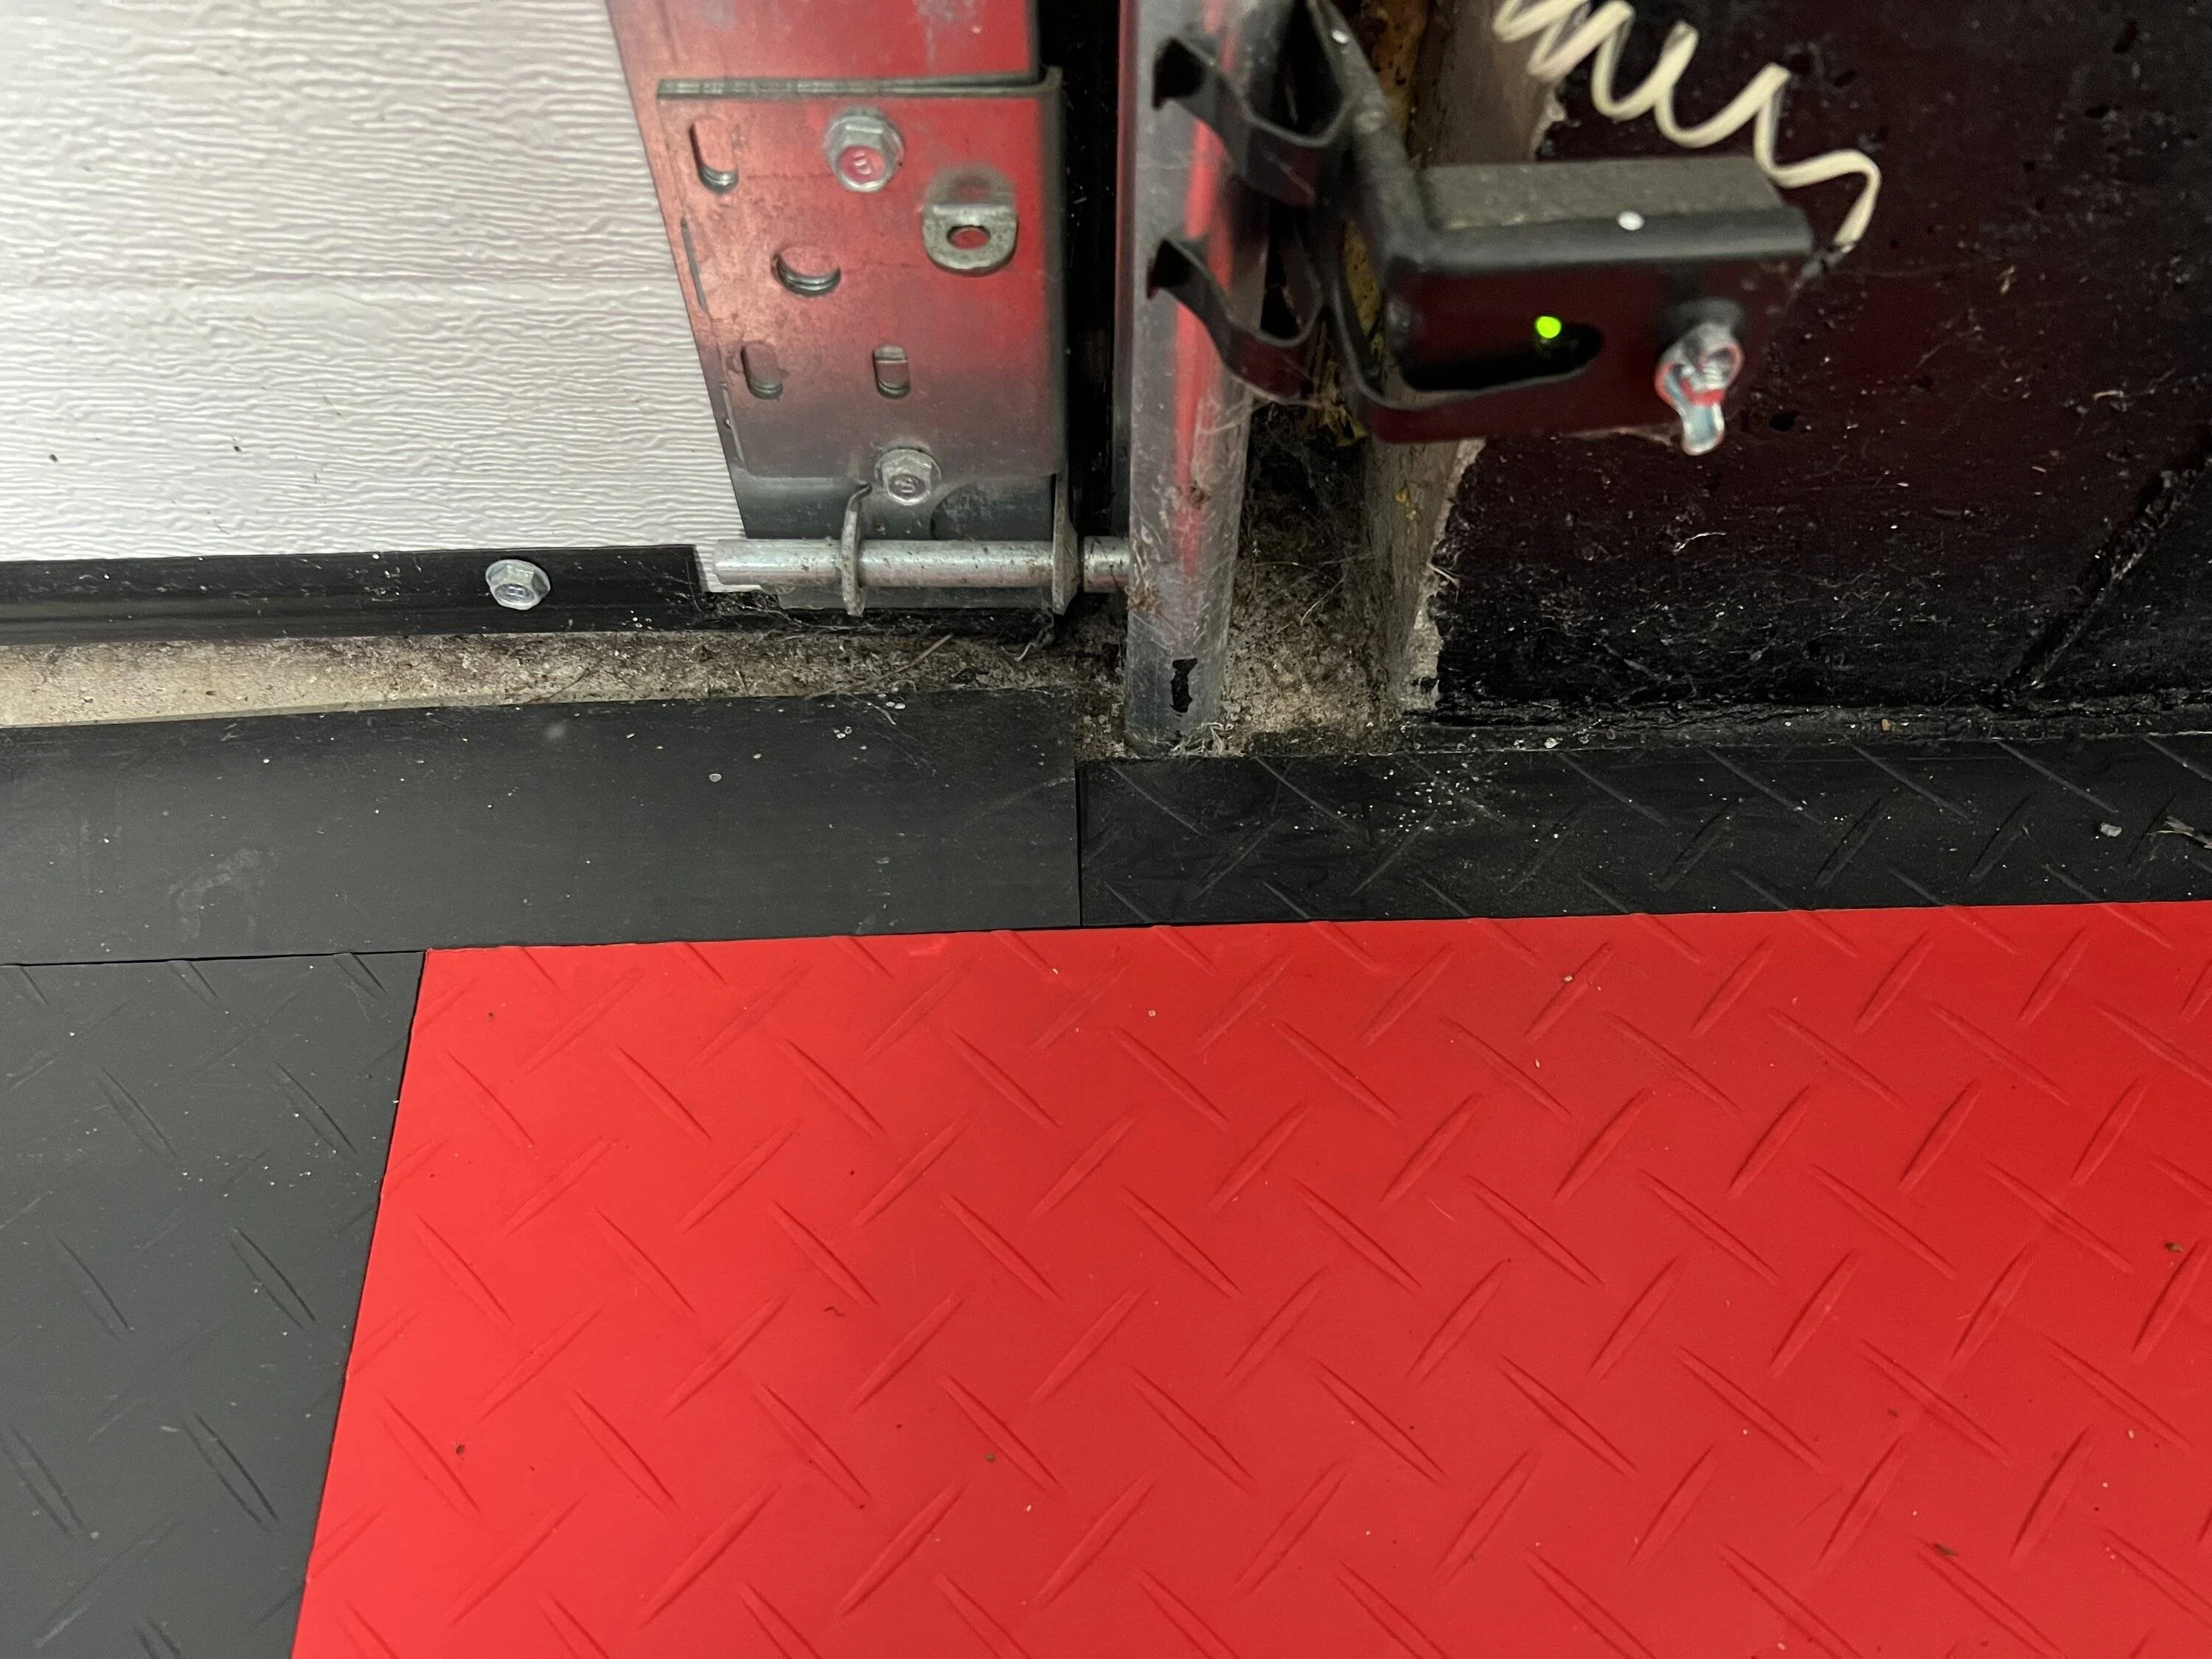


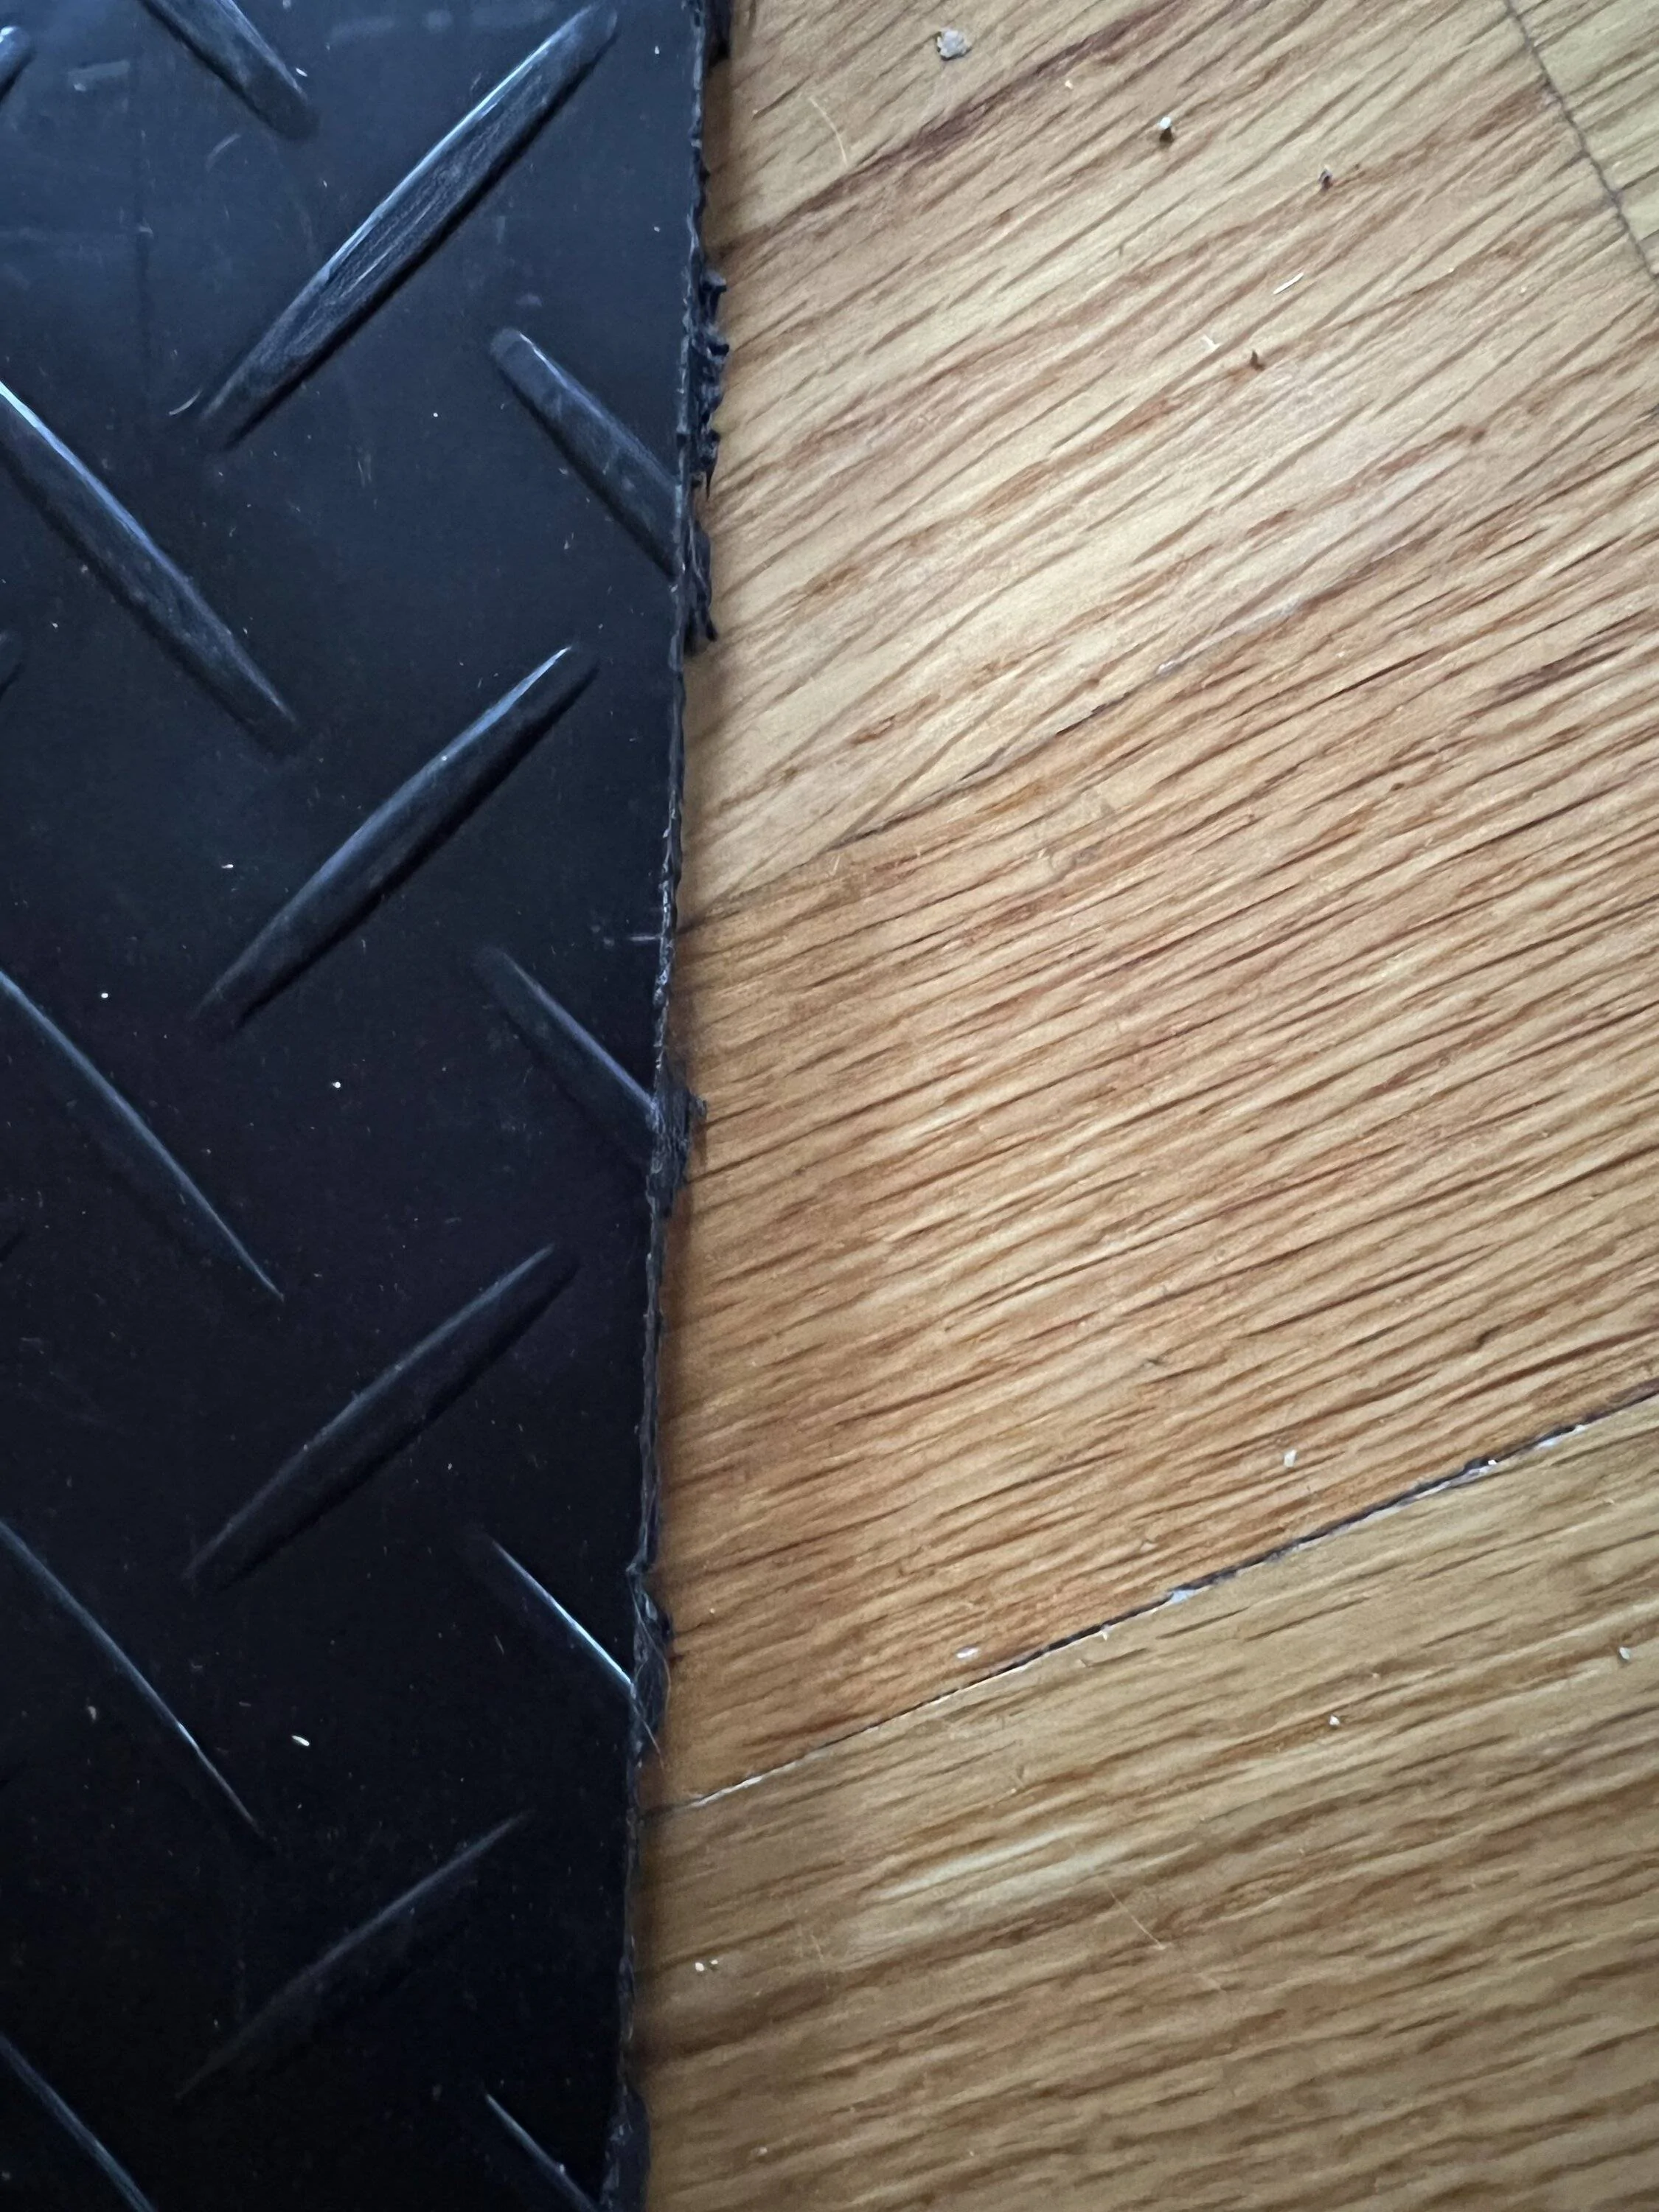
A few pictures around the door tracks. Hopefully you can tell how I cut it out.Was it necessary to cut out the tile around the garage door tracks? How is cleanup if you spill something or just need to do a general cleaning from dirt/dust?
I’ve had oil and transmissions fluid (lots from the Hotrod) on the floor. Used a paper towel for most of it then an all purpose cleaner and it looks nothing was ever there.
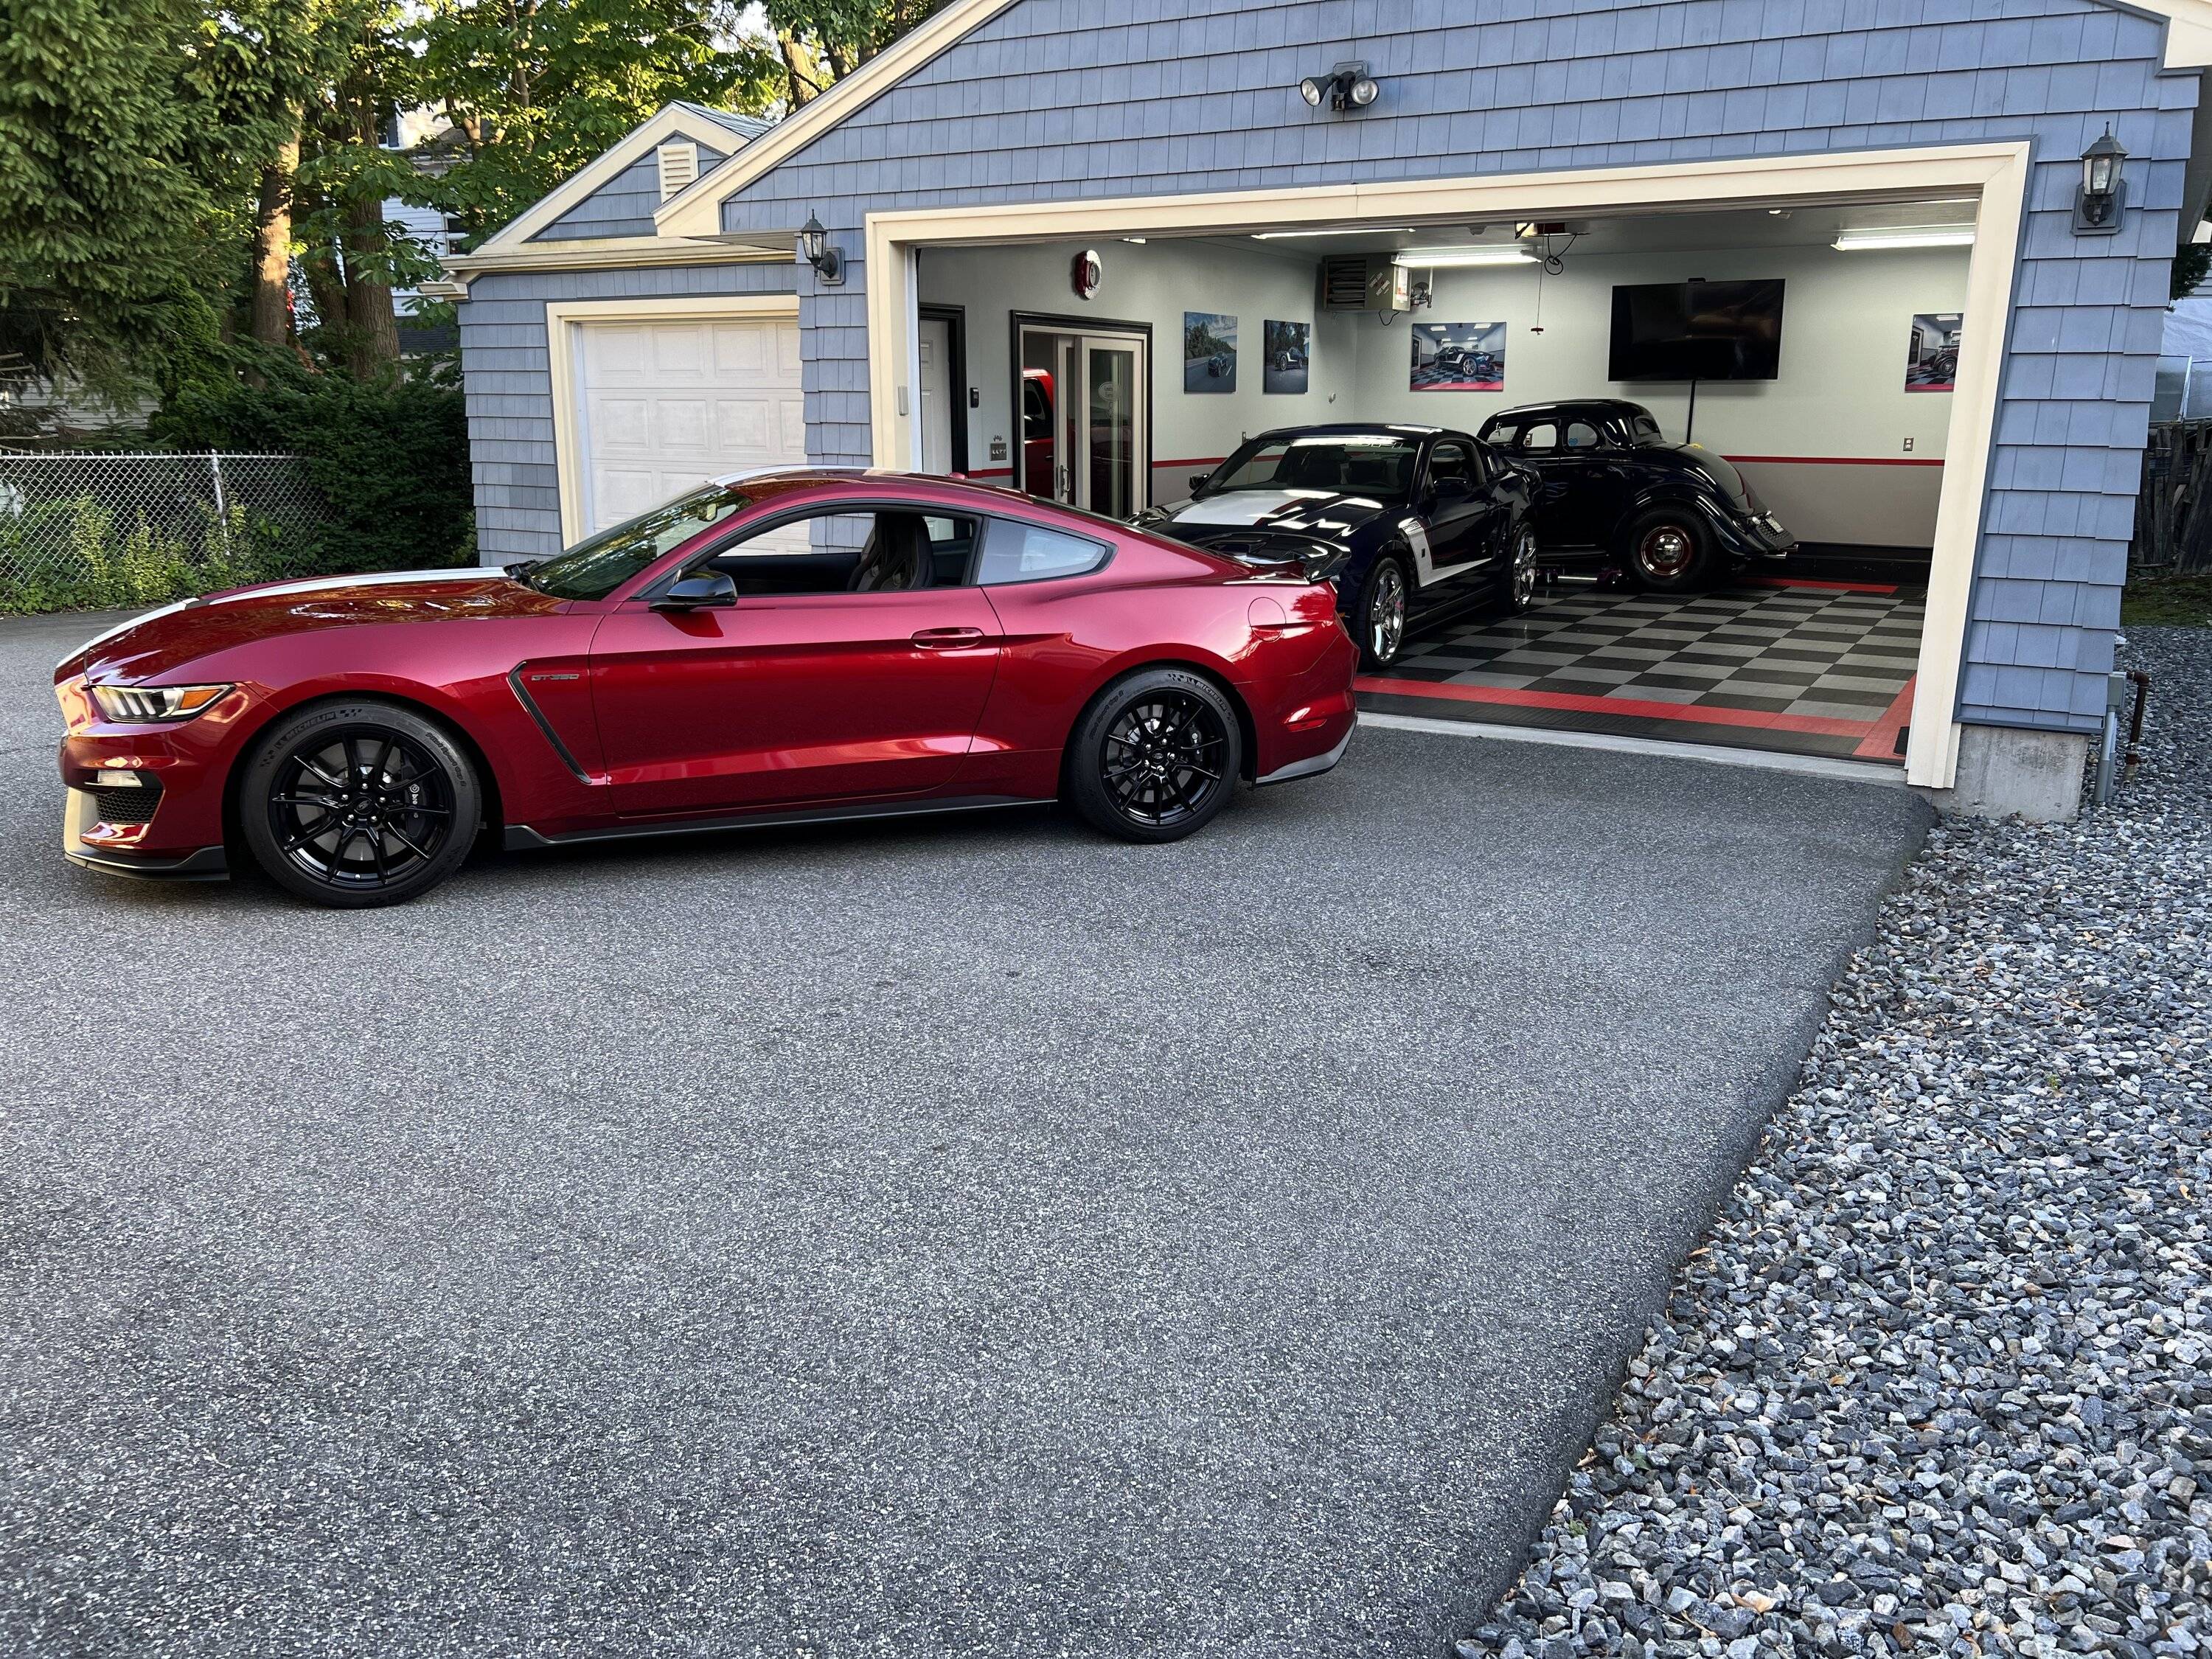
I bought 3 sample tiles before I did the complete floor. I drove over them for months and on purpose put all kinds of crap on them. They looked terrible! I cleaned them and they looked great. I’ve got to say when I first installed all the tiles it looked like cheap shiny plastic In my opinion. As the floor comes of age and the high gloss wears off it looks much better. Then the look never seems to change. Just my opinion. Oh, I couldn’t help but take a picture of the car. Had to stop and look at it for a minute or two Before I left the garage!
NGOT8R
Well-Known Member
Thank you for taking the time to answer all of my questions and provide pics.
A few pictures around the door tracks. Hopefully you can tell how I cut it out.
I’ve had oil and transmissions fluid (lots from the Hotrod) on the floor. Used a paper towel for most of it then an all purpose cleaner and it looks nothing was ever there.
I bought 3 sample tiles before I did the complete floor. I drove over them for months and on purpose put all kinds of crap on them. They looked terrible! I cleaned them and they looked great. I’ve got to say when I first installed all the tiles it looked like cheap shiny plastic In my opinion. As the floor comes of age and the high gloss wears off it looks much better. Then the look never seems to change. Just my opinion. Oh, I couldn’t help but take a picture of the car. Had to stop and look at it for a minute or two Before I left the garage!
Sponsored