Trent W
Well-Known Member
- Thread starter
- #1
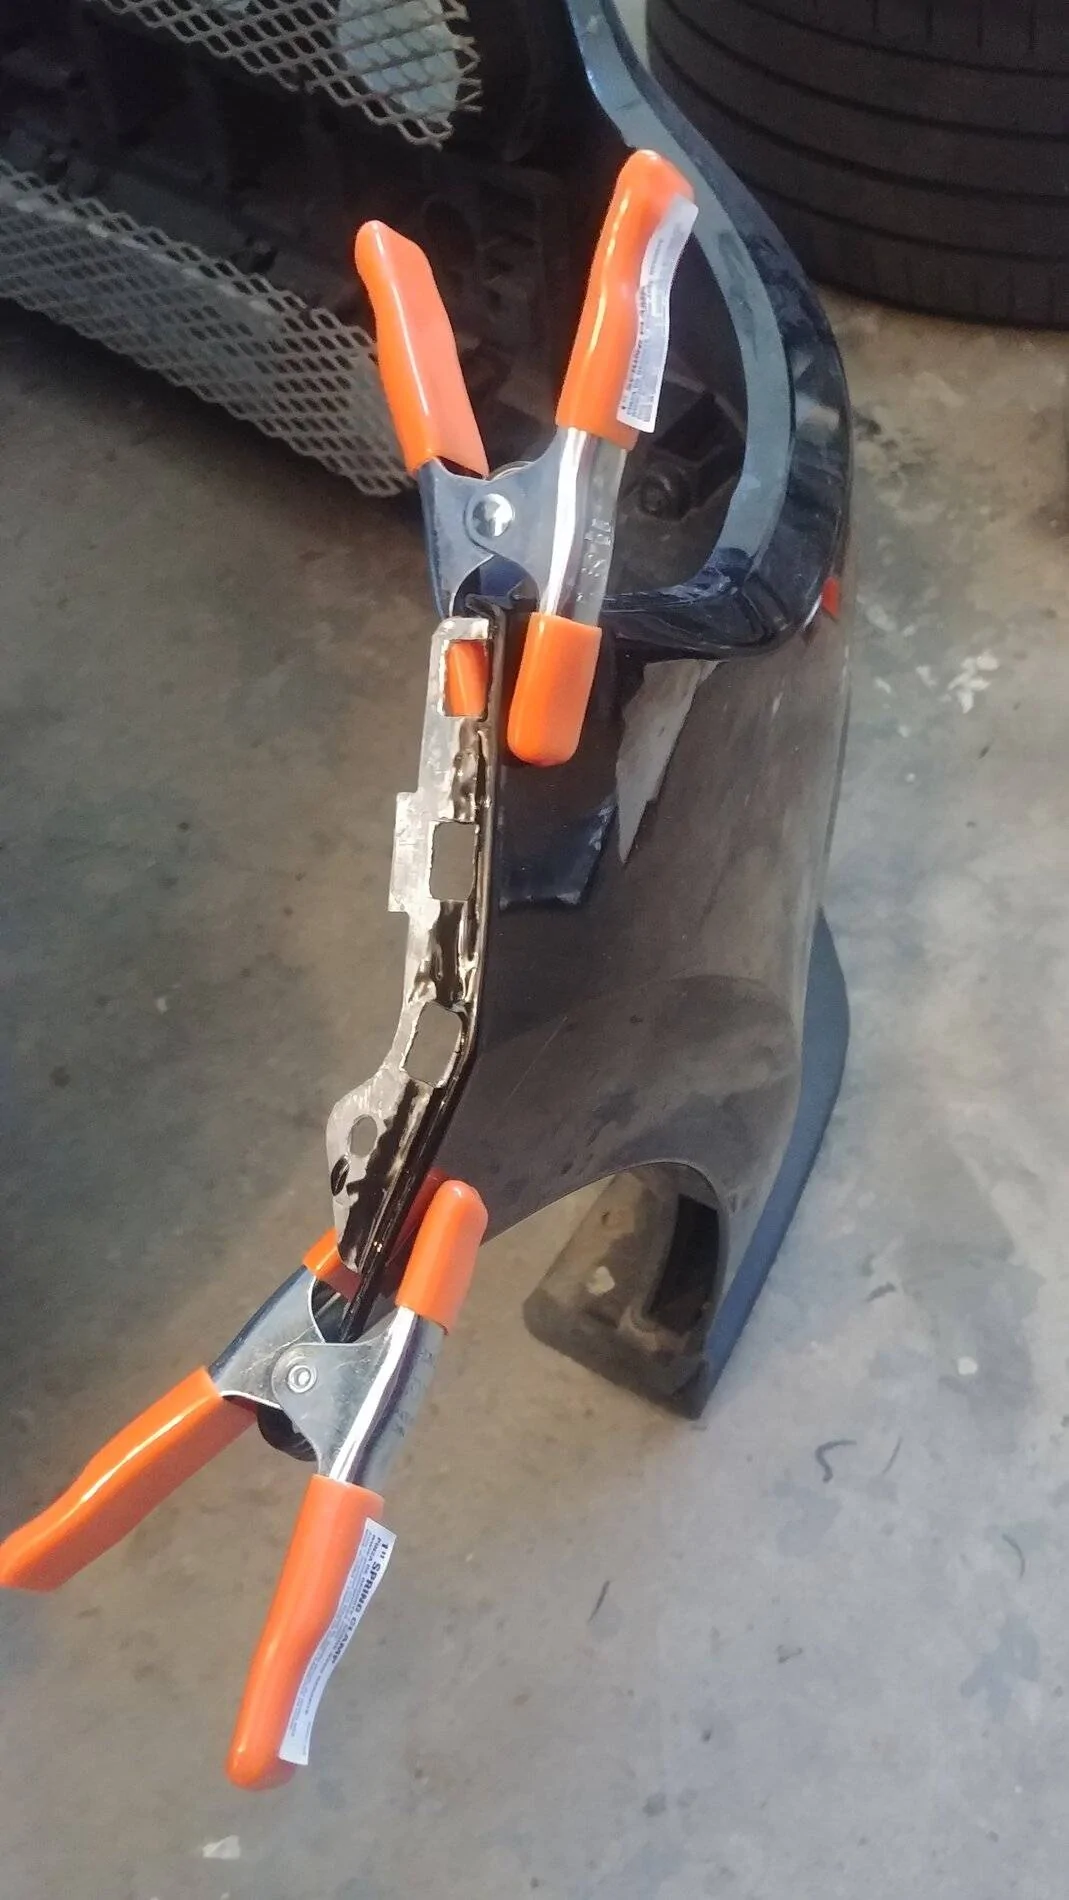
I've seen this a bunch and unfortunately with no real solution other than to install ugly pins. So if your somewhat handy this works AMAZING! 10x stronger than factory.
Tools Needed:
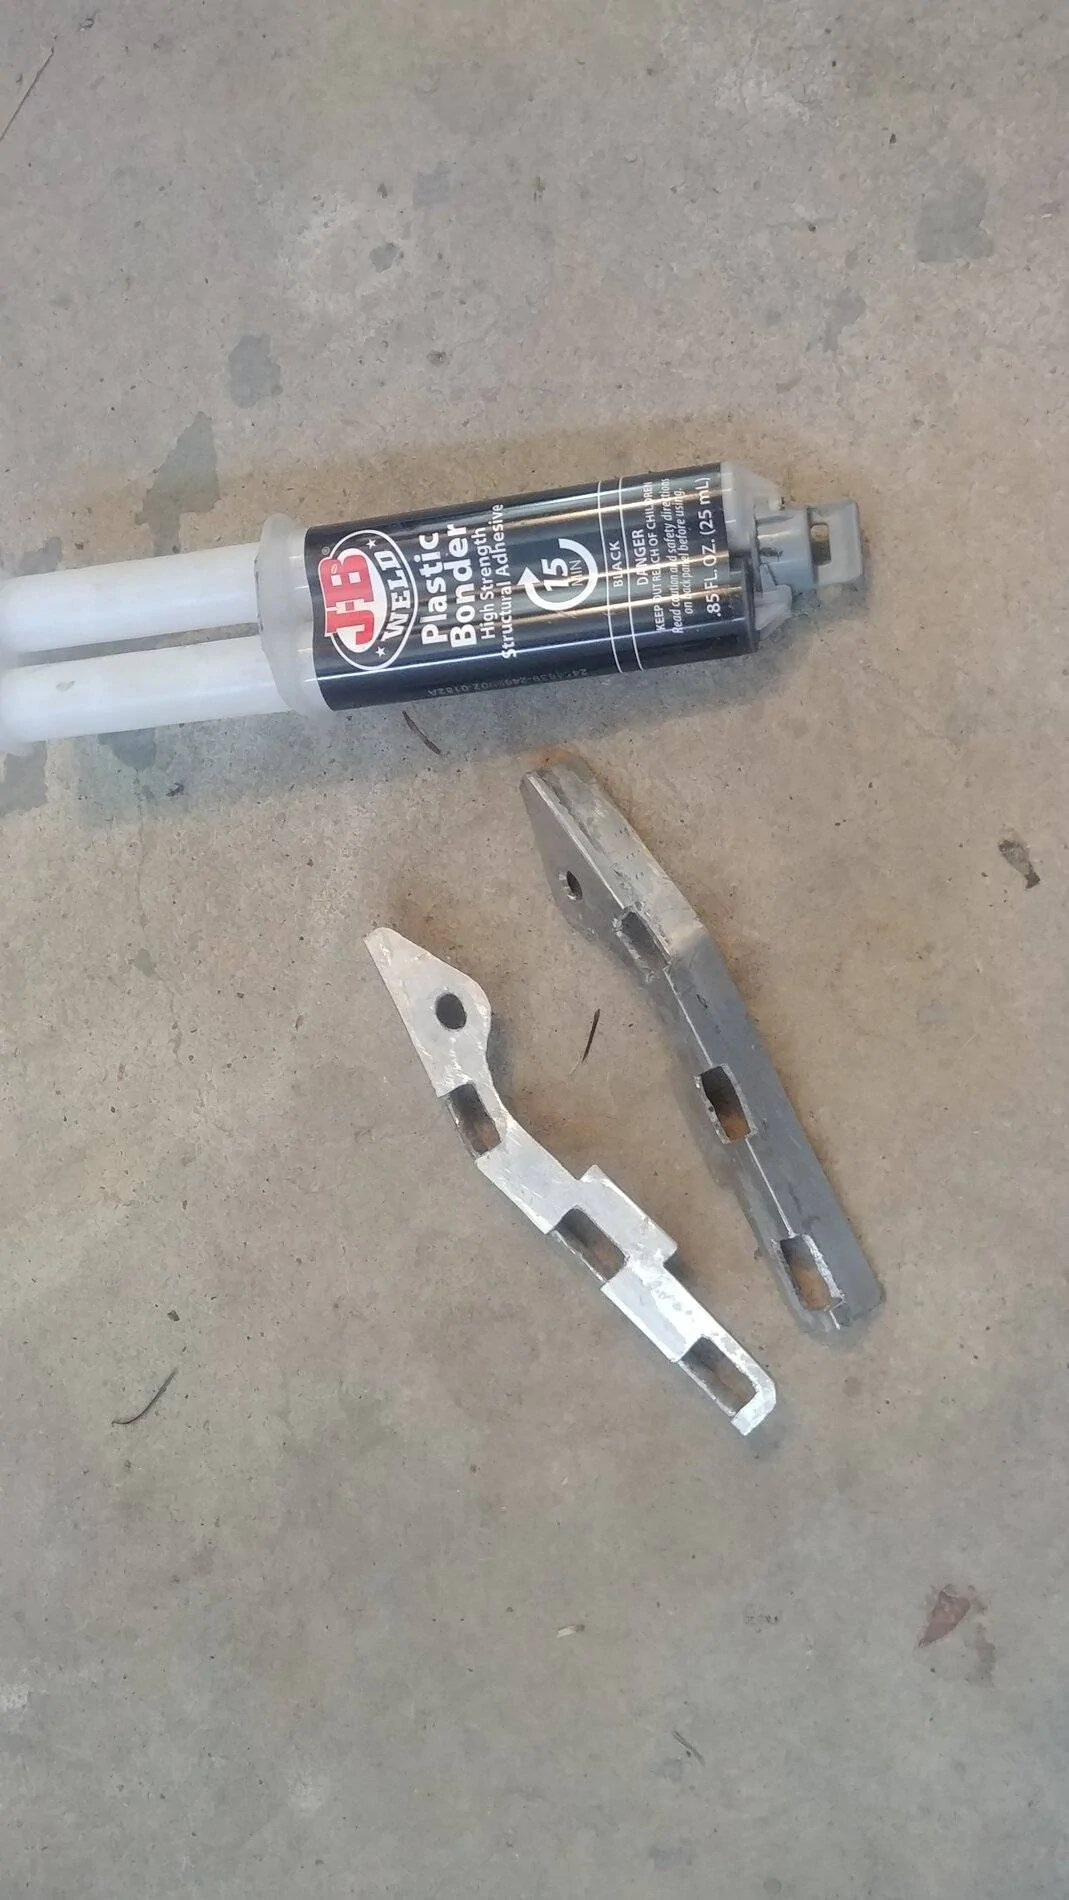
Drill bits
File
Epoxy (Autozone)
1/2"x1" Aluminum angle (Lowes)
Tin sheers
1 inch Clamps (lowes)
You'll also need a bench Vice and a hammer for some persuasion
Just use your old clip as a template


Tools Needed:
Drill bits
File
Epoxy (Autozone)
1/2"x1" Aluminum angle (Lowes)
Tin sheers
1 inch Clamps (lowes)
You'll also need a bench Vice and a hammer for some persuasion
Just use your old clip as a template


Sponsored