Tuxedomouse
Well-Known Member
Haha. Alright, I'll solder pins on the other wires and give it a shotIt is possible in that picture I had them backwards.

Sponsored
Haha. Alright, I'll solder pins on the other wires and give it a shotIt is possible in that picture I had them backwards.
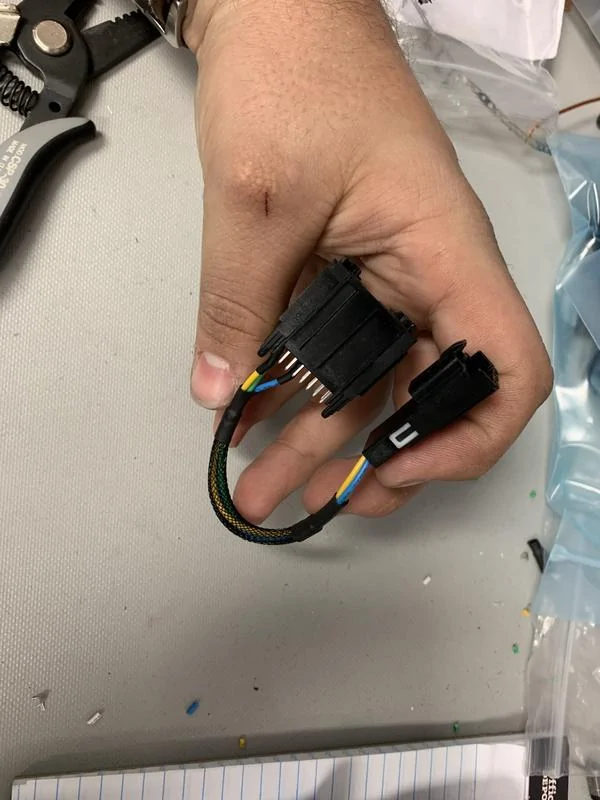
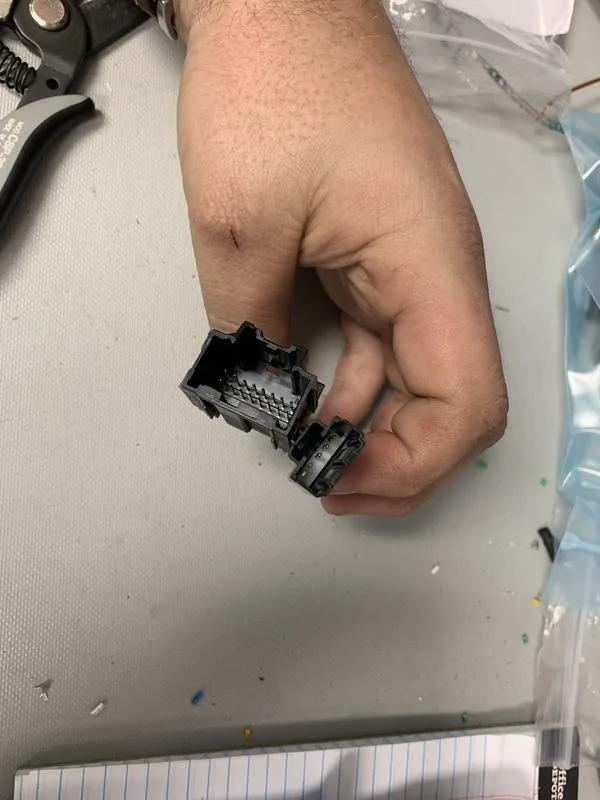
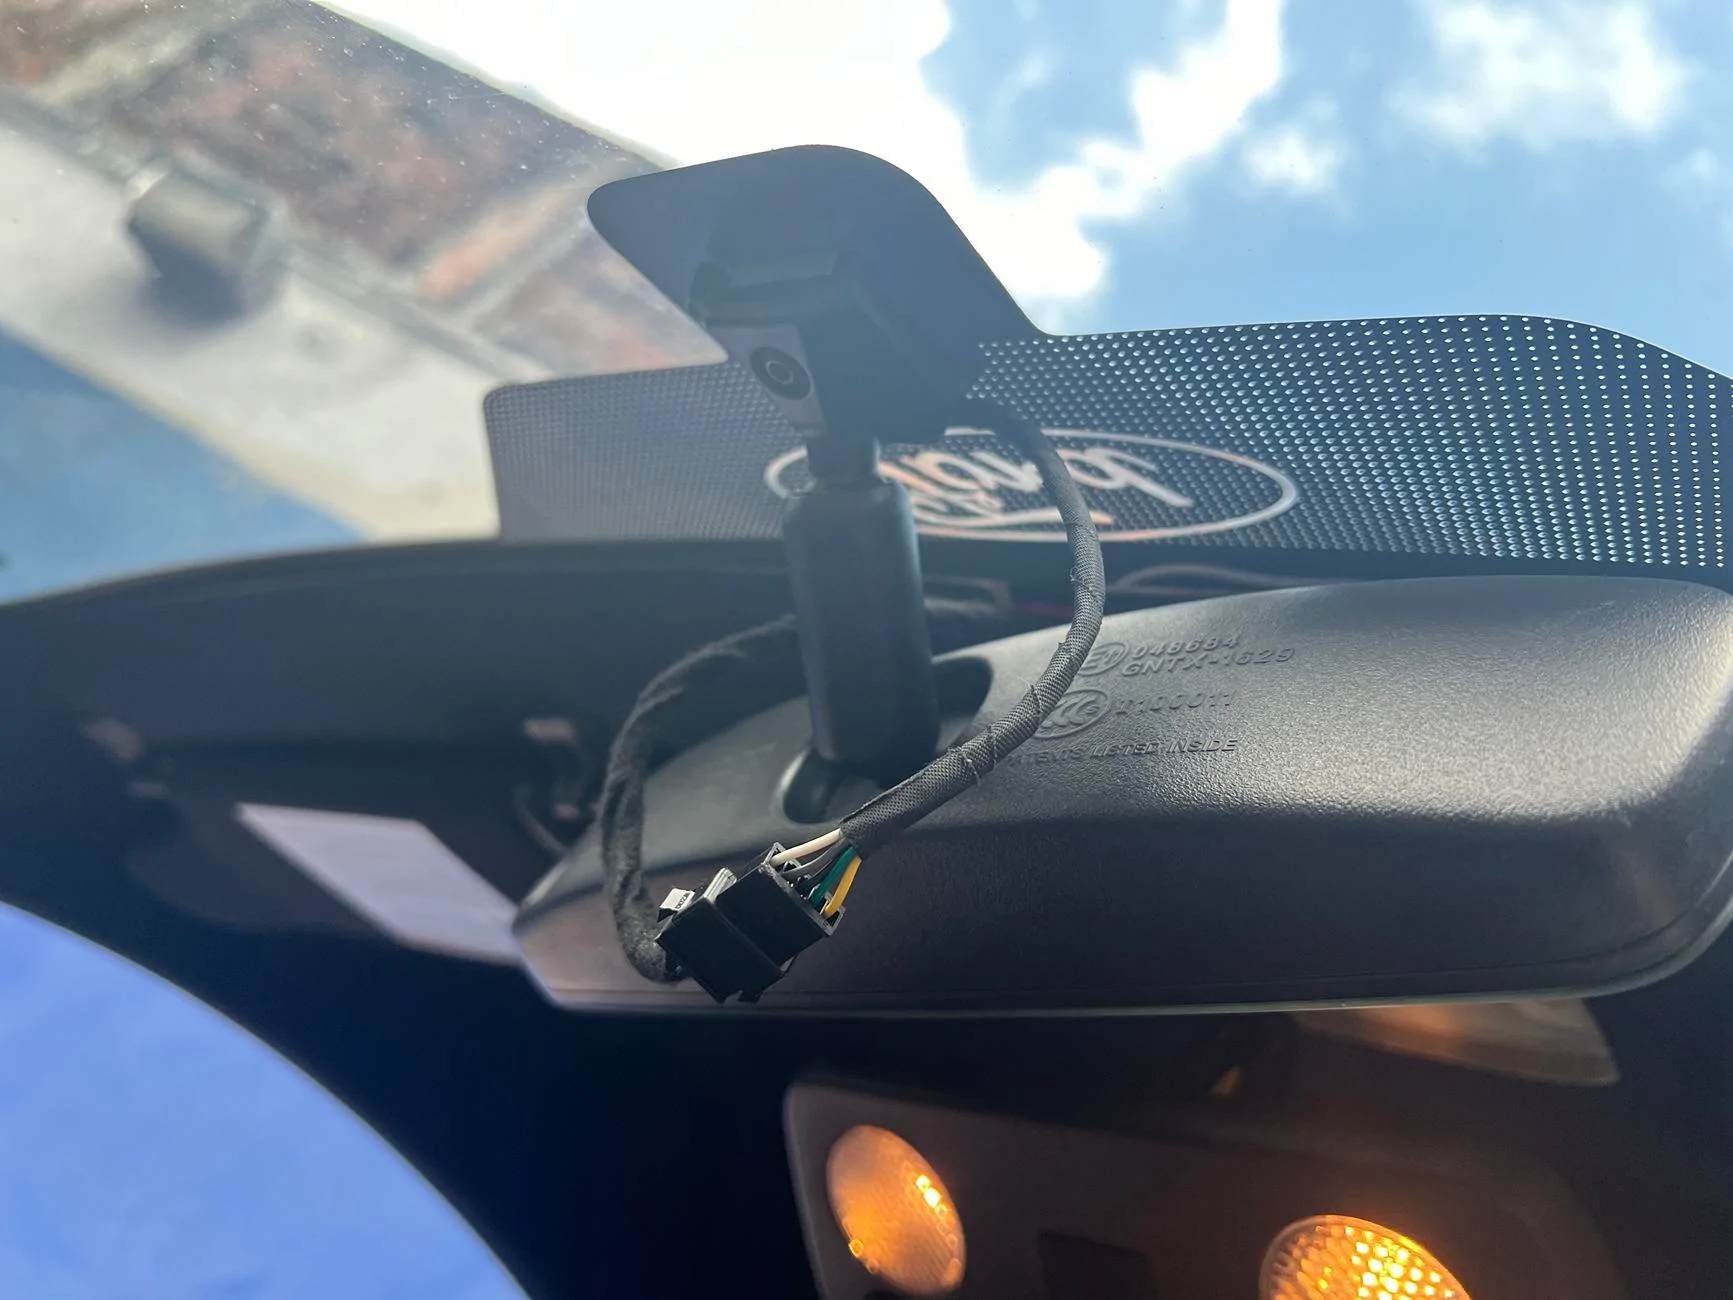
Would you happen to have anymore of these harnesses? I just recently bought a frameless mirror and came upon this for installing it.Here's the harness. What sucks is the old plug is so big its hard to put anywhere. I may just have to tape it to the back of my mirror... Won't see it from the inside but I guess if you look through the windshield you will. I tried to stick it in the overhead console/light area but I have other stuff up there and it wouldn't fit. You may be able to get it to fit.
I made a short and long version. If you want one, let me know via PM! Sending one out to db252 for his mirror.
Thanks for bringing awareness to this cool mirror, OP! I didn't even know it was an option!

")


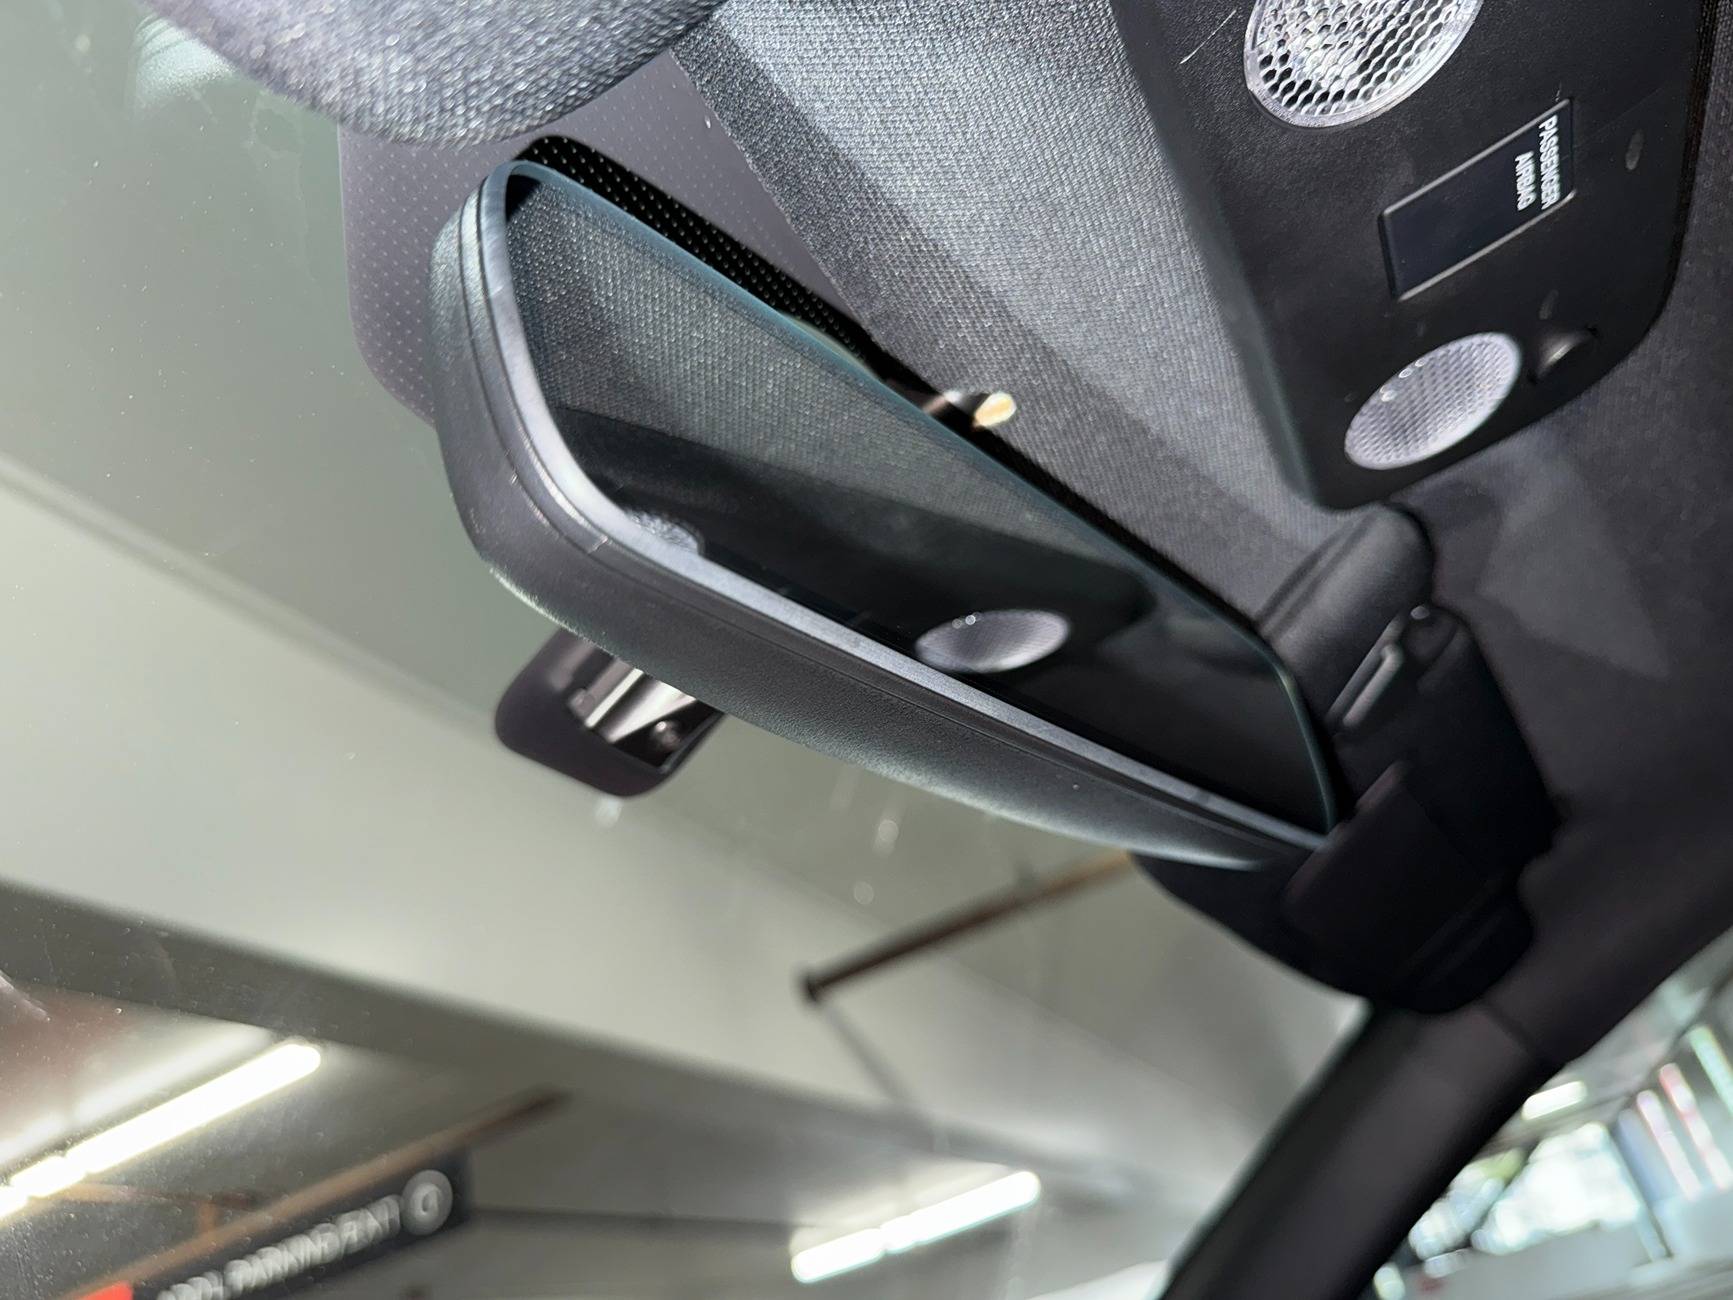
link to connectors?+1 with frameless mirror. Looks pretty good, the interior feels 5 years younger
I cut off the factory connector and put a typical china style one. It fits well behind the dome light stuff.

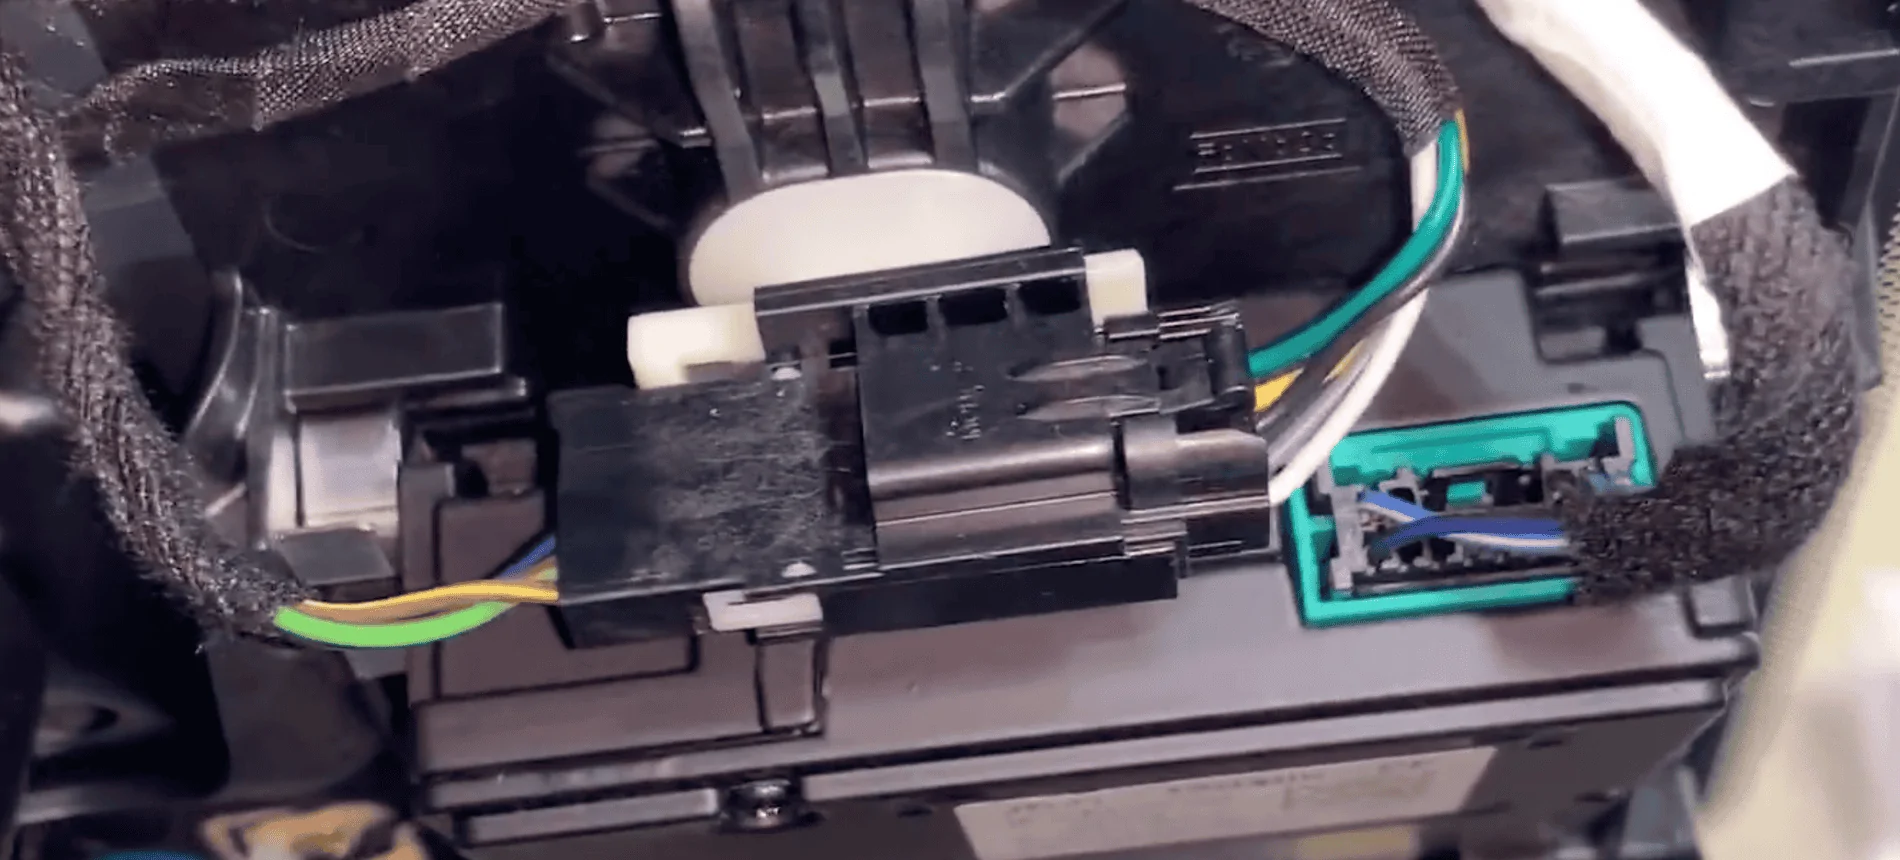
If someone will be wondering how to deal with 5 wires - only 3 are in use. Here are some images of the factory harness (found it in one youtube video):


If you have a soldering iron, just do what fonatig (and me as of recent) did. Pry your original mirror open and unsolder the connector from the board, and reference the posted wiring diagram to solder it onto the frameless mirror's harness. It gives you the most seamless, and least bulky mounting method.link to connectors?
If you have a soldering iron, just do what fonatig (and me as of recent) did. Pry your original mirror open and unsolder the connector from the board, and reference the posted wiring diagram to solder it onto the frameless mirror's harness. It gives you the most seamless, and least bulky mounting method.
Did this exact modification yesterday following the pinout diagram on page 2 of this thread. Connector on the PCB of the old mirror was a little difficult to remove (although not that experienced in doing a large connector with that many pins), but was able to finally get it. Snipped the 5-pin connector off of the new frameless mirror, extended the length of the 3 wires needed (white, grey, and black - yellow and green are not used) so it could reach the map light cover, and soldered the 3 wires to the connector from the old mirror. Plug and play at that point with the headliner connector. Wrapped the connection under the map light cover with some cloth Tesa tape so it wouldn't cause any rattles. Great interior upgrade for less than $50.Thank you so much for the connector wiring diagram!
I unsoldered connector from my original mirror and soldered it to the fameless mirror wires.
Works just fine and looks great!
This is the best $35 interior upgrade you can possibly do on this car.