gqneon
Well-Known Member
- Joined
- Jun 25, 2015
- Threads
- 91
- Messages
- 867
- Reaction score
- 144
- Location
- Westfield, IN
- Vehicle(s)
- 18 GT PP / Manual
- Thread starter
- #1
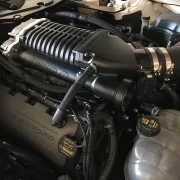
I bolted my Whipple stage 2 on my 2015 GT convertible last week and have been tooling around town with it for a few hundred miles this last several days.
I just wanted to say, man I love my Whipple.
Bad ass.
:cheers::cheers::cheers:

I just wanted to say, man I love my Whipple.
Bad ass.
:cheers::cheers::cheers:

Sponsored
Last edited: