suckerv
IG: @amelias550
- Joined
- Jan 20, 2015
- Threads
- 41
- Messages
- 545
- Reaction score
- 222
- Location
- Brentwood, CA
- Vehicle(s)
- 2015 Mustang GT PP Deep Impact Blue
- Thread starter
- #1
UPDATED WITH HANDS-ON IMPRESSIONS 7-22-16
OK, I've now had a few days to play around with this gauge, and I love having it. The unit turns on as you start the car, and turns off when you shut the car down. WHen the car is off, you can still enter the config menu by holding both buttons down
When you start the car, it immediately defaults to the boost mode, where it shows the Boost in PSI and Vacuum in inHg. Not too useful since my stock PP gauges basically show the same thing. The next mode is your coolant temp, which supposedly gives a more accurate reading that your car's needle gauge. The air intake temp is next, which is also a factory feature, but it's easier to access from this gauge. The ignition timing follows after that, where it shows you the spark timing of your engine in real time. next is the exhaust gas temp as calculated by the ECU. After that, you get your throttle position, which shows the actual throttle plate position.
Perhaps the most interesting feature is the next mode, the RPM readout. You can see your exact RPM, record and playback your shifts, and also program the gauge to flash after a specific RPM (default is 5700). The next mode is the speed readout, which is the actual raw, uncorrected roadspeed, so it may not match the speed on your speedometer. The next mode is also a fun one; a 0-60 timer with auto start/stop. let's just say I'm glad I'm the only person who has moved onto my block so far, so I have a nice stretch of empty road to play with. Lastly, you have the battery voltage meter, which is especially useful to me right now since I had left something on recently and my battery was completely dead.
It's a fantastic gauge to have and gives you a ton of readouts and features to play around with. Nothing there is a must have, but if you like tech toys and are the type of person that needs to know exactly what their car is doing, this is a no brainer. I can see it being especially useful for those who track their cars.
INSTALL INSTRUCTIONS BELOW:
I know that having a car that isn’t tuned or tracked really doesn’t call for any use for gauges, especially since the stock PP gauges (and those within the information center) pretty much tell me more than I’ll ever need to know. But, I work in tech and techy toys are my weakness, so when I learned about the Raxiom vent integrated multi-gauge, I was pretty much all over it. It’s kind of like offering me a good sub sandwich; the answer is always “YES PLEASE.” Basically, I’m a sucker for electronics with buttons and a cool display.
With that being said, Raxiom has done a great thing by basically taking all the complication and flair out of the concept of a gauge, and pared it down to something simple and easy to use. The fact that it actually installs into an existing air vent means this looks no more out of place than any of the other gauges or vents.

Installation was extremely simple, and took me less than hour to complete (I worked very slowly since plastic clips and I have a bad history). Step 1, open your glove compartment and pop off the panel directly to the right of the glove box. Use a side to side rocking motion while pulling out, otherwise you run the risk of breaking the clips.


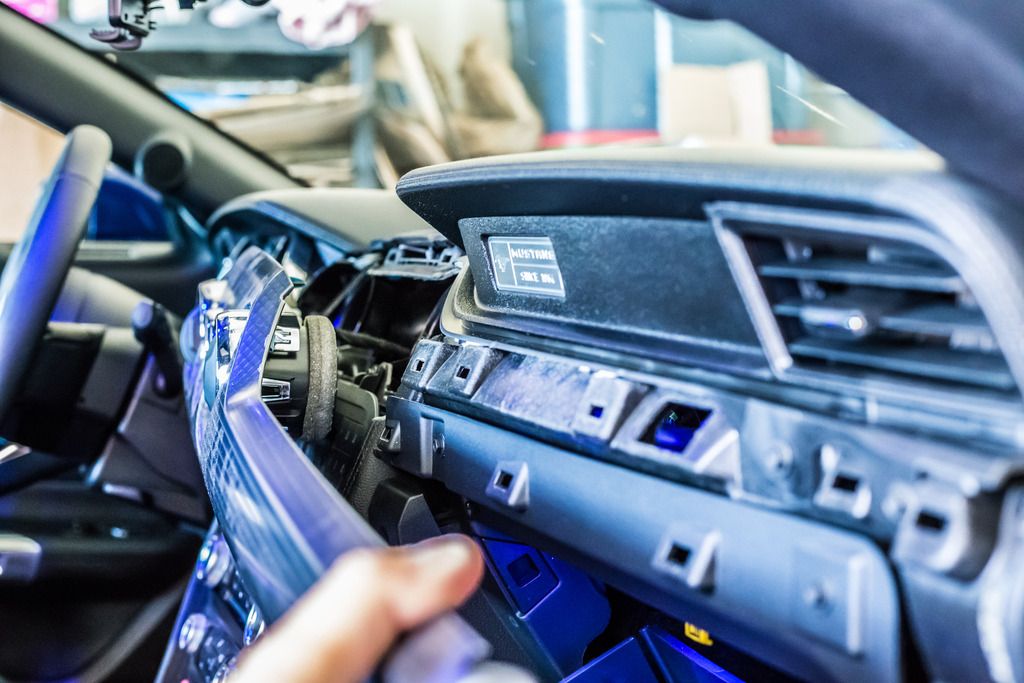
Once that piece is off, start popping off the main dash panel. On mine, the center of the panel popped out more easily than the edges, so I loosed the center clips and just worked my way out until the whole thing popped out. When the panel is loose, remember not to pull at it because it IS connected by a plug behind the factory gauges (you’ll want to unplug that). Once the plug is removed, pull the entire dash panel out.


Flip the panel over and locate the vent you want to use (I believe you must use the driver’s side vent because the wire isn’t long enough for the passenger one). There should be three chrome clips holding the housing to the panel. Depress each clip and pop the entire vent housing out through the front of the panel. Once you have the housing removed, pull the faux-chrome trim off by also loosening the clips holding in place.


Once the trim is removed, you’ll need to pop the outer black ring apart from the inner portion that holds then vents. Just pull this right off; it’s not too difficult to do. Once that’s off, proceed with removing the bottom vent slat and bracket. The one with the straight indentation is the top vent and should NOT be removed.


Installing the gauge itself was actually harder than it seemed. There are two tabs on either side of the gauge, and these tabs need to snap into the holes in the vent bracket. Slide the bottom of the gauge in through the front of the bracket, snap the two tabs into place, then swing the bottom towards the front until it snaps into place as well. The gauge will be at a slight angle; this is normal. Once the gauge is securely in place, open and shut the upper vent to make sure it still works. It should open/shut with no issues.

Put the black trim ring back onto the vent bracket, and feed the gauge wire through the bottom left hold in the housing, and snap everything back into place. Once the housing is reassembled, snap the chrome trim ring back on as well (the tab with the two bumps lines up with the very bottom of the housing).


With the chrome ring back into place and the vent housing reassembled completely, simply pop the whole thing back into the dash panel (flat part of the barrel goes at the 6 o'clock position). Once everything is secure in the dash panel, give it a look over to make sure you have everything nice and snug where it needs to be.


Before putting the dash panel back into place, look for a panel to the bottom right of the steering column. Pop that open (top only, the bottom stays connected) but do NOT pull the whole thing out. There's a wire harness behind that you won't need to touch. You'll be feeding the gauge wire behind the dash panel through this area behind the panel. Just leave it open for now.


Reinstall the dash panel now. Remember to reconnect the factory gauge wiring clip, then let the panel rest somewhere while you feed the Raxiom gauge wire through the vent hole, and down into the panel by the steering wheel.

When you have the Raxiom wire fed correctly through the vent hole and down into that panel, go ahead and snap the dash panel securely back into place. Remember to also replace the small panel to the right of the glove box.

Next, plug the OBD2 wire into the OBD2 port (bottom left of steering column), and plug the other end of that wire into the control box.

Take the gauge wire that you fed through the panel by the steering wheel, and plug that into the other end of the control panel (they will have unique ports so don't worry about confusing the two sides). When everything is hooked up, the gauge should power on and it should look like this in your driver's side footwell:


All that's left to do is tuck all that crap somewhere out of the way. I zip tied everything together and stuff it all behind the bottom of the steering column. So far I haven't taken the car out yet so I don't know if it'll stay in there when I'm doing some spirited driving, but worst case scenario, I can always use some Velcro to hold it in place.
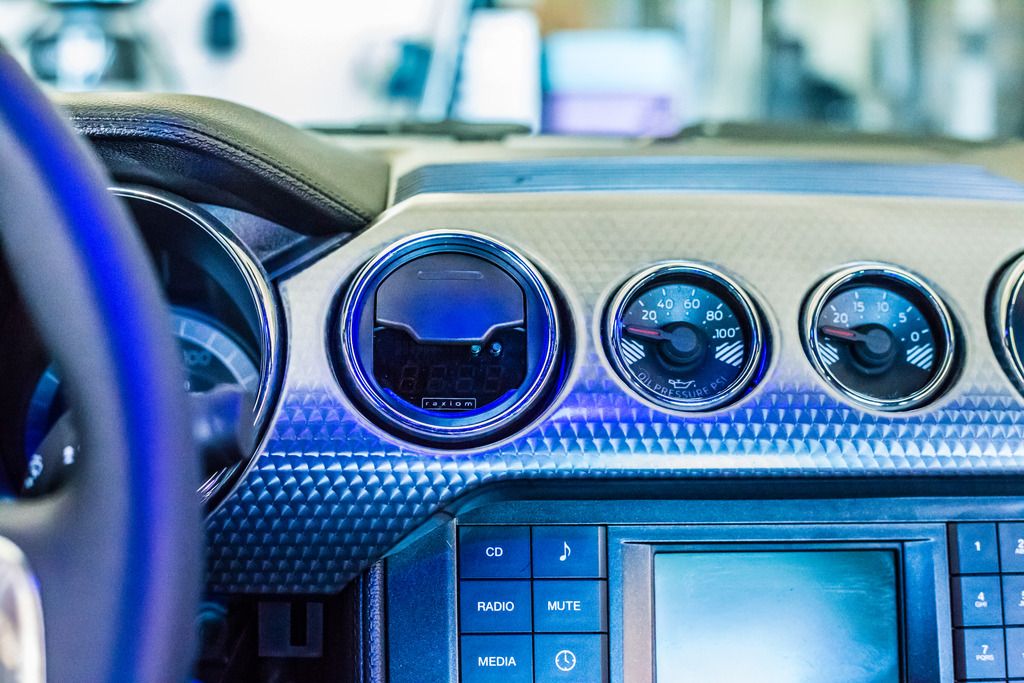
And here's the finished product!


Now, a disclaimer: I have NOT yet taken the car out and played with the gauge, so I will update this thread with a review as soon as I get a chance to do so. For now, it's just the installation procedure, which honestly was pretty easy!
OK, I've now had a few days to play around with this gauge, and I love having it. The unit turns on as you start the car, and turns off when you shut the car down. WHen the car is off, you can still enter the config menu by holding both buttons down
When you start the car, it immediately defaults to the boost mode, where it shows the Boost in PSI and Vacuum in inHg. Not too useful since my stock PP gauges basically show the same thing. The next mode is your coolant temp, which supposedly gives a more accurate reading that your car's needle gauge. The air intake temp is next, which is also a factory feature, but it's easier to access from this gauge. The ignition timing follows after that, where it shows you the spark timing of your engine in real time. next is the exhaust gas temp as calculated by the ECU. After that, you get your throttle position, which shows the actual throttle plate position.
Perhaps the most interesting feature is the next mode, the RPM readout. You can see your exact RPM, record and playback your shifts, and also program the gauge to flash after a specific RPM (default is 5700). The next mode is the speed readout, which is the actual raw, uncorrected roadspeed, so it may not match the speed on your speedometer. The next mode is also a fun one; a 0-60 timer with auto start/stop. let's just say I'm glad I'm the only person who has moved onto my block so far, so I have a nice stretch of empty road to play with. Lastly, you have the battery voltage meter, which is especially useful to me right now since I had left something on recently and my battery was completely dead.
It's a fantastic gauge to have and gives you a ton of readouts and features to play around with. Nothing there is a must have, but if you like tech toys and are the type of person that needs to know exactly what their car is doing, this is a no brainer. I can see it being especially useful for those who track their cars.
INSTALL INSTRUCTIONS BELOW:
I know that having a car that isn’t tuned or tracked really doesn’t call for any use for gauges, especially since the stock PP gauges (and those within the information center) pretty much tell me more than I’ll ever need to know. But, I work in tech and techy toys are my weakness, so when I learned about the Raxiom vent integrated multi-gauge, I was pretty much all over it. It’s kind of like offering me a good sub sandwich; the answer is always “YES PLEASE.” Basically, I’m a sucker for electronics with buttons and a cool display.
With that being said, Raxiom has done a great thing by basically taking all the complication and flair out of the concept of a gauge, and pared it down to something simple and easy to use. The fact that it actually installs into an existing air vent means this looks no more out of place than any of the other gauges or vents.
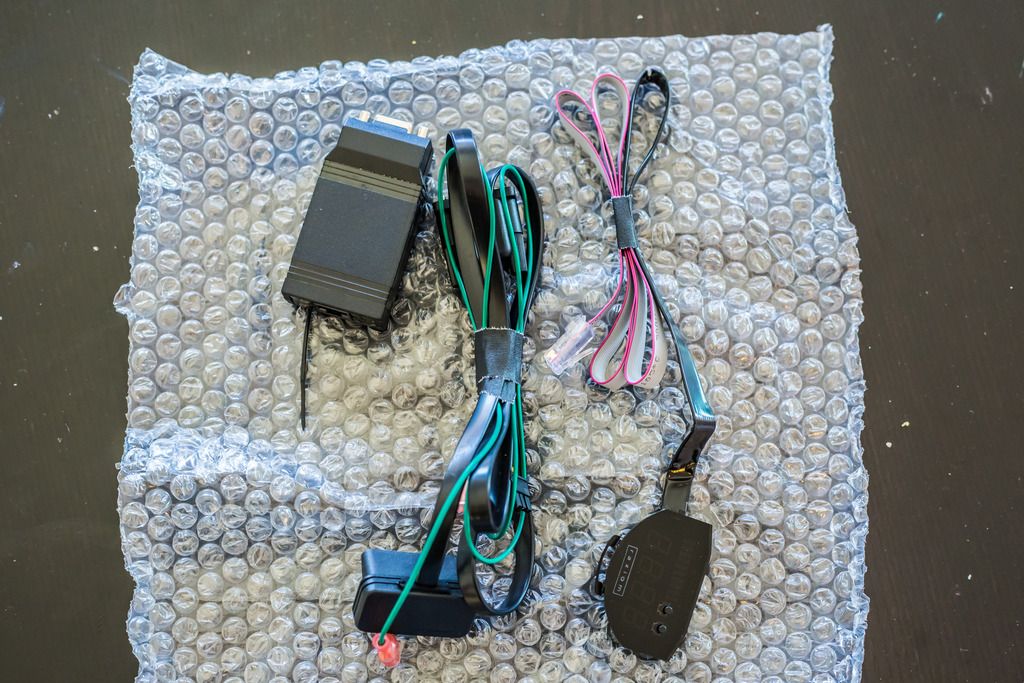
Installation was extremely simple, and took me less than hour to complete (I worked very slowly since plastic clips and I have a bad history). Step 1, open your glove compartment and pop off the panel directly to the right of the glove box. Use a side to side rocking motion while pulling out, otherwise you run the risk of breaking the clips.
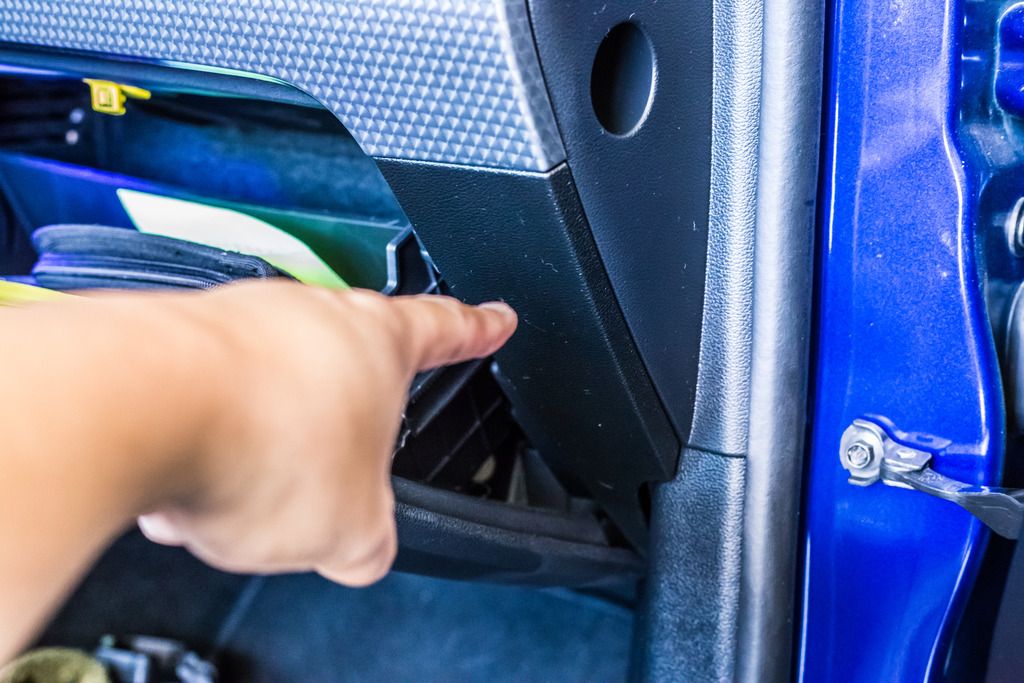
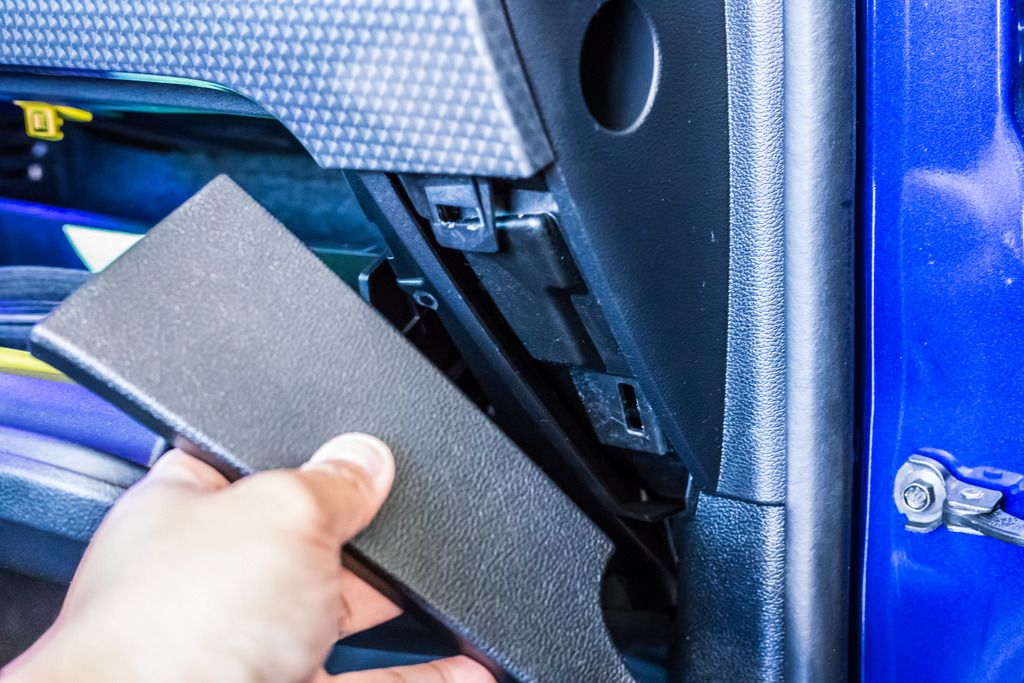
Once that piece is off, start popping off the main dash panel. On mine, the center of the panel popped out more easily than the edges, so I loosed the center clips and just worked my way out until the whole thing popped out. When the panel is loose, remember not to pull at it because it IS connected by a plug behind the factory gauges (you’ll want to unplug that). Once the plug is removed, pull the entire dash panel out.
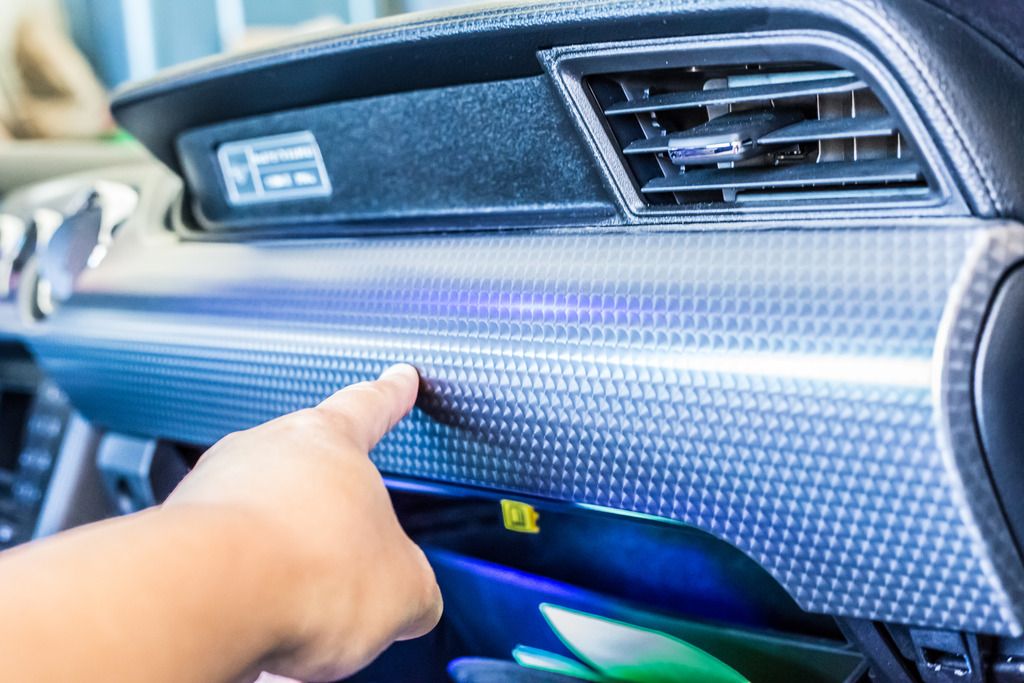

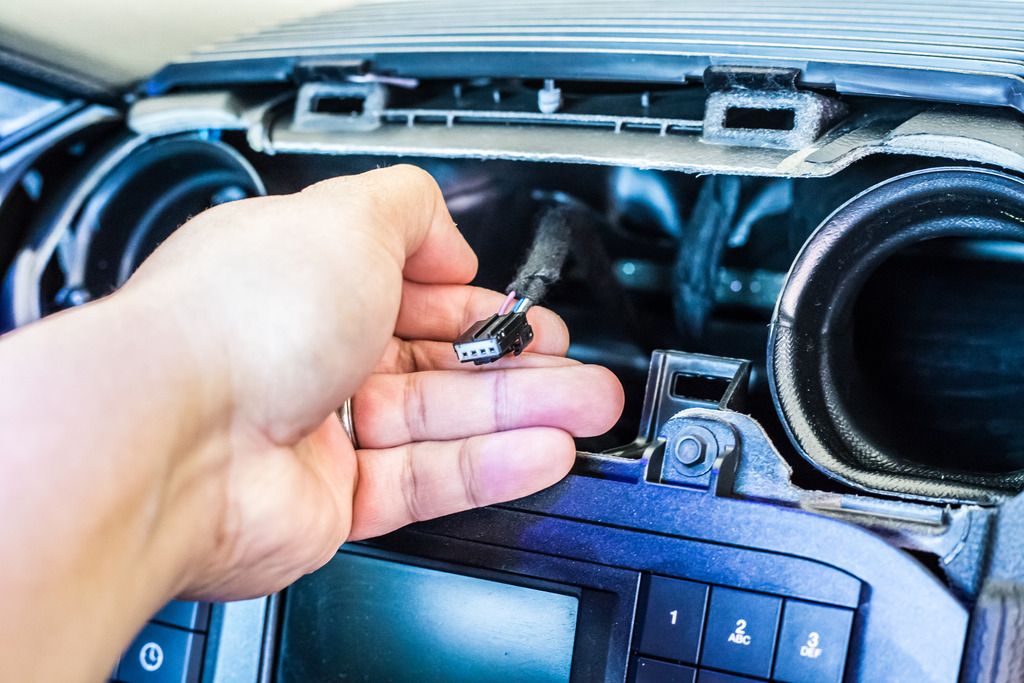
Flip the panel over and locate the vent you want to use (I believe you must use the driver’s side vent because the wire isn’t long enough for the passenger one). There should be three chrome clips holding the housing to the panel. Depress each clip and pop the entire vent housing out through the front of the panel. Once you have the housing removed, pull the faux-chrome trim off by also loosening the clips holding in place.
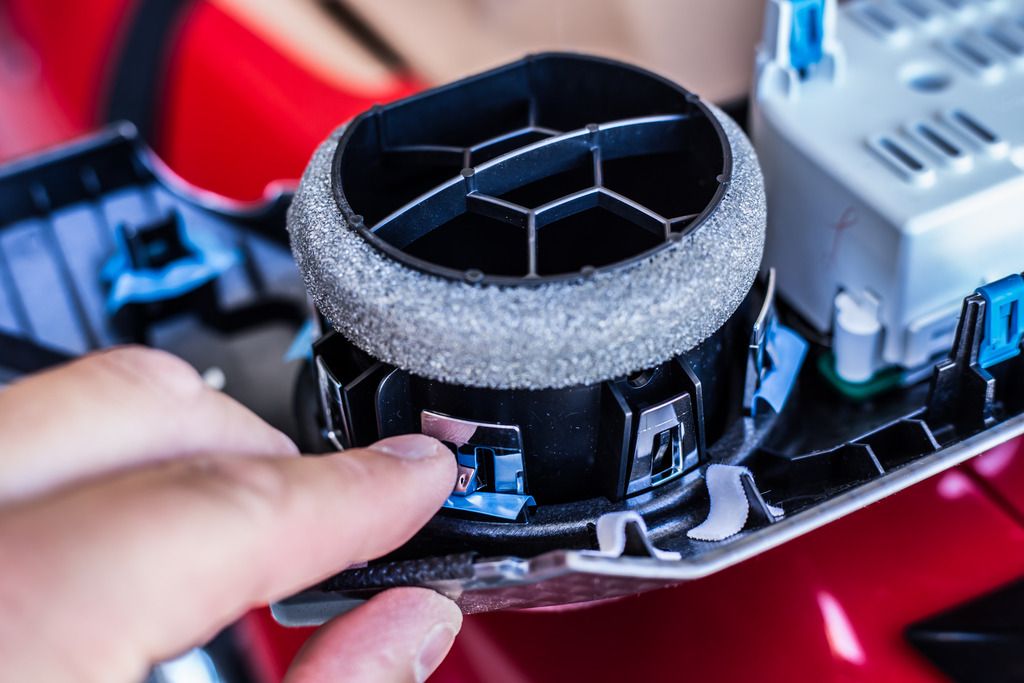
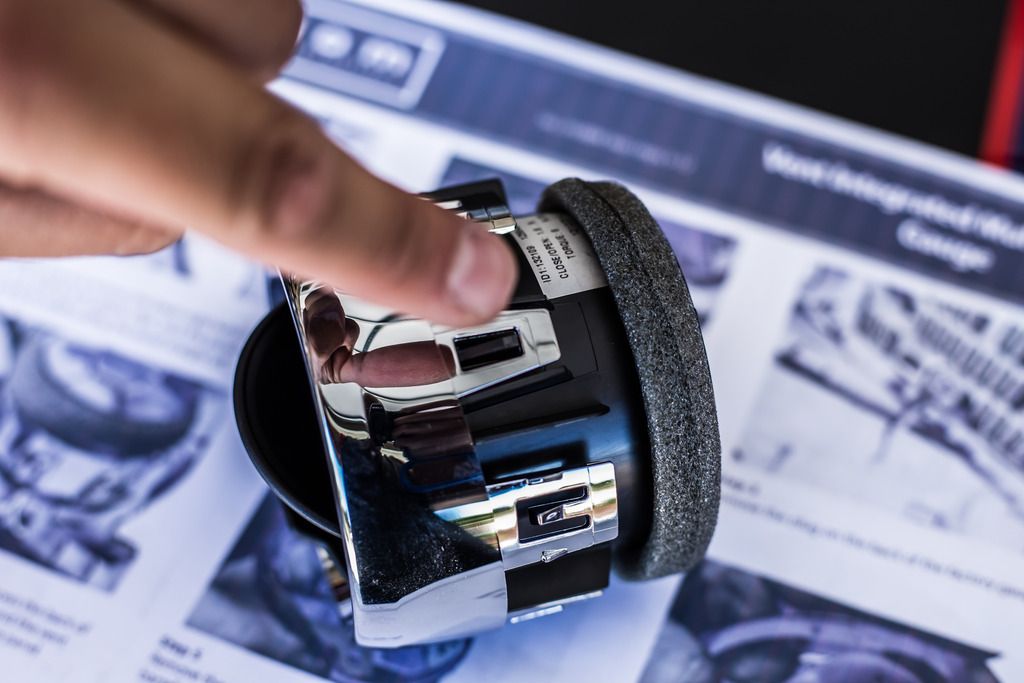
Once the trim is removed, you’ll need to pop the outer black ring apart from the inner portion that holds then vents. Just pull this right off; it’s not too difficult to do. Once that’s off, proceed with removing the bottom vent slat and bracket. The one with the straight indentation is the top vent and should NOT be removed.
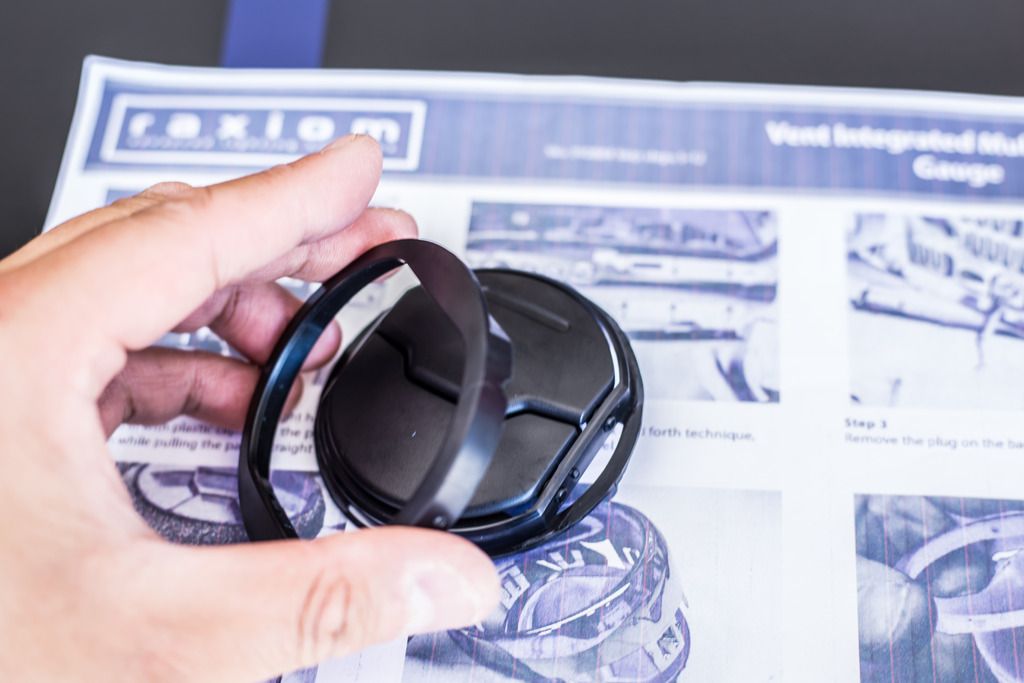
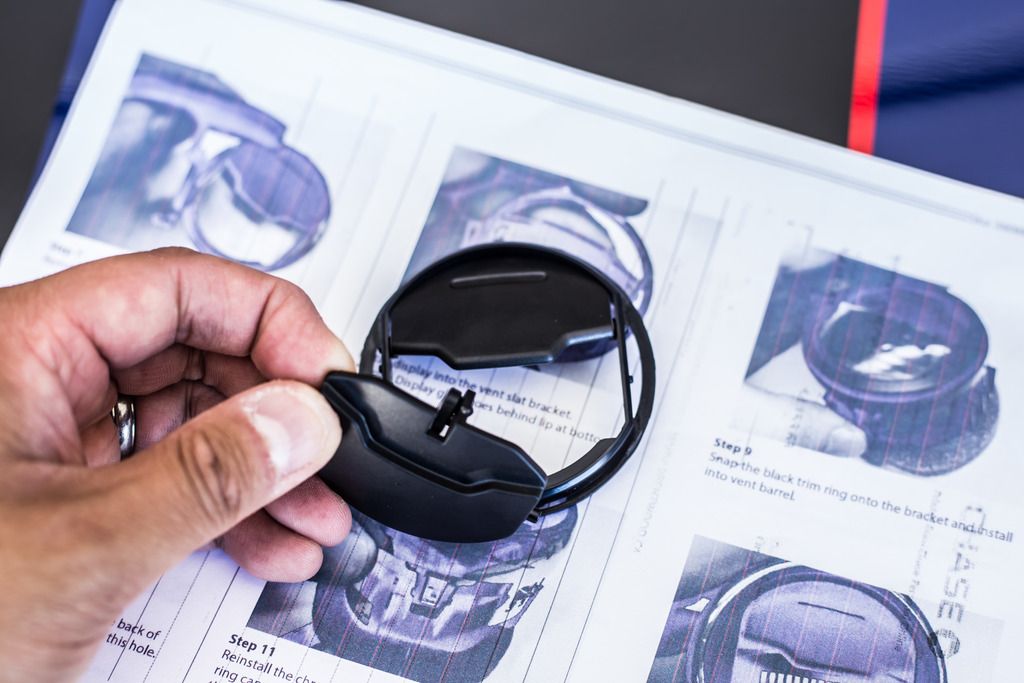
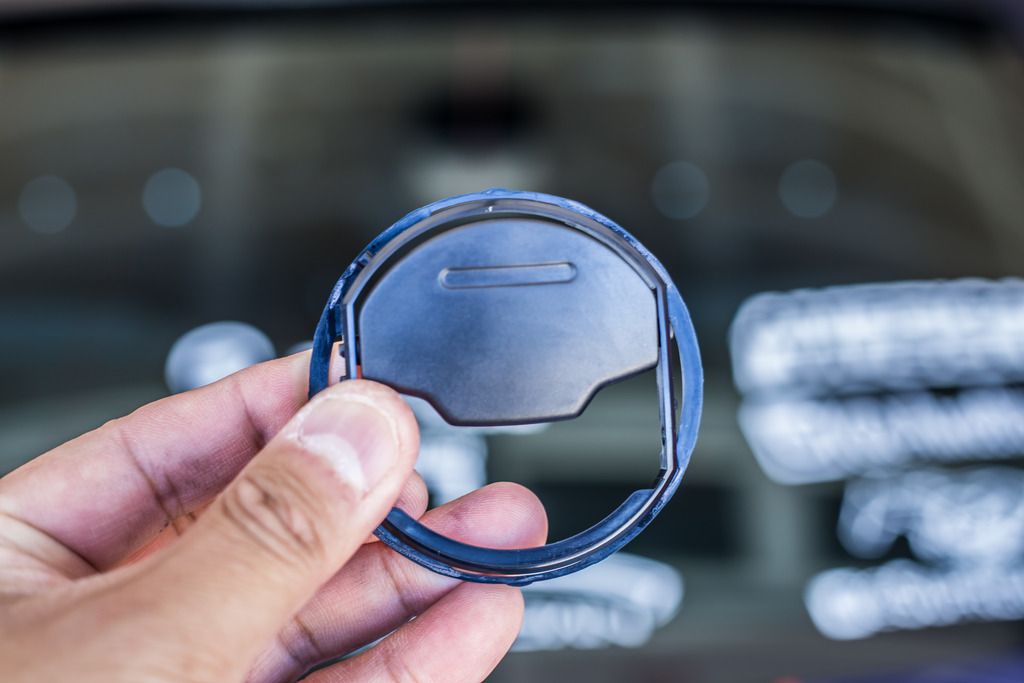
Installing the gauge itself was actually harder than it seemed. There are two tabs on either side of the gauge, and these tabs need to snap into the holes in the vent bracket. Slide the bottom of the gauge in through the front of the bracket, snap the two tabs into place, then swing the bottom towards the front until it snaps into place as well. The gauge will be at a slight angle; this is normal. Once the gauge is securely in place, open and shut the upper vent to make sure it still works. It should open/shut with no issues.
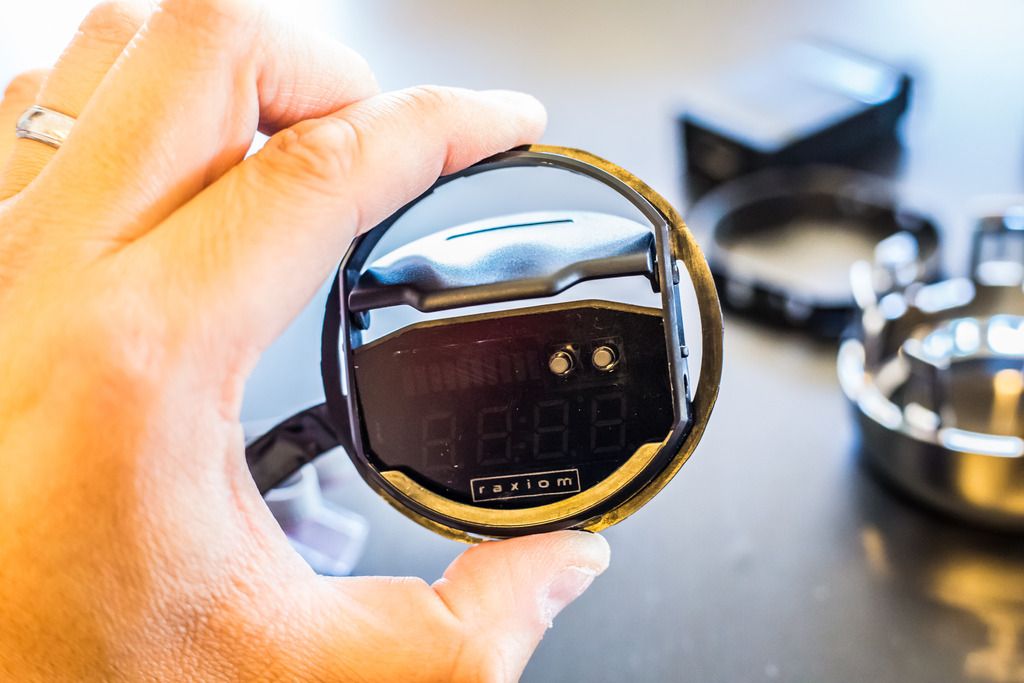
Put the black trim ring back onto the vent bracket, and feed the gauge wire through the bottom left hold in the housing, and snap everything back into place. Once the housing is reassembled, snap the chrome trim ring back on as well (the tab with the two bumps lines up with the very bottom of the housing).
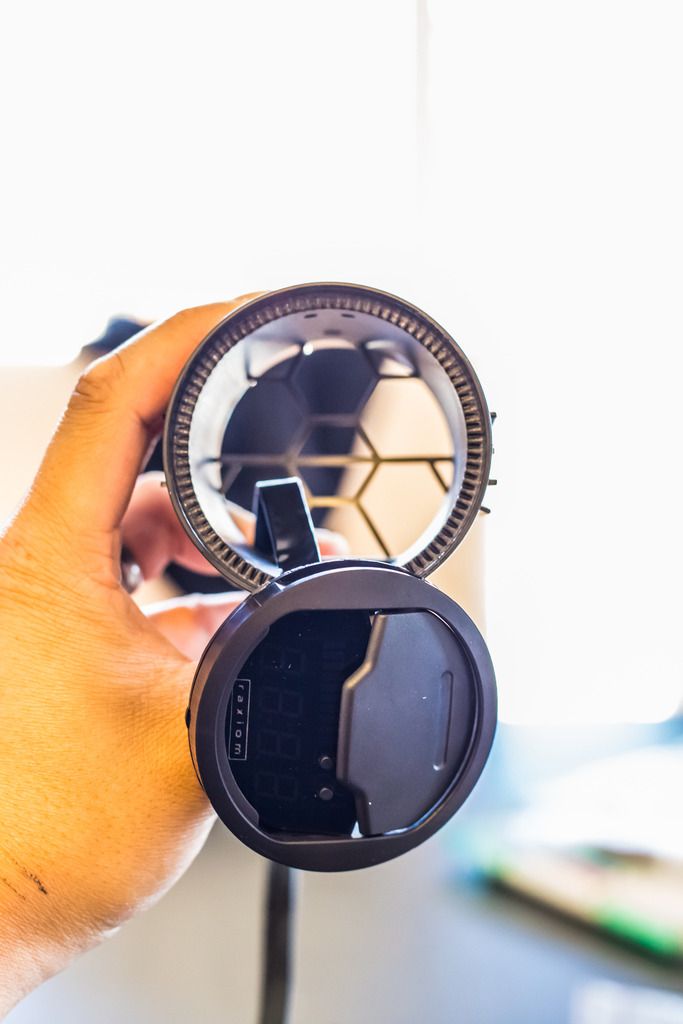
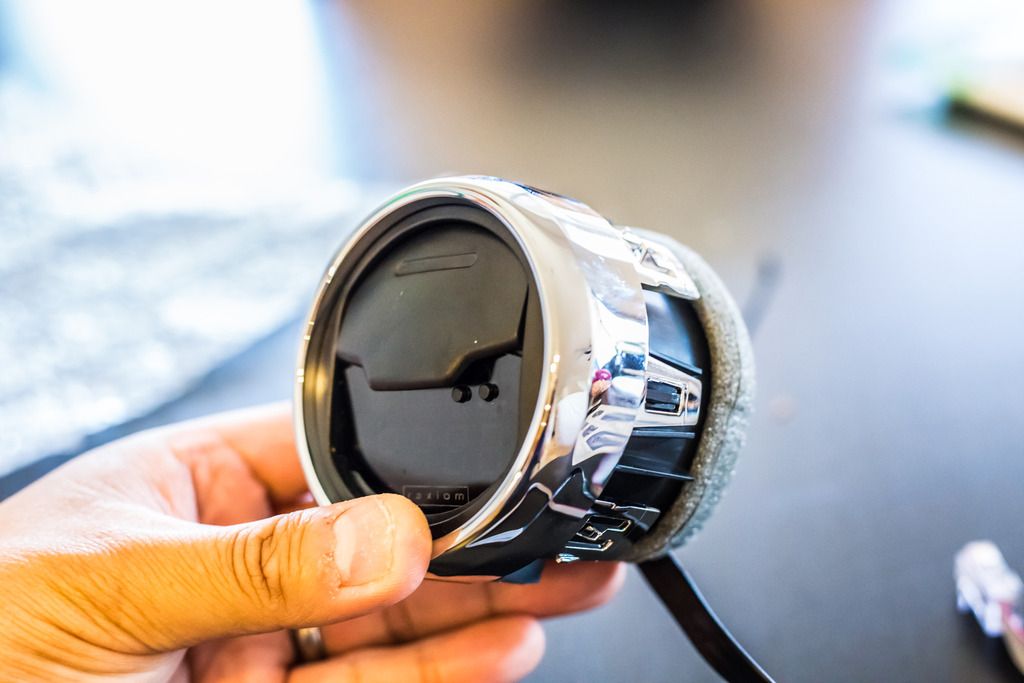
With the chrome ring back into place and the vent housing reassembled completely, simply pop the whole thing back into the dash panel (flat part of the barrel goes at the 6 o'clock position). Once everything is secure in the dash panel, give it a look over to make sure you have everything nice and snug where it needs to be.
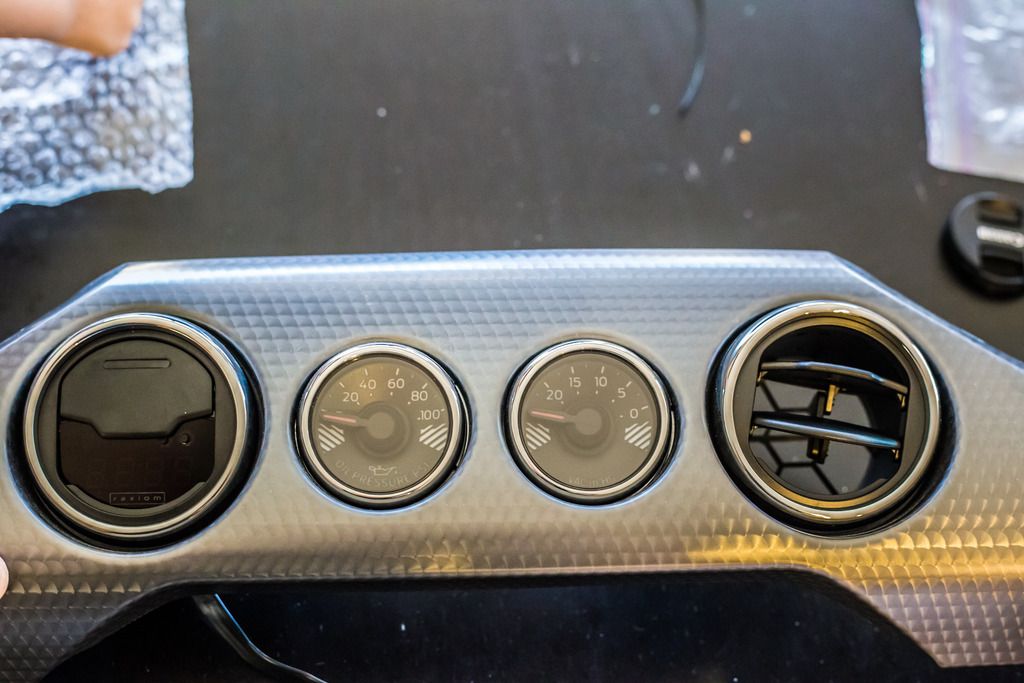
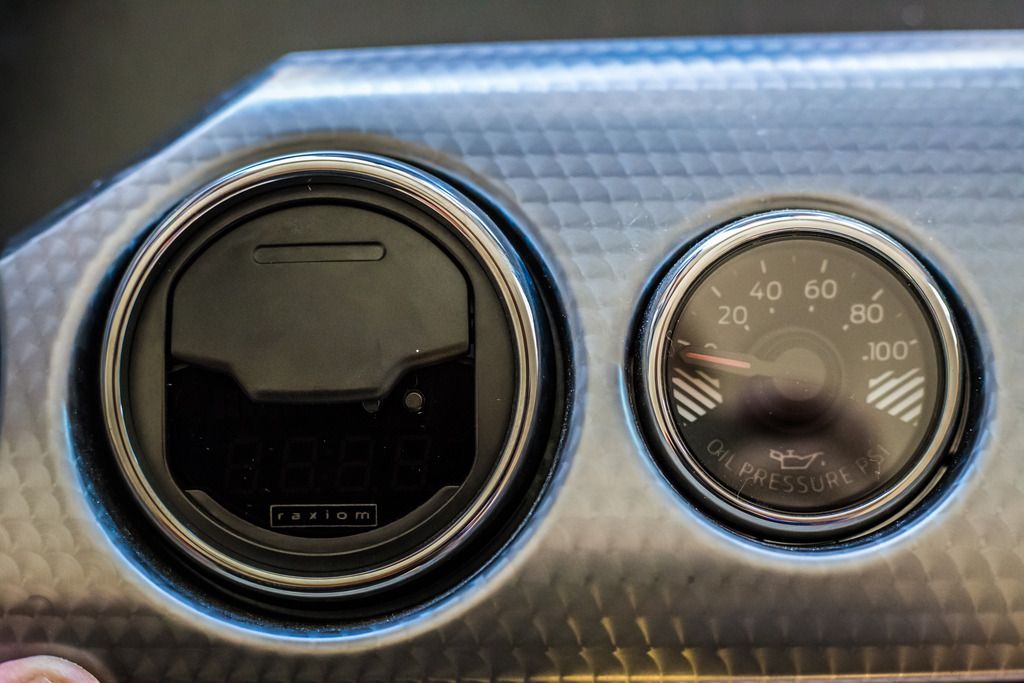
Before putting the dash panel back into place, look for a panel to the bottom right of the steering column. Pop that open (top only, the bottom stays connected) but do NOT pull the whole thing out. There's a wire harness behind that you won't need to touch. You'll be feeding the gauge wire behind the dash panel through this area behind the panel. Just leave it open for now.
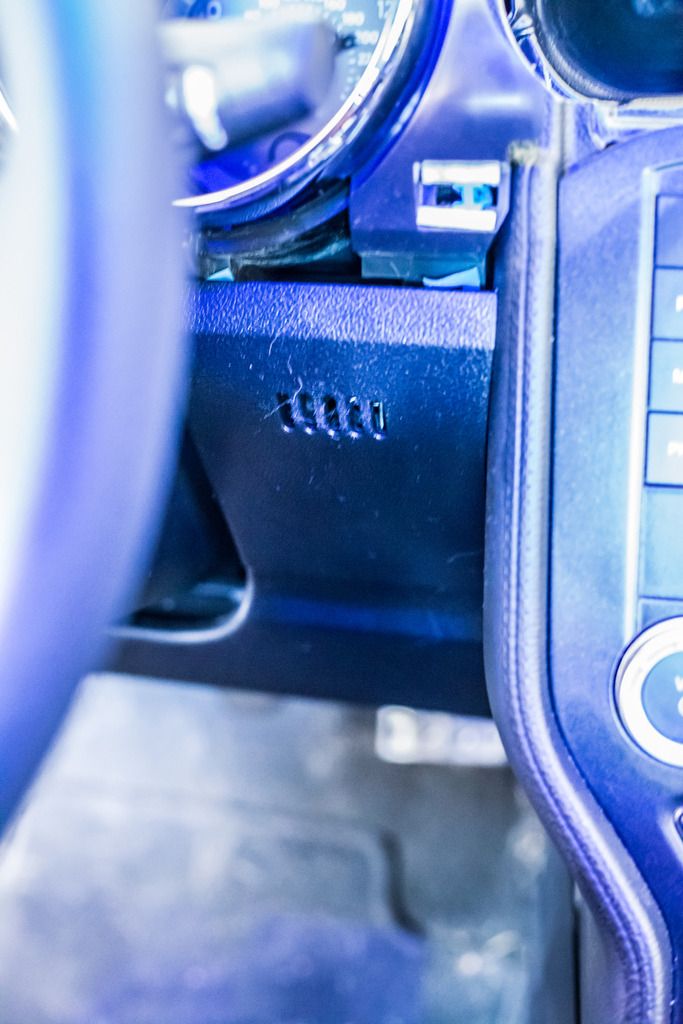
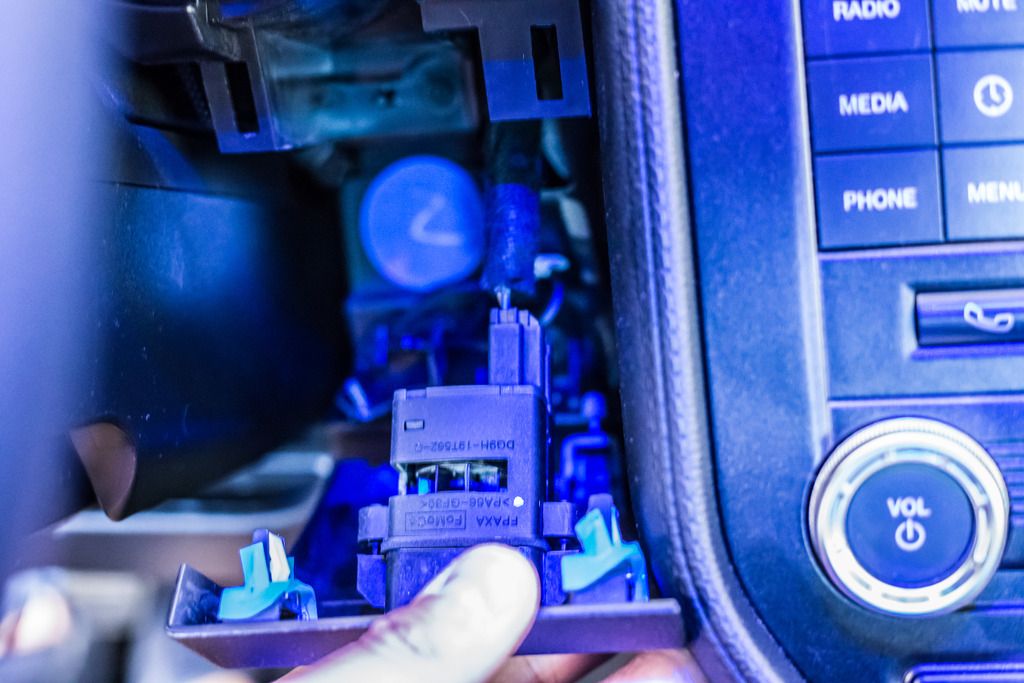
Reinstall the dash panel now. Remember to reconnect the factory gauge wiring clip, then let the panel rest somewhere while you feed the Raxiom gauge wire through the vent hole, and down into the panel by the steering wheel.
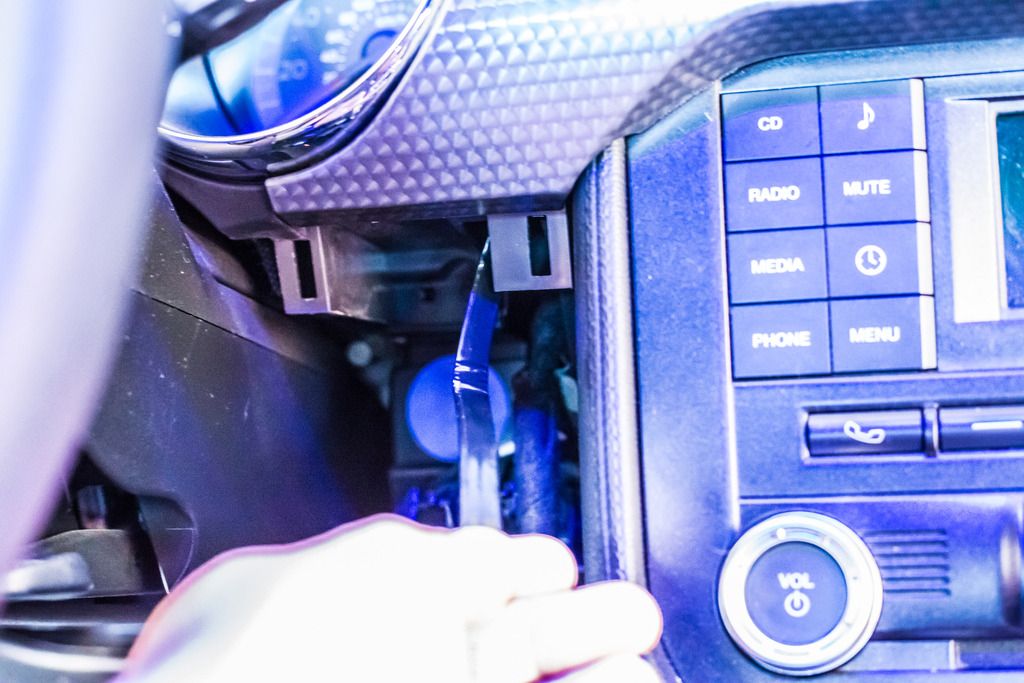
When you have the Raxiom wire fed correctly through the vent hole and down into that panel, go ahead and snap the dash panel securely back into place. Remember to also replace the small panel to the right of the glove box.
Next, plug the OBD2 wire into the OBD2 port (bottom left of steering column), and plug the other end of that wire into the control box.
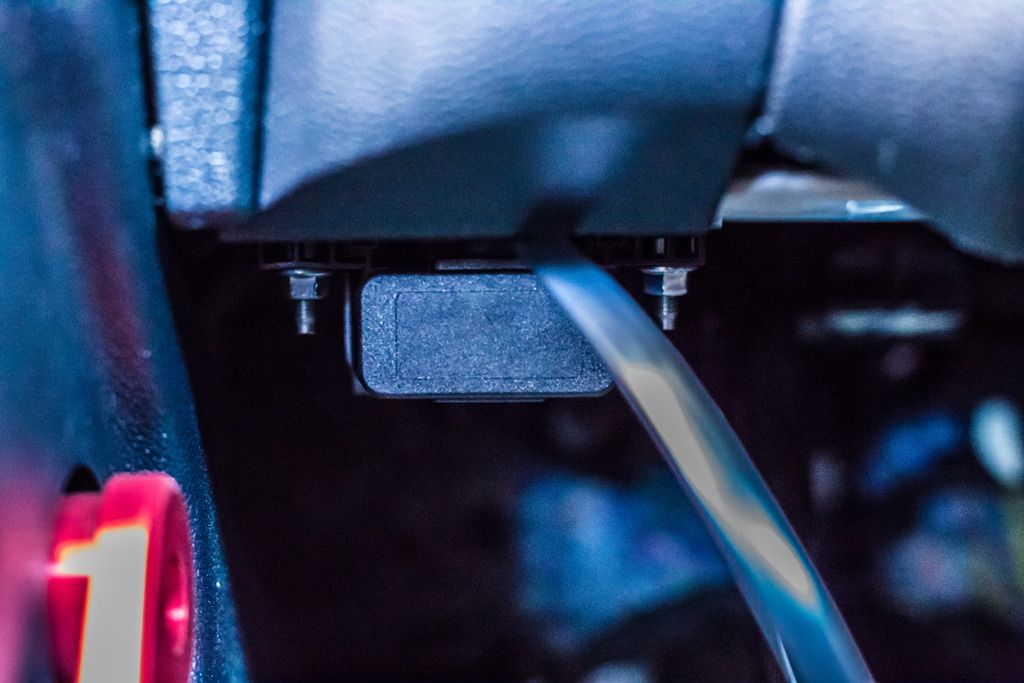
Take the gauge wire that you fed through the panel by the steering wheel, and plug that into the other end of the control panel (they will have unique ports so don't worry about confusing the two sides). When everything is hooked up, the gauge should power on and it should look like this in your driver's side footwell:
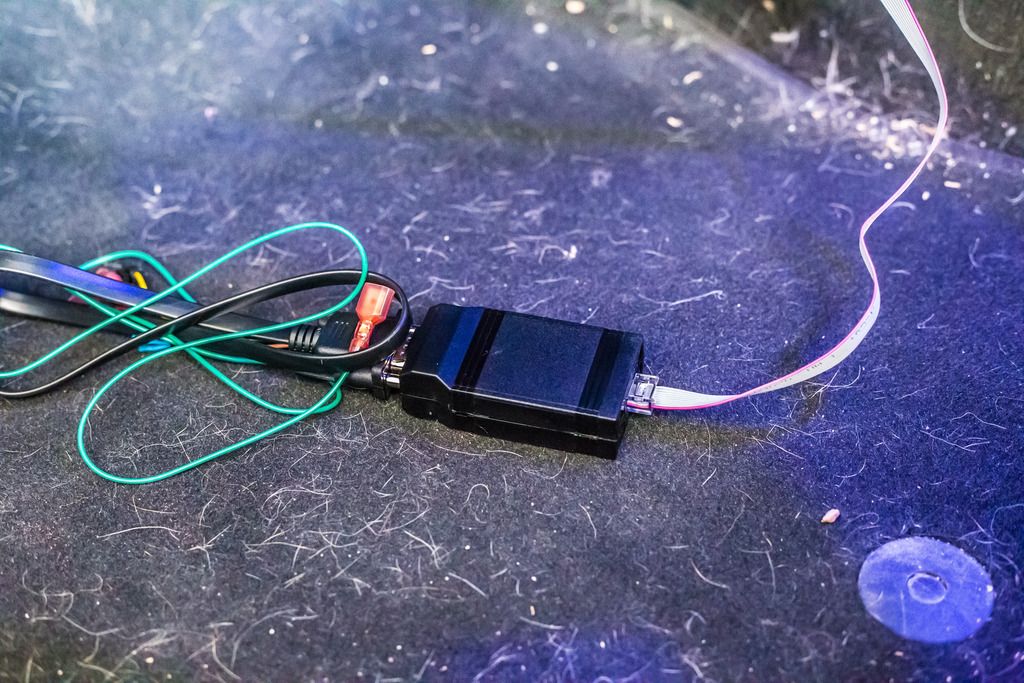
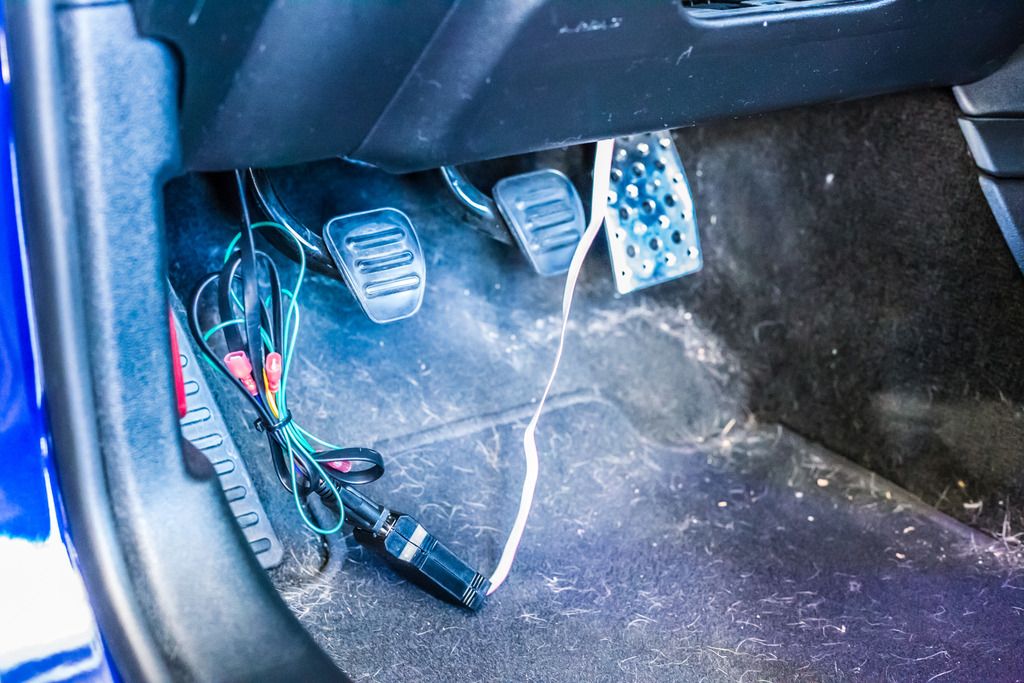
All that's left to do is tuck all that crap somewhere out of the way. I zip tied everything together and stuff it all behind the bottom of the steering column. So far I haven't taken the car out yet so I don't know if it'll stay in there when I'm doing some spirited driving, but worst case scenario, I can always use some Velcro to hold it in place.
And here's the finished product!
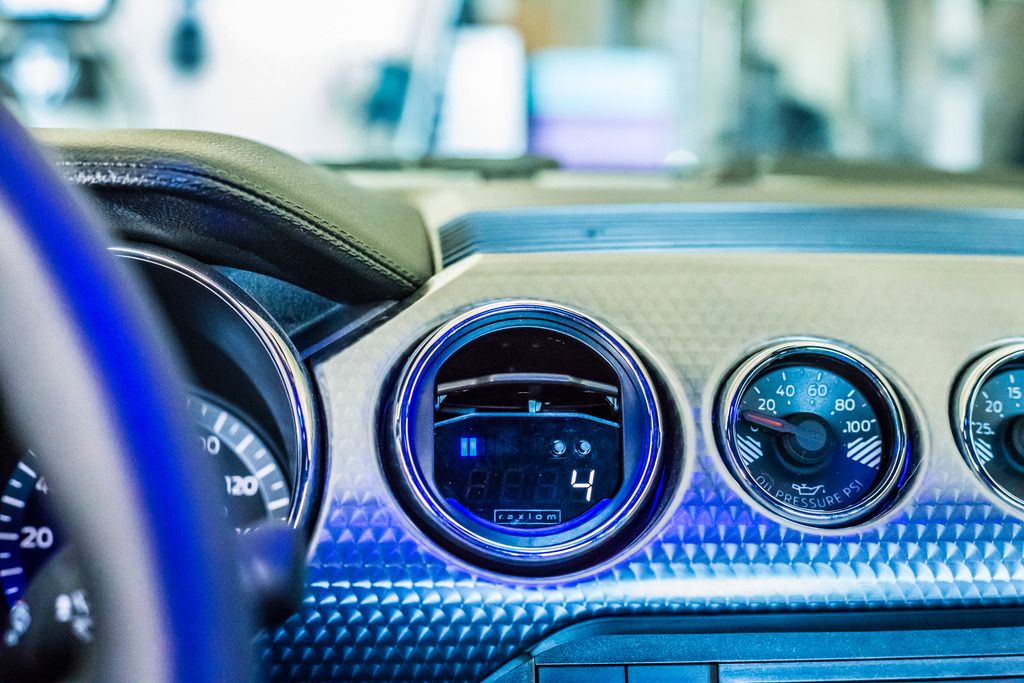

Now, a disclaimer: I have NOT yet taken the car out and played with the gauge, so I will update this thread with a review as soon as I get a chance to do so. For now, it's just the installation procedure, which honestly was pretty easy!
Sponsored
Last edited:
