tonyd1
US NAVY,US ARMY,USCG-RET
- Joined
- Mar 19, 2017
- Threads
- 48
- Messages
- 249
- Reaction score
- 29
- Location
- New Port Richey,fl.
- First Name
- Tony
- Vehicle(s)
- 2018 Mustang GT Ruby Red PP,Automatic


Sponsored
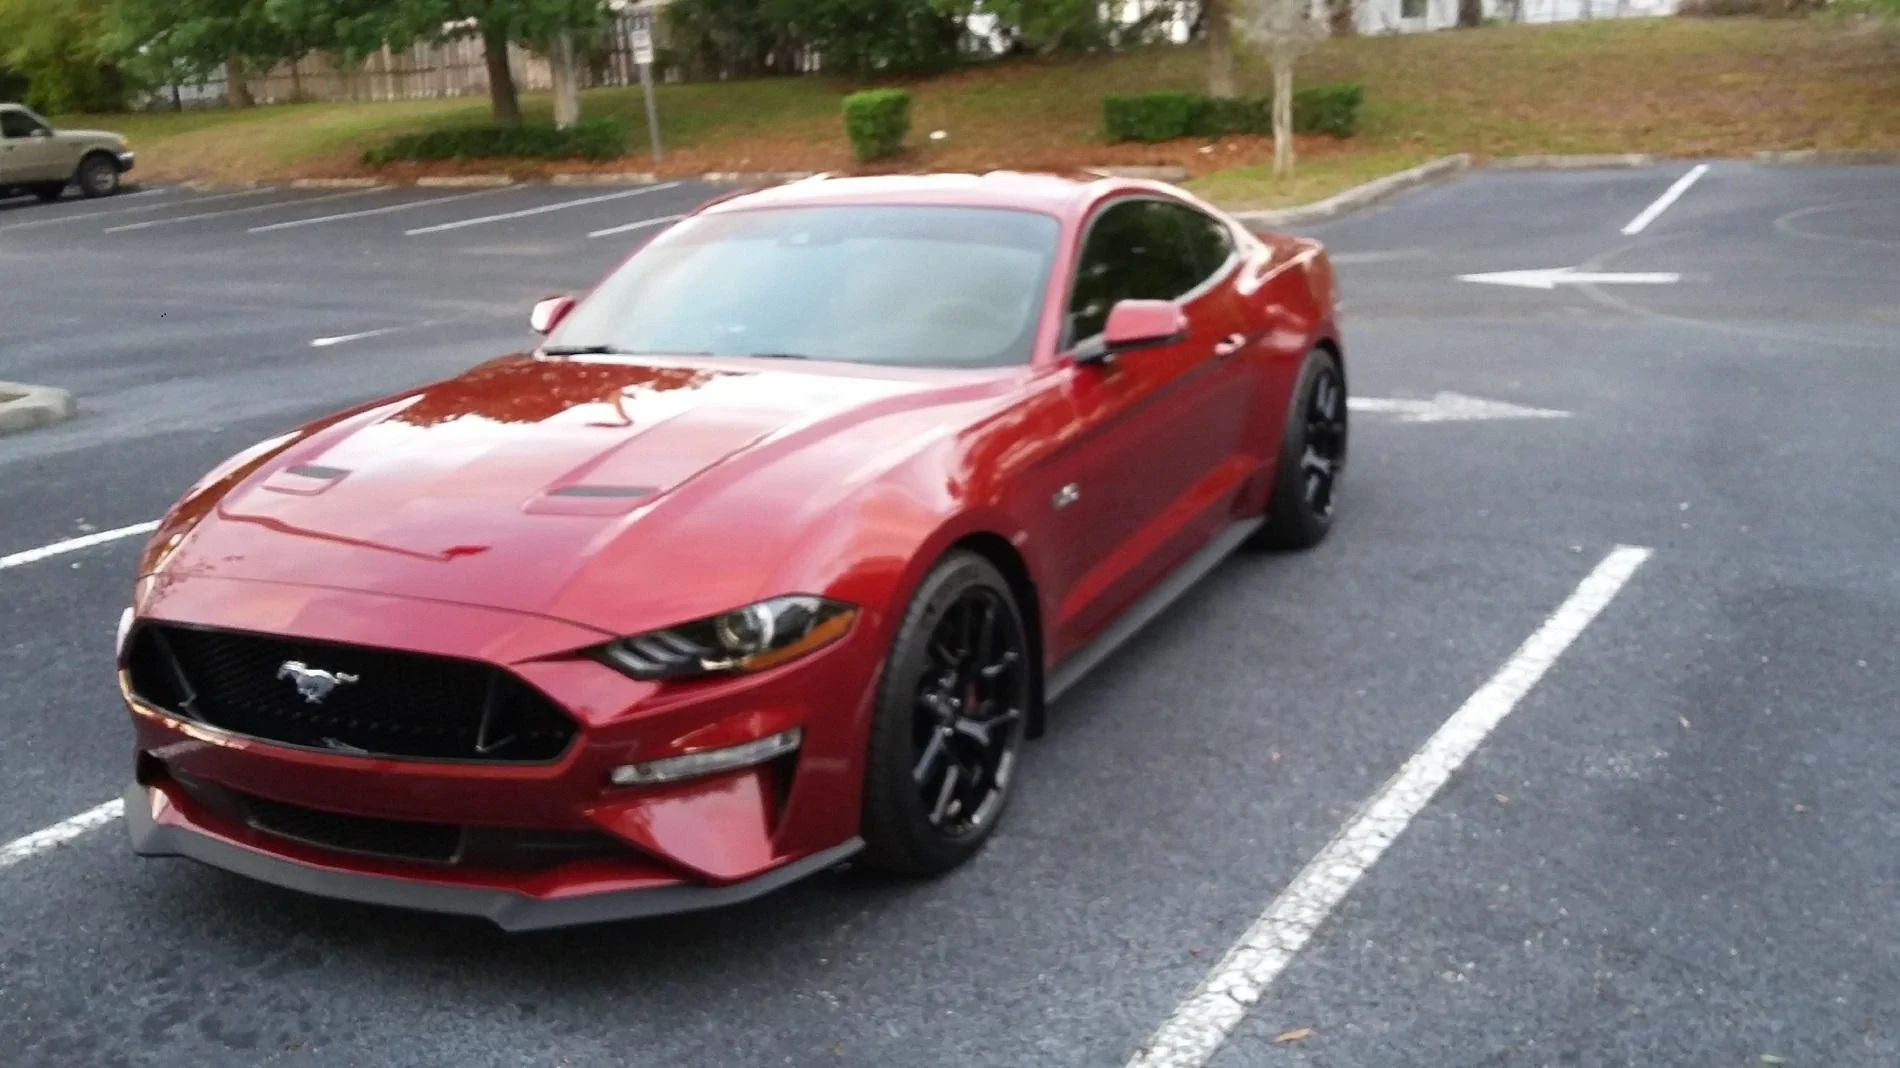
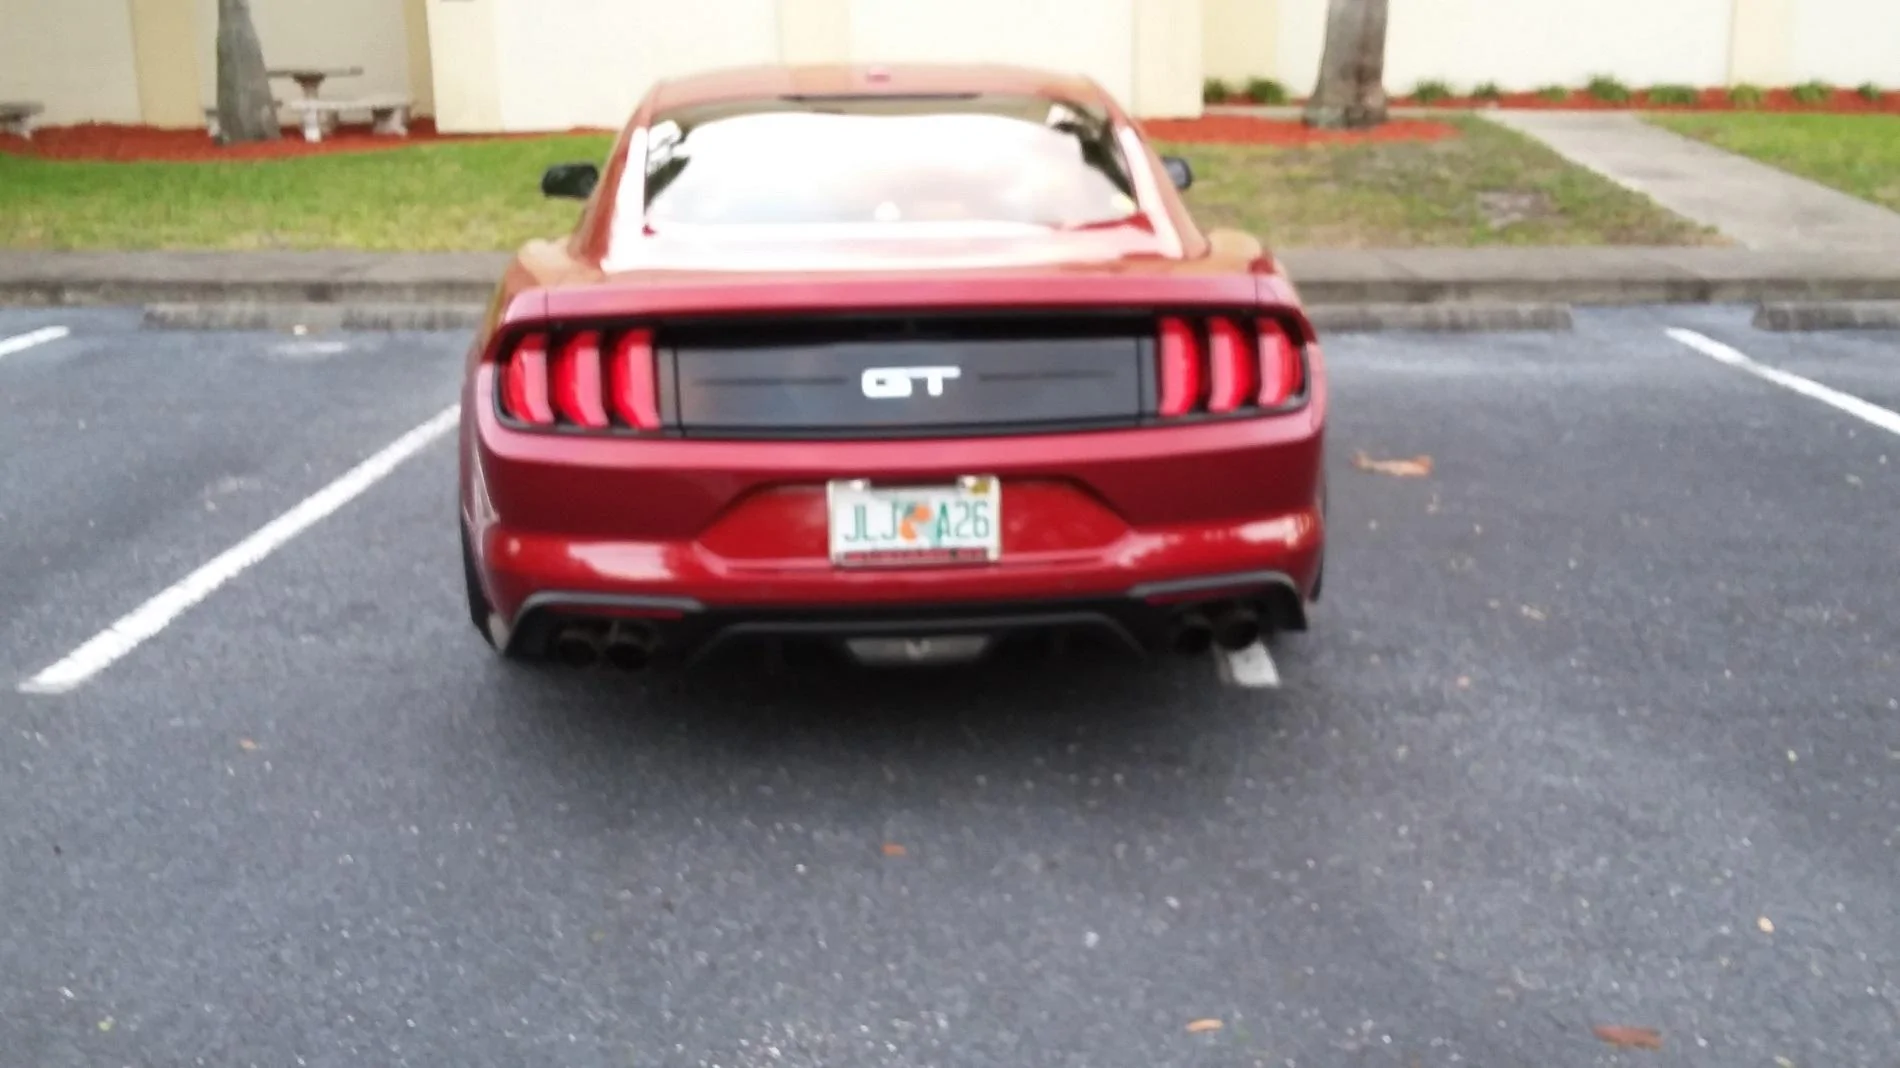
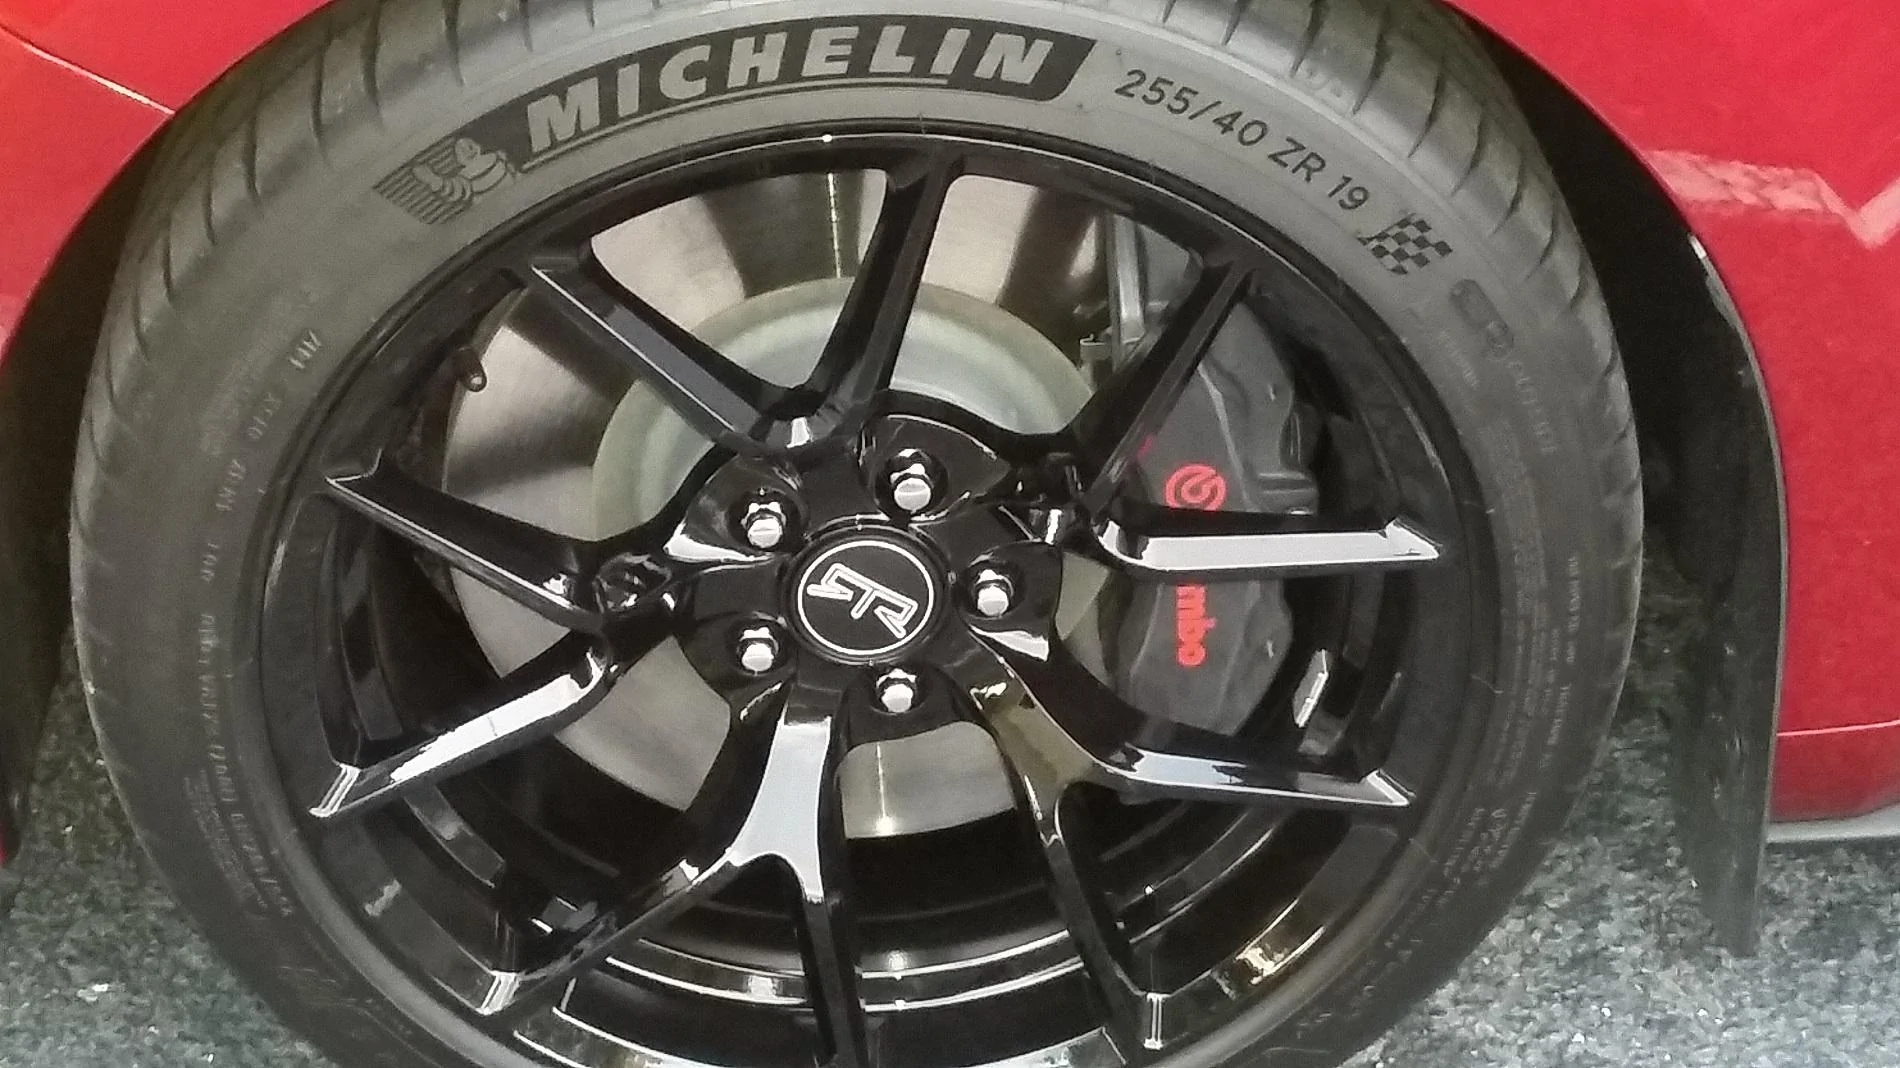
mud flaps are from -RPI, their install instructions for the rear are screwed up, you'll need 6 screw clips to complete the rears, they provided 6 push pin, I told them those wouldn't work-they got stupid on me, so I just stopped trying to tell them their set up wouldn't work. these are the thicker version of there mud flaps, cost me about 73.00 with the clips from a parts store. the car isn't lowered at all, stock height, thanks for the kind words. the wheels are from American muscle-RTR , 19" set up-9.5's front, 10.5 rears, stock tires-255's front, 275 rears-Tond1:ford::ford:[MENTION=29412]tonyd1[/MENTION]
Nice pics!! The wheels really make the car pop!
What mud guards and what lowering springs do you have on your ride?
some more-[MENTION=29412]tonyd1[/MENTION]
Nice pics!! The wheels really make the car pop!
What mud guards and what lowering springs do you have on your ride?


Gorgeous! :cheers:some more-
What Windows did you tint and what % tint....very nice ..Bare..needs this!!
front windshield strip-5%front doors-30% state legal(FL) , rest of car 15%- GREAT JOB BY MY INSTALLER!:clap2:What Windows did you tint and what % tint....very nice ..Bare..needs this!!
i DIDN'T WEIGH THE WHEEL/TIRES COMBINED. tHE WHEELS WEIGHT IS 26#. OK, ON THE RPI MUD FLAPS, you'll have to take the rear wheels off . there's 1 push pin that needs to be removed and reused on the lower inner corner,RPI provides the screws and spacers for each screw. i applied a little silicone to keep the spacers from coming off the screws, after you remove the liner, you'll see 3 small holes that the screws screw into, the idiots a RPI provided push pins to fill the 3 holes on each the car, I assume they wanted us the screw the provided screw /spacer set up into the push pins.I went to O'Reilly's parts store and picked up 3 small screw clips that will slide over the 3 holes , then you reinstall the liner the 3 holes on the mud flap screw into those hole and alignment into the clips, then install the lower push pin and your done. I didn't like their push pin set up because,after you screw the screws into the pins, if they crack and break apart, you'll have screws flopping around, once you screw the screws into the clips, they'll never fall out, just my opinion. -I'd go to the RPI web site print out the instruction and you'll get a better idear of what I'm speaking about,GOOD LUCK- Tonyd1:cheers:[MENTION=29412]tonyd1[/MENTION] your car looks great, especially with the PP2 replicas! Did you weigh them before installation?
I am about to order the RPI Mud Guards also, could you post what kind of screw you needed from the hardware store? Thanks!


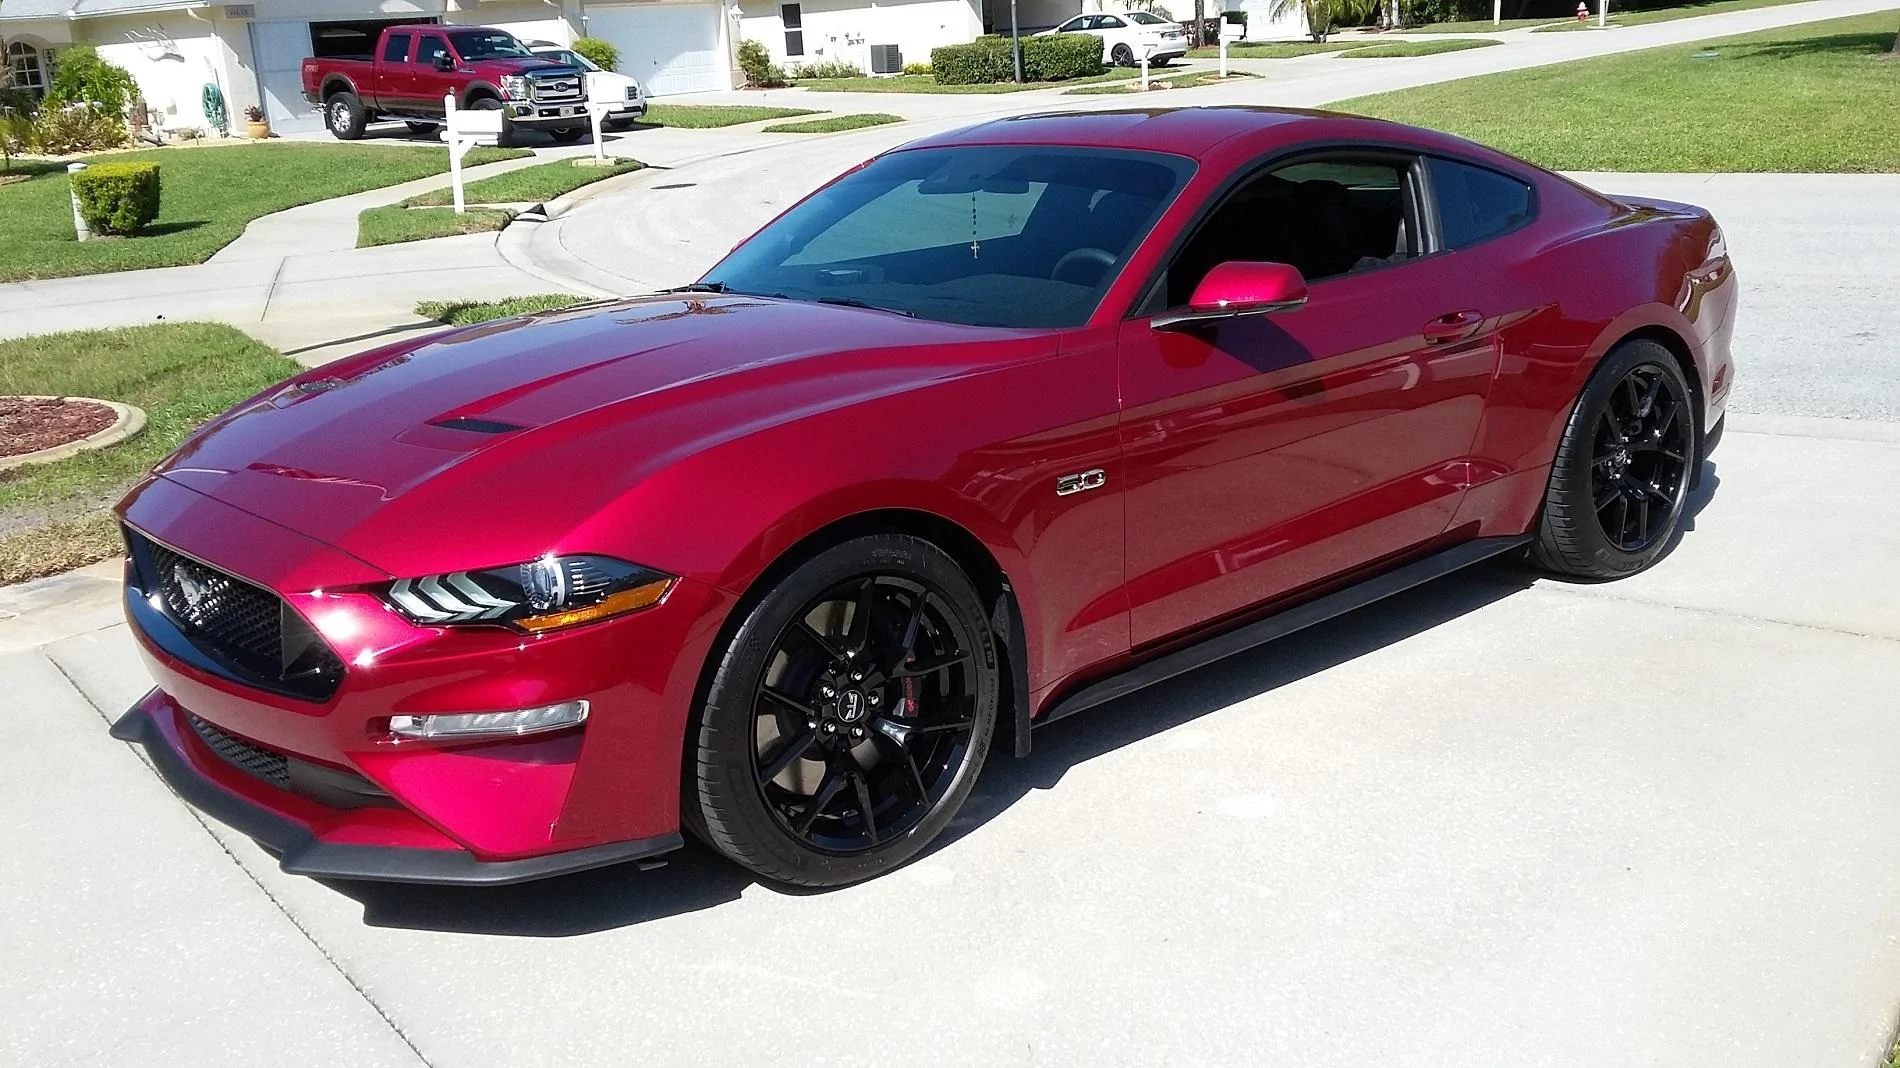
After having DD it all winter I forgot how awesome ruby red is in the sunlight! Just gorgeous, and this is even before my detail/ceramic goes on in a few weeks.
Doing it yourself or farming it out?? I did mine, easy job but 3 days. Not long days, a few beers and tunes took it easy with the polisher! The big thing is...clean, clean, clean before application and wear rubber gloves! :cheers::cheers:lAfter having DD it all winter I forgot how awesome ruby red is in the sunlight! Just gorgeous, and this is even before my detail/ceramic goes on in a few weeks.
This is as close as I have to full on side shot for now.have u got a side shot?
Yessir! I plan on at least 6 Corona. Plan is to make the ceramic coating it's own day from everything else so I can take my time with it.Doing it yourself or farming it out?? I did mine, easy job but 3 days. Not long days, a few beers and tunes took it easy with the polisher! The big thing is...clean, clean, clean before application and wear rubber gloves! :cheers::cheers:l

The actual application is easy-peasy.....won’t take long, just make sure to change the applicator cloth a lot...it will dry and become. Hardship that will actually scratch the paint again!!! I started on the trunk lid....a smaller area to get the hang of it. Good luck, it’s fun!! End result will kill ya!!!This is as close as I have to full on side shot for now.
Yessir! I plan on at least 6 Corona. Plan is to make the ceramic coating it's own day from everything else so I can take my time with it.
So when ya coming over to do mine??The actual application is easy-peasy.....won’t take long, just make sure to change the applicator cloth a lot...it will dry and become. Hardship that will actually scratch the paint again!!! I started on the trunk lid....a smaller area to get the hang of it. Good luck, it’s fun!! End result will kill ya!!!
