HISSMAN
Large Member
- Joined
- Jun 10, 2016
- Threads
- 39
- Messages
- 2,992
- Reaction score
- 1,467
- Location
- West Virginia
- Vehicle(s)
- 2016 Oxford White GT/PP Premium
- Thread starter
- #1
Even though winter has set in and I can't drive the mustang I decided to go ahead and swap in some 47's and a Lund FF base tune. Now, I just have to wait for good weather before I can do the required logging. Anyway, here is my quick step-by-step.
Total time : About 30 min.
Tools needed :
Rags
10mm deep socket
Ratchet wrench
Difficulty : Two Beers out of five. For relation, 1 beer is swapping the rear deck lid badge. 5 Beers is building an engine.

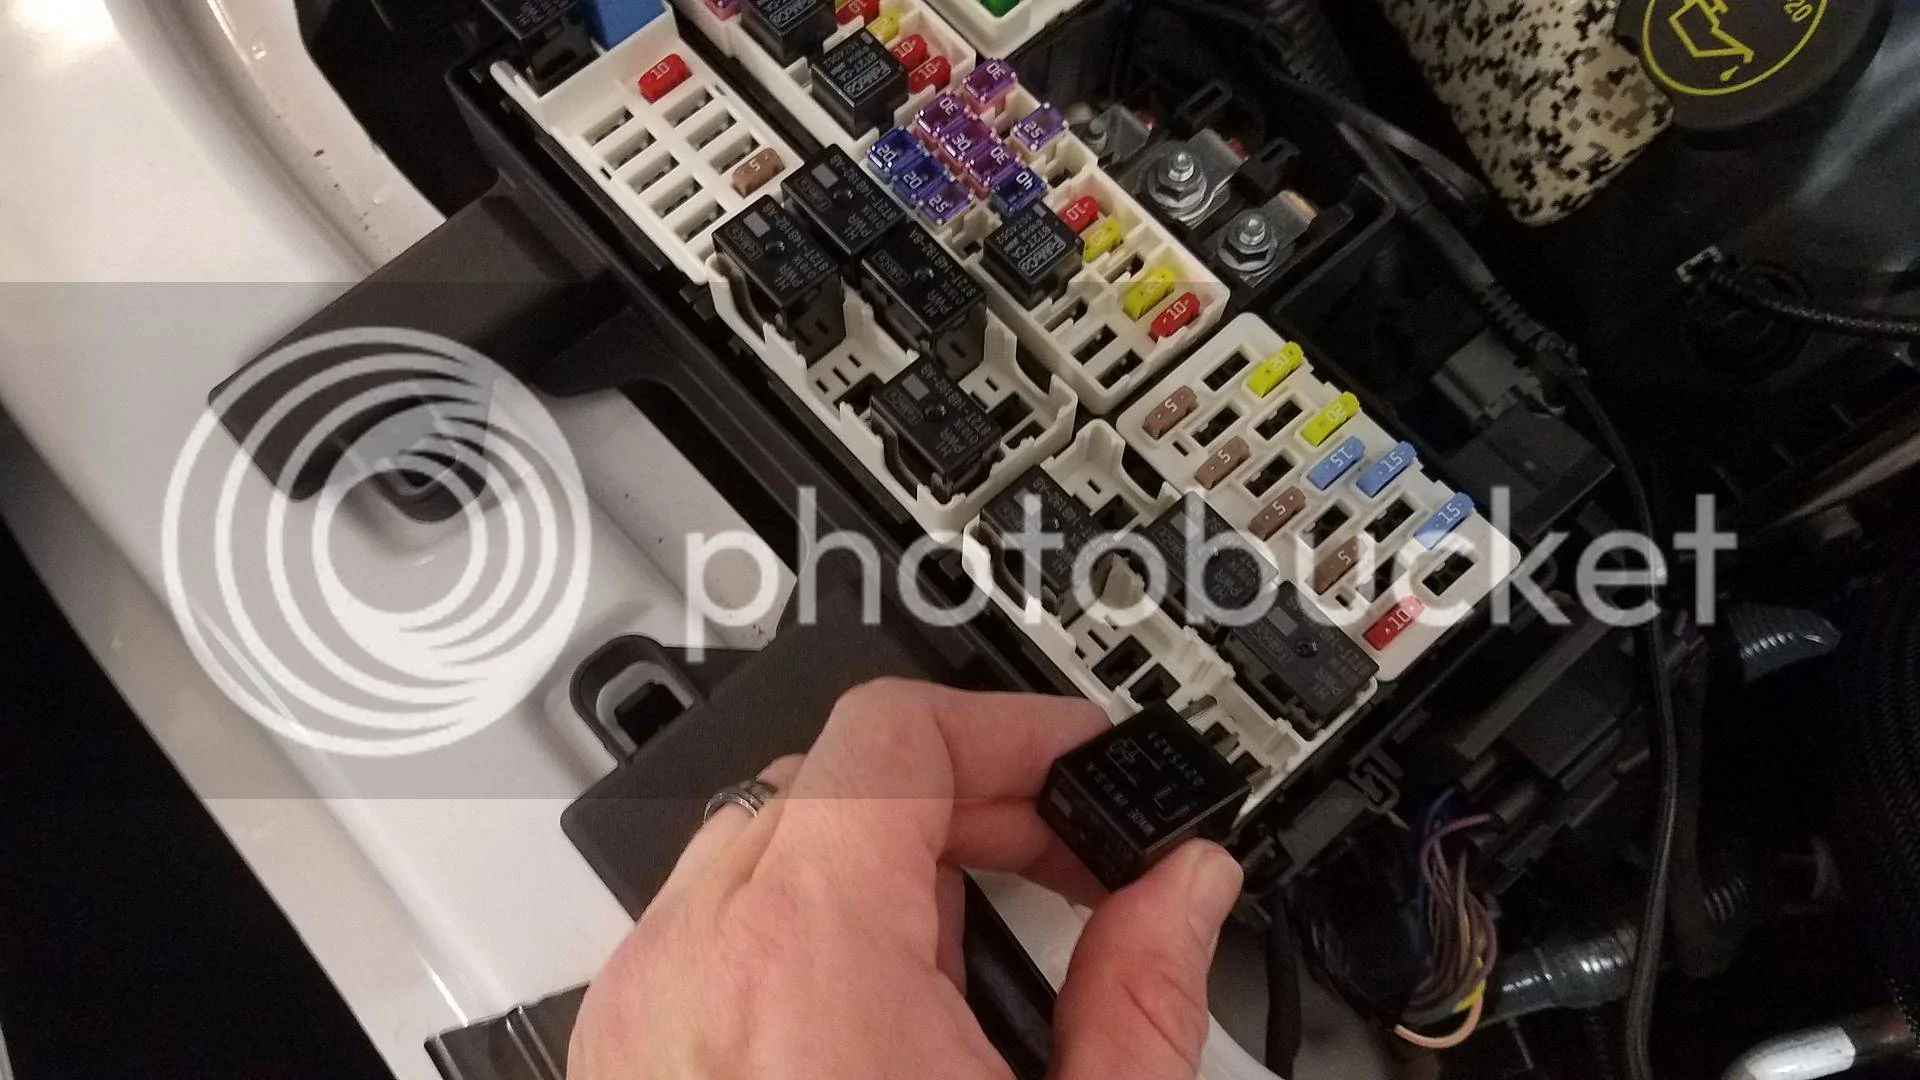
Remove the fuel pump relay. I simply turned it upside down and set it back in the slot where it will return, so I wouldn't lose it or have to look in the the manual again to see where it goes

Now crank the engine over about 4 times, not letting it crank for more than about 4 seconds each time. It's probably safe to go longer, but my brain won't let me listen to it for longer than that... :headbonk:
First thing is first. DISCONNECT THE NEGATIVE BATTERY TERMINAL
Unbolt 4 nuts that hold the insulation pad and plate down.
Remove the plate and insulation pads on both sides. Be careful with the foam pads as the can tear easily.
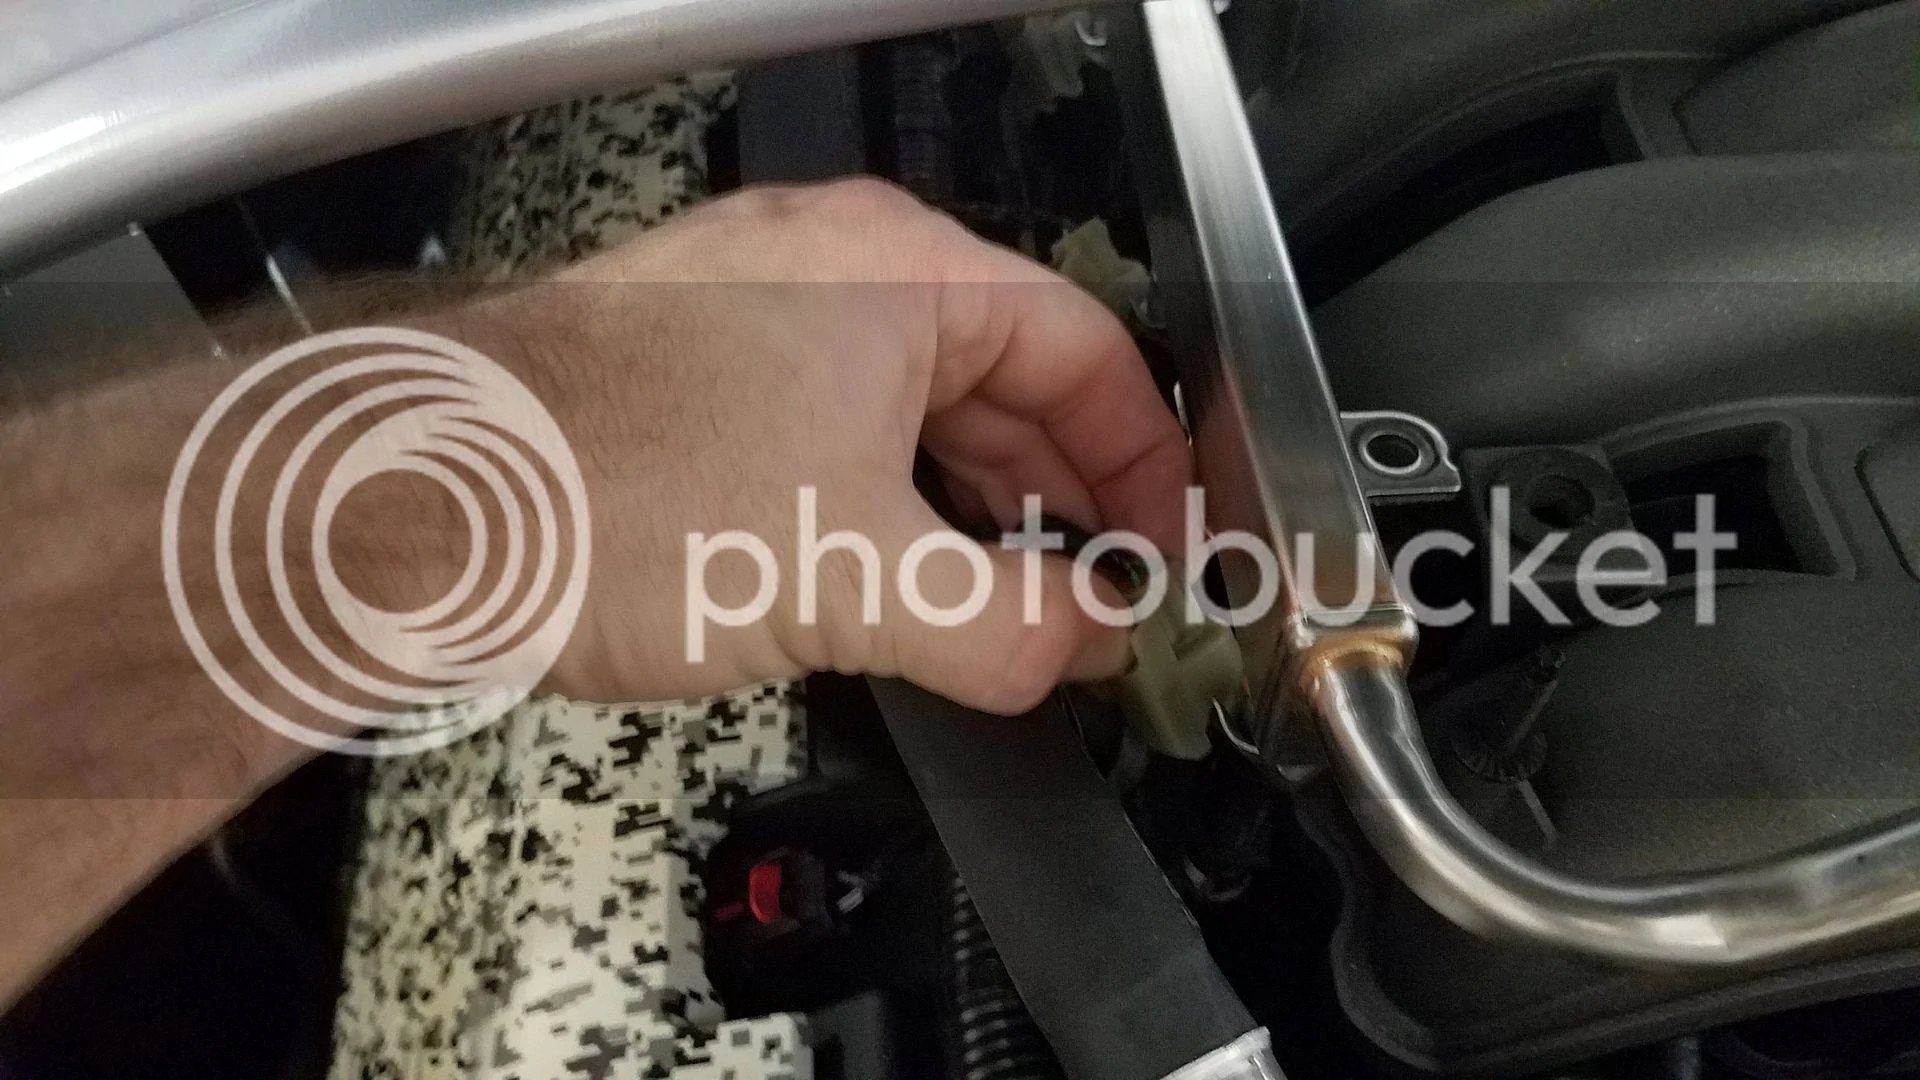
Now, wedge some rags under the fuel line to fuel rail connector and push in on both sides of the blue clip near the base and it will pop loose. Then lift it all the way up. Next, pull the fuel line off of the rail.
Now unbolt the 4 bolts that hold the fuel rail down.
Next, unclip the connectors from the injectors. And slowly slid the fuel rail, with injectors still attached up and out. If you remove the tower brace it is easier, but it isn't worth the time to remove the brace.
Now, dump the remaining fuel out of the rail and set it on the ground with the injectors facing up. Then begin unclipping the metal retainers that hold the injectors in position. KEEP THESE. YOU WILL REUSE THEM. Then remove the injectors by pulling straight up. There may still be a small amount of fuel in the bowls, so be aware.
Add a small amount of di-electric grease to the o-rings on the new injectors. LESS IS MORE. This will help them slide into place without damaging them.

Now gently push the new injectors into place and install the retainer clips back around the injectors. Note: this also aligns the injectors correctly.
FINALLY! Reverse the procedure and you are all set. :clap2:
Total time : About 30 min.
Tools needed :
Rags
10mm deep socket
Ratchet wrench
Difficulty : Two Beers out of five. For relation, 1 beer is swapping the rear deck lid badge. 5 Beers is building an engine.
Remove the fuel pump relay. I simply turned it upside down and set it back in the slot where it will return, so I wouldn't lose it or have to look in the the manual again to see where it goes

Now crank the engine over about 4 times, not letting it crank for more than about 4 seconds each time. It's probably safe to go longer, but my brain won't let me listen to it for longer than that... :headbonk:
First thing is first. DISCONNECT THE NEGATIVE BATTERY TERMINAL
Unbolt 4 nuts that hold the insulation pad and plate down.

Remove the plate and insulation pads on both sides. Be careful with the foam pads as the can tear easily.


Now, wedge some rags under the fuel line to fuel rail connector and push in on both sides of the blue clip near the base and it will pop loose. Then lift it all the way up. Next, pull the fuel line off of the rail.

Now unbolt the 4 bolts that hold the fuel rail down.

Next, unclip the connectors from the injectors. And slowly slid the fuel rail, with injectors still attached up and out. If you remove the tower brace it is easier, but it isn't worth the time to remove the brace.
Now, dump the remaining fuel out of the rail and set it on the ground with the injectors facing up. Then begin unclipping the metal retainers that hold the injectors in position. KEEP THESE. YOU WILL REUSE THEM. Then remove the injectors by pulling straight up. There may still be a small amount of fuel in the bowls, so be aware.


Add a small amount of di-electric grease to the o-rings on the new injectors. LESS IS MORE. This will help them slide into place without damaging them.

Now gently push the new injectors into place and install the retainer clips back around the injectors. Note: this also aligns the injectors correctly.

FINALLY! Reverse the procedure and you are all set. :clap2:

Sponsored
Last edited: