GTP
Deutsche Pony
- Joined
- May 27, 2015
- Threads
- 262
- Messages
- 5,985
- Reaction score
- 3,870
- Location
- Indy
- Website
- www.BambergAudio.com
- First Name
- Philip
- Vehicle(s)
- 2019 GT PP1 A10 Outrageous Orange HPDE mods
- Thread starter
- #1
TLDR
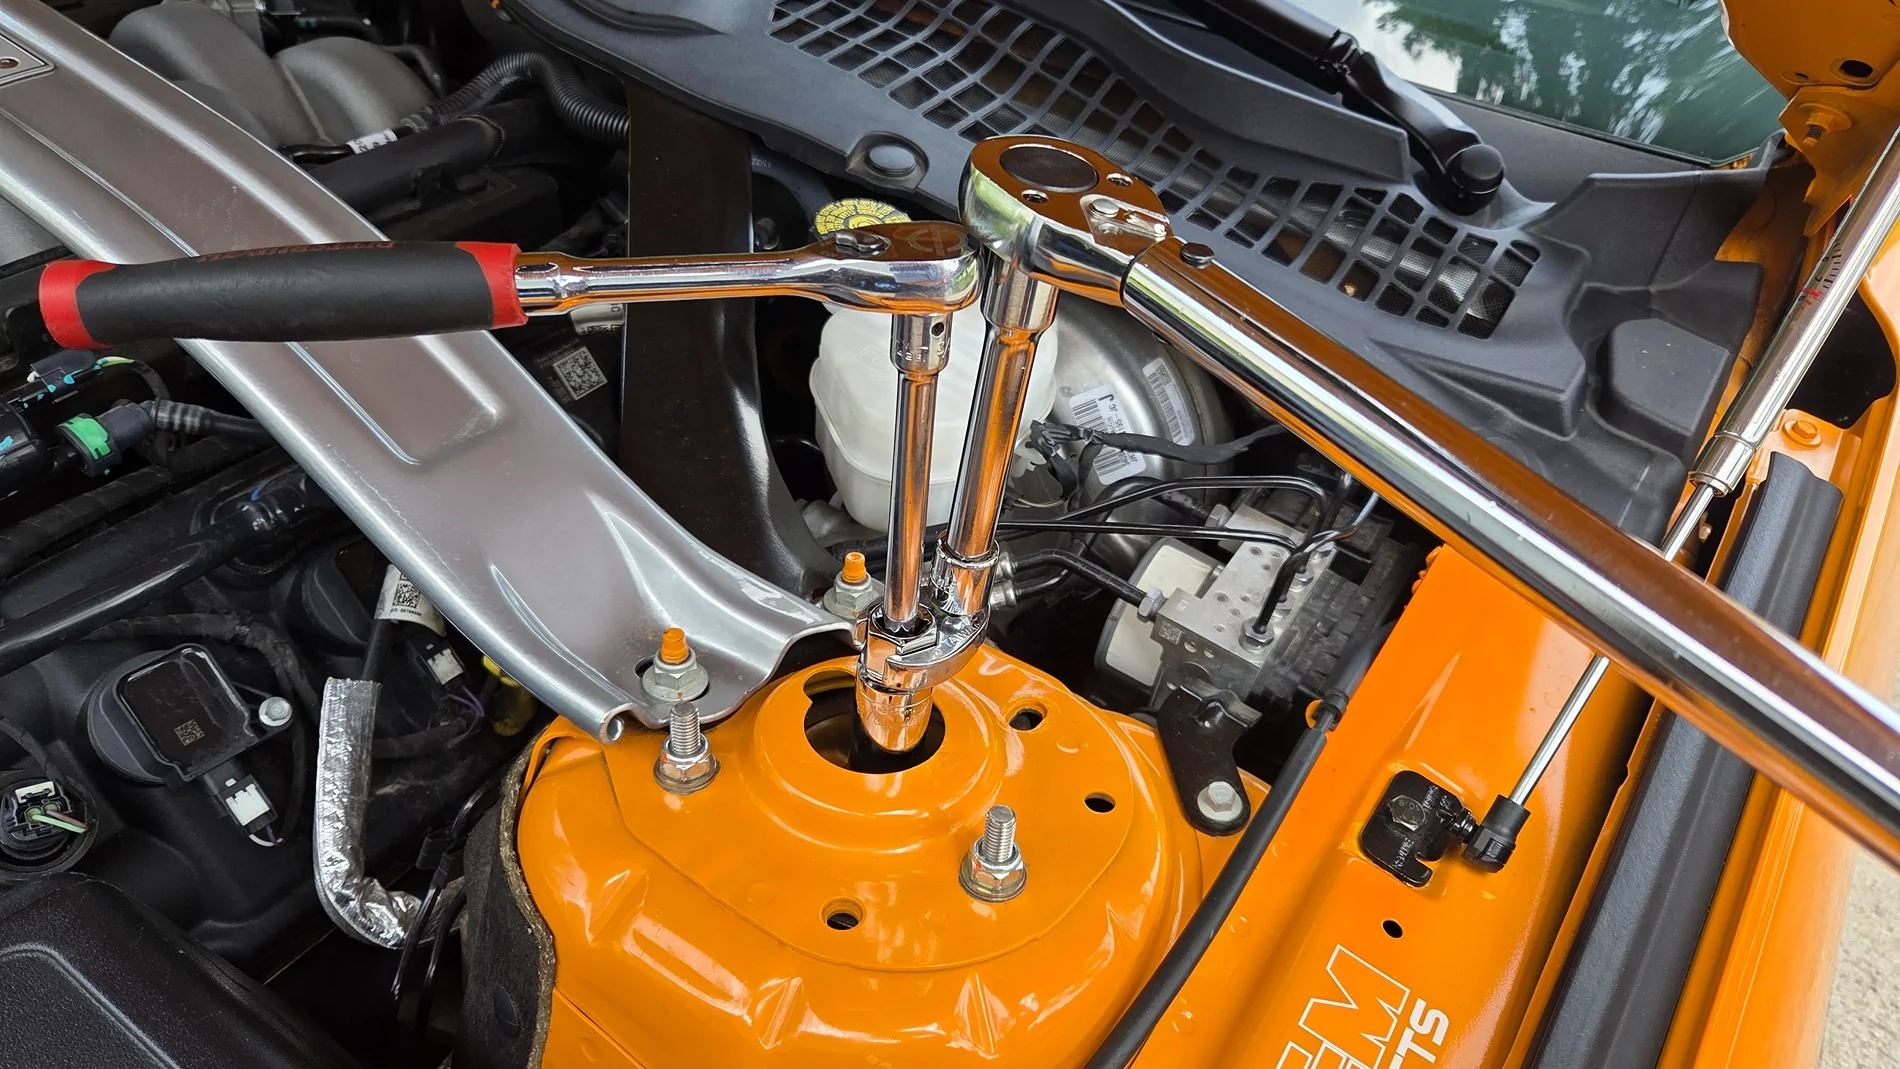
Use Crescent 13/16 spark plug socket, Capri 10mm 3/8 drive socket (on 3/8 extension slipped through the 13/16 socket), 7/8 crowsfoot, and torque wrench to tighten the strut nut to 60 ft-lb. See first two photos.
Keep the crowsfoot at right angle with the torque wrench so that the torque value remains correct. I tightened to 50#, and then again to 60#. I got too nervous to try for the 75# spec because I worried about the 10mm socket and strut shaft giving out somehow. Yes, I am aware of the impact wrench method.
Background
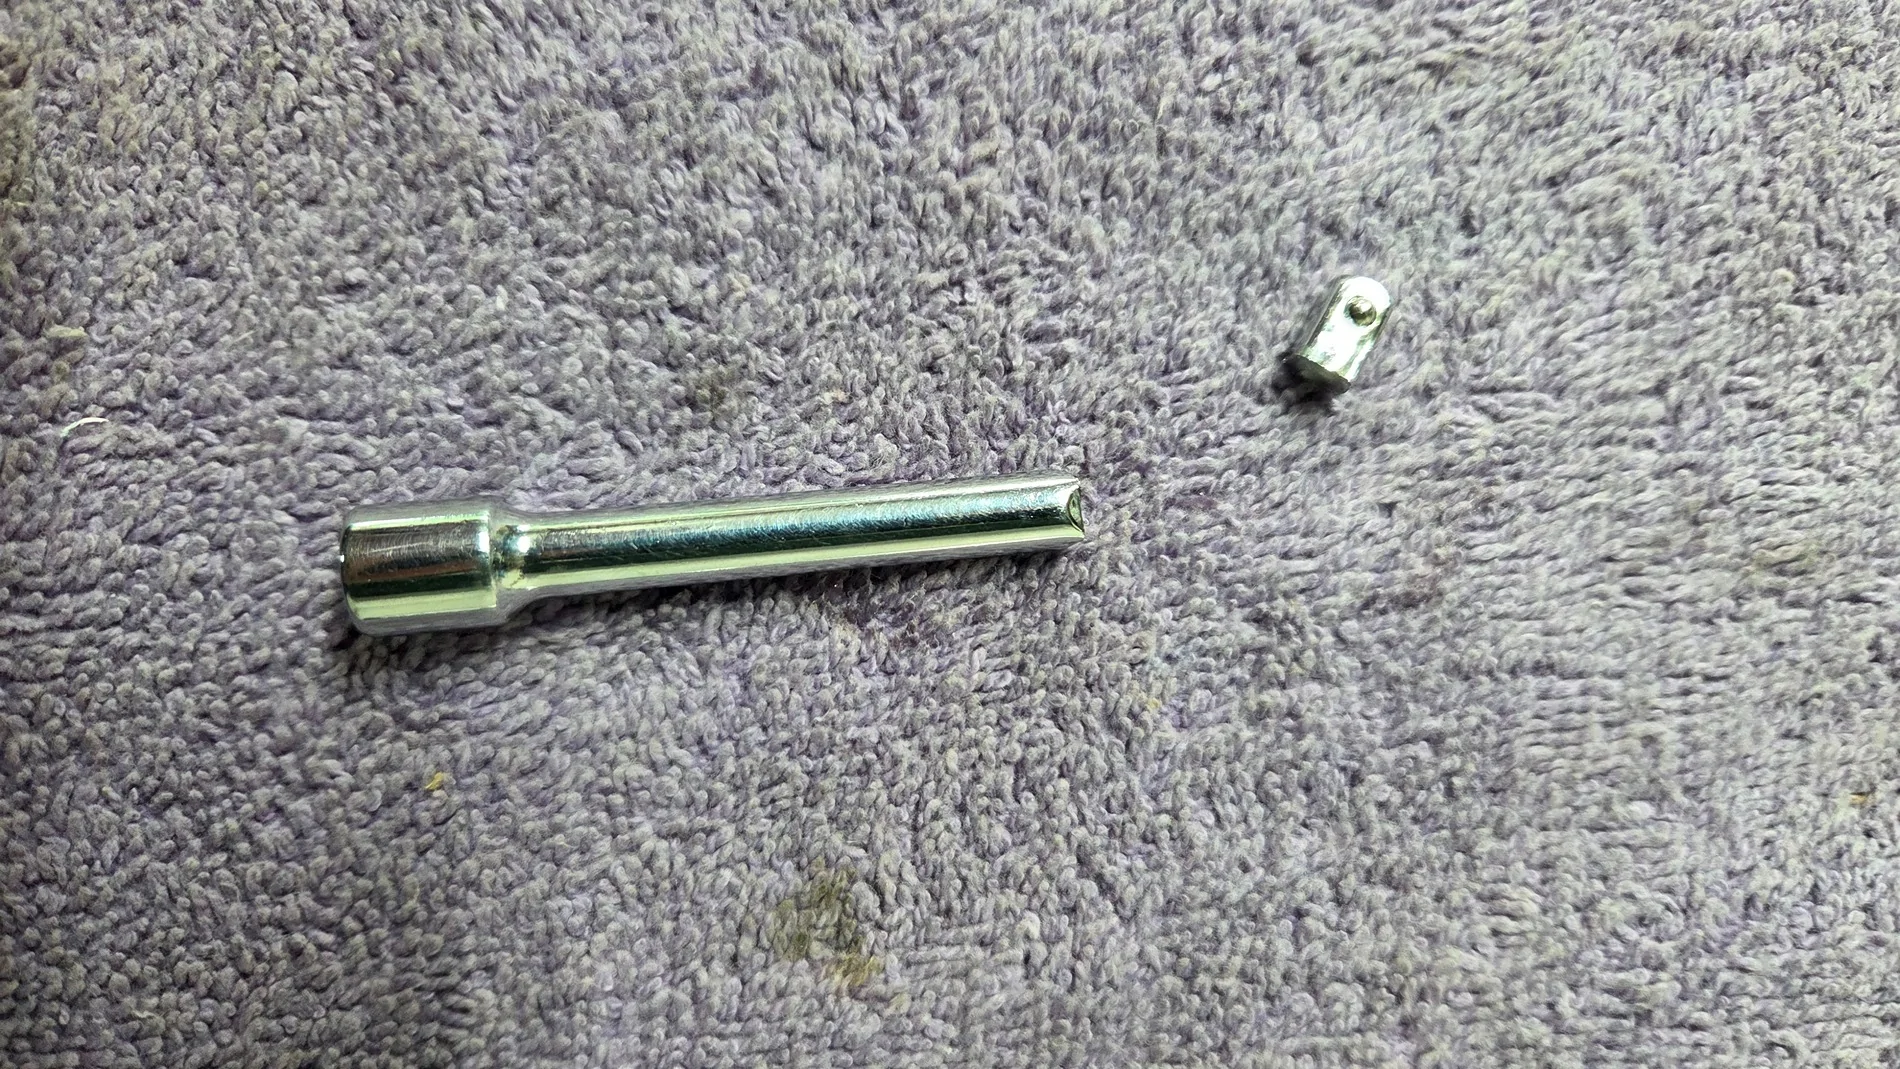
I tried this setup with a store-bought spark plug socket (3/8 drive) and 1/4 extension through it. 40# torque was OK. 50# sheared the extension at the square end. So I repeated the idea but with 1/2 drive spark plug socket and 3/8 10mm socket. I bought and tried three different spark plug sockets. Only the Crescent brand spark plug socket had a through hole large enough for a 3/8 extension to pass through. I also ordered 4-5 different sockets in 10mm, 6-point, 3/8 drive shallow (normal depth). The unbranded and Capri brands had the deepest hex for the most engagement with the strut shaft. All sockets had the relieved corners (modern design), and this is important since the strut hex has generously rounded points.
It was my experience that I got no rattling sound with the strut nuts tightened to 40#. A even slightly loose nut generates a distinctive hard metal-on-metal knocking sound from the front of the car.
Note the torque wrench is perpendicular to the crowsfoot for accurate torque value:

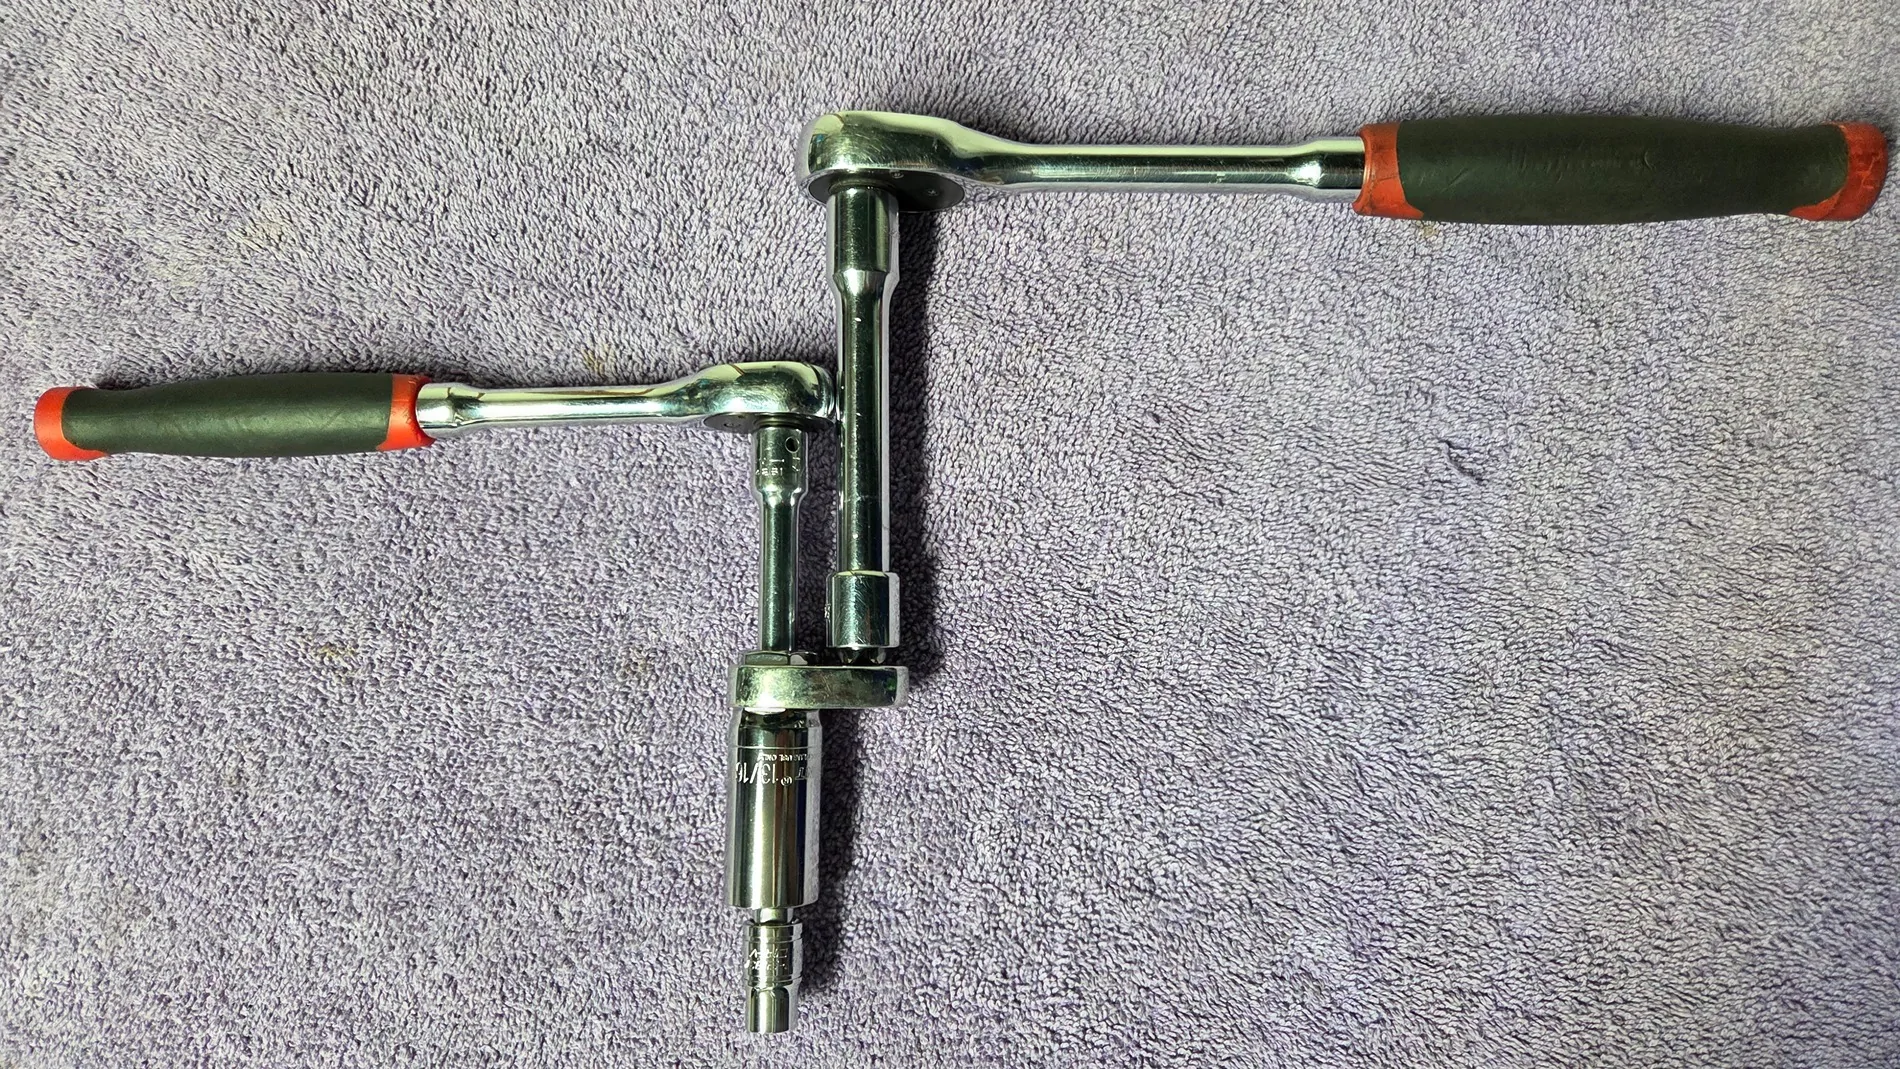
Clearer view of the setup:
Socket depth, left to right: Craftsman=6.2mm, Gearwrench=8.8mm, 2-for-1 NoName=10.1mm, Capri=10.9mm.
Result of same method but with 1/4" extension and 50# torque:
Use Crescent 13/16 spark plug socket, Capri 10mm 3/8 drive socket (on 3/8 extension slipped through the 13/16 socket), 7/8 crowsfoot, and torque wrench to tighten the strut nut to 60 ft-lb. See first two photos.
Keep the crowsfoot at right angle with the torque wrench so that the torque value remains correct. I tightened to 50#, and then again to 60#. I got too nervous to try for the 75# spec because I worried about the 10mm socket and strut shaft giving out somehow. Yes, I am aware of the impact wrench method.
Background
I tried this setup with a store-bought spark plug socket (3/8 drive) and 1/4 extension through it. 40# torque was OK. 50# sheared the extension at the square end. So I repeated the idea but with 1/2 drive spark plug socket and 3/8 10mm socket. I bought and tried three different spark plug sockets. Only the Crescent brand spark plug socket had a through hole large enough for a 3/8 extension to pass through. I also ordered 4-5 different sockets in 10mm, 6-point, 3/8 drive shallow (normal depth). The unbranded and Capri brands had the deepest hex for the most engagement with the strut shaft. All sockets had the relieved corners (modern design), and this is important since the strut hex has generously rounded points.
It was my experience that I got no rattling sound with the strut nuts tightened to 40#. A even slightly loose nut generates a distinctive hard metal-on-metal knocking sound from the front of the car.
Note the torque wrench is perpendicular to the crowsfoot for accurate torque value:
Clearer view of the setup:
Socket depth, left to right: Craftsman=6.2mm, Gearwrench=8.8mm, 2-for-1 NoName=10.1mm, Capri=10.9mm.

Result of same method but with 1/4" extension and 50# torque:
Sponsored

