wildcatgoal
@sirboom_photography
- Thread starter
- #1
I installed Steeda engine mounts last night. Aside from the two bolts holding the stock bracket to the frame having enough loctite on them to hold back Earth's rotation, this process is relatively easy if done methodically.

I found the instructions from basically anyone that makes these things to be lacking. so I decided to do a small write-up. Sorry, I don't have a picture book here. Once you get under the car, what you have to do is obvious.
First, disconnect your battery because a ground wire will be temporarily removed.
To make this job easy, you will want real swivel sockets (13, 15, and 17mm), deep well socket (13mm), a bendy ratchet wrench (bends at the head), long/solid extensions (vs. connecting multiple short extensions), an impact gun (air or large battery), a 90° gun (air or electric), a T40 torx ratchet bit for the steering shaft, ideally a bendy head torque wrench (for the bracket that bolts to the engine; you can do without one, just frustrating), and your choice of procedure for lifting the car and jacking each side of the engine.
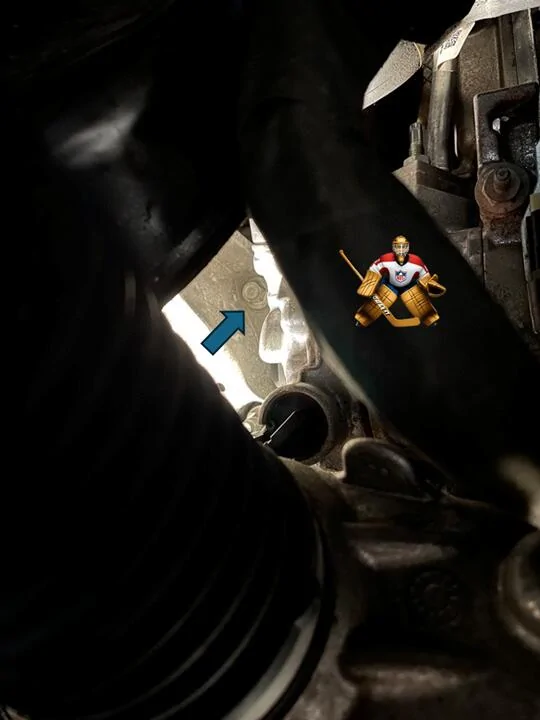
You will want to install one side at a time. Do NOTHING to the passenger side engine mount and start on the driver's side, since it is the most frustrating - get it out of the way. First, support the driver's side on the little ear at the point where the transmission connects to the engine. Careful, there are wires there and you should use rubber or wood to protect the area. See the example below. You will see this on both sides. You only need to make it so the jack will hold the weight of the engine when the mounts are removed. You don't need to jack the engine up to kingdom come.
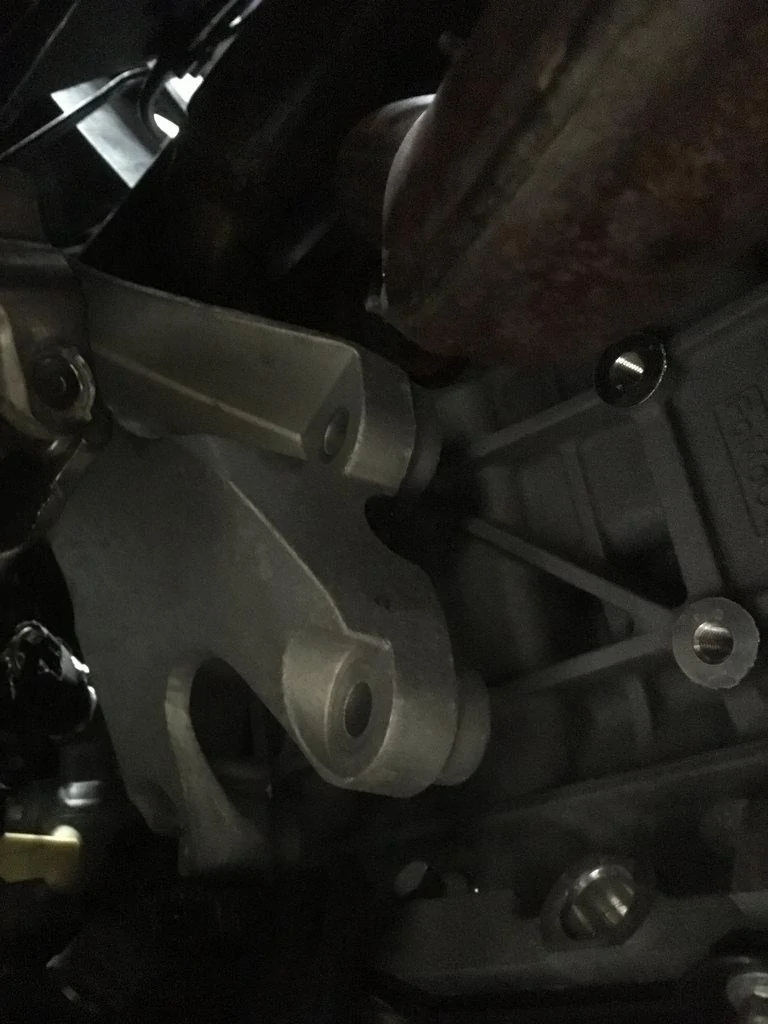
Then, from the engine bay with appropriate length of extensions, I unbolted the two 13mm (mount bracket) bolts almost until they are out. These are a royal PITA to get out since they are loctited on every single thread - at least mine were. I used an impact swivel socket and my Makita impact gun (the big kind that'll do lug nuts) and backed them out and even it was complaining. You can finish removing these bolts with a swivel head ratchet from the underside of the car or the top if you have the engine supported, but I chose to leave them until I removed the engine mount bracket (see photo below for what I'm talking about).

Before you remove that bracket on the drivers side, you will need to use the T40 torx to remove the two pinch bolts that hold the steering shaft together. Once you've removed those, just push down in the connection and back out the upper portion of the steering shaft and push it to the side. Obviously don't forget to re-assemble the steering shaft properly (and don't turn the steering wheel or front wheels while it is disconnected).
Now fish out the bracket. You'll have to push up a bit to clear the OEM engine mount's center bolt... you have plenty of room to do so. Then finish removing the stock engine mount bolts and fish out the stock engine mount.
After that, wipe off the seat where the engine mount sits with your hand just to clear any debris and then pop in your new Steeda engine mount. I decided to go .5" lower, so I put it in with only once spacer. Start the two mount bracket bolts as far as you can by hand, then give them a little extra with the ratchet until they're hard enough to screw down that you give up and say "I'll finish it from the top". This is just to make sure they are secure.
You'll then fish the through bolt through the properly oriented engine bracket with the two remaining spacers properly seated and a small washer on top of them (then the bolt head) ABOVE the bracket opposite the engine mount and the single spacer. Hard to describe, but you'll get it. Start the threads on that bolt for a bit while holding the engine bracket in proper orientation.
Then just re-install the engine bracket to the engine with the 4 bolts positioned exactly as they had come out. Please note, the passenger side has a different bracket shape and therefore the bolts are in a little bit different spots AND there is a ground wire held on by a 15mm (instead of 13mm) bolt on the top right (top front) mounting point which you will need to be sure to re-install exactly as it was installed.
Torque the engine bracket bolts down (I did 41 ft. lbs). This especially is where swivel sockets and swivel head torque wrenches make life easy. Some of the angles you need to get are weird and you need this articulation to make the job easy. Fortunately I was able to borrow both. But, I was able to get the job done with a swivel ratchet and a standard 3/8" torque wrench, it was just going too slow so I borrowed tools and made life easier.
Once that engine bracket is torqued down and you've verified you didn't screw something up, you'll then lower the engine onto the new mount, head up top, and torque the two bracket bolts down (I did 41 ft lbs) and the isolator bolt down (I did 37 or 38 ft. lbs, can't remember exactly).
Repeat this process for the passenger side - don't forget the ground wire which gets sandwiched between the 13mm bracket bolt and a 15mm bolt.
Also, tip, while it isn't necessary at all, removing the wheels keeps you from hitting your head on said wheels. Ask me how I know...

I found the instructions from basically anyone that makes these things to be lacking. so I decided to do a small write-up. Sorry, I don't have a picture book here. Once you get under the car, what you have to do is obvious.
First, disconnect your battery because a ground wire will be temporarily removed.
To make this job easy, you will want real swivel sockets (13, 15, and 17mm), deep well socket (13mm), a bendy ratchet wrench (bends at the head), long/solid extensions (vs. connecting multiple short extensions), an impact gun (air or large battery), a 90° gun (air or electric), a T40 torx ratchet bit for the steering shaft, ideally a bendy head torque wrench (for the bracket that bolts to the engine; you can do without one, just frustrating), and your choice of procedure for lifting the car and jacking each side of the engine.
You will want to install one side at a time. Do NOTHING to the passenger side engine mount and start on the driver's side, since it is the most frustrating - get it out of the way. First, support the driver's side on the little ear at the point where the transmission connects to the engine. Careful, there are wires there and you should use rubber or wood to protect the area. See the example below. You will see this on both sides. You only need to make it so the jack will hold the weight of the engine when the mounts are removed. You don't need to jack the engine up to kingdom come.
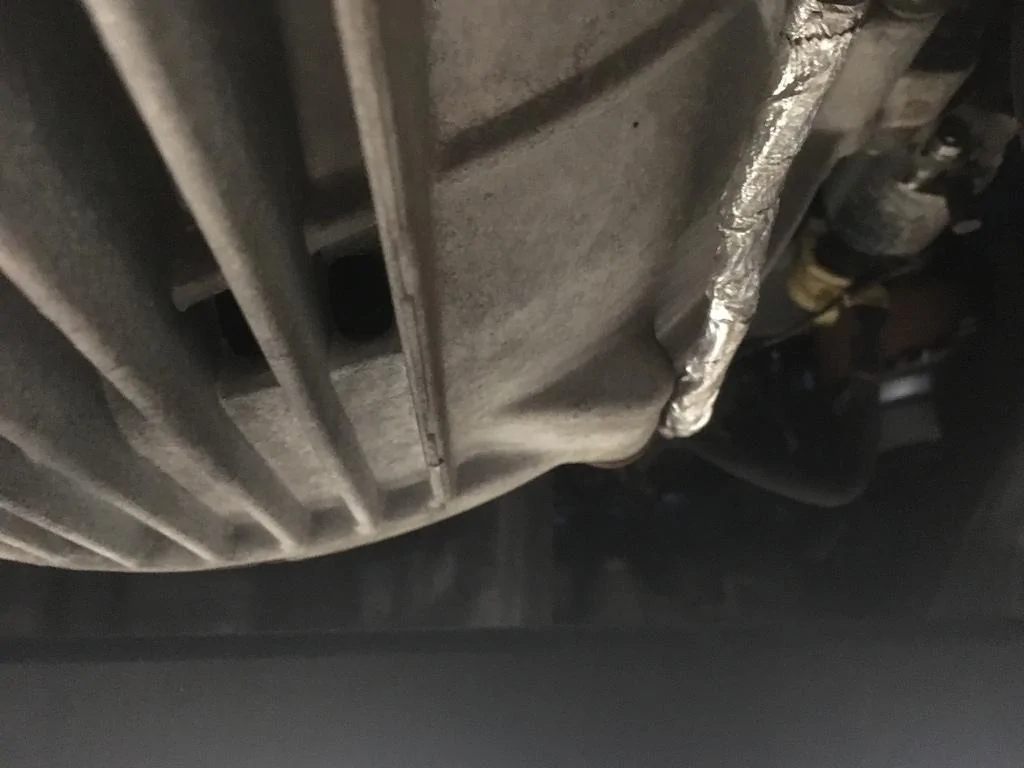
Then, from the engine bay with appropriate length of extensions, I unbolted the two 13mm (mount bracket) bolts almost until they are out. These are a royal PITA to get out since they are loctited on every single thread - at least mine were. I used an impact swivel socket and my Makita impact gun (the big kind that'll do lug nuts) and backed them out and even it was complaining. You can finish removing these bolts with a swivel head ratchet from the underside of the car or the top if you have the engine supported, but I chose to leave them until I removed the engine mount bracket (see photo below for what I'm talking about).
Before you remove that bracket on the drivers side, you will need to use the T40 torx to remove the two pinch bolts that hold the steering shaft together. Once you've removed those, just push down in the connection and back out the upper portion of the steering shaft and push it to the side. Obviously don't forget to re-assemble the steering shaft properly (and don't turn the steering wheel or front wheels while it is disconnected).

Now fish out the bracket. You'll have to push up a bit to clear the OEM engine mount's center bolt... you have plenty of room to do so. Then finish removing the stock engine mount bolts and fish out the stock engine mount.
After that, wipe off the seat where the engine mount sits with your hand just to clear any debris and then pop in your new Steeda engine mount. I decided to go .5" lower, so I put it in with only once spacer. Start the two mount bracket bolts as far as you can by hand, then give them a little extra with the ratchet until they're hard enough to screw down that you give up and say "I'll finish it from the top". This is just to make sure they are secure.
You'll then fish the through bolt through the properly oriented engine bracket with the two remaining spacers properly seated and a small washer on top of them (then the bolt head) ABOVE the bracket opposite the engine mount and the single spacer. Hard to describe, but you'll get it. Start the threads on that bolt for a bit while holding the engine bracket in proper orientation.
Then just re-install the engine bracket to the engine with the 4 bolts positioned exactly as they had come out. Please note, the passenger side has a different bracket shape and therefore the bolts are in a little bit different spots AND there is a ground wire held on by a 15mm (instead of 13mm) bolt on the top right (top front) mounting point which you will need to be sure to re-install exactly as it was installed.
Torque the engine bracket bolts down (I did 41 ft. lbs). This especially is where swivel sockets and swivel head torque wrenches make life easy. Some of the angles you need to get are weird and you need this articulation to make the job easy. Fortunately I was able to borrow both. But, I was able to get the job done with a swivel ratchet and a standard 3/8" torque wrench, it was just going too slow so I borrowed tools and made life easier.
Once that engine bracket is torqued down and you've verified you didn't screw something up, you'll then lower the engine onto the new mount, head up top, and torque the two bracket bolts down (I did 41 ft lbs) and the isolator bolt down (I did 37 or 38 ft. lbs, can't remember exactly).
Repeat this process for the passenger side - don't forget the ground wire which gets sandwiched between the 13mm bracket bolt and a 15mm bolt.
Also, tip, while it isn't necessary at all, removing the wheels keeps you from hitting your head on said wheels. Ask me how I know...
Sponsored