Sponsored

Front Tribad LED with Sequential Turn MOD!

Status
Not open for further replies.
OP
OP
papinist

papinist

The Italian Pony
Joined
Nov 30, 2014
Threads
47
Messages
3,188
Reaction score
781
Location
Tuscany, Italy
First Name
Stefano
Vehicle(s)
Mustang EcoBoost MT Race Red EURO - NO MORE
Was it hard to do?
Post a video;)
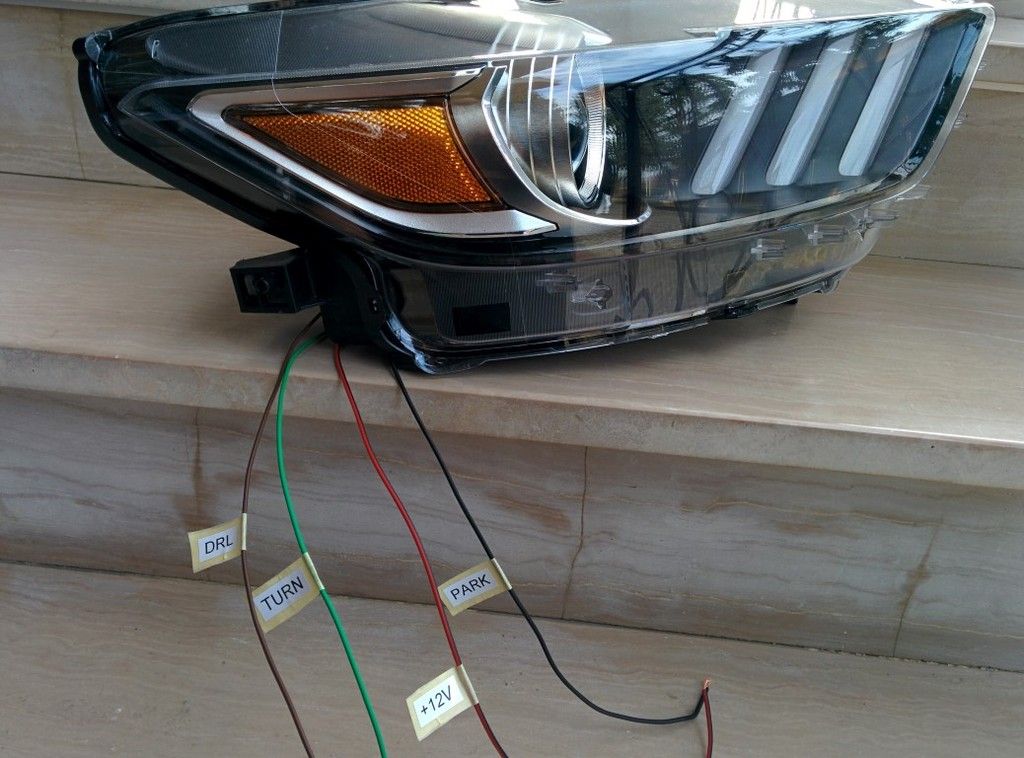
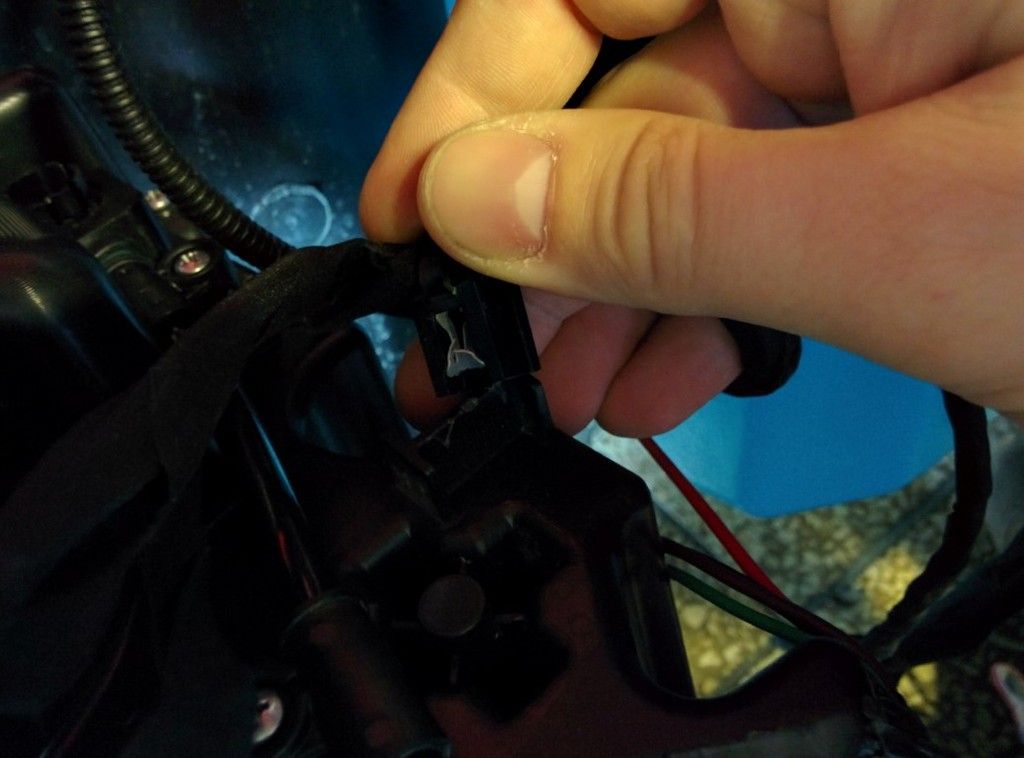
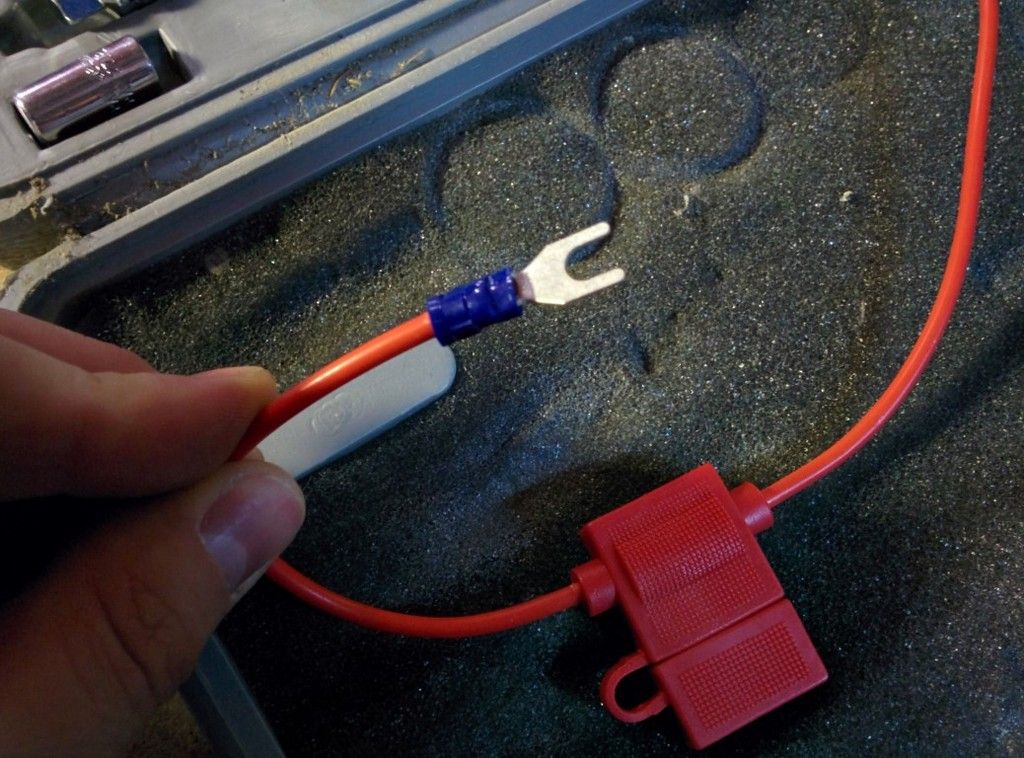
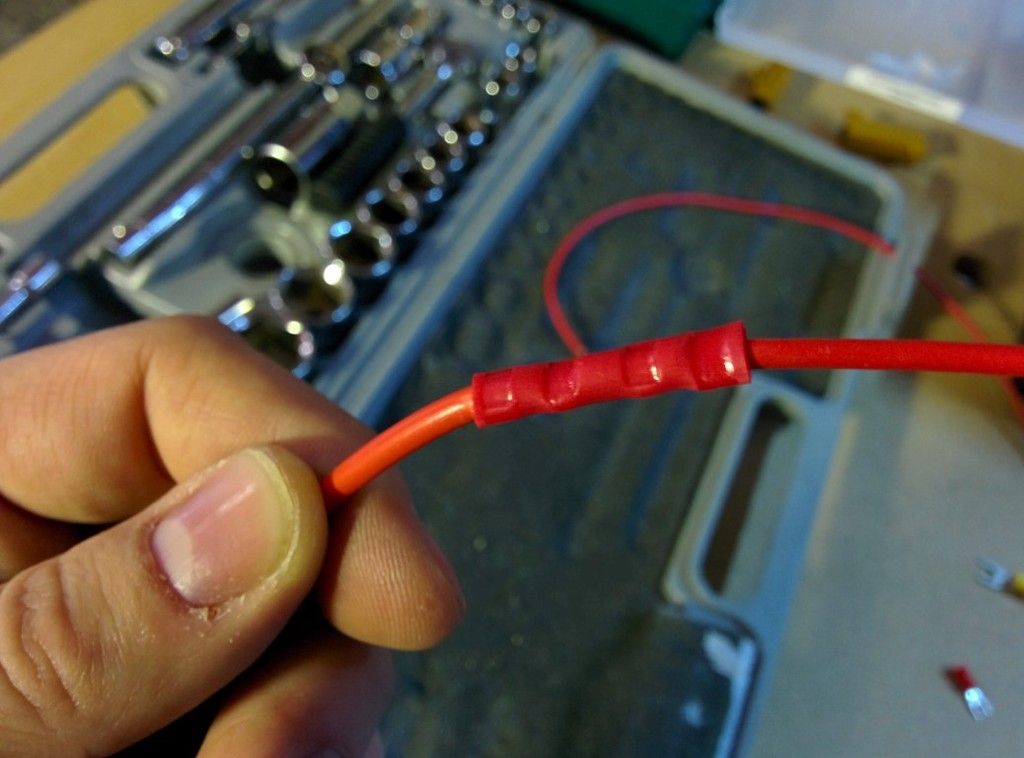
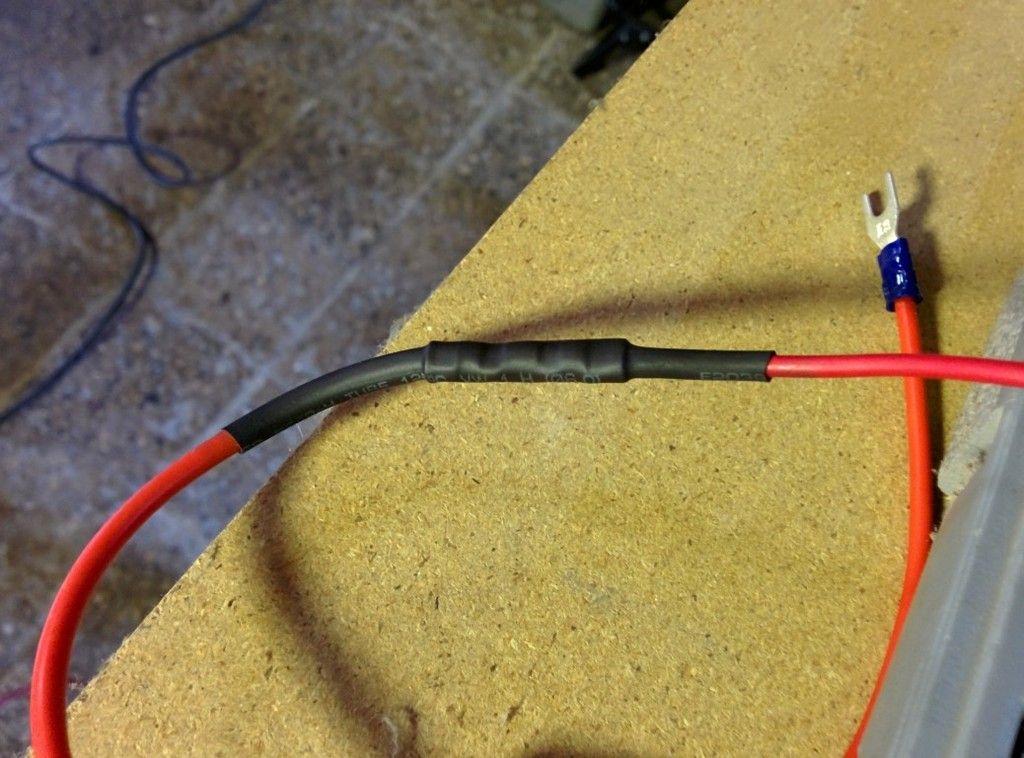
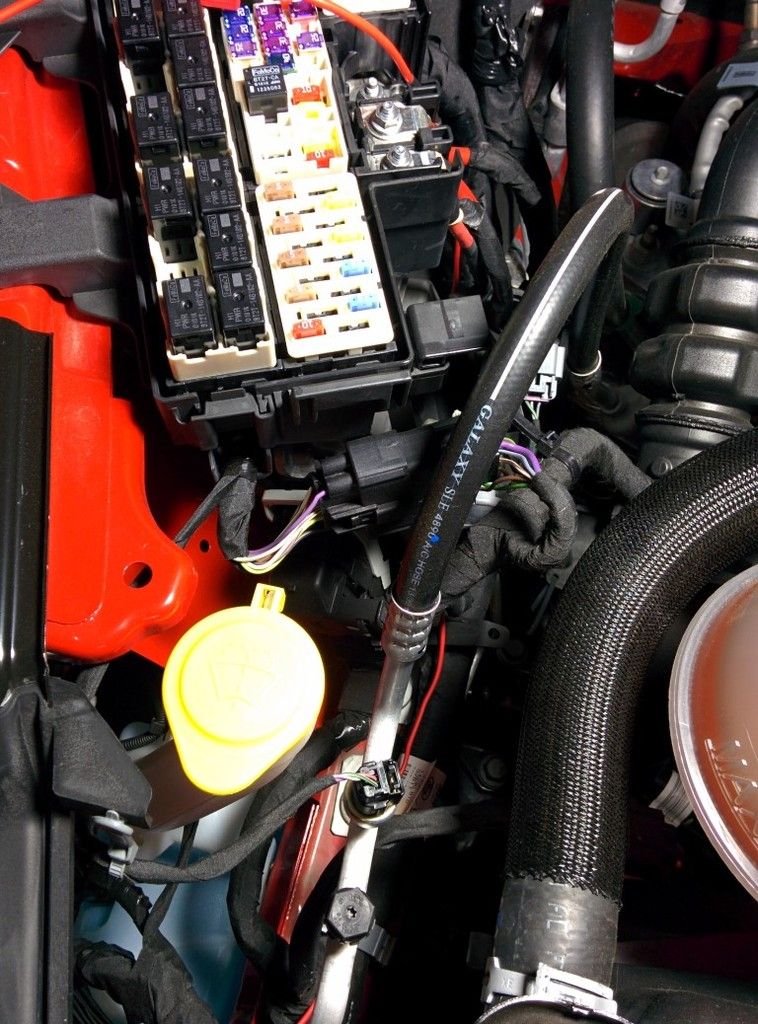
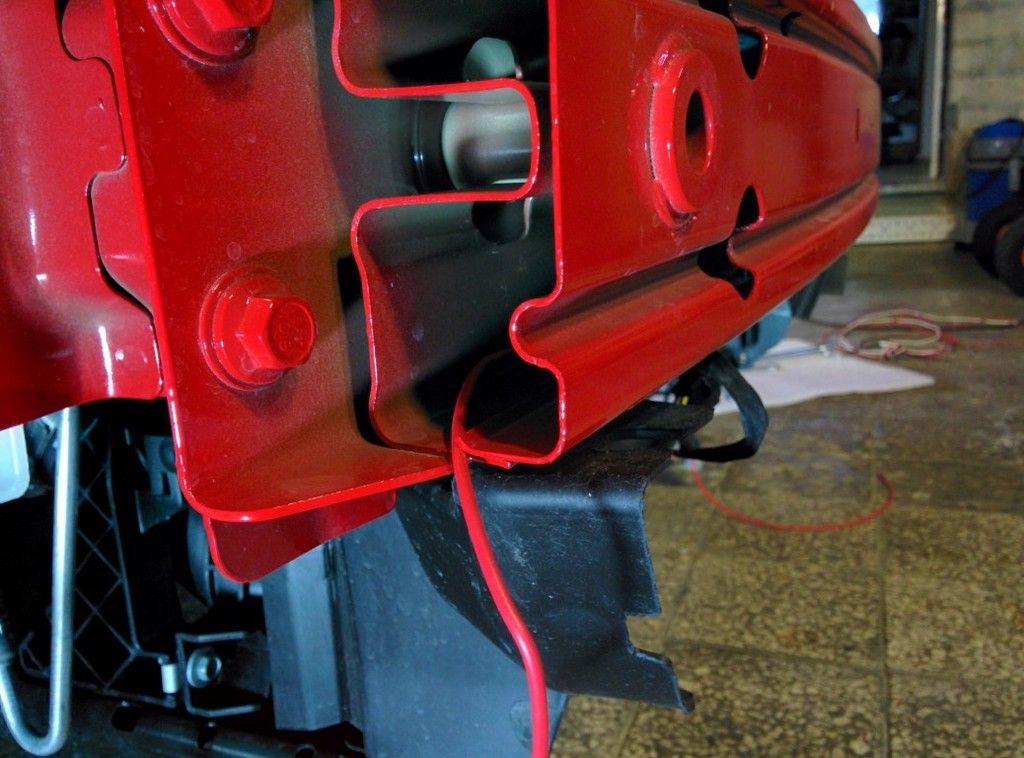
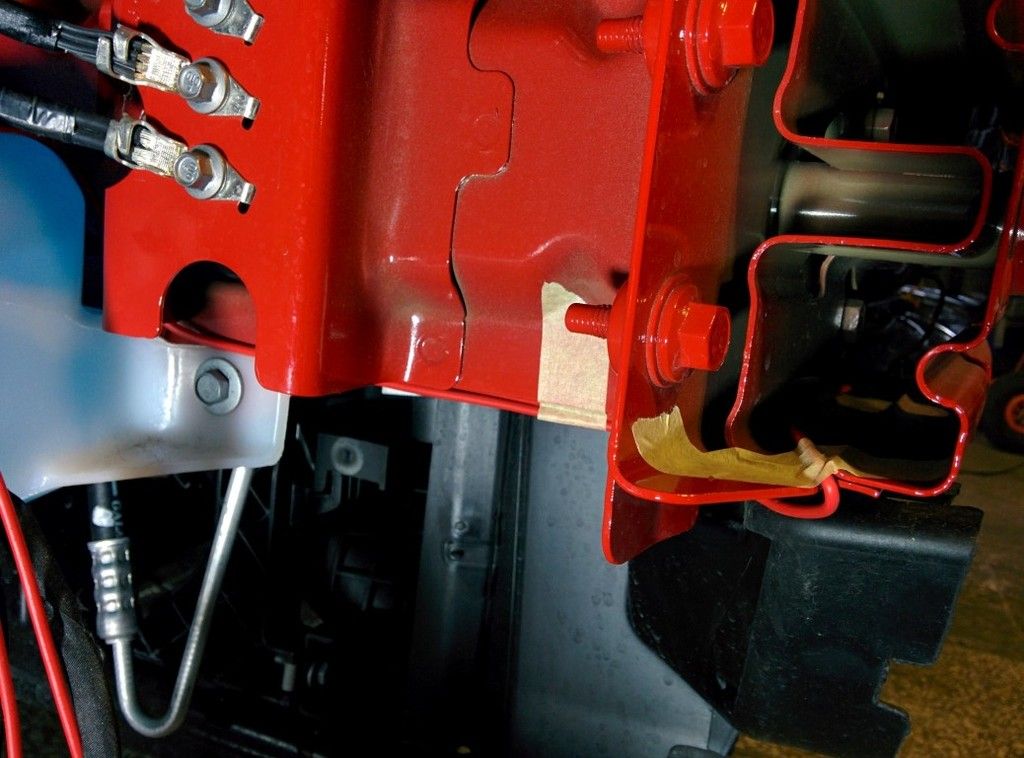
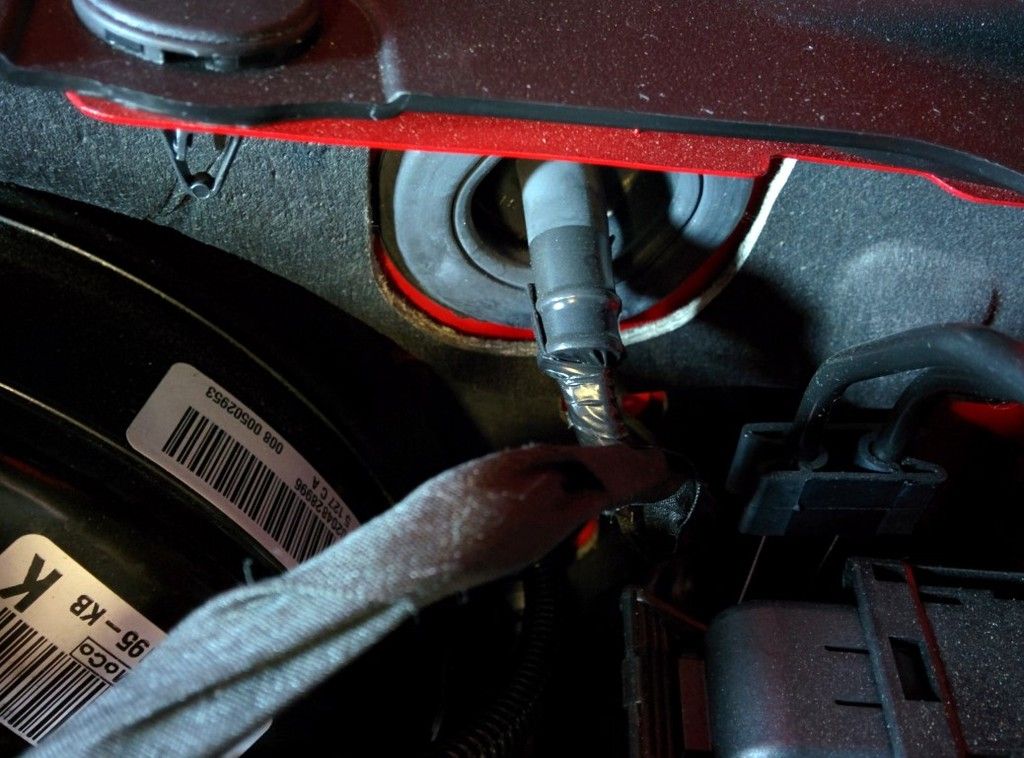
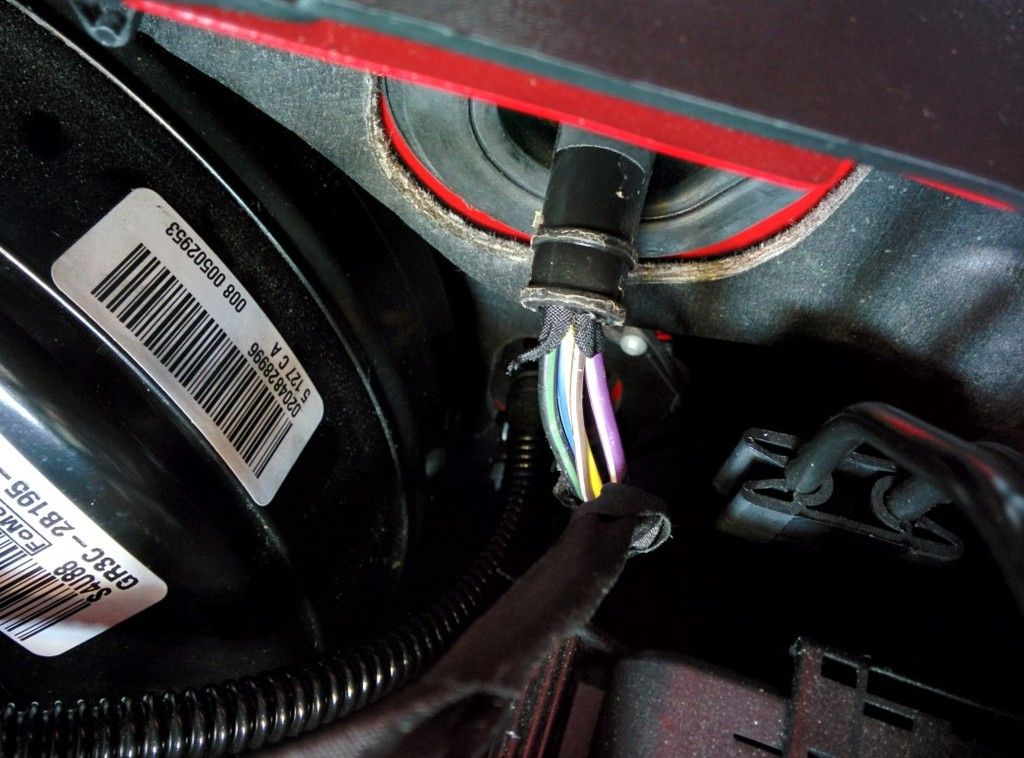
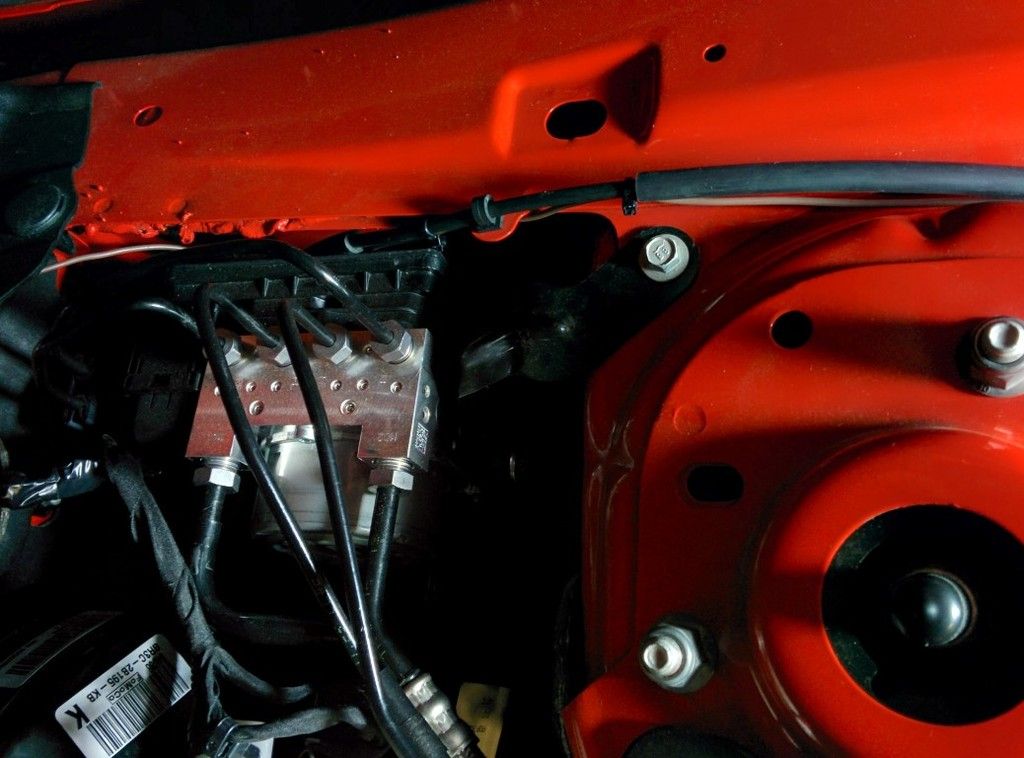
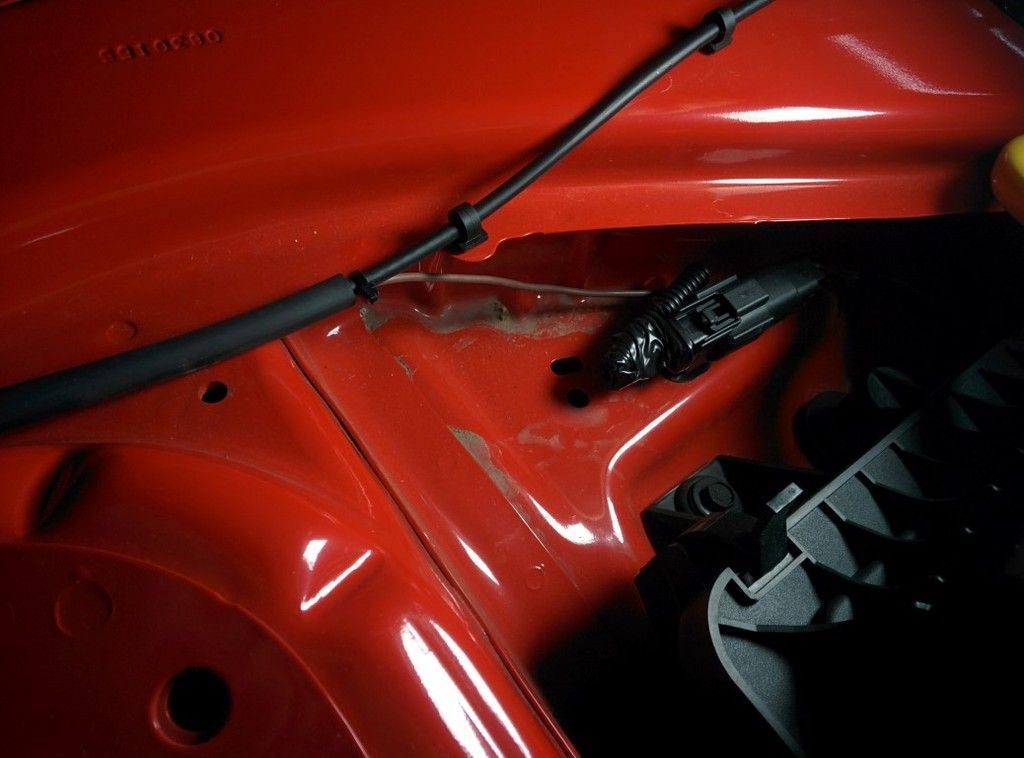
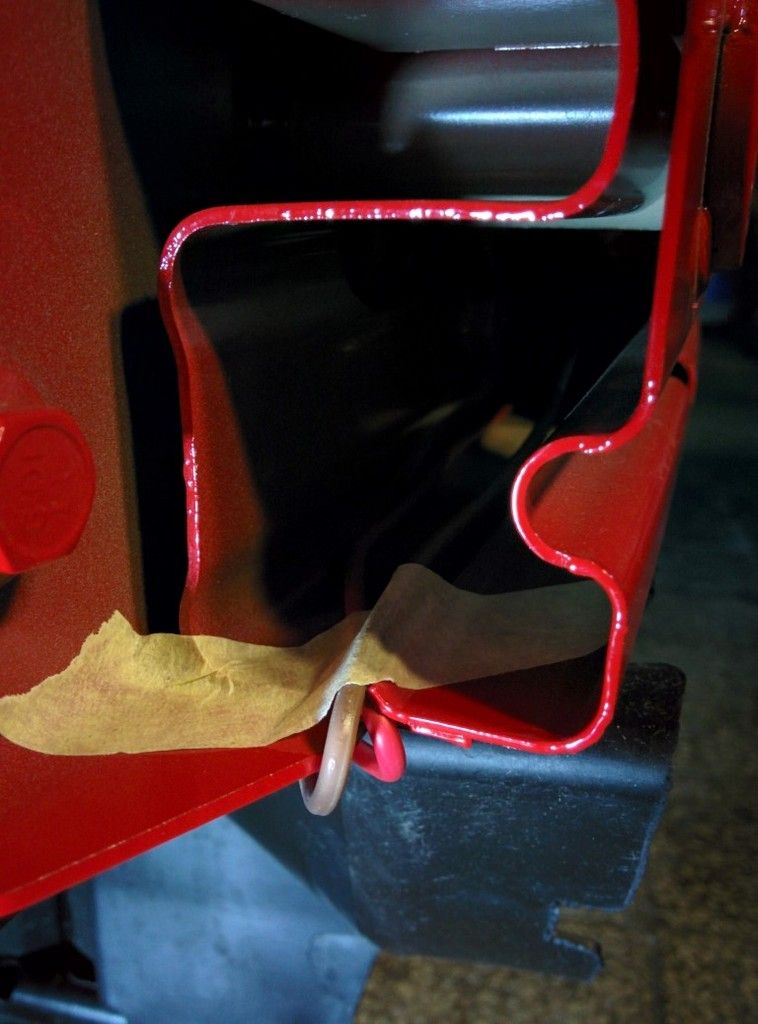
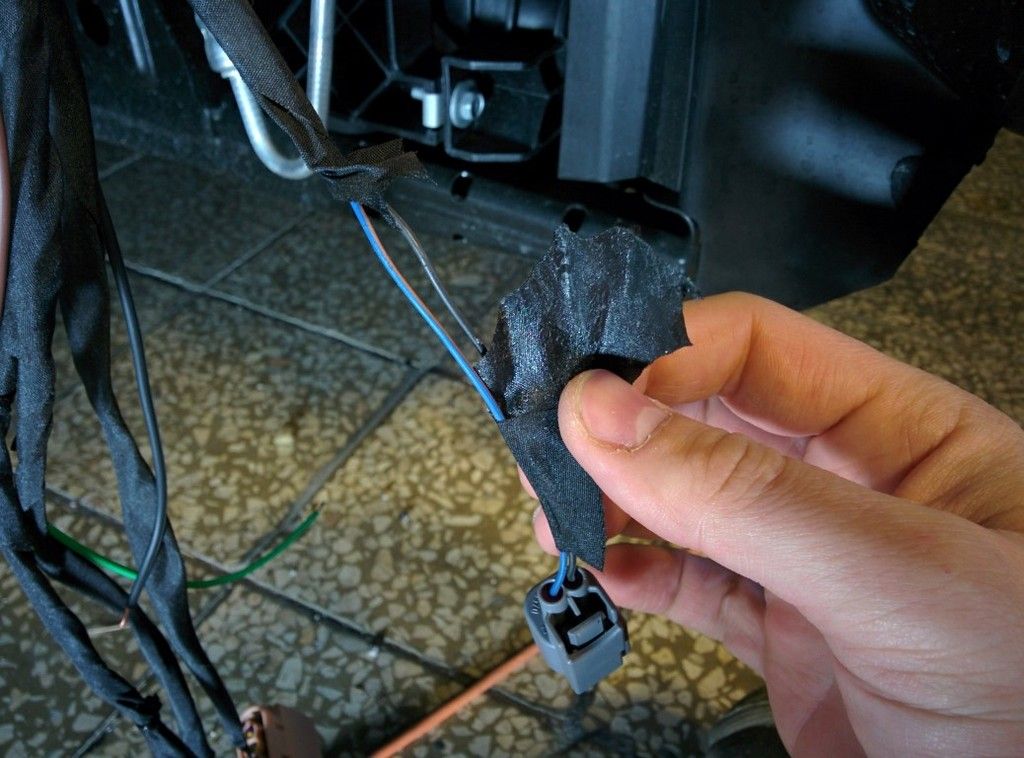
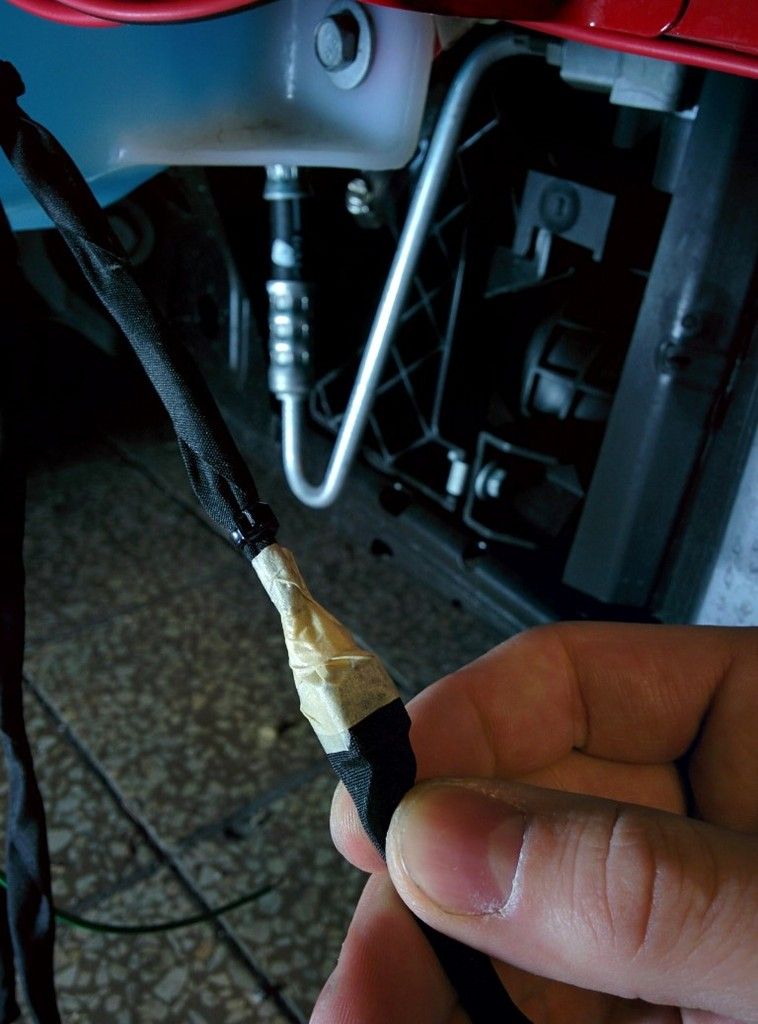
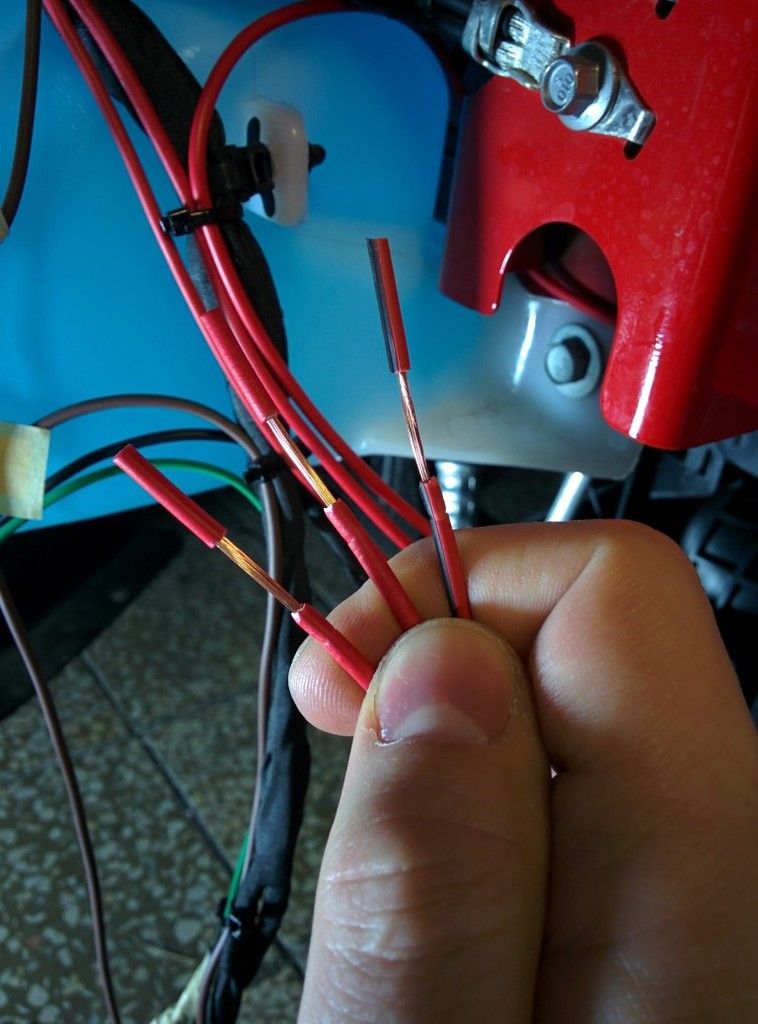
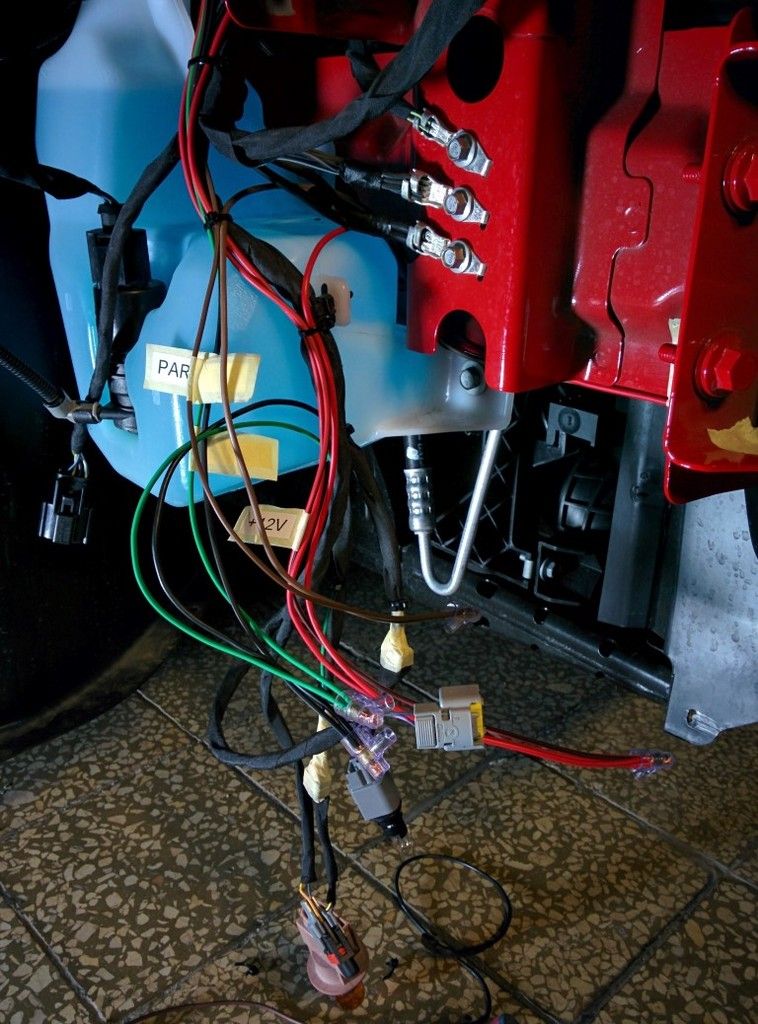
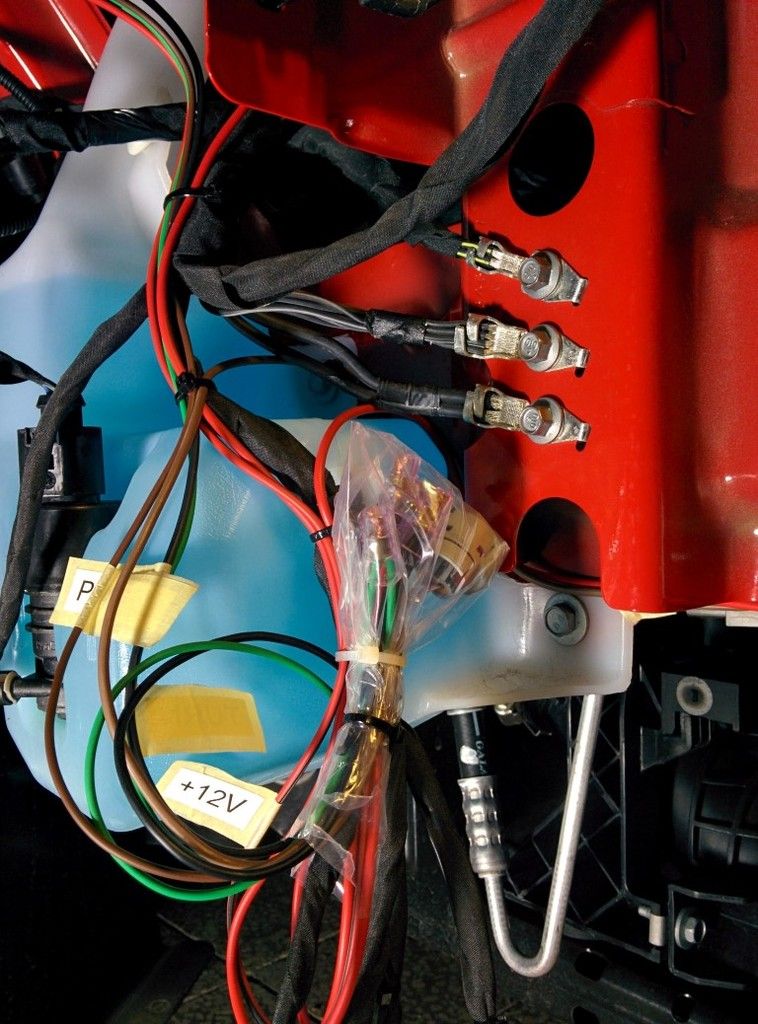
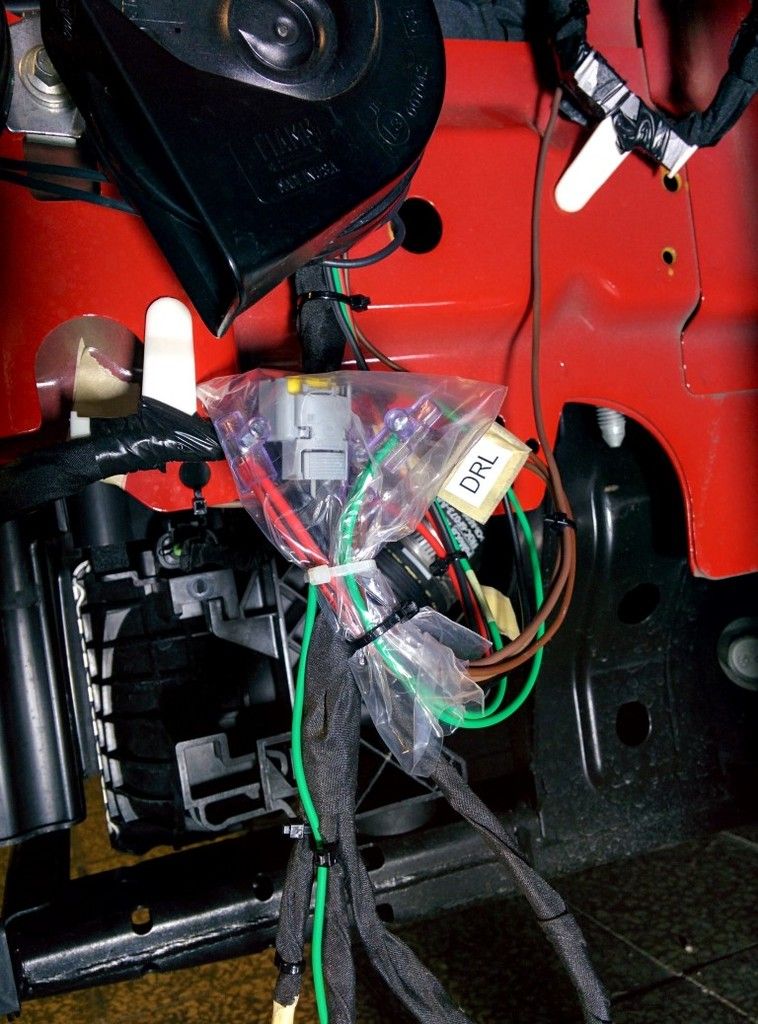
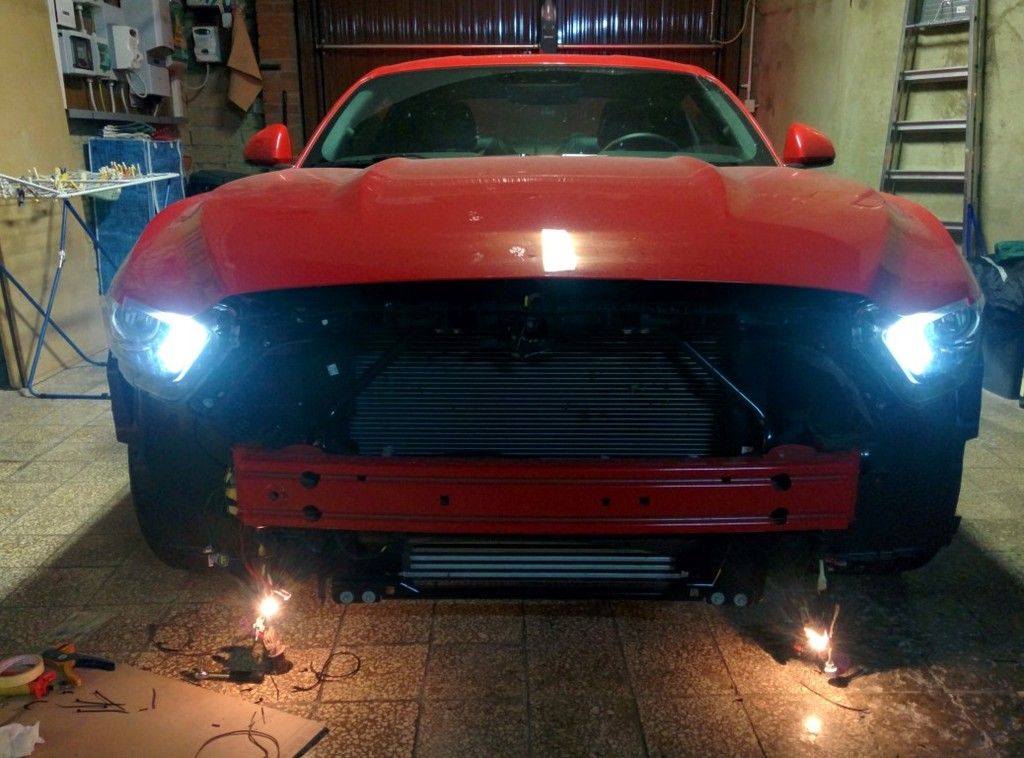
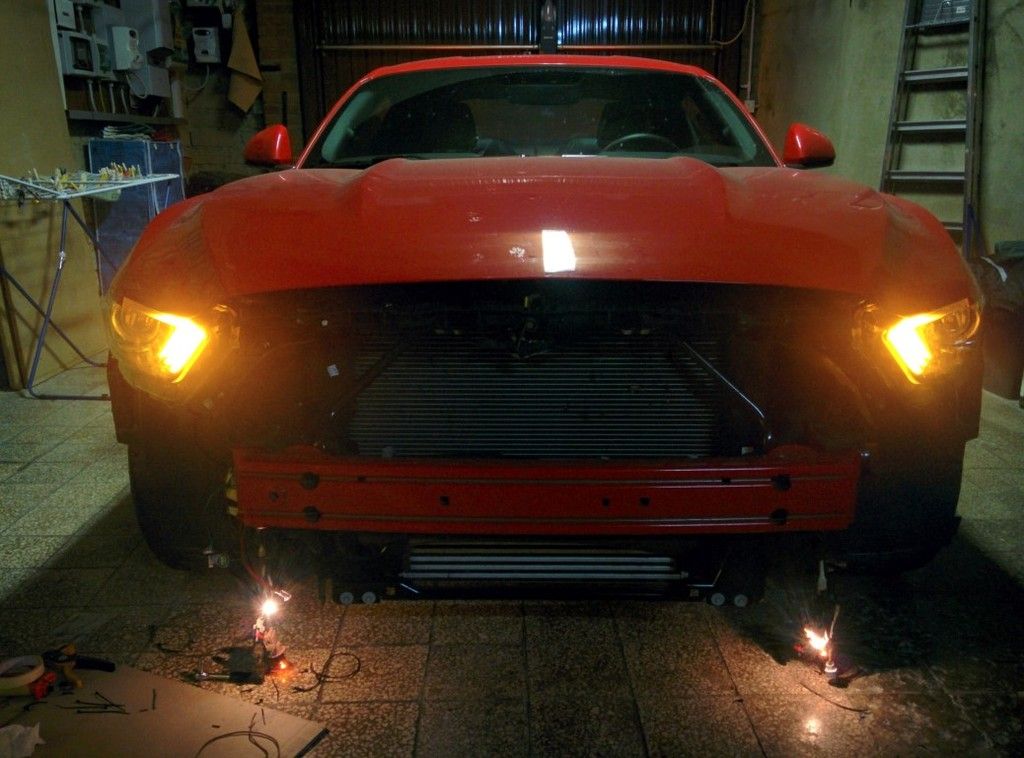
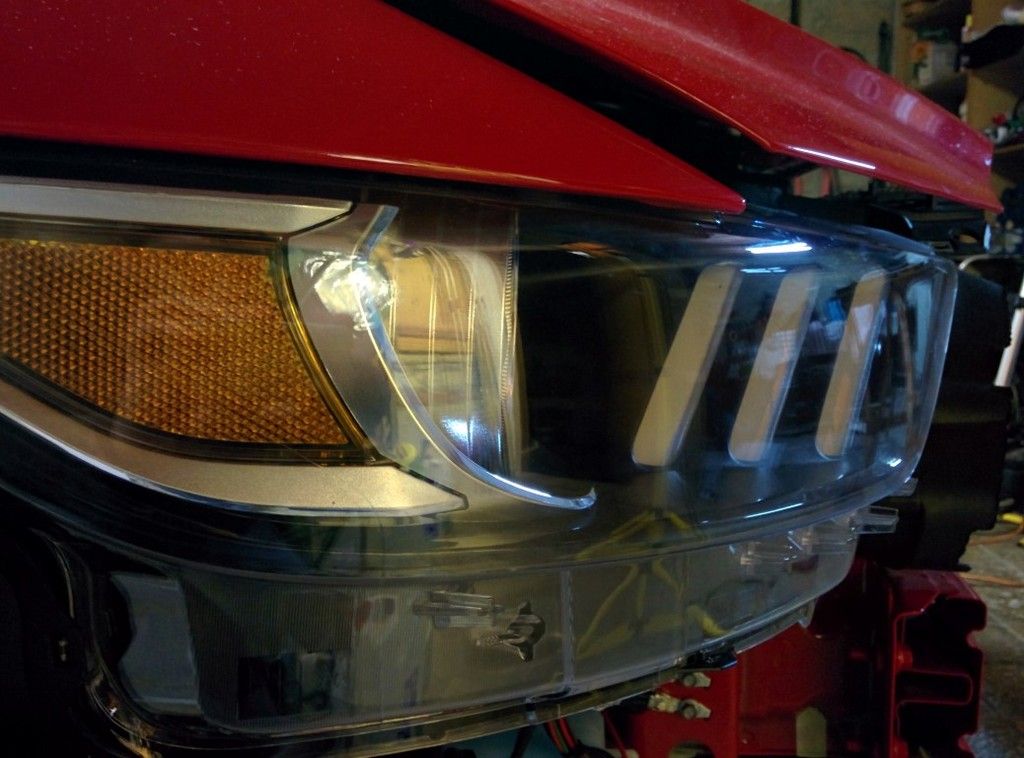
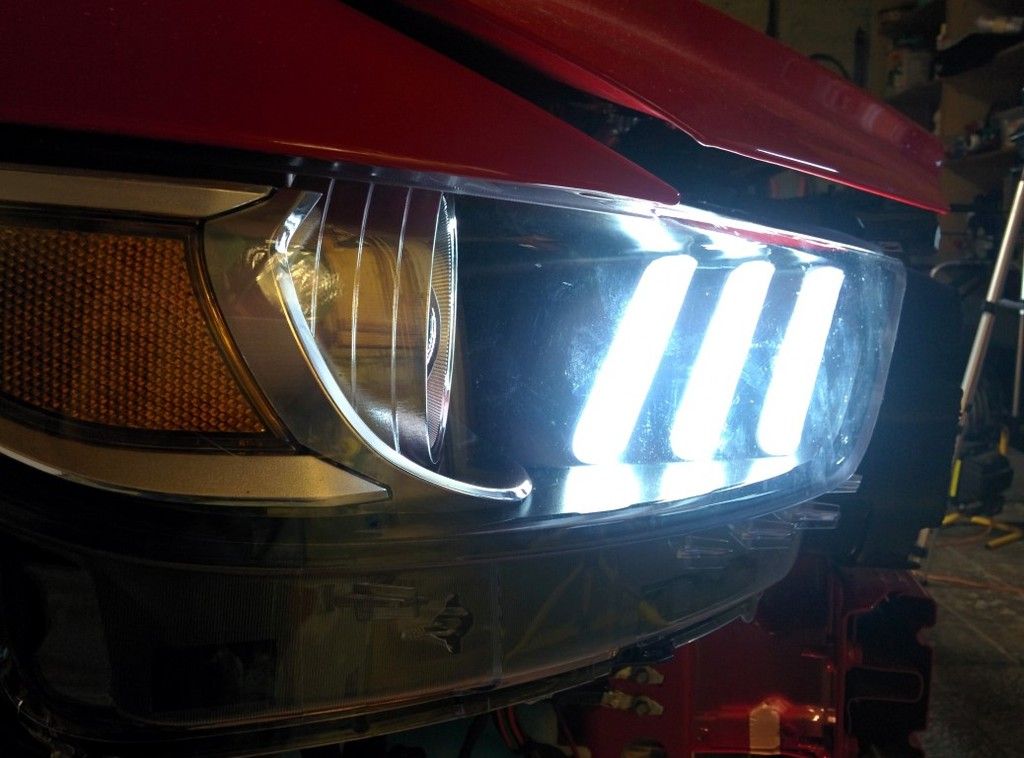
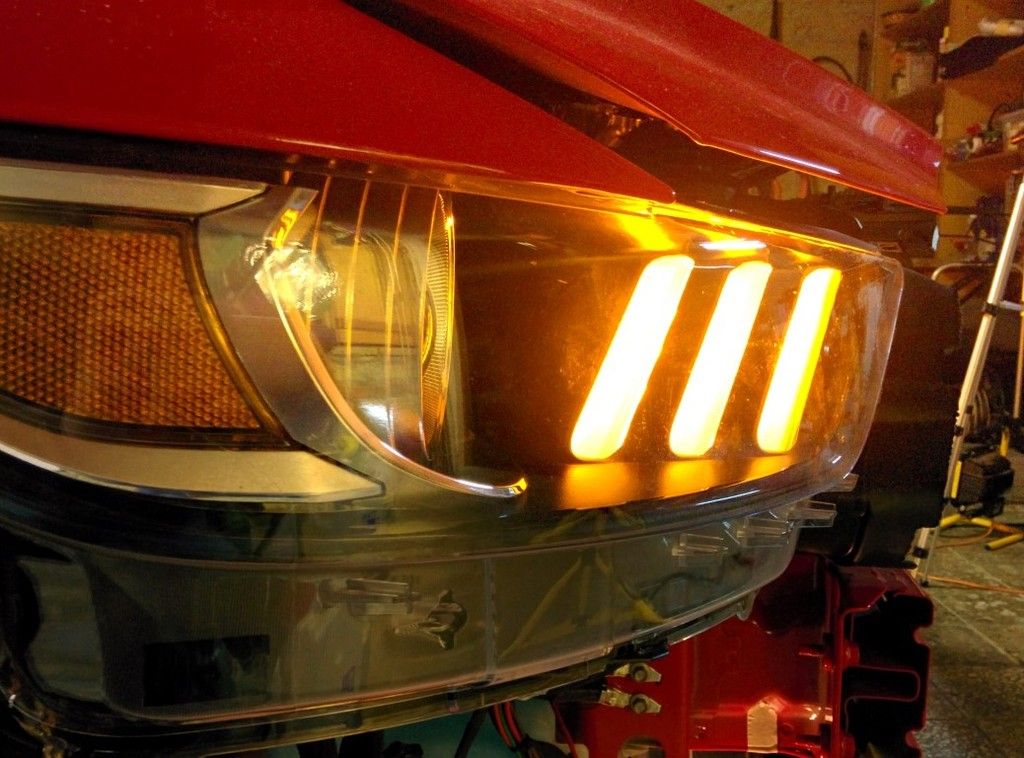
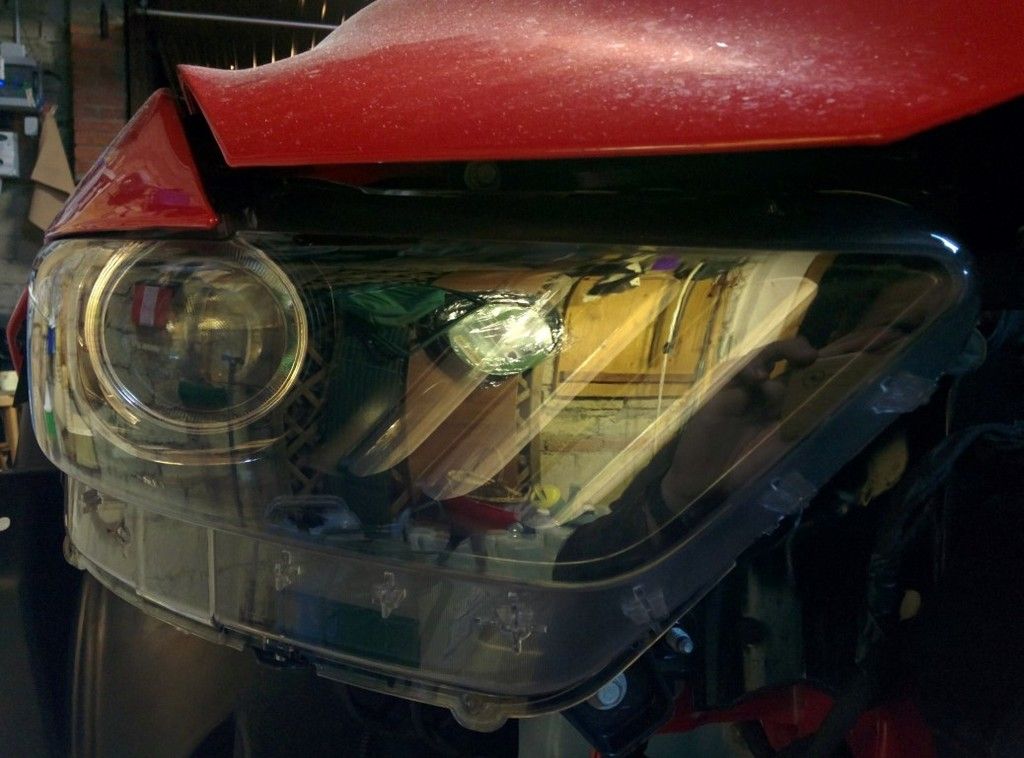
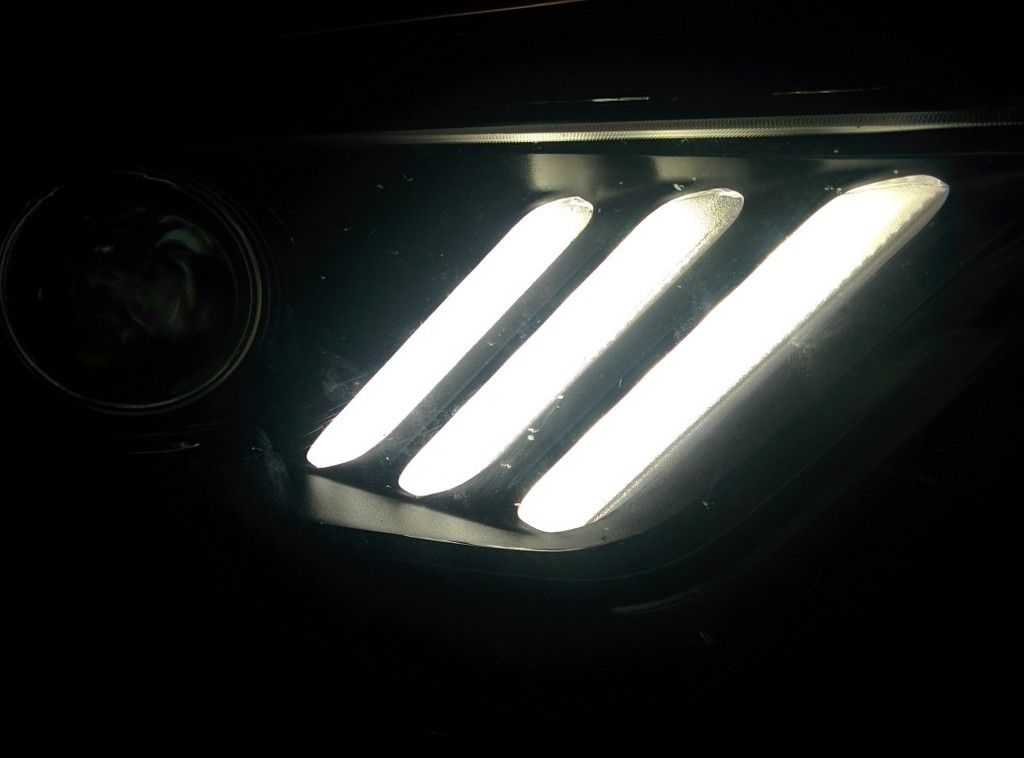
Wiring was very easy, assuming that you are able to do some splicing :)
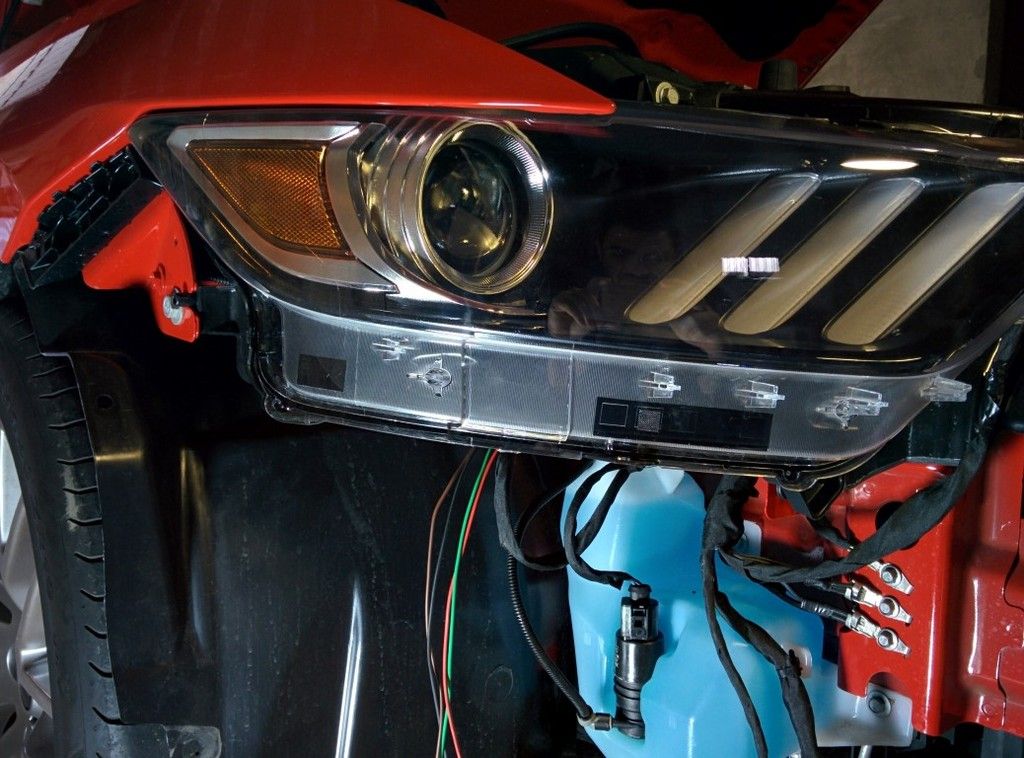
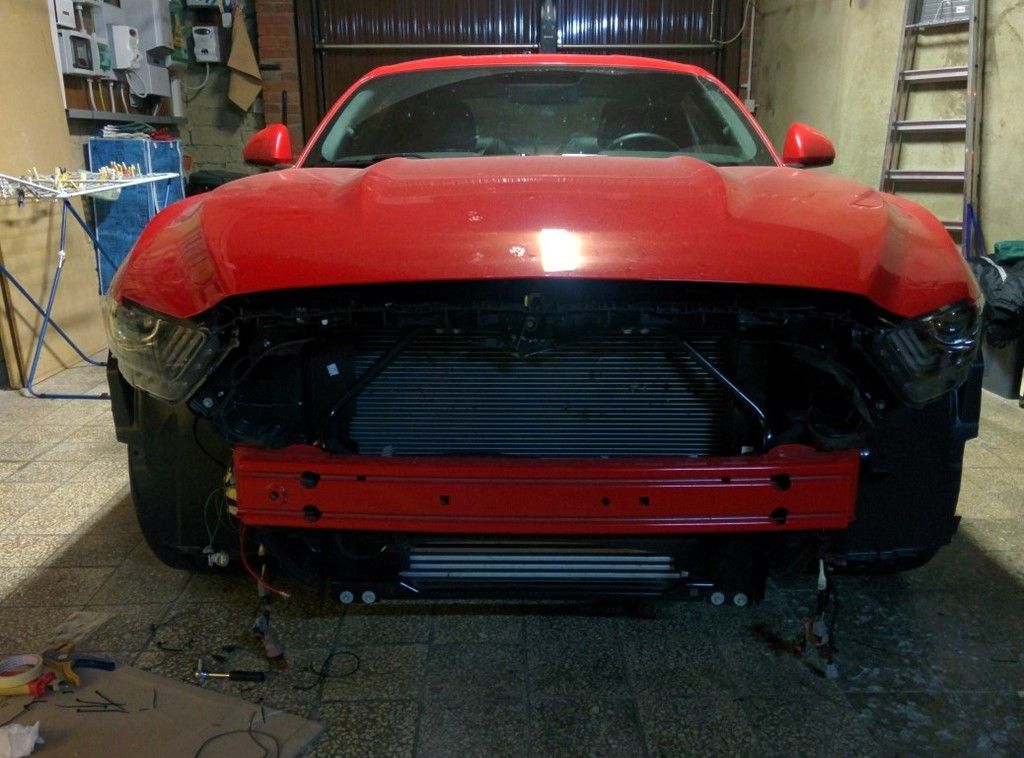
I have to fix my mistake today and then will post pictures and video.

I need more time.. and internet bandwith!! Only to upload taillights videos (less than 4 minutes total) it took SIX hours! :( :rant:
Sponsored


friendgr

Well-Known Member
Joined
Feb 25, 2015
Threads
30
Messages
884
Reaction score
55
Location
GREECE
Vehicle(s)
.
If you have 4G cover in your area from your mobile network and some decent data plan, use your phone to upload videos. ;)
 
OP
OP
papinist

papinist

The Italian Pony
Joined
Nov 30, 2014
Threads
47
Messages
3,188
Reaction score
781
Location
Tuscany, Italy
First Name
Stefano
Vehicle(s)
Mustang EcoBoost MT Race Red EURO - NO MORE
If you have 4G cover in your area from your mobile network and some decent data plan, use your phone to upload videos. ;)
yeah, "decent data plan"... my 1Gb monthly data plan will end in no time :D
We are waiting for new fiber connection for my village, due in a few weeks\months...

Thats because you need to convert it to MP4. Don't use the .mov or .avi
I use my Nexus 5 to shoot photos\videos and then let Google Photos sync them online. Once I have the video synced online, I go to my youtube account and import it.
I just checked and these two videos are in .mp4 format, 272 and 205 Mb!
 

friendgr

Well-Known Member
Joined
Feb 25, 2015
Threads
30
Messages
884
Reaction score
55
Location
GREECE
Vehicle(s)
.
Oh that's why the average picture quality. Nexus 5..... 272MB and 205 are too much for this quality.....

You should use proper camcorder at 1080p .
Then down convert the video to 720p and decrease bitrate with mx player pro (with one click literally) .

The key word is the bitrate. The lower bitrate, the lower MB and the lower quality. BUT if the source is good (i.e. 1080p .m2ts from a good camcorder) then even with lower bitrate the output result quality is still good.
 

Sponsored

OP
OP
papinist

papinist

The Italian Pony
Joined
Nov 30, 2014
Threads
47
Messages
3,188
Reaction score
781
Location
Tuscany, Italy
First Name
Stefano
Vehicle(s)
Mustang EcoBoost MT Race Red EURO - NO MORE
Oh that's why the average picture quality. Nexus 5..... 272MB and 205 are too much for this quality.....

You should use proper camcorder at 1080p .
Then down convert the video to 720p and decrease bitrate with mx player pro (with one click literally) .

The key word is the bitrate. The lower bitrate, the lower MB and the lower quality. BUT if the source is good (i.e. 1080p .m2ts from a good camcorder) then even with lower bitrate the output result quality is still good.
I know!
But I prefer the convenience of a device that I always have with me (the phone).. I rarely record a video :)
 

Ericc B

Well-Known Member
Joined
Oct 30, 2013
Threads
34
Messages
3,431
Reaction score
1,355
Location
NL/SP
Vehicle(s)
Various Mustang GTs
Very much looking forward to your front images as well. My headlights came back from Poland today! They're in my office but I was out so I haven't seen them yet. Installation is planned for Wednesday.
 

Ericc B

Well-Known Member
Joined
Oct 30, 2013
Threads
34
Messages
3,431
Reaction score
1,355
Location
NL/SP
Vehicle(s)
Various Mustang GTs
I just checked out the modification work on my headlights and it looks very well done. Obviously you can tell where Carniggia cut into the assembly and glued it back together but it's completely invisible when the light unit is installed back into the car.

Looking good so far, installation will commence tomorrow.
 
Last edited:

friendgr

Well-Known Member
Joined
Feb 25, 2015
Threads
30
Messages
884
Reaction score
55
Location
GREECE
Vehicle(s)
.
Looking forward to ;)

With bumper off, I believe it is a good chance to EASILY replace all the awful yellowish bulbs with LED for: - oem turn lights, running lights and fog lights.
 

bigul

Active Member
Joined
Oct 29, 2015
Threads
2
Messages
43
Reaction score
11
Location
Poland
Vehicle(s)
Mustang GT 2015 EU
There is still no video ? :(:(:paddle:
 

Sponsored
OP
OP
papinist

papinist

The Italian Pony
Joined
Nov 30, 2014
Threads
47
Messages
3,188
Reaction score
781
Location
Tuscany, Italy
First Name
Stefano
Vehicle(s)
Mustang EcoBoost MT Race Red EURO - NO MORE
I'm a bit busy at work, so haven't finished yet :headbonk:
 
OP
OP
papinist

papinist

The Italian Pony
Joined
Nov 30, 2014
Threads
47
Messages
3,188
Reaction score
781
Location
Tuscany, Italy
First Name
Stefano
Vehicle(s)
Mustang EcoBoost MT Race Red EURO - NO MORE
Finally solved some issues I had and all is working as it should be! Just to be clear, issues was caused by me that want to do a different wiring that what caniggia said :D
I had the idea of wiring the new drl to the stock drl cable, removing the stock ugly drl. Problem is that the power in this cable is 'strange' and sometimes new drl won't lit. Caniggia always suggested to get power from another source (window wipers motor) but I want to try if the fuse box above the battery has some switched 12v.. Save your time, there isn't :ninja:
So after wasting all this time, I follow caniggia's suggestions and took power from that wire, and voilĂ , all working perfectly! :headbonk:

Again, Ford you created those badass tribar DRL and when you export this car worldwide.. you remove them?? :rant::rant:

So, on installing!


2. INSTALLATION part 1

Headlights are back after a 3,000 km round trip to Poland (together with taillights)


Both headlights have 4 new wires coming out from the housing:
+12V - power for the sequential module (I think)
TURN - sequential turning light
DRL - high brightness DRL
PARK - low brightness DRL

DRLs have two brightness level so when parking\headlights are on, DRLs dim a bit, otherwise they are too bright at night.


Workplace lights set


And all nuts\bolts\screws are identified :)


Reconnect both light and height level adjust connectors, before reinstalling the housing to the car


Remember to reconnect this clip holding cables in order :)


Headlights has a perfect fit thanks to a couple of prong. Don't overtight bolts, after all you are working on plastic!


Start wiring by finding a constant 12v source from fuse box


One of those three connectors is perfect for that


caniggia sent me this fuse holder with 5A fuse, and I crimped a fork terminal on one end. Wait to connect to 12v until you have wired all the rest.


Then extended it with a red wire (I tried to keep the same color coding for all wires so it's easier to find out how it works even in years :D )


Then route the wire all the way down to the passenger side front light


You also need this 12v at the driver side front light so I choose to pass inside the front bar


and fixed it with tape to the frame


Collect all wires with zip ties


(to be continued..)
 
Last edited:
OP
OP
papinist

papinist

The Italian Pony
Joined
Nov 30, 2014
Threads
47
Messages
3,188
Reaction score
781
Location
Tuscany, Italy
First Name
Stefano
Vehicle(s)
Mustang EcoBoost MT Race Red EURO - NO MORE
2. INSTALLATION part 2

Then, we need to find the 12v switched power for the new drl. As suggested by caniggia, one easy place to find is is the window wipers motor. Cables coming from the inside are located here


Remove the tape, the wire you want is violet w\white stripe


I used a quick splice connector and run a brown wire through the side to the driver side front light


This is needed at the passenger side too, so I passed it inside the front bar, together with the red wire


Now you have to get signal from both parking and turning wires


Again I used quick splice connectors and then covered with tape


Do the same on the other side, then connect together all wires of the same color. You should have:

passenger side
- three red: to headlight (seq turn power), from fuse box (constant 12v), to driver side
- two black: to headlight (low brightness drl), from parking light wire
- two brown: to headlight (high brightness drl), from driver side (switched 12v)
- two green: to headlight (seq turn signal), from turning light wire

driver side
- two red: to headlight (seq turn power), from passenger side
- two black: to headlight (low brightness drl), from parking light wire
- three brown: to headlight (high brightness drl), from window wipers motor (switched 12v), to passenger side
- two green: to headlight (seq turn signal), from turning light wire


To made it waterproof, I used the higher technology I have available: a small plastic bag :D


Remember to also cover the stock drl connector since you don't want to have those horrendous light (even disconnected, you will get no errors from ECU)


Last thing, connect the red fused wire to the fuse box


There is also room to keep this small fuse holder inside it the fuse box


Now you only need to reinstall bumper and reconnect fog, parking and turning light connectors, and the pedestrian safety sensor.

DONE!

I ordered a led switchback kit so I'm waitin for that before reinstalling bumper.


These are really beautiful... thanks caniggia! :clap2:
Video will follow :cheers:
 
OP
OP
papinist

papinist

The Italian Pony
Joined
Nov 30, 2014
Threads
47
Messages
3,188
Reaction score
781
Location
Tuscany, Italy
First Name
Stefano
Vehicle(s)
Mustang EcoBoost MT Race Red EURO - NO MORE
:clap2:


3. VIDEOS


[ame]
 

friendgr

Well-Known Member
Joined
Feb 25, 2015
Threads
30
Messages
884
Reaction score
55
Location
GREECE
Vehicle(s)
.
I lost you somewhere....

Why do we need this, since we have 12V from the fuse box?
Then, we need to find the 12v switched power for the new drl. As suggested by caniggia, one easy place to find is is the window wipers motor. Cables coming from the inside are located here
Sponsored

 
Status
Not open for further replies.


Top