papinist
The Italian Pony
- Joined
- Nov 30, 2014
- Threads
- 47
- Messages
- 3,188
- Reaction score
- 781
- Location
- Tuscany, Italy
- First Name
- Stefano
- Vehicle(s)
- Mustang EcoBoost MT Race Red EURO - NO MORE
Before replacing stock parking lights with leds I tested the system and all worked good. Also, Gnome says that only dimmed tribar flickers so it should not be a power issue.
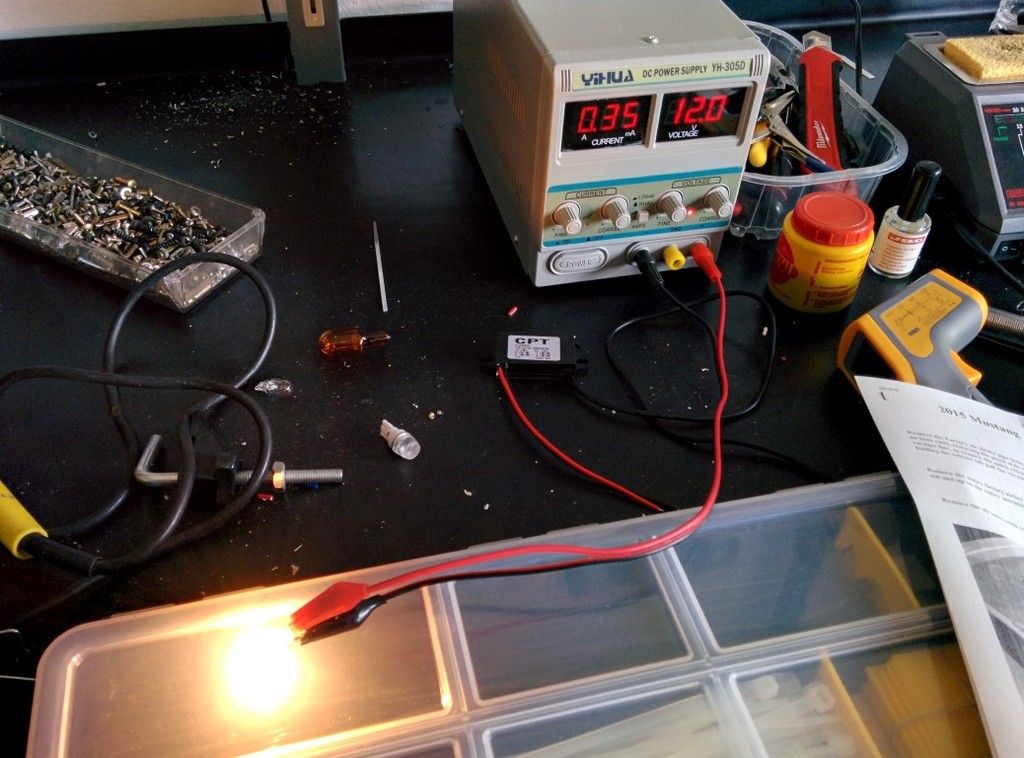
Just FIY, this is the power consumption of stock parking light

and this is a led parking bulb
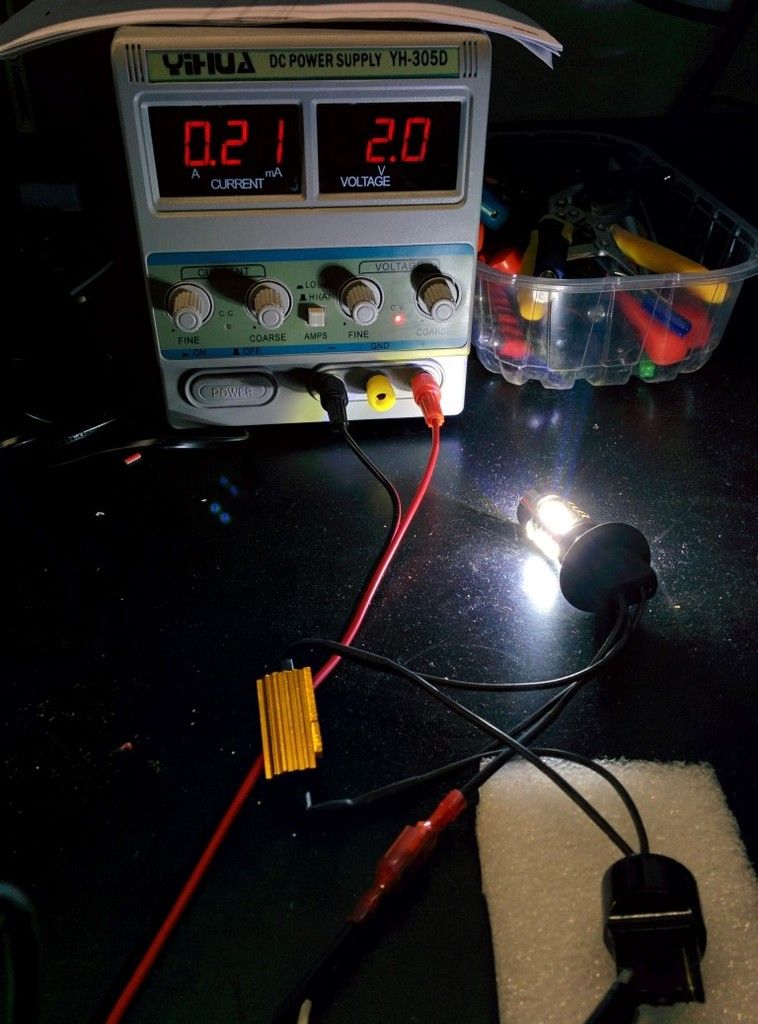
and even adding the switchback white side, they both are lower than the original stock parking bulb consumption:
(camera missed a '1'.. it's 12v)
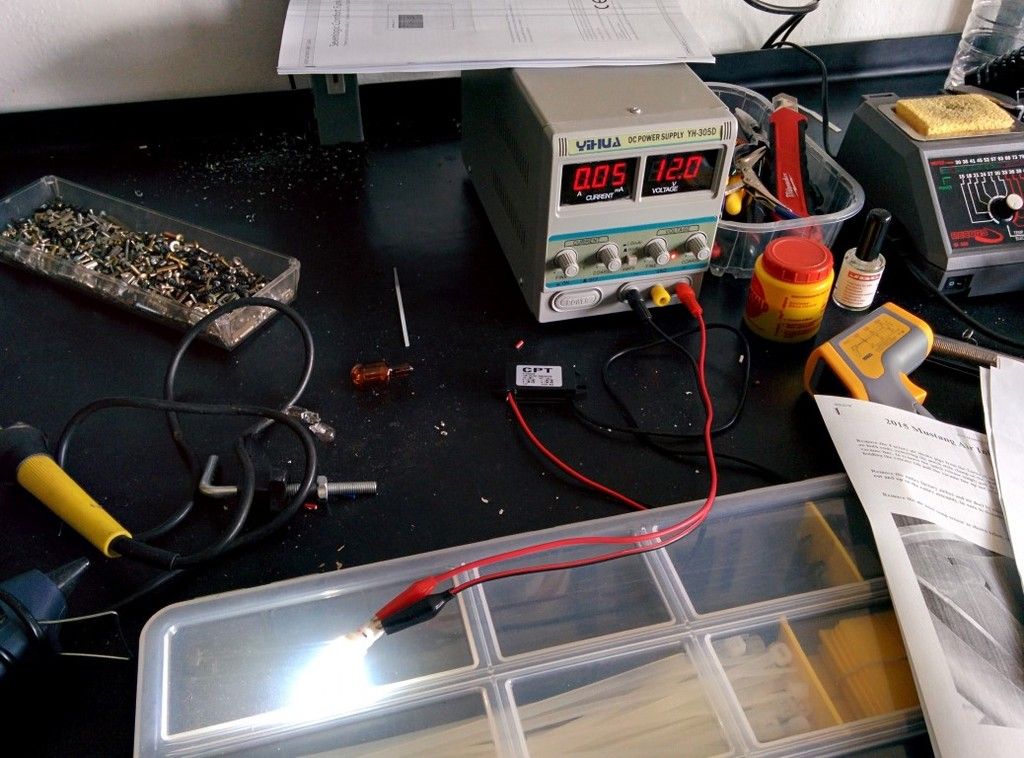
Just FIY, this is the power consumption of stock parking light
and this is a led parking bulb
and even adding the switchback white side, they both are lower than the original stock parking bulb consumption:
(camera missed a '1'.. it's 12v)
Sponsored
