Sponsored

Active Exhaust Actuator problem after Corsa install

V8der

Well-Known Member
Joined
Feb 3, 2019
Threads
29
Messages
176
Reaction score
340
Location
Las Vegas
First Name
Eric
Vehicle(s)
2018 F150 Lariat 502A SCrew 2018 Mustang GT Premium 401A PP A10
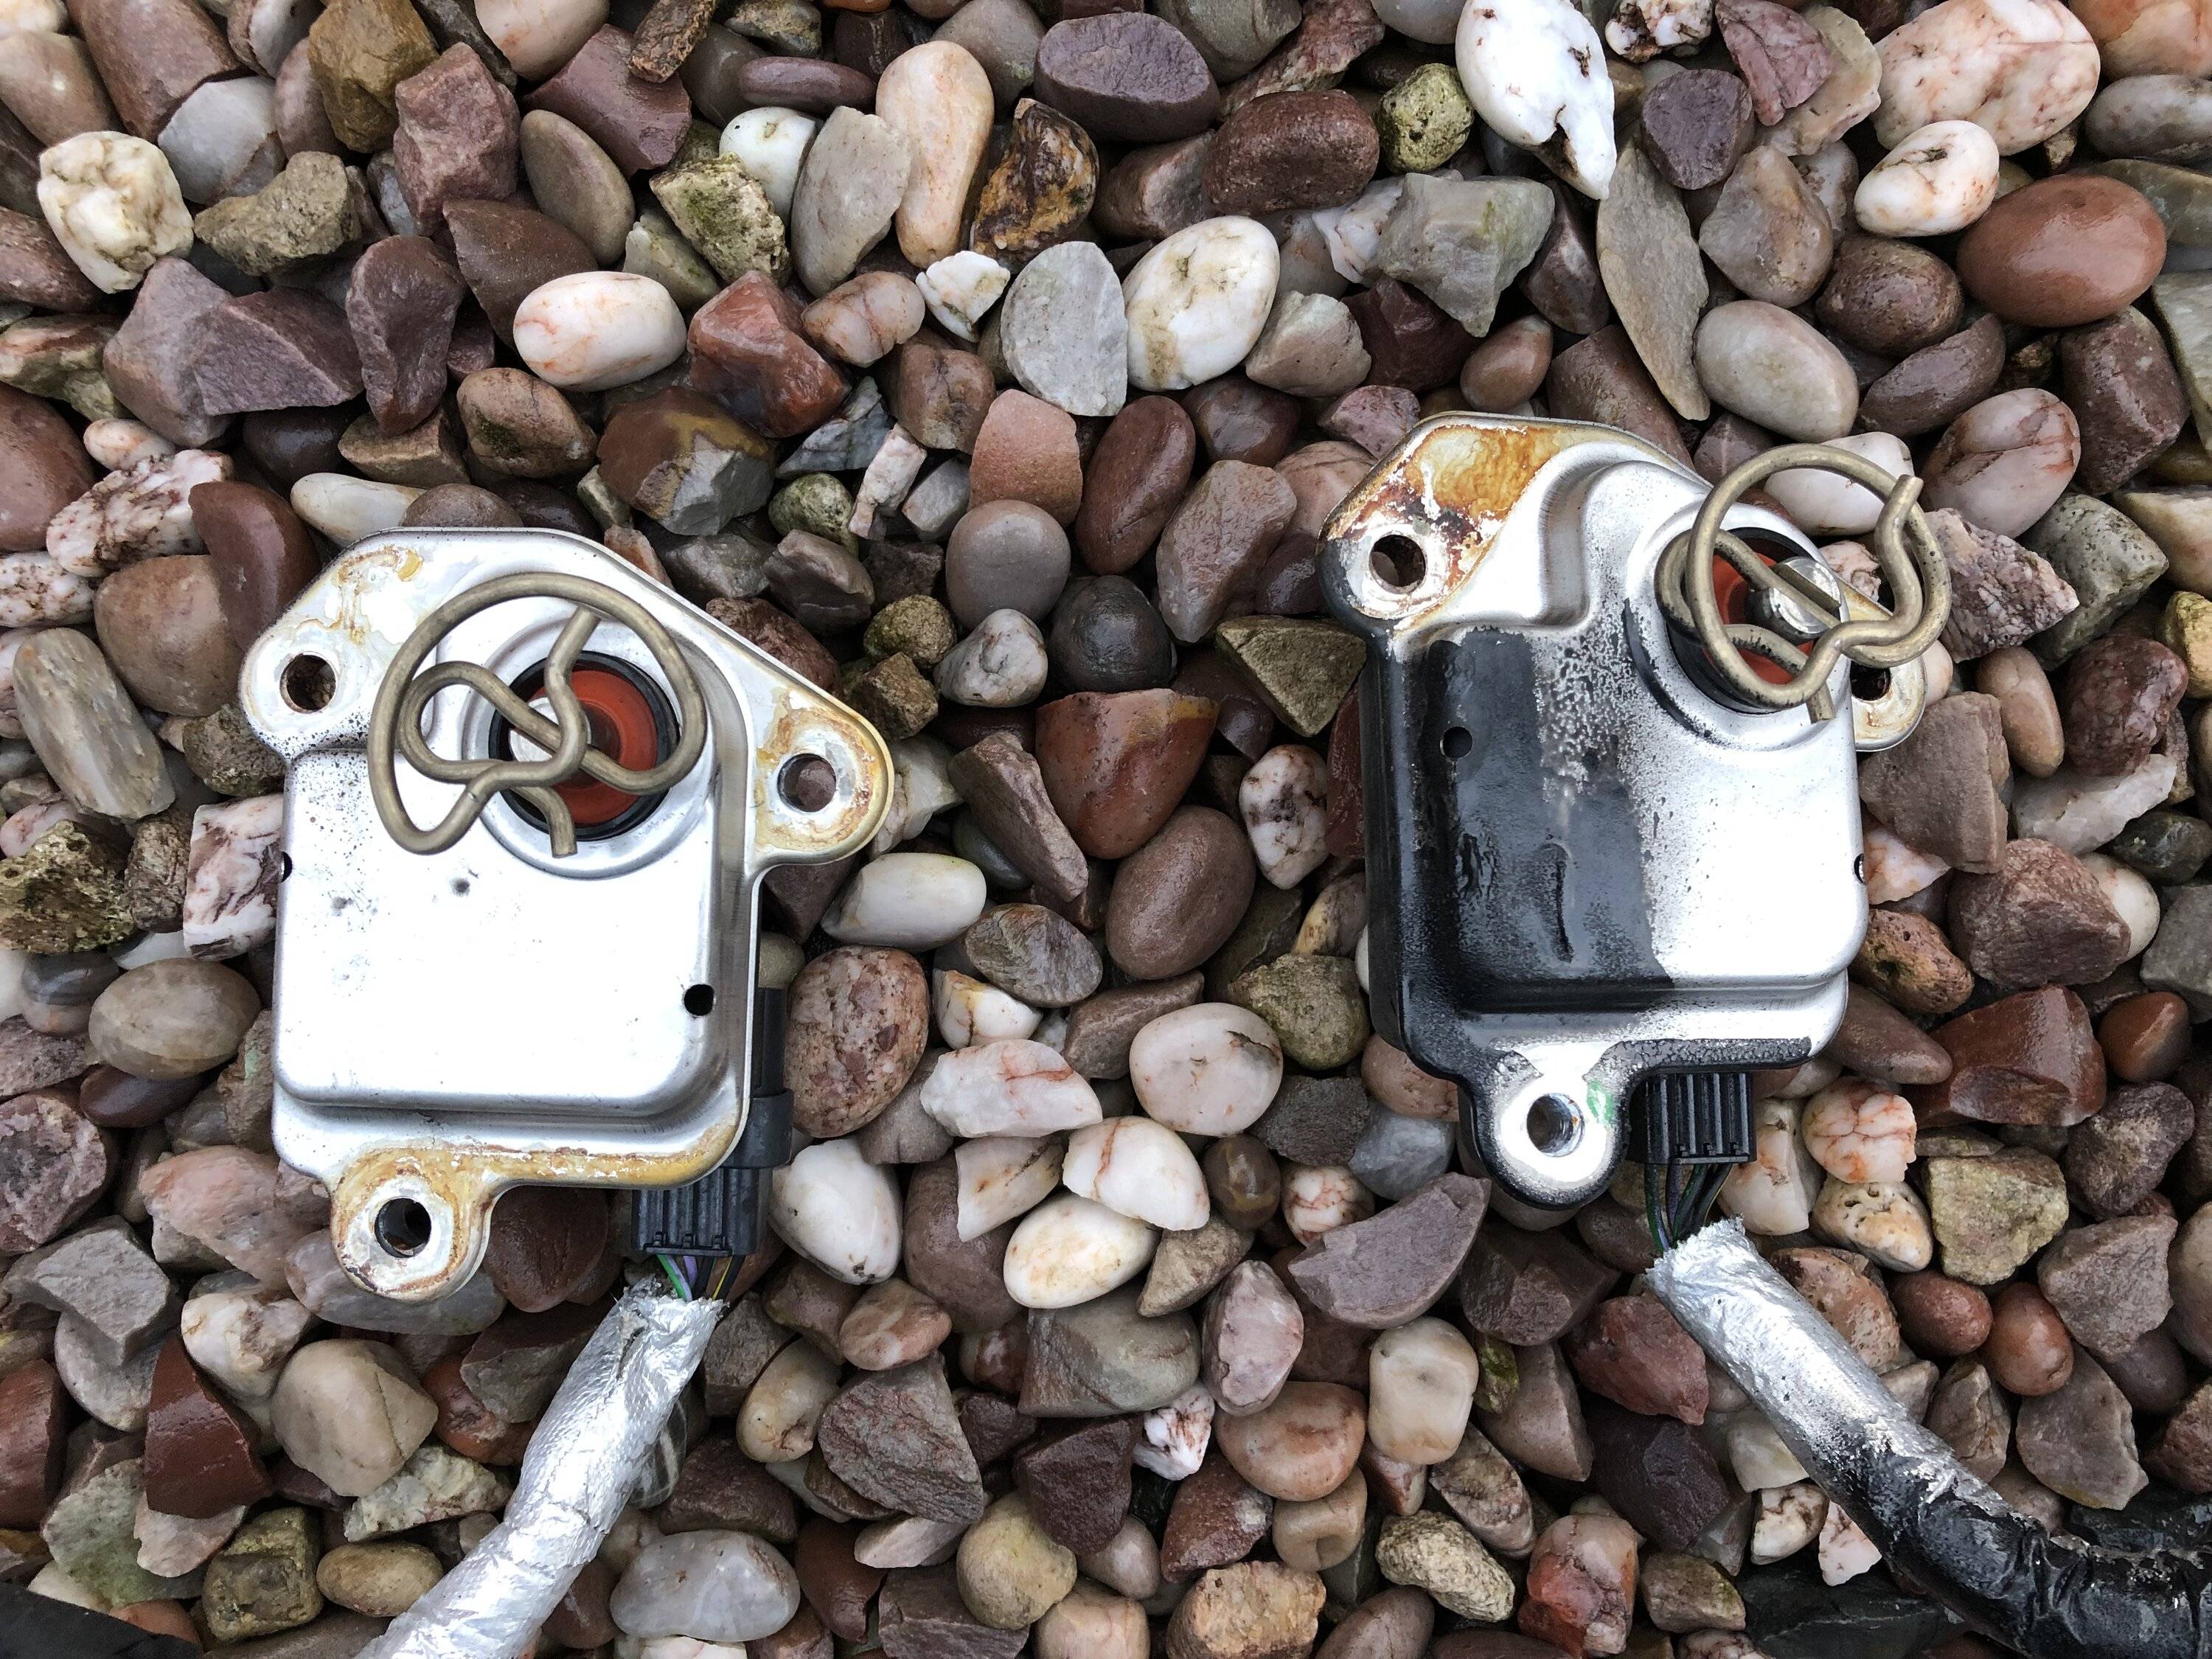
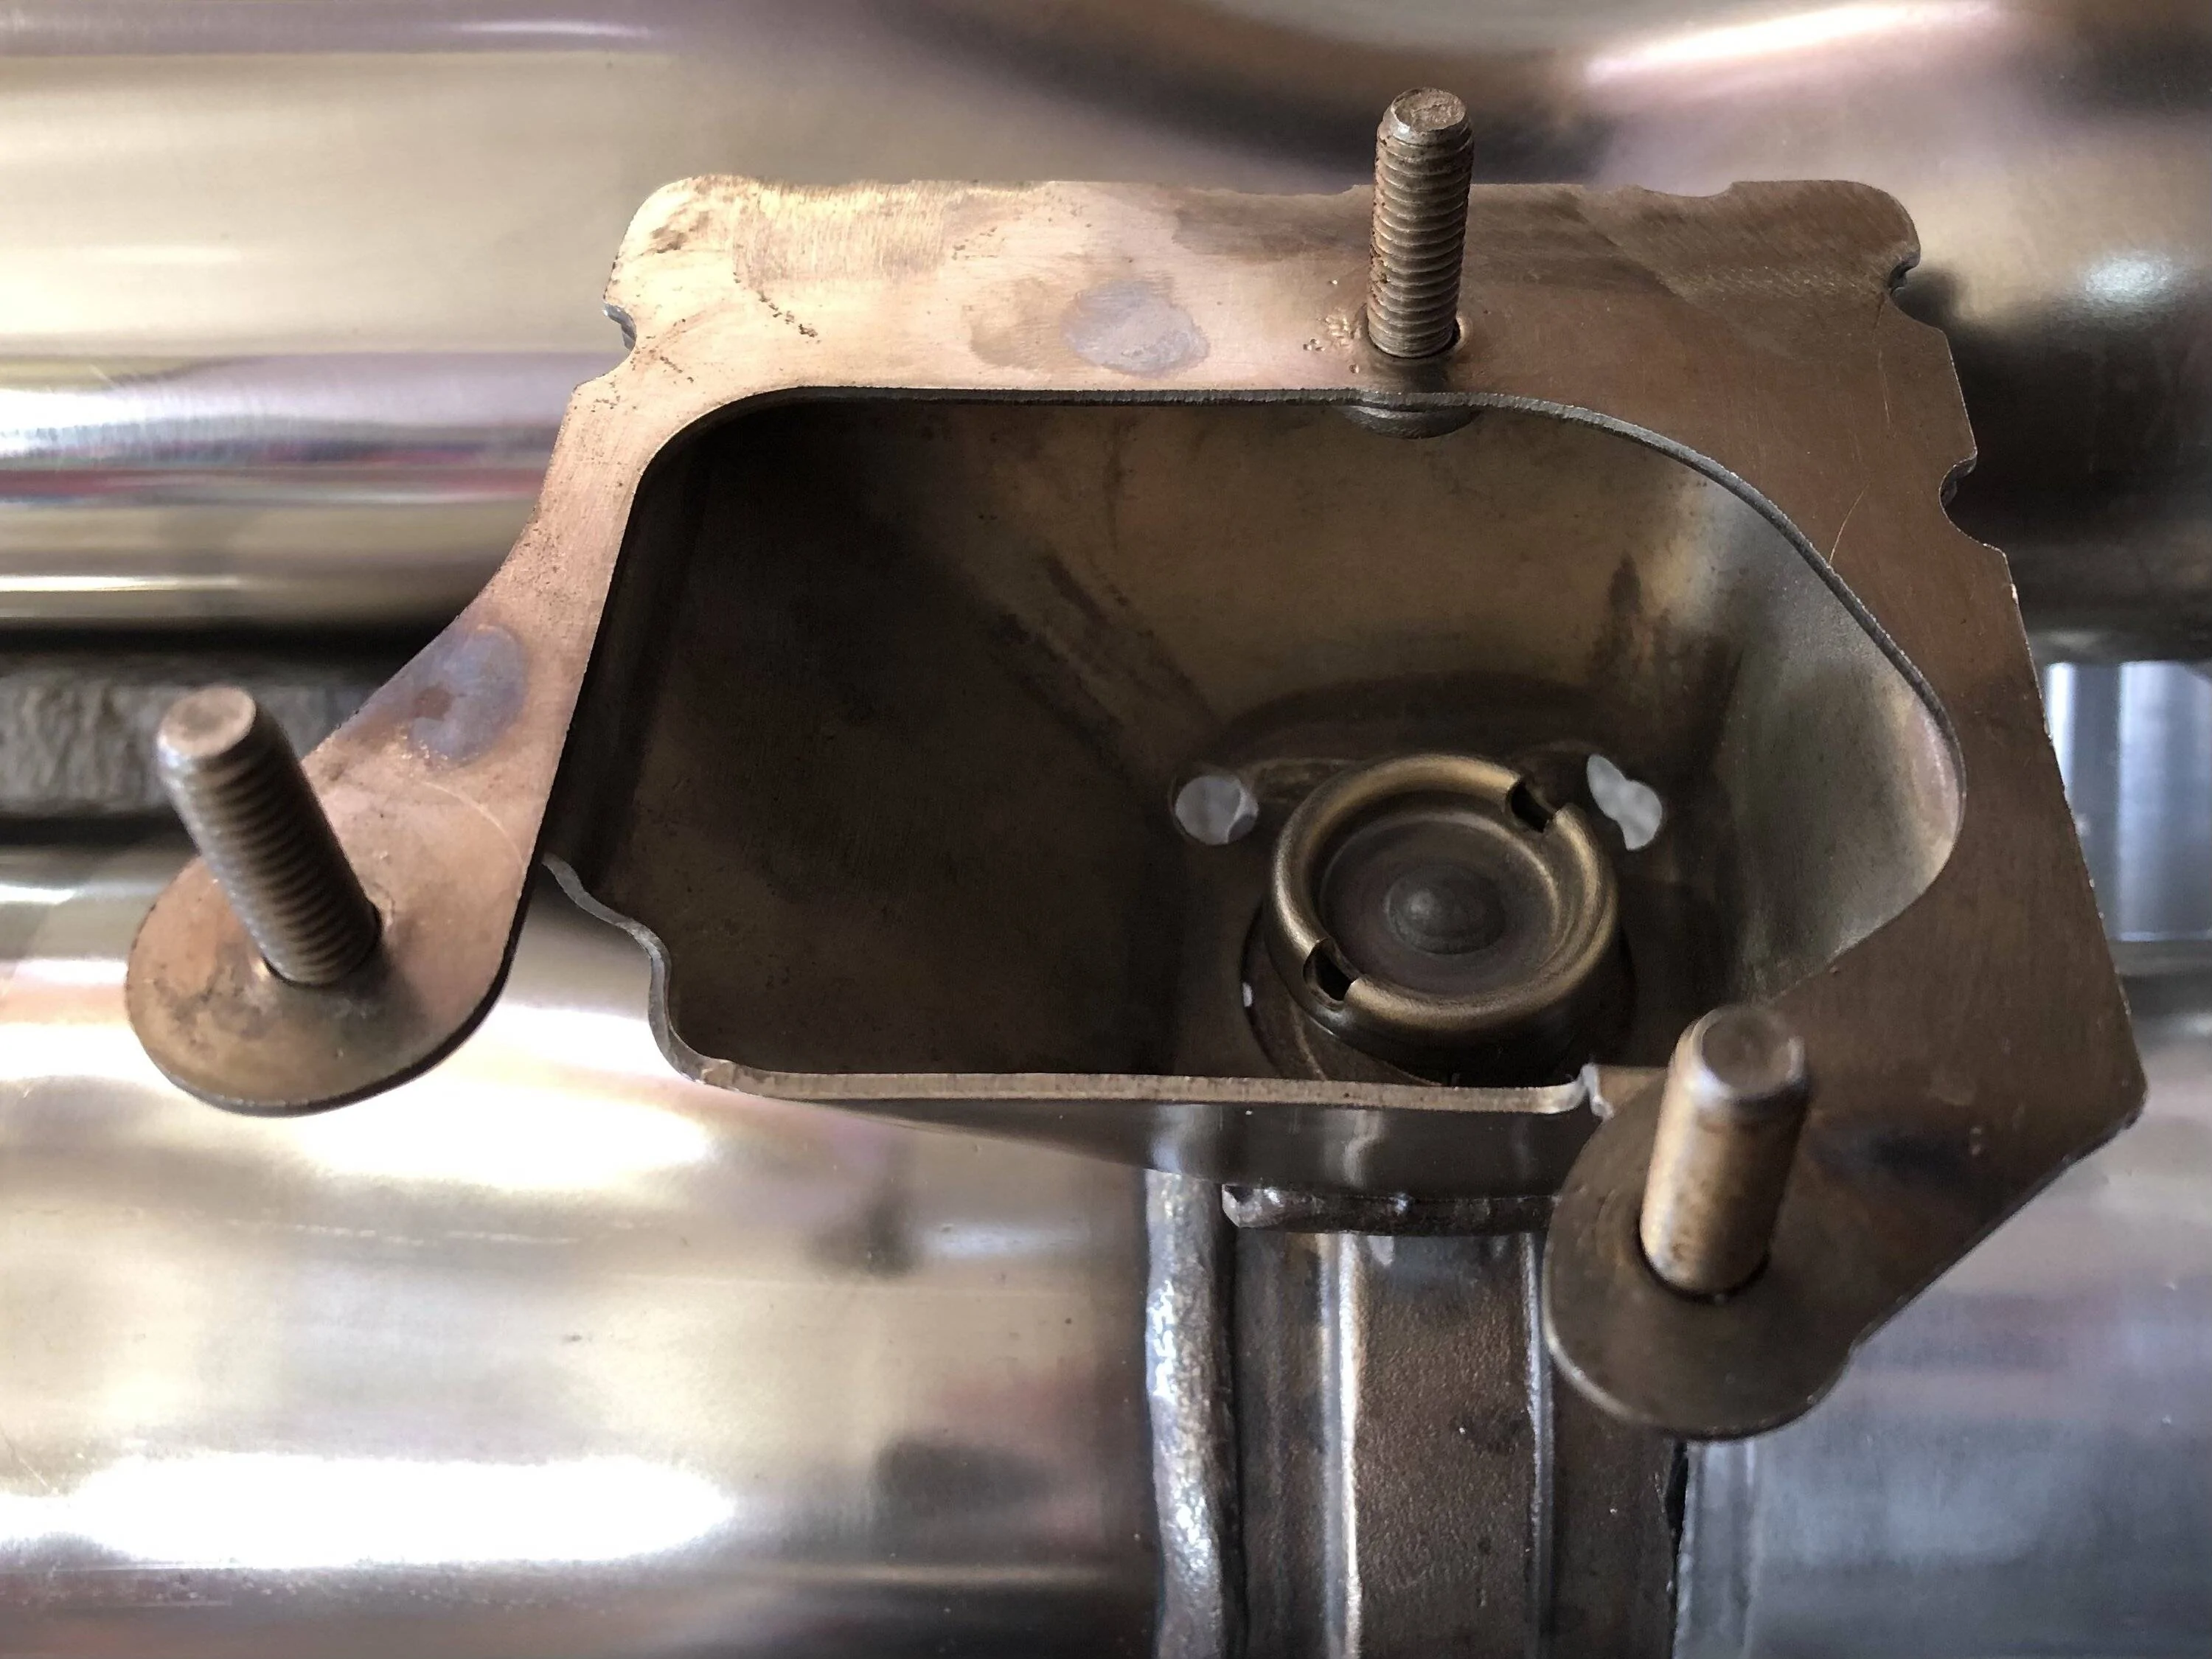
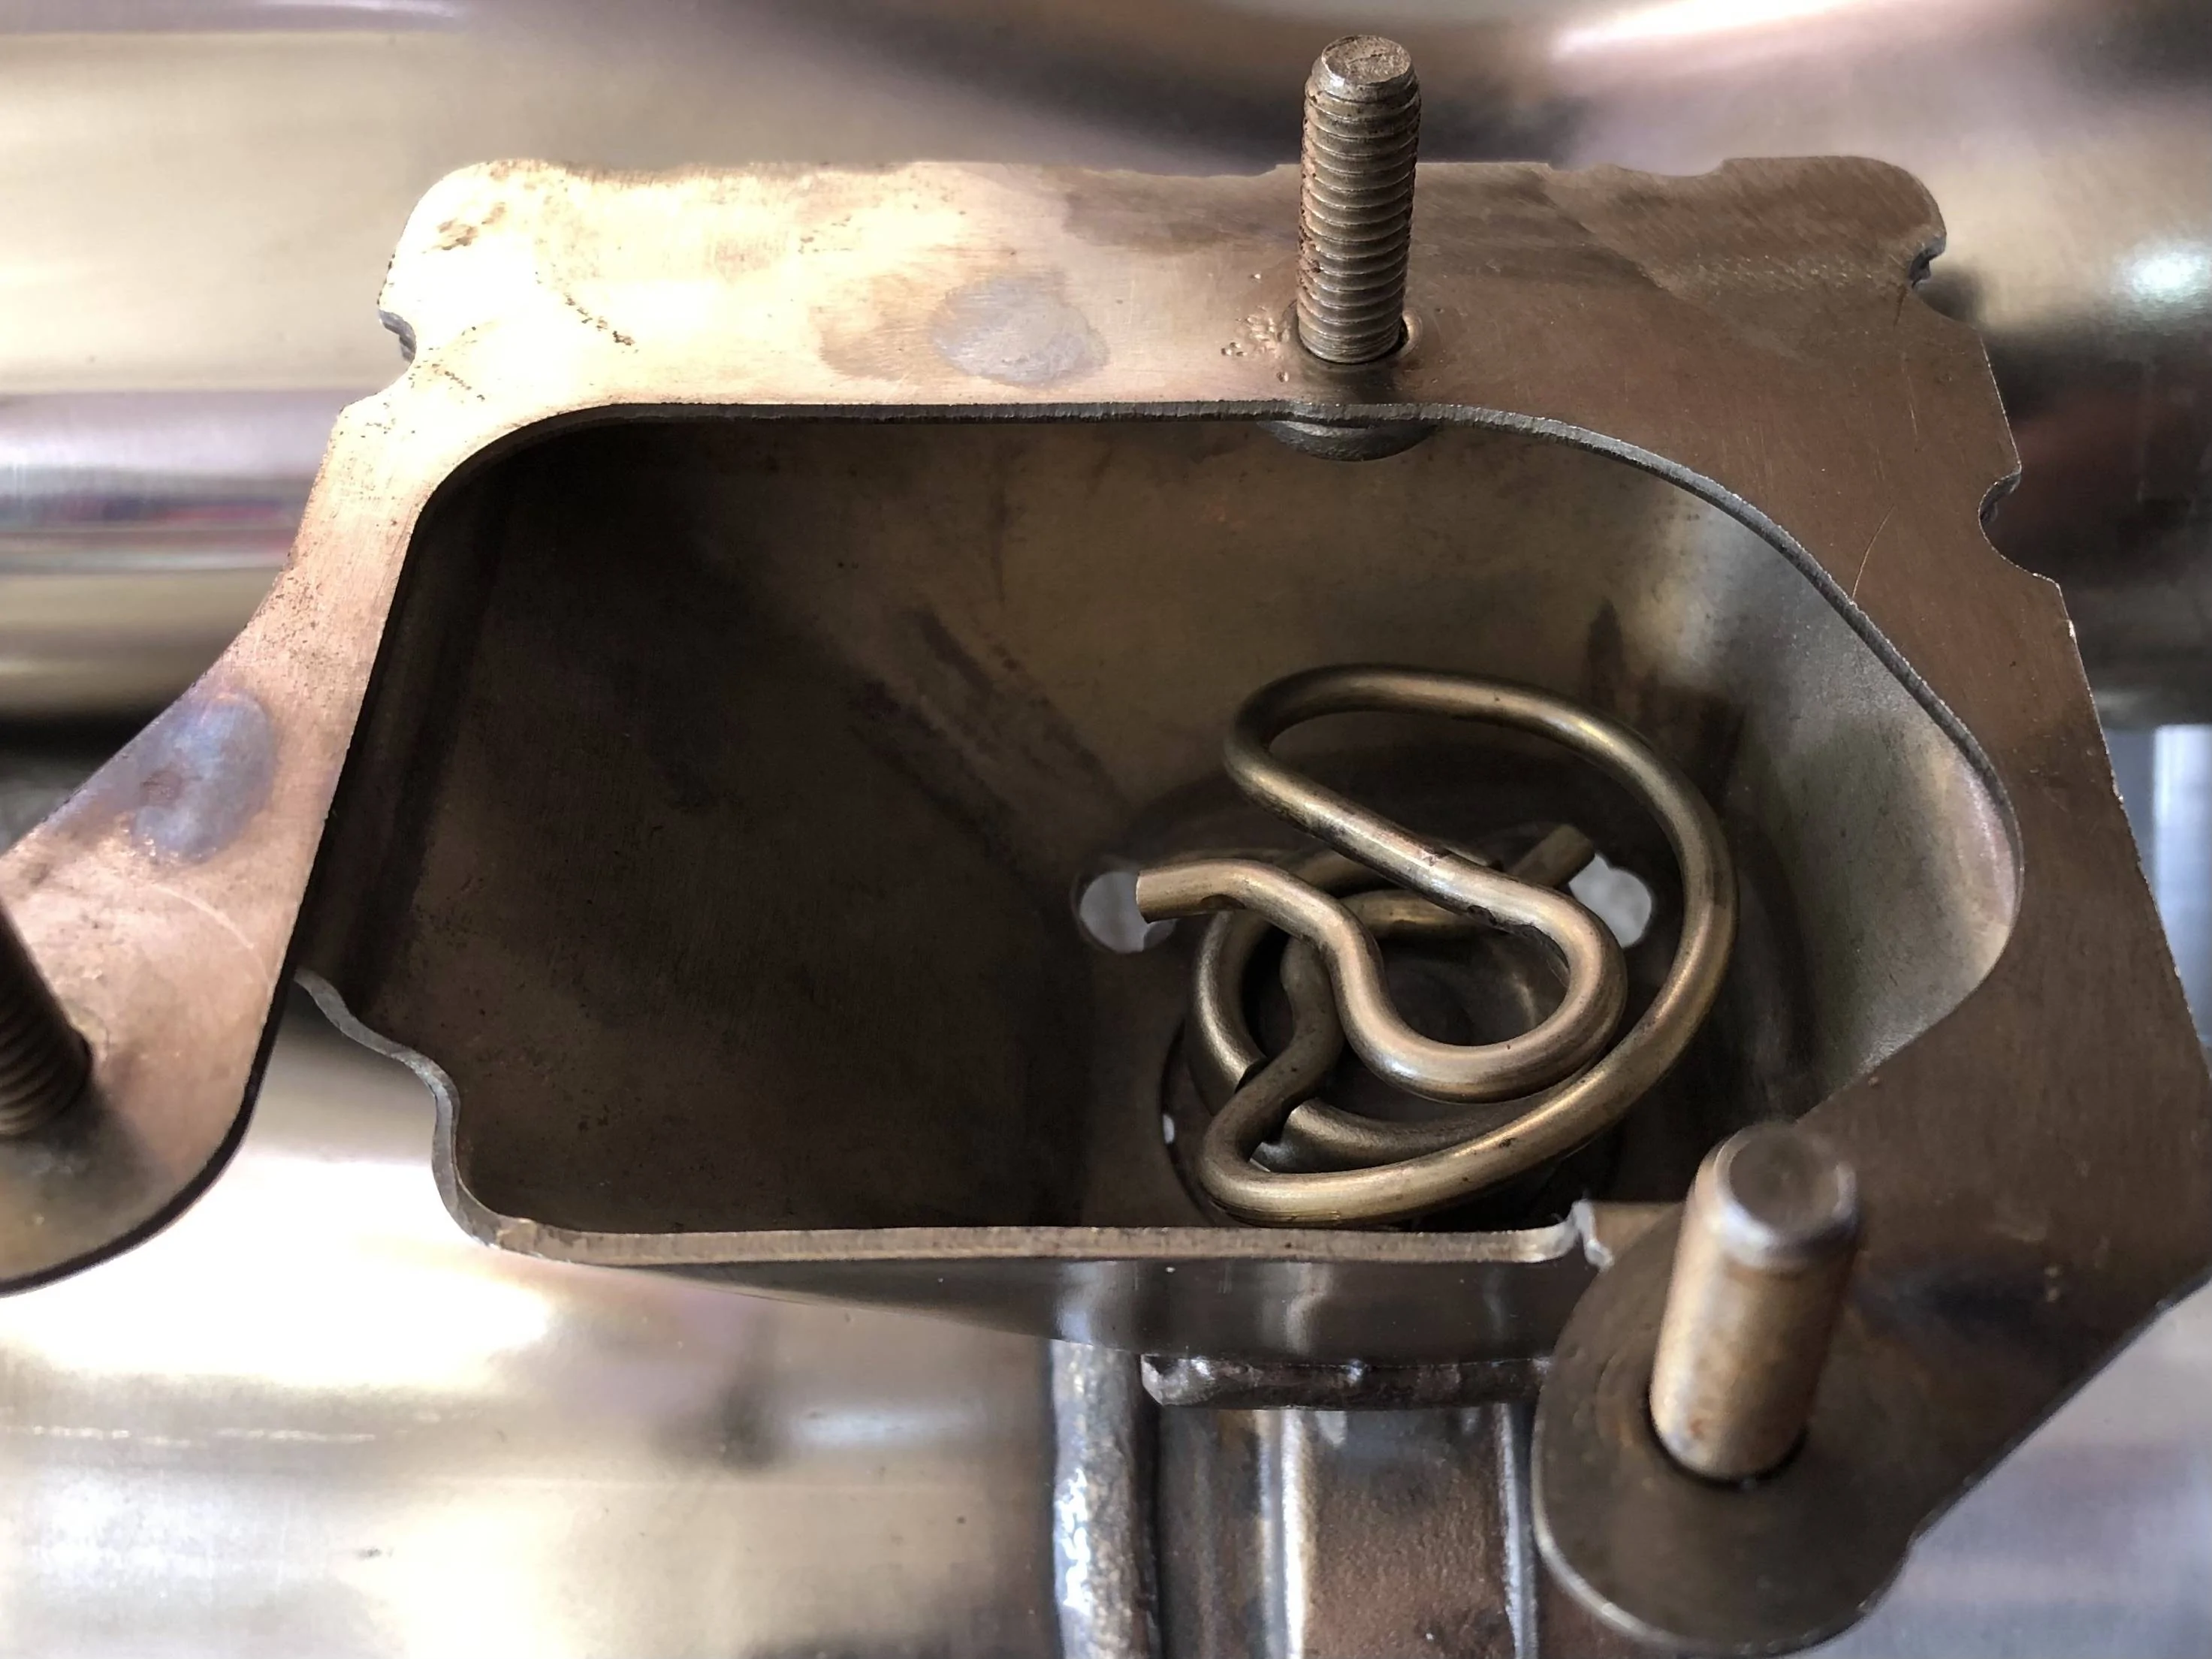
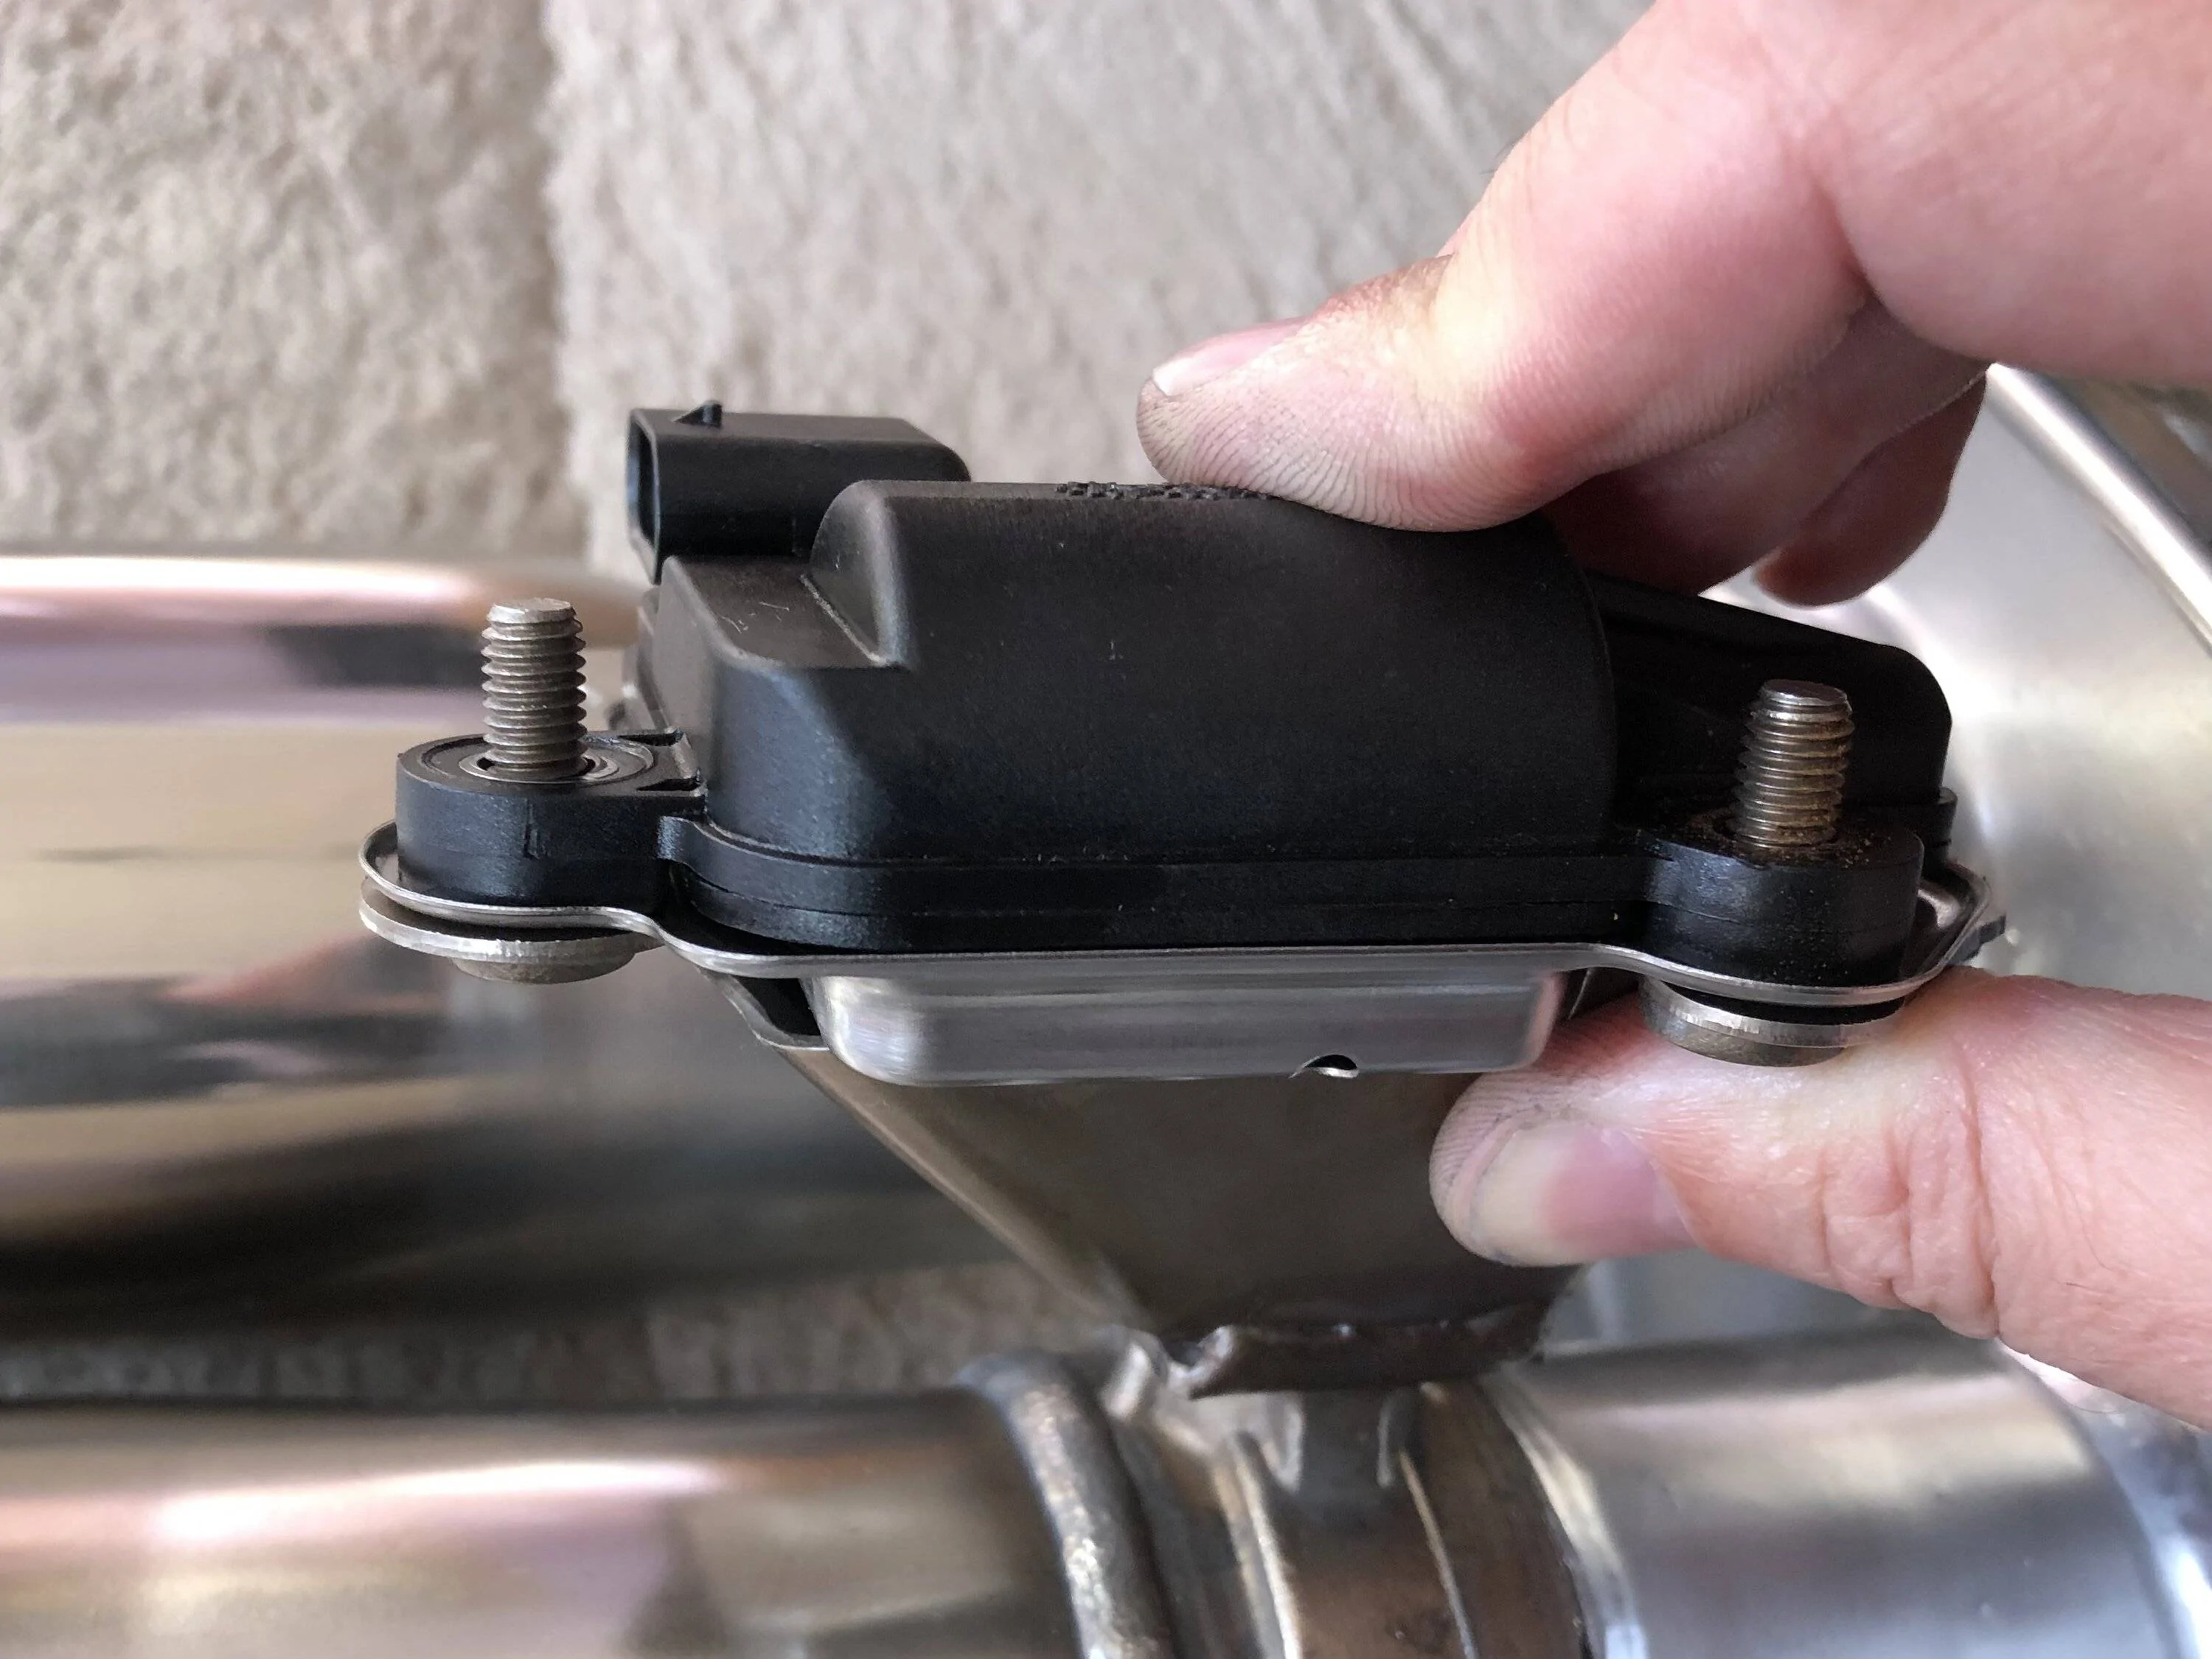
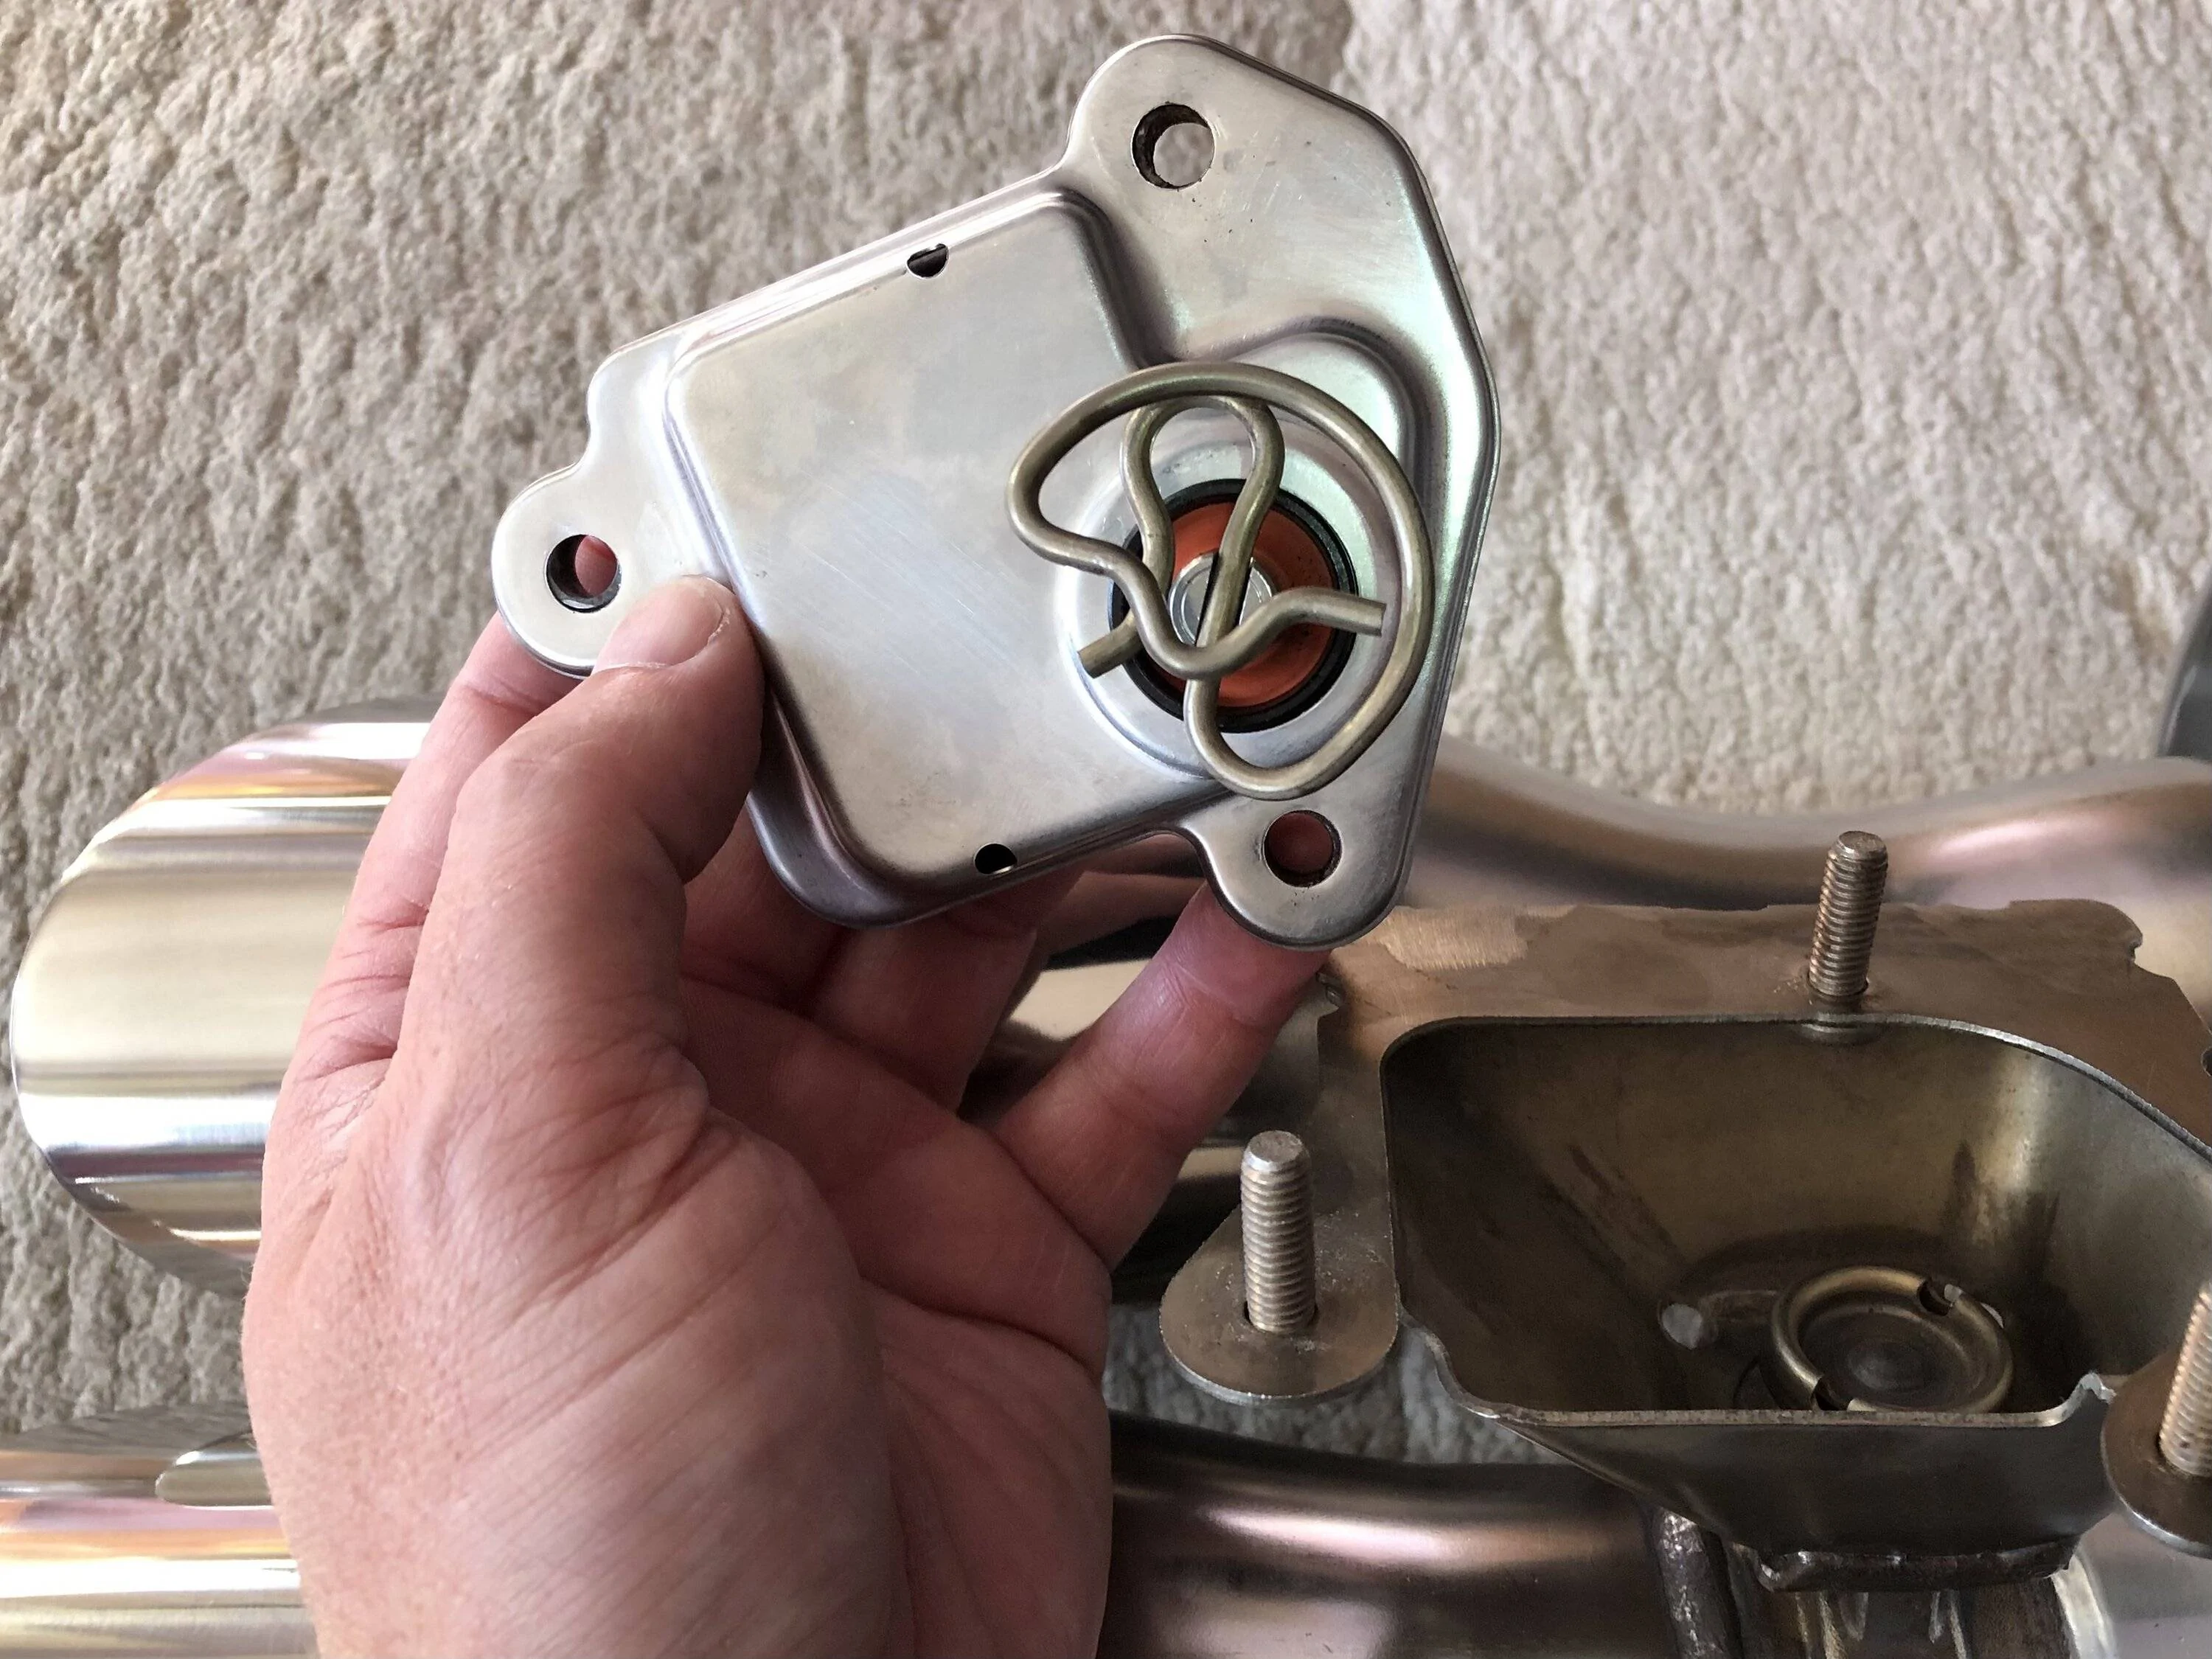
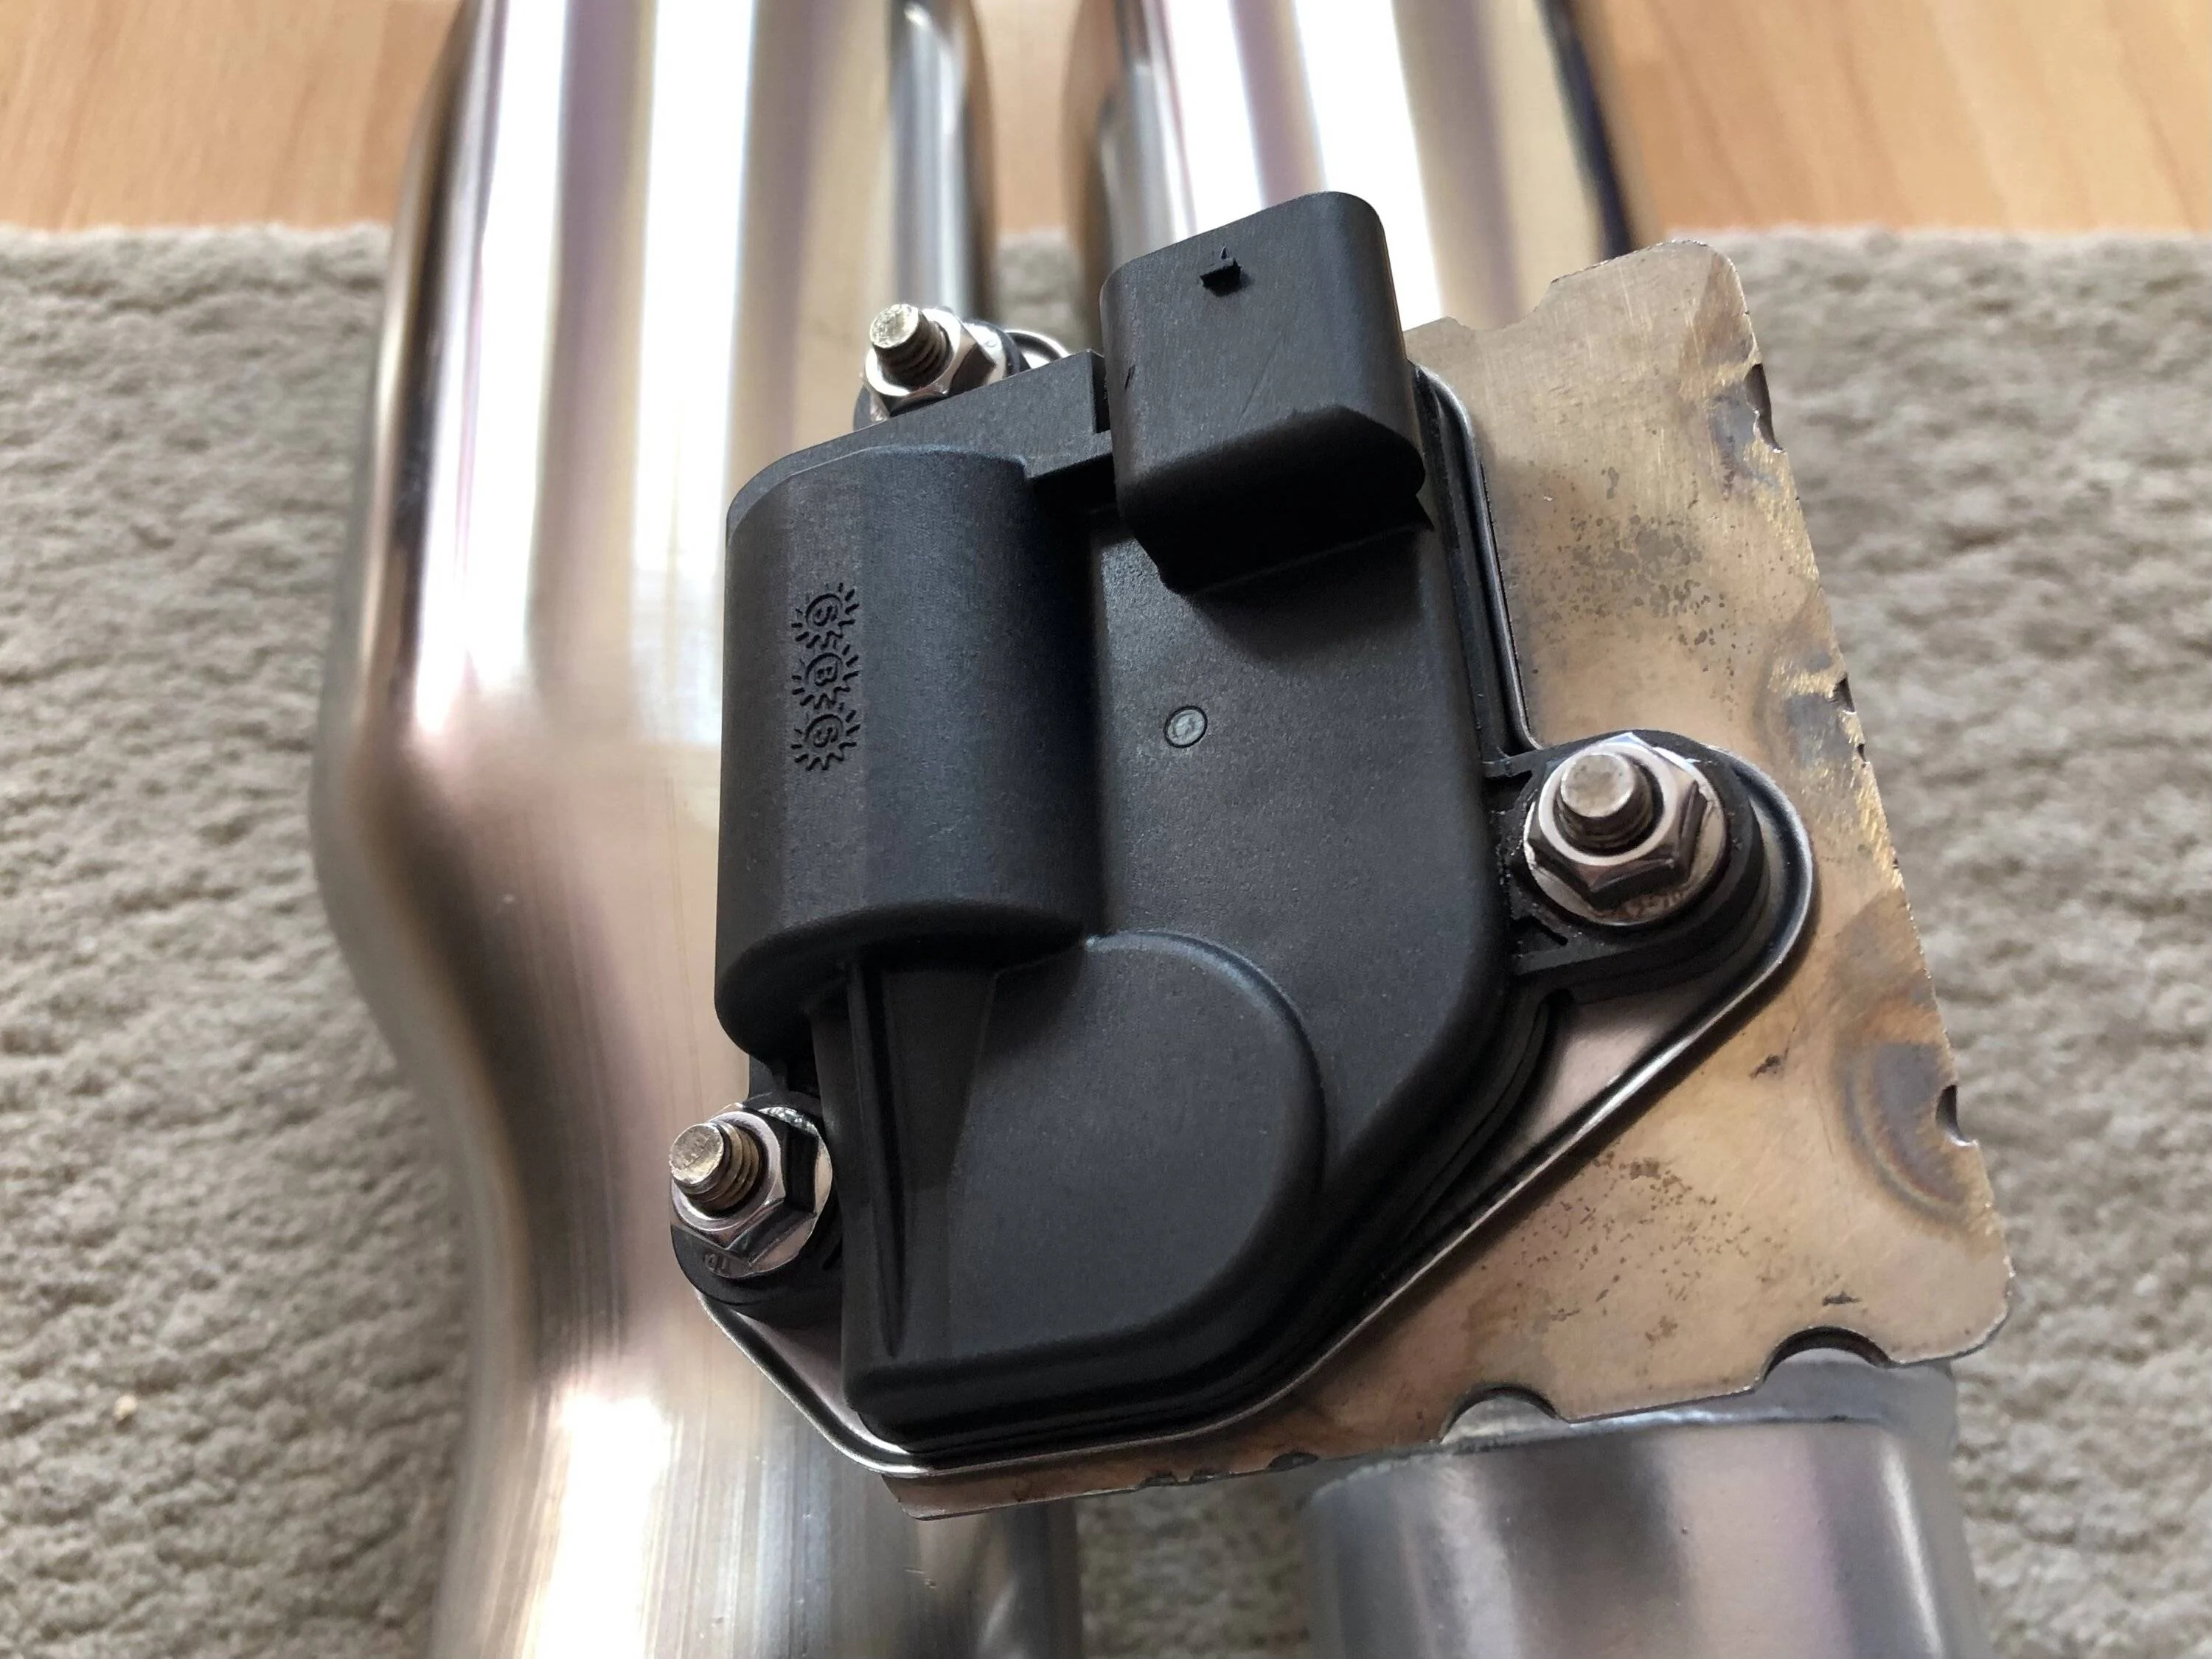
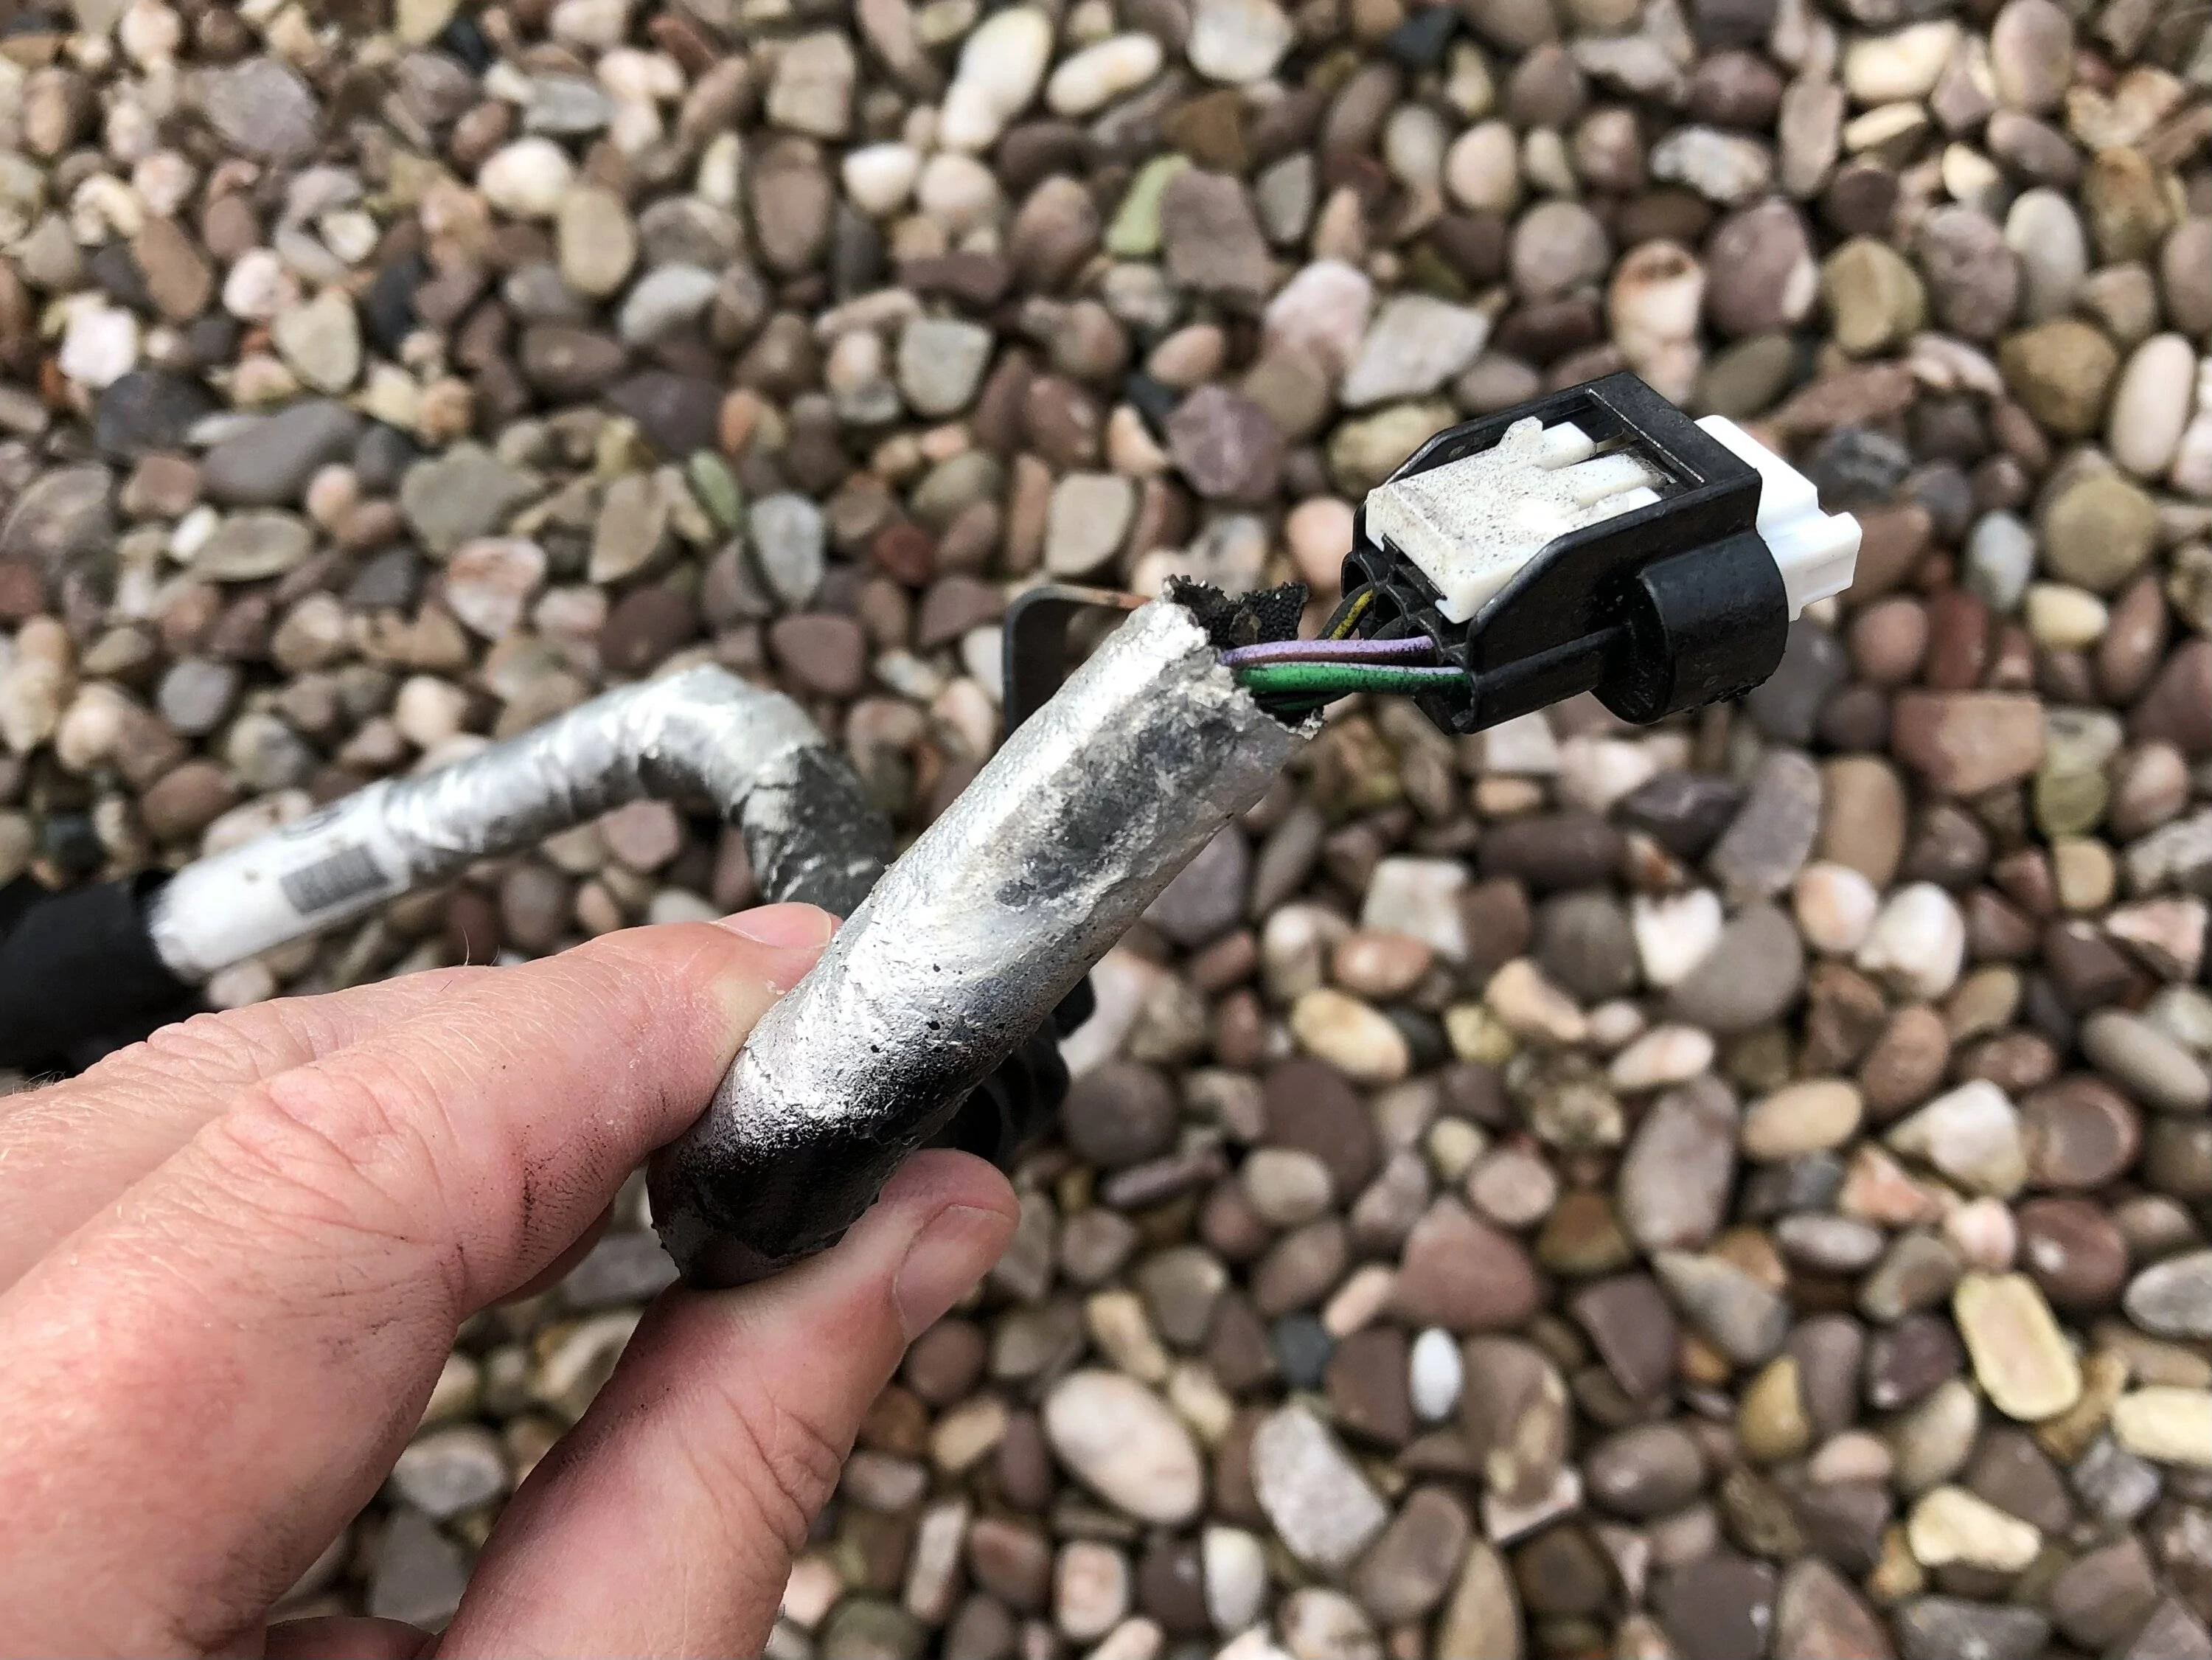
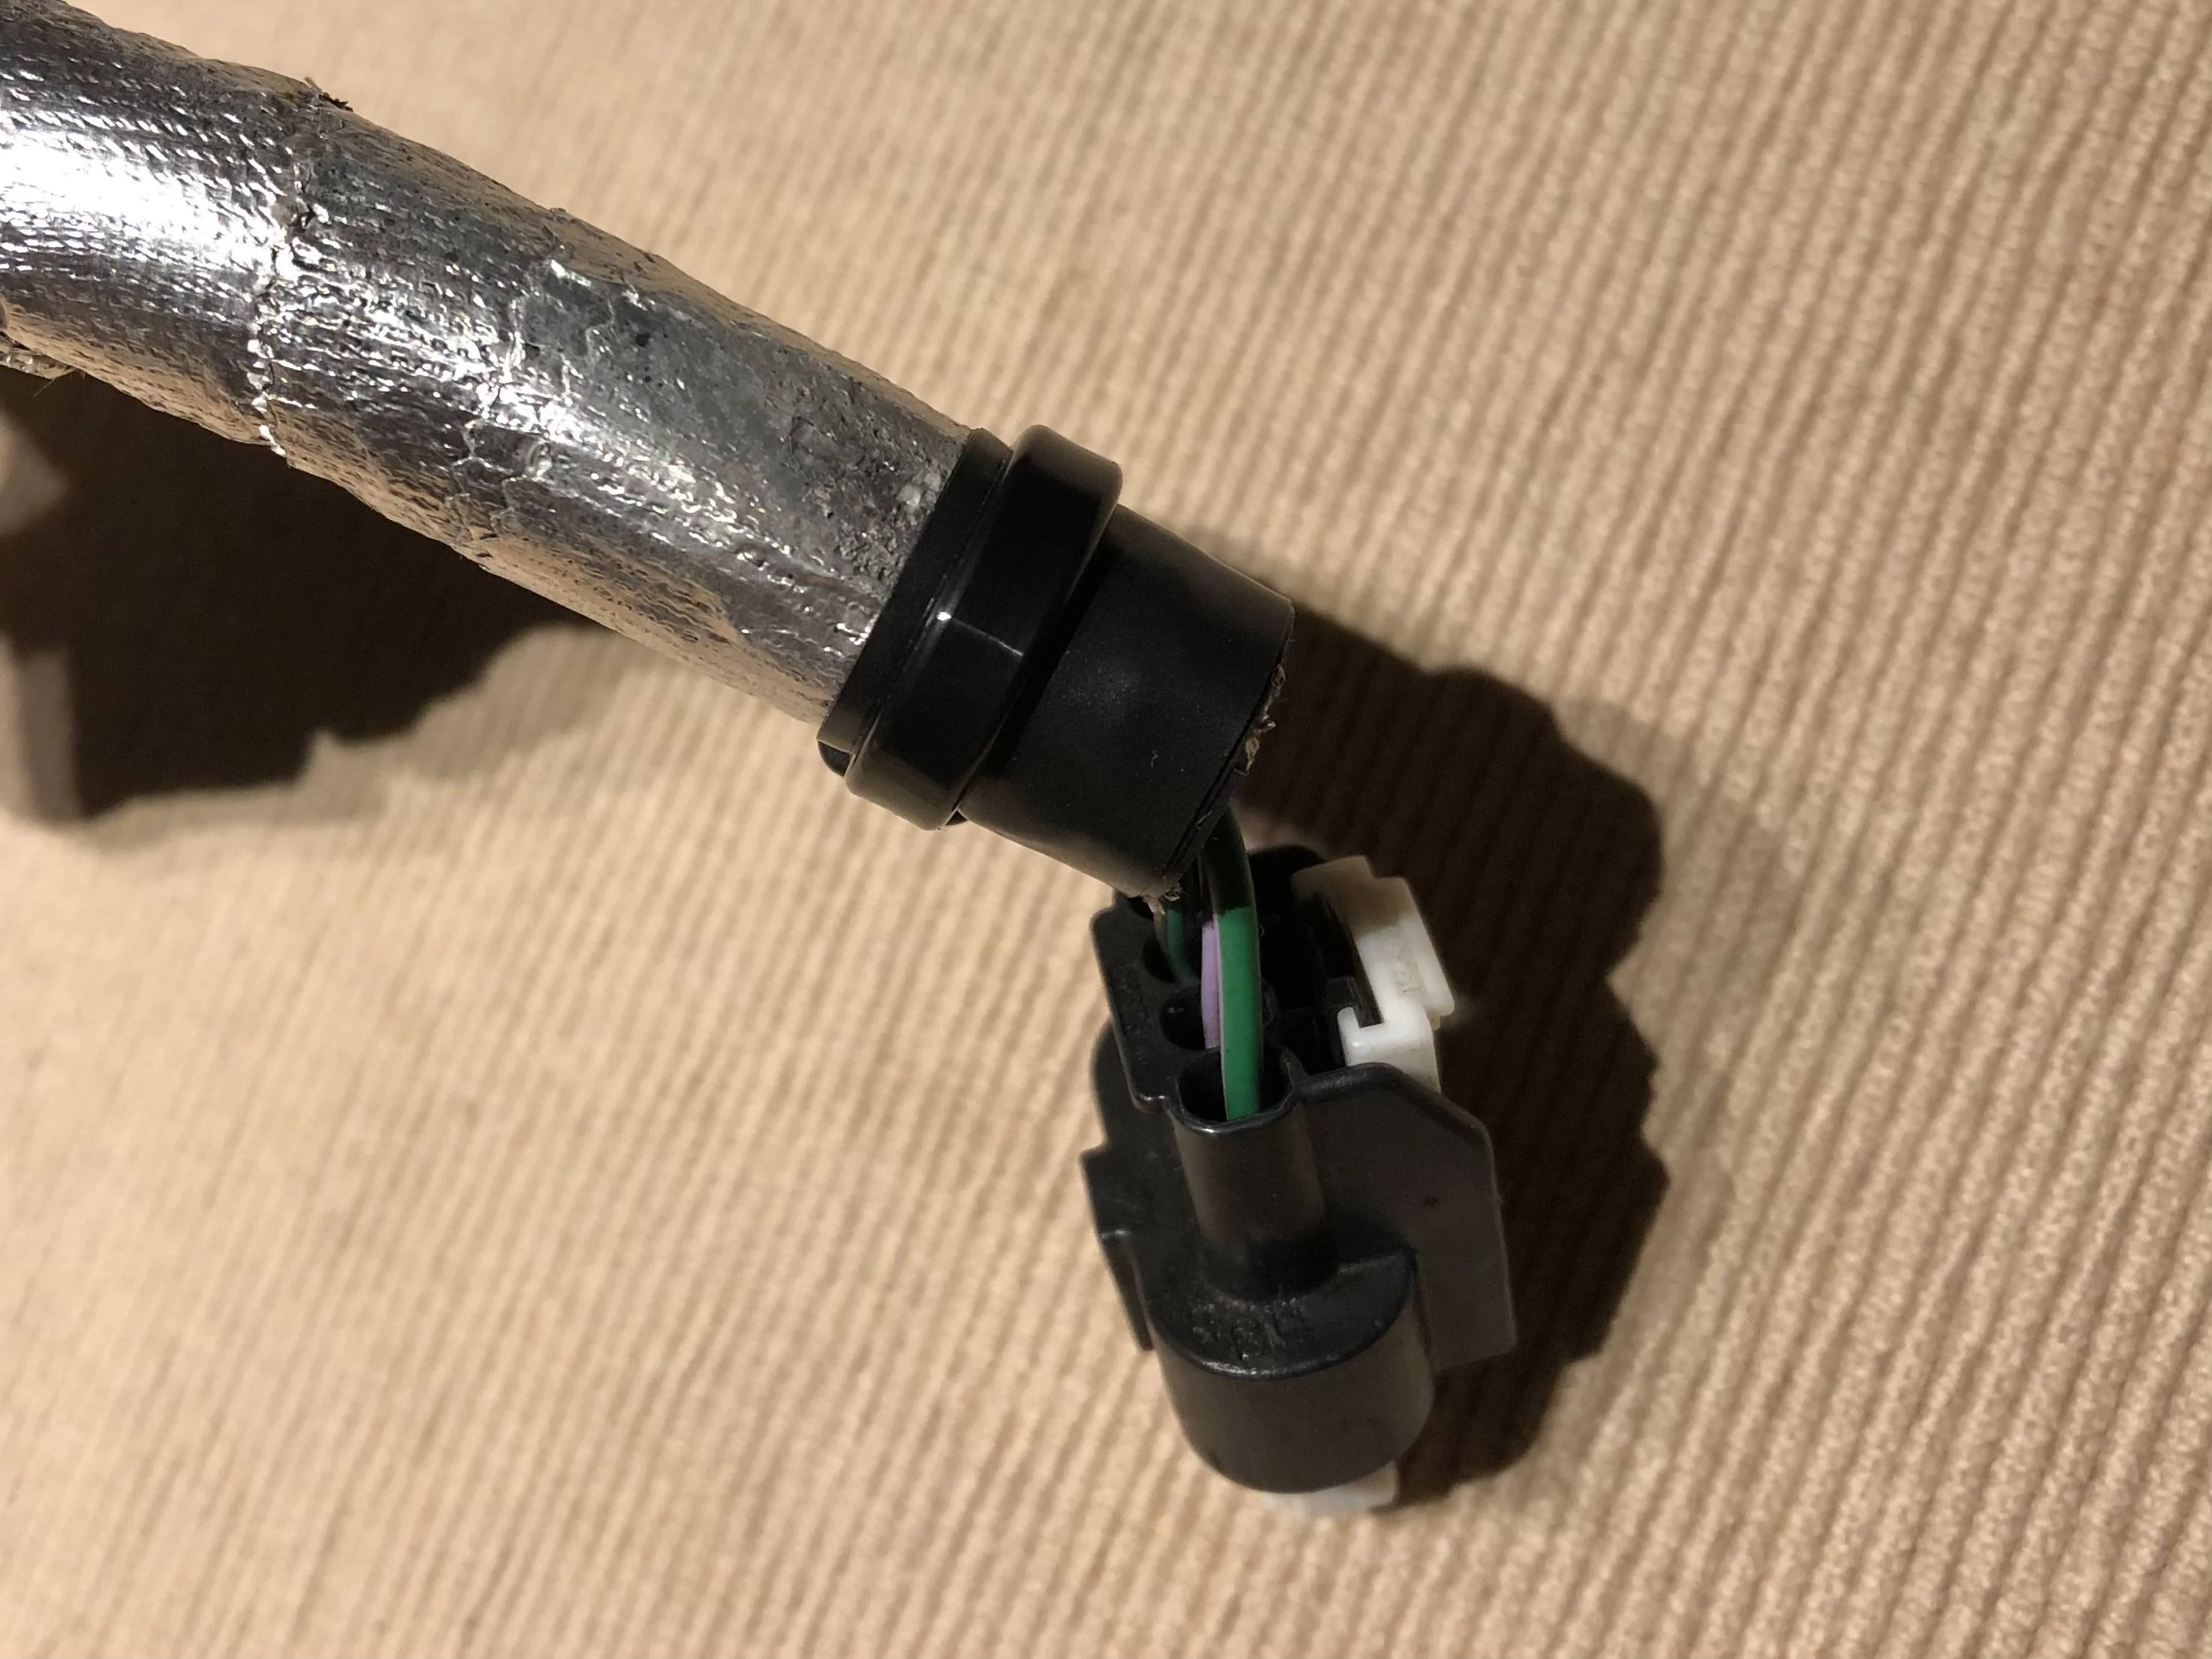
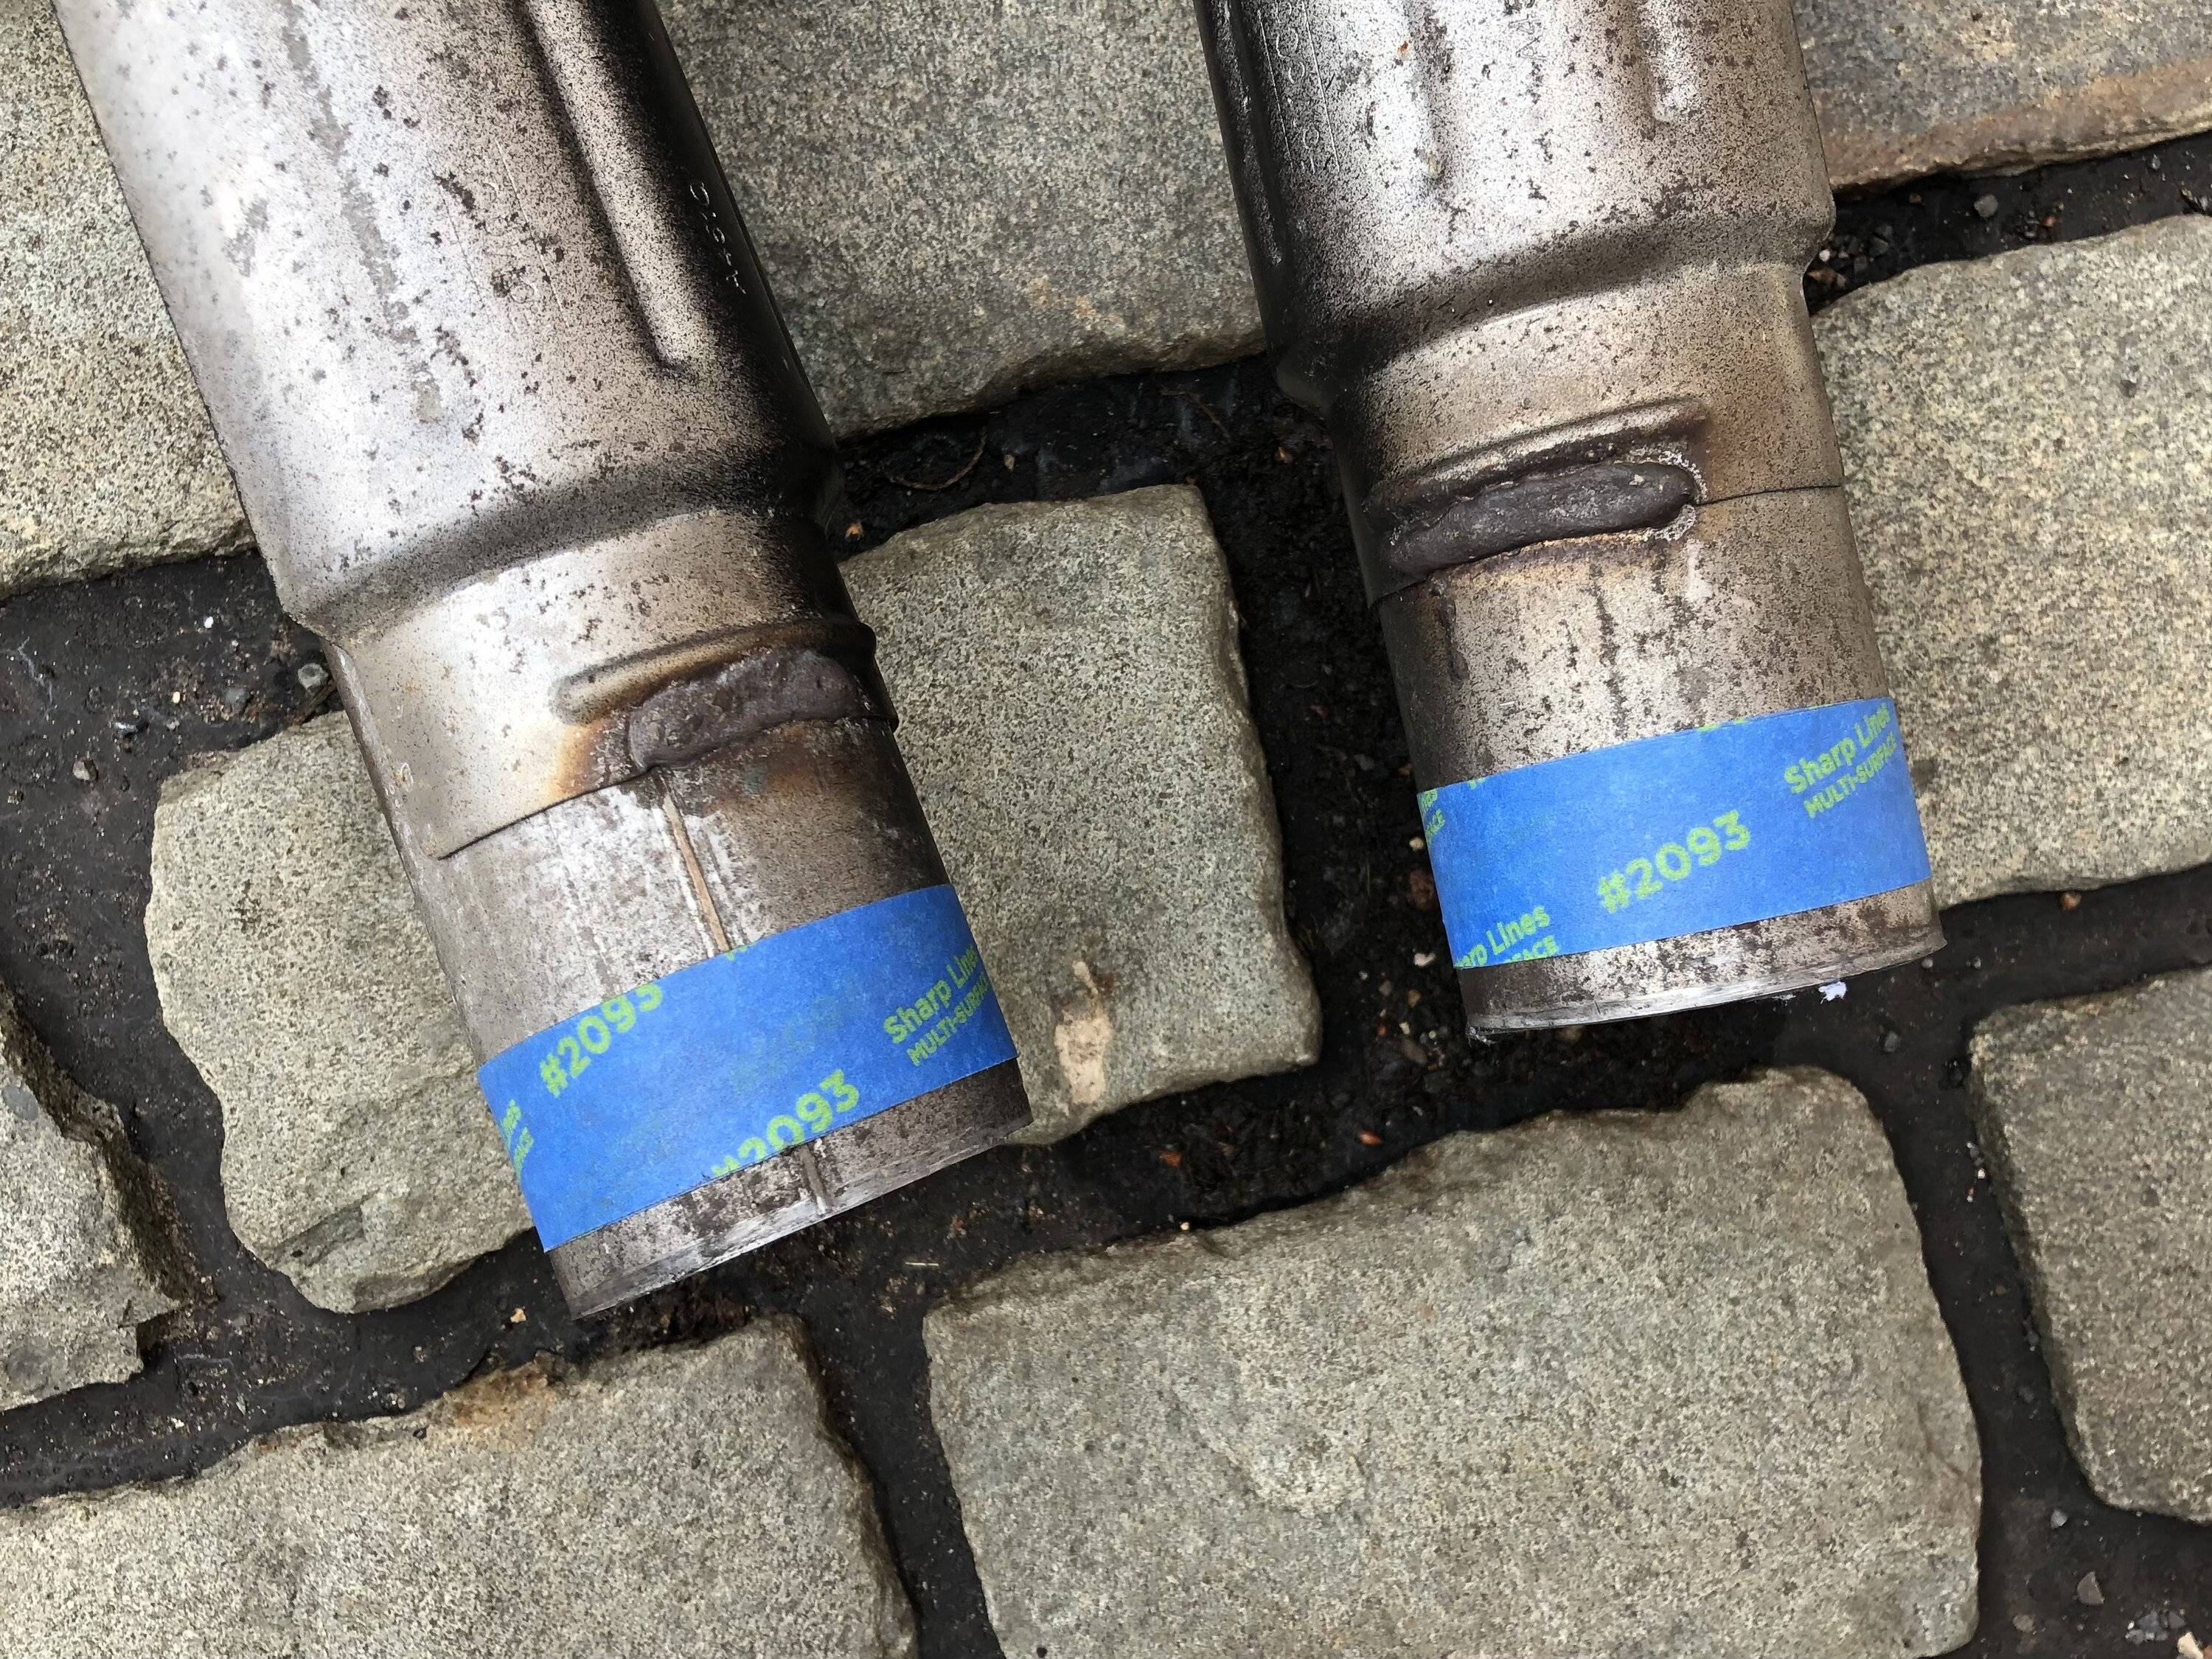
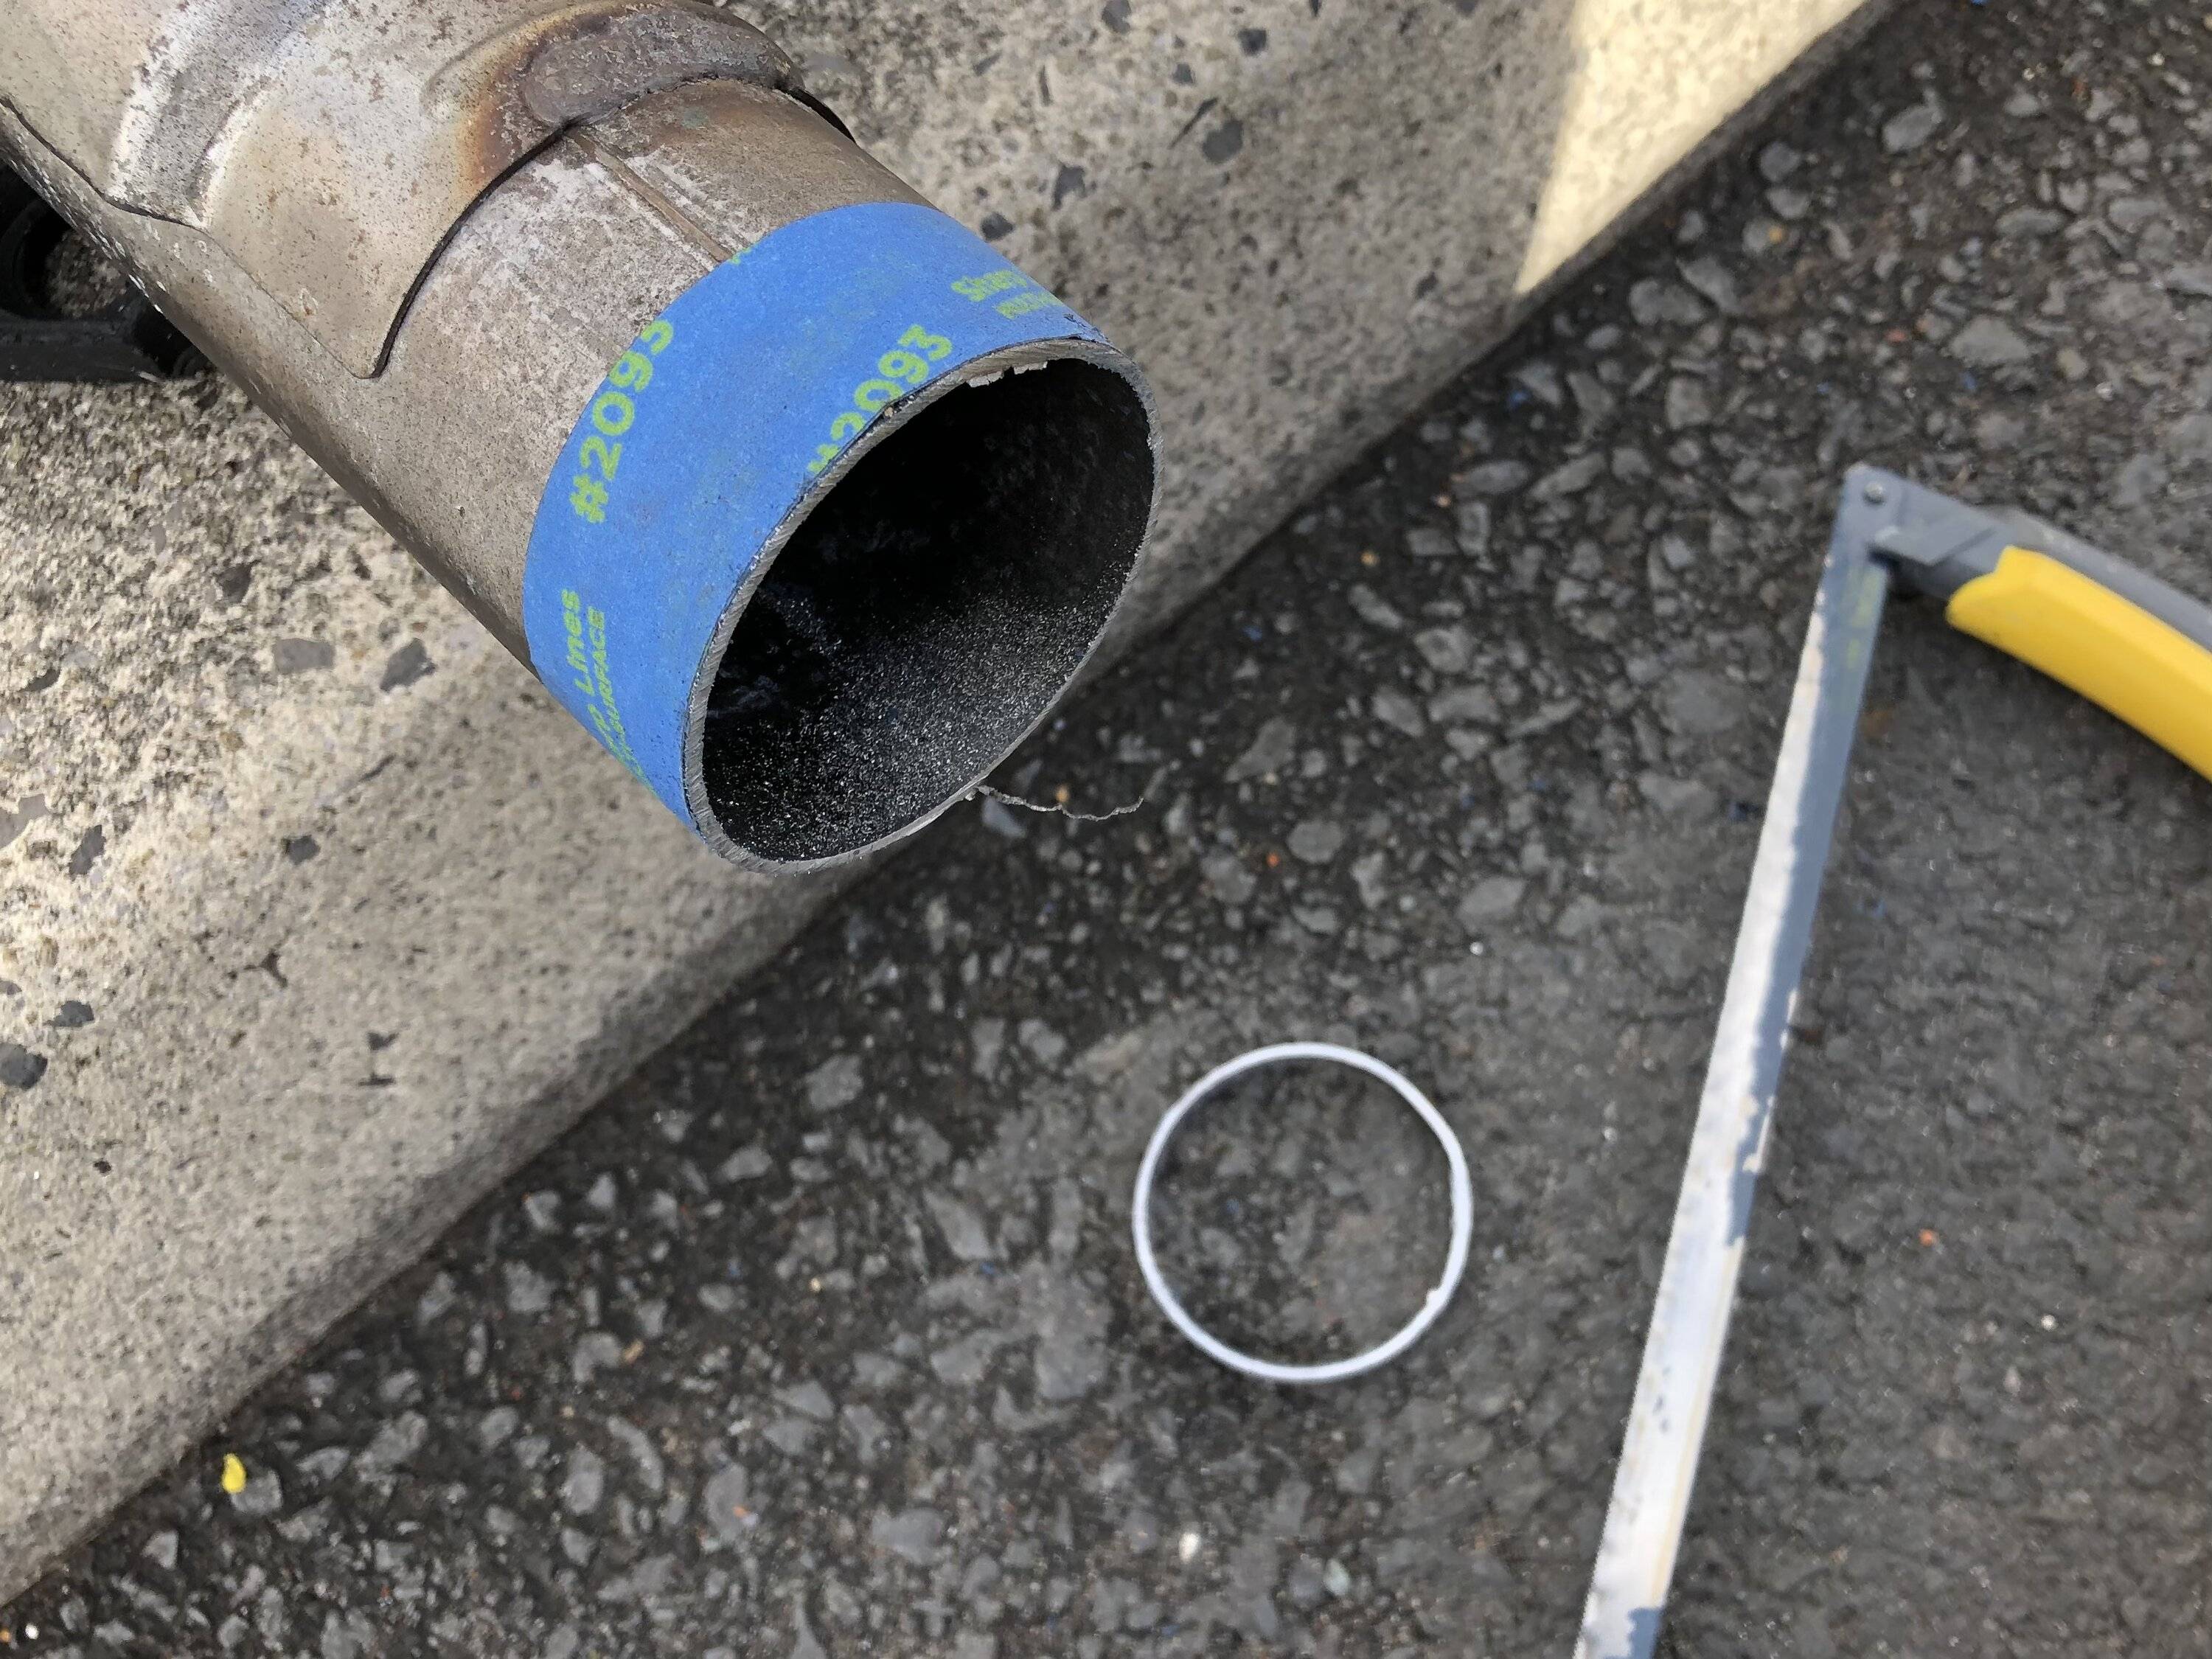
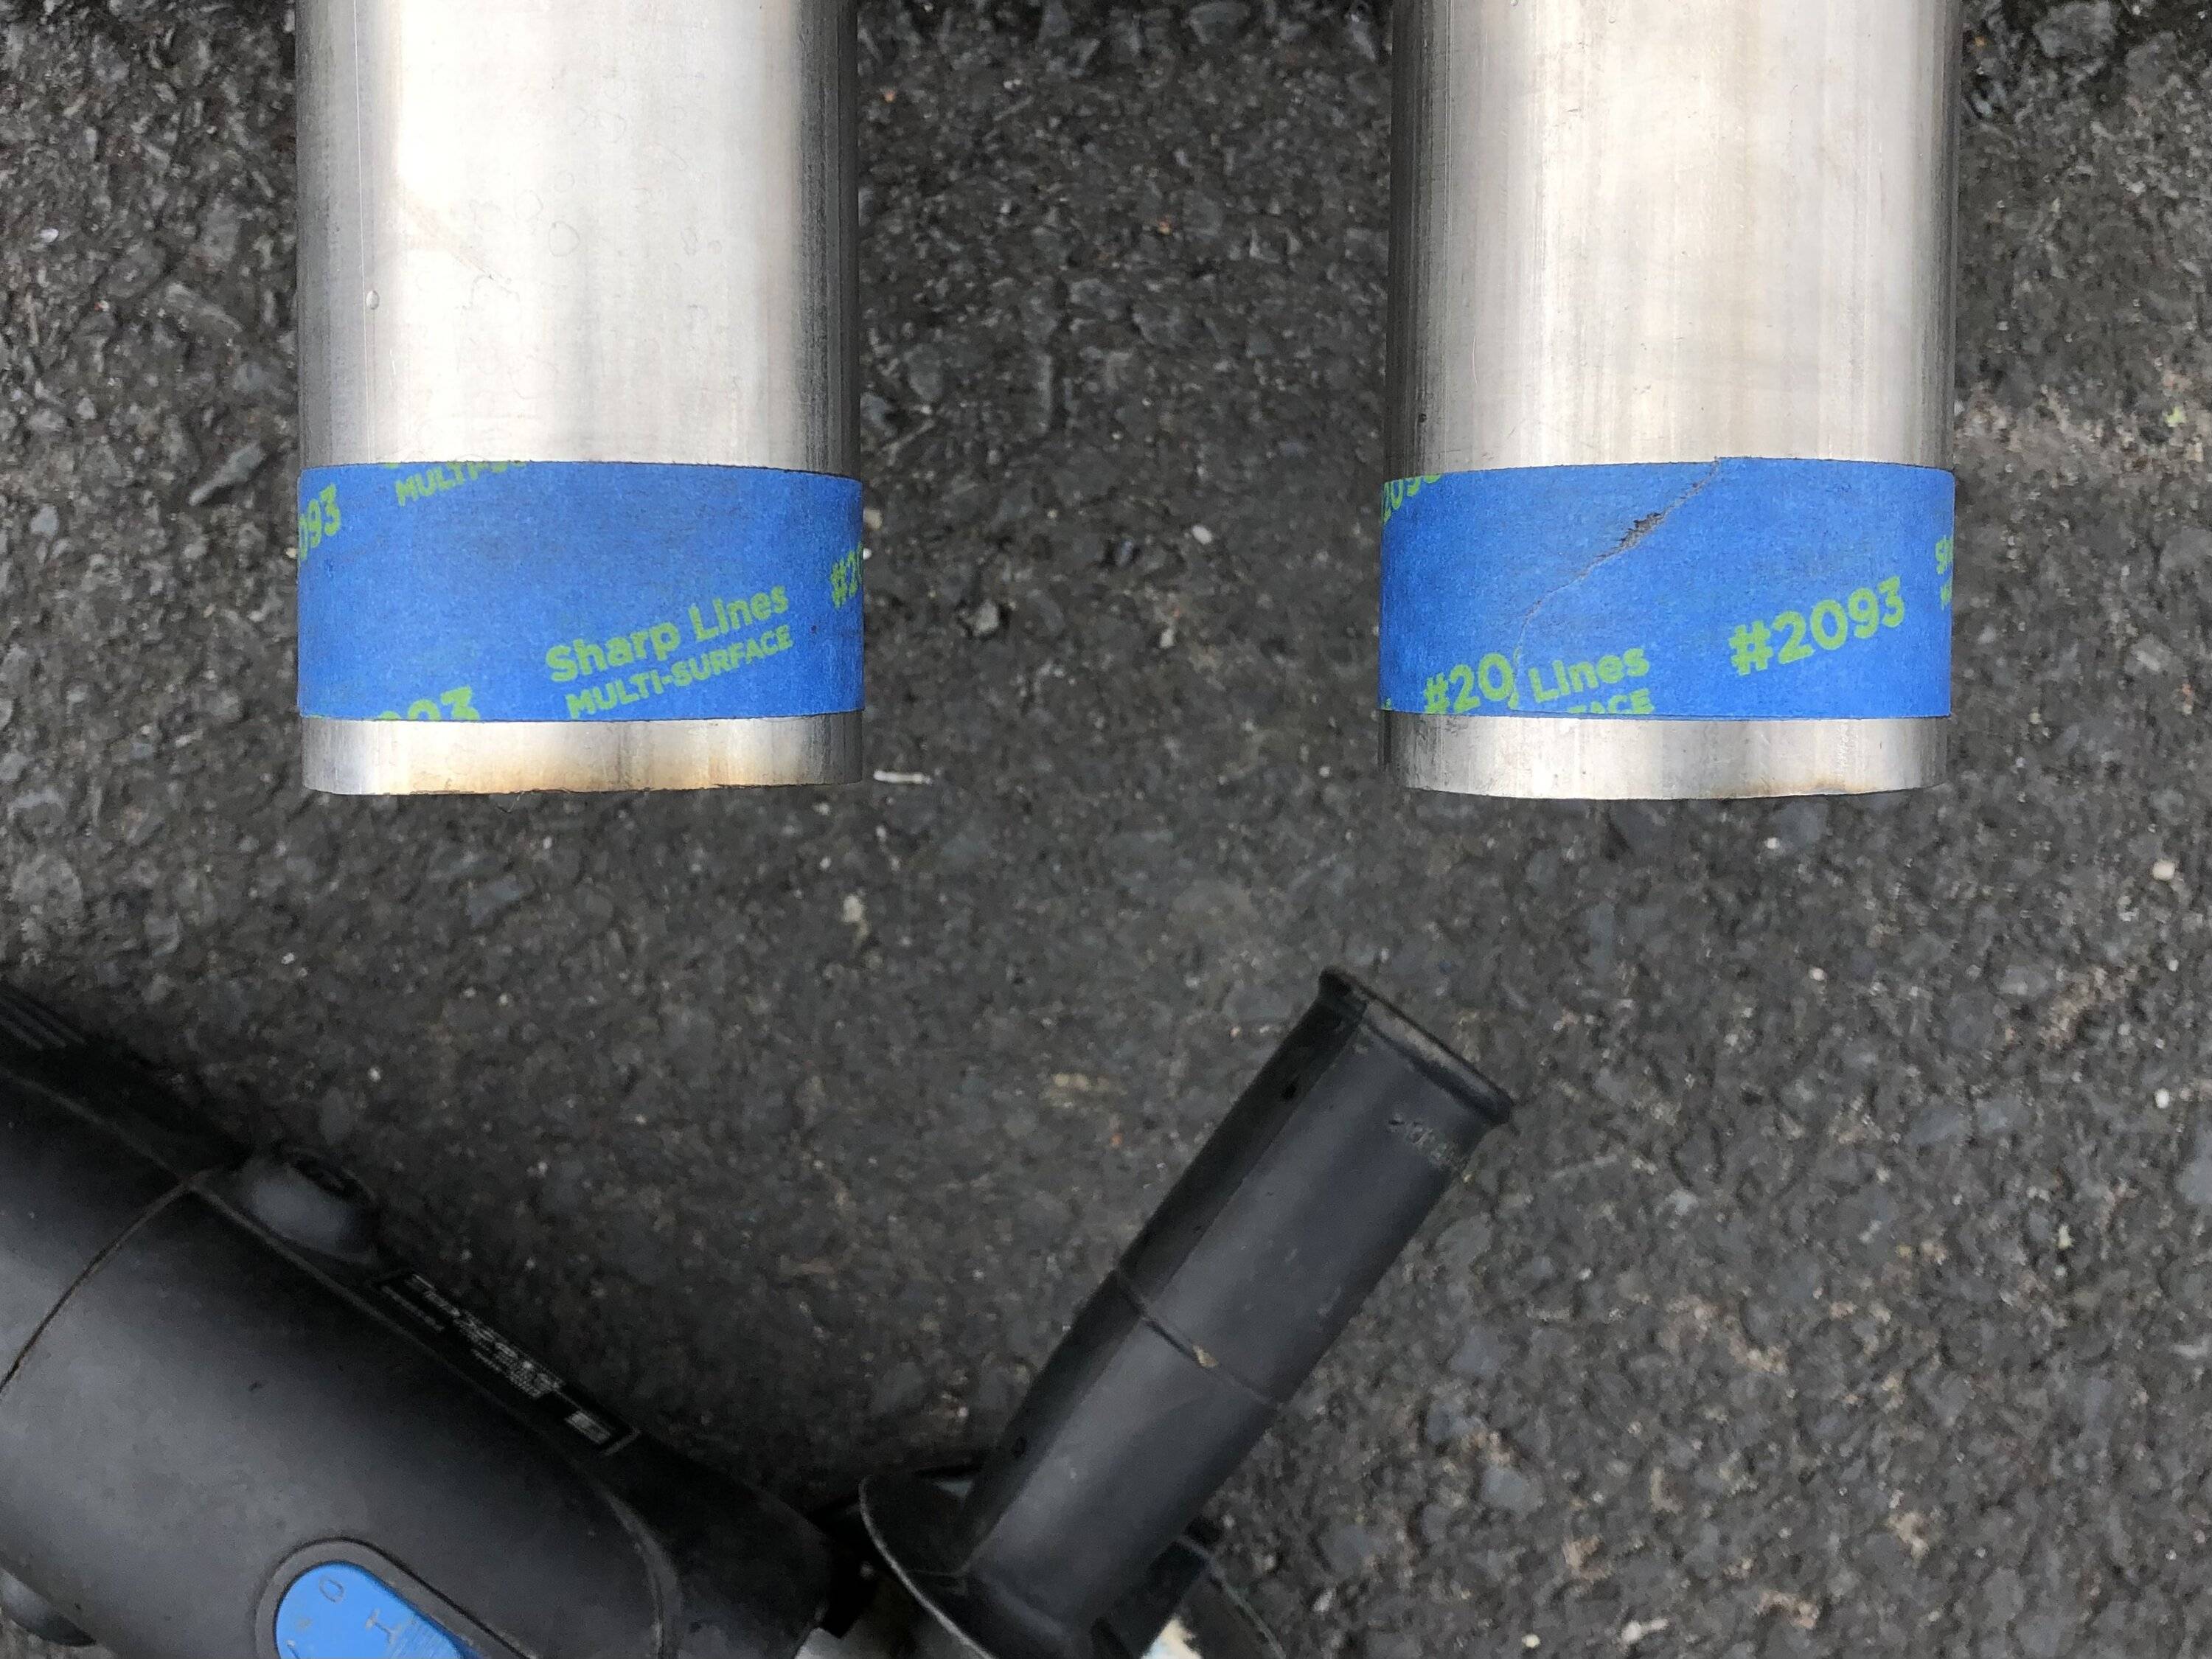
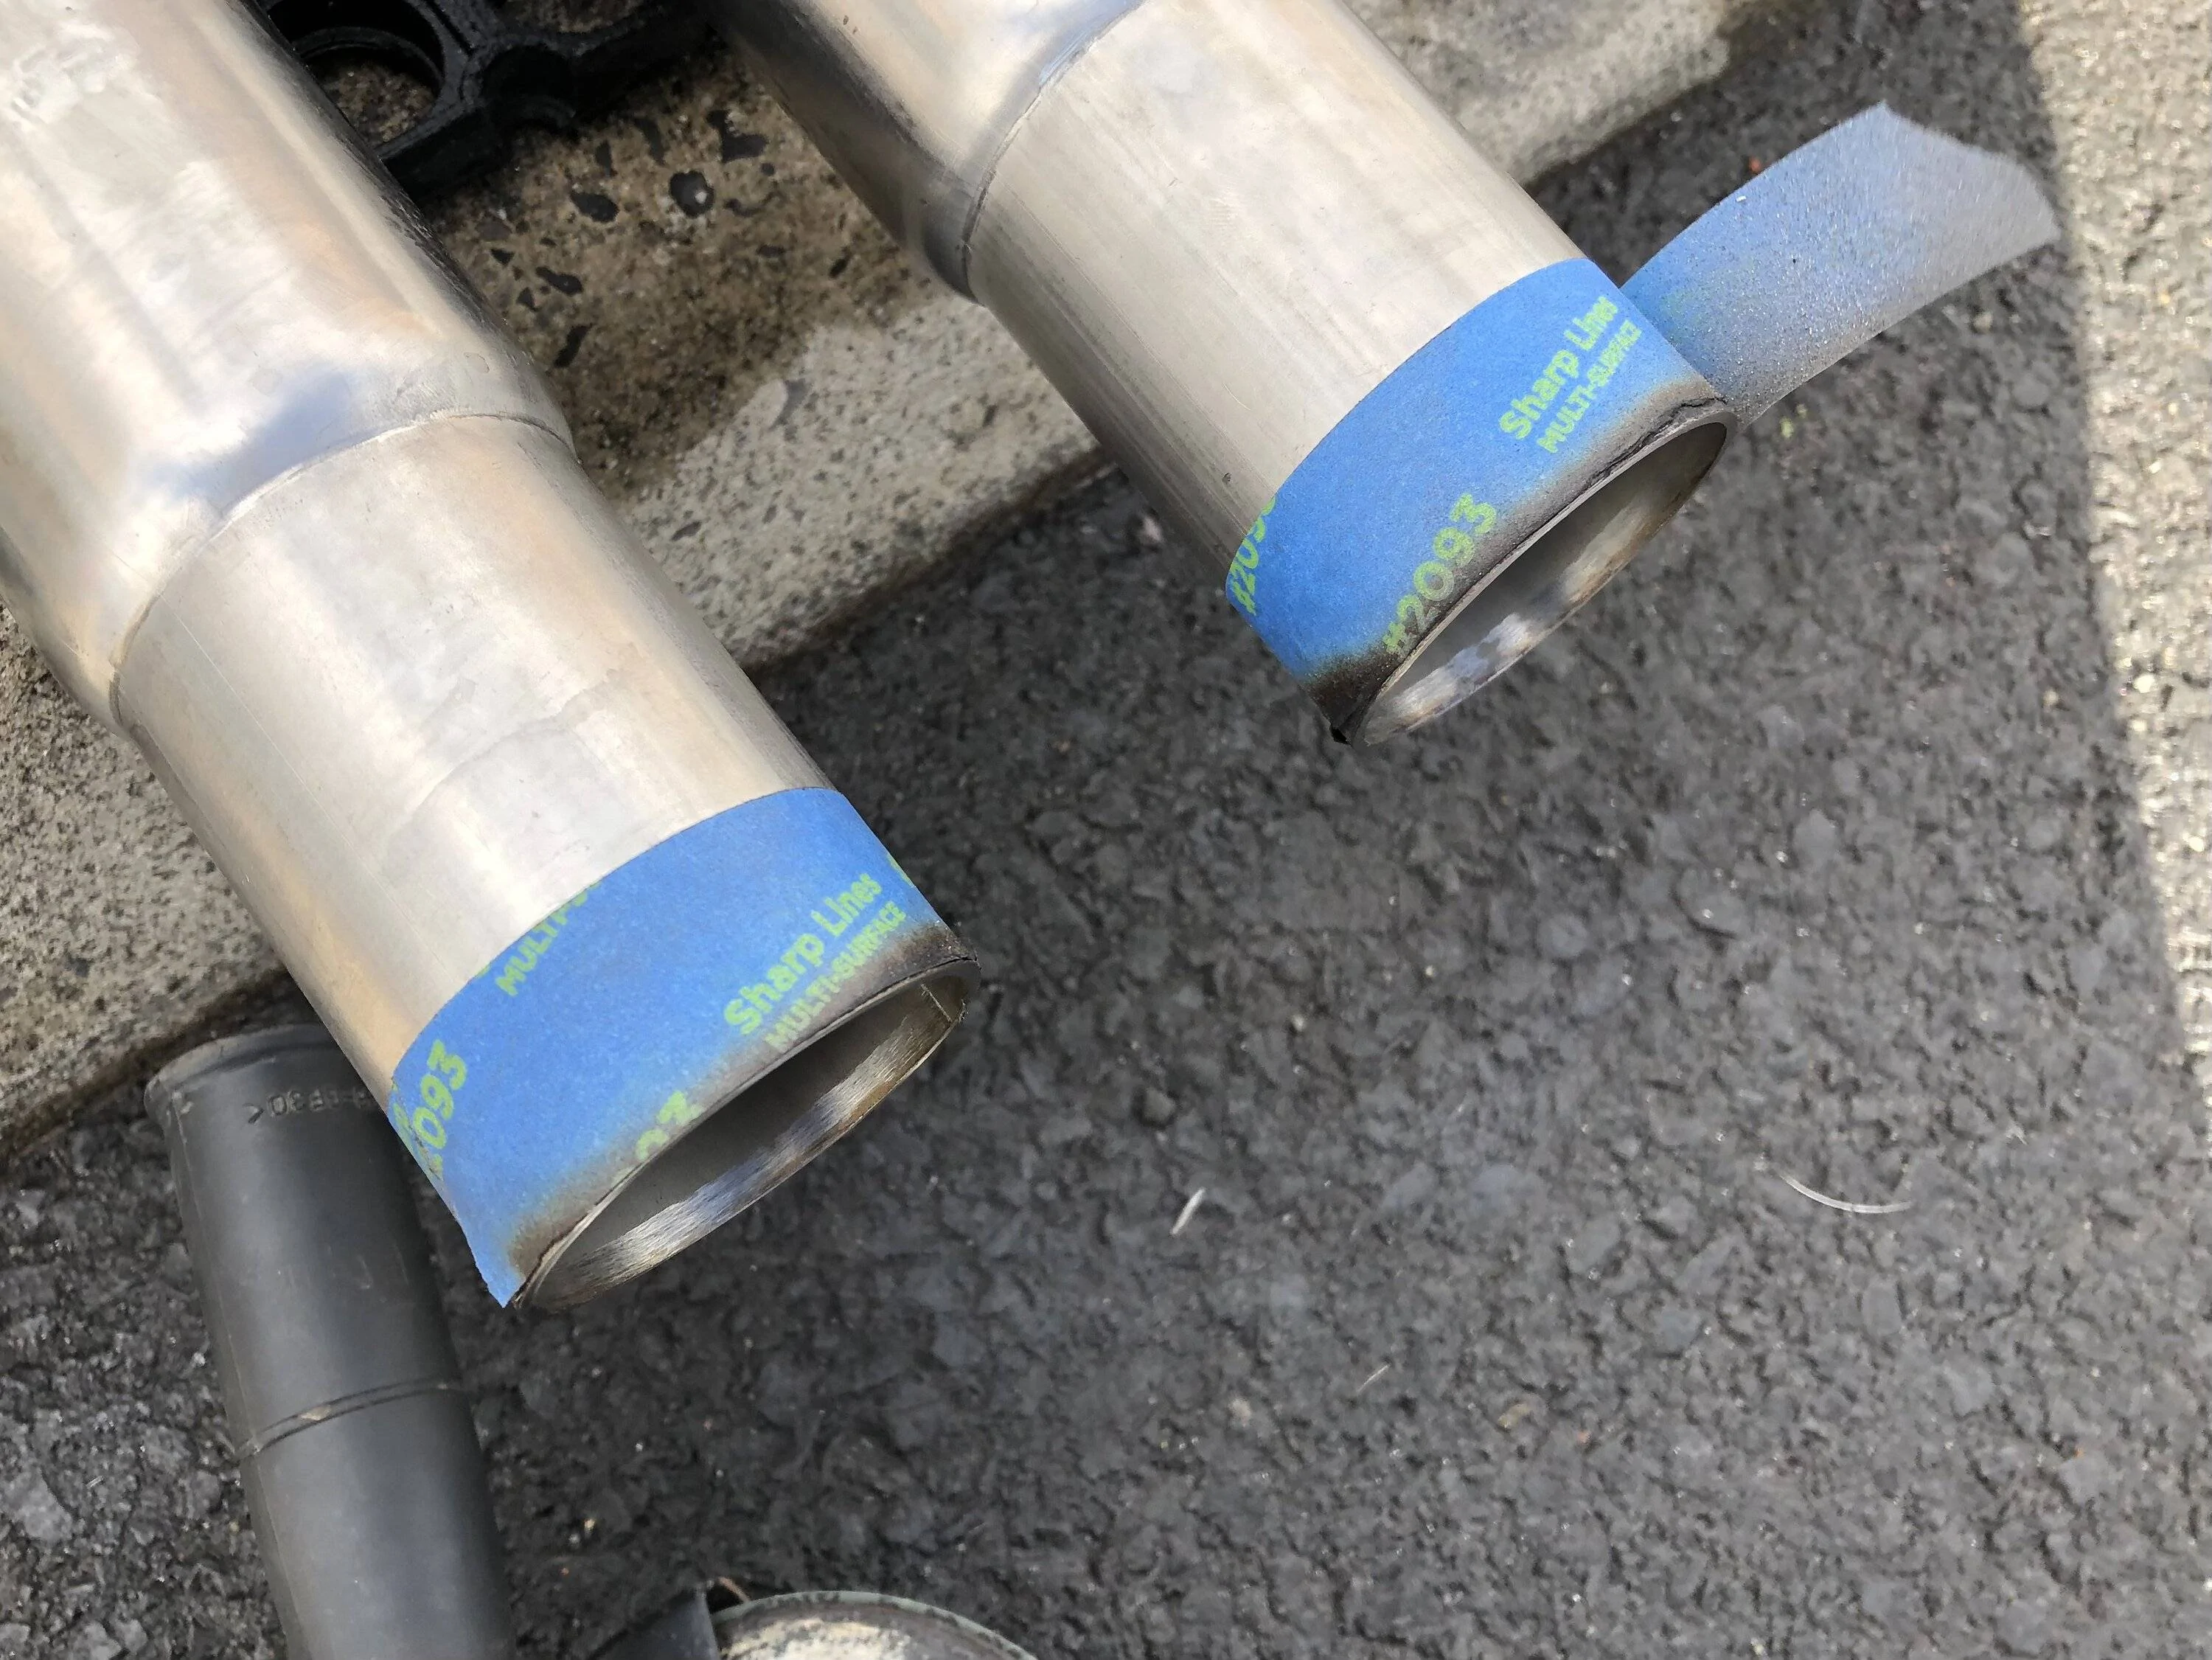
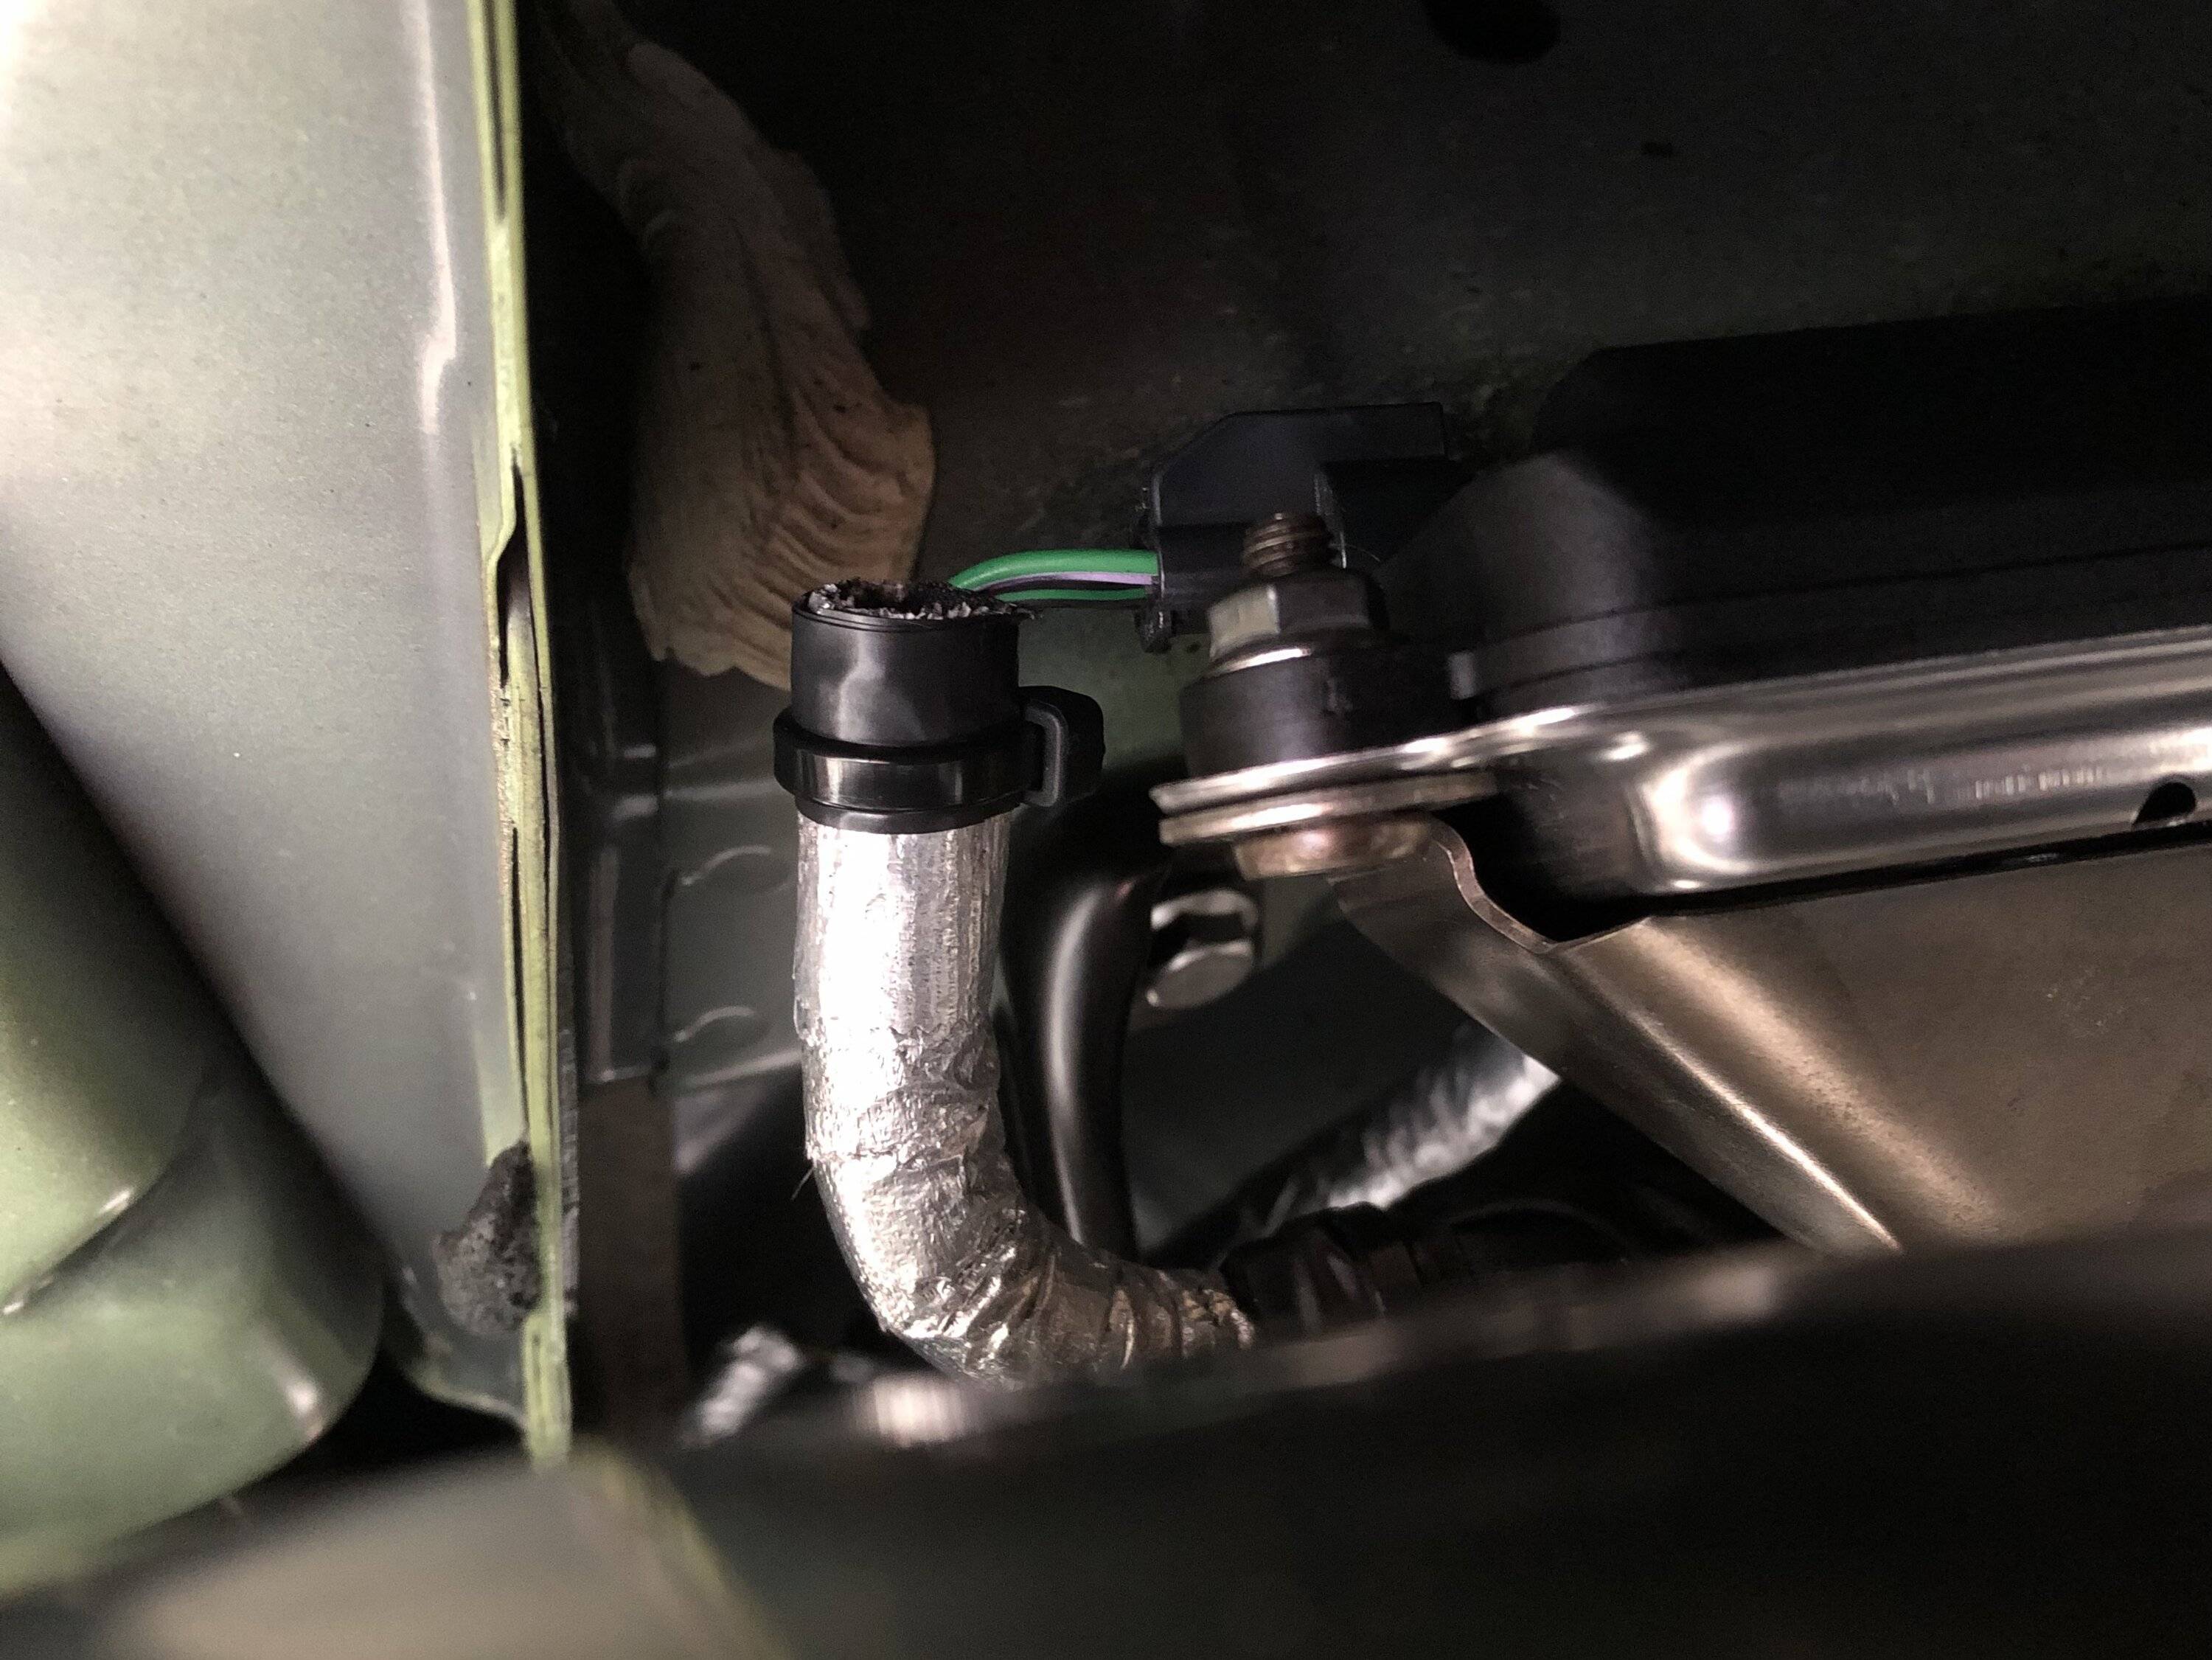
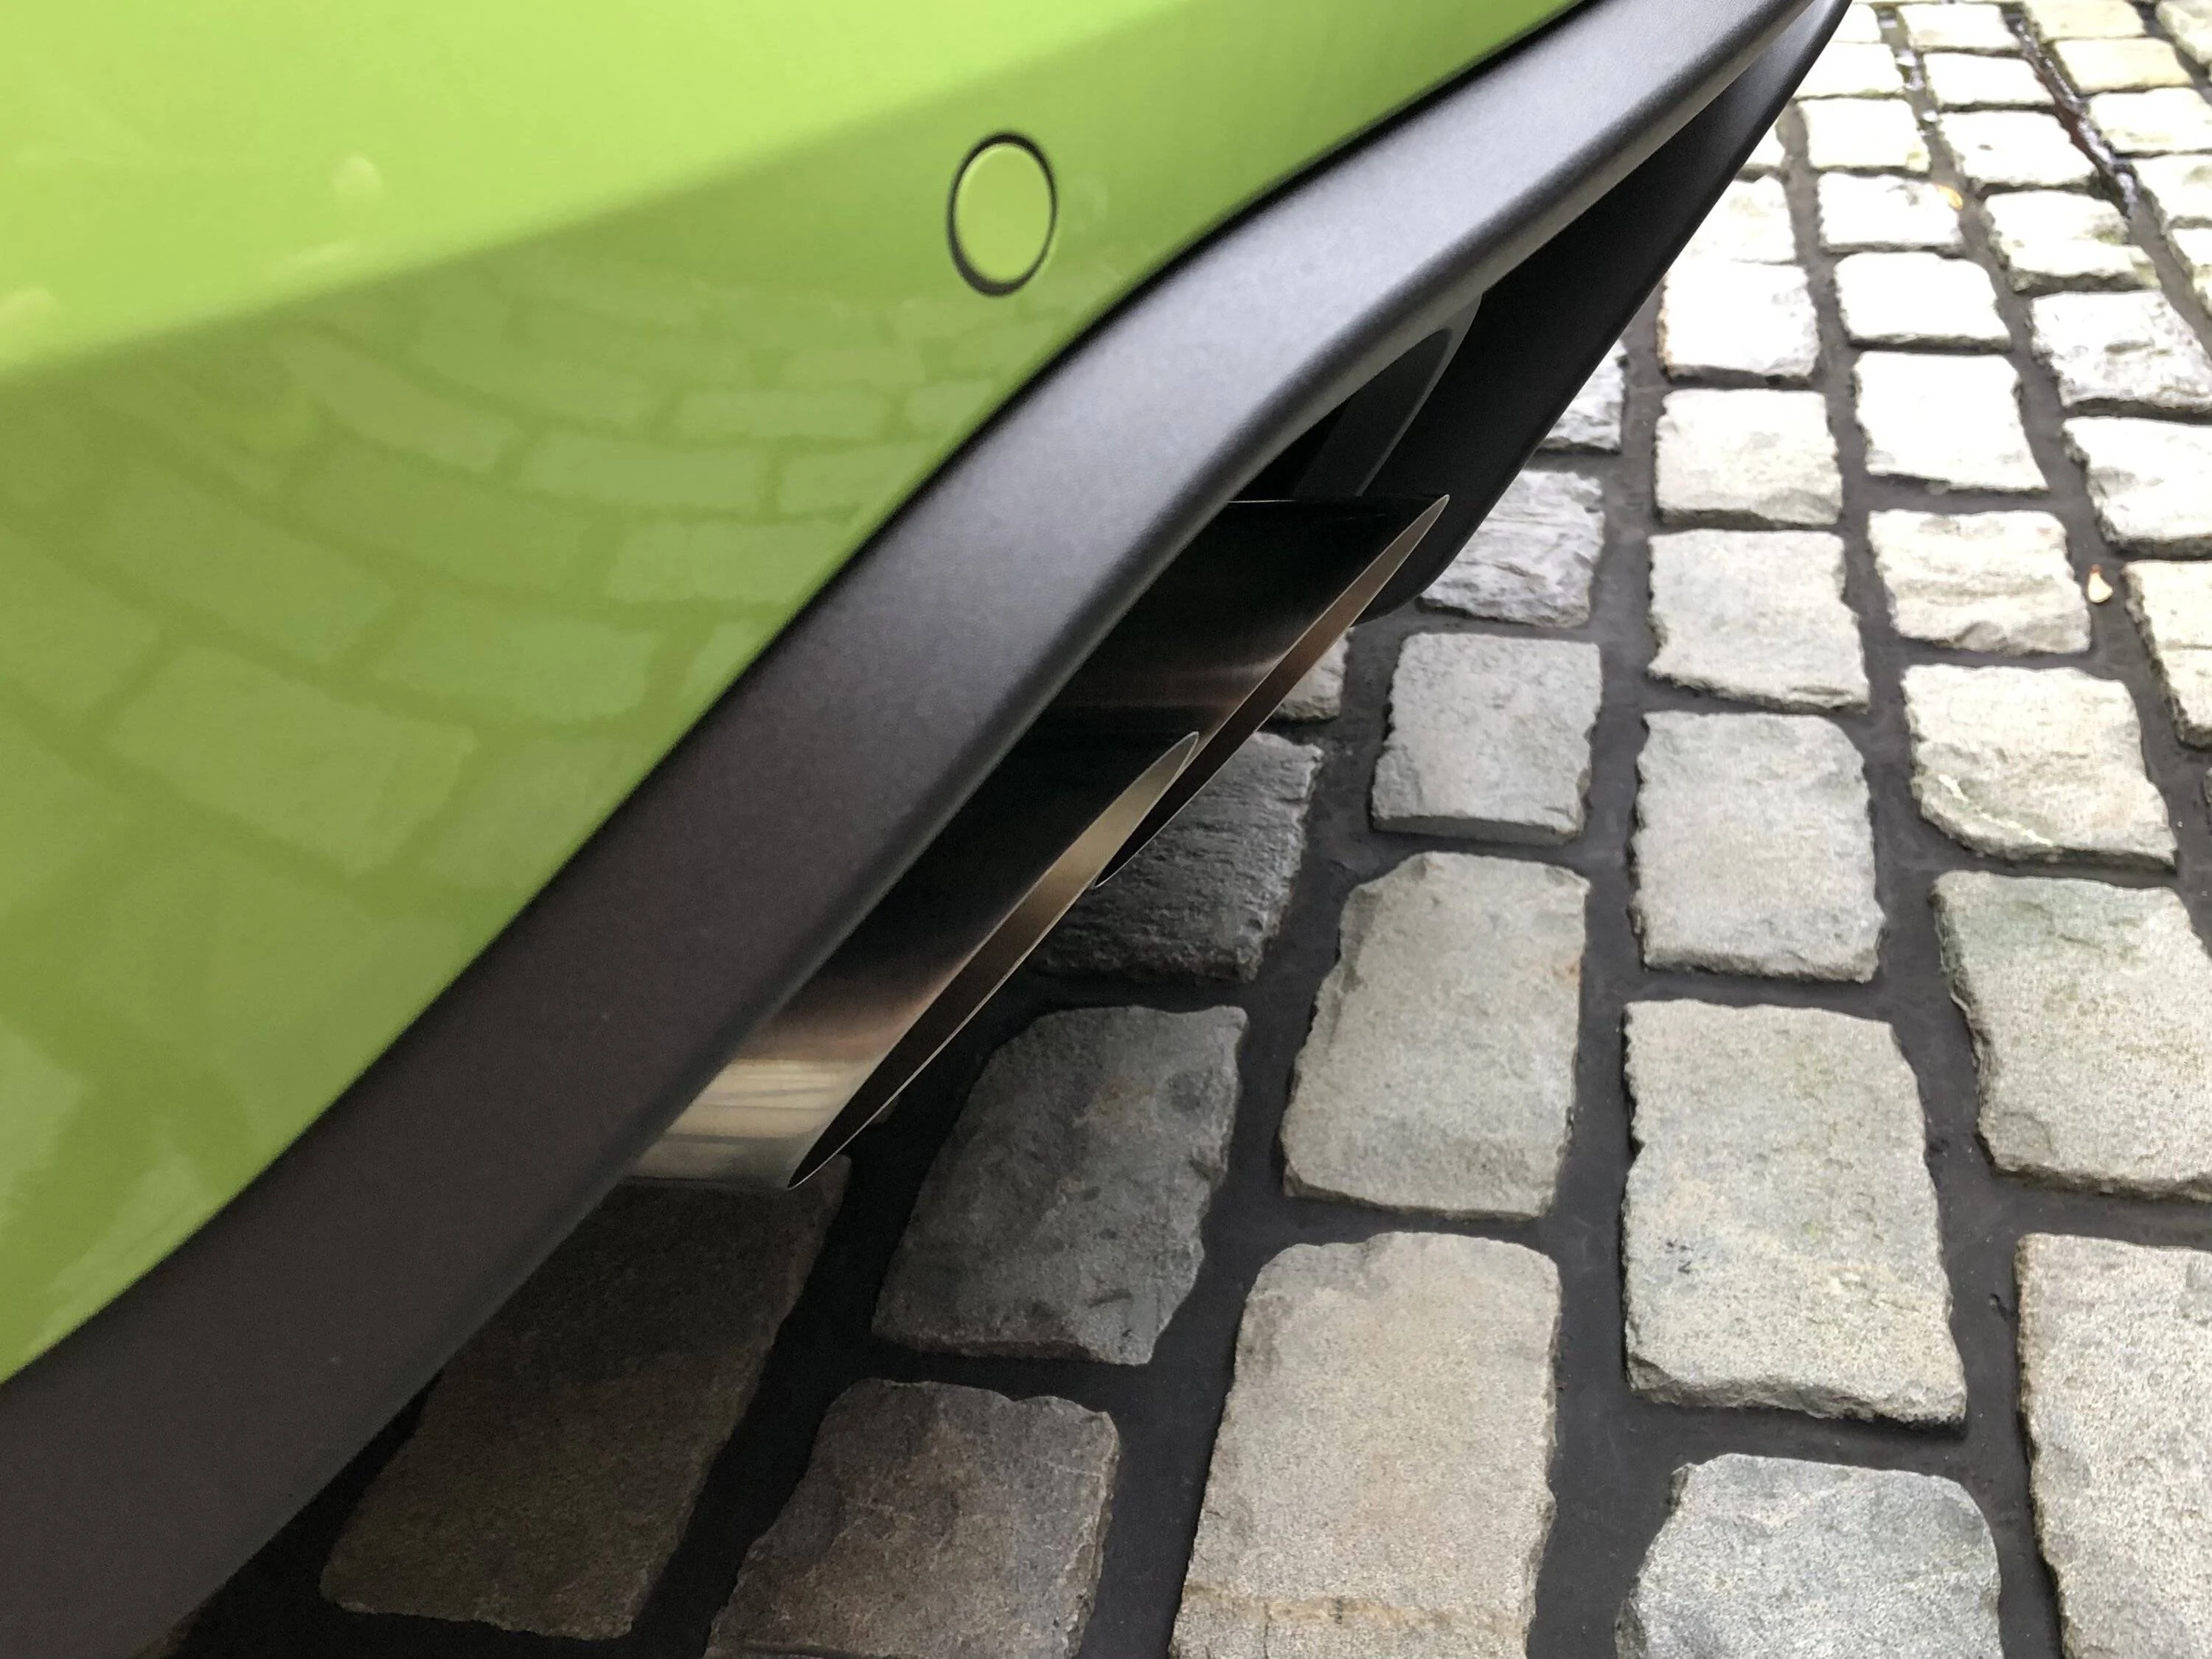
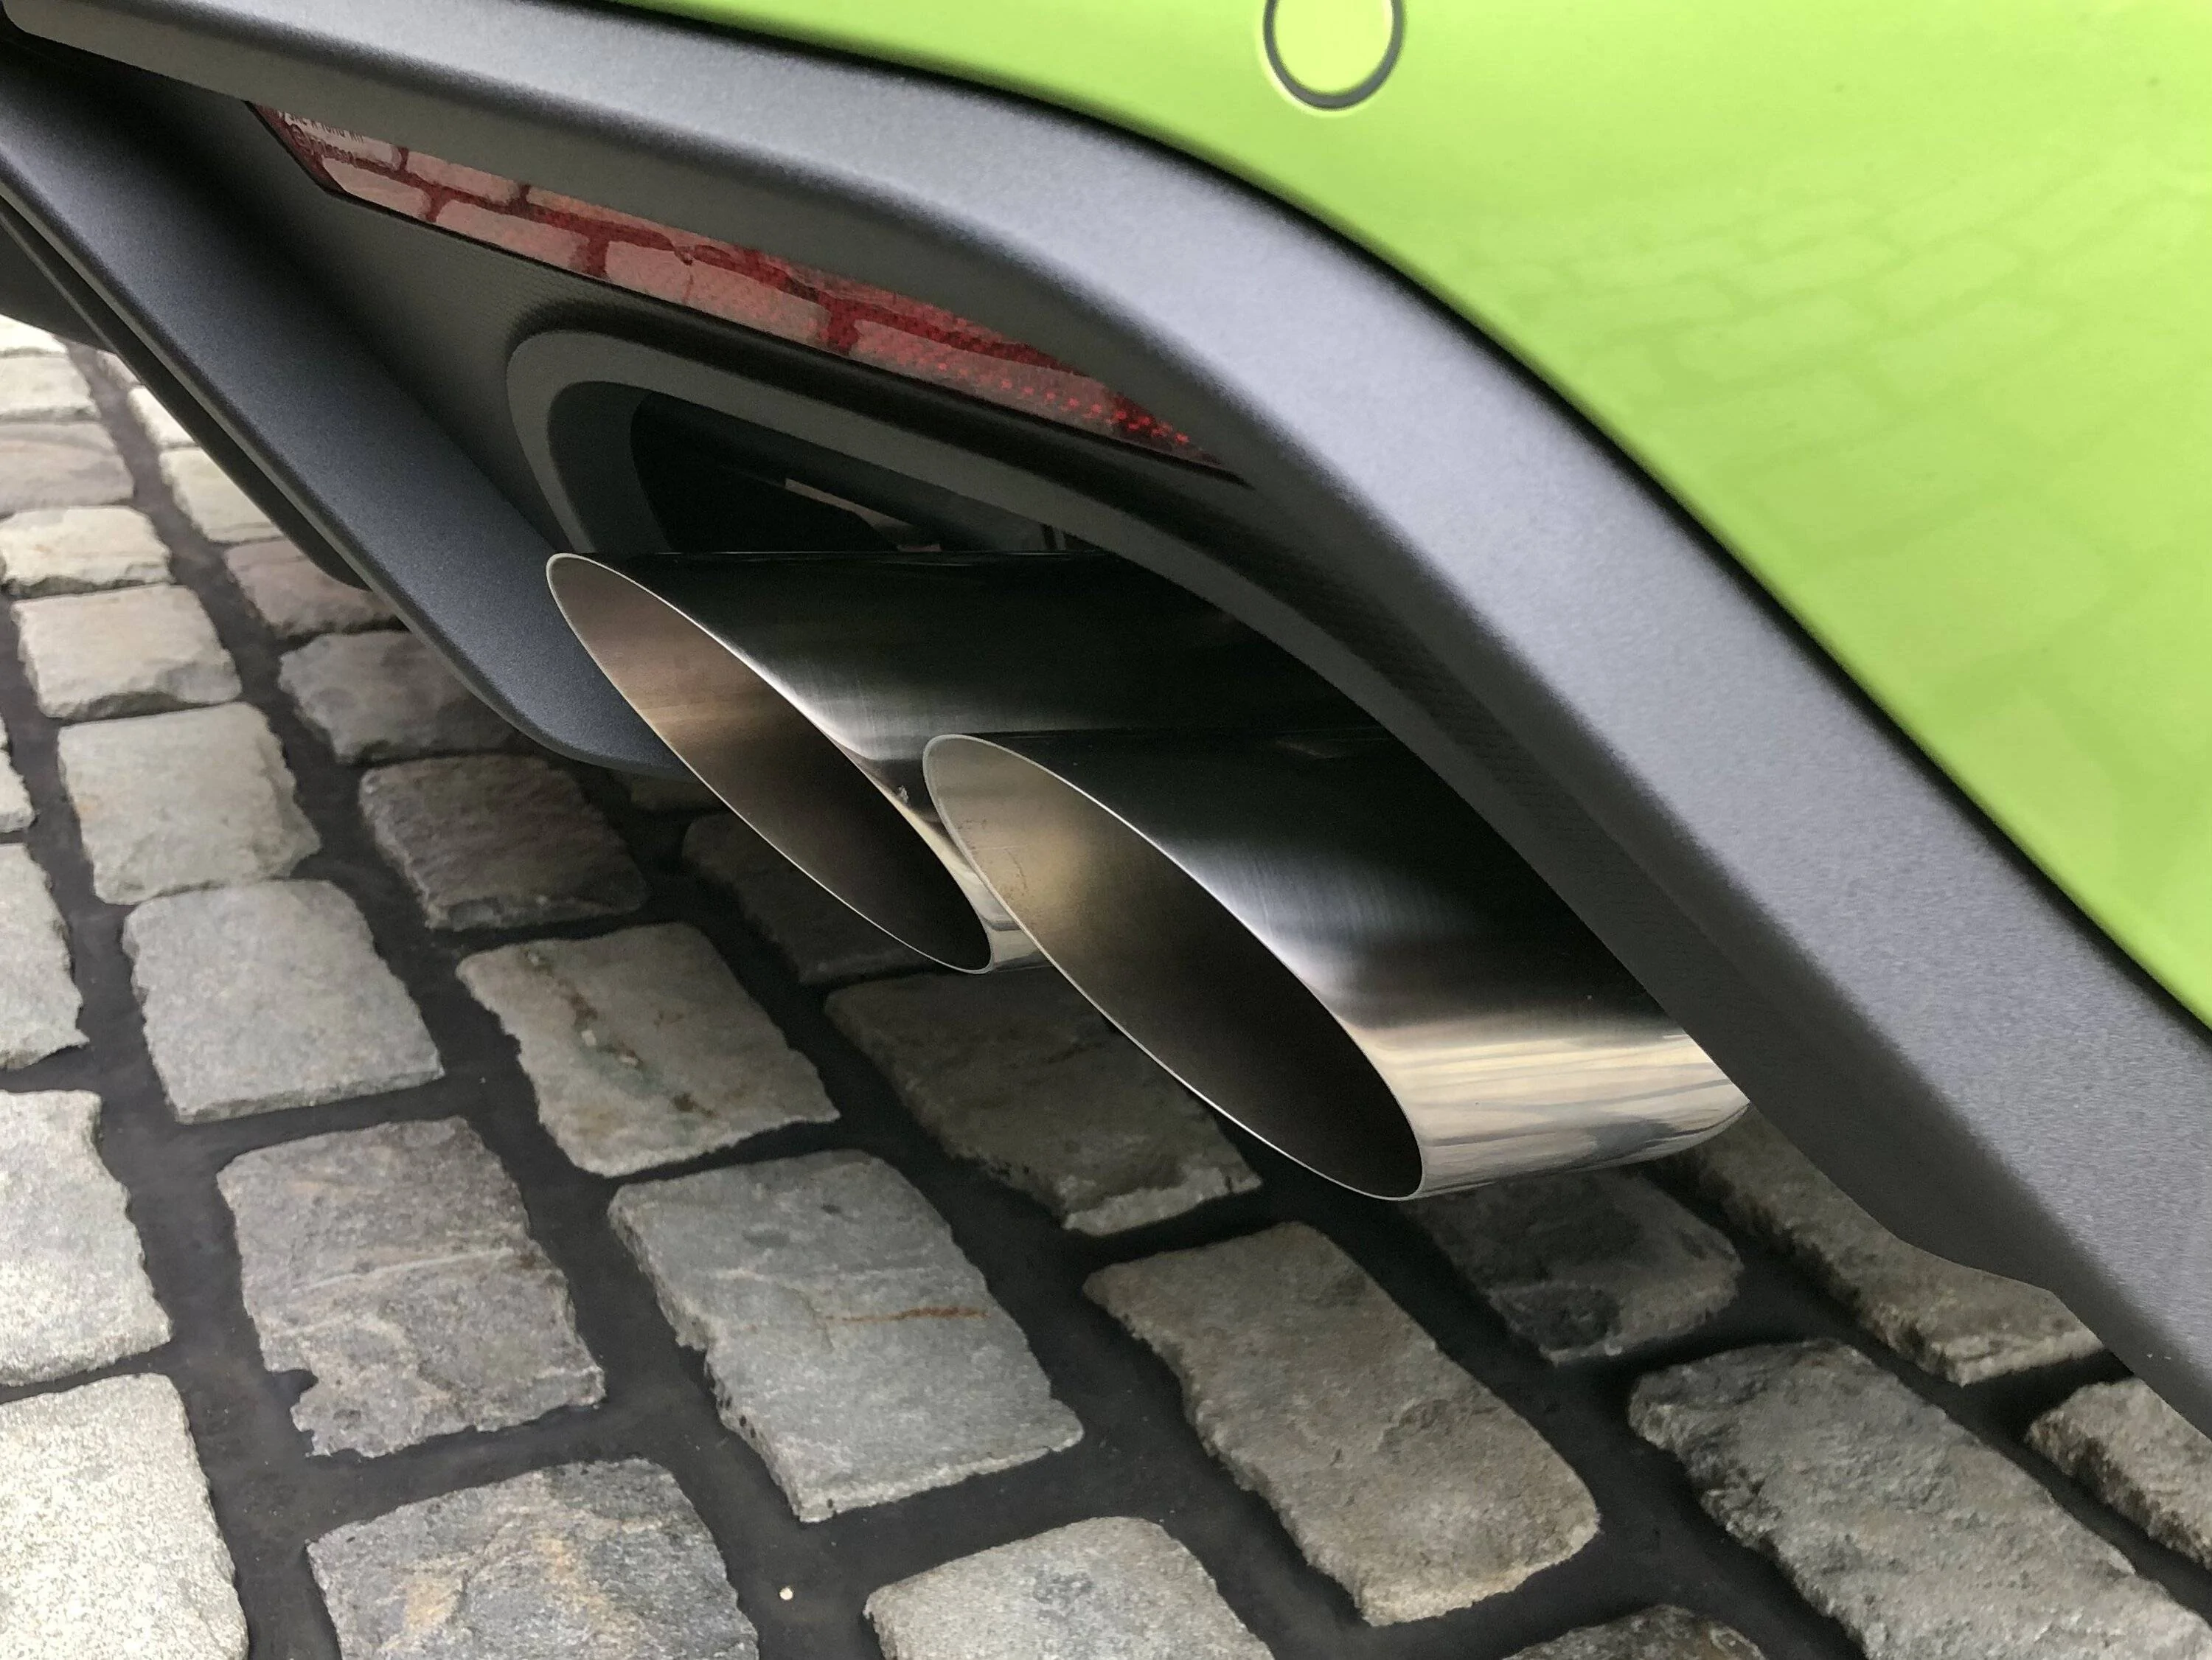
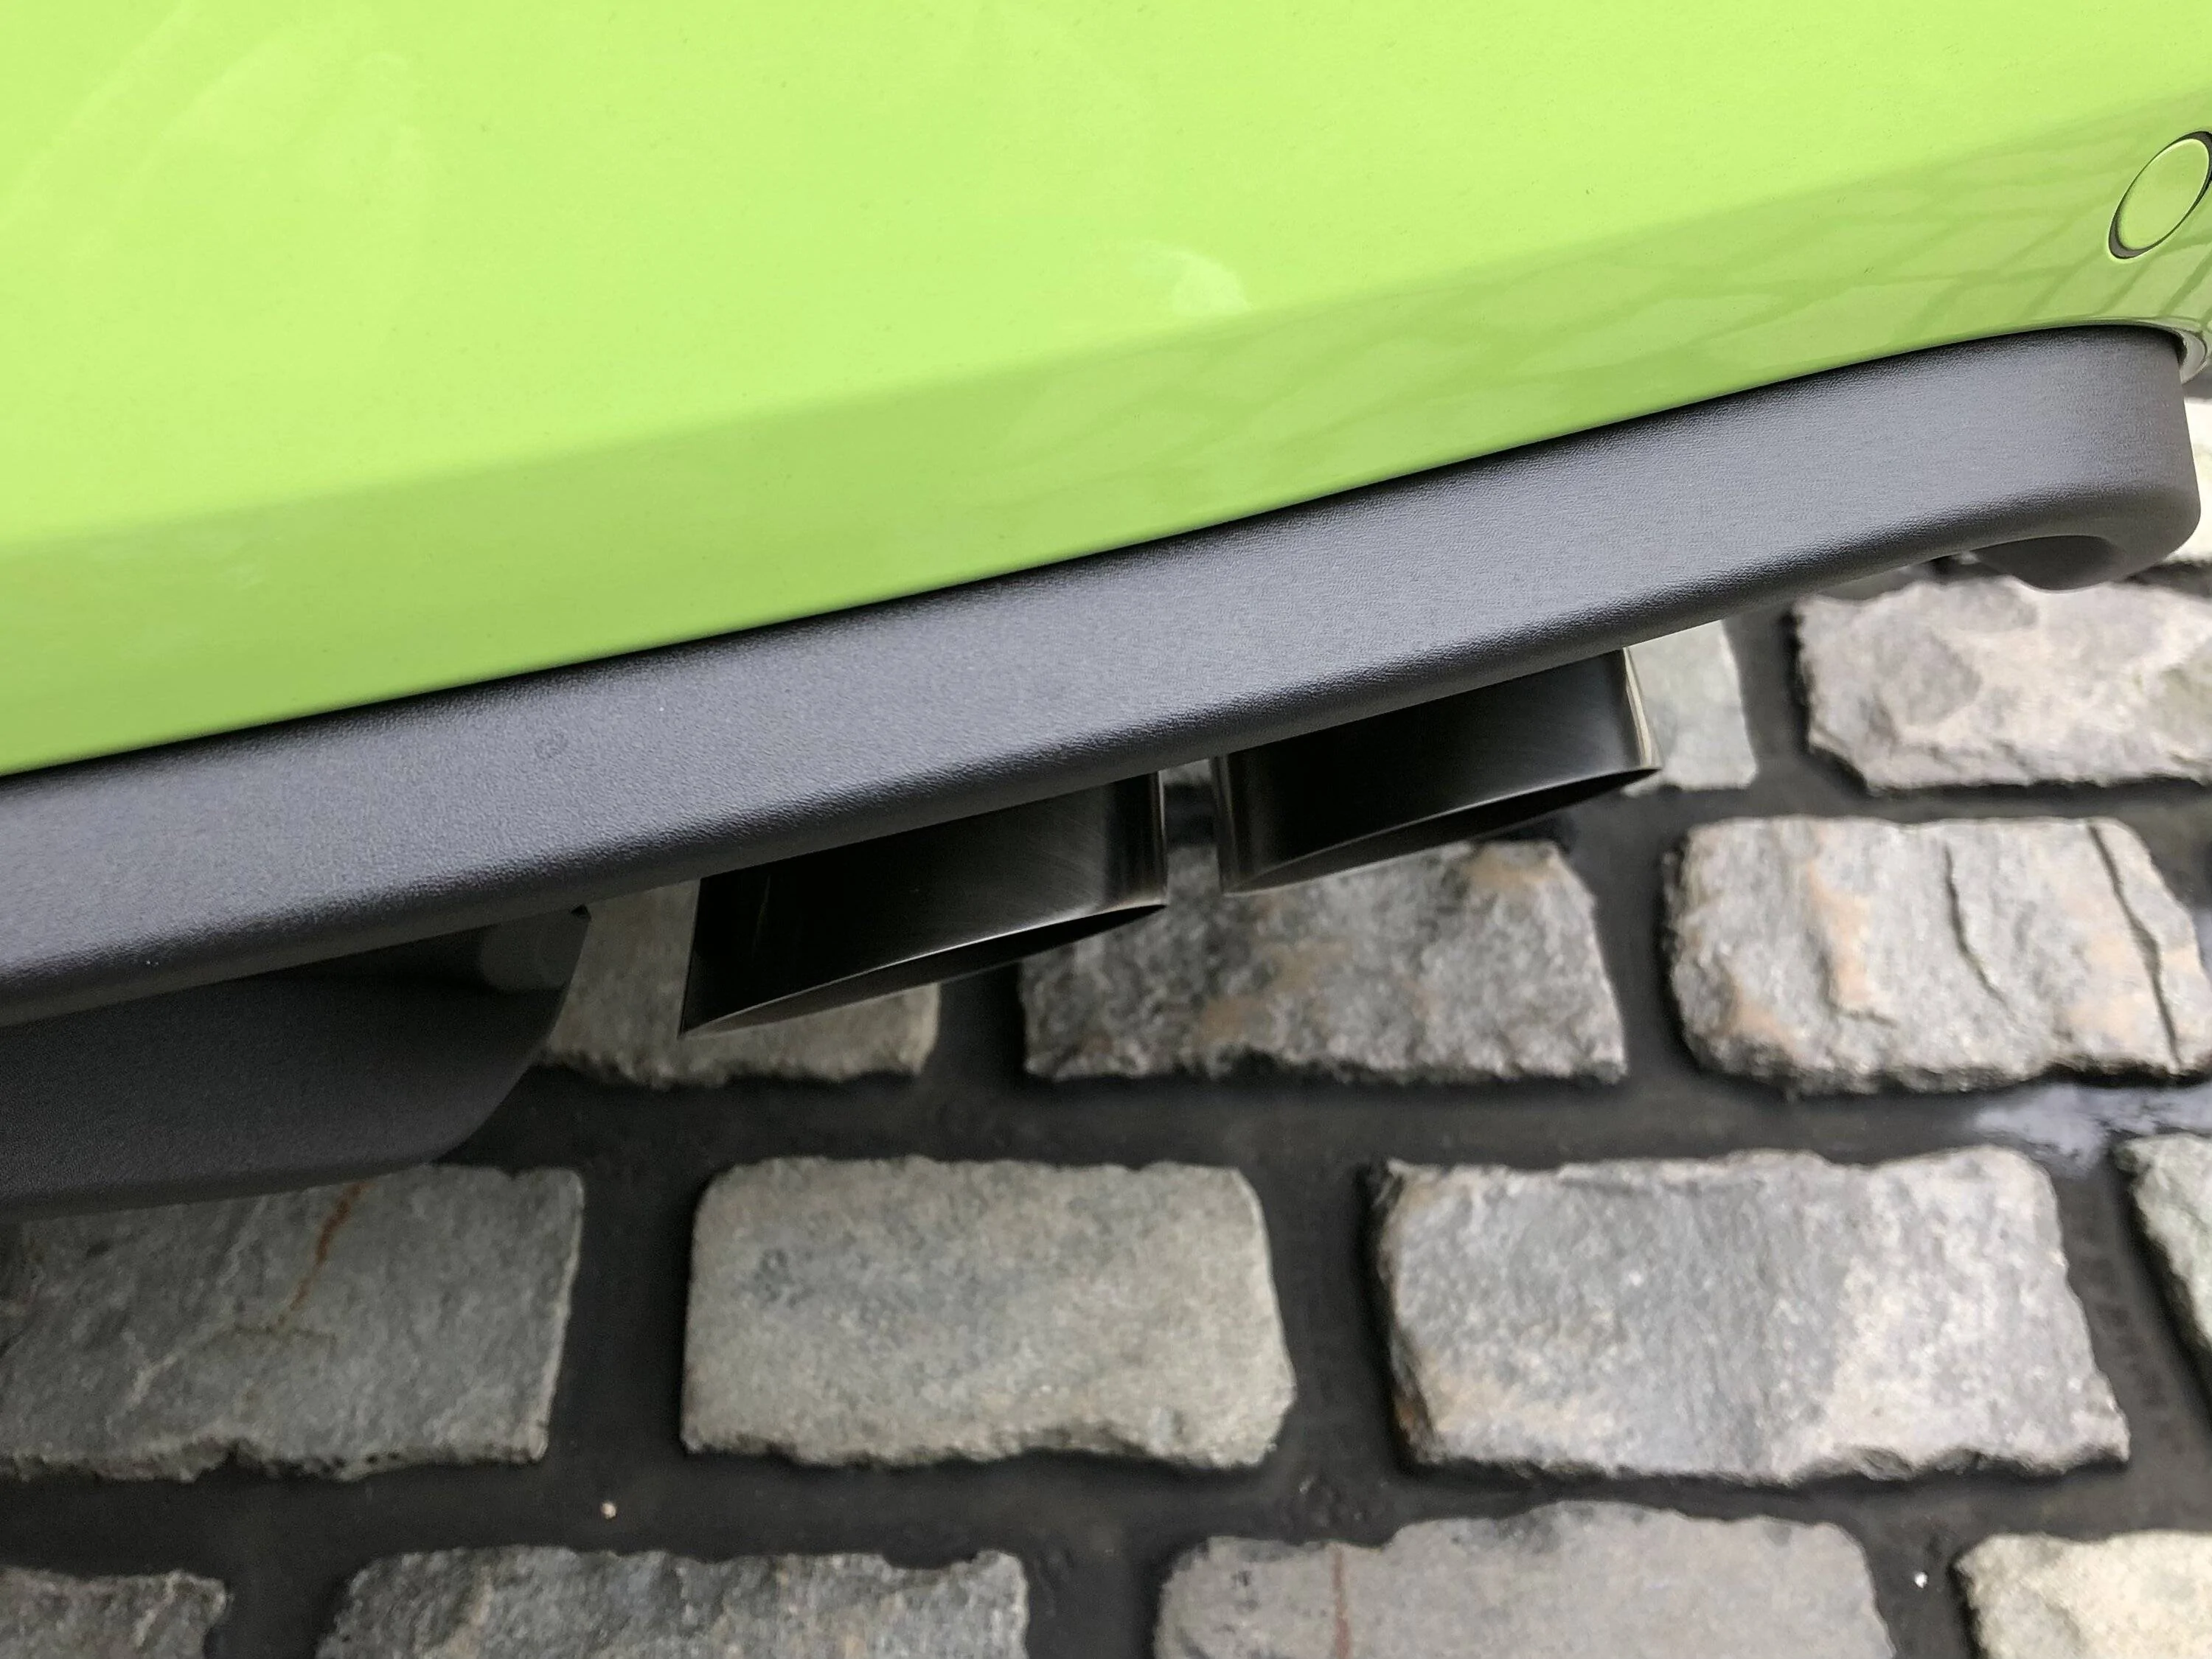
I’ve searched and read through numerous post on here with active exhaust problems on here but still haven’t been able to find the answer to my problem. Wondering if someone can shed some light on my situation. Car has 1100 miles on it. Just installed Corsa extreme active exhaust on the car. Took old actuators off car very gently making sure to take note of driver passenger side reference. Installed then on new catback and when I start it I would get “active exhaust not avail” on dash. I’ve checked both driver/passenger harness and they are like new. No damage. Fuse 34 is totally fine. Cleared KAM. Checked on Matco scanner and code said side B actuator was problem. Swapped actuator to other side and then got side A problem so figured it was bad actuator. Trippy because we could still trigger and test each actuator still to work via the Matco scan tool even though it said it was bad. I bought a new Ford one and installed it. Now when I key the car on both valves move to the quiet position and key off moves them back to track mode.Tried to do reset procedure via All data (ford instructions) and cant get valves to learn. When I key the car on to do relearn valves just switch to quiet and doesn't move anymore. Not avail message comes up still and can’t select any mode but normal. I don’t have access to my buddy’s Matco scanner so I haven’t reset KAM or cleared the codes for actuator error since installing new actuator. Do you think this could be problem why the PCM won’t learn it or should it be able to learn it regardless of code errors and then clear code itself? Another thing worth mentioning, Ford says to install actuator loosely and then do relearn for springs to seat in position then tighten down. Corsas instruction are basically the opposite and says to put actuator in and rotate spring in position that it will be tension when you bolt it down. I did it the way Corsa told me to install them. Any help would be greatly appreciated!
Sponsored


Minichell04

New Member
Joined
Feb 15, 2020
Threads
1
Messages
2
Reaction score
0
Location
Reidsville NC
First Name
Alex
Vehicle(s)
2019 mustang gt
Did you ever figure this out? Same thing happened today. I still haven’t did all the troubleshooting you did, but I would love some feedback, thanks !
 

s550.bullitt

Member
Joined
Jun 30, 2021
Threads
3
Messages
18
Reaction score
12
Location
Chicago
First Name
Tyler
Vehicle(s)
2020 Mustang Bullitt
Any update on this? I have a 2020 mustang and I am having similar issues with corsa extreme exhaust and error messages keep appearing for exhaust modes saying not available and switches back to normal mode, springs seem loose and valves rattle making a $2000 exhaust sound extremely poorly made.
 

TRP45ACP

Well-Known Member
Joined
May 25, 2020
Threads
6
Messages
157
Reaction score
92
Location
Houston, TX
Vehicle(s)
2018 GT Premium Coupe, PP1, MT82, 401A
I swapped my exhaust the other day and had the same issue. I found the wiring harness going to the actuator was damaged slightly during the install (some of the wires were scraped and exposed tat the connector). I swapped out the 12" harness with a new one (available from Ford). Exhaust works fine. It is my understanding that harness, has issues and can fail from time to time.
 

2020 GT

Member
Joined
Dec 28, 2022
Threads
0
Messages
5
Reaction score
0
Location
Biloxi, MS
First Name
Ken
Vehicle(s)
2020 Mustang GT Auto & 2014 Corvette Z51 Manual
Any update on this? I have a 2020 mustang and I am having similar issues with corsa extreme exhaust and error messages keep appearing for exhaust modes saying not available and switches back to normal mode, springs seem loose and valves rattle making a $2000 exhaust sound extremely poorly made.
Corsa, has updated their Active Valves (they now have bearings) and they sent me two new ones for free.
 

WD Pro

Well-Known Member
Joined
Jan 18, 2018
Threads
121
Messages
5,720
Reaction score
11,049
Location
United Kingdom
Vehicle(s)
Lime GT
Vehicle Showcase
1
I’m going to post a few things I found out messing with my GT active exhaust, hopefully they help :

Looking for help and any tips n tricks to line up the spring clip on the actuator with the valve - mine don’t quite line up, it’s like the spring needs to be under just a little tension for it to align ?

WD :like:
Answering my own question and although it's for a GT, I guess it may be a very similar procedure for a 500 :like:

Unlike the aftermarket active exhausts, the GT AE seems to hold the valves under tension, so once they are released it's tricky to get them lined up with the spring again (maybe this is Fords method to combat valve noise ?).

There is a procedure to reseat the springs :

IMG_7283.jpg


But for my own reasons this just wasn't practical - I need the exhaust to be perfect when it goes back on, without having to drop it a little and re-secure the actuators after the seating / reset process.

So after unsuccessfully messing around with the spring pre mounted on the actuator, here's the only way I found I could do it :

1) Start by recording how your actuators and springs were when they were first removed - the GT's aren't handed :

1665262668917.jpeg


2) Once everything has been stripped and cleaned and your ready for reassembly, make sure the actuator slides on and off it's mounting studs very easily. Re align the studs if needed. Use two M6 nuts and a deep socket to provide leverage without damaging the threads :

1665262810137.jpeg


3) Ensure the valve is fully turned in the direction to line up with the actuator - in the case of the GT they were fully open :

1665262887563.jpeg


4) Make sure the exhaust is level, and then carefully position the spring on the top of the valve :

1665262935359.jpeg


5) Without disturbing the spring, carefully lower the actuator so it just rests on the spring :

1665263072456.jpeg


6) Note I am working with the cut out of the actuator housing towards me, that's so I can peep under and see the actuator shaft and spring is 'almost' aligned. From 6 o clock :

1665263180020.jpeg


And from four o clock :

1665263205606.jpeg


7) If all looks OK, push the actuator down and wiggle / twist it a little it on its studs whilst maintaining downwards pressure. If you hear a fairly loud snap, then the spring has most likely seated in the actuator shaft.

1665263513875.jpeg


8) Don't trust it the first time, open it back up and check its correct. Do it a few times to get a feel what it's like when it correctly seats.

The first indication that it has seated correctly, will be that the actuator goes tight on its studs as it's now fighting the spring a little - there will be some resistance to lift it of it's studs.

The second indication is that the spring is fully located in the actuator shaft when you lift it off :

1665263496084.jpeg


9) Once you are confident you can do it right every time, bolt it down to stay (I know I have missed the little bracket from the inboard nut, it's paint is hardening) :

1665263618263.jpeg


10) As a final check, fist your exhaust deep enough to twiddle the flap. In the case of the GT it's fully open, rock solid one way (it's up against it's stops), but it can be moved with firm spring resistance the other way - instantly returning to it's home position when you remove pressure on the butterfly.

Just as a heads up and I know I'm not alone with this, the inserts around the bolt holes in the plastic actuator body (to stop it getting overtightened) seem to corrode excessively and very easily (maybe a reaction to all the stainless in that area ?). I covered the bottom bit of the stud, the insert and all mating faces with high temp grease before tightening everything down.

Hope that helps and that it's also useful for the 500 setup :like:

WD :like:
Then there was the damage to the loom and my work around / attempt to future proof it :

Ref the fitment of the H pipe and Fords ongoing problem with chaffing the AE loom on the UK (drivers) side, here were my mods in an attempt to fix the problem :

A) Shorten the cut line.

B) Shorten the end of the H / X pipe where it mates to the original system.

C) Ensure everything is pushed fully home on reassembly.

Mine had loads of clearance when cold, but it must expand and move around a lot when hot and under torque.

Mine had just started to rub the heat tape :

1666564188873.jpeg


Repaired with a bit of sacrificial protection :

1666564241442.jpeg


Rough cut in the right place, then a bit of a reduction and a neatening :

1666564318623.jpeg


1666564509270.jpeg


1666564344446.jpeg


H pipe reduction

1666564398206.jpeg


1666564420873.jpeg


That should give approximately 15mm of extra clearance at the back end :like:

So here it is fitted after those two mods - not the easiest of things to capture on a photo … lol

1669489486746.jpeg


I believe this to be a much better option than the other method of relieving (i.e. cutting away or hammering out of the way) the frame in that area :shock:

Loads of clearance now and the wiring in that photo is very relaxed, it could easily be encouraged to be a little more forward if required.

Tailpipe fit is in my option is perfect, the cut angles fit with the flow of the rear valance perfectly :

1669489712744.jpeg


1669489763065.jpeg


1669489785197.jpeg


1669489805711.jpeg


i.e. I don’t think shortening the cut point and h pipe compromised the rear fit - and maybe even improved it … :like:
WD :like:
There is also this thread :

https://www.mustang6g.com/forums/th...st-sounds-like-actuators-are-rattling.124967/

Where I posted this :

* I don’t have a Corsa exhaust * but after reading your thread and messing around with my standard active exhaust, I got interested …

So when I rebuilt my standard active I looked for videos for refitting the actuators. All the videos I could find were for aftermarket exhausts and they seemed to suggest that the actuators just bolted straight on.

That’s not quite so with the standard exhaust (why I was looking for videos in the first place), they are a little tricky and they hold the butterfly’s under tension when fully closed.

So rattling valve people, did you fit the actuators yourselves and if so, did they bolt straight up or were they a little tricky to get the springs aligned due to some pre tension ?

WD :like:
I hope there is something in that lot that helps you get your problem sorted :like:

WD :like:
Sponsored


Top