Sponsored

RaiderJatt02's GT350 story, first 1000 miles and beyond...

OP
OP
raiderjatt02

raiderjatt02

Well-Known Member
Joined
Aug 13, 2015
Threads
6
Messages
990
Reaction score
1,050
Location
Bay Area, CA
First Name
Jessie
Vehicle(s)
2016 GT350 - Track Pack; 1995 GT - Saleen Clone
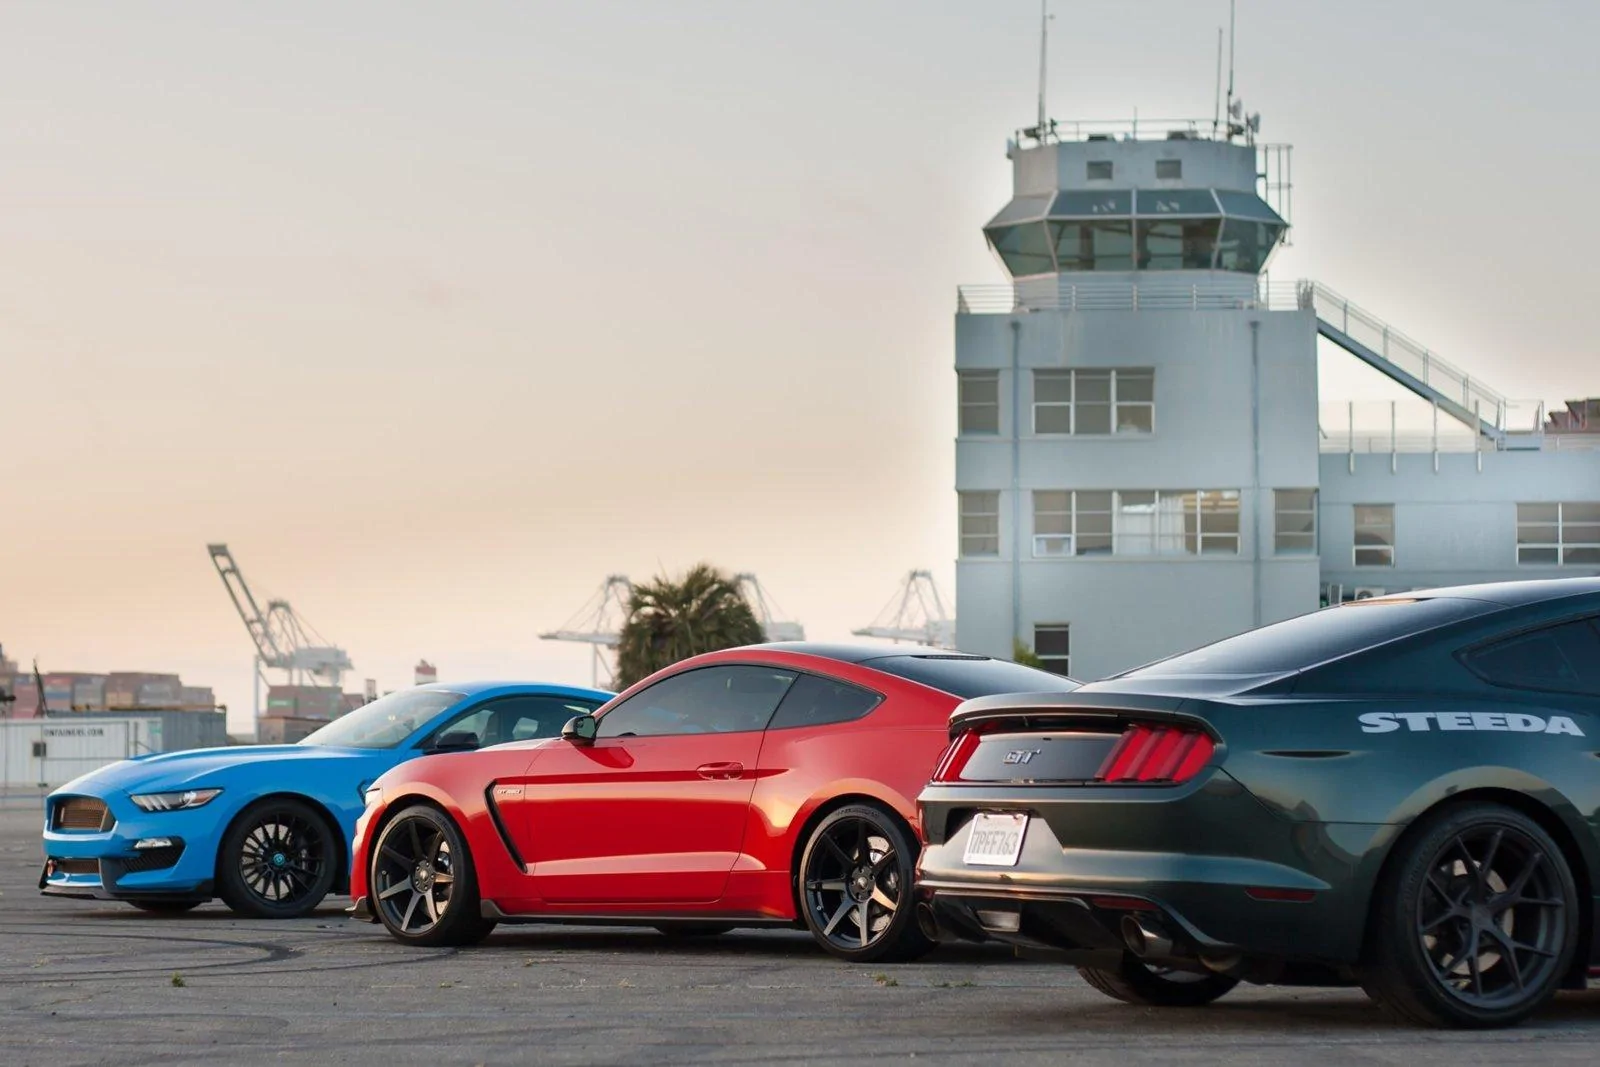
haha yup! That's Cole (Hegonee5.0 from IG). He's about sell his Mustang to build a Coyote swapped BRZ. I don't think I'll be able to keep up with that one. You might though! And Thunderhill is the best place to test the adhesion limits! No walls to worry about. I love that track.
Sponsored


icormba

Well-Known Member
Joined
Sep 26, 2015
Threads
6
Messages
1,224
Reaction score
829
Location
San Jose, Ca
First Name
Chris
Vehicle(s)
Jeep SRT8 / GT350R / FocusRS
I use GLoc R12 in front and GLoc R10 in the back and Castrol SRF fluid. The initial bite is very immediate and they don't fade at all throughout the session. They're too much for the stock MPSS tires but when paired with the Cup 2s, I slam on the brakes as hard as I can and they stop on a dime. Ask @icormba how good they stop :crackup:.
Yup! My neck still hurts! :curse: :wink:
 

VUDUGT350

Well-Known Member
Joined
Feb 1, 2016
Threads
5
Messages
97
Reaction score
33
Location
Fresno, CA
Vehicle(s)
2017 Shelby GT 350R Shadow Black
Here are a couple more videos from my day at Thunderhill.

This was a fun battle between me, a GT350R, a Mustang GT, and a Focus RS. My tires were shot and I was trying so damn hard to keep up but it was probably the funnest session of the whole day.


This was with me and a 2018 GT on NT01's. We kept getting caught up in a little traffic but once the road cleared up...DAMN those new GTs are quick!
Great video! That session was the most fun I had all day.
 
OP
OP
raiderjatt02

raiderjatt02

Well-Known Member
Joined
Aug 13, 2015
Threads
6
Messages
990
Reaction score
1,050
Location
Bay Area, CA
First Name
Jessie
Vehicle(s)
2016 GT350 - Track Pack; 1995 GT - Saleen Clone
Since it's been a while, I thought I'd post up a couple pics from a random drive in the back roads after a light rain shower. As I went through one of the turns, I came upon this amazing sunset and all I had was my cell phone. I tried to make the most of it via Lightroom since the lighting was really difficult to work with on a shitty phone camera but the sight was too nice to pass up.

full.jpg


full.jpg


full.jpg


I should really keep my DSLR on my at all times.
 

Epiphany

Well-Known Member
Joined
Oct 11, 2015
Threads
69
Messages
7,485
Reaction score
11,741
Location
Global
Vehicle(s)
I like to disassemble things.
Race red looks so darn good!
 

Sponsored

OP
OP
raiderjatt02

raiderjatt02

Well-Known Member
Joined
Aug 13, 2015
Threads
6
Messages
990
Reaction score
1,050
Location
Bay Area, CA
First Name
Jessie
Vehicle(s)
2016 GT350 - Track Pack; 1995 GT - Saleen Clone
Race red looks so darn good!
It really does! It just "pops" in every type of light. Especially when it's stripeless, but I might be slightly biased on that.
 
OP
OP
raiderjatt02

raiderjatt02

Well-Known Member
Joined
Aug 13, 2015
Threads
6
Messages
990
Reaction score
1,050
Location
Bay Area, CA
First Name
Jessie
Vehicle(s)
2016 GT350 - Track Pack; 1995 GT - Saleen Clone
I installed the AWE SwitchPatch Remote on my car yesterday to give better control over my exhaust modes. I was going back and forth between this and the GrimmSpeed exhaust mode defeat modules but ultimately chose to spend the extra money and get the AWE remote since it give the flexibility of opening/closing the exhaust at the touch of a button. I didn't want to keep having to go under the car to plug/unplug anything.

The packaging of the module gave me a little chuckle when I found the Blow Pop in there :crackup:

full.jpg


The installation was straight forward and relatively easy. First you have to remove the rear undertray/diffuser which doesn't take too long. 4 bolts and a few body clips and the whole thing comes right off. The part that was a real pain in the ass was trying to unplug the exhaust acuators. They are located on top of the muffler so you can't see the plug and it's hard to reach. You have to push open a locking clip, then push down a tab and pull the plug. Hard to do when you can't see it but once the first one is done, the second is slightly easier. I used a mirror and a small curved pick to see what I was doing. After plugging everything in, and tidying all the wires up, just put the undertray back together and you're set!

full.jpg

full.jpg

full.jpg

full.jpg

full.jpg


I had a few reasons behind installing this. The main reason was so I can keep the exhaust closed while going WOT so I can pass sound at Laguna Seca. Since you all know the flaps open regardless of drive mode, you have to lift while going past the sound booth to keep your sound below the dB limit. With the AWE remote, there's no need to do that anymore.

This will also allow me keep the exhaust open when I go into 6th gear even when I'm in Sport or Track mode so that's a nice plus! Oh, and it makes cold starts a little better because I don't have to open the exhaust back up every time I start it.

Here's a little video of me testing it out this morning.


LAPTIMZ

Well-Known Member
Joined
Oct 17, 2017
Threads
11
Messages
93
Reaction score
89
Location
NorCal
Vehicle(s)
GT350
Nice Jessie!! What track days are you planning on running this year? Also go ahead and buy a spare 27A 12V battery (or 4) now. My remote died after a single track day and a handful of use. It's a small price to pay for such a convenient and essential modification :like:
 
OP
OP
raiderjatt02

raiderjatt02

Well-Known Member
Joined
Aug 13, 2015
Threads
6
Messages
990
Reaction score
1,050
Location
Bay Area, CA
First Name
Jessie
Vehicle(s)
2016 GT350 - Track Pack; 1995 GT - Saleen Clone
Nice Jessie!! What track days are you planning on running this year? Also go ahead and buy a spare 27A 12V battery (or 4) now. My remote died after a single track day and a handful of use. It's a small price to pay for such a convenient and essential modification :like:
After I saw your setup, it finalized my decision to get the same thing brotha! I even mounted the remote in the same spot :fistbump:

Damn, they die that fast? Thanks for the head's up. I'll get a few to keep on hand when I make it out to LS. And I'm gonna take it easy this year so I might only hit up 3 or 4 track days MAX. I just got LASIK done so I gotta save some money. I don't have any planned yet but I definitely want to try LS sometime this year with the new setup! I'd love to join you for a track day sometime and take a ride in that beast.
 

Epiphany

Well-Known Member
Joined
Oct 11, 2015
Threads
69
Messages
7,485
Reaction score
11,741
Location
Global
Vehicle(s)
I like to disassemble things.
Very cool Jessie. You did what the factory should have done in the first place. Crazy that it has taken this long for a workaround.
 

Sponsored

ShelbyGT350DG

Member
Joined
Dec 23, 2018
Threads
1
Messages
24
Reaction score
4
Location
Washington
Vehicle(s)
2018 Shelby GT350
I met up with a few friends from around the Bay Area last week and had a small photoshoot in Alameda, CA. Here are some of the pics from there while I try to process the videos from my track day at Sonoma Raceway.

I love the stance in the first picture. It looks so damn nice on the FP springs and track focused camber!

full.jpg


full.jpg


full.jpg


full.jpg


full.jpg


full.jpg


full.jpg


full.jpg


full.jpg


full.jpg
Amazing car and amazing pictures. Your threat and posts reassured me that I made the right color selection!
 

nordique14

Well-Known Member
Joined
Jun 25, 2017
Threads
9
Messages
374
Reaction score
228
Location
NorCal
Vehicle(s)
2018 GT350 Magnetic Gray (J1601)
Just wanted to add a little to the AWE install. I had the Grimmspeed modules and used those for quite a while until I switched to the AWE. Using the Grimmspeed was pretty easy if combined with the pigtail connectors. Whether you used Grimmspeed or AWE, I think the big decision is whether you want full control of when the actuator opens and closes. If you like the way Ford controls it (opening at higher throttle, closed at low throttle, always open in Sport & Track modes, always closed in 6th gear, etc) then the Grimmspeed will be better for you as you just use the Grimmspeed when you need to go to a track with noise restrictions. I have found that with the AWE, I just keep it in one mode or the other and do not switch around too much. So now at open throttle, it stays in quiet mode as I generally keep it in quiet mode around town.

For the install, as raiderjatt mentioned, unhooking the cable from the actuator is a huge pain. Below is a pic of the connector. Trick is to push in the red tab. Not easy to do when you are doing it by feel only. I used a small flat head screwdriver. I would also note that the instructions specify a side for mounting the control box but it can be mounted on either side of the car. I mounted on the passenger side. I did not remove the undertray but, in hindsight, it would have been much easier zip-tieing the control box to the car if I had.

For mounting the remote, I did not like it next to the shifter. I prefer it in line-of-sight. So I mounted it on the radio. I do not have Sync3, so I had lots of real estate to play with. I found a great spot right above the volume knob where it does not block anything. The shape of the bottom of the remote even curves nicely around the volume knob.


exhaust valve actuator zoom in.jpg
AWE control.jpg
 
OP
OP
raiderjatt02

raiderjatt02

Well-Known Member
Joined
Aug 13, 2015
Threads
6
Messages
990
Reaction score
1,050
Location
Bay Area, CA
First Name
Jessie
Vehicle(s)
2016 GT350 - Track Pack; 1995 GT - Saleen Clone
Nice! I like the little "Cobra" sticker covering the AWE logo. I've been thinking about painting my entire fob black to get rid of the logo. You just gave me another idea :like:

And to give an update, I finally did a full throttle pull with the valves closed and whoa...it sounds...different. It's so quiet but you can actually hear how the mufflers sound. I kind of like it. I never realized that we never really got to hear how the mufllers sound at WOT because the baffles always opened up. With these forcing the baffles closed, it's kind of nice being able to floor the car and stay a little under the radar. I mean, besides the bright ass red paint :crackup:.
 
OP
OP
raiderjatt02

raiderjatt02

Well-Known Member
Joined
Aug 13, 2015
Threads
6
Messages
990
Reaction score
1,050
Location
Bay Area, CA
First Name
Jessie
Vehicle(s)
2016 GT350 - Track Pack; 1995 GT - Saleen Clone
I did a few LED lighting upgrades to the car recently.

- OPT-7 Front LED Switchback Turn Signals
- Diode Dynamics Rear LED Sidemarkers
- Sequential LED Rear Reflectors from @chrisgonzales

The sidemarker install was probably the easiest thing I've done to the car. Didn't even need to lift it up or take anything off the car. Basically pop out the original sidemarkers, unplug the harness, pop the new ones in and plug them back in. Done. Less than 5 minutes.

The OPT-7 turn signals were a lot more intensive. You have to take the whole front bumper off to get to them and I've never taken a bumper off of any car before, let alone my precious GT350. I was pretty nervous going into it but the video by "Woman.Driven" on YouTube helped out A LOT.

full.jpg

full.jpg


Looks crazy with the bumper off! I kept the splitter and undertray connected because I didn't want to deal with re-installing the splitter so the whole thing came off in 1 piece. Luckily, I had my dad to help out. Definitely a 2 person job.

full.jpg


Once it was off, I finally got a good look at how everything is packaged behind the bumper. I could stare at this for hours.

full.jpg


Here's the view on the inside of the front fascia. I love looking at the air management going on inside.

full.jpg


This is the damn turn signal housing that can't be reached until you take the whole damn fascia off.

The final look is awesome when everything is put back together. Here are some Before/After shots

full.jpg

full.jpg


full.jpg

full.jpg


The only thing that bothers me a bit is the difference in color temperature between the white turn signal LED and the "gills" in the stock headlight housing. My last picture is an exaggerated look and it's not THAT pronounced in real life but you can still tell a difference. I'm not too worried because I plan on getting my headlights re-done and will aim to make the "gills" match the turn signals when I'm done with them. I just wanted to make sure you all know that they don't match up and it's something to think about if you don't plan on making any changes to your headlights. Here is a picture with the exposure dropped so you can make out the individual LED's. It makes the temperature difference a lot more pronounced and they don't look this different in real life.

full.jpg


This picture is more closer to the difference you see in person.
full.jpg


Installing the rear reflector LED's from Chris was a pretty big pain in the ass because of how little room there is to work back there. The end result is awesome but most of it the install consists of feeling around and working nearly blind.


ShelbyGT350DG

Member
Joined
Dec 23, 2018
Threads
1
Messages
24
Reaction score
4
Location
Washington
Vehicle(s)
2018 Shelby GT350
I did a few LED lighting upgrades to the car recently.

- OPT-7 Front LED Switchback Turn Signals
- Diode Dynamics Rear LED Sidemarkers
- Sequential LED Rear Reflectors from @chrisgonzales

The sidemarker install was probably the easiest thing I've done to the car. Didn't even need to lift it up or take anything off the car. Basically pop out the original sidemarkers, unplug the harness, pop the new ones in and plug them back in. Done. Less than 5 minutes.

The OPT-7 turn signals were a lot more intensive. You have to take the whole front bumper off to get to them and I've never taken a bumper off of any car before, let alone my precious GT350. I was pretty nervous going into it but the video by "Woman.Driven" on YouTube helped out A LOT.

full.jpg

full.jpg


Looks crazy with the bumper off! I kept the splitter and undertray connected because I didn't want to deal with re-installing the splitter so the whole thing came off in 1 piece. Luckily, I had my dad to help out. Definitely a 2 person job.

full.jpg


Once it was off, I finally got a good look at how everything is packaged behind the bumper. I could stare at this for hours.

full.jpg


Here's the view on the inside of the front fascia. I love looking at the air management going on inside.

full.jpg


This is the damn turn signal housing that can't be reached until you take the whole damn fascia off.

The final look is awesome when everything is put back together. Here are some Before/After shots

full.jpg

full.jpg


full.jpg

full.jpg


The only thing that bothers me a bit is the difference in color temperature between the white turn signal LED and the "gills" in the stock headlight housing. My last picture is an exaggerated look and it's not THAT pronounced in real life but you can still tell a difference. I'm not too worried because I plan on getting my headlights re-done and will aim to make the "gills" match the turn signals when I'm done with them. I just wanted to make sure you all know that they don't match up and it's something to think about if you don't plan on making any changes to your headlights. Here is a picture with the exposure dropped so you can make out the individual LED's. It makes the temperature difference a lot more pronounced and they don't look this different in real life.

full.jpg


This picture is more closer to the difference you see in person.
full.jpg


Installing the rear reflector LED's from Chris was a pretty big pain in the ass because of how little room there is to work back there. The end result is awesome but most of it the install consists of feeling around and working nearly blind.

Looks great. I was thinking about buying the OPT-7 turn signals myself. Did you get the clear, diffused, or smoked version? I wonder how each option changes the color temperature difference with the headlight gills.
Sponsored


Top